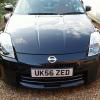
richparks Posted September 5, 2014 Share Posted September 5, 2014 (edited) I have mainly made this post to try and keep track and maybe put some order into what I am doing with my Zed. I am generally poor at all mechanical and DIY things (too much force, not enough patience). Therefore I will probably go to a few specialists garages such as Horsham and maybe bore them with 50 questions while they work on my car. A lot of the first things I want to do, mainly because I've come from a new BMW 335i is to refresh the look of the car, I had sort of forgotten what it was like to have dated materials such as scratches, paint chips and wear. ALL Pictures are from the same camera and same upload, not sure why some are bigger than others and some are stupidly small - at this moment in time they will do though. 335i pics - just for fun In some maybe possible order: Driver & Passenger Leather seat revive - 50% done Nissan Badges swapped to Z - Done Headlight fogginess removal - Done Interior deep clean and revive - 25% done Window switch door card - Done Rays sprayed black - Door Cubby hole latch scratches Metal kick plates installed - Done Full Service at Horsham P3 Service - Done Full detail - Thinking it may not be worth it until after winter now, or maybe one now and one after winter? Install after market double din head unit Pioneer I'll keep adding to things I want to do because there is more and keep adding pictures for each. Z badge back can't really see it properly but I'm sure you've all seen what a Satin Z badge looks like, thanks Asad. Driver seat - So far i've cleaned and conditioned, The color coded dye is on the way Before: After: The window switch handle is scratched quite badly, i've bought the paint to sort it out but need to figure how to get it out :| i've read posts on the old one but not the facelift. Before: After: Relatively happy with the results, It took me a while with painting because I messed it up a few times and it's not perfect but it's a lot better than the state it was in before Cubby hole scratches: Before: After: TBC Headlight fogg After: Not completely perfect but it looks a lot better, in fact it might be the best thing ive done yet, didn't realise the difference it would make. Handbrake and Gear knob No before, cleaned and conditioned happy with both but gear needs slight dye wear worn. Edited March 11, 2015 by richparks Quote Link to comment Share on other sites More sharing options...
GMballistic Posted September 5, 2014 Share Posted September 5, 2014 Some good plans there, lovely BMW and the Zed look's pretty cool too. Regarding the interior door pull/switch housing. I believe on the facelift versions it's just clipped in and doesn't have a screw holding it. Here's a guide that will show you how to remove the door pulls on the pre-facelift and for yours I think you just need to do the same but when you get to "step 2" just lift it upwards from the back slowly & it should just unclip. Link: http://liljerk.morpheus.net/350Z/front_speakers/ Quote Link to comment Share on other sites More sharing options...

Recommended Posts
Join the conversation
You can post now and register later. If you have an account, sign in now to post with your account.