


SunsetZ
-
Posts
30 -
Joined
-
Last visited
Content Type
Profiles
Forums
Events
Gallery
Store
Posts posted by SunsetZ
-
-
Still available. PAC SWI-PS STEERING WHEEL ADAPTOR and the METRA FACIA KIT £25 for both delivered. £20 collect.
Cheers,
Bruce.
-
PACROEM-NIS2 now sold
TAX DISC HOLDER now sold
STUBBY AERIAL now sold
Still have the PAC SWI-PS STEERING WHEEL ADAPTOR and the METRA FACIA KIT for sale.
Bruce.
-
All items still available if anyone wants to make me an offer.

-
Well unfortunately I decided to get rid of the Z last week. Cant justify the ever increasing expense (Fuel, Road Tax) when I was only doing 3000 miles a year.
Therefore I have a few bits for sale.
PAC ROEM-NIS2. "SOLD" This adaptor allows the connection of a aftermarket headunit and amp to the Bose system, keeping the Bose amp active. I have also installed a generic ISO connector which allows nearly all aftermarket headunits to be used. (I think this was a Micra adaptor which was the same as the one required for the Z). £20 delivered. £17 collected.
PAC SWI-PS. This adaptor allows connection of a pioneer head uint to the steering wheel controls. I think its also compatible with Sony units. Included are the required resistors. £20 delivered. £17 collected
METRA FACIA KIT. This kit includes all the bits to install any single or double din headunits in the dash. (Part No 99-7402.) £14 delivered. £10 collected.
350Z RICHBROOK TAX DISC HOLDER. "SOLD" Brushed metal effect, with 350z engraved on the back. Unfortunately I dont have the 3m sticky pads to mount it. £4 delivered. £3 collected.
STUBBY AERIAL. "SOLD" Same as the S2000 ones available on ebay. £5 delivered. £4 collected.
All prices delivered 2nd class to UK mainland only.
Cheers,
Bruce.
-
Its been photoshopped. Look at the rear pic.
-
Keegan signs Wright-Phillips......
-
I've found the pic...............................

-
Thank you to SunsetZ for sending me replacement numbers. What a star.

No problem.
-
For some reason mines never had one.
Has anyone got one? Need the clips to fit it as well.
Car feels very light at high speed. Think it may be partly due to not having this fitted. Very beneficial to airflow and downforce I think!
Bruce.
-
Might have to pay them a visit.
-
Not too bad for all that then.
Colour match looks good in the photo.
Is it as good in the flesh?
-
How cheap is "not cheap"?
I'm hoping its going to cost between £200-300.
-
Front bumper is starting to look a little tatty. Covered in stone chips and a few scuffs on the undersides.
Can anyone recommend a spray shop in the Notts/Derby area?
What sort of price should I be looking at? Think it will need a good rub down before spraying.
Bonnets also got a few small chips but not really noticeable.
Should i just get the bumper sprayed or get them to blow it into the bonnet and wings to avoid a colour miss-match.
Thanks,
Bruce.
-
I've got a spare 350 badge which hasn't been used. Bought it for the "Z" bit. The 350 bit is still brand new if you want it. Still got the adhesive backing ready to stick straight on.
PM me if your interested.
Bruce.
-
Any luck sunset, how'd you get on with ya new template ?
Not had a chance to make one yet. Been really busy at work. I'll give it a go next week when things quieten down.
There shouldn't be too much to change really, the outside dimensions were more or less spot on. It's just the opening for the tomtom that needs changing slightly.
-
I just found a piece of plastic lying around at work. Anything like tuppaware plastic will do the job! Maybe a plastic tray or something. The plastic I used was about 3mm thick. It does flex but is sturdy enough to hold the tomtom in place.
Yes I did just tap into the cig lighter power feed. This still works fine if needed.
Bruce.
-
Did you get my 2 pm's?
-
Here you go.....
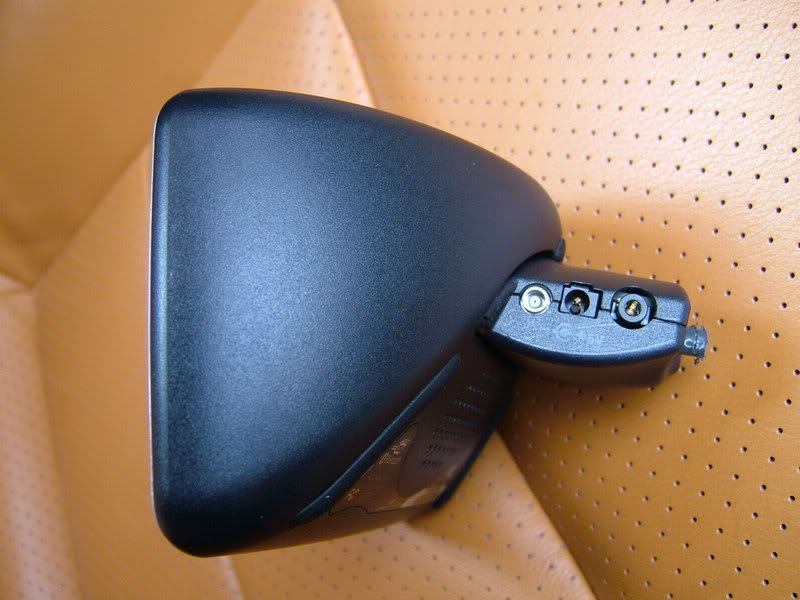
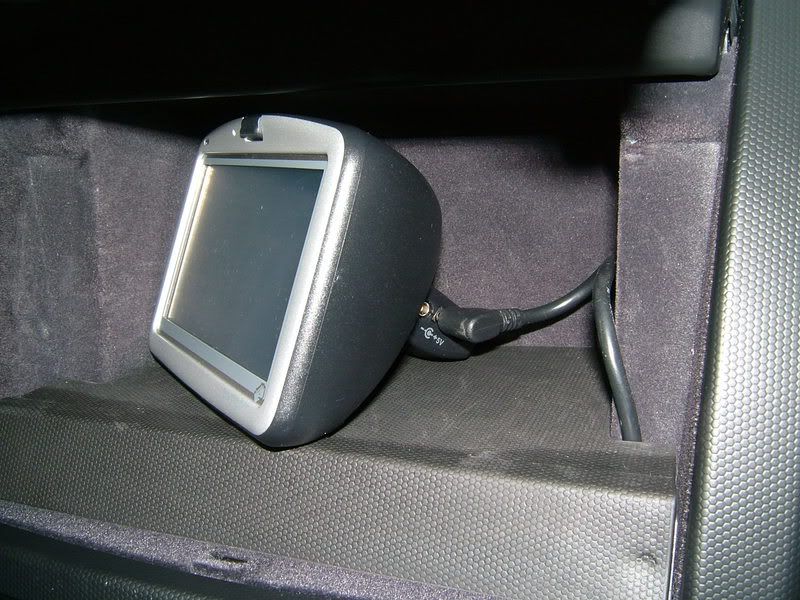
I had a spare tomtom mount so i chopped off the suction cup which left me with this.....
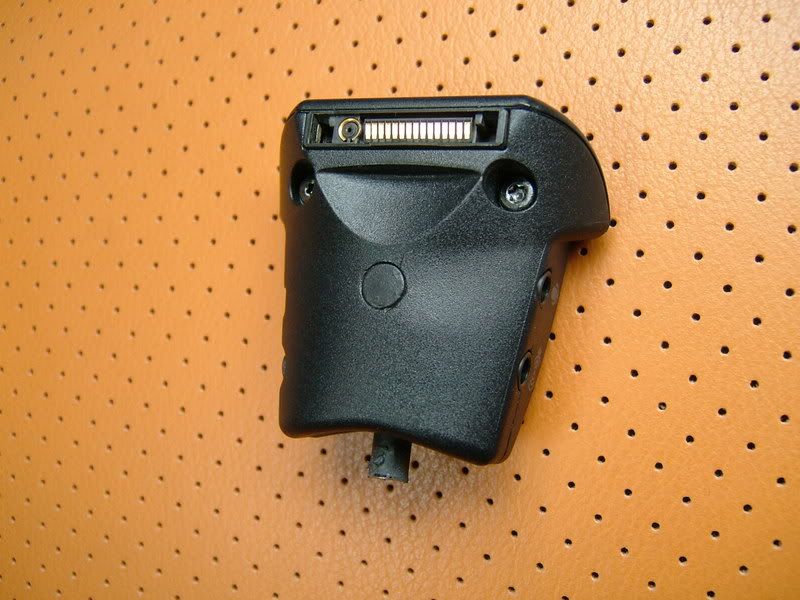
This is how it looks fitted to the tomtom......
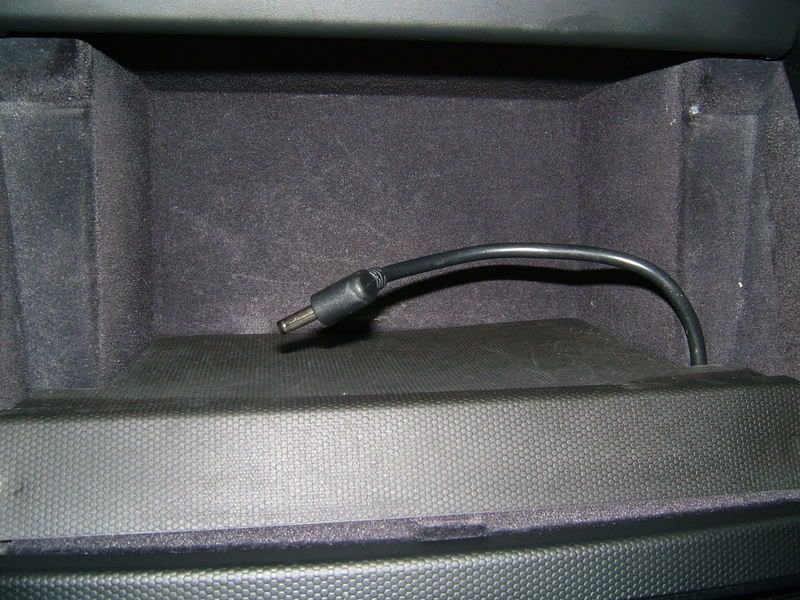
I purchased a 12v extension lead from maplins for about £2 and took a feed from the back of the 12v outlet under the passenger side dash. I then fed it up behind the cubby and plugged in my spare tomtom 12v charger. All this is hidden away leaving just the charger plug fed through a hole underneath the rubber mat in the cubby.......
The surround was cut out of a piece of spare plastic that I had lying around.......
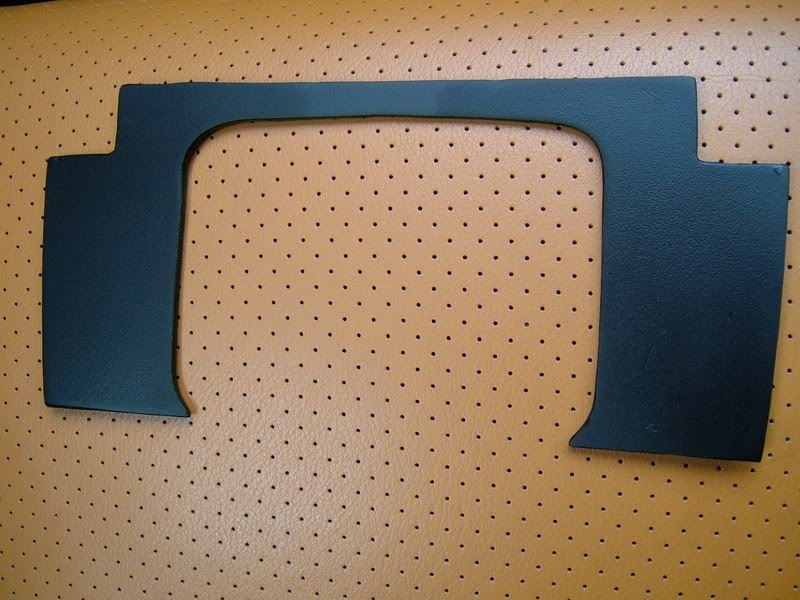
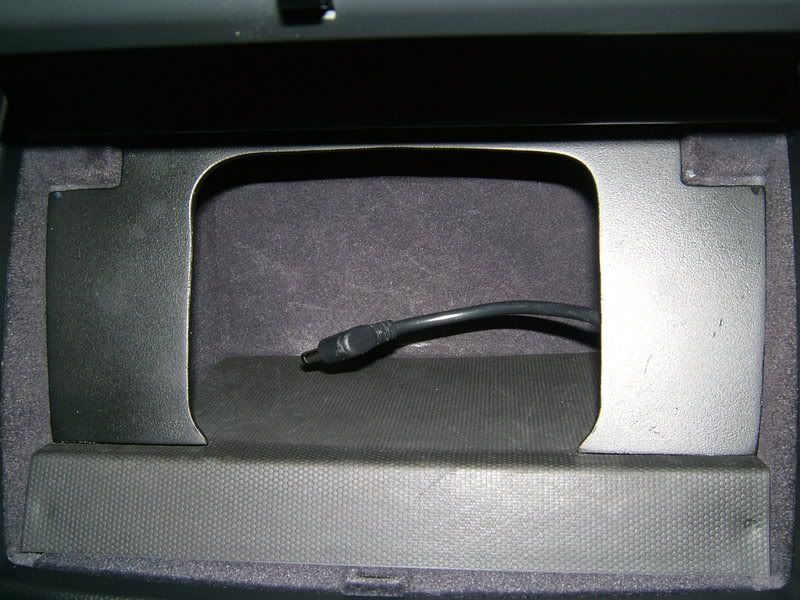
It sits in the cubby at an angle flush with the tomtom.......
The surrond isn't perfect so I'm going to have another go using this one as a template.
You cannot access the power button on the tomtom using this surround. You have to remove the tomtom a little to get to it. I managed to overcome this by downloading a software update that allowed the tomtom to switch on and off automatically with the ignition, as long as it was connected to the 12v power supply.
Also, mine is a 54 plate so I don't know if this will fit later models.
I'll get the correct measurements and post them up later.
Bruce.
-
Loking good sunset Z, sounds bit silly, but you got any drawings for size's e.t.c, thats what i had in mind, like ya sub install too, never really thought of that !

Don't have any drawings, but it wont take much for me to remove it and take some measurements for you.
I used a jigsaw to roughly cut the shape and finished it off with my dremel.
Its sits at just the right angle same as the tomtoms facia. I had to chop off part of the tomtom mount to fit it in the cubby. I'll take some more pics soon to explain.
Bruce.
-
I got my speaker cloth from Maplin. Couldn't find anywhere cheaper.
Cost me £5 for 1m x 1.5m. They do different thickness of cloth too.
Here's a link...
-
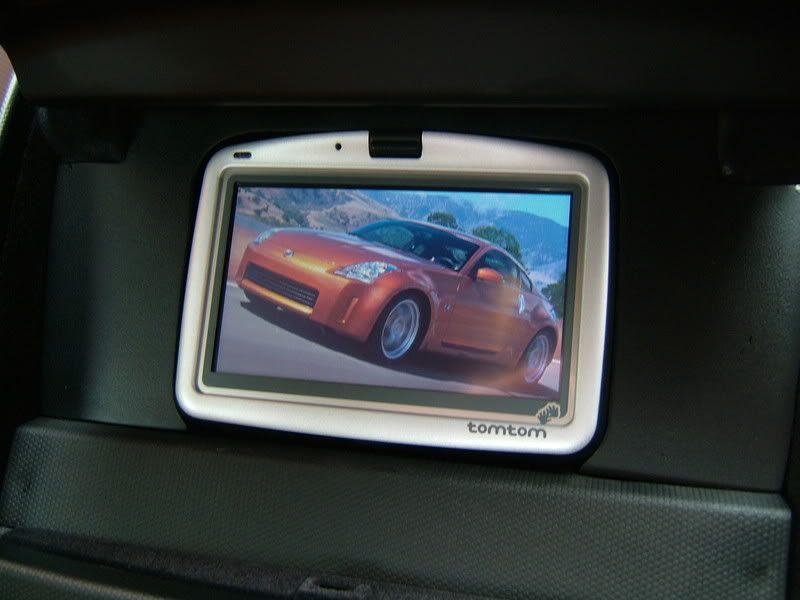
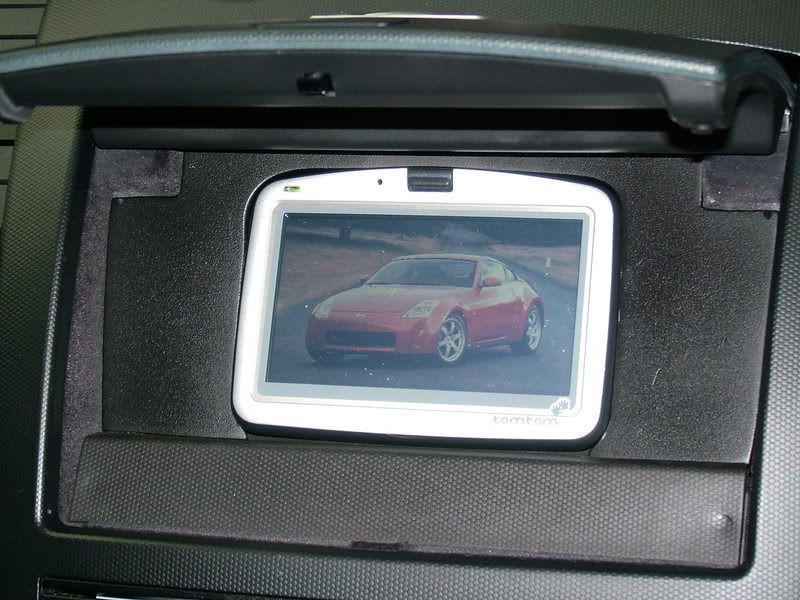
Here's my satnav install. I've got the TomTom 910 hard wired in to the cubby. I made a template for the surround and cut a piece of plastic to size. It holds the TomTom unit firmly in place and hides the wire behind. I cut a hole underneath the mat in the cubby and ran a 12v extension from the outlet under the passenger side dash. I sprayed the plastic in matt black to match the rest of the dash.
I'm quite pleased for my first effort, although I may have another go at perfecting the template to fit round the TomTom better.
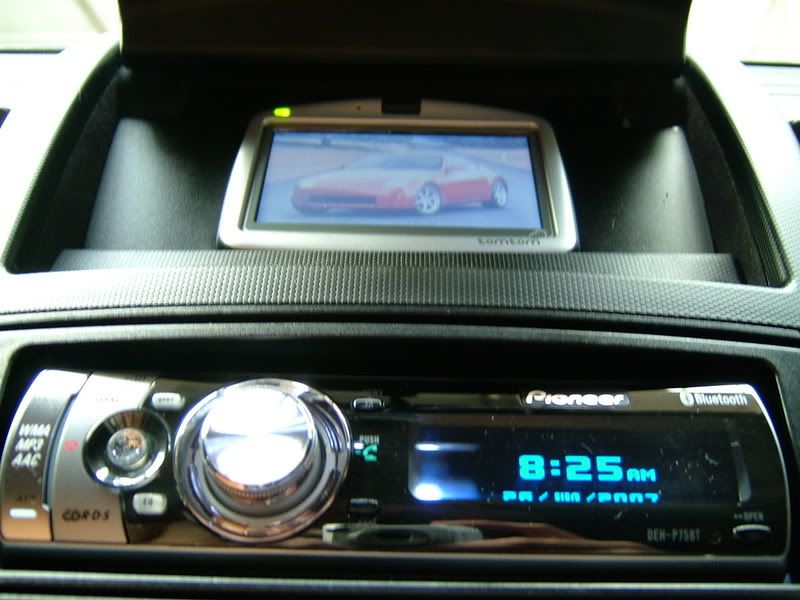

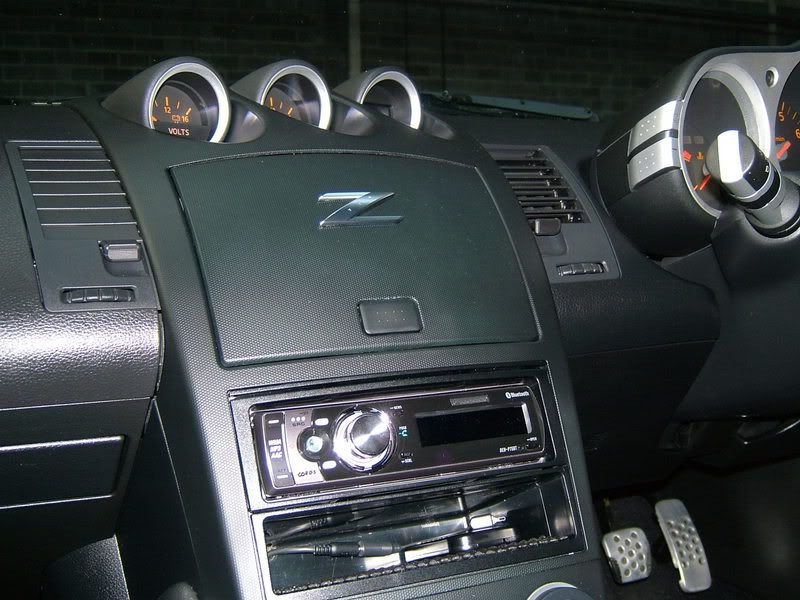
Here are a few pics of the rest of my install....
The 12" sub is hidden under here.....
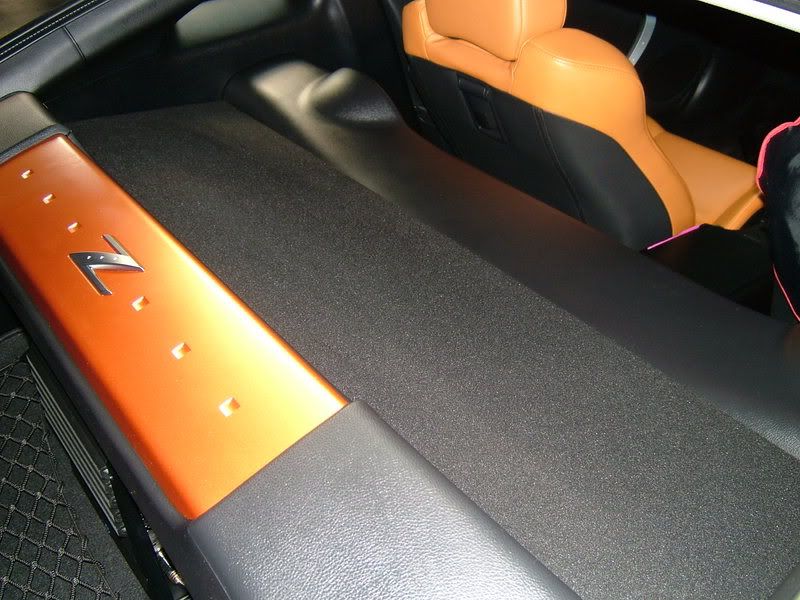
I made this tonneau cover to mount the amp on........
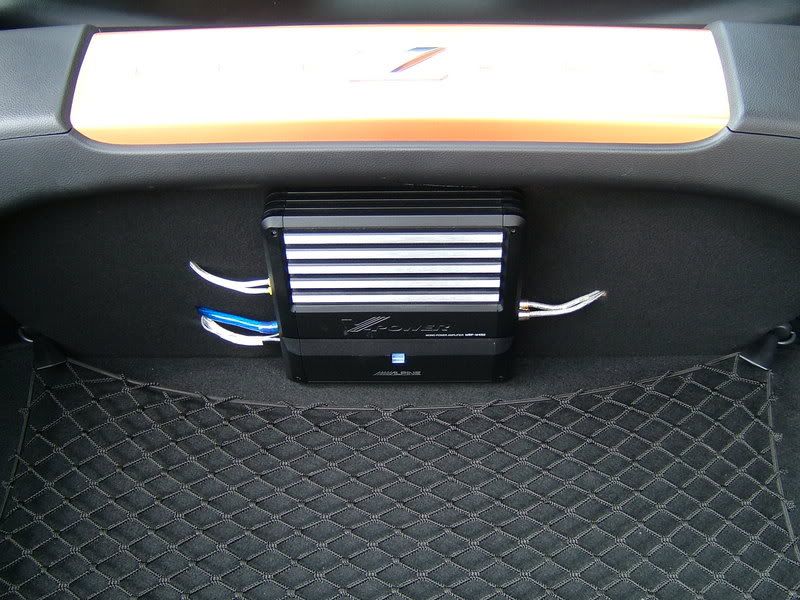
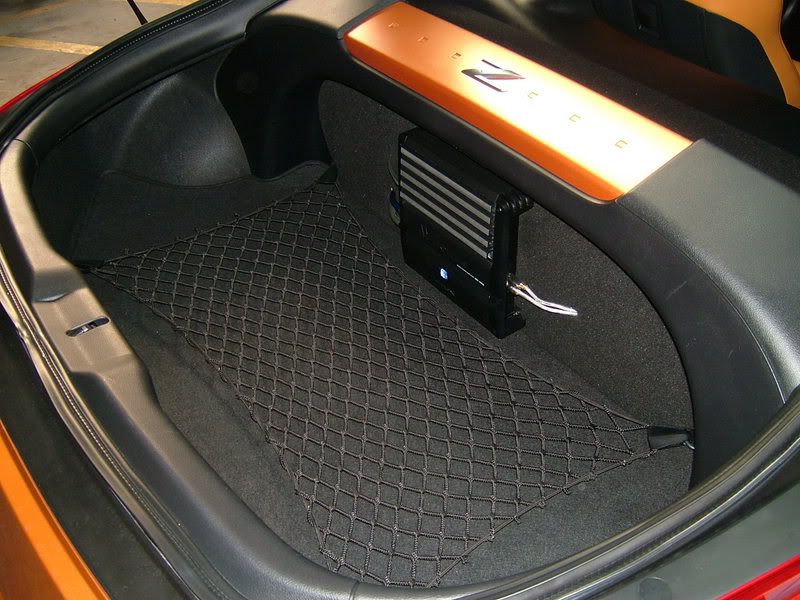
It all comes out really easily if I ever need the whole boot. No rattles so far. Just need to upgrade the rest of the speakers now!
Bruce.
-
How do servicing costs compare to main dealers?
Mine's out of warranty this December and to be honest I don't trust my local dealer with my car. I'd rather find a good independant garage like the one recommended in Derby.
Bruce.
-
Nearly fininshed installing everything. Just have the Pac-SWI-PS steering wheel remote adaptor left to fit. I'll probably get around to doing that tomorrow.
Found everything quite simple so far. Everything connected easily and worked first time! Didn't even bother disconnecting the Bose sub. I just switched on the high pass filter on my headunit so that there's no low frequencys going through it.
I've built my own sub enclosure in between the rear strut bar and the rear speakers with a false shelf above so that nothing is visible from the outside. Its the only place I could fit the 12" sub without losing the rear boot space. Mounted the amp on the torneu cover that I made myself as well. Got some black speaker cloth from Maplins to cover everything and match the rest of the interior.
I'll post a few pics once its completed.
-
Bits For Sale
in For Sale
Posted
Sorry mate, provisionally sold both items earlier.
If anything changes I'll let you know.