-
Posts
458 -
Joined
-
Last visited
Content Type
Profiles
Forums
Events
Gallery
Store
Posts posted by Chromatic
-
-
-
Keep em' comin'.
 Great vids & write ups.
Thanks.. just thought I'd finally grab some of the other builds/bits and put them in my "build thread" where they belong... Who knows how big this thing is going to get lol..
-
Berk High Flow Cats + Invidia Gemini Cat-Back ( Recorded with Canon HF R500 with External Mic on Gecko Mount)
http://www.youtube.com/watch?feature=player_detailpage&v=KvwvnSZDkuM
Edit: Added ~1 Year Later -- Follow up after 12,000 Miles with Berk HFC's and Invidia Gemini Exhaust fully "Broken In".
(Shot with two Mobius Cameras -- So not a perfect comparison to the Canon HF R500, but you get the idea)
Berk High Flow Cats + Invidia Gemin Cat-Back-Dual-Exhaust -> "Broken In" Video:
-
I should have video'd the actual install of the Berk HFC's .. but this is all I got,.. which is the Driver Side Berk HFC in place,.. better than nothing:
-
After 2 Hours of working on ONE Bolt, The one you access from the Driver side Engine bay.. Still wouldn't budge -- He had a Friend/Customer come by and was outside talking to him taking a break. -- I give a little Synopsis of what's going on.
We got the "Demon Bolt" Out from the Driver side after 2-3 Hours,.. and had the process down to a science for removal of the other identical bolt on the Passenger side. I managed to catch the Torching of the Flange surrounding the Bolt in full, and then was filming while holding the Cat with one hand,.. and you'll see SUCCESS as the bolt Breaks (as we wanted) with the breaker bar and the Factory Cat falls out. (This one took us 10 minutes or so, but only because we learned just what had to be done to coax these things out!)
-
Hold you horses guys! lol.. This did NOT go quickly.. I got in there and started working with him.. This took 5 Hours!
I'll go ahead and put the Video's up first for you guys... you were asking for them.. I know it's not top notch quality but I was busy working most of the time,.. there is NO WAY in hell I could have done this at home without an Acetylene Torch,.. and considering I've never used one, nor have one.. I would have certainly caused a mess with this project.
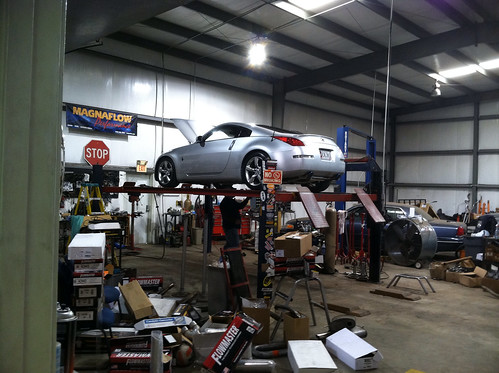
The Car Up on the Lift,.. let the fun begin.
Mechanic probably wondering why I'm videoing him lol.. But this is about 1 hour into the first "demon Bolt" on Driver side,.. And out comes the Acetylene Torch.
-
Berk Technology High Flow Cats:
I'm at the exhaust shop.. It's literally called "The Exhaust Shop" lol.. Guy has my car on the rack right now.. I sprayed the bolts last night (jacked the car up got under there and coated them with PB Blaster and the O2 Sensors (just the nut
 ) ) -- So maybe they will come off with ease. (Knock on wood).
He started about now.. a buddy of his just walked in so he's literally right in front of me on the phone cheking on a part for his buddy (or customers 98 BMW) nice guy.. we just chatted about his BMW M3..
 Now the guy is also mentioning his Ducatti (He's 65 lol).. and making it's exhaust louder (this mechanic builds custom exhaust primarily..).. Very cool.. anyways... So I'll update on how quick or slow this becomes..
I may be able to get some pics of the car on the rack.. but it's nothing special.. Just my 08 350 lifted up lol..
Now the customer headed out and he's back to it..
I'll definitely get some sound video of how these Berk HFC's change the sound.

-
Shorty Antenna:
Here's the stock antenna .. just for before and after.
(You can click on any of these images for larger ones if need be )
Here's the $3 Antenna (Believe it comes stock on Dodge Avenger?) installed:
I think it looks much better personally. Less than 1/2 the height of stock,.. And I'm particular with how things match up, and I know you guys are too. So here's a close up of where it screws into the base of the mast. It's a perfect match imo.
Here's the invoice (which has part number on it, so you don't get the wrong piece if searching around for it):
-
Well,.. Exhaust is on!
......and,.. I ended up doing it myself,.. that keeps happening..

I went down to my Mechanic first thing,.. and he wasn't there! He was going to be there in an hour,.. BUT, they had 8 jobs in front of me and there was no way they could get to my car today at all. I was bummed out to say the least,..
So I went and grabbed 2 more jack stands, some PB Lube.. and drove home.
The removal of the stock exhaust went as easy as it possibly could have gone! I guess I got lucky to some degree,.. but instead of just wrenching the nuts by the Cats and Y pipe.. I decided instead to hold the Ratchet on them tightly and use a hammer to hit the wrench with hard quick knocks.. (Nothing hurting anything.. just I figured it gave me a shot to break the nuts first try..)... And it worked. Every single nut broke on the 2nd or 3rd hit .. Then I just Ratched them off. No stripping of the nuts,.. Once I got the Cat bolts and Y pipe bolts loose I wasn't worried about the bolts further towards the rear of the car.
I got the factory exhaust off in 20 minutes! Hardest part for me was getting it out of the hangers (I didn't unbolt the hangers.. ).
Then of course the Invidia Gemini Exhaust went on beautifully as expected.
Did notice one thing,.. either I was missing a set of Gaskets from Invidia.. OR,.. they mean for you to re-use the gaskets that go to the Cats. Either way I re-used one "set" of gaskets.
Checked for leaks,.. tight as it can be. In fact,.. my factory exhaust had a little "rasp/gurgle" when you let off the gas -- That is now gone.. it's 100% smooth, so there must have been some sort of small leak with the stock exhaust?
The Invidia Gemini catback took me about an Hour.. I was really taking my time with it.. And the tips took longer than I expected, but got them lined up to my liking.
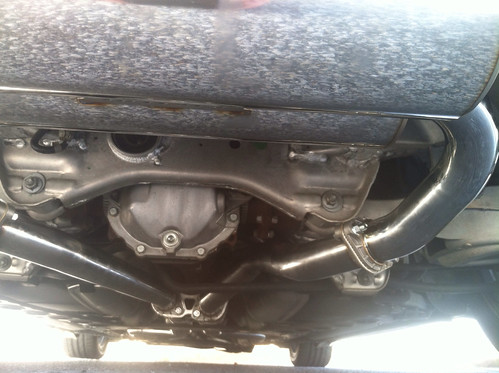
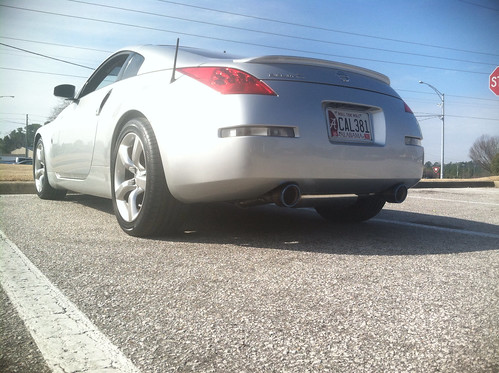
Here's the car with exhaust on.. bolts "hand tight" and before I put the tips on.
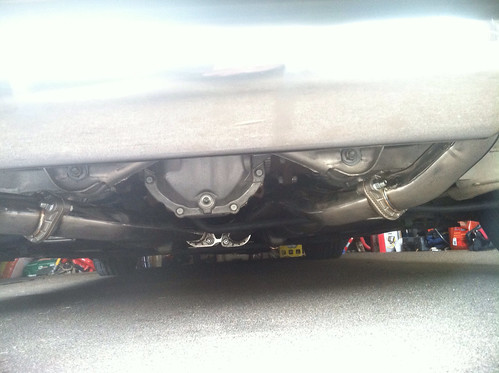
A few views of the Exhaust.. mainly to show the Passenger side pipe going Under (or over.. however you want to say it) the sway bar.
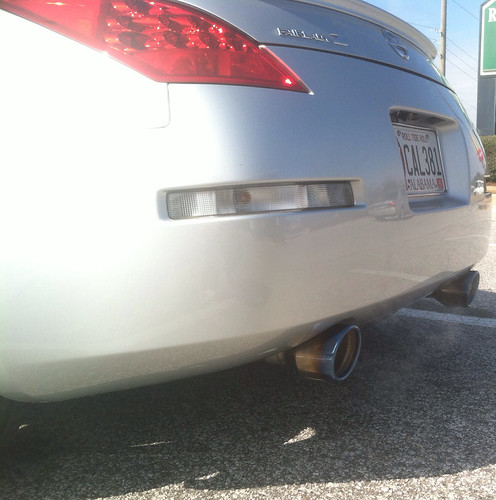
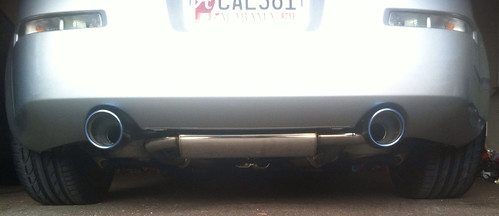
Some random Pics of the Tips/Back of the exhaust:
I love it!
Sounds SO deep.. Under 2500 RPM it sounds the loudest.. maybe that will change as it "breaks in".. I don't know.
And,.. yes.. I want it louder. lol.. Don't get me wrong I love this , perfect sound -- But I need just a bit more ,.. so I wonder if I should go with HFC's or Test pipes.. (I just don't want the Light to come on..) And not sure which will keep the great sound but maybe open up the sound once you pass 2500 Rpm to 5500rpm (Very quiet in this range).
-
Cat Back Exhaust - Invidia Gemini
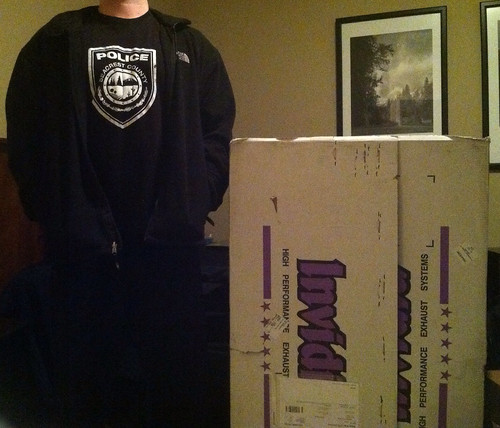
Exhaust arrived.. lugged it inside.. And just for reference here it is in Box next to me.. I'm 6 Ft. Tall (1.83m):
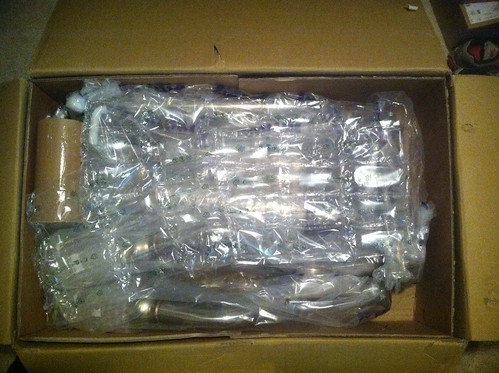
Box opened without touching anything:
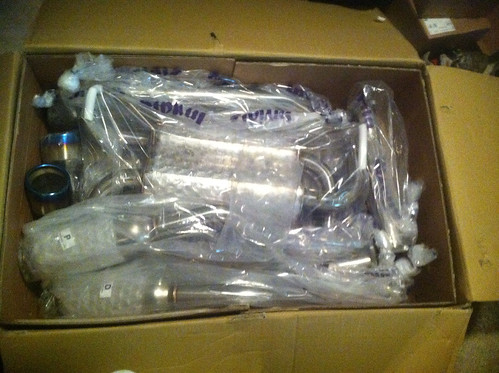
Box with some packing removed: (decided to not take it off so it doesn't get nicked up while moving it around before installing).
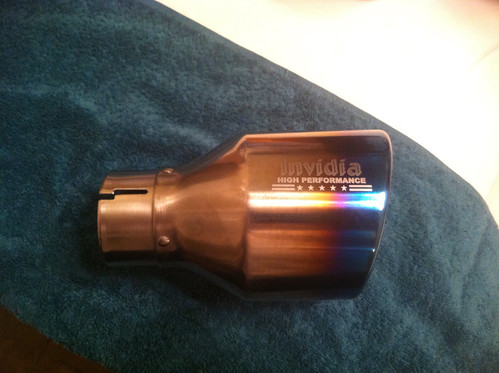
The Tips (one of them anyway)
 : (Titanium Rolled Lip)
Very well protected.. as I already said MUCH larger than I expected from the picture that was shown.. But this is about what I expected when I ordered it.. An exhaust is large.. especially a dual exhaust.. I'm surprised they could pack it in this box, but it's not overly packed.. it fits well with a lot of room to move around.
-
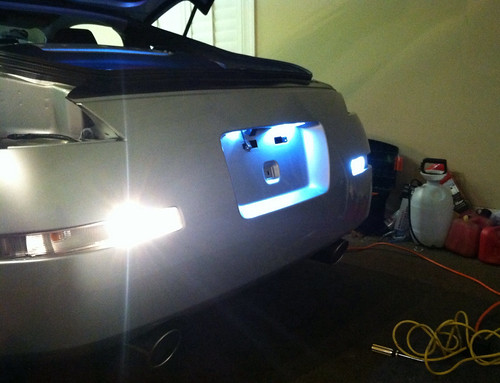
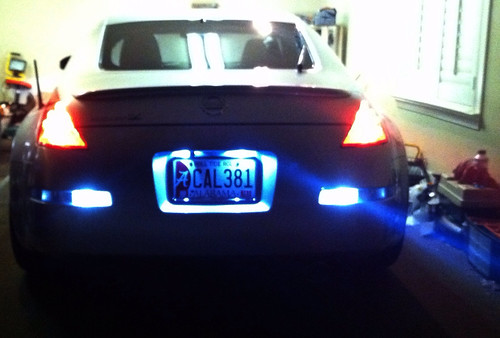
Took forever to get here.. But my LED Reverse Lights and Tag Lights arrived.
The Reverse lights weren't the best design.. I had to dissassemble them and pull all the pins and resolder them.. as when I plugged them in they would only work when you "jiggled them".. and with a light in a moving car that's not gonna fly lol. Wasn't a big deal though, took maybe 3-4 minutes .. after the solder fix they are great! The tag lights just plugged right in no issues.
I always try to take at least one or two pictures for the heck of it if anyone is interested in these lights (hey there are only a few dollars)..
Pictures don't do it justice, especially on lights.. but they look much "cooler" something I didn't really expect .. but they are 10 times brighter.
Here's a picture where I left the Driver side reverse light in with the normal OEM bulb. You can tell how much different the color/shades of the lights are.
*The Tag LED's are in of course in this picture as well.
And one final shot of them all in.. Again, they are much brighter than the old bulbs,.. I highly recommend installing these bulbs even if you aren't putting in a Reverse Camera.
Just in case you are wondering.. The tag lights take 2-3 minutes (remove tag) -- use screw driver to push in clip on right side (on my car) and the whole thing comes down.. pull bulb, put new bulb in.. done.
For the reverse lights, they are to the inside of the blinker bulbs.
Easiest way to do this is to pop the hatch.. and look on each side.. you'll see 3 plastic pop off round "covers" of bolts. Pop those 3 off on left side, then 3 on right side. Use 10mm socket.. remove bolts,.. and remove the taillights/brakelight housings.
Then you can easily reach in and pull the reverse lights out and put new ones in.
-
 1
1
-
-
I ended up Buying a new piece for that area for about $70'ish.. that's made differently (not white under the "paint"/finish.. so any nicks won't show up ) -- And while I had the old piece off I bought a black paint marker.. and used it to touch up the lower piece that I couldn't justify replacing for a half inch spot of scratches. -- Turned out well.
For reference.. Here's what it DID look like:
and...
Here's how it looks now:
Yeah the picture was at night... but it looks great. Looks brand new (as it is lol) -- but the touch up under it was perfect. Huge cosmetic fix for an otherwise 99 percent perfect interior.
Highly recommend people replace it if you can get the part cheap enough.. just easier imo. But pulling it, sanding, priming, painting, clear coat (maybe not).. and wet-sanding if needed can obviously look just as good.
-
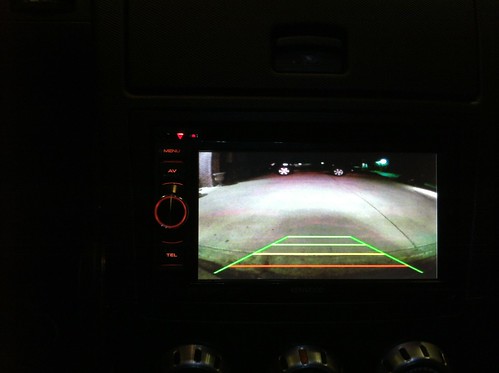
Added a Reverse Camera to the Vehicle.
Ran a Dedicated ground to the factory wiring harness, so the Headunit would have a proper ground (It was grounding through the Antenna,.. which also had a side effect of giving me a shock randomly when I touched the car (ie: opening the door). )
Plus I removed the Pioneer Sirius XM boxes, magnetic antenna, and all wires - And did a slew of wire cleanup behind the headunit and wired in other things that I didn't do the first go around; to name a few : Ran power to the Antenna Amplifier (so FM signal was clear again),.. Wired in the Illumination Wire, .. and other small things like that.
To keep it brief, here is the Reverse Camera:
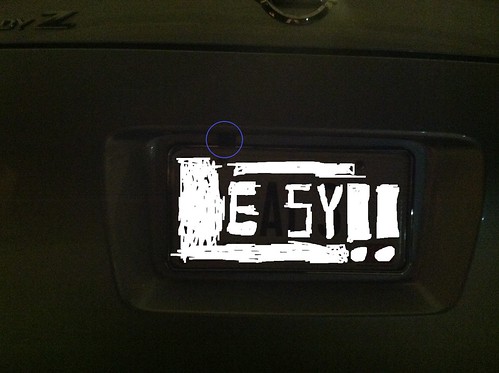
Put the Reverse Camera on the Driver side -- It's super "stealth" ... I like it, really no need for brighter tag lights, but I have them on the way anyways.
Then here's the image from the $24 Camera -- (Keep in mind it's at night)
-
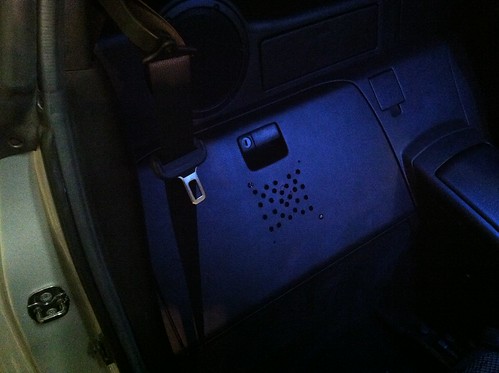
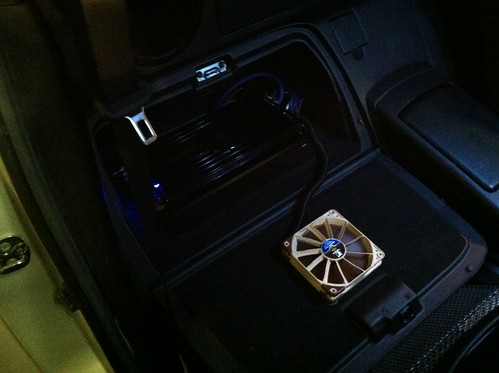
Well,.. The amp was getting too hot for my comfort in that Glove Box due to not having any air to circulate. So given the prospect of not being able to really utilize any of the space for anything other than the amp (box is smaller than it seems). I decided to go ahead and drill holes and put an Intake Fan to draw in cool cabin air to rectify the issue.
Intake Holes (Not perfection here.. but not finished):
Fan Wired via Relay - mounted on spacers Pulling Cabin Air:
Cleaned this Up: Those holes were not going to cut it,,.. and were just to provide adequate intake aperature for airflow.
Final Complete "Cosmetic" Fabrication "Cleanup":
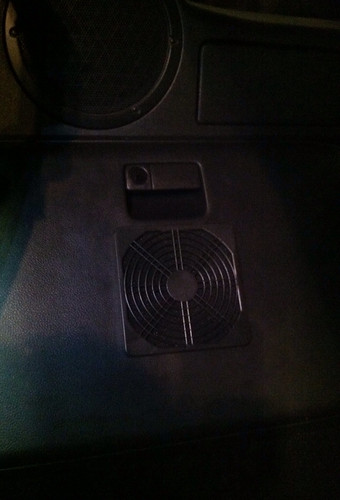
Amp runs considerably cooler now.
I decided to wire the Fan up "properly" so if anything did occur with the electrical system it wouldn't have a chance to mess up the Head unit, as the Remote isn't meant to power anything and is around 250mA give or take. (Yes, I know many people just power stuff off their remote wire,.. but doing things right is worth it in the long run.)
So I wired the fan up off a SPST Relay,.. and Fused the power going to the relay with a 3amp Fuse in-line.
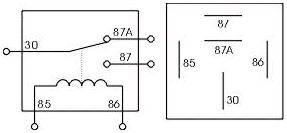
Essentially it's wired,..
Terminal 85 --> Ground.
Terminal 86 --> Remote from Head-unit
Terminal 30 --> In-line 3amp Fuse from Power
Terminal 87 --> To Positive of Fan
The Ground of the fan is wired into the Ground with the other grounds.
Didn't anticipate thermal issues with the amp in that location, and even with the Amp getting hotter than it should being Class D,.. it most likely would have been ok in there without this addition, but might as well do something since it's relatively simple.
-
Today was the big day to see if all my hard work .. well ... worked!
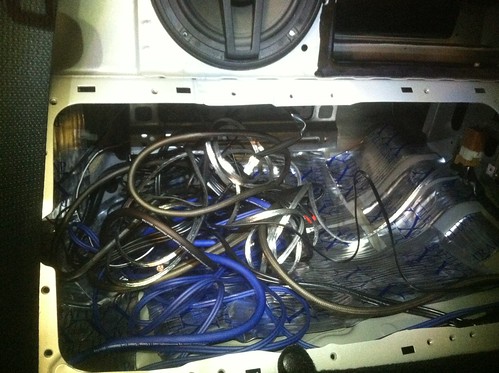
First I decided I should put more sound deadener in the car.. I deadened this entire area and bulk heads.. Plus other areas I didn't bother to take pictures of.
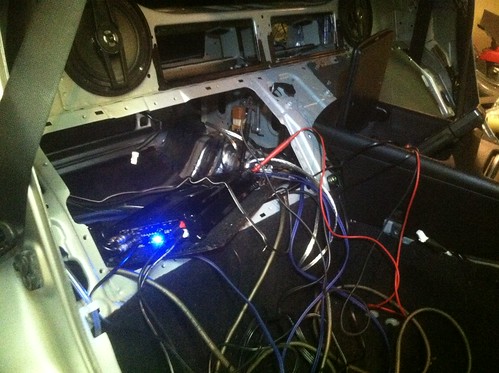
And.. it's ALIVE! -- Setting Gains!
And.. only other shot I took was of the headunit,.. as I tuned the system in after Gains were set properly.
Fired right up! Everything worked flawlessly.. I couldn't believe it

It sounds phenomenal,.. way better than anticipated.
To get proper voltages for speakers,.. I ended up at 50% on gains for front,.. 50% on gains for rear.. and 60% on gain for Sub. Not too bad.
One thing I DID notice was not only did my 90's MB Quarts work,.. but they sounded at least 5 times better than the JBL's. This isn't knocking the JBL components I put up front,.. but Germany did something right with this old set of MB Quarts I have. WOW! To adjust for the MB Quarts being a greater SQ and tone.. I faded to front about 50%.. thus dropping the quarts down about half way,.. this set things up very well for sound positioning.
For ME,.. Putting rears in the car does sound better. I dropped the rears, then added them.. over an over..
The sub is absolutely DEAD on perfect,.. It's not too much.. but if I WANT it to be ridiculous .. It's right there,.. with my Bass knob next to me.
All in all, I couldn't have done a better job myself... oh wait.
 -- I'm just being a smart a.ss.. Seriously, I'm a very happy guy right now.
 Tomorrow is put the interior back in day,.. no more worries of if all my work is going to work! Straight forward job on panels, trim, et al. Wonder what it's going to sound like with the interior back in?
-
Did the Complete Install (Took about 5 days):
Well.. you've probably run across one of my posts in the last month or so while I was researching and asking questions.
I've been trying to keep everything in a single thread,.. but since this is the actual build process with pictures I thought it would be appropriate to put this JUST build log into this section,.. could benefit others down the road.
I've been working since Friday on this car,.. don't even know how many hours I've put in now, lost count.
Anyhow,.. Here's some pics of the car:
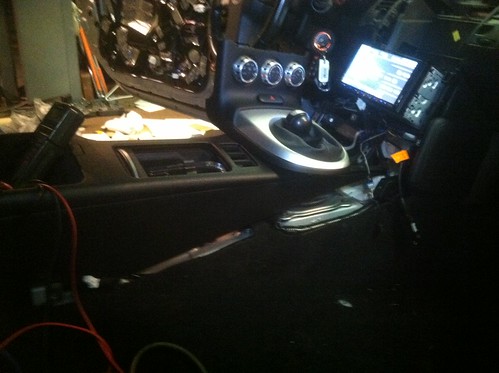
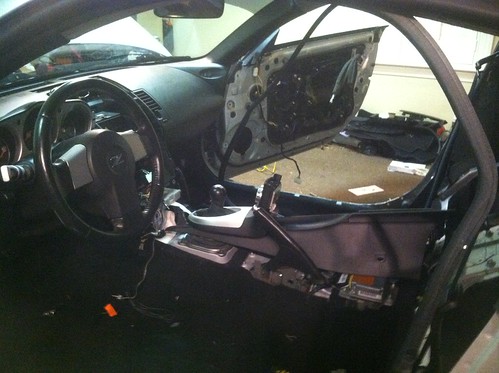
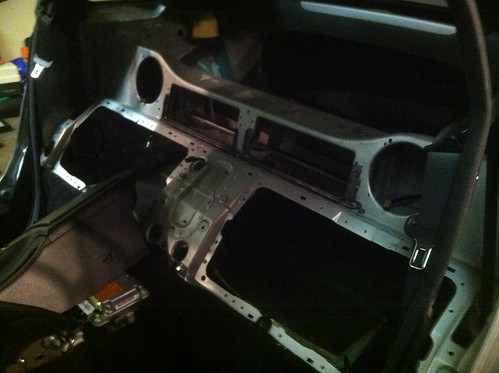
Car interior stripped 90%:
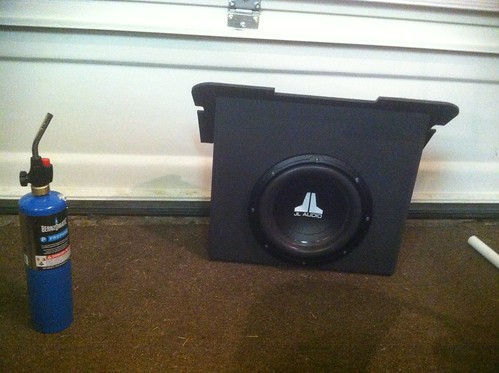
JL 10" sub wired, and mounted into Custom Box:
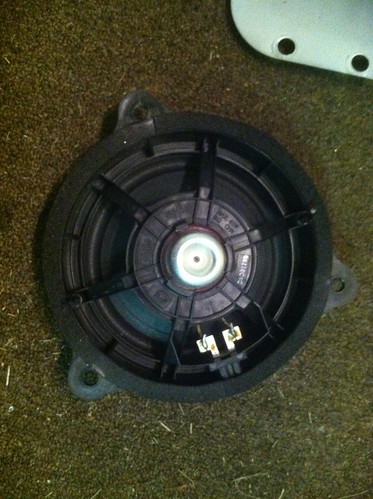
Factory Mids pulled out (Wow, these are terrible!) -- Had to cut them out of their spacer to reuse it with the new Components I bought.
New JBL Components successfully in factory spacers (one heck of a job fabricating those spacers to put these JBL mids!) -- And put the 1" tweeter in stock location (had to cut/fab behind that sail panel quite a bit to get them to fit.. but they fit perfect)
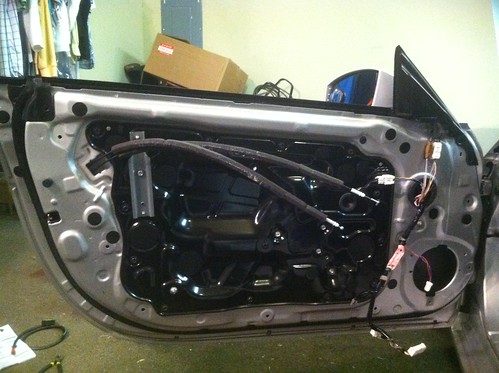
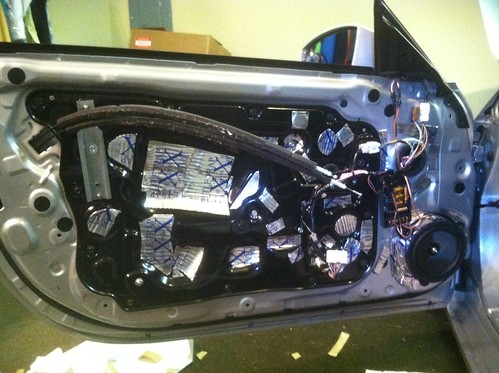
I Used Rattle Trap Extreme to deaden doors -- Am running out of deadener, and the doors were A LOT better sealed by factory than I anticipated.
If you have some recommendations of where else to put the deadener on these doors let me know.. I have a little left.
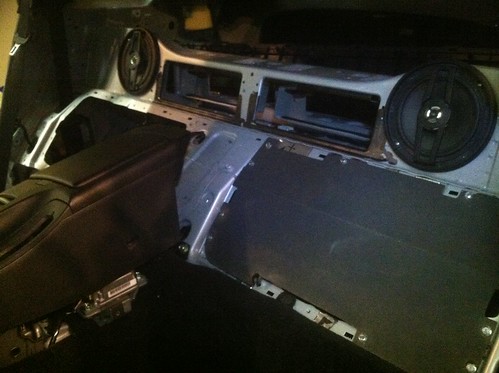
Slot where the Custom stealth Sub box is going,.. Used a ton of sound deadener in this spot.. picture just shows bottom, but it's done up top, sides , etc. Plus there is a 1" rubber mat that is on top of this material, not shown in pic.
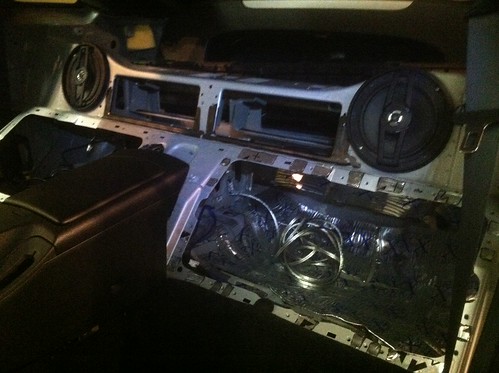
Rear 6.5" (Late 90's German) MB Quarts installed with X-overs. [i used 5+ sq ft. of sound deadener just up in this area.. that stuff goes fast!]
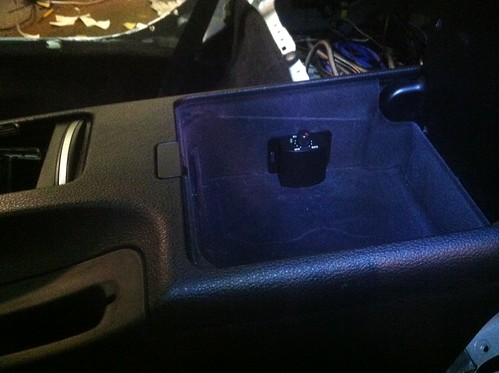
Yes,.. I opted to wire and install a Bass Knob. I KNOW many of you go against the notion of using one,.. but I plan on adjusting it on the fly quite often. So here it is mounted in a discreet "Invisible" location in the center console pop up box (top comes down and covers this). Used Industrial Velcro to mount it (worked fantastic!).. and dremeled below it for the phone cord to come through properly. I think it turned out pretty good:
The Custom Sub Box installed (It's downward firing). [This thing was a beast to get installed,.. 3 of the 12 bolts lined up
 .. So more dremel work with a light sanding bit being very careful with that MDF.] Turned out well though.
I'd say I'm 90% done now.
I have (not pictured) a carpeted amp rack built to go in the left "glove box" behind passenger seat (which when closed won't be seen).. that's drying right now.
Tomorrow I wire the amp up,.. plug in the headunit,.. and pray. If all works, I dial in the amp, then start re-assembling the vehicle.
Wish me luck!
-
Car Stereo "System" Install
Hi guys, and ladies. I have done a ton of homework and research over the past 3 ish weeks and this is what I ended up ordering to upgrade my factory stereo (I have the base model stereo):
Headunit: Kenwood DDX-470 - http://www.kenwoodus...le_Video/DDX470
Amplifier: PPI 900.5 (5 Channel Amp) - 70Watts RMS x 4 + 270Watts RMS x 1 (Sub) - Precision Power PPI P900.5 (p9005) 5-Channel Phantom Car Amplifier
Front Components: JBL MS-62C 6.5" Mids with 1" Tweeters (80 Watts RMS) - JBL MS-62C (MS62C) 6-1/2" 2-Way MS Component Car Speakers System
Rear Speakers: MB-Quart QM-160 KX 6.5" Mids with 1" Tweeters (Coaxial) (70 Watts RMS) - No link for these as these are from the 90's, and I had them stored. These are when MB Quarts were made in Germany. Purchased them in 1997 for $400-500.
Sub Woofer: JL Audio 10" w0v3-4 (300 watts RMS) - JL Audio 10W0v3-4 W0v3 Series 10" 4-ohm subwoofer at Crutchfield.com
Custom SRQ Sub Enclosure for the 350z: (10" Enclosure with .66 cu. ft of airspace, covered in Black textured finish, built to order, with Spring-loaded Terminal Cup.) - Nissan 350z Vehicle Specific Sub Enclosure 1-10"
Sound Dampening Material: (Versa Kit - 4 Square Feet of Sound Dampening Material) - I decided to get a little Sound material for the doors, as you guys told me it would help with sound quality. --
NVX SDVK4 Versa Kit, 4 Sq Ft of Sound Dampening (1 18"x32" Piece)
Wiring: 4 Gauge KCA Power Wire, 4 Gauge KCA Ground Wire, Inline Fuse Holder, with 80Amp AGU Fuse, 17 Foot Bassik RCA Cable with Remote Wire built in, 20 Feet TCA 14 Gauge Tinned CCA Speaker Wire (Gold plated Ring Terminals, and Spade Terminals). -
KnuKonceptz KCA 4 Gauge True 4 Gauge Amp Kit Installation Wiring Kit | eBay
2 More RCA Twisted Pair RCA Cables (Total of 6 RCA's) that are 18 Feet.
KnuKonceptz Twisted Pair 4 Channel Smoke RCA Cable 20ft | eBay
50 Feet of Kord Kable 14 Gauge Speaker Wire, Polarity Marked -
KnuKonceptz Kord Speaker Wire Ultra Flex Blue OFC 14 Gauge Cable 50' True AWG | eBay
Amp:

-
Talk to Bob at Gaugecraft
He will tell you all you need to know about 350z clusters.
Way ahead of you there.. Spoken to Bob weeks ago,.. for my needs his prices are a bit high as I'm not looking for anything different than factory,. and just programming I have $30 or his price which is considerably more than that.
I was just curious if my cluster was *supposed* to have the Cruise and Set on it like it shows in the video being a Base model.
-
I hear ya..
Man,.. these Engines are HOT. It's only 74 F (23.3c) out today,.. and a 20-30 minute drive I pull over to have a smoke,.. lift the hood to listen to things.. (Engines are a bit noisy.. meh) -- But anyways the heat they put out is something else.
IE: Burn your hand to hold it on the engine hot.. - Hottest running engine bay I can ever remember having,.. Seems like things would melt under there somewhat easily with time. Especially in the climate I live in.
I usually don't pay much attention to it,.. but since I've put on those intake hoses and air diversion plate I've been feeling the intake tubes just to see how warm/hot they are from time to time.. And I keep getting reminded how damn hot the engine bay is. Hood remains cool ,.. so very little heat is able to escape these engine bays..
Heat rises,.. no vents = Crazy buildup of heat. The lower cover probably doesn't help the temps any.. but I'm sure it's partial headers/exhaust + engine in general. I wouldn't think HFC's would cause *more* heat.. in fact I'd think it would lower heat output over stock cats that have some level of wear/buildup. To be fair, I never "measured" the temp of the engine when I got it.
It has me thinking about hoods and ways to let heat escape from the engine bay.. The cheapest choice seems to be a carbon fiber (roughly same weight) with vents built in. But,.. I don't like the look of Black on any other color but black. Just looks like an unpainted panel to me.
The actual coolant temps are fine.. Never goes over halfway.. and always stays (warmed up) just under the halfway point. So I suppose this is just the way they are,.. but some power loss has to occur with such heat surrounding the intakes.
I can tell the plastic around some of the factory wiring (grommeting) like the covers to the MAS wiring is grey and brittle.. and has to just be from high heat. Makes me want to rewire the electric fan to stay on 100% of the time.. although that's going the wrong way (to the radiator) and not toward the engine.. plus there is no real area for the heat to escape (which is the culprit to start with). So even with something to move air in there it just wouldn't have anywhere to go but down, hit the cover.. and the slight bit of room by the header to cat flanges..
Not looking to spend say $800 (or so) on a hood.. then another $1000 for paint.. just to have a few vents
 -- Just an observation I guess.
 I've been looking around for "heat solutions" .. but there aren't many people concerned with in engine bay heat.. The coolant is fine, so the engine is fine internally,.. but the air intake temps have to suffer I suppose. Maybe I should put some intercoolers on my intakes

-
Definitely agree and know what you mean. My local garage couldn't give me a set price for fitting my Berks HFC's and Invidia system. He said the exhaust alone he could (which I understand) but the Cats he wasn't sure about as they could cause problems ~ as you know.
I was happy enough though to agree with it as I couldn't get under my car even with my axle stands enough to fit the Cats and in the end it cost me £95odd ($158). Not too bad for the 4+hours labour it ended up taking.

Can drop the conversions when it's done locally lol.. Is your petrol half price? Your bread half price?

95 pounds for 4+ hours of labor is insanely cheap.. that's less than 25 pounds an hour.. Perhaps the average rate there is 25-40 pounds an hour on mechanical work. Here it's about 80-110 an hour.. Just depends on where you live, they tend to jack up the prices living where I do. Again, big reason I've been building my tool collection , getting the impact setup going, etc.. So I won't need the mechanics for much.. Just missing a lift,.. one day, one day

-
I'm doing the same thing with my '07 base model, I, but then you need to get the mileage to match or get it changed which I think only Nissan can do (I might be wrong) and then they will only 'add' miles.
True.. I've done my homework on how to get it all done via mileage change etc.. I've found a place here in the states I called and emailed, that will change my mileage for $30.. Which is VERY reasonable compared to all the other places that wanted $200+.. I'm a bit hesitant now because to swap guts you have to remove needles, and re positioning the needles isn't an exact science.
Oh, and I've heard the "only nissan" thing as well.. and perhaps it's just this place I contacted.. but they only require a form from the Dept. of Motor Vehicles showing a mileage change and they will adjust up or down. Obviously, a used cluster is usually going to be higher than your mileage.. at least in my case with now 28k miles.. If I found a cluster with say 30k miles.. I would just wait until I was close to 30k and swap it in... but finding the right 7500 rpm red line HR cluster with the right mileage is like finding a needle in a haystack. I've only found one HR cluster and it's $225 + shipping.. The parts dealers want $400+ for used clusters.. and Nissan wants $700 for a new cluster. So it's certainly something to shop around for.. I'm not in any hurry to spend any more than $100-$150 for a used cluster for 2 lights.
-
I have a set of clusters from a non GT (base model) JDM. I have taken these apart down to circuit board level and although the solder pads are in position there are no LED's on the board neither are there cruse windows in the dial face.
I have populated this board with LED's and plugged it into a UK GT car but the LED's did not illuminate although the cruse still worked.
Don't know if this is relevant to your situation but its more info for you anyway.
Can you clarify.. "there are no LED's on the board neither are there cruse windows in the dial face." -- Do you mean on these boards they did not have the Cruise and Set lettering like my video shows on my cluster?
Thanks
-
Hard to say whether they'll light up really tbh. Unless they receive a signal from the cruise control somehow then I guess they won't do squat.
Mine do light up but then I have cruise control on the steering wheel of my UK Zed as it is standard on the GT models, which mine is.
Are you changing the steering wheel to one like the below with the cruise control on it already or fitting some type of aftermarket add on kit?
I'm flashing my ECU to a higher trim.. which will enable cruise.
Cruise and the controls are standard on all models except the Base.. (really poor form by Nissan to not include what is really , now, a standard feature on a 30-40k car).
No, I'm not changing the steering wheel out. The Base models are no different than the higher models in this respect. They have all the wiring in them ready to go. I buy the buttons from Nissan ($50) for both the Volume (radio controls on one side) and the Cruise buttons (on the other side) and there is a plug in there by the airbag that plugs right in to the factory parts and it's ready to go. (You also buy the clutch and brake switches so it knows when to cut cruise off).. Other than that you just flash the ROM file to a non base trim (doesn't matter which trim you choose).. and the car now has cruise just like all the rest, operated with the same buttons and same wiring.
So anyone getting a tune done anyways who has a base model should spend the $100-$150 in parts for switches, and buttons as the cruise flash is a free part of the tune from Uprev. Plus it makes switching between your 5 Tuned maps much easier as you use the cruise buttons to do so.

Example.. These are the buttons I have.. They light up as well
 -- But are just factory Nissan buttons:

-
I'd imagine that all clusters contain the same lights. Wouldn't really make sense for Nissan to have different clock clusters just for the sake of a few lights that can or can not be illuminated depending on the level of spec you have.
My main concern would be that your steering wheel is on the wrong side of your Zee


Well,.. I thought the same.. but then that's not true. Because some clusters have the Traction control and some other various lights.. that are NOT on my base cluster.
So it makes sense they'd print all the clusters the same regardless.. but they don't.. some have X some have Y and some Z.. I still think once I flash over to cruise there just aren't LED's back there and cruise won't light up.
Which is why I asked.. appreciate the speculation,.. I imagine there only a few dozen people who actually truly know as most don't know the first thing about how the Base Z's have Cruise wired up in them from the factory and getting it to work is very simple.









Chromatic's - 2008 350Z Build Journal/Log
in Member Build Projects
Posted
Yup, in hindsight I have.. Had the car just about 3 months.. accomplished quite a bit in that time .. Tune is next,..
Thanks!
Thanks,.. much of that I just added was previous work,. I just wanted to get it all consolidated in my ongoing build log thread.. The engine stuff.. intakes, air diversion plate, logos, and such are within the past week..
And, I absolutely LOVE the way the sound turned out with the Invidia Gemini + Berk HFC's.. I don't want to alter it in any way whatsoever.. Zero rasp, perfect tone,.. not too loud (but loud).. and great power (I really felt the power kick in when I had the HFC's fitted).. .. Another has mentioned putting headers on, but honestly.. even if headers gave me 20 hp (which they wouldn't).. I don't want the sound changed 1 slight bit..
I was trying SOOOO hard to find a used or new Nismo S-Tune exhaust .. and I'm SO glad that the two deals I had fell through (got sold from under me).. on the Nismo S-tune,.. because the Invidia Gemini is a better exhaust in every way (to me). It produces more power,.. it has a chrome finish everywhere not just the tips.. front to back the Invidia Gemini is beautiful (shame you can't see it).. And the Nismo S-tune was a Y pipe to single pipe like Stock,.. the Invidia Gemini changed it all to a true functioning Dual exhaust,.. AND the sound from the Invidia Gemini is, imo, better than the Nismo S-tune.
I did have a complaint with the Invidia Gemini and that was after 3k RPM it got really quiet (stock like).. That's the primary reason I immediately went with the BERK HFC's.. (had them in my possession within 1-2 weeks at most after I installed the Invidia Gemini).. and was crossing my fingers by some miracle the two Cats would magically make the 3k-7500 rpm range open up and sound good and louder.. And that is exactly what it did. Left the low end 0-3k with the lovely deep Invidia Gemini tone.. and it's like the Berk HFC's were designed specifically to go with this Gemini exhaust.. as the cutoff at 3k was eliminated. Not sure what that was all about,.. but anyone who has just the Invidia Gemini .. I highly recommend the Berk's.
I was also surprised the Berk HFC's didn't introduce some Rasp to the exhaust,.. but they didn't. You can hear from my many clips .. that it's a nice smooth tone. I know several others on here have the identical exhaust setup (Invidia Gemini + berk hfc's) so it's a winner.
While I don't have personal experience with the other exhaust and hfc/testpipe combo's -- I would still bet (based on the sound clips/videos I've seen) the combo here is the best sounding you can get for the 350/VQ engine if you don't want Rasp,.. or ridiculous obnoxiously loud exhaust. (Though my DB meter did record this setup at 104dB's at it's peak.. so it's not quiet )
)
Yup. I've already removed it hehe.. It's a good looking logo,.. Not sure if it's the reflection changes it has or what, but it just doesn't work there. So it's trash now. I'd like a pure white Invidia sticker/logo to put somewhere.. perhaps a small one to put neatly on the air diversion panel,.. I do like to have my perf. parts represented in the engine bay, just with "class". That invidia sticker is not classy lol..
I'll post another picture and maybe video cause I like using this Canon HF R500 after I remove the factory stickers and such to show the difference of the looks. Small things like that really make a big difference which the picture(s)/video will show. (To me anyways)