

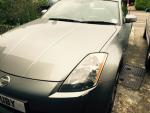
zubairhussain123
-
Posts
113 -
Joined
-
Last visited
Content Type
Profiles
Forums
Events
Gallery
Store
Posts posted by zubairhussain123
-
-
I lie, it was August
-
I've tried PMing him a few times, havent had a response since June this year lol
-
So,
I've always been a DIY audio installer for all my cars, and sift through hundreds of forums to help me do it - thought I'd finally give back to the community!!
Here is my Nexus 7 and aftermarket sub install (in the OEM Bose location).
First and foremost, took all the Bose crap out, changed the headunit and replaced all door speakers (sorry I don't have any photos of the dismantle, but it's pretty straight forward and you'll find hundreds of forum threads detailing the procedure with very good photos.
I never use OEM wiring, generally because they're not made for solid power, but also because I just like to know I've got my own stuff in the car. It's the way I make the car mine.
I used JBL components for the doors, replaced the factory tweeters too. The tweeters take some persuading, and feel like they're gonna pop out of the OEM tweeter mould, but its finee, strapped em down with a small metal plate, and all is well.

The JBLs were £40 from eBay, and do their job well. I use my components just for vocals, as once the sub goes in, there's no point having much low end bass coming from the components. I just use them to fill the gap between 60-80Hz or so.
Next came the dash removal, this one gets a bit more tricky:
1. Put your fingers under the rear silver ring on the gearlever casing thingy, pull it up. Will pop pretty easily.
2. This will just lift and twist around (together with the AC controls), and just move it 90degrees to get it out the way. Note, there is a white ribbon cable connected to the back of the controls, this deals with the AC controls AND your speedo/petrol/temp gauges behind the steering wheel.
3. You'll see a plastic white box from which that white ribbon cable came from, this box is held on by two screws at the back. Pretty easy to find
4. Now you'll see a metal bracket with 2-4 screws in it (can't really remember). This releases the Bose stereo.
The key to the dash removal is start from bottom up, because the topmost screws are always hidden by the panel that's just below them. So you have to hunt for the screws! The cheekiest ones are under the little rubber mat in the cubby hole.
The easiest thing probably is, if you really get stuck dismantling, give me a shout and I'll help. I want to focus this write up on the tablet.
Once dismantled, you'll be left with this:

The more observant of you will notice a little yellow RCA peeking out, this was for my rear view camera. For £15, I seriously recommend you get one! I bloody love it.
Took the dash bits into the shed to work on:

And hello Nexus!
I bought the tablet for £30 on eBay with a smashed screen. The eBay listing showed a nearly invisible hairline crack, but this is what I actually received!!

Figures eh!
Alas, I got a new screen for £20 and replaced it so I was happy in the end.
Mocking up:

The tablet looked pretty good in the headunit location, but I already had my headunit to go there, so had to move the tablet up top.
This is where the fiddling comes in.
1. Remove the cubby from the front fascia, it's held on by 4 screws which are very easily identifiable round the back.
2. Remove the lid of the cubby, it's held on by two silvery screws on the hinge where the entire lid pivots. You'll see it.

3. Remove the cover of the lid, because this gets completely in the way when trying to close the lid over the Nexus. I wanted to be able to hide the tablet when not in use.

4. I had to dremel the top left, and top right screw holes (nearest the metal bar) otherwise the lid wouldn't close.

5. Test the tablet fit

6. The actual cubby box, was removed, but put back on. You will need to dremel the left and right sides of the cubby hole by about 2mm, and dremel the edge of the tablet by about 1mm for everything to fit in. Without this, the tablet can be forced in, but the pressure will cause the screen to bend and discolour. Don't do it. It's pretty safe to dremel the edges of the tablet, its all plastic, nothing important or electronic.

7. The tablet fits bloody well, the edges fit in perfectly, and just enough pressure to hold it so it doesn't fall out even under hard acceleration. Also, on the right hand side of the tablet, I cut a little slot for the USB, so it can be charged from the headunit. Also, arranging the tablet with the USB port to the right hand side (when looking front on) allows the power/sleep/volume buttons to be accessible on the top left.

8. You can just about see the little USB cutout above

9. So, I idiotically broke the metal bar off the plastic, and couldnt get it back on! So had to superglue, using washers and little bits of metal to hold the glue, otherwise it just dripped through the holes. Don't break this!!

10. Tablet in!


I removed the cubby button as it was too big, and pointless now. So I just use that little hole to lift the lid. Pretty nice.
The tablet is DEFINITELY worth installing. I use spotify on it, sync all my music when I'm in wifi range on my driveway, and then drive off! And google navigation is unbeatable in my opinion. I hate standard GPS devices.
----------------------------------------------------------------------------------------------------------------------------------------------------------------------------------
Now for the subwoofer
Currently, I have dual 12" sealed AudioBahns in the boot. Which take up the ENTIRE boot.

Don't like it
So started work on putting an aftermarket sub in the stock Bose location (behind the drivers seat)..

The test fit looked pretty nice, so I carried on. But also at this point I realised I'd have to cut some plastic to get the sub sitting flush and proper.
The sub wouldn't fit without cutting the plastic up, so here we go...

Cut the a section of the bottom bit out, so the sub could fit. Also, you can see my badly made MDF ring on the floor there. But it suffices for the job at hand


I used no nails glue here to seal the MDF to the metal, but also used the 4 original bolts that came off the Bose subwoofer. These will work if you sink them into the MDF by about 8-10mm. This was 18mm MDF btw.
Note - DO NOT USE NO NAILS FOR THIS. The second I got the subwoofer in, and started a test playlist, the no nails cracked around the edge. It was still held on so it's fine, I just didn't like the crack.
So I took it all apart, sanded everything down, cleaned all the glue and crap off. And started again using silicone sealant instead. It dried pretty strong, and the screws are there to hold it in, so the silicone does its job well as just an air seal.
Took everything off, and dismantled alot more of the plastic this time so I had more room to work

I spotted a can of matte black paint in the shed, so thought why not! Didn't want the MDF ring showing through the BOSE speaker grill at the end

With everything done, I tested the system.
It's far better than the stock BOSE for the entry level audio guy. But, the sub does not/will not drop low because the enclosure is not air tight. This location was designed for a free-air (infinite baffle) subwoofer, which mine is not. But I wanted to try this option out to see if it would suffice at all for my needs.
I didn't use any form of dynamat in the back to seal the space off and make it air-tight, but the sub works fairly well without this. The reason I didn't go on and dynamat the back (which I think would make a huge difference) is because I realised that with the sub hitting at full power, I really wouldn't like that much vibration against the driving seat.
So I'm moving on to the under-strut sub box option. But I'm glad I ruled this one out first.
This is a cheap and easyish install for someone who wants just a touch above the BOSE. But I got rid of my BOSE in the first day, it was beyond a joke.
For anyone more into their sounds, go for a sealed boot box!
-
Paaattcchhhhh! Where art thouuu
-
Is patch still alive??
-
I'm after one!! (depending on price ofc
 ). Would love a listen of how deep they hit!
 -
Are these still available?
Dirty stinking bass, Under Strut Box Complete
in I.C.E & Electronics
Posted
Yeah I thought he may not be doing them anymore, but would have expected a reply for the PM. No harm, I'm off to Wickes tomorrow to build one for myself! Tried one before, but didn't have a decent workbench so I got pi**ed and left it lol
Hopefully tomorrow will be a bit better!
Appreciate the info