


jamesyj
-
Posts
319 -
Joined
-
Last visited
Content Type
Profiles
Forums
Events
Gallery
Store
Posts posted by jamesyj
-
-
I don't see why it wouldn't work?
The only missing link is the transponder but if that can cope with being an extra 1cm away (max by the looks of it) then it should work like normal.
All the gubbins fit together perfectly well.
With that eBay one, you get new buttons too.
-
And upsidedown...
-
Jesus, iPad cameras are crap!
-
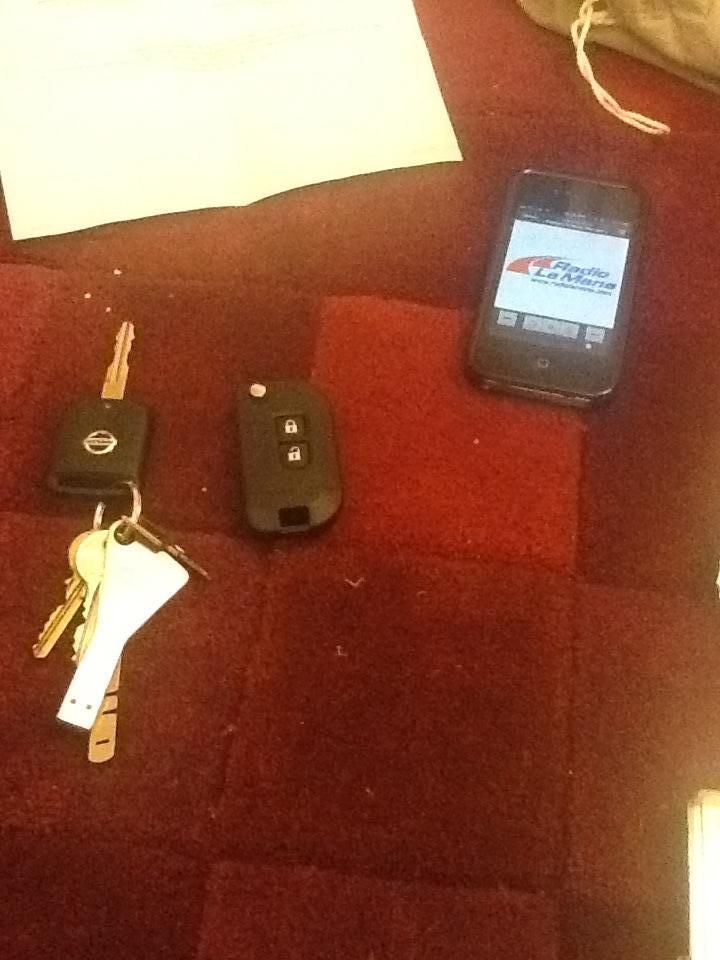
Minor update, bought some key fob nissan burgers for the fob. £2.49 from the magical eBay for two.
Looking forward to Saturday and I'll have a key worth putting in the bowl at parties!
-
that's a new case design, must have been a recent release.
I think so mate, on my journey of research, it seems around June last year.
-
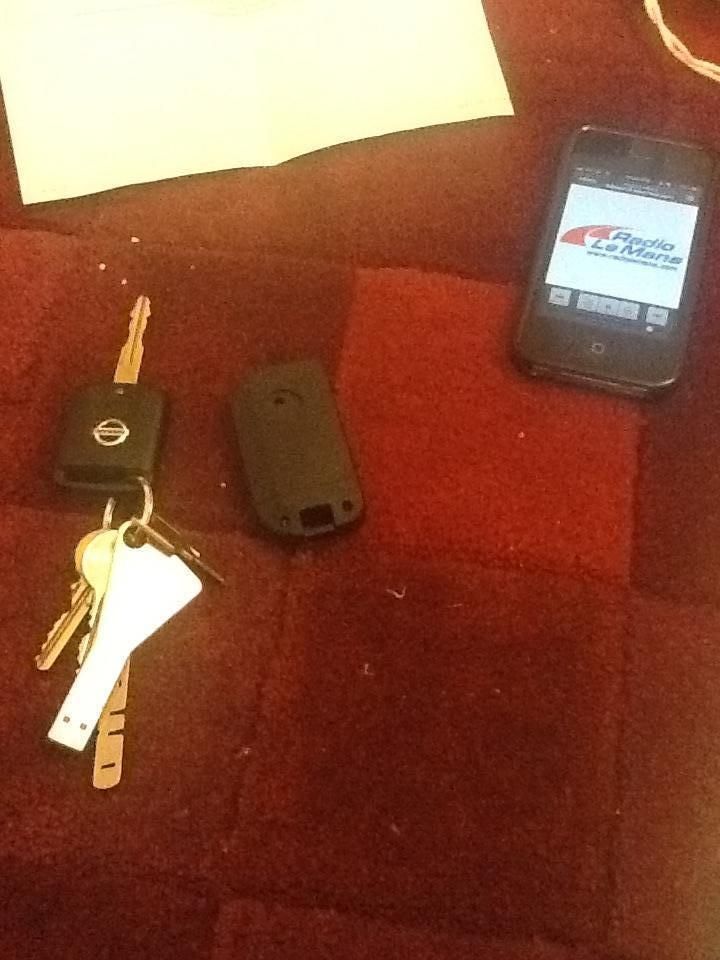
I bought this the other day - http://www.ebay.co.uk/itm/2-BUTTON-FLIP-KEY-CASE-UPGRADE-FOR-NISSAN-MICRA-NOTE-NAVARA-REMOTE-4-5-CM-/321067673609?pt=UK_Cars_Parts_Vehicles_Other_Vehicle_Parts_Accessories_ET&hash=item4ac11fe809
I put some real research in as I know we've all wanted a flip key for a very long time.
All the internals from my key fit in, I haven't glued the transponder in place yet though. It locks and unlocks my car, all seems perfect to me!
I'm going to have a wander down to my local key cutting place on Saturday morning and get the blade cut and, I think, that's it?
Quality of the case is the same of the normal key, although it doesn't feel as 'slick' as other marques. Quite light, could probably do with a little weight in it but apart from that, all is well! That key for sale that I've linked to doesn't come with the little nissan 'badge' for the key, well, mine didn't! I can live with sorting one out myself.
Possibly the most important modification for the Zed since....... 2002?
-
Alright guys swapped the coil pack from cylinder 3 to cylinder 5 today and the code changed from p0303 to p305 so its definitely the coil pack causing the misfire.
Check the cam covers haven't leaked oil on to the plugs, which then in turn knackers the coil pack.
-
Same here really, never met him. Just PM's over a few years on Celica Club.
First time I was supposed to meet him properly was that meet where he was supposed to be coming in his infamous MR2.
Very sad.
-
its the only failside kit i like, that and maybe the MR2 widebody.
Mk2 or Mk3? I can't stand the Mk2 veilside kit, and generally dislike Mk3 '2s purely because the Mk1 and Mk2 were great cars for their time/price range but the Mk3 I thought just lacked anything special.
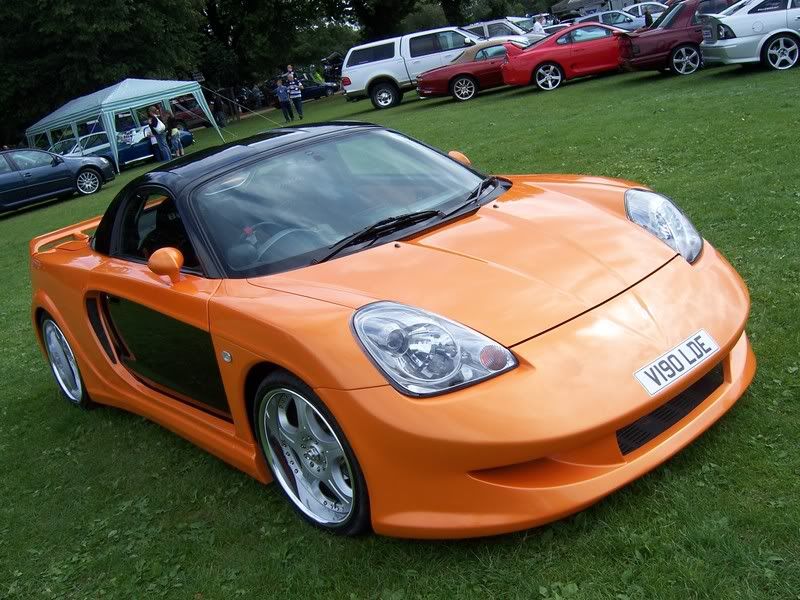
this one is an old friend of mines, he sadly passed away when i was a member of the MR2ROC, great guy and alot went into it.
had a mk3 myself loved it, was a great car, the balance and handling was sublime.
alot of the mk2 guys have slowly converted to them as they;ve found out how good the chassis is. and turbo conversions were so cheap and turned it into a right beast. and such an easy car to mod.
i know its not to everyones liking but the little negine in it was great. or the 2zz engine conversion turned it into a great track car.
Perry, bless him.
I was supposed to see him at a meet, he didn't turn up, he'd passed on a few days previously. Was quite a shock.
Good man - knew him through Celica Club.
-
I've just been looking at the possibility of buying a printer and doing this myself, but at a minimum of £400 I can't think of anything else I'd actually make that would make this worthwhile.
which one you loooking at? is it a reel fed or a cartridge machine?
as for the drawing depending on what software its done on if someone can get it to me i can redo the drawing and remove the text.
i have contemplated buying 10 cases sorting all the internals and blanks + painting/carbon dipping etc, but its a big out lay, they won't be cheap and people will still have to pay for key cutting on top.
would people be interested in this if i sorted it all out?
I would be interested, but I'd prefer just black plastic - I much prefer the OEM look and feel.
How fragile do you think those Quashqai keys are? Considering they're not made from ABS.
-
I'm just so happy that there's actually a solution to the Micra key problem.
Worst case scenario - you look like you've got a Quashqai key rather than a Micra key.
-
Stumbled across this earlier, there is light at the end of the tunnel!
http://www.shapeways.com/forum/index.php?t=msg&th=3964
Looks alright to be honest!
Shame it says Qashqai on it. I shall look more in depth and I may treat the beast this week.
-
I'd probably recommend a Scorpion too with your list of provisos.
Subtle noise down low with more noise up high.
Doesn't look 'bazzed up' either which is nice.
-
I've snowfoamed a PVC roof of an extension from a first floor bedroom window before....

That's bloody brave of you with the hose and pressure washer all inside!
-
Okay, changed my mind - i can definitely feel it now
Been out for a spin today, just friving it round town and you can really feel the difference! I wouldnt call it a performance mod per-se but it does yield some interesting results...

Thanks guys for your help and Col for spotting it.
Good job! -
Plus the fact that a pressure washer comes in handy for other tasks like patio cleaning and stuff
Haven't got a patio, well one worth washing anyway, just grass
In the long run, it makes sense though
At work we have some kinky Karcher that does red hot water too, red hot water through the lance keeps your hands warm and it's amazingly fun when the wash bay is covered in snow!
-
My instructions are different? Different pictures etc.
I've got a V1?
-
It's better than just shampoo, honestly. Slightly better than soapy water probably wasn't the best description.
I'd say it's a halfway house between just shampoo and snow foam from a pressure washer.
But yes, I'd prefer a proper set up!
-
When i installed it, i held Set for 7 seconds, and then press he throttle until it said 1.5 and pressed set again, then pressed the peddle down fully till it said 2.0 then pressed set again - and that was it... have i missed anything?
The pressing of throttle until 1.5 - I don't think you're meant to do that chap.
Press and hold set and it'll countdown to 0.
Release set at 0.
It'll be flashing L15 (if it isn't, press set again), make sure go pedal is fully released. Press set.
Press set and it'll flash H 45. Fully depress go pedal and whilst fully depressed, press set.
You are done.
When you're on SP7 for the first time, take care accelerating out of a corner. Try it on a straight bit first. It's rather sensitive!
-
Well, that time of the year again.
Cheeky P3.
More interestingly, compression arm bushes.
I didn't have a knocking, just a slight 'squelch' when cold on the downwards journey of a speed bump.
Visual indication - Passenger side looked right, driver side really wasn't at the same level.
When my mechanic took the driver compression arm off, the rubber part had just literally come unstuck from the metal outer.
Bloody bushes looked fine apart from that!
Well, that's a job I won't have to have done for a while. Suspension isn't harsh any more
Although I'm still dodging potholes, drains, and general bumpiness on my daily routes.
-
Well... this arrived today... took me 5 mins to install and.... it didnt work.
It wasnt getting any power so i thought it was fooked, but it turned out that the power wires on the ODB2 connector just needed re-soldering... phew

So set it up and went for a drive... and i cant say i've noticed much difference to be honest
 It was a little damp outside, so my test was doing a launch in 1st in eco, normal and SP7. In eco the wheels didnt spin so easily, and in SP7 they did... so maybe thats all i'll notice.
Verdict: Bargain, but ot sure yet.
There's a pretty large difference between ECO and SP7 on drive!
Did you do the little reset/relearn procedure for the controller?
-
Looking at the customer submitted pics at the bottom of the page (1st link), it seems to just make soapy water, not really the thick foam that you get with a pressure washer / foamlance setup
Mine was ever so slightly better than 'very soapy water'. I was pretty happy with it.
But for £8 of the Queen's finest instead of having to buy a pressure washer and lance gubbins etc, and the faff of a pressure washer, 'tis great.
-
To be fair - it probably doesn't work very well as a speed defender.
-
Oh and the trim is quite harsh on my pianists fingers (girl hands and it was freezing when I was doing it) so to remove each little clip, I used a flathead screwdriver with a bit of rag around the end. Gently levering.
Didn't break any clips which was was nice.
Edit - found this.
Ok, this is from the top of my head, but here goes. First off do not use fingers to remove the trim, it is very brittle and can break easily. What you want to aim to do is get a trim remover (ideally) or big flat screwdriver, next to each clip as you pop it off, so that the force is applied locally to the clip where the plastic is much beefier. If you try to grip and edge and pull, you risk breaking the trim as the most of it is thin and brittle.1.) First remove the bits that are on top of the stut, to the left and right of the silver bit. Pop these up from the centre outwards (flat blade screw driver on top of the silver, under the blue plastic). You can get these off completely with a little wiggling around where it meets the side of the boot, but be careful not to break anything. They are held on only with one popper in the middle of the piece and a few other "guide" bits.
2.) Next you need to do the two big flat pieces that run across the strut. These are a bit more complicated. Start off on the far side of the piece. Get a small flat blade screw driver and use it to remove the 2 boot net rings. Just pop the blade down behind the locating bit in the centre and pop it forward.
3.) There are quite a few popers along the strut which need popping. Ideally this should be done with a trim remover as they can be stiff. Or a big screwdriver if done carefully, placing it as close to the popper as possible to avoid breakages. Working from the outside of the boot in you can work your way across.
4.) When you get to the bit around the silver bit you are trying to remove, there are poppers along the middle of it, and also locating tabs running along the top where the blue plastic meets the silver cover.
5.) You need to repeat this for the piece infront of the stut, but you wont be able to remove it completely due to overlap. Just pop the poppers and you should get enough room to slip the silver cover out.
Hope that helps. Cant see its explained anything more than Paul managed to though.
If you are still stuck later, I will try and get out and take some pictures of mine as I do it for you

Flip key - nearly sorted
in 350Z General
Posted
Anyone is welcome to do a guide. I'll take some proper photies on Saturday morning when it's all working nicely (famous last words)!.
Technically you could glue the transponder to the ignition barrel, not ideal from a security point of view though.