


Falcata
-
Posts
107 -
Joined
-
Last visited
Content Type
Profiles
Forums
Events
Gallery
Store
Posts posted by Falcata
-
-
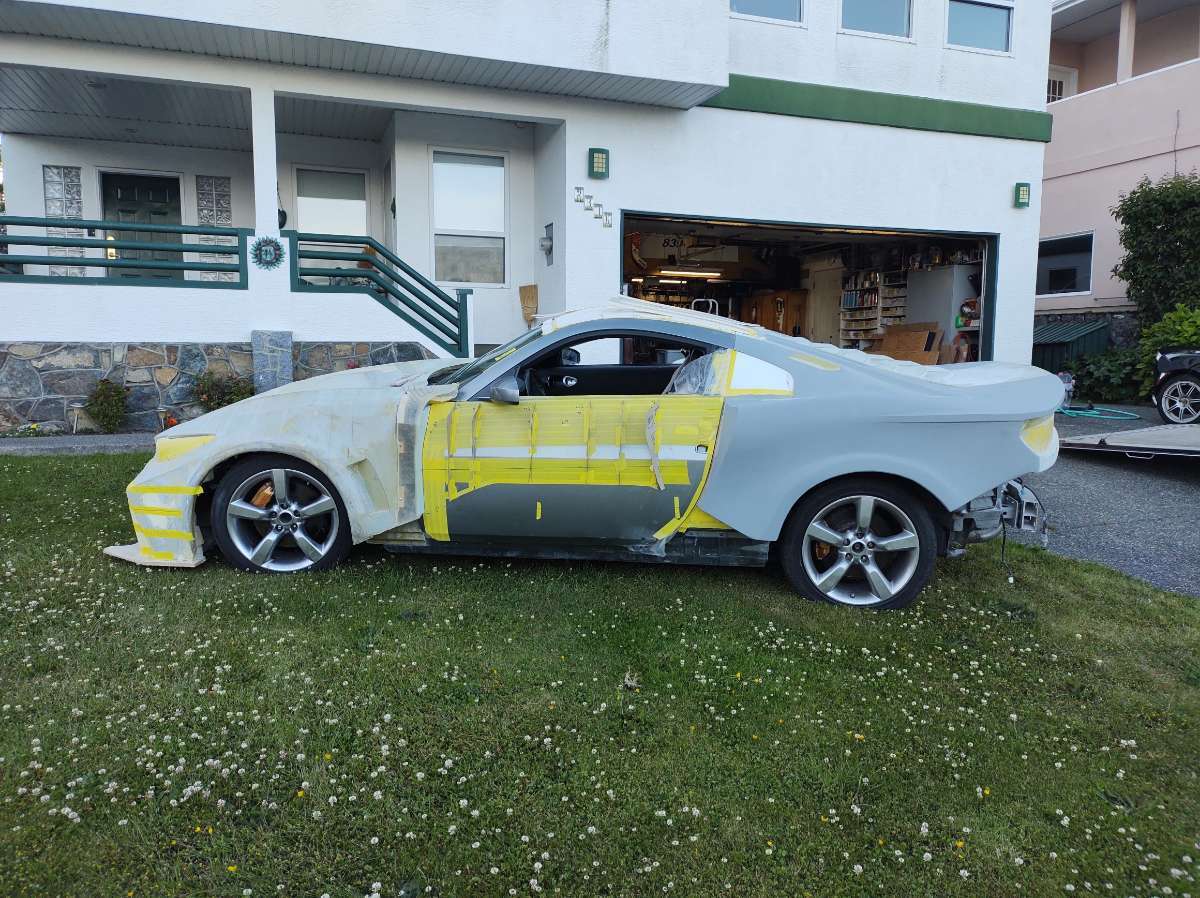
Hi everyone
It's been a year !!!! holy cow the time flies by .
It's been crazy here with a harsh winter and moving the workshop , not to mention all the home repairs etc .
Well I am happy to let you know I will be back on the build some time next week so stay tuned for updates !!!!
Also working on a YouTube Channel to fallow the progress , the first part will be from the beginning and will be in a slideshow format .
So looking forward to diving back in !!!
Cheers Phil
-
 8
8
-
-
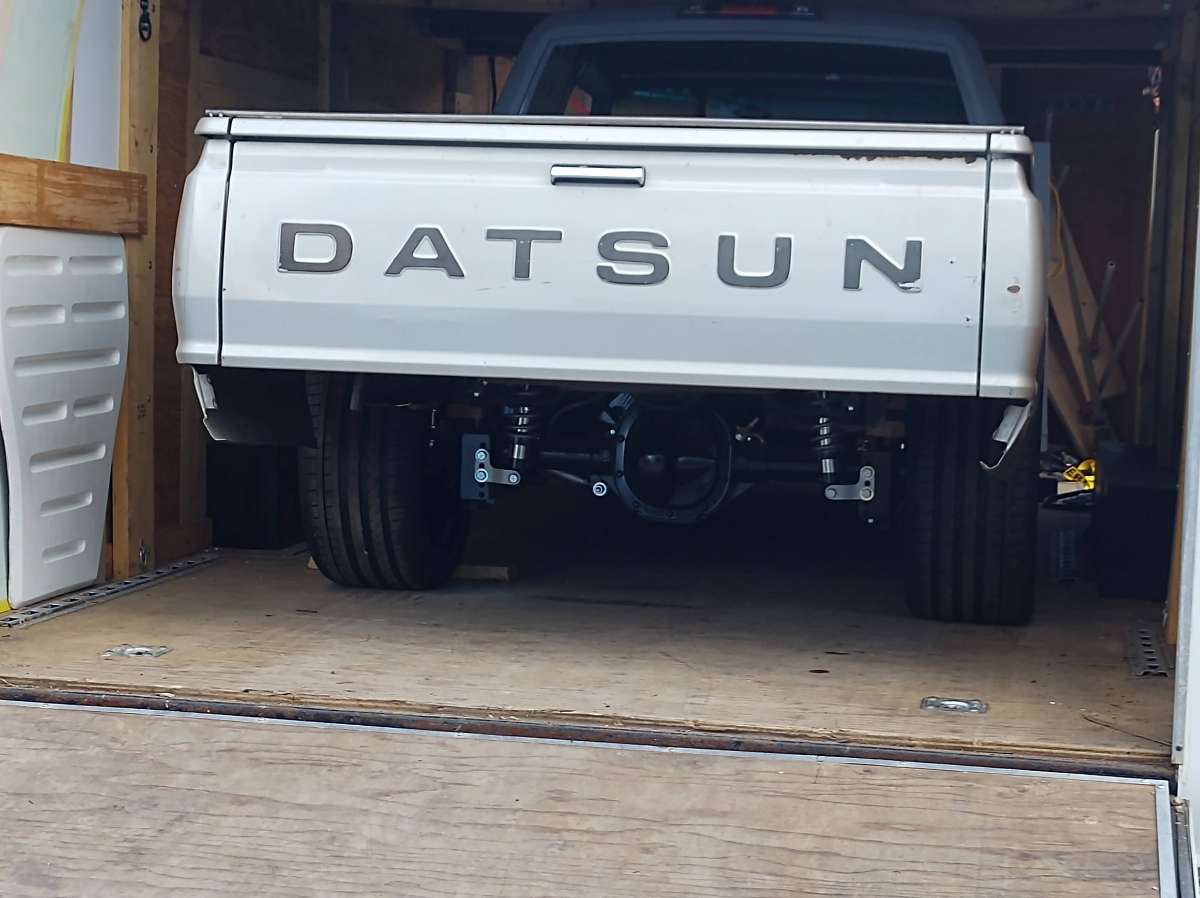
Hi I have some time at the moment better do this now .
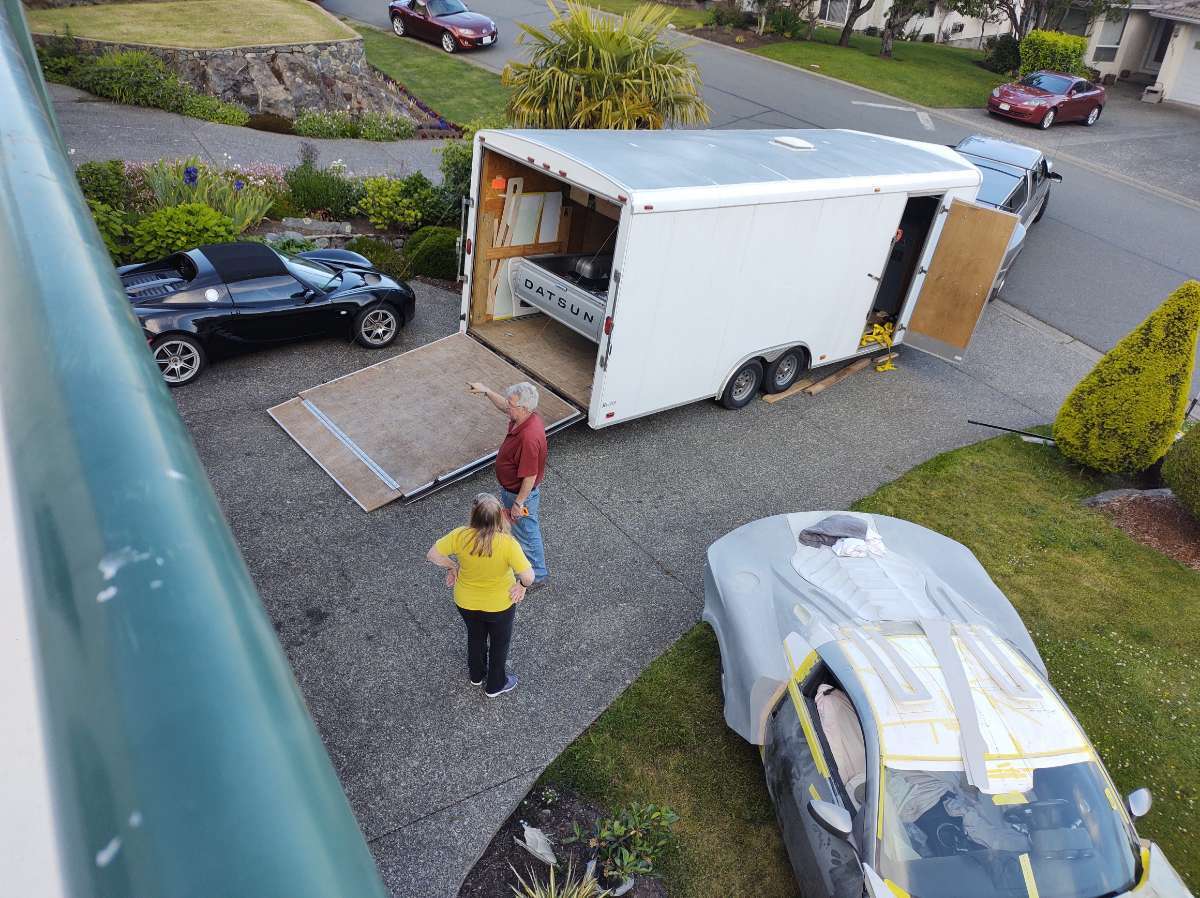
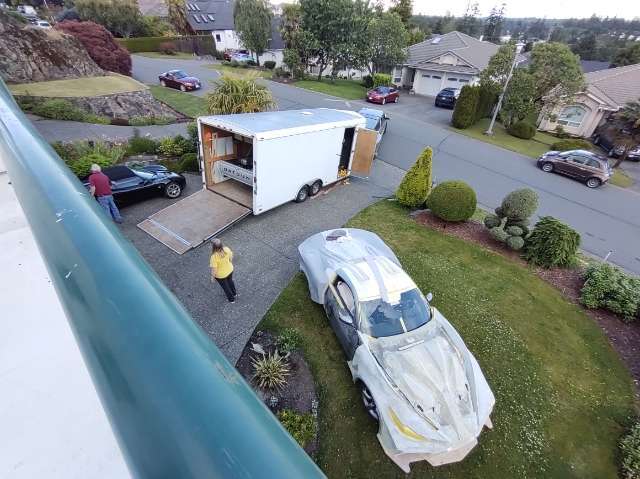
I was totally stressed out , had to move at a moments notice , a full workshop and the car ...... all the storage places were full or too expensive , just to put the car in was $500.00 a month then to put the rest of the stuff would be another $500.00 a month , and even move if it was on the ground floor where you could drive up to it !!!! .
Another Car builder friend of mine was using his brothers car hauler to house his next project the Lambo until his storage container arrived .
If the container haden't been delayed I wouldn't have found the trailer .
It was a great bit of luck , as there is a shortage of enclosed car haulers here new or used .
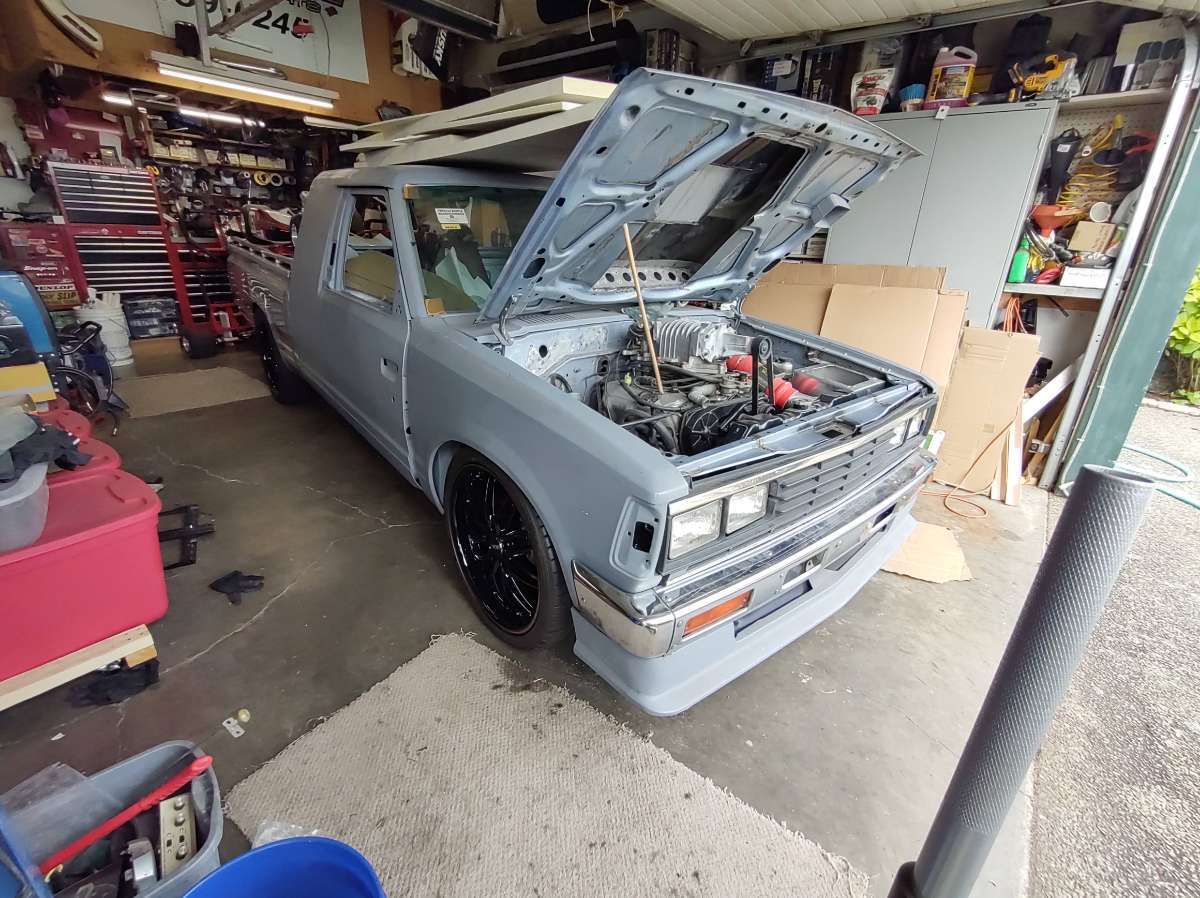
So with the trailer full of stuff and my Nissan pickup in it it costs $100.00 dollars a month to store it all.
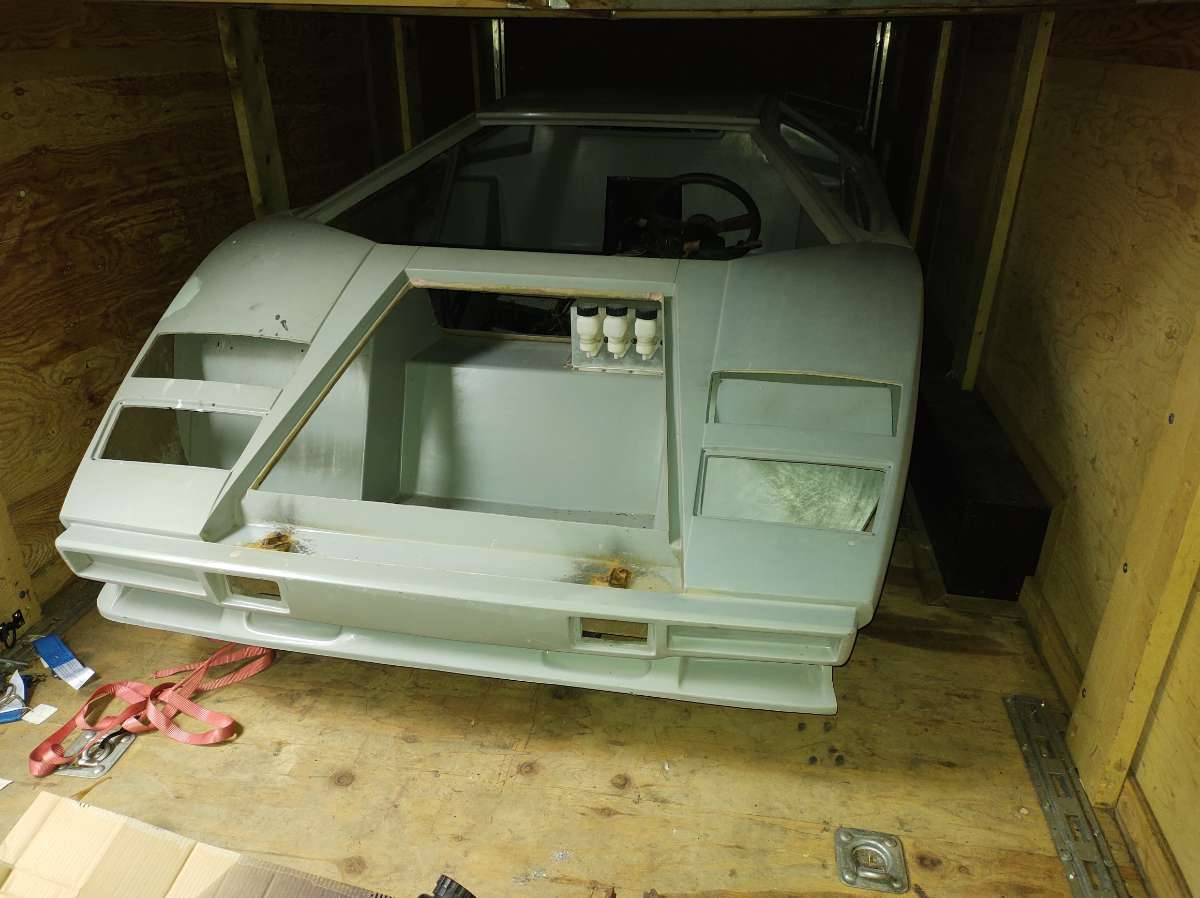
So the Lambo belongs to my friend Don who just finished a 308 build .
Had a BMW M70 V12 and a Porsche 915 gearbox to go in it , we all talked him out of that !!!.
So now he is going LS3 or LS2 So much less hassel and almost double the power .
The Deck or balcony I am standing on needs to be replaced , 25 years old and water has gotten in so it's not happy ( been on the list scince before starting the Falcata )
and before the Falcata came it was what I call DNR which stands for Dump N Run
I had no time to put stuff away .

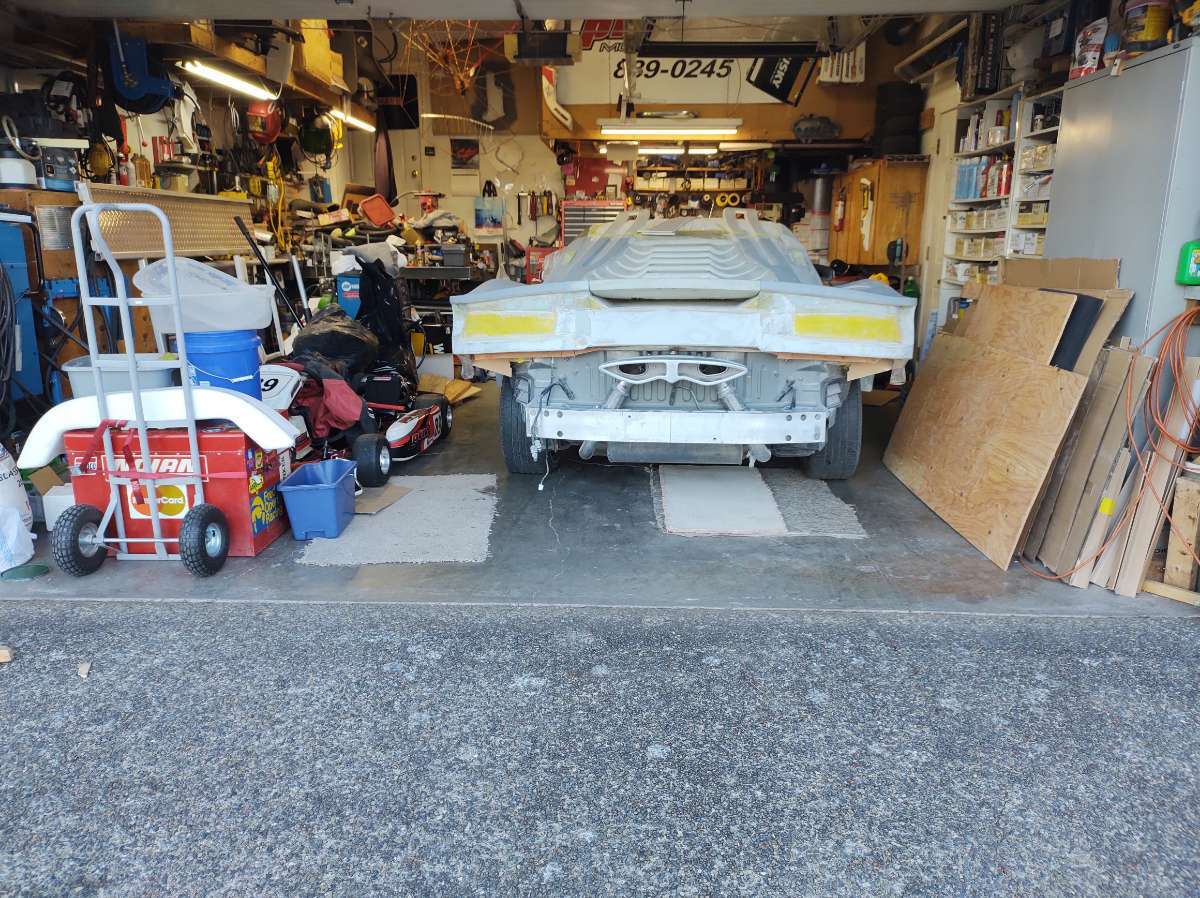
this is before three truckloads in my little truck arrived from the other shop !!!!
And two loads to the dump .
So scince the move I have rebuilt the deck and fixed a few cars and done some maintenace on the house .
Still a @*!# load of stuff to sort , re arrange etc
-
8
-
-
Hi everyone
I know everyone wants to know whats happening with the build .
Well as you know I was having an issue with the fiberglass shop in the forest , well the owner kept jerking me around and changing her mind , I just could'nt stand the anxiety an longer , she agreed to the middle of july and a week to move after that .
That was just enough time to finish the nose and take molds off the front and back .
so i arranged to have a couple of mates come and help to accomplish this .
Then june 1st she said she wanted me out in two weeks .
so this made me furious !!!
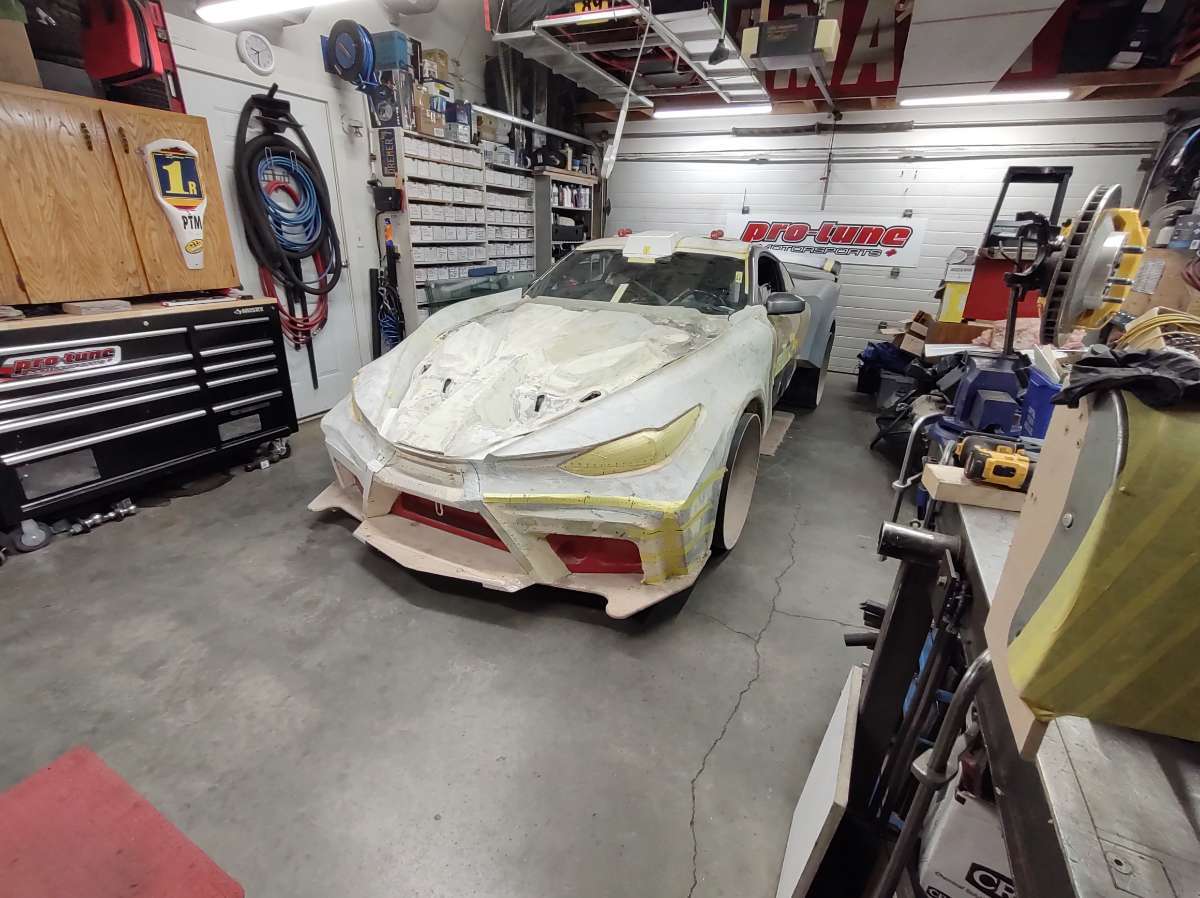
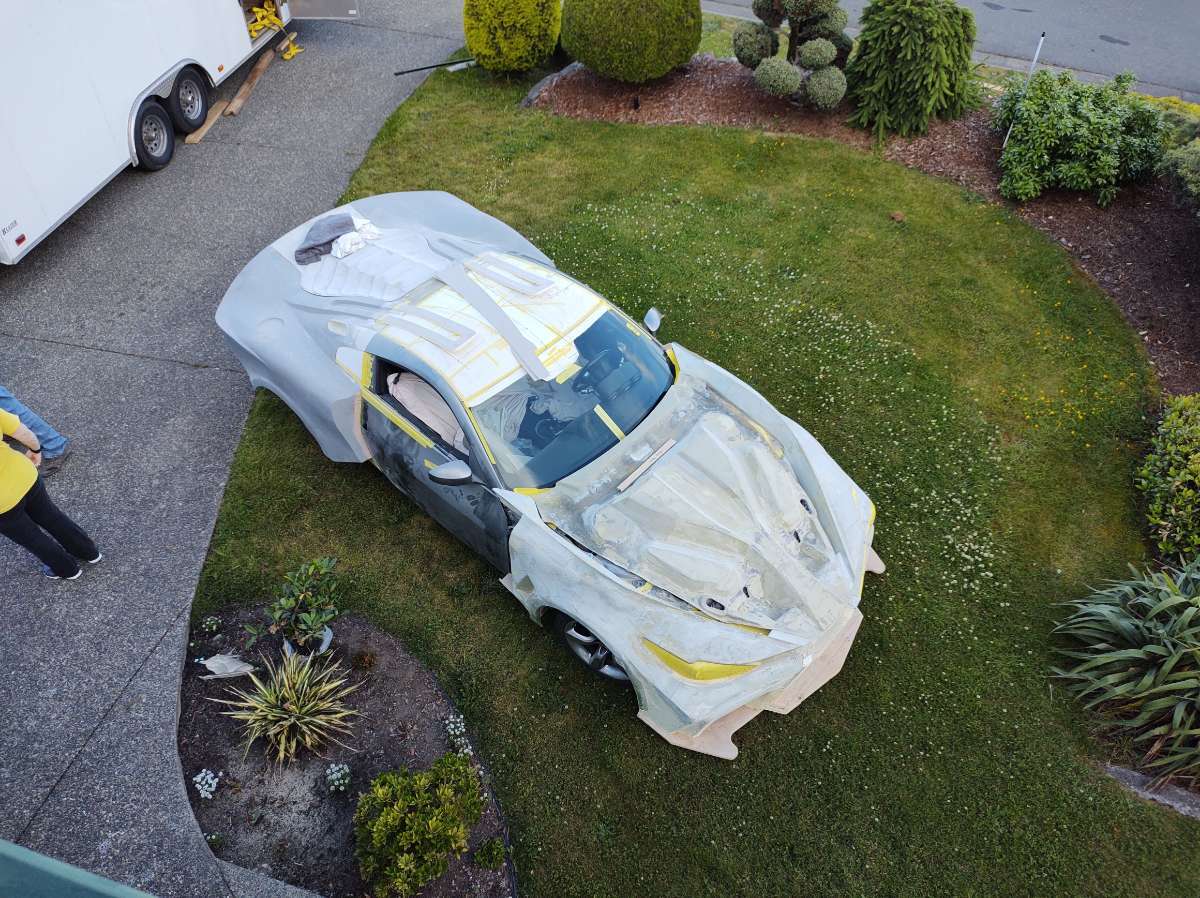
So I was forced to purchase a 28 ft enclosed trailer to store my Nissan pickup and a @*!# load of stuff to make room to take the car to my home shop .
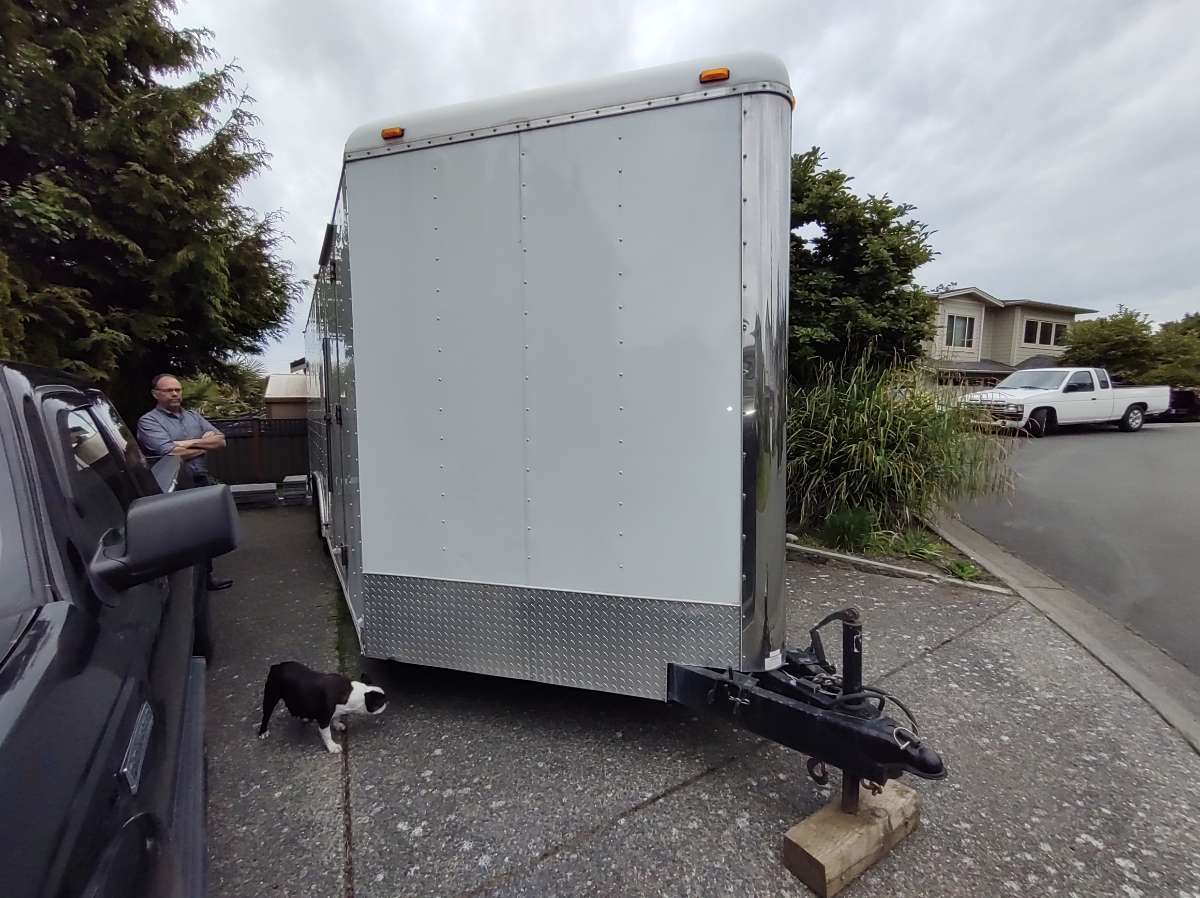
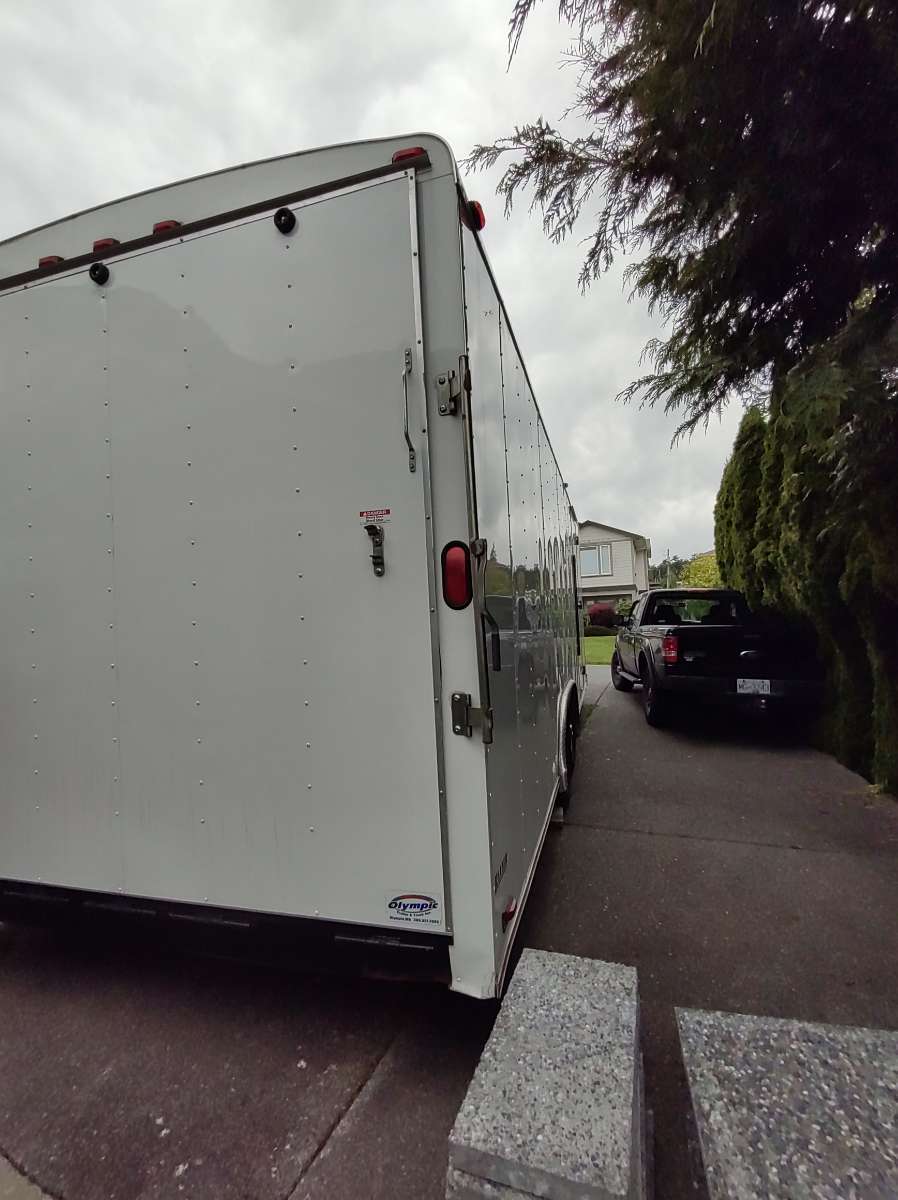
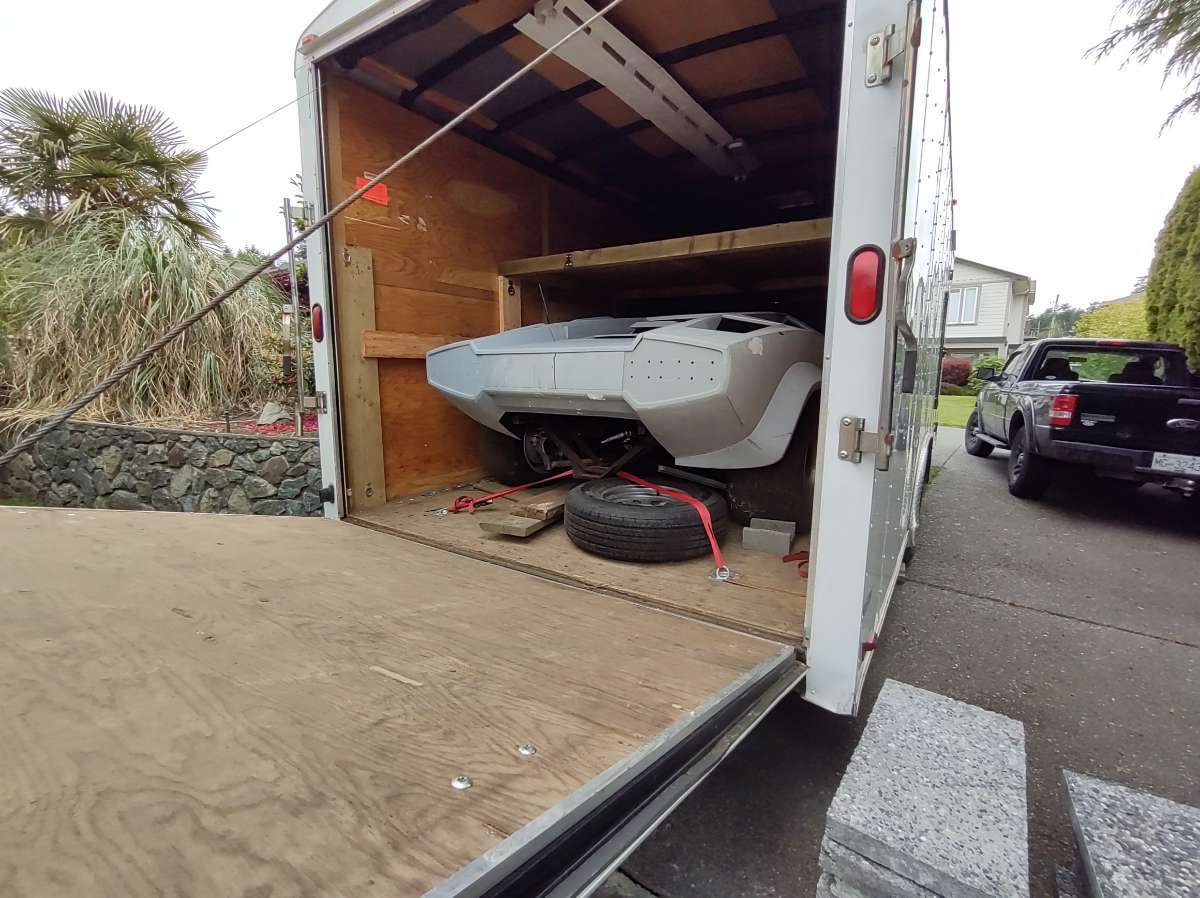
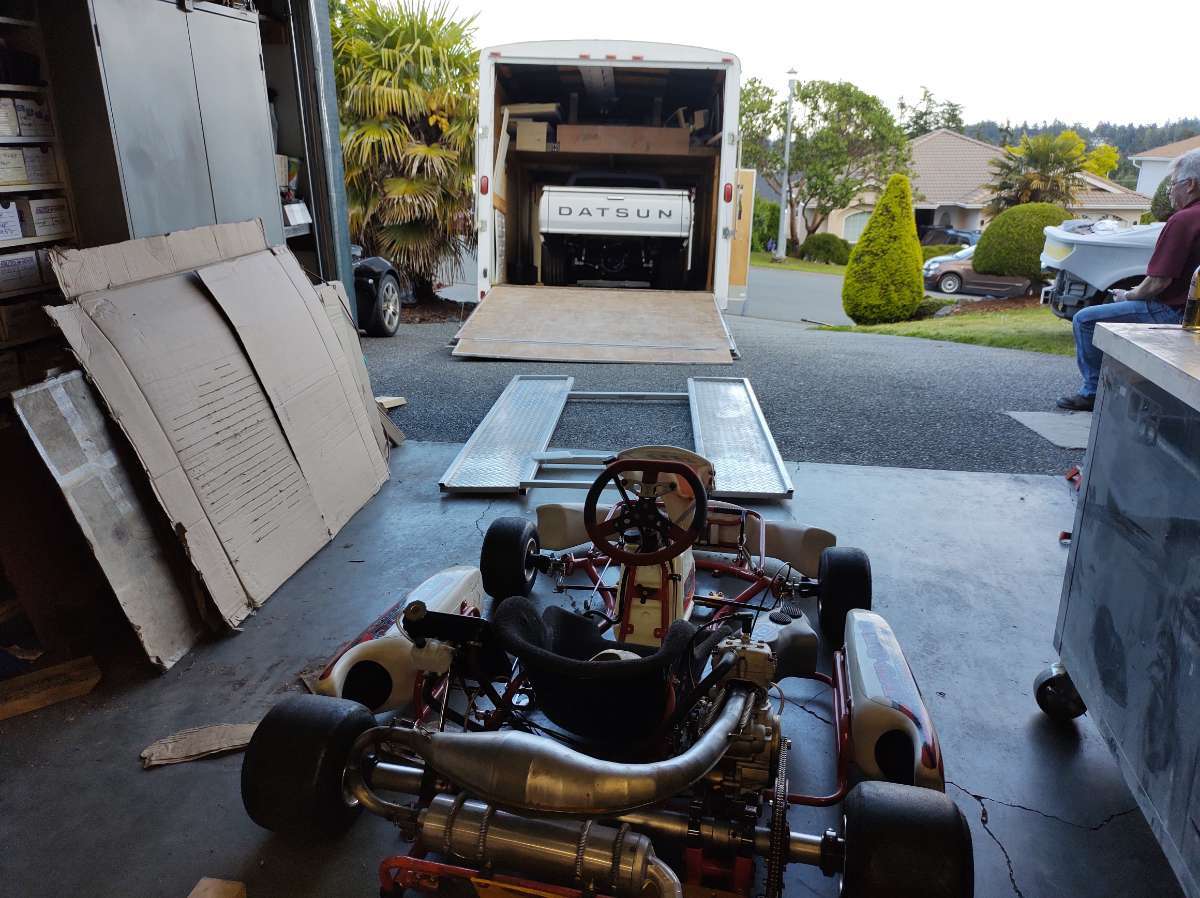
I will post so pics of the Falcata out side tomorrow !!! I have to go at the moment
Cheers
-
5
-
-
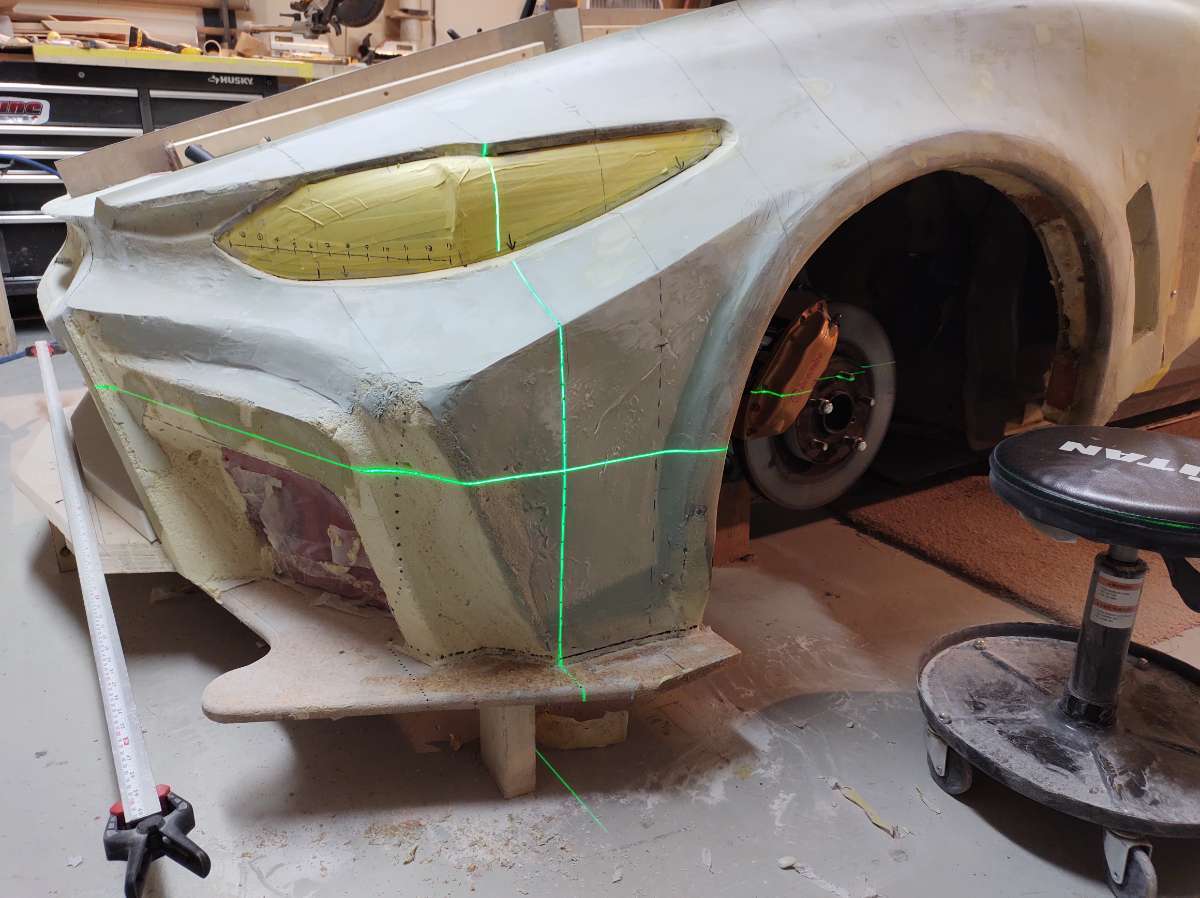
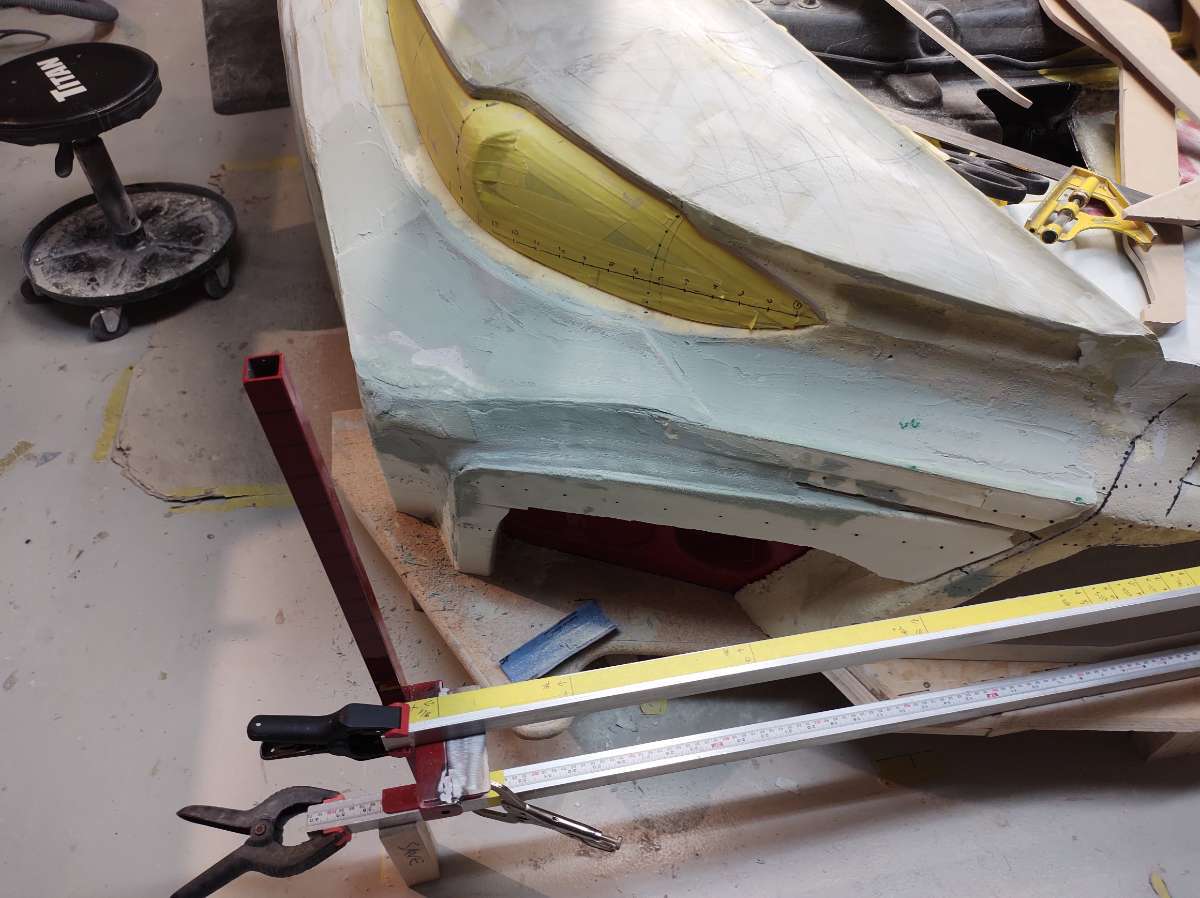
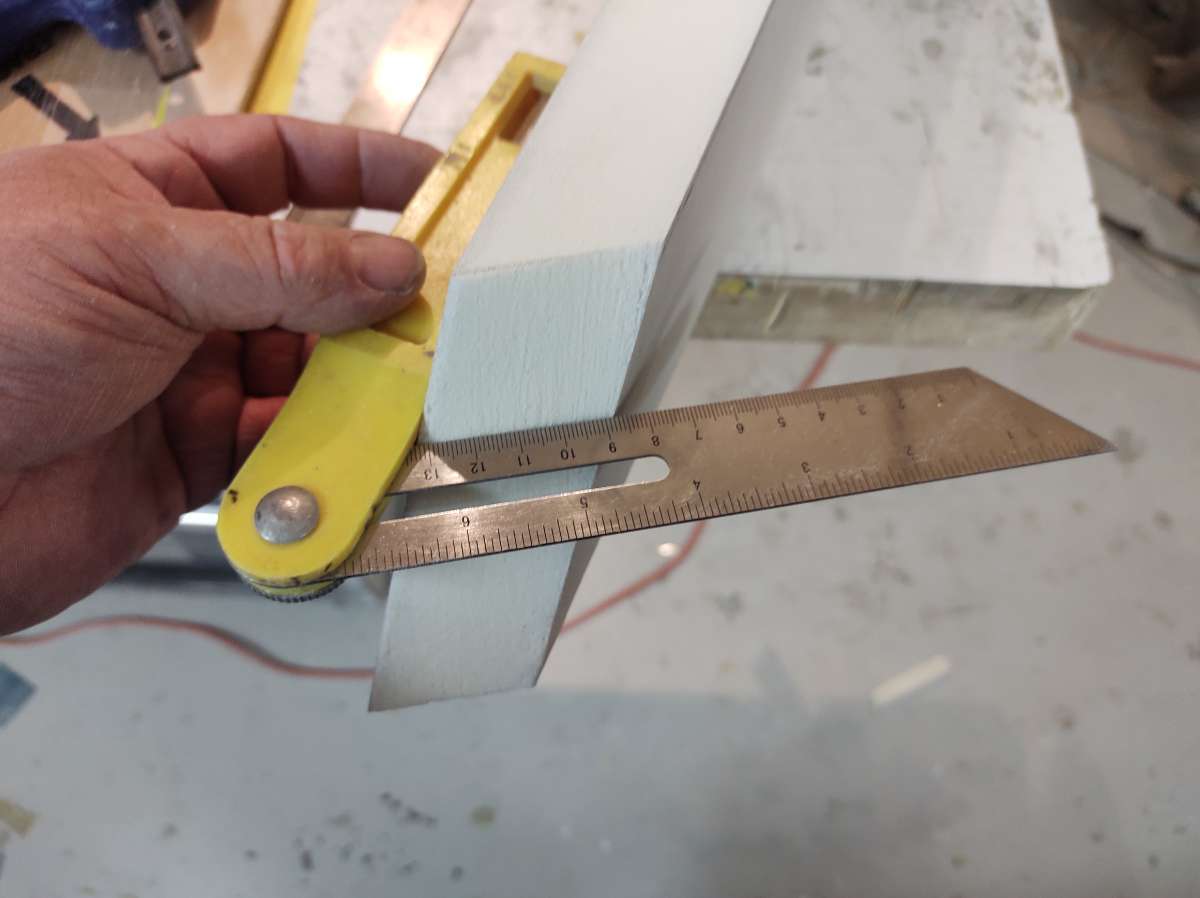
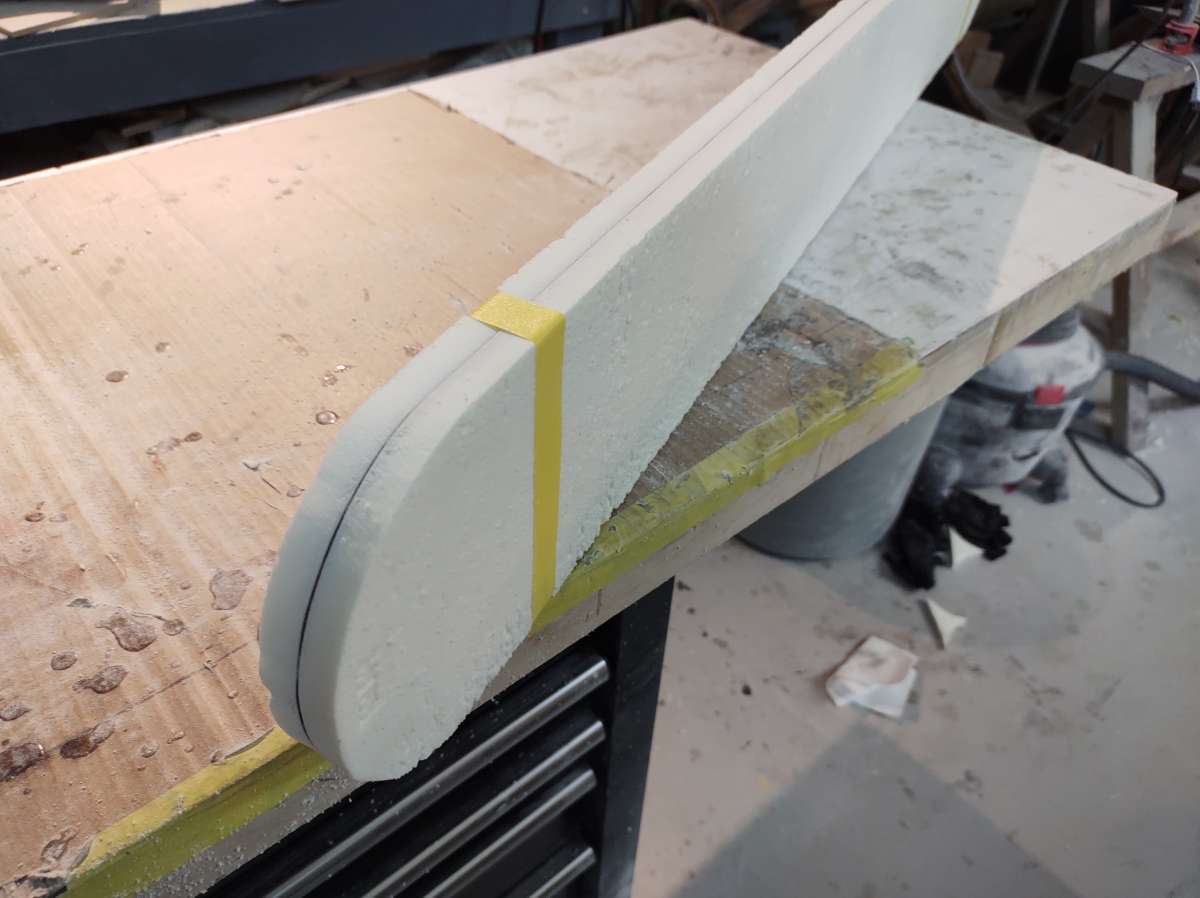
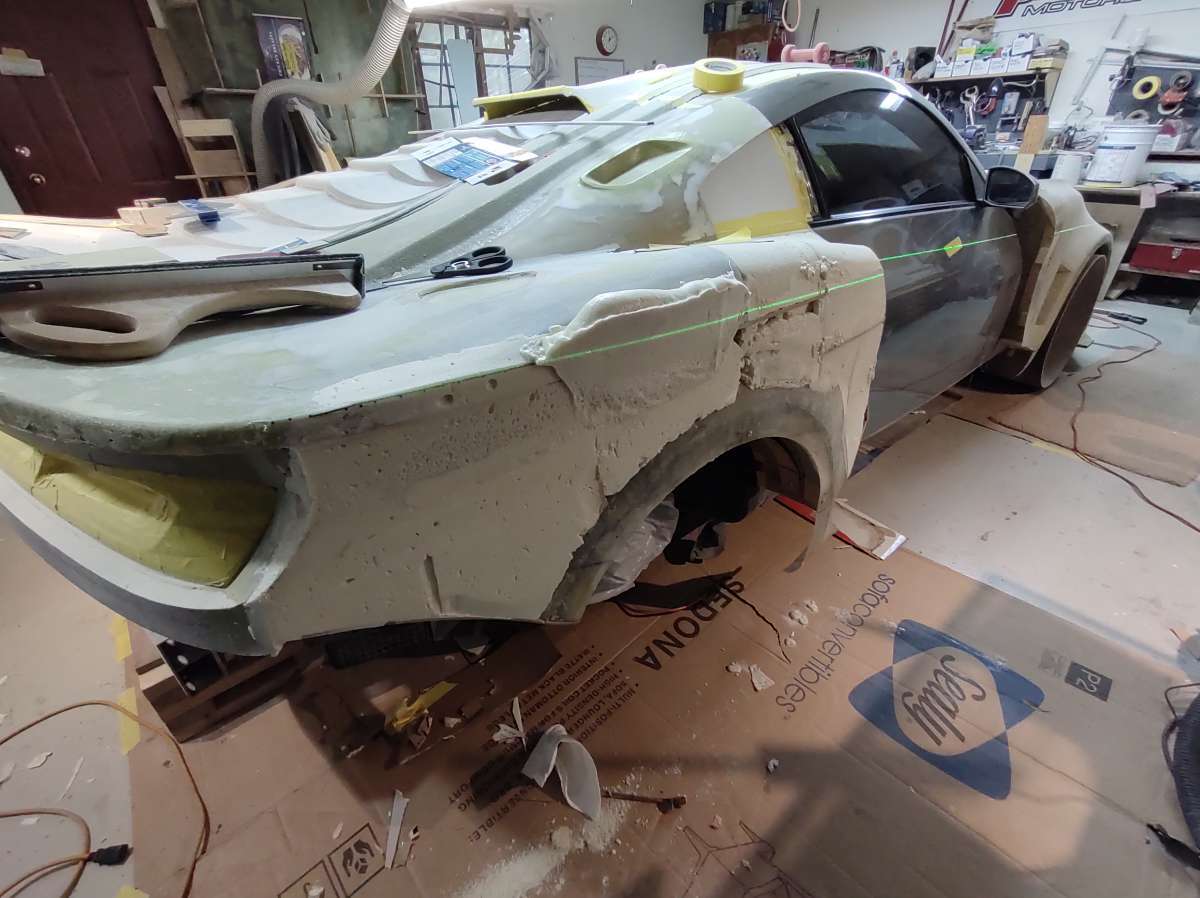
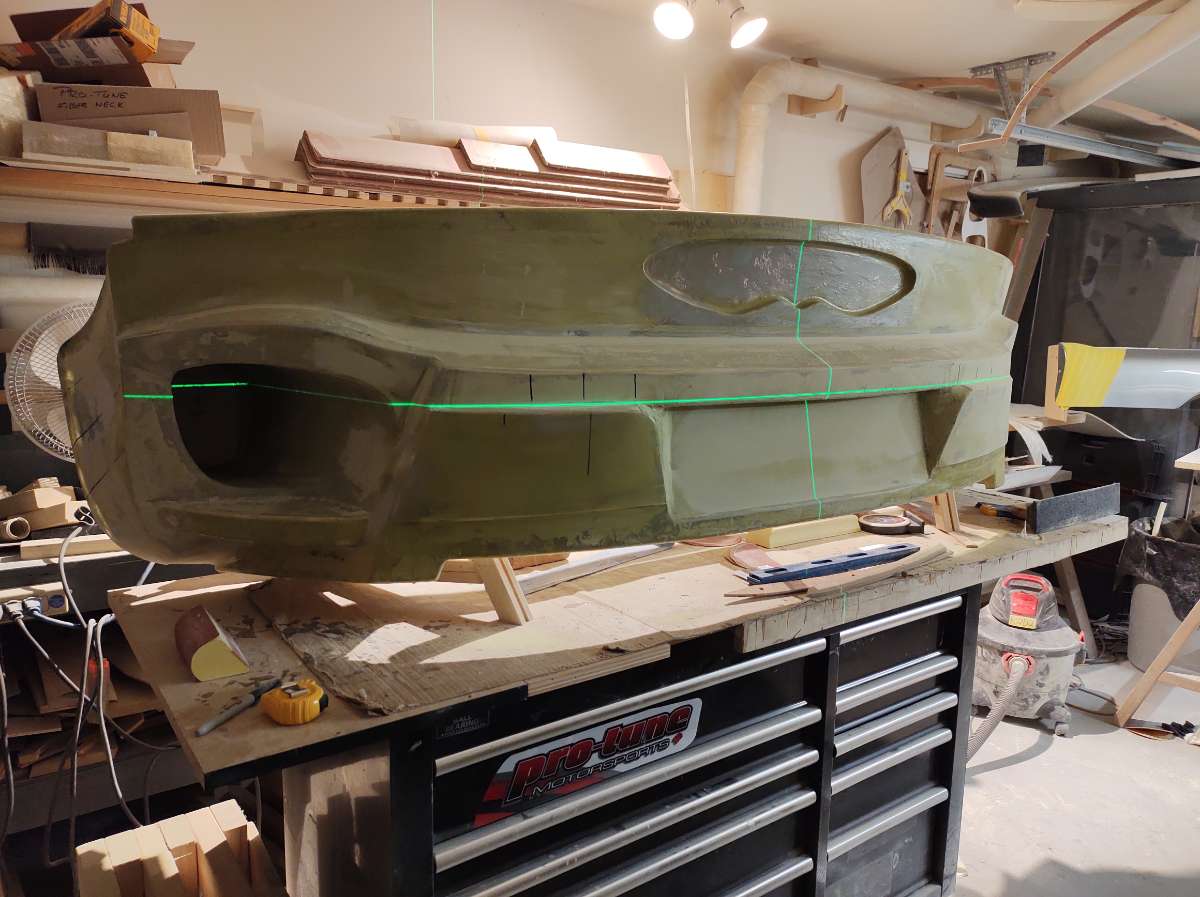
Ok
Now with a beverage I can continue on .
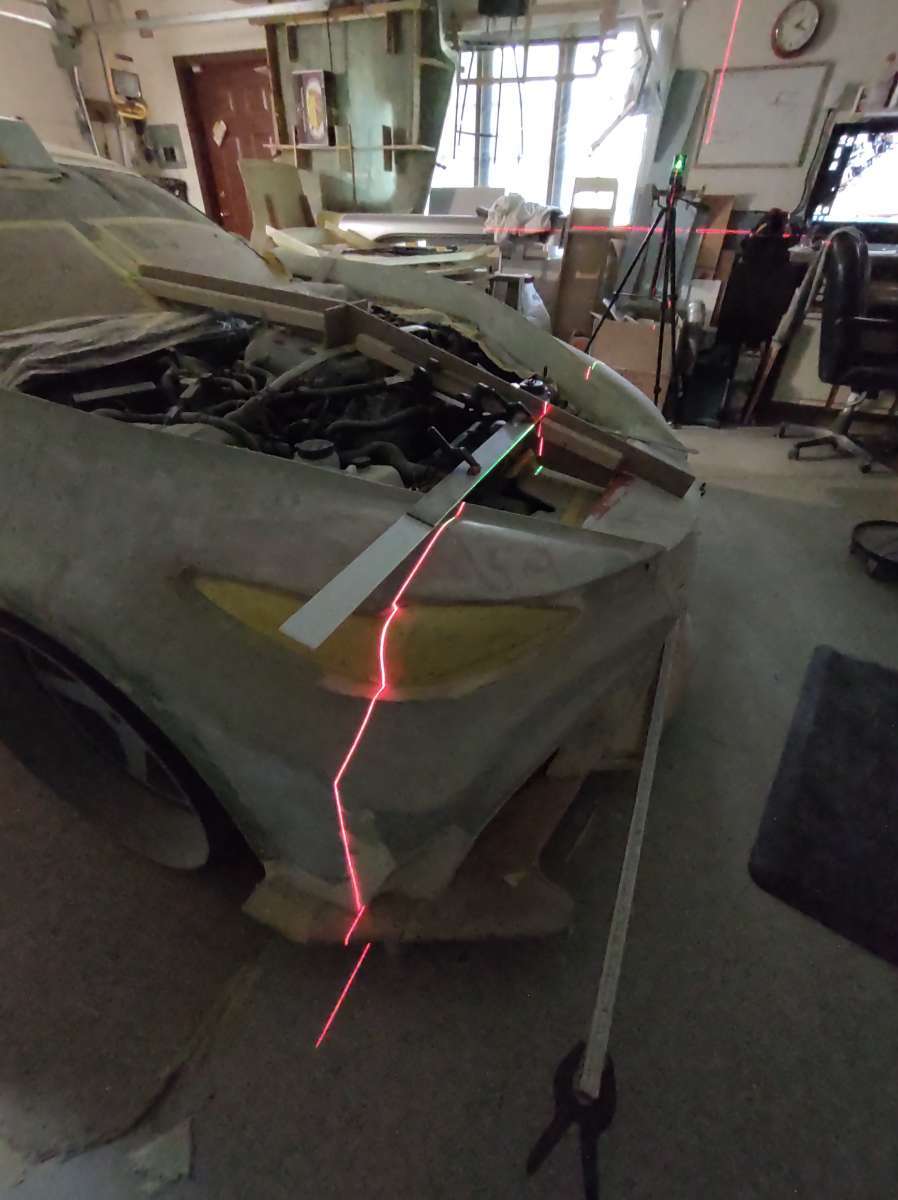
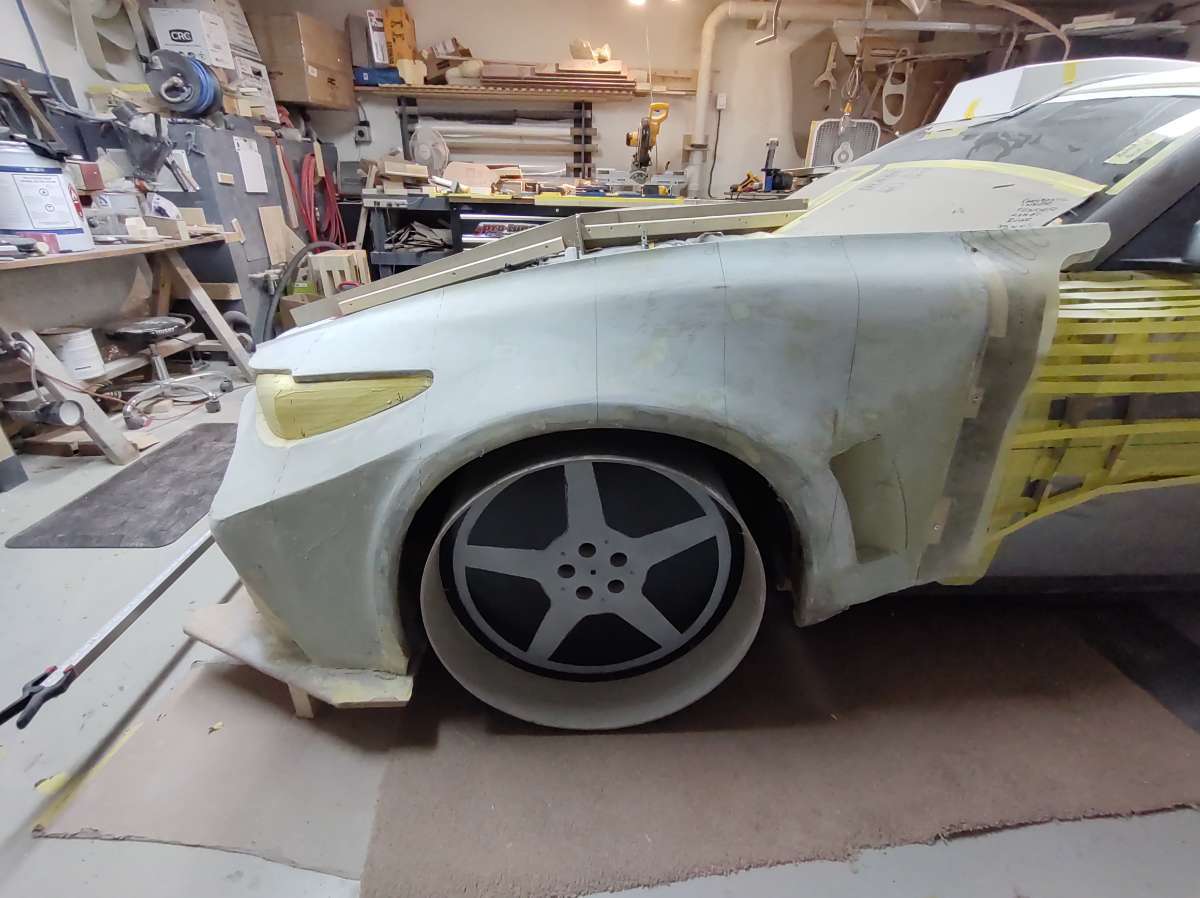
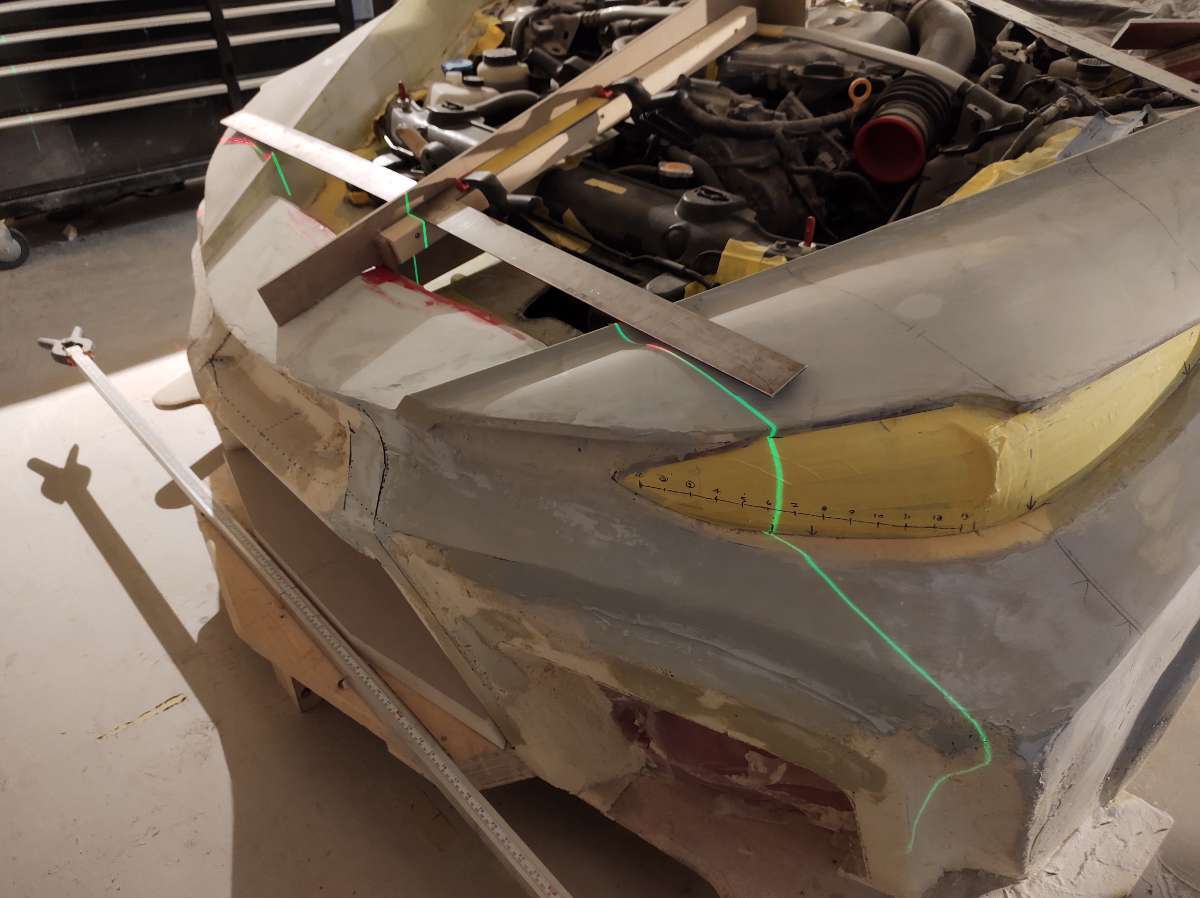
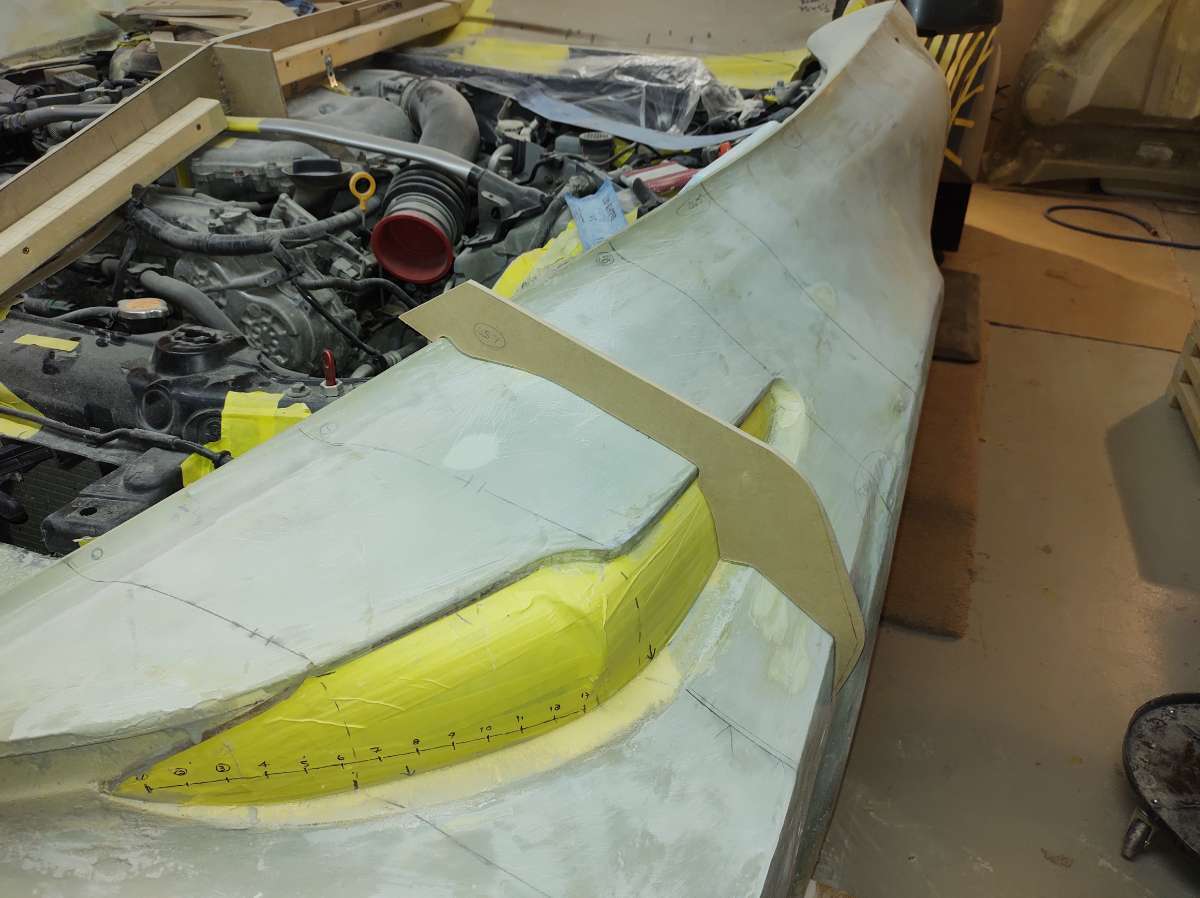
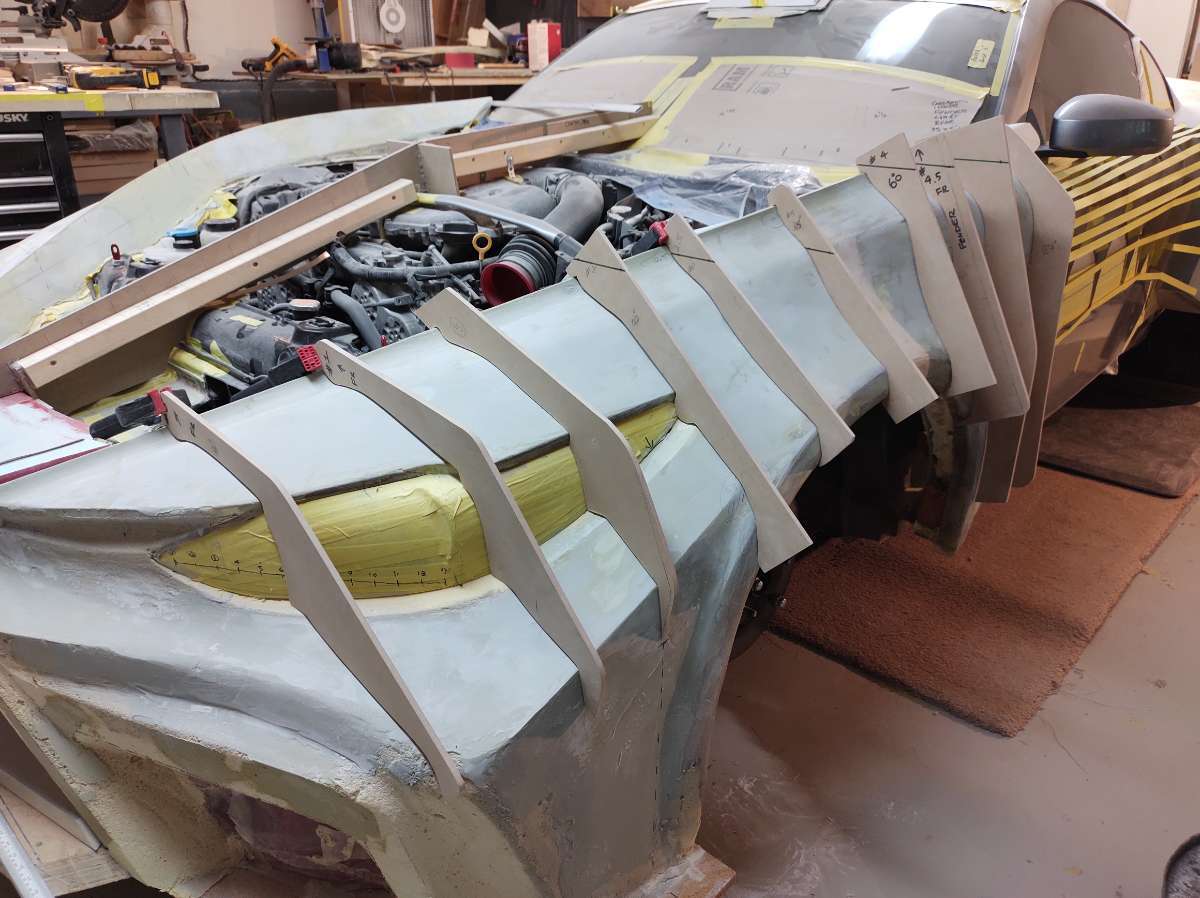
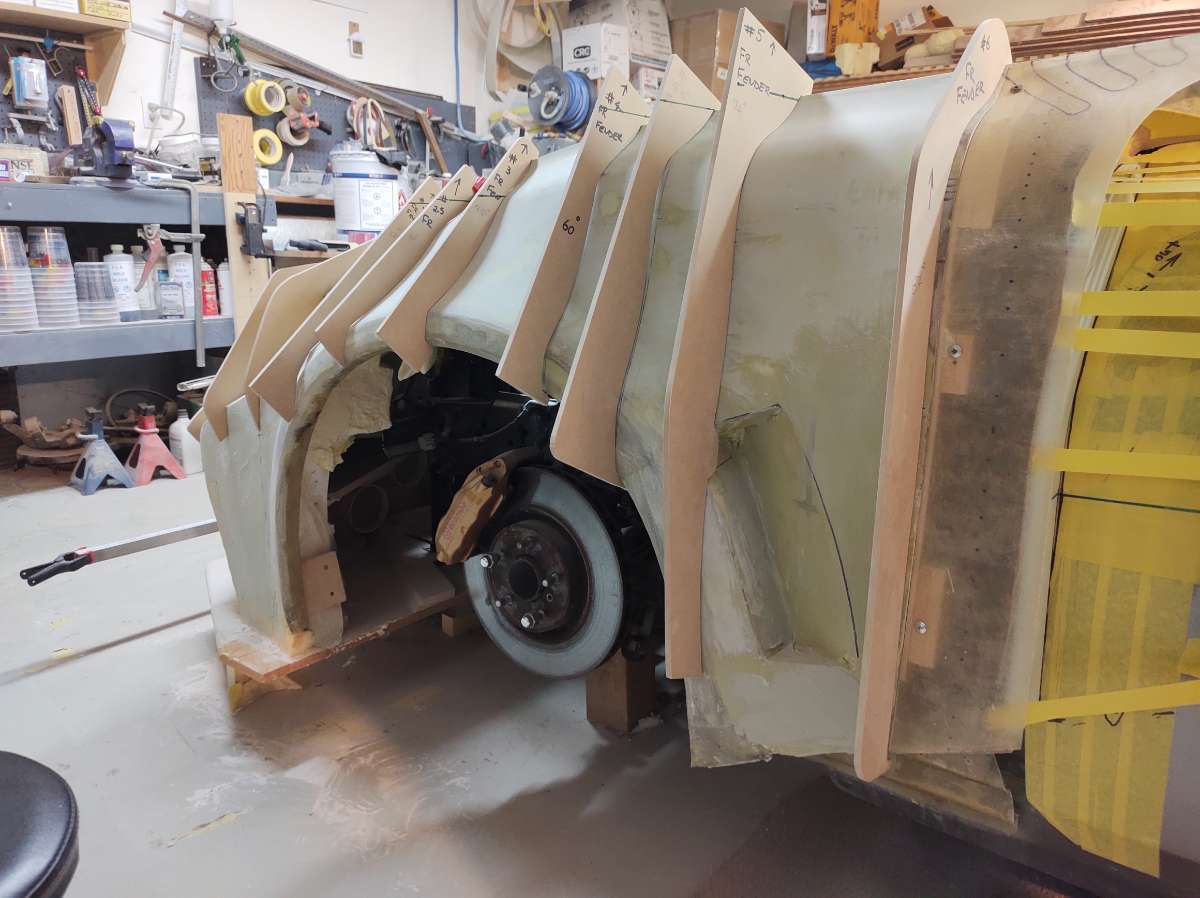
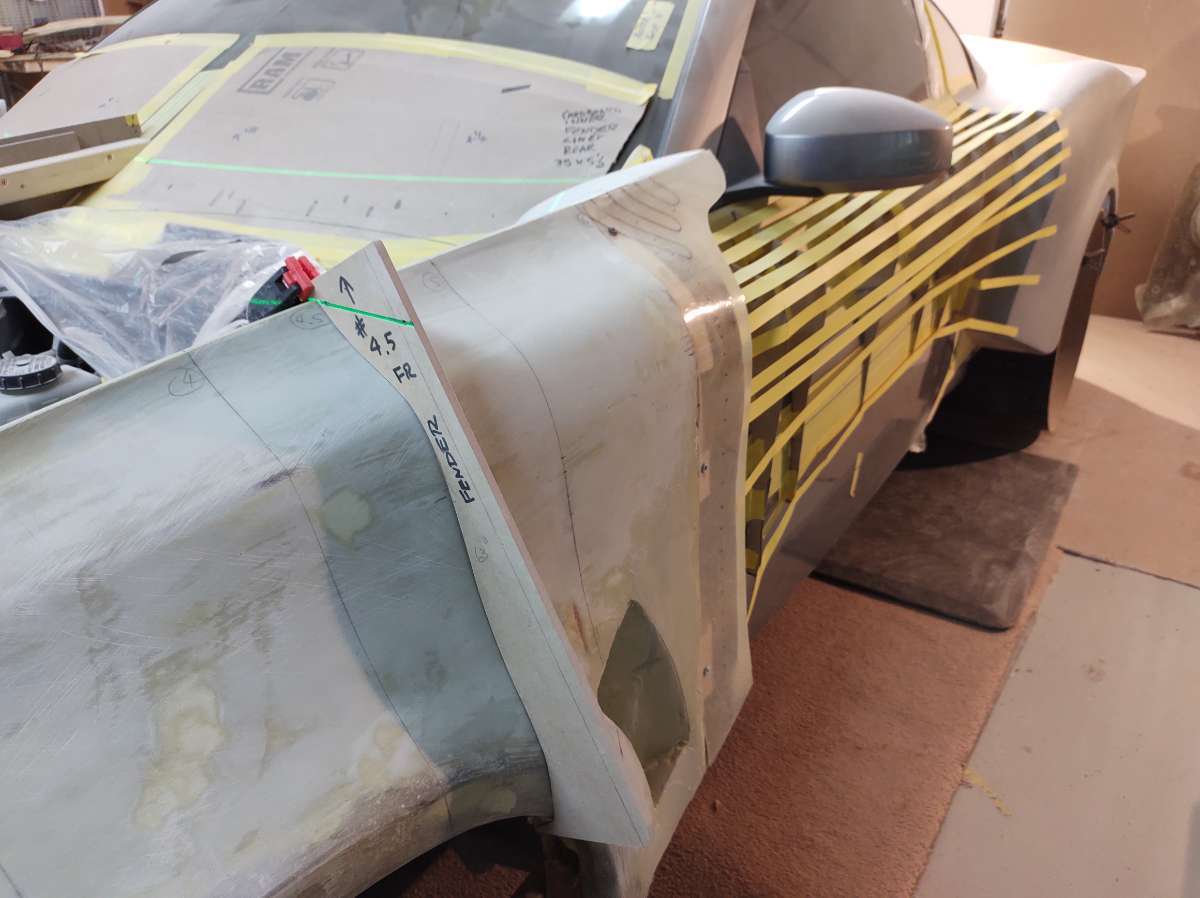
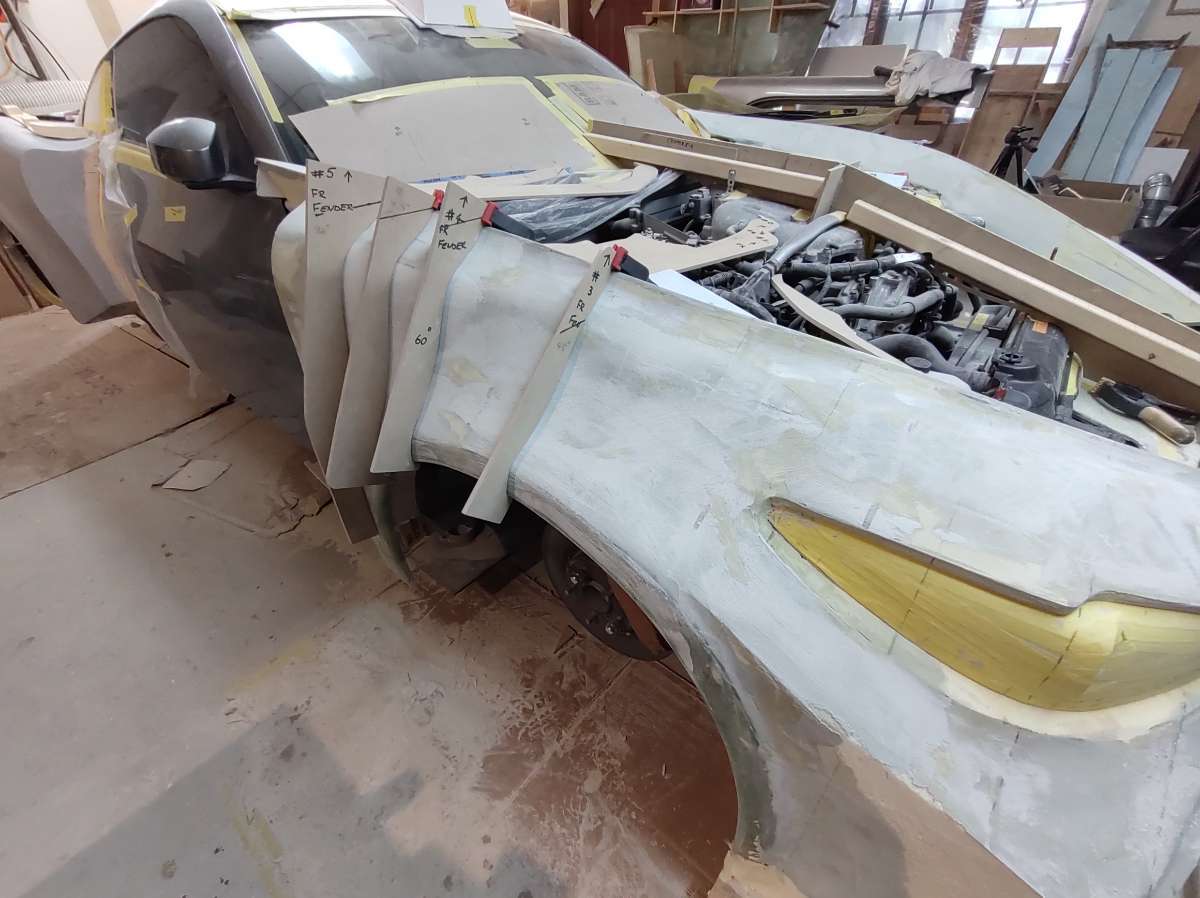
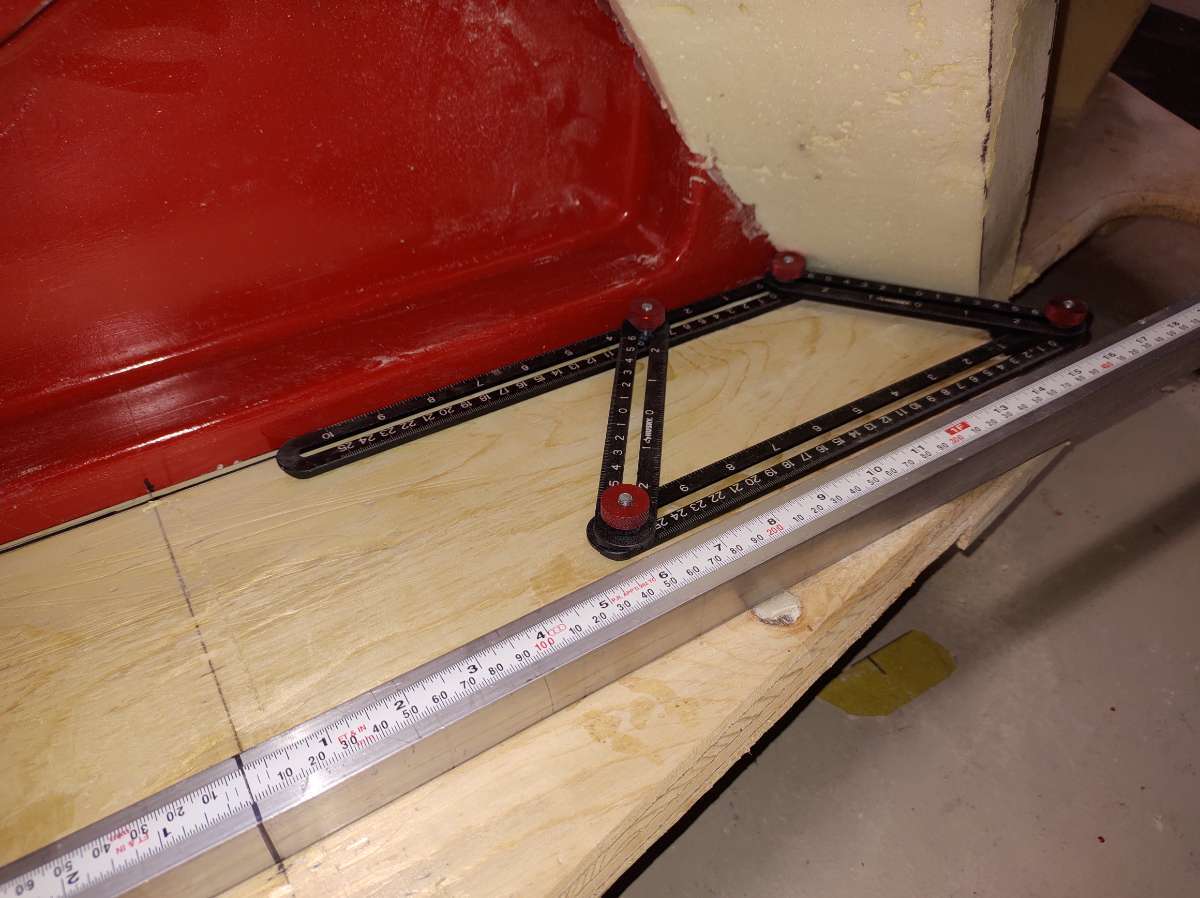
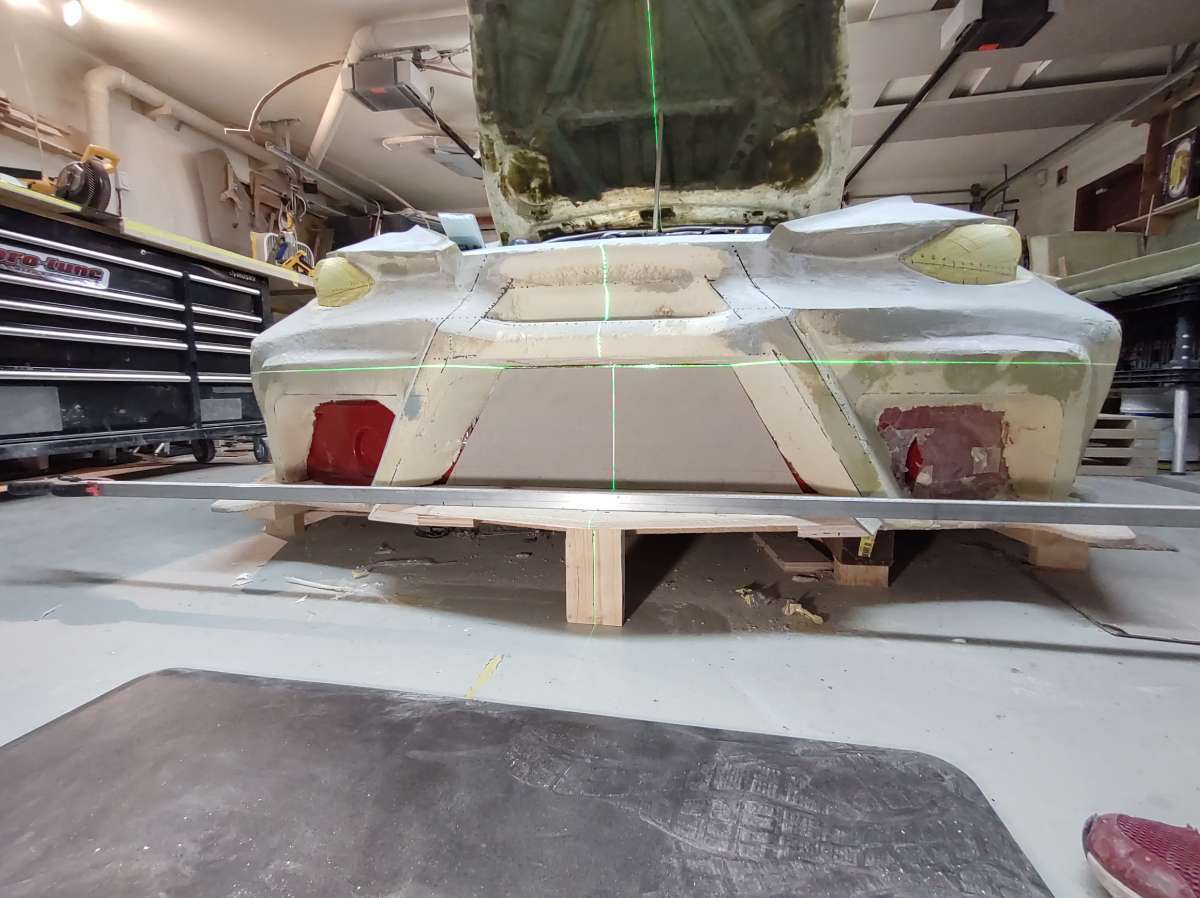
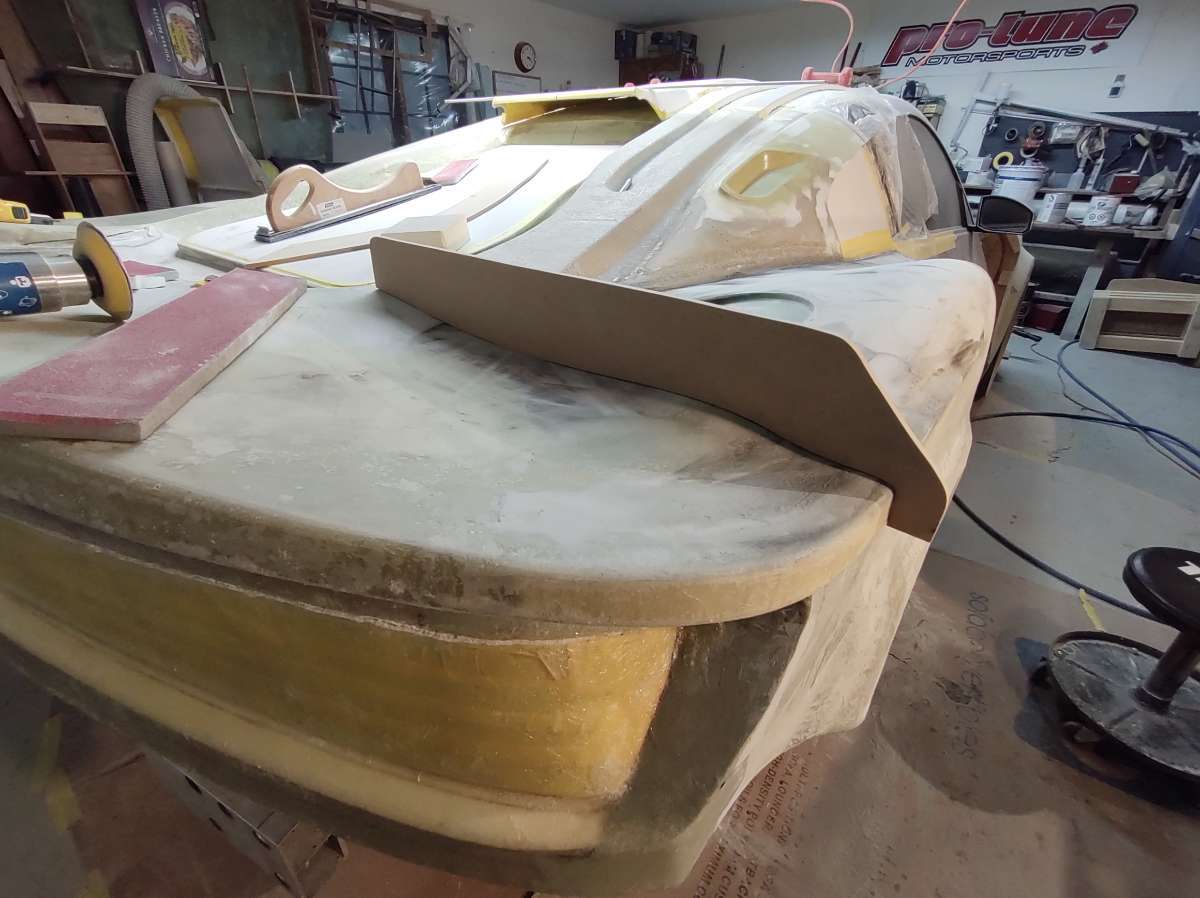
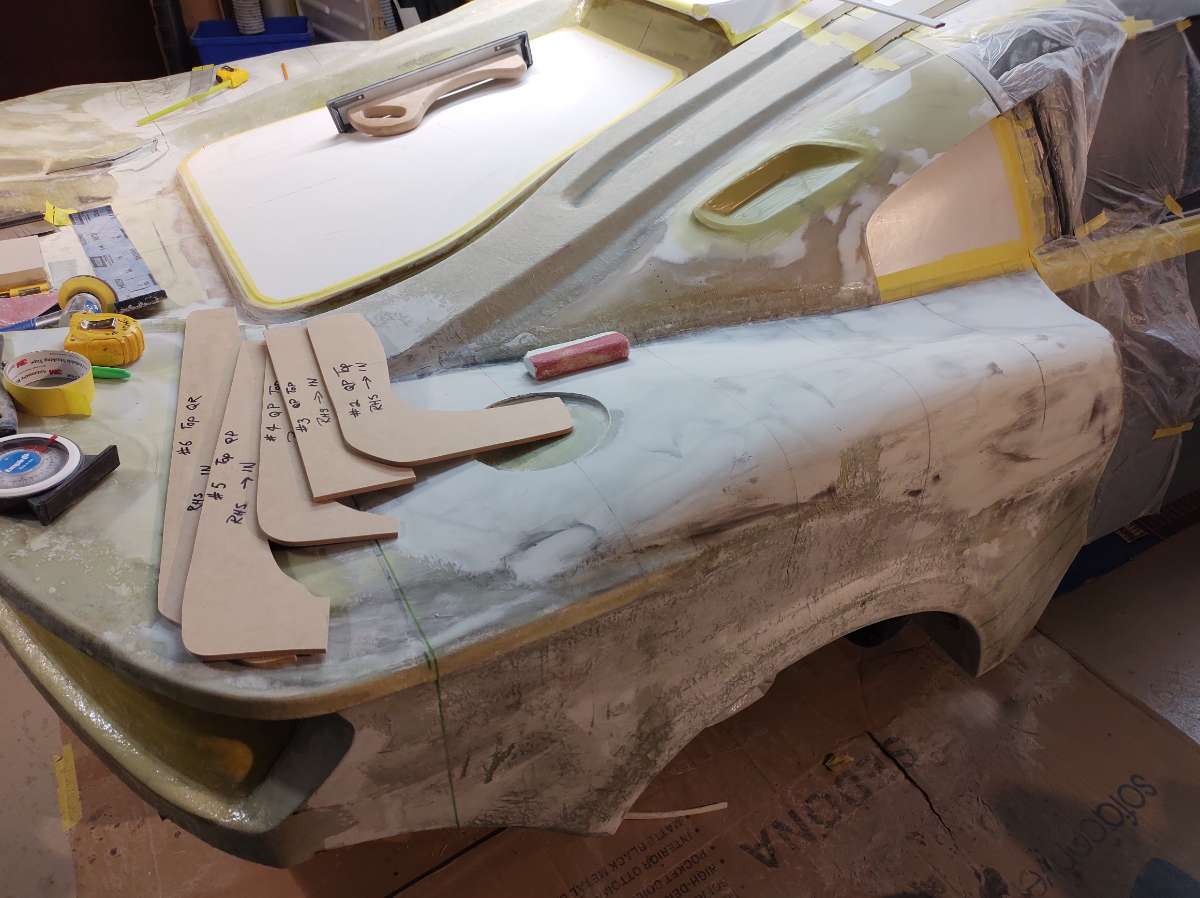
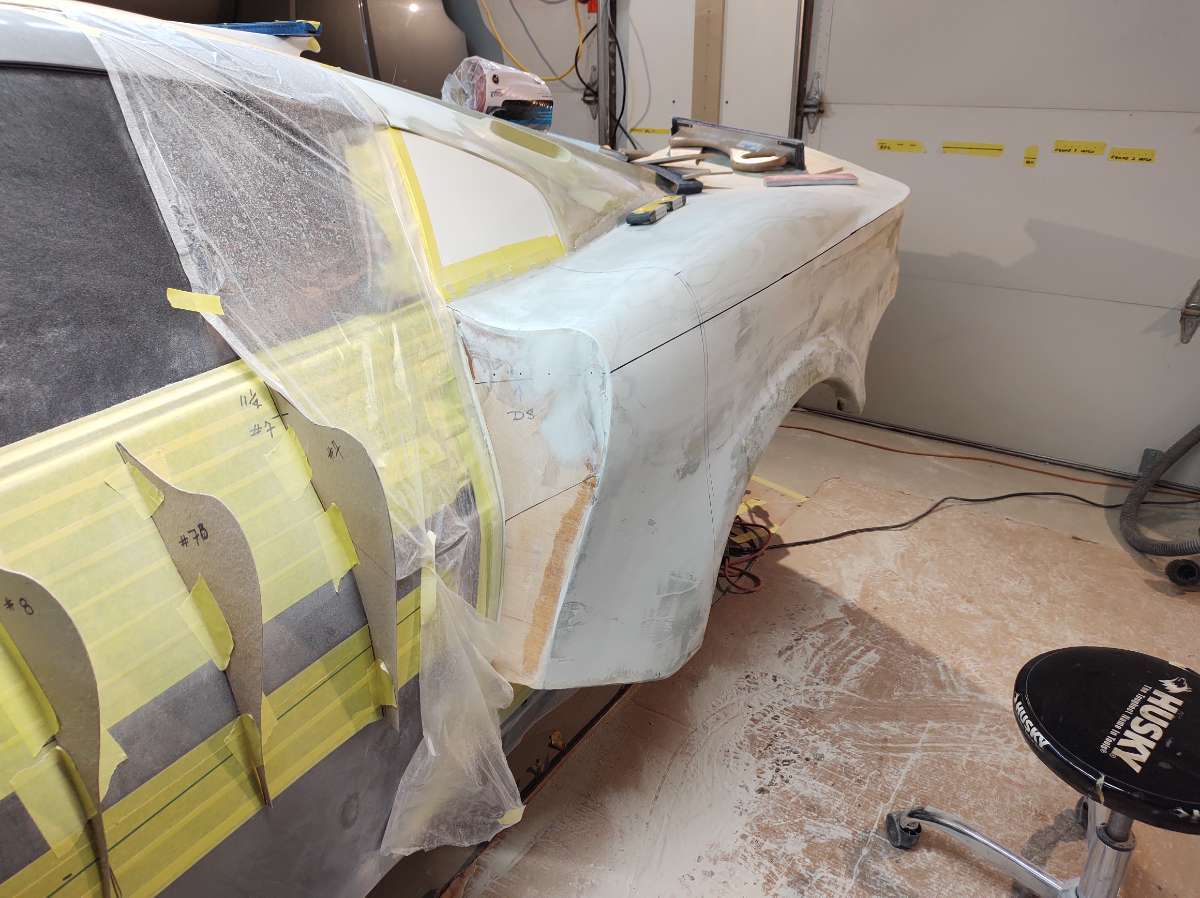
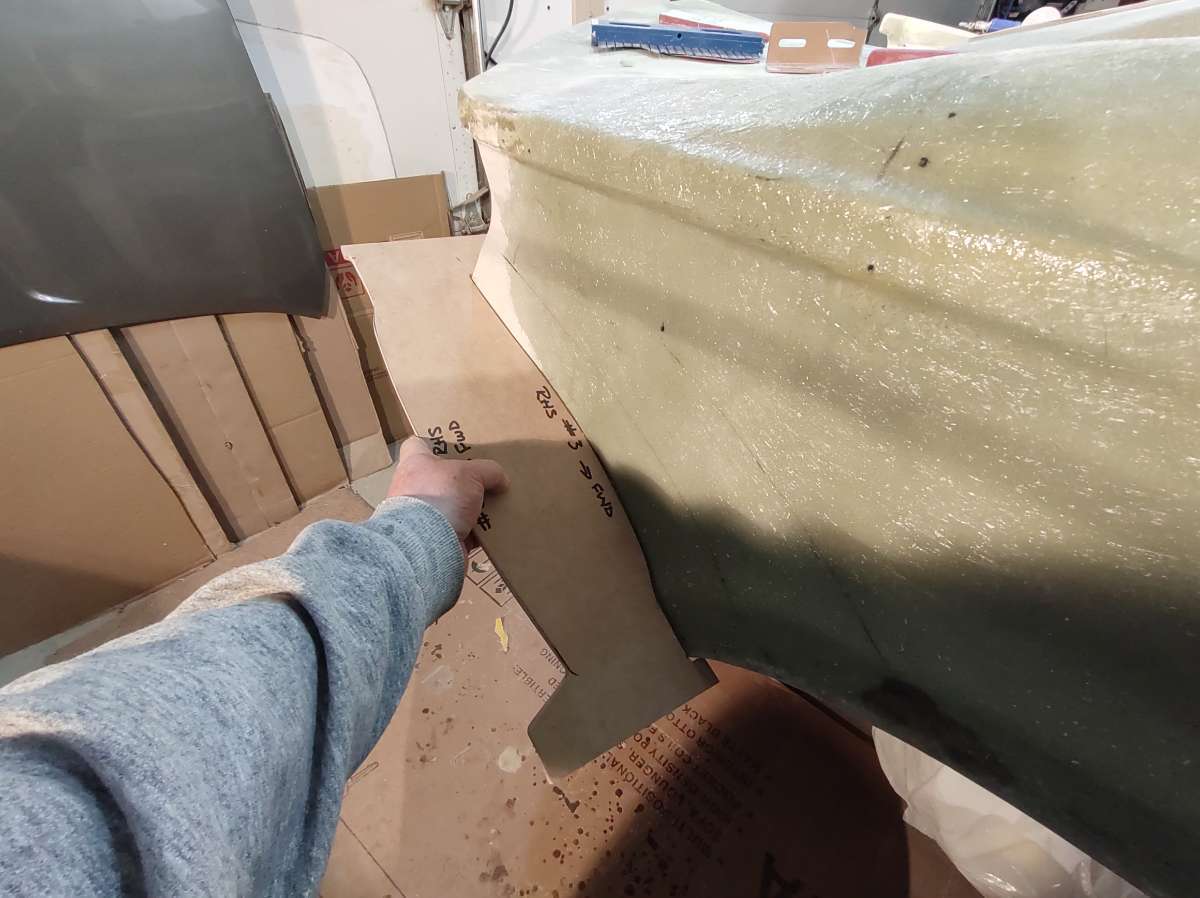
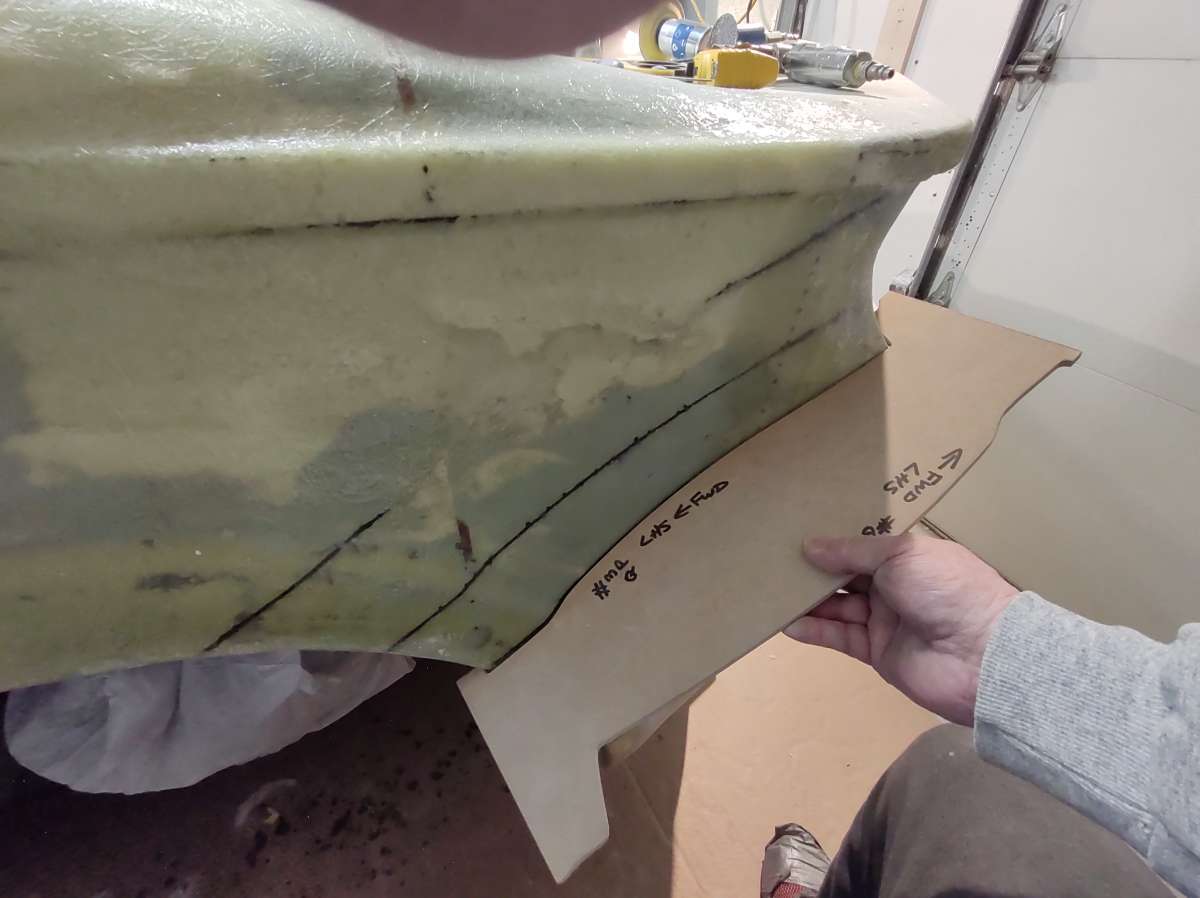
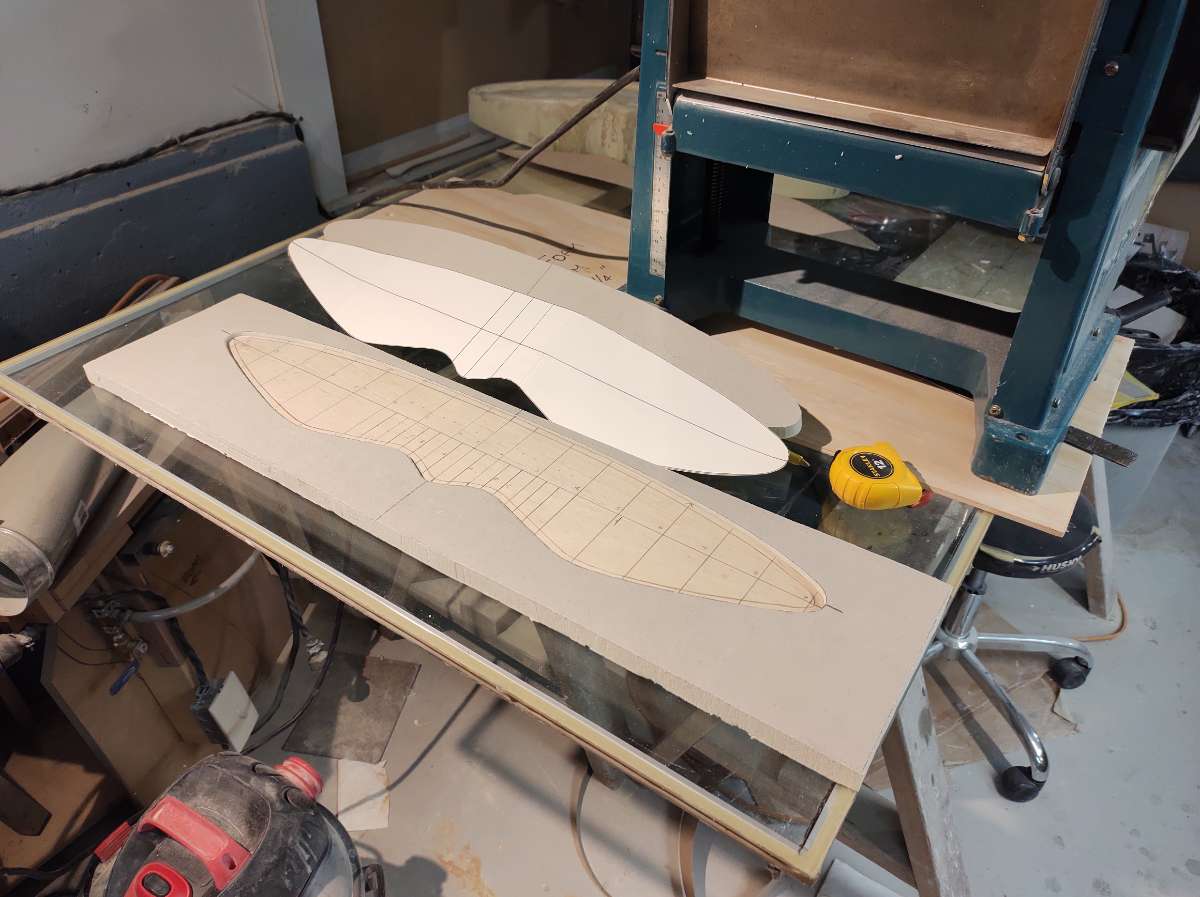
Laying out grid lines on the fenders to make templates like I did on the rear quarters , using the lasers and the center jig I made a while back to keep the tops of the fenders level and even with each other
Here are the lines
Ok this is the only way I could figure out how to measure the edge of the fenders.
I tried going off the front hub but if the steering isn't dead straight would be way off .
My Dad who sadly passed away was a brilliant man , him and I built this laser , it's for pointing up , so if you were installing something like lights or ducts , speakers etc. on a ceiling , you would do your layout on the floor and then put the self leveling laser on the mark on the floor and it projects where to put your mark on the ceiling .
It has a gimbal bearing to stay level and a center point at the bottom to line up with your marks.
it's made from a piece of aluminum tube and some thick aluminum round stock and a laser .
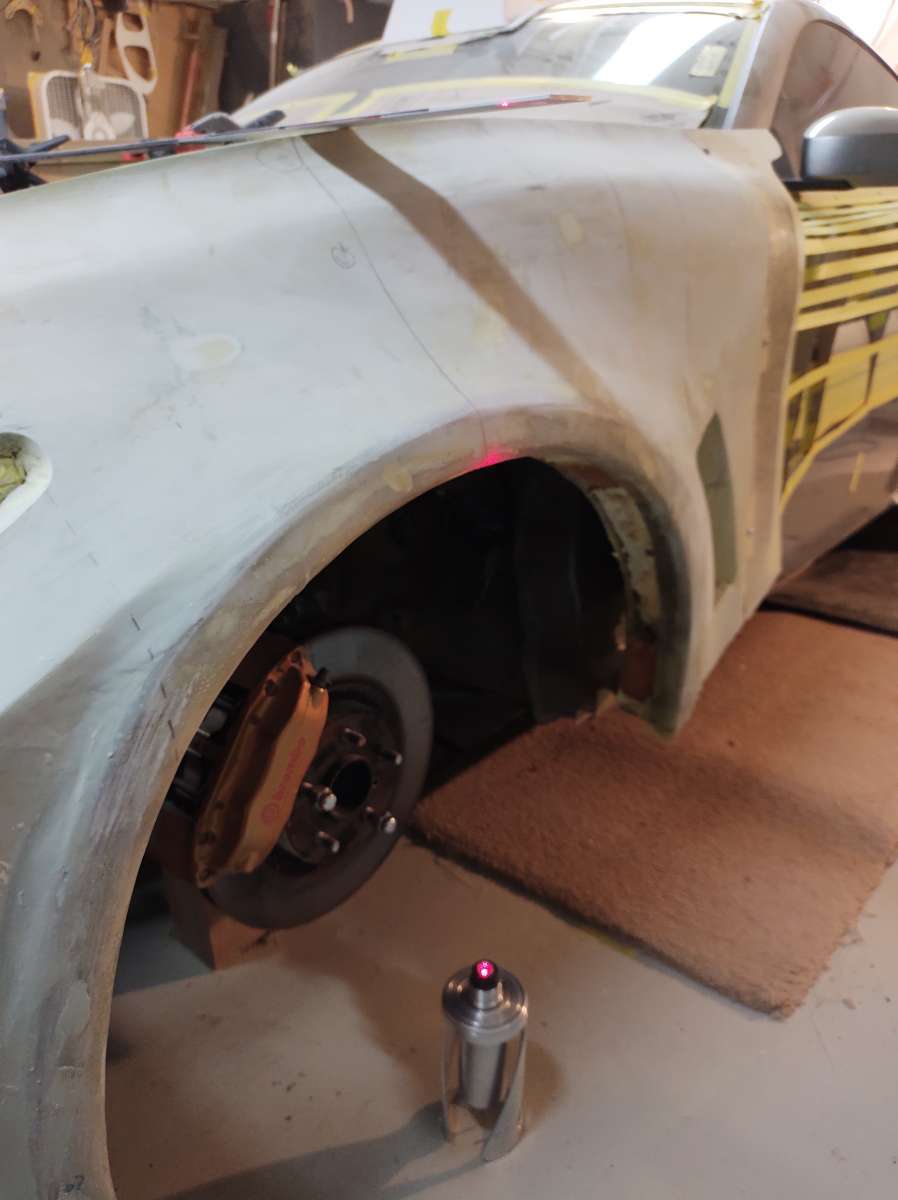
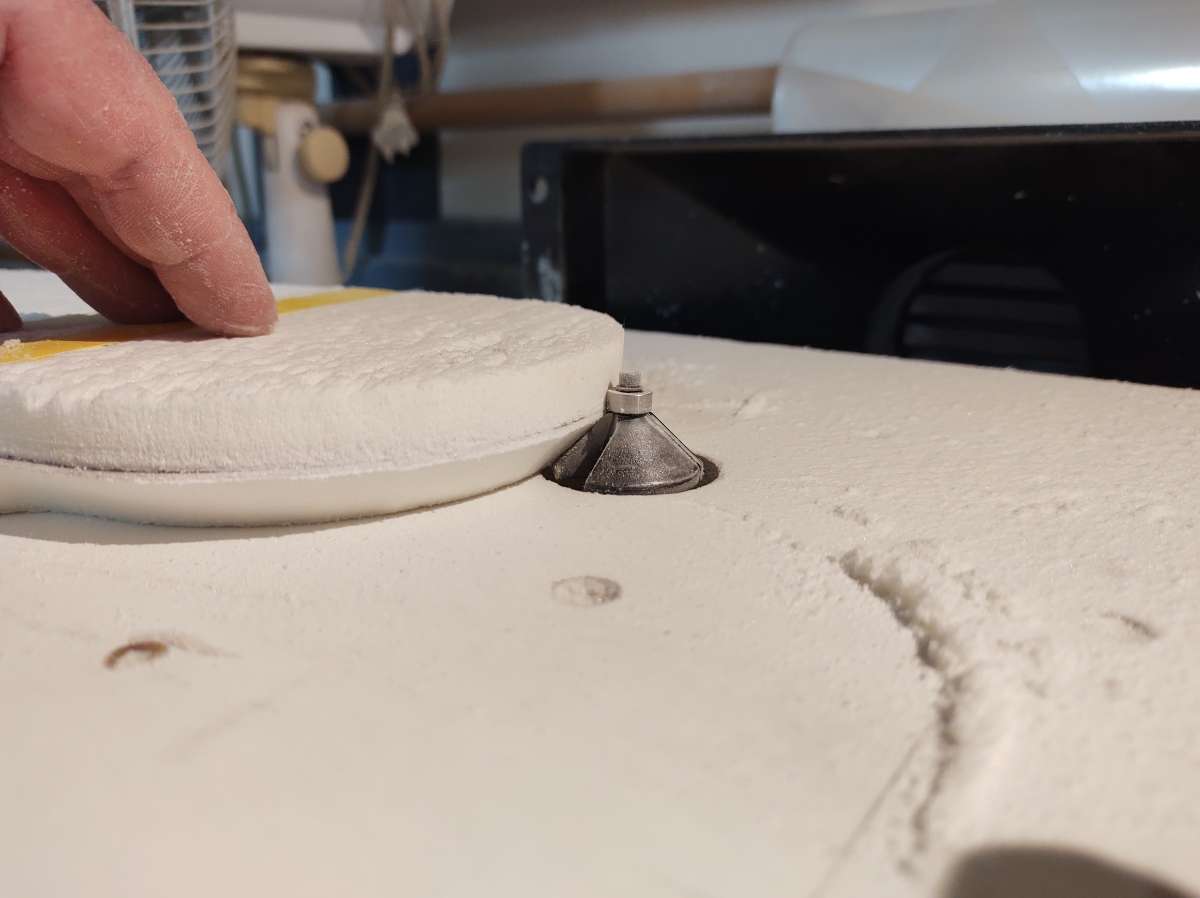
i didn't have anything to go off to mark the floor , so I placed the 3 foot rulers on the center of the arch in the centering jig on the car , found the edge of the fender with the laser and read the ruler to check and make sure they were the same , the passenger side was out too far by 1/8th of an inch , remedied by the sander .
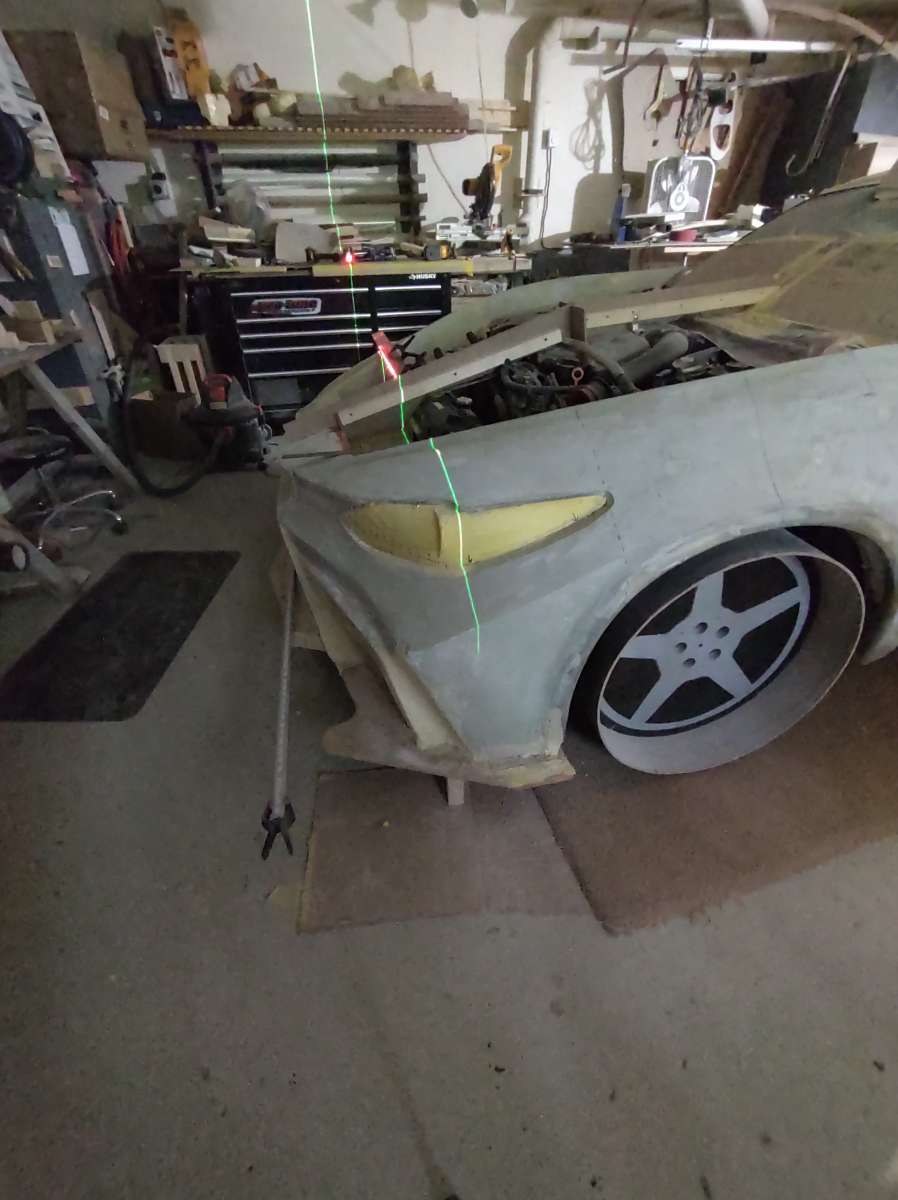
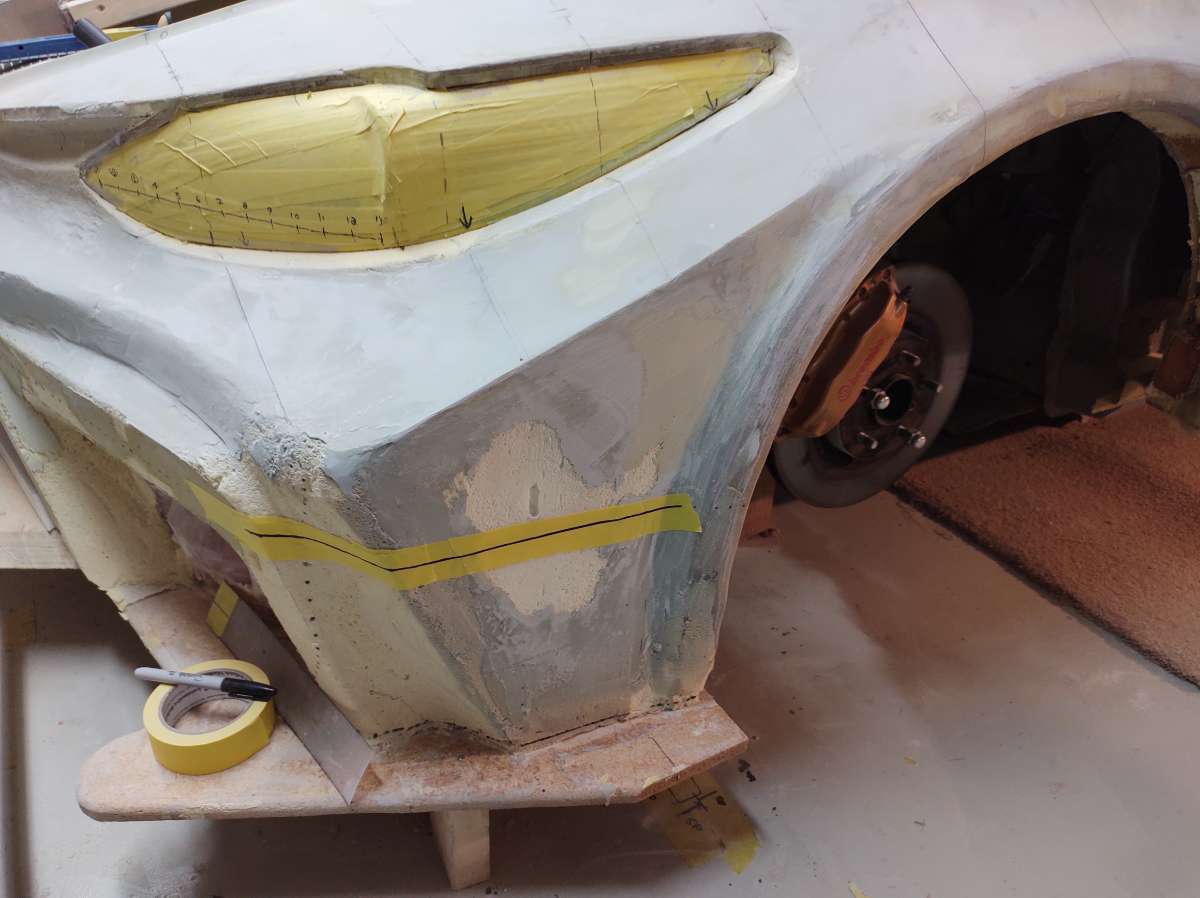
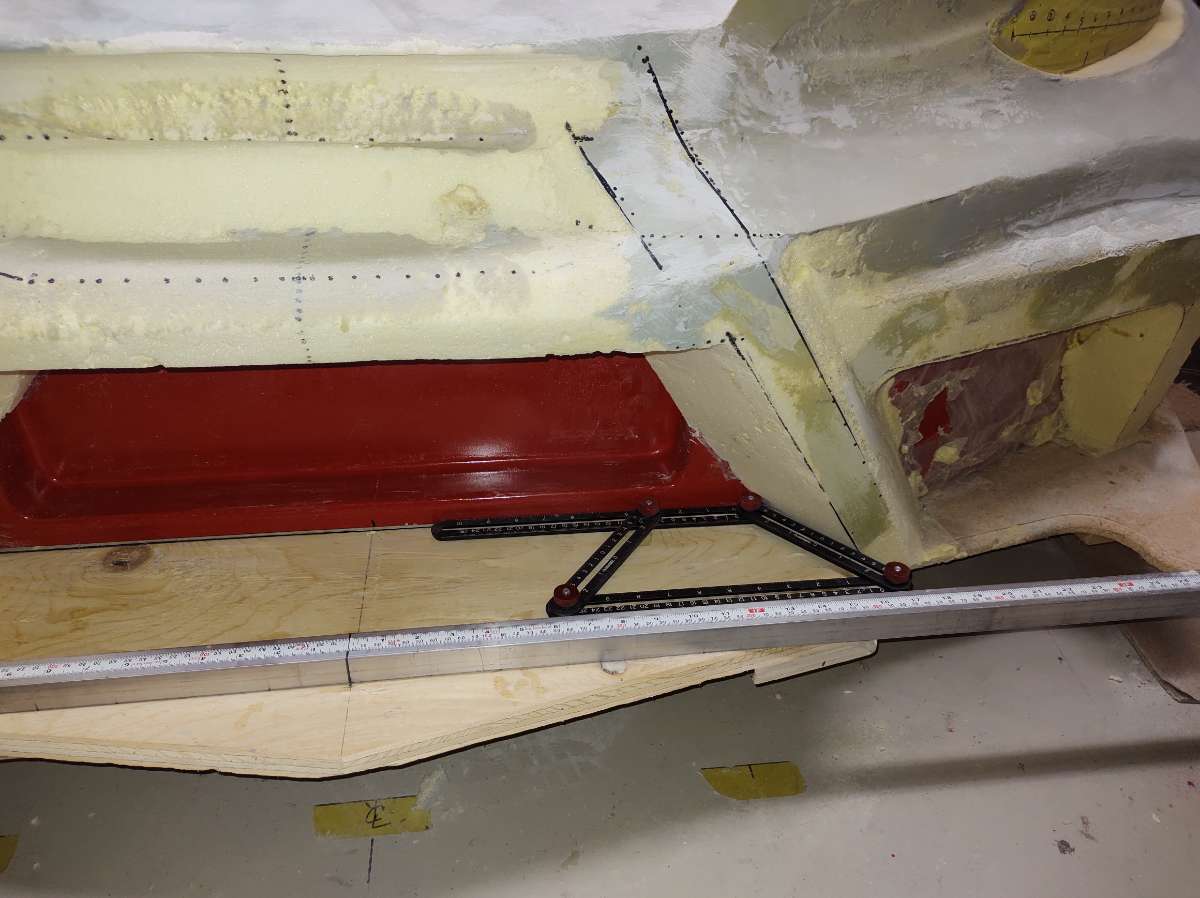
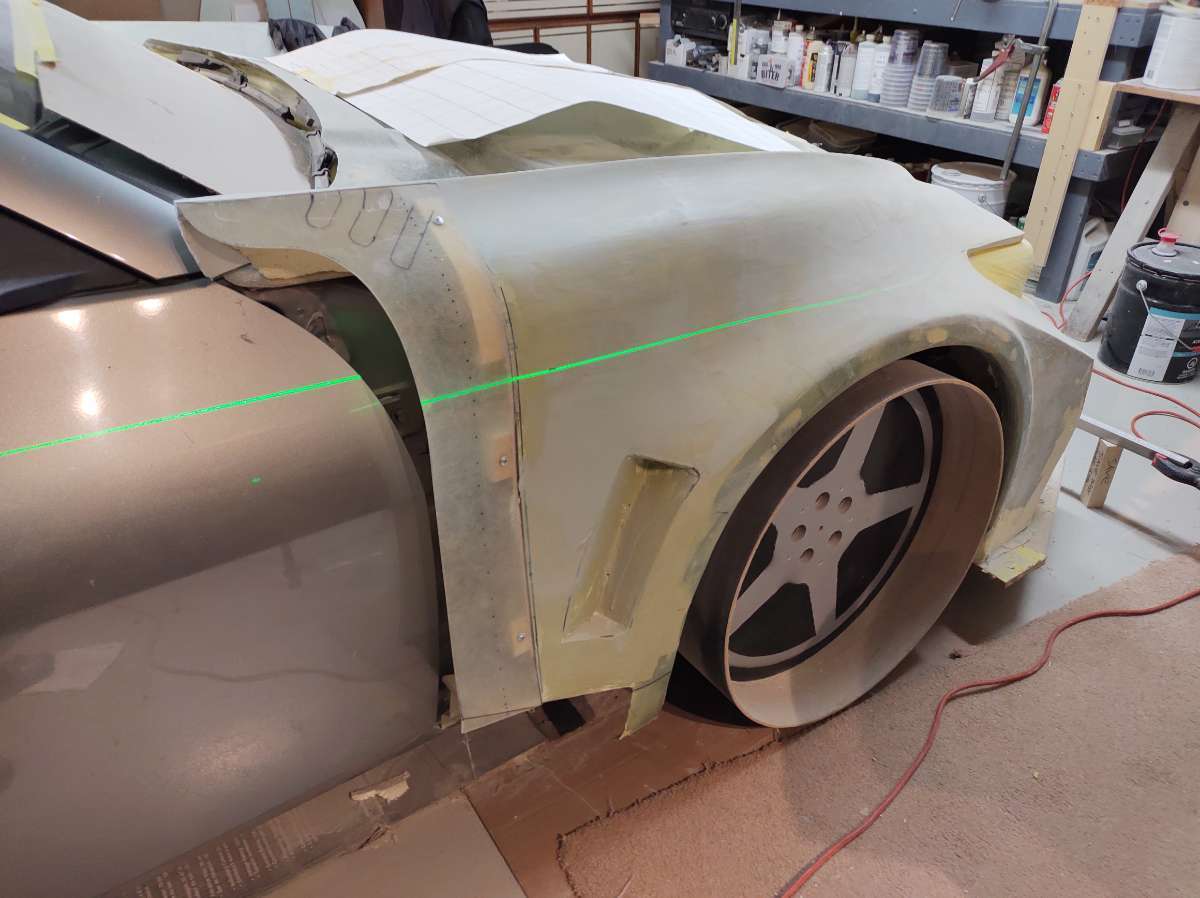
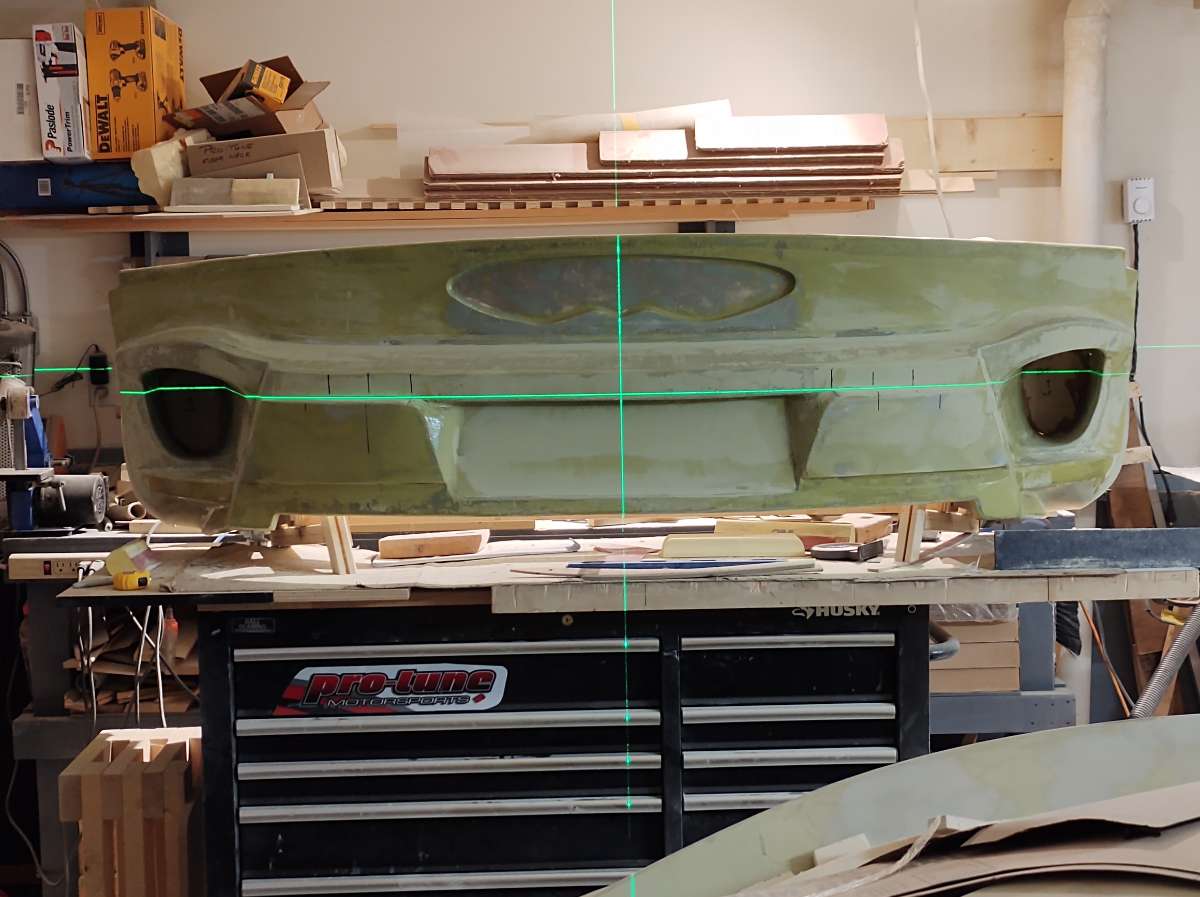
Ok so now the width is sort of sorted , lets start matching up the rest , yes you guessed it !!! it template and sanding and foaming , and as usual as careful as I try to be , there is always something that needs attention .
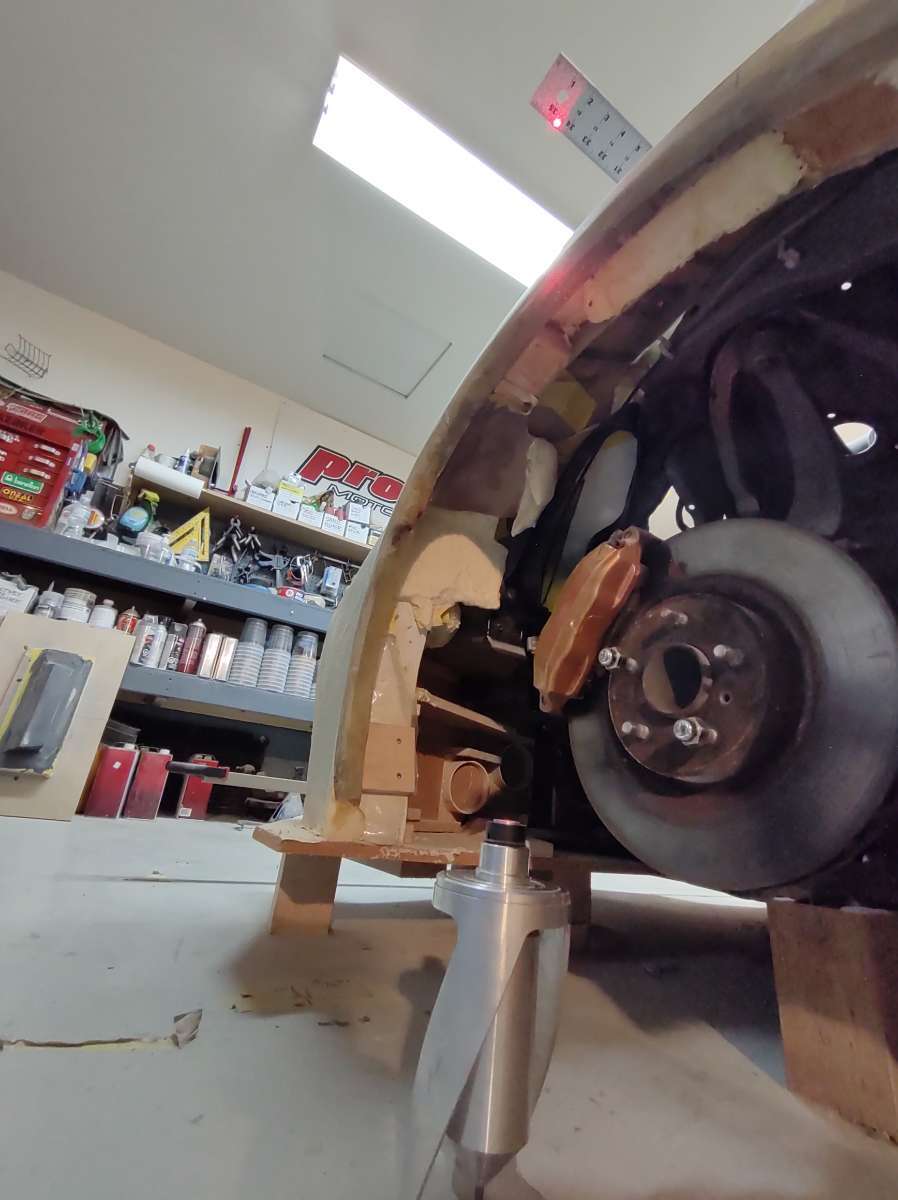
More grid lines
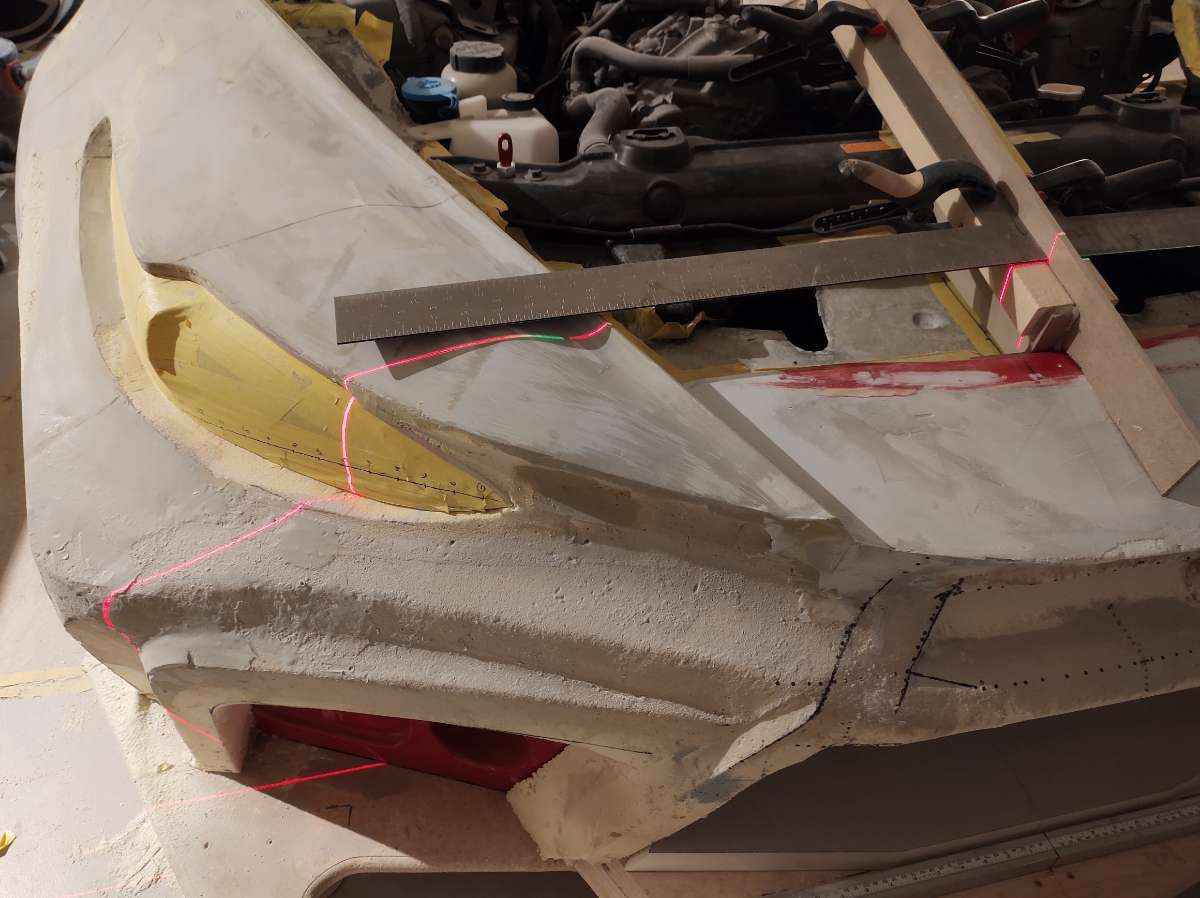

here i was 1/8 tall in this section so I had to sand into the foam and some of the fiberglass fender arch
this is the only way I know how to get the same shape on both sides , if anyone know a better way please let me know asap .
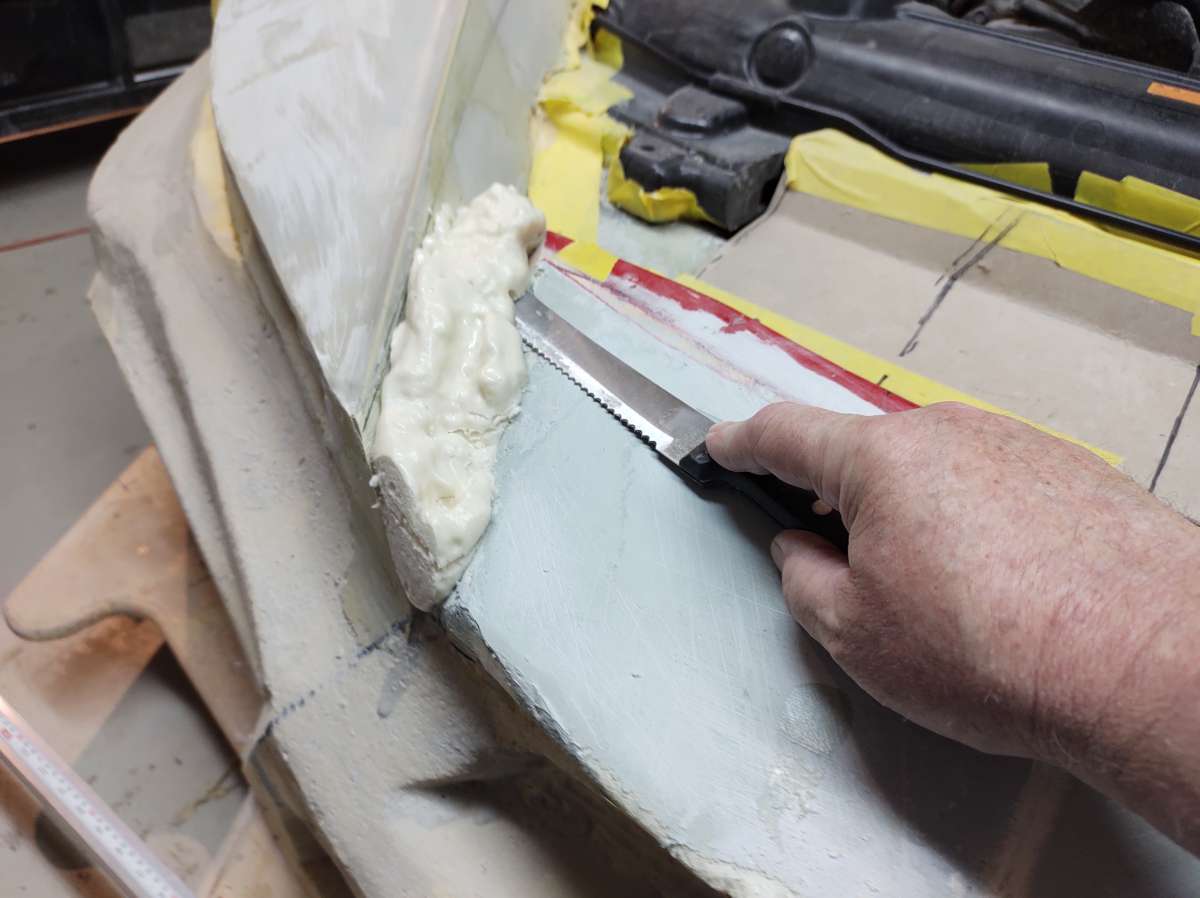
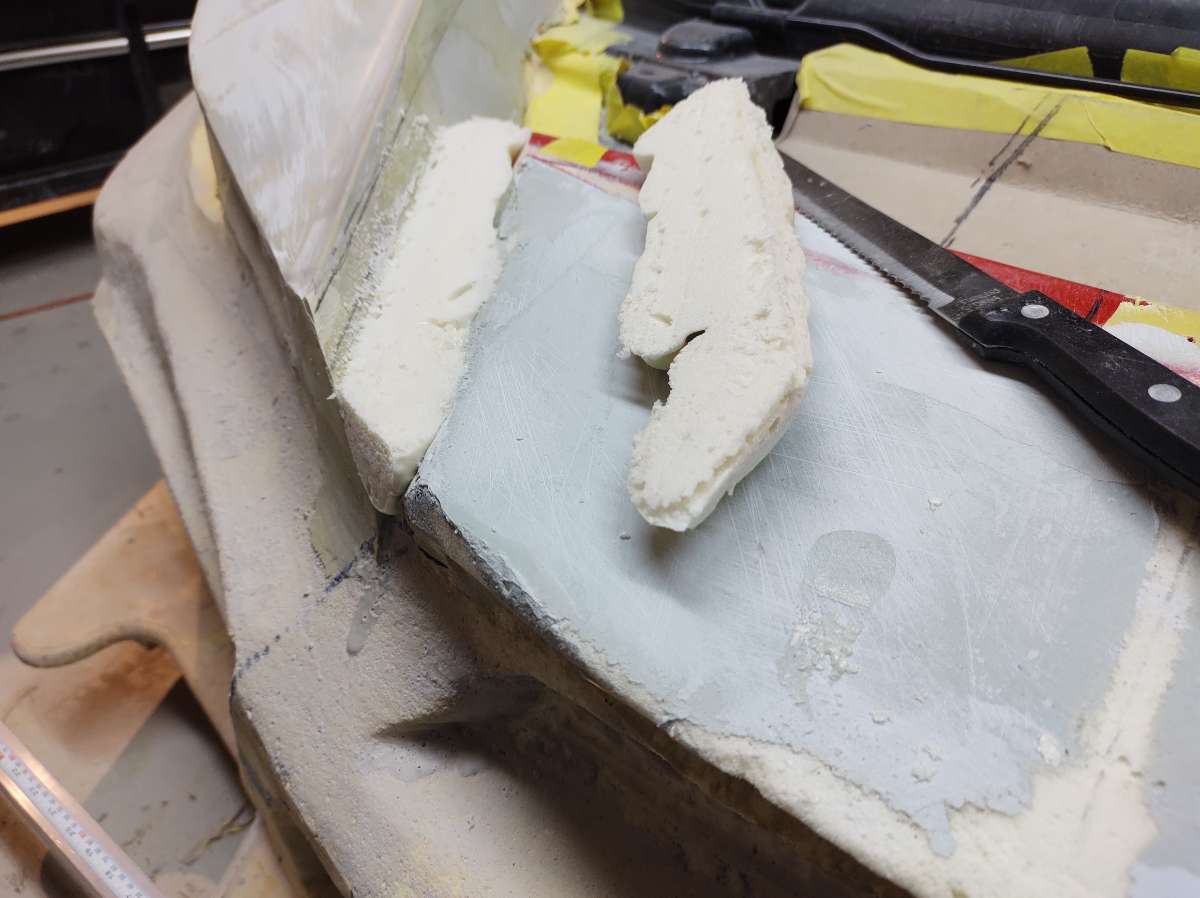
added some filler over the exposed foam , it's very tricky , you have to sand it before it gets hard or it tears out the foam , it's a real fine line between wet and hard .
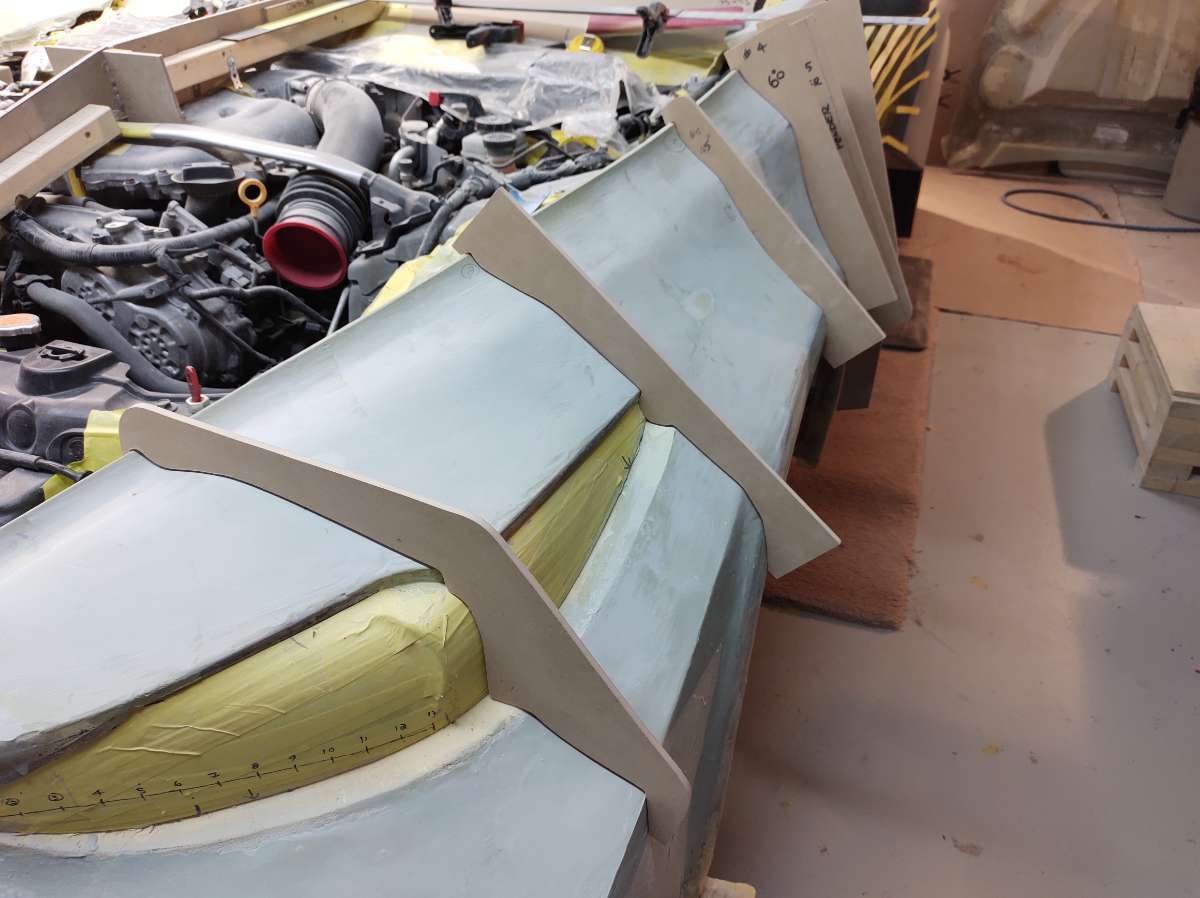
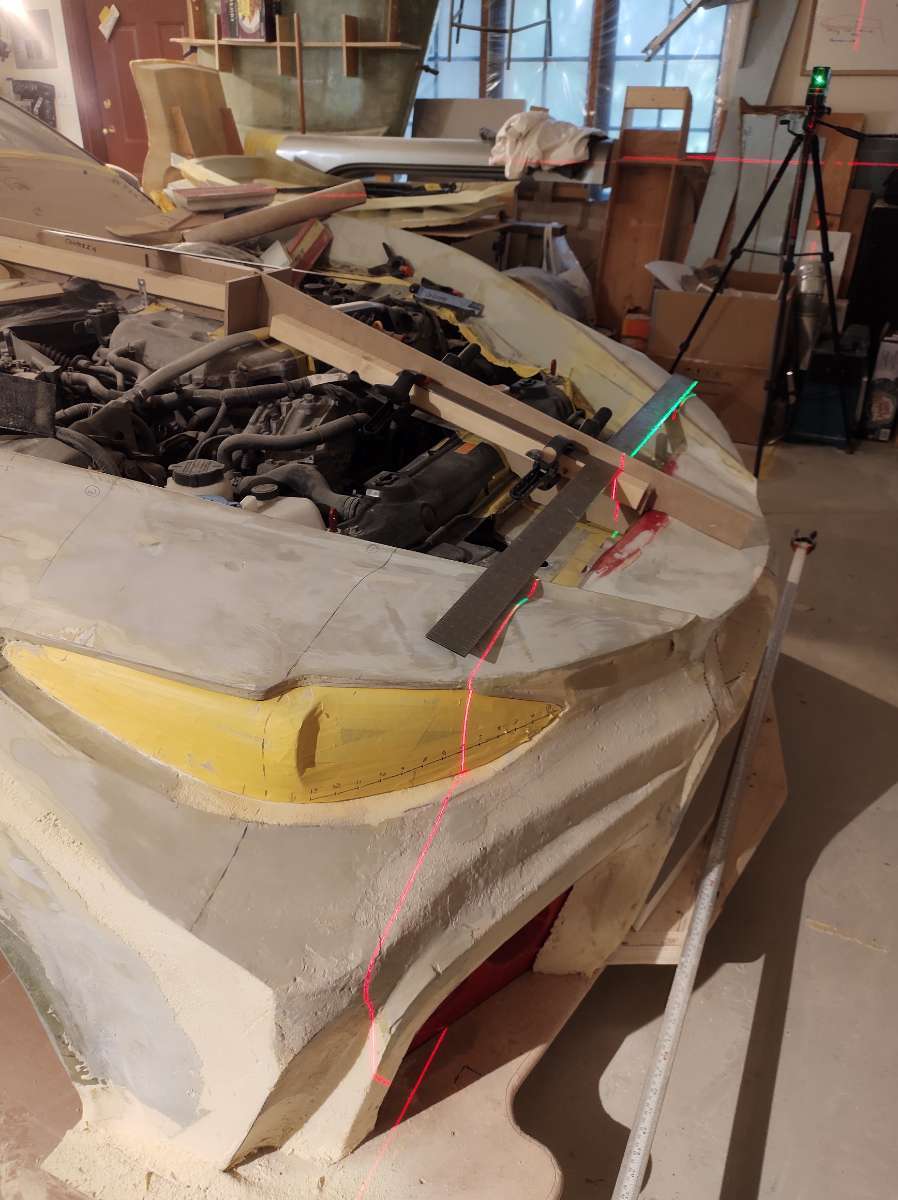
the pursuit of symmetry .......... I built this adjustable jig to measure off of it really helps but it all so labor intense .
So I measure off the center line on the upper tube at the key points mark everything on tape on the tube with a T Square , and then compare each side and fix accordingly .
I made a wooden template of this so I could use it repeatedly to fix the other side
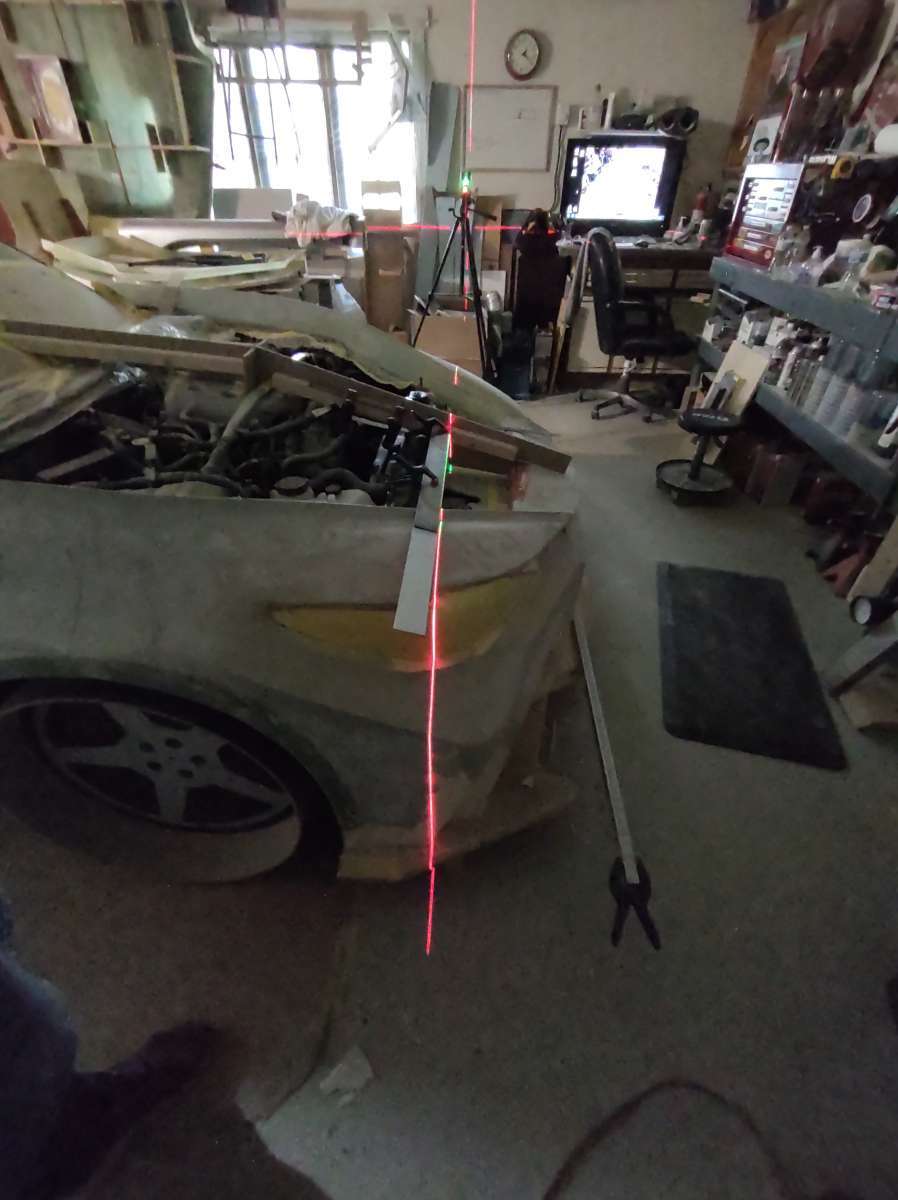
Here is the foam I had to add from my eager sand way back when .
I use everything I can to help me , I have a drawer in the tool box full of paper and cardboard and wood patterns .
this is so hard to see what's going on sometimes , too low too tall too deep ahhhhh
That explains the beverages , should have built a lambo could have just used plywood lol
and yes you have to improvise sometimes , I hope my wife doesn't see her missing knife on here lol

Thanks again everyone for fallowing my build and the great comments , the kind words it really helps to keep going on the frustrating days , been a long haul
Hope to have the nose sorted and a couple of layers of glass on it so I can bodywork it in the next couple of days , looking forward to seeing the front in primer .
Cheers
Stay Safe and Stay Tuned in !!!
-
6
-
-
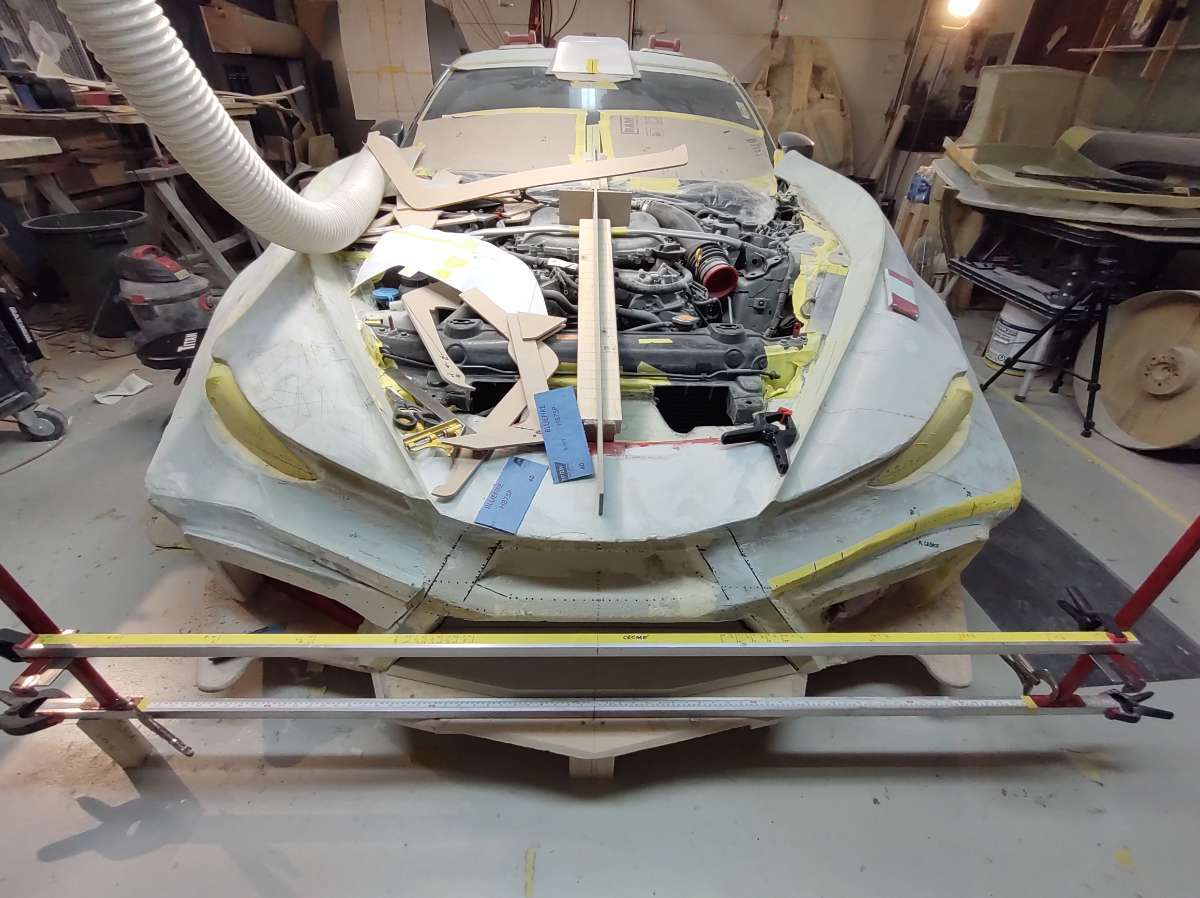
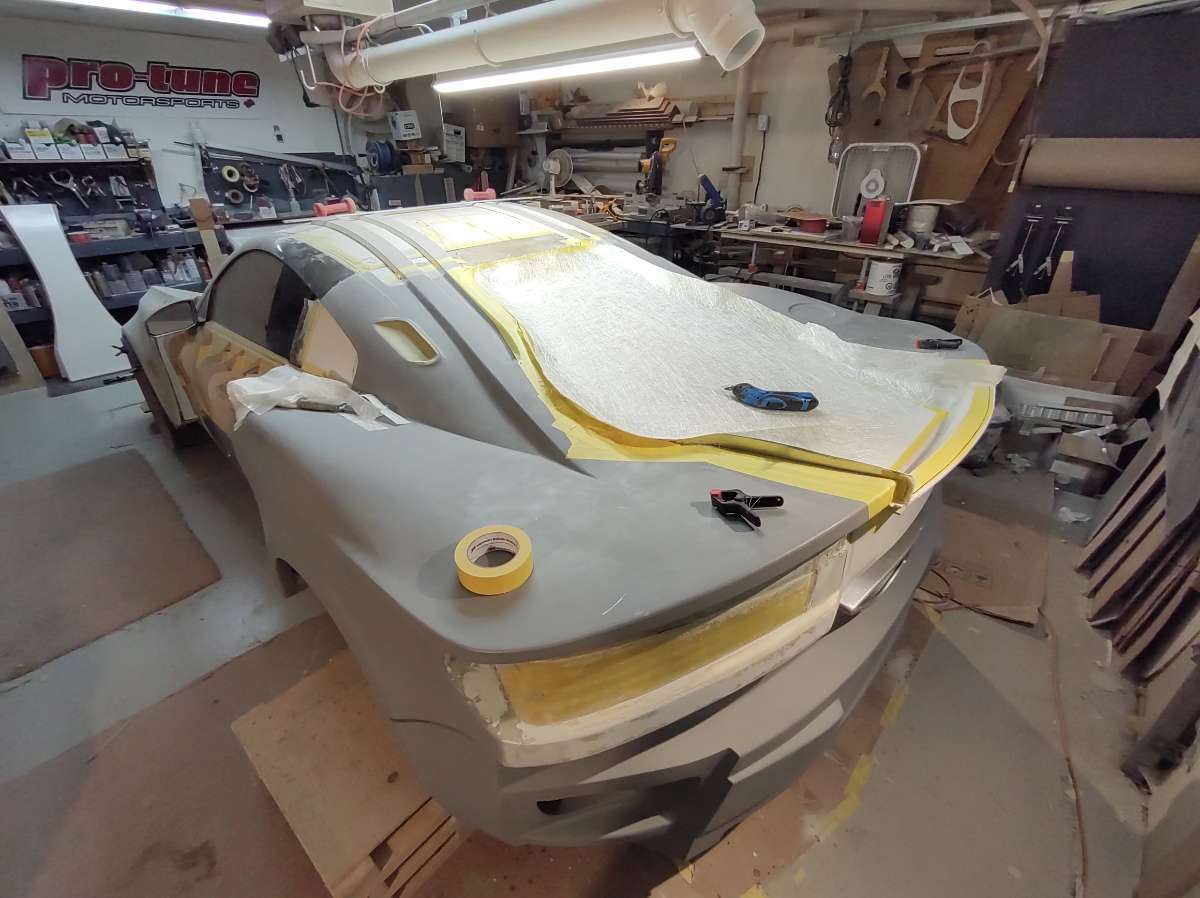
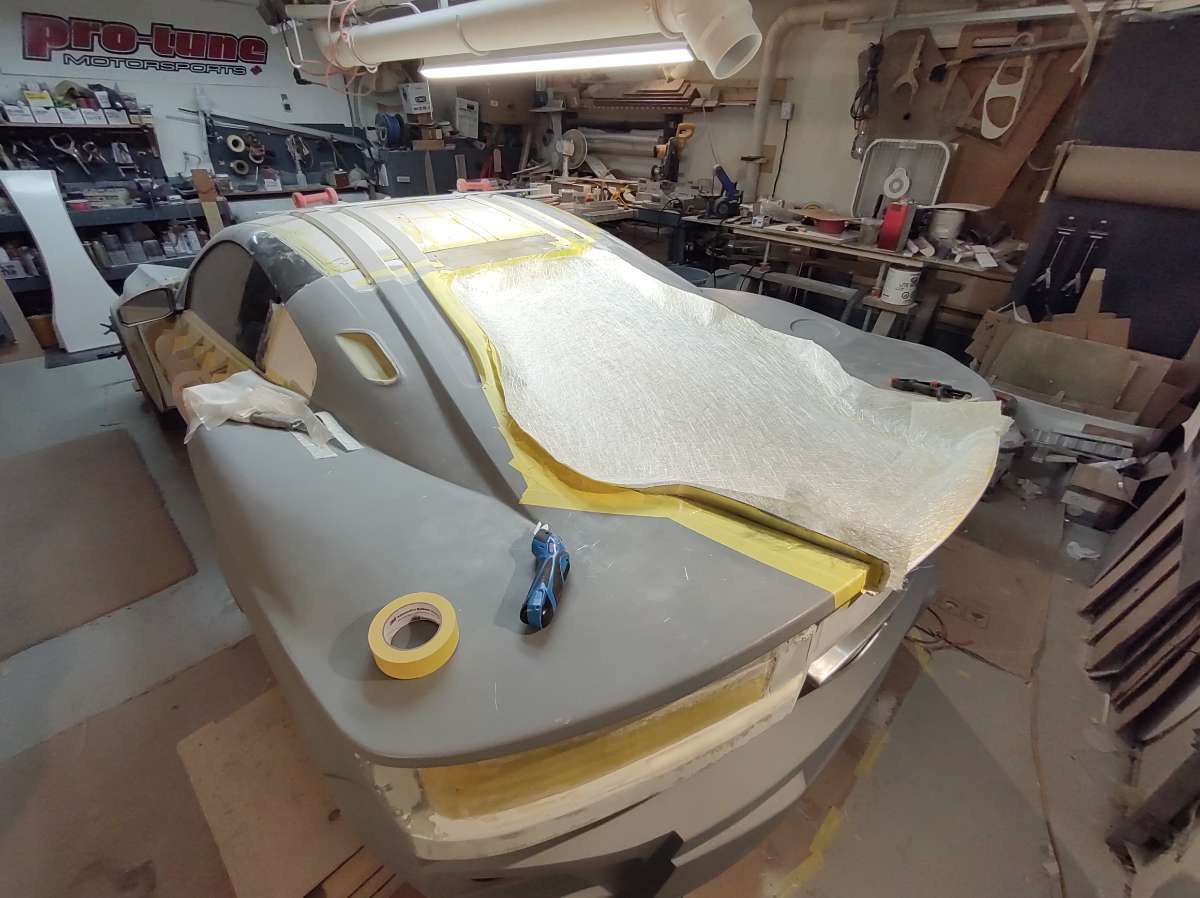
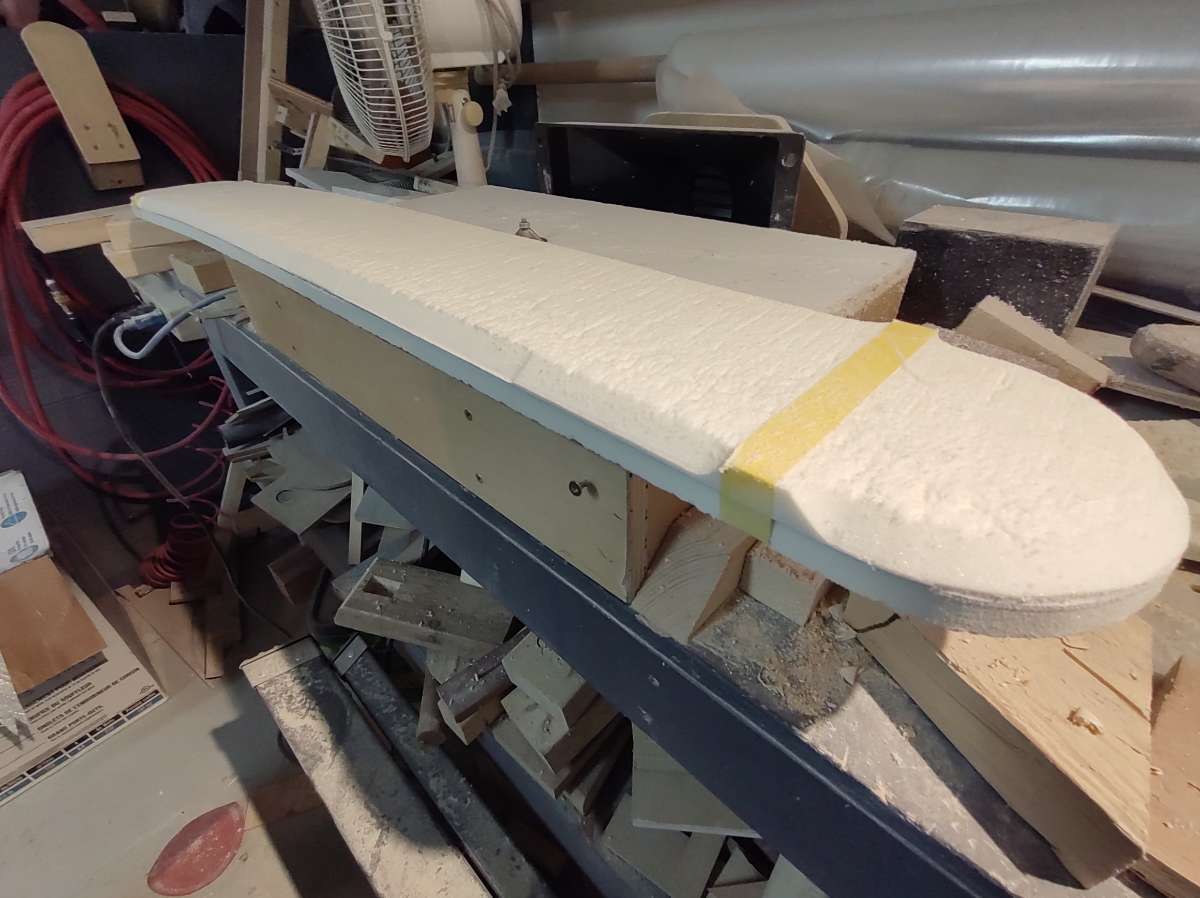
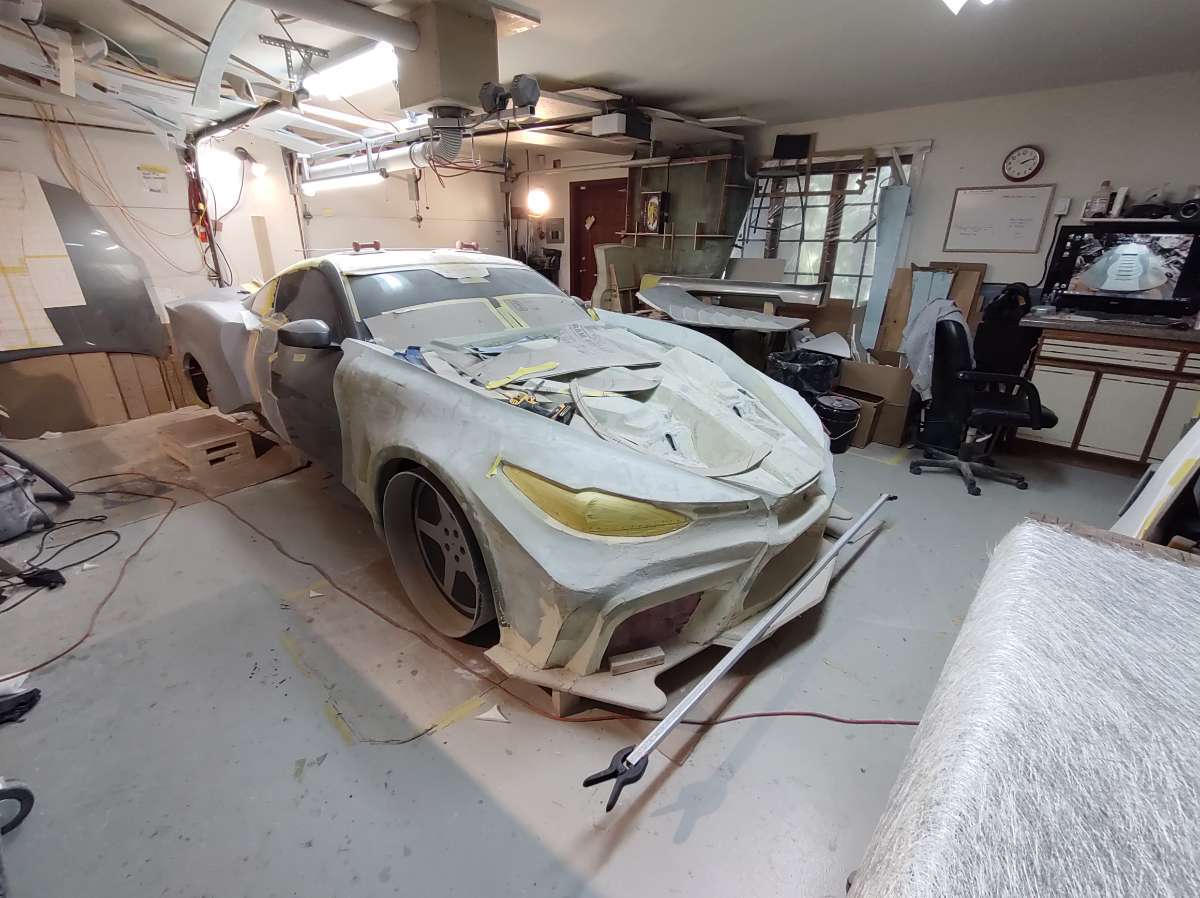
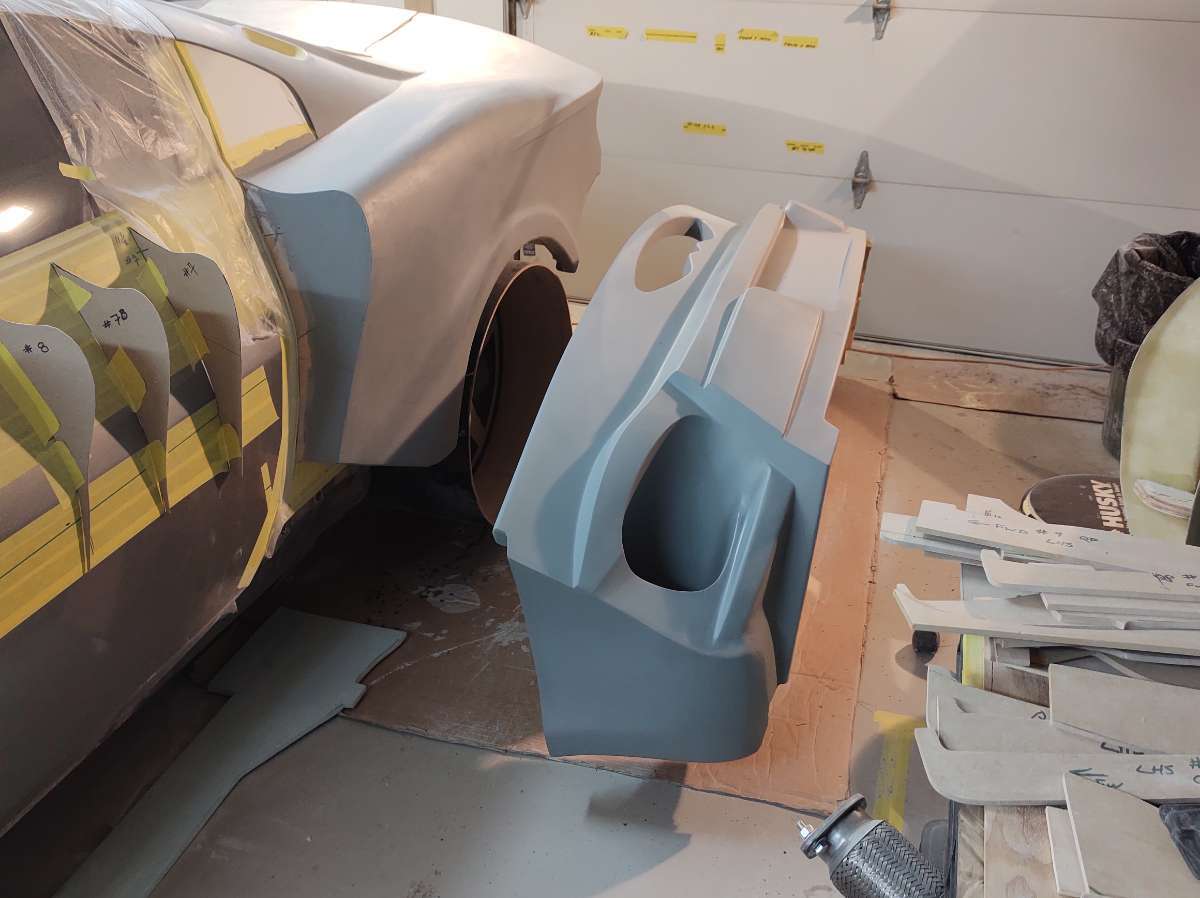
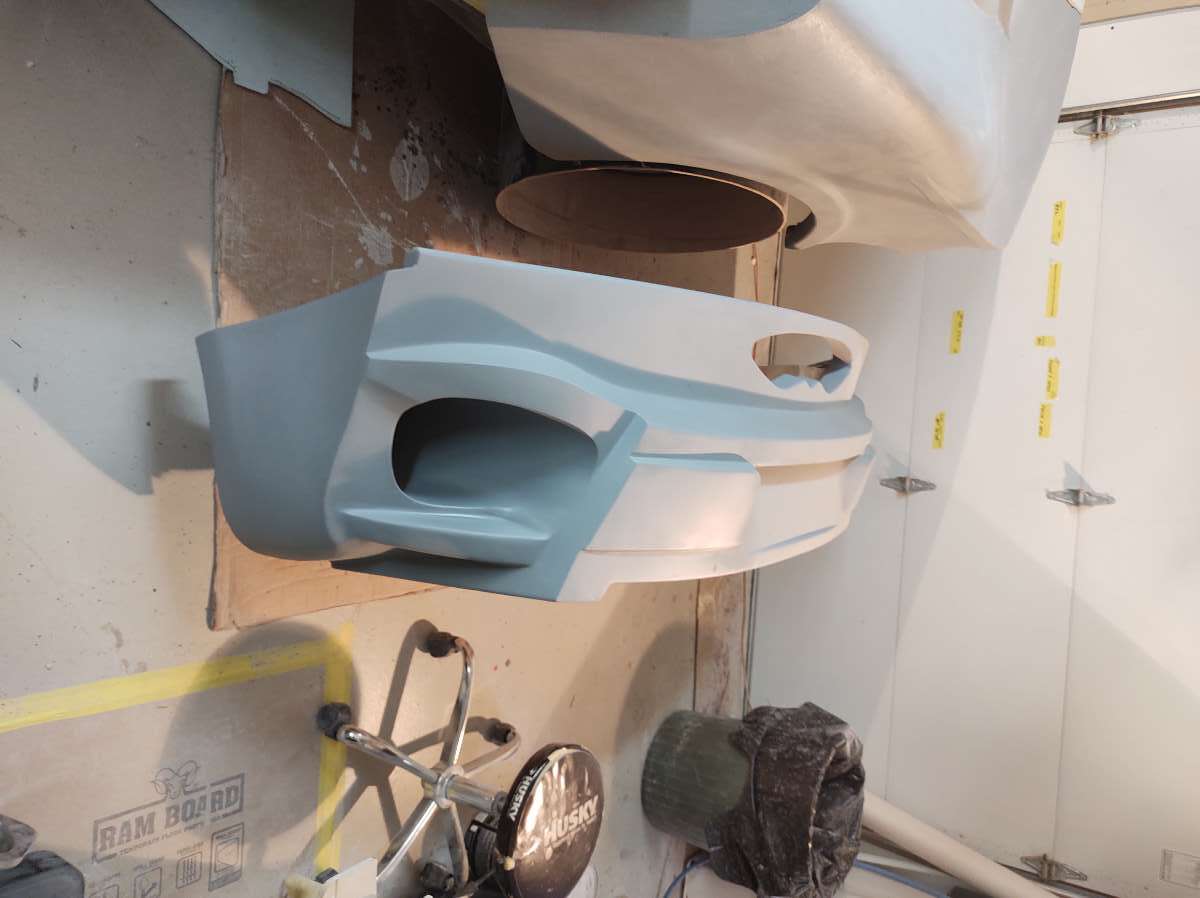
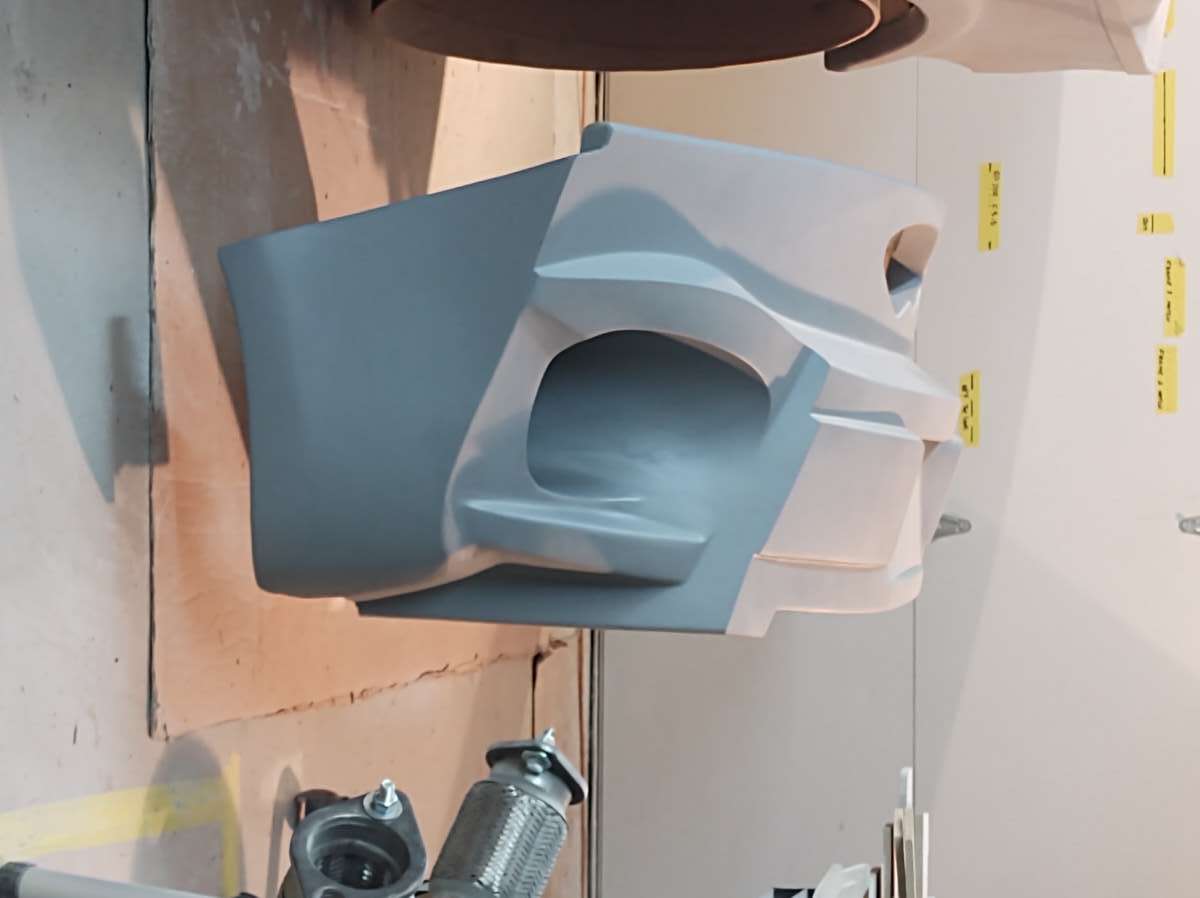
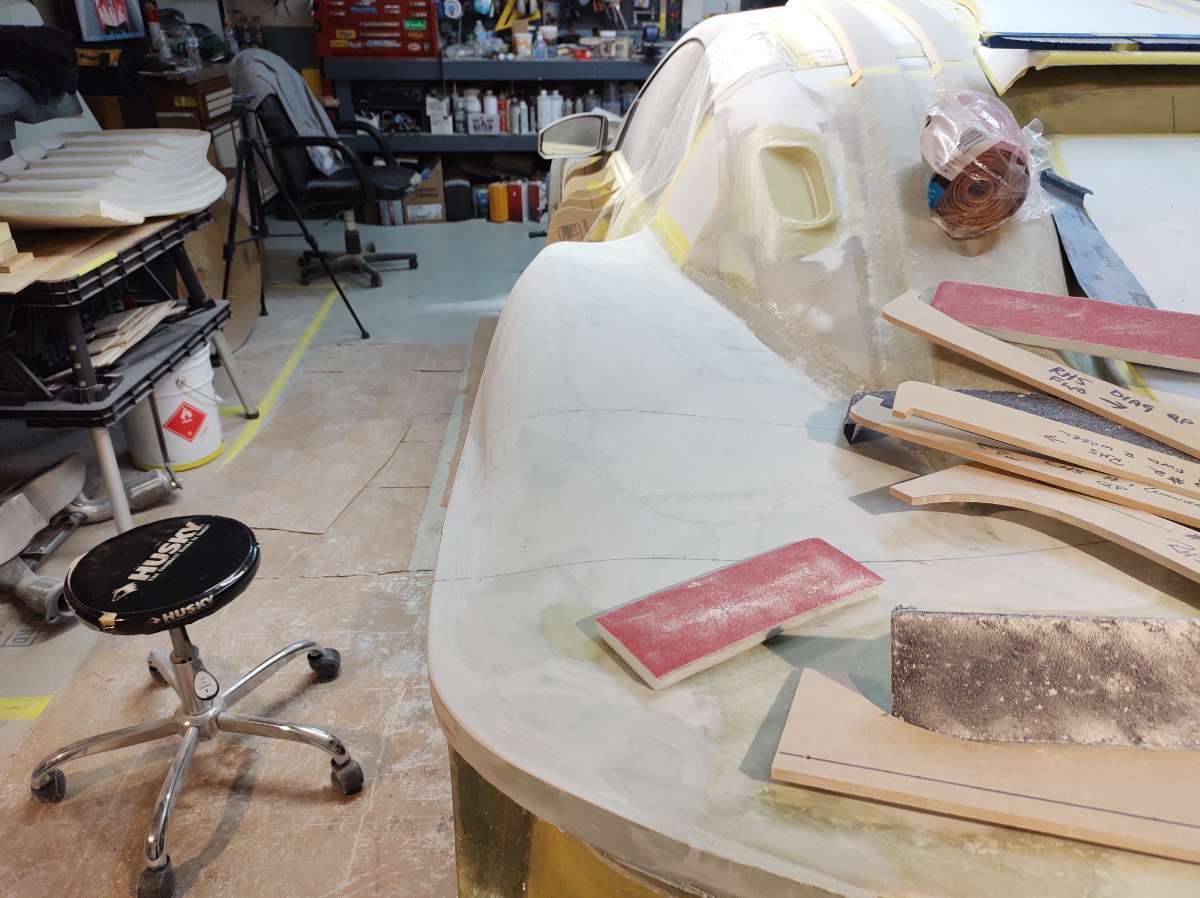
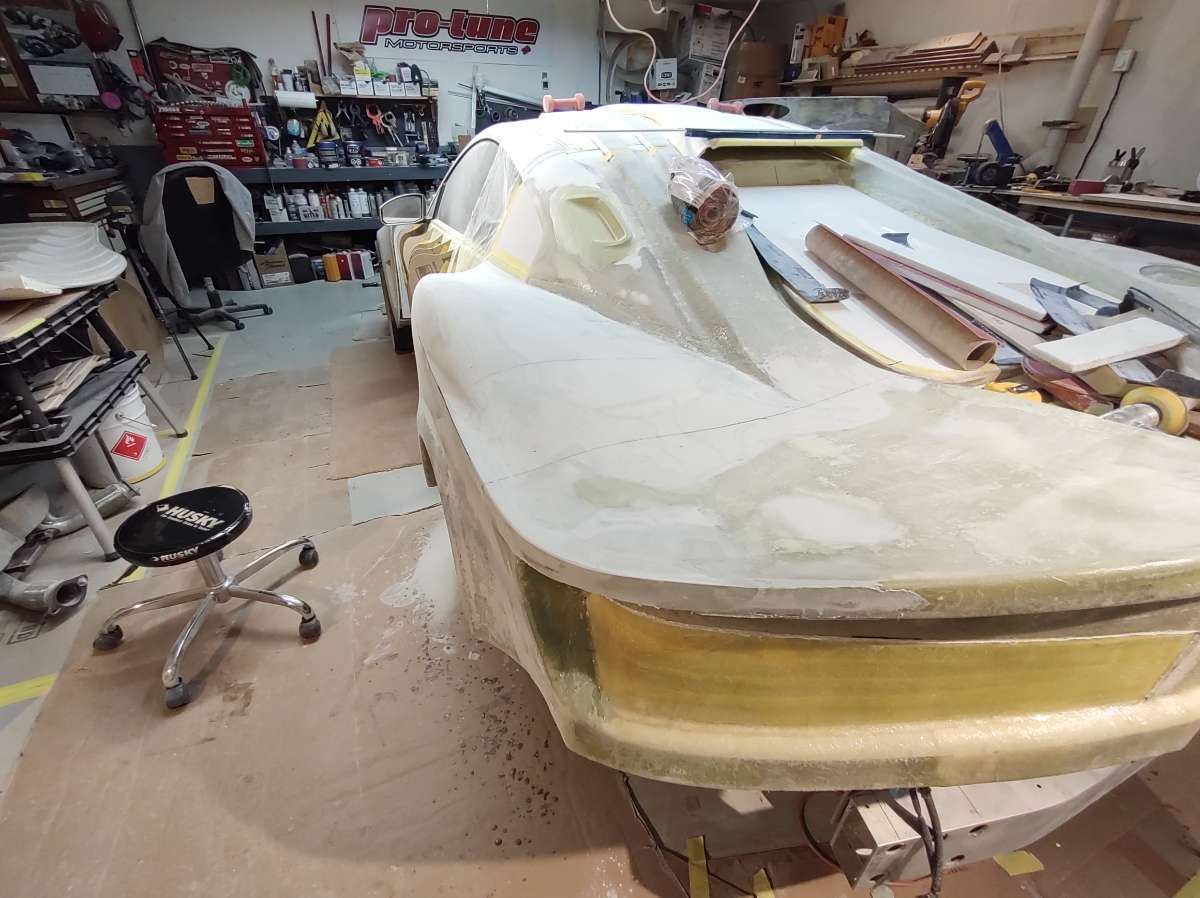
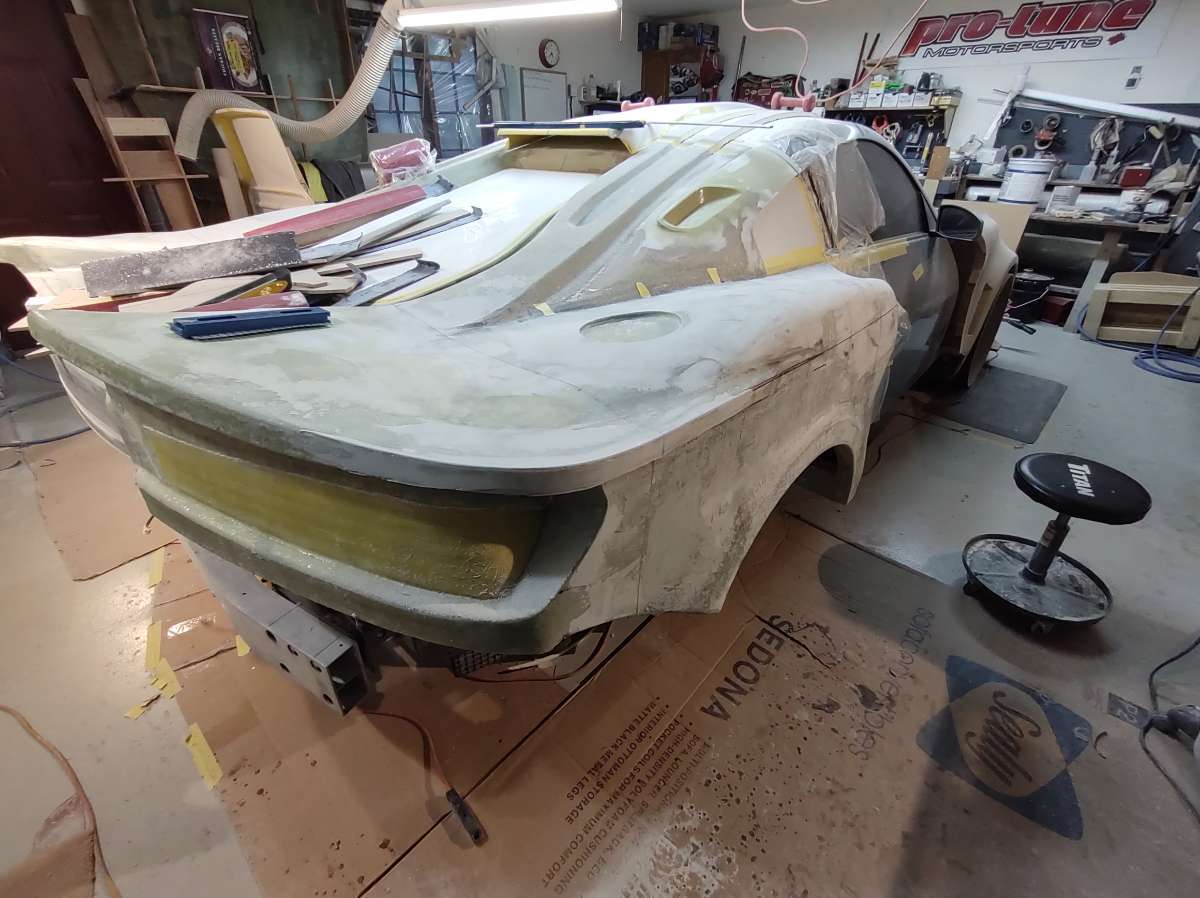
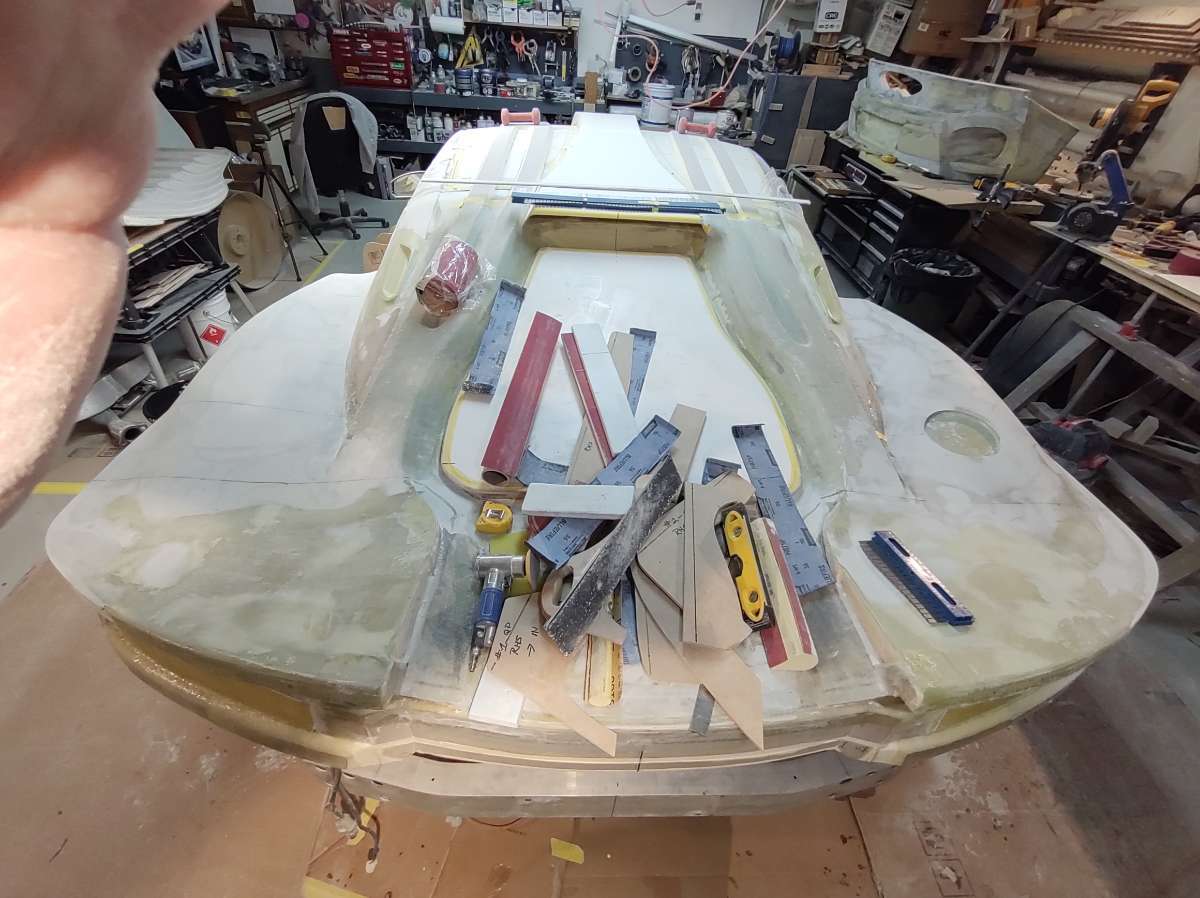
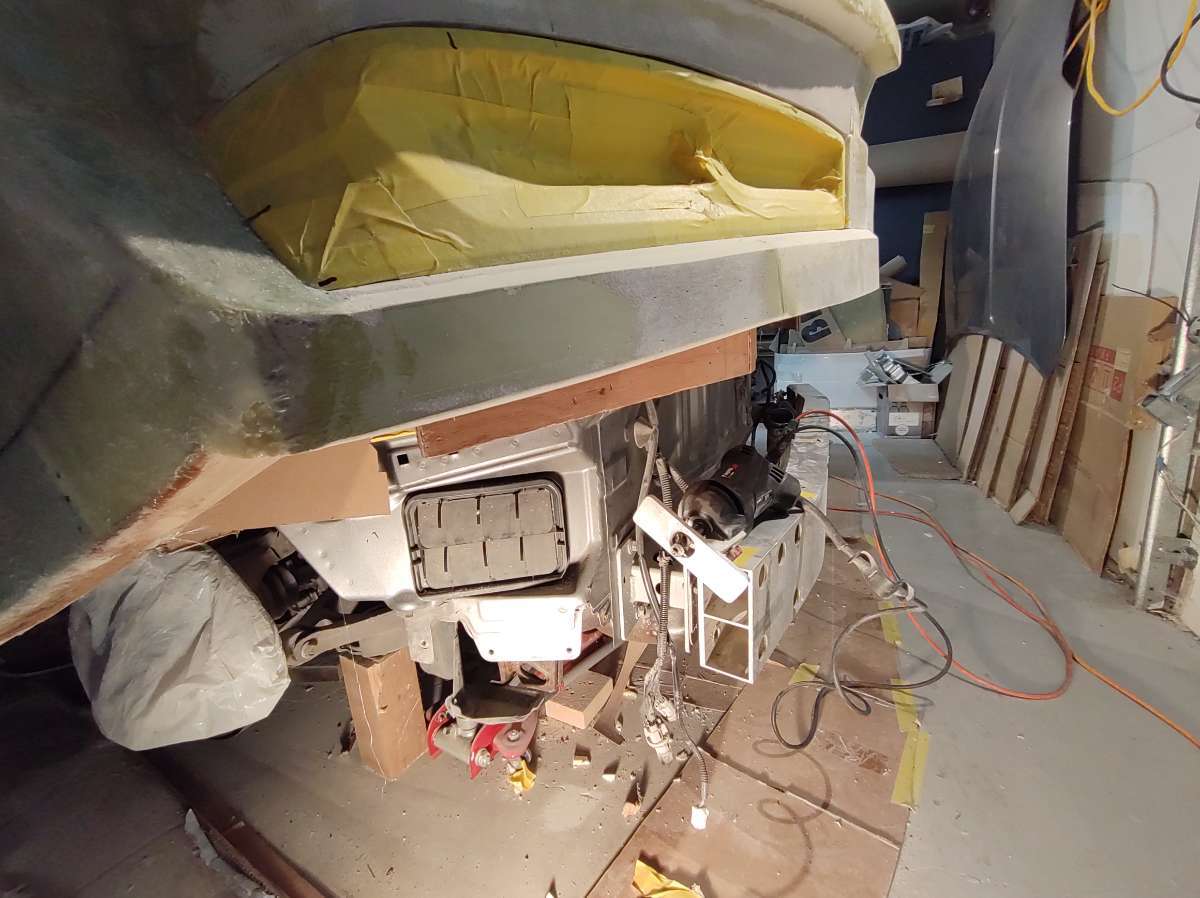
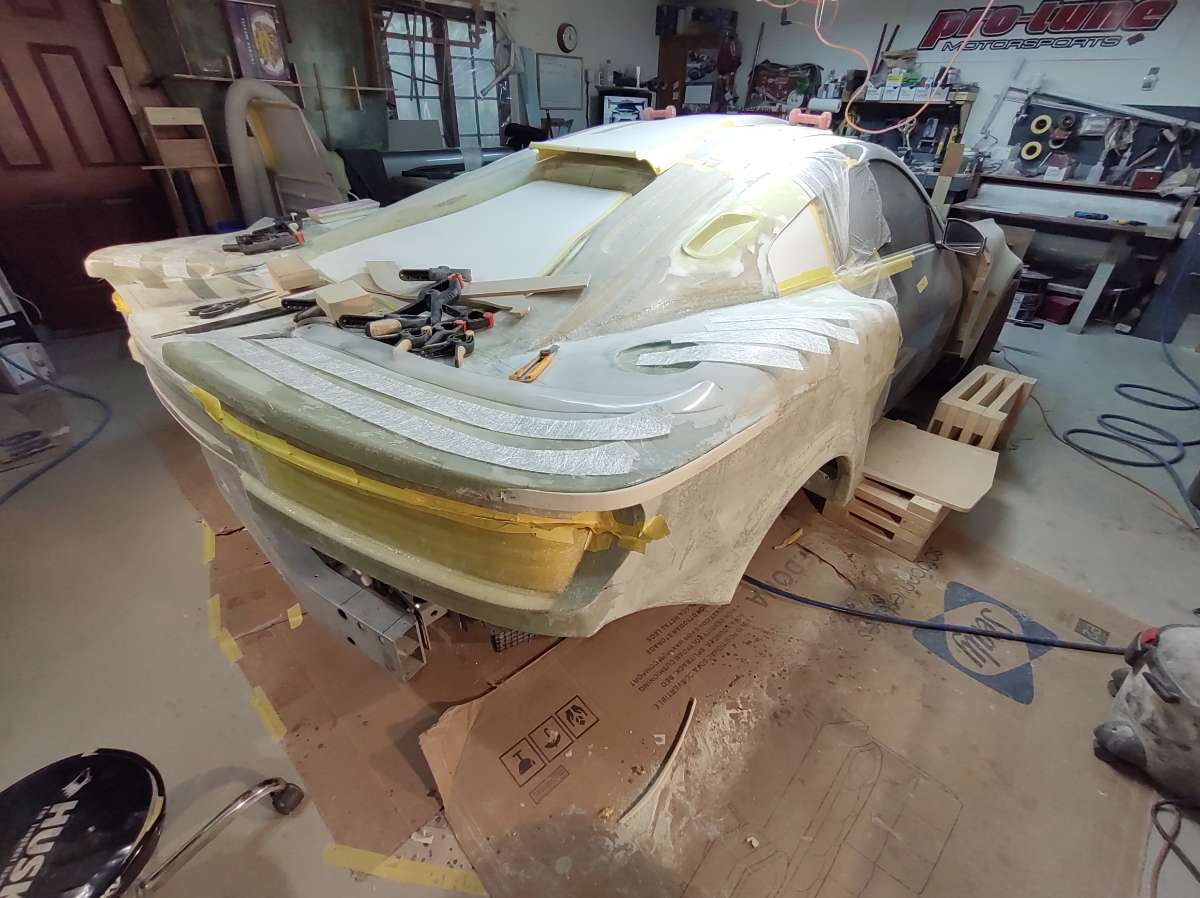
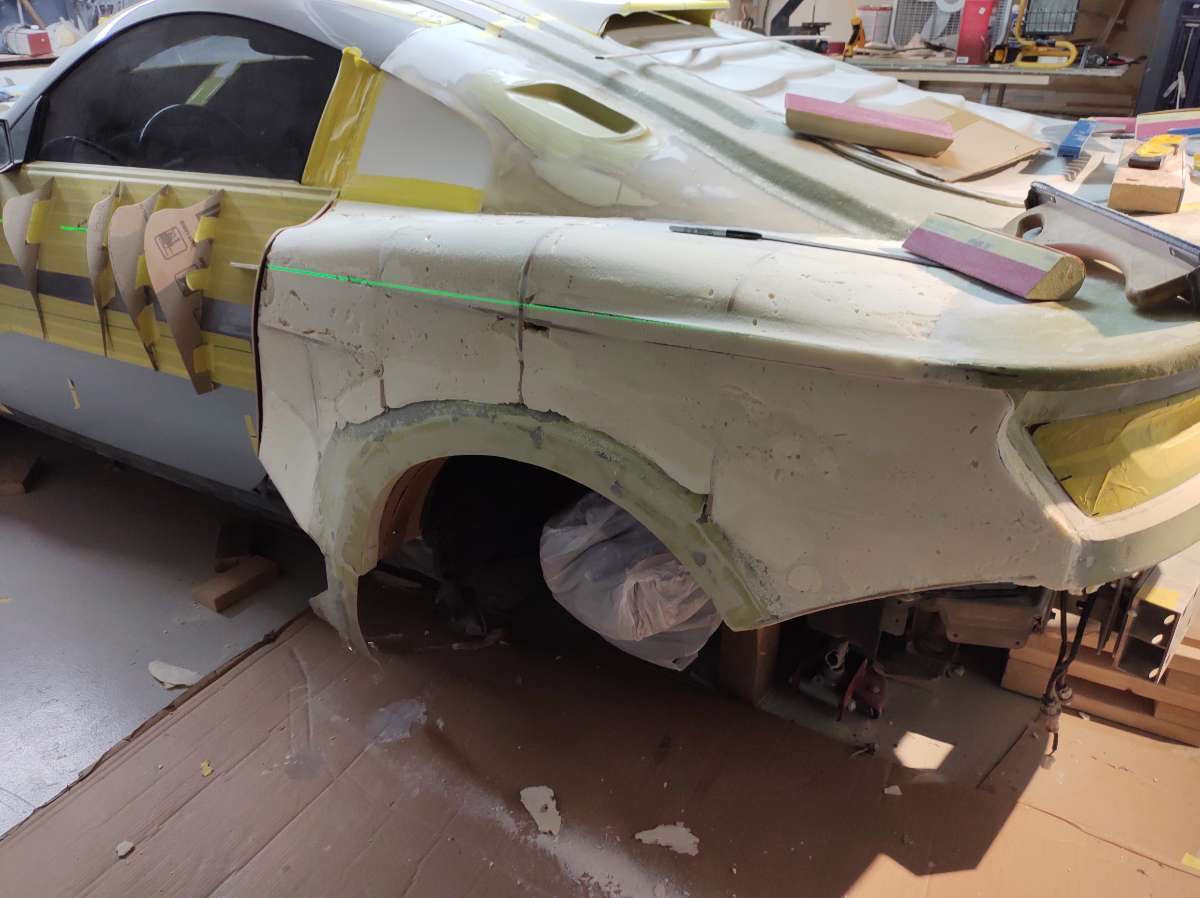
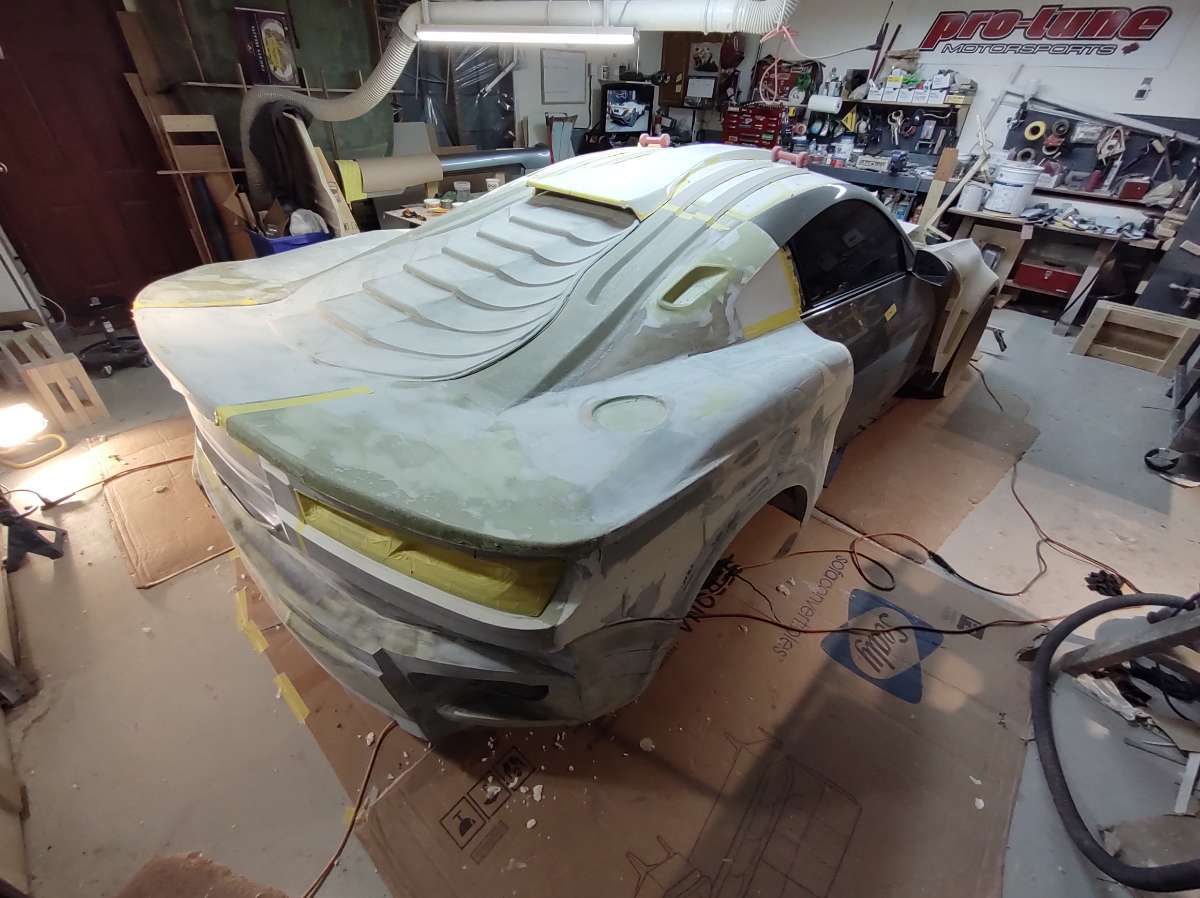
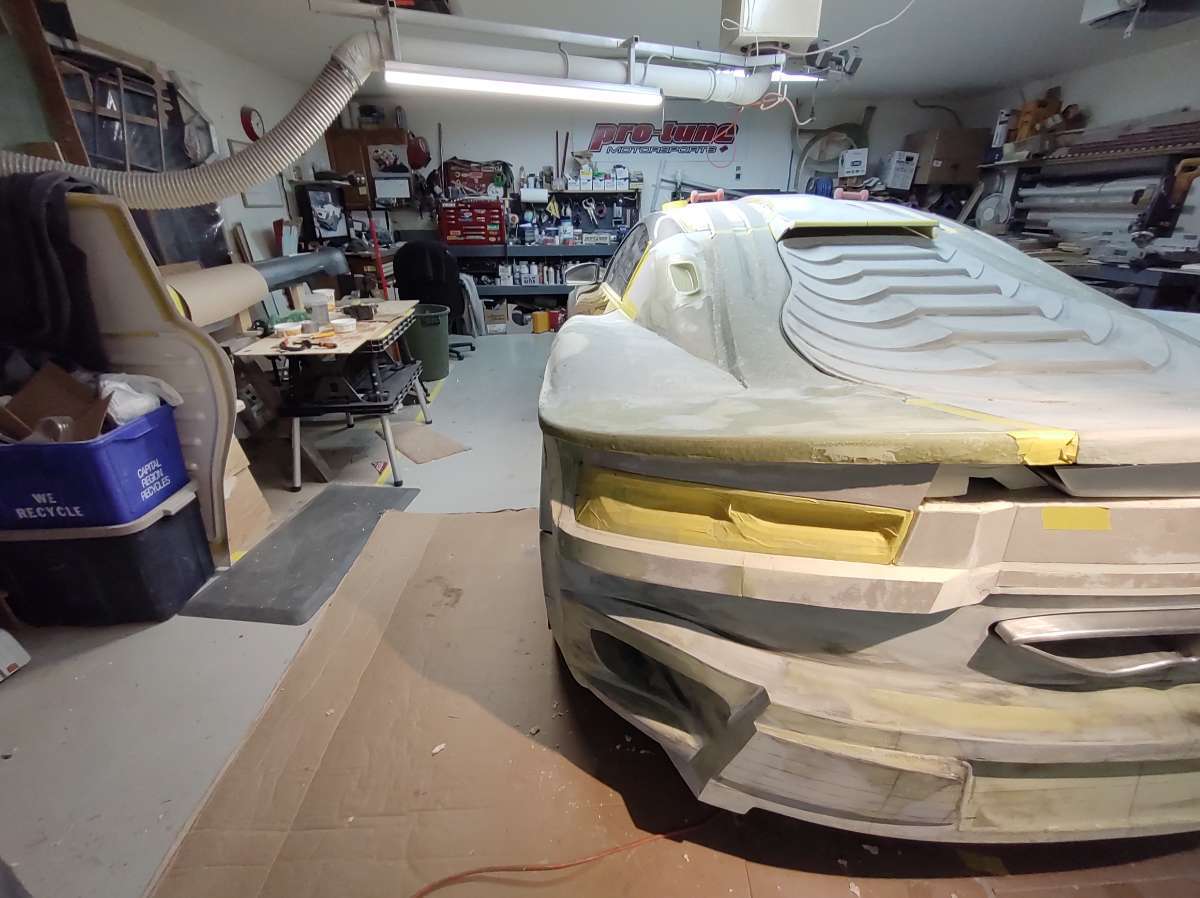
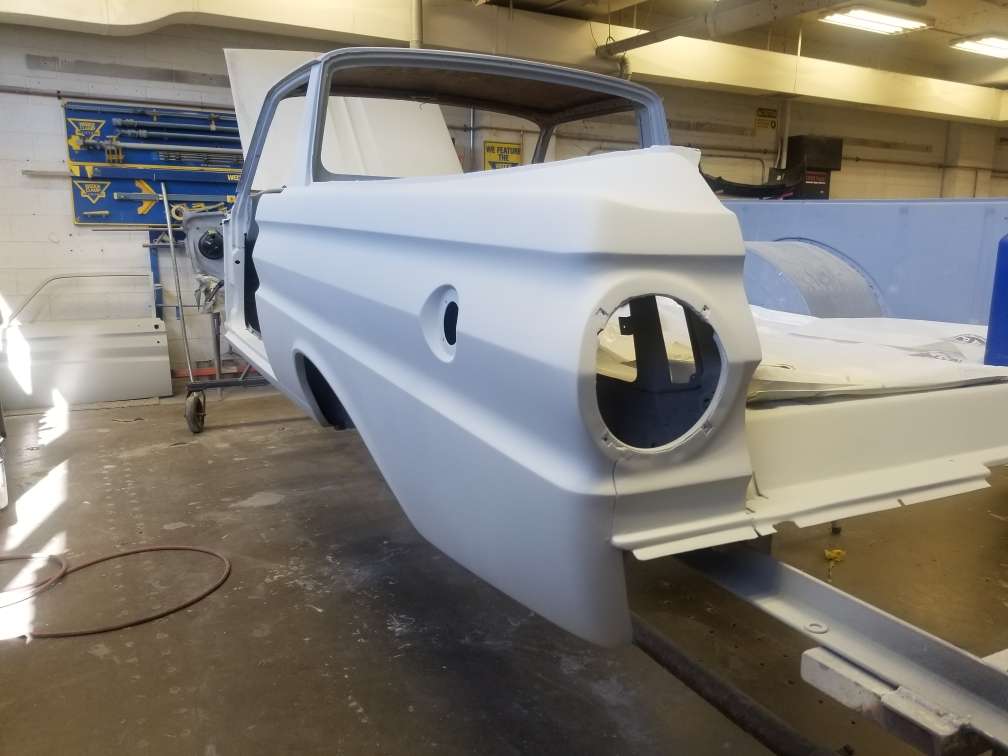
Hi everyone
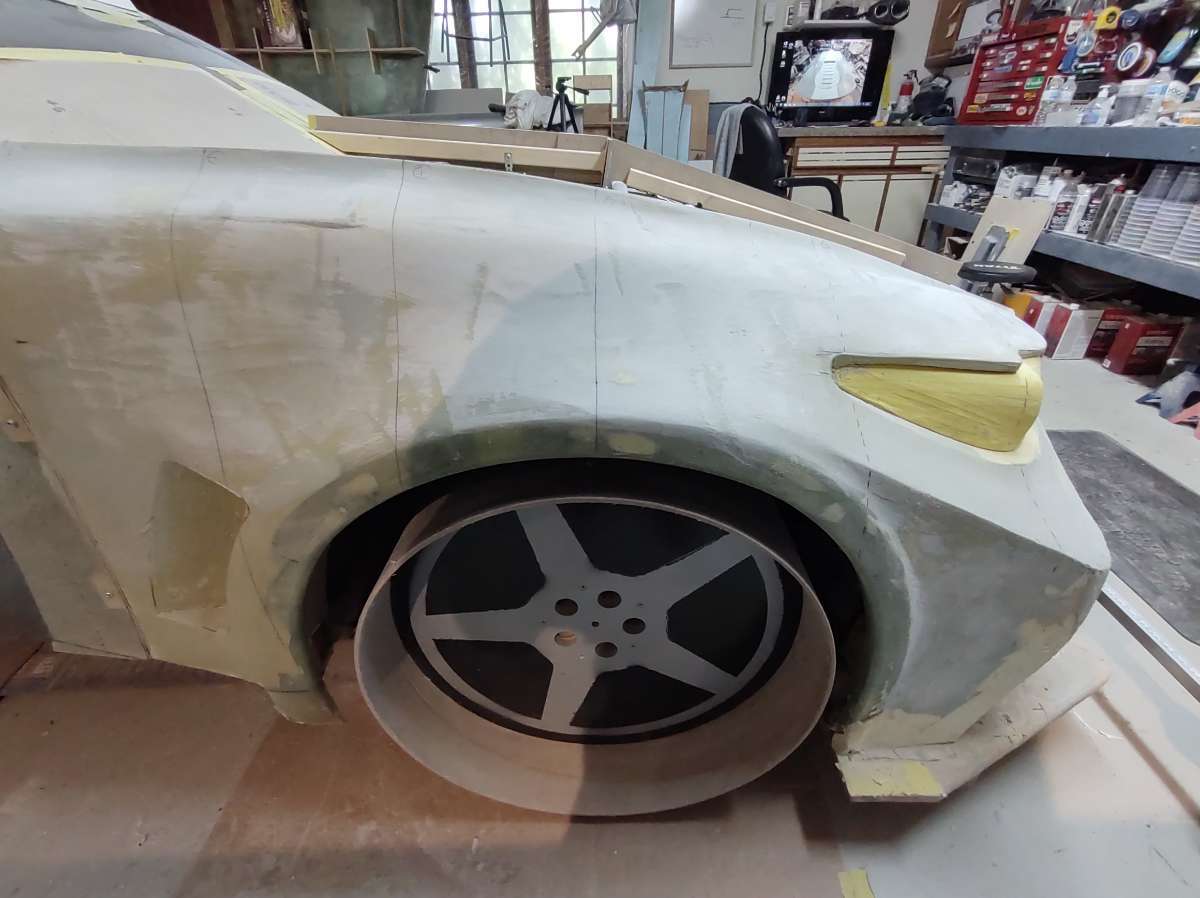
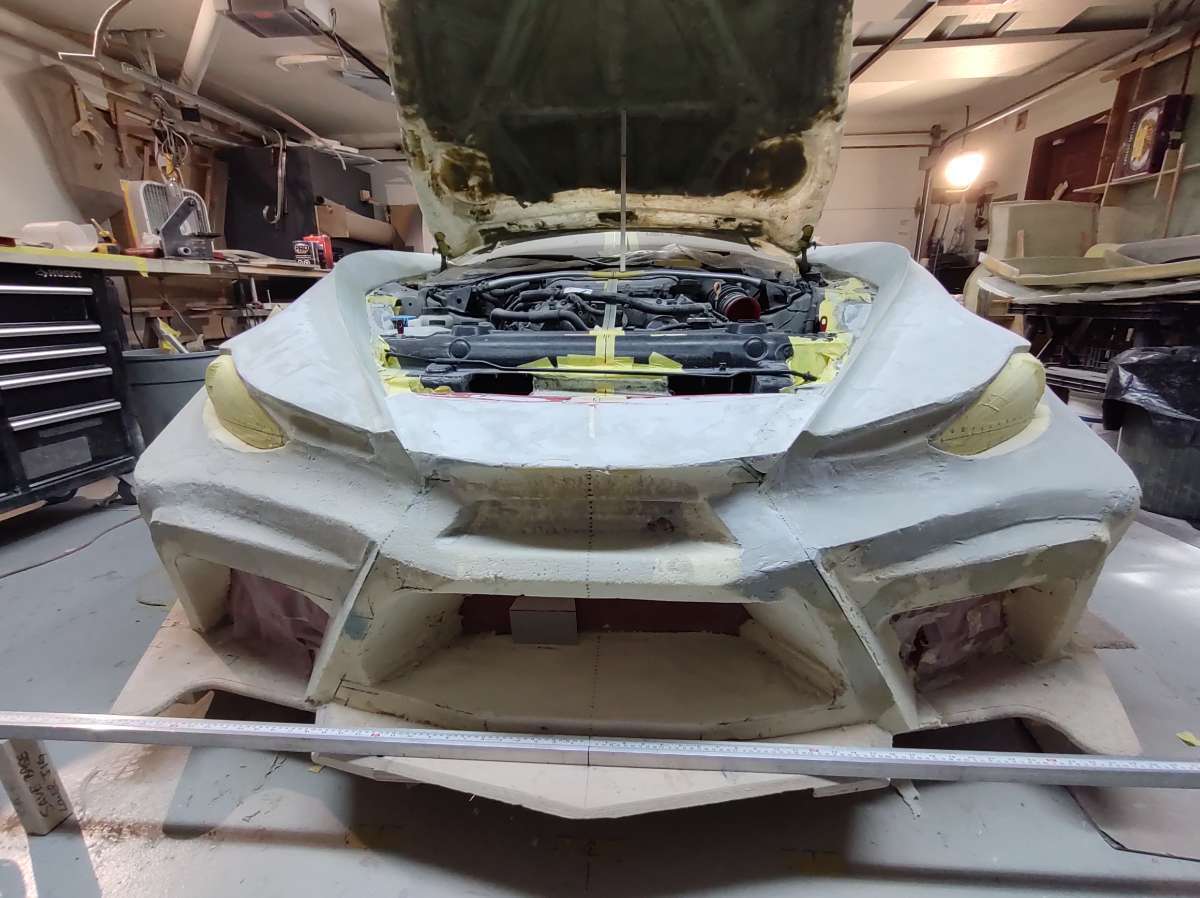
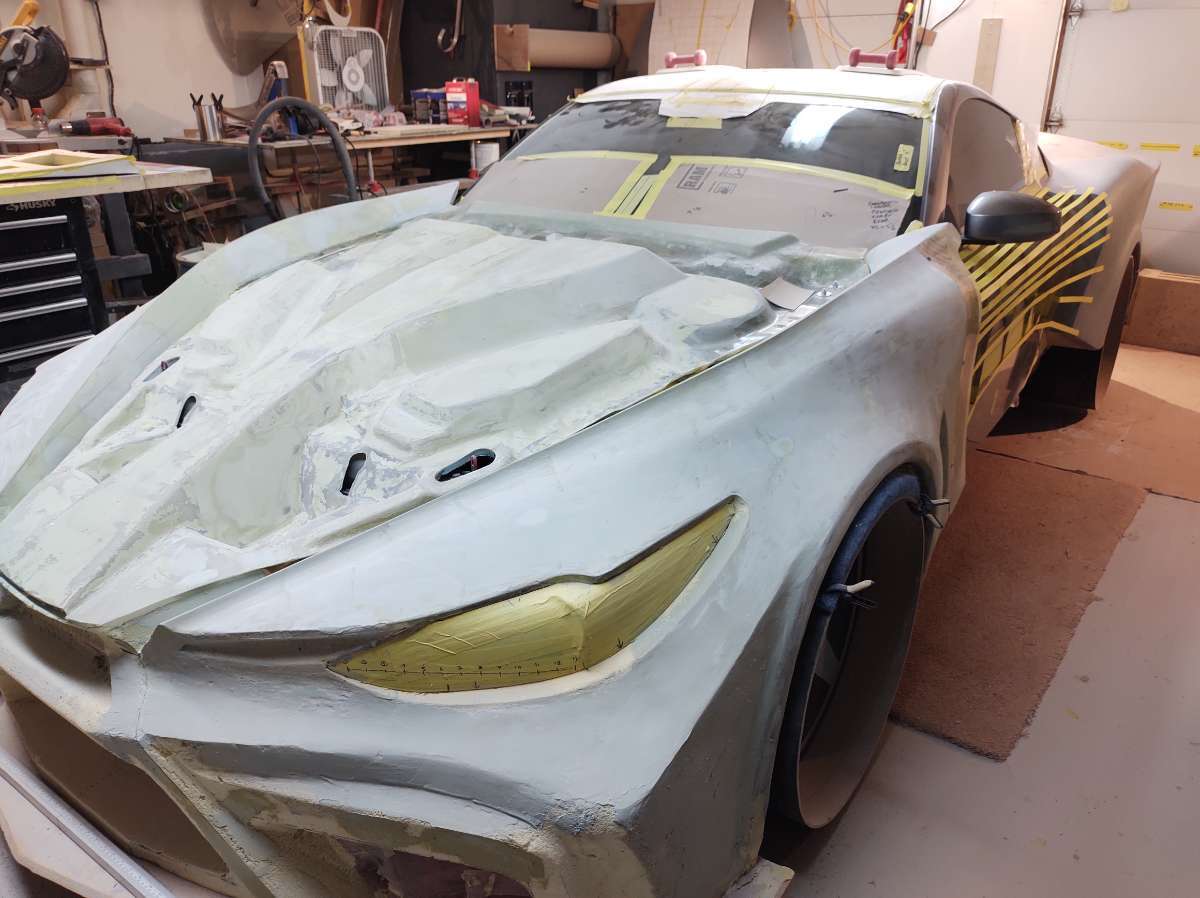
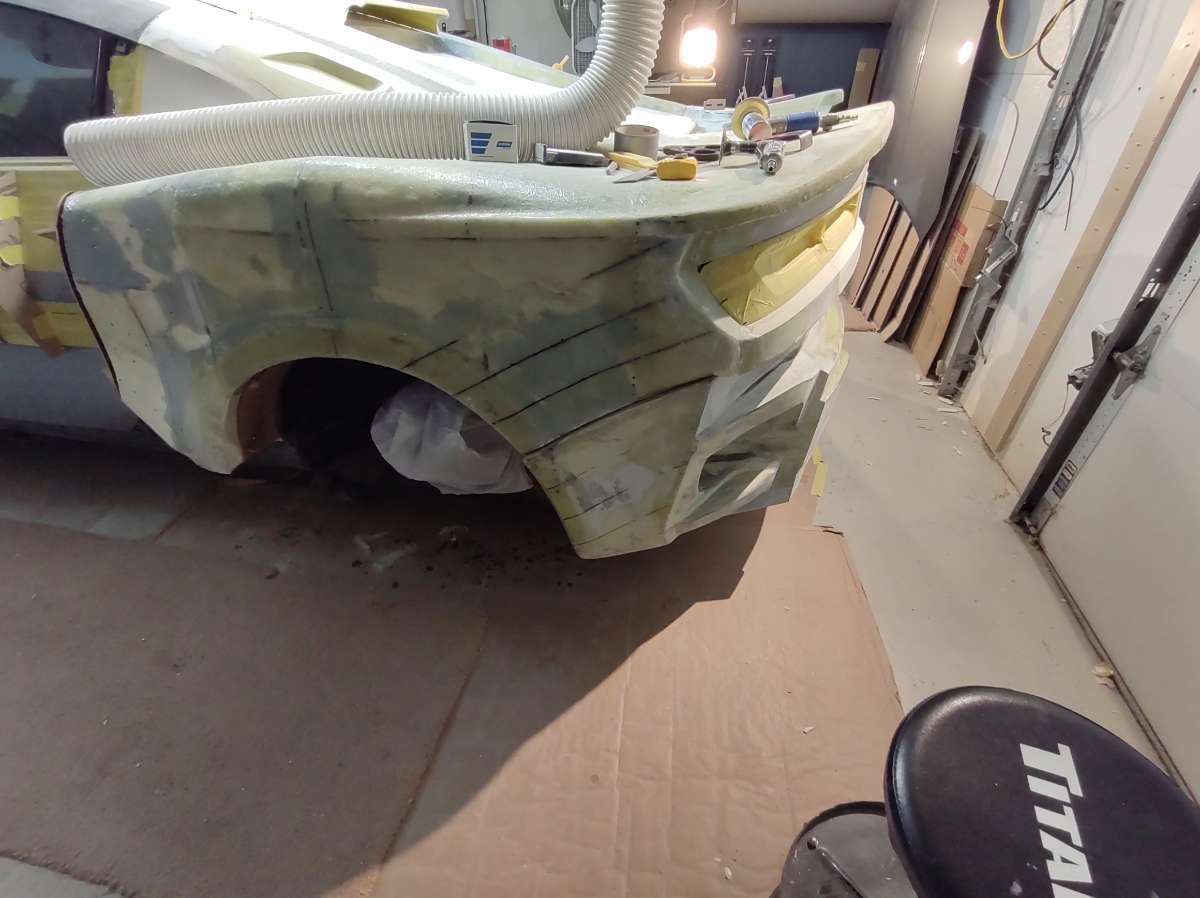
Back with another update , been working on the nose and front fenders

Well it's been a long time since I worked on the nose ,
I remember when I poured the foam in the big cardboard moat , so eager to start carving the foam !!!!
So I carved freehand got it close by eye , tape measure and some bits of paper , well that was stupid .
Should have built some wooden bucks for a guide , it turned out to be not too bad but still , I had gone too far on the passenger side by 1/2 an inch ( 13 mil ) so have been fixing stuff all week and trying to get it the same as possible to the Drivers side .
I was going to make the fenders separate and a center nose piece , but time in the shop in the forest is coming to an end and the plans have changed a bit .
I am going to make the front mold all one piece , then make one part from the mold and then cut it and make them separate later .
It will make it easier to ship and if you get hit by some bad driver you can just swap out the fender instead of the whole front .
So to do that I have to fill in the funky grooves in the center piece with two part foam.
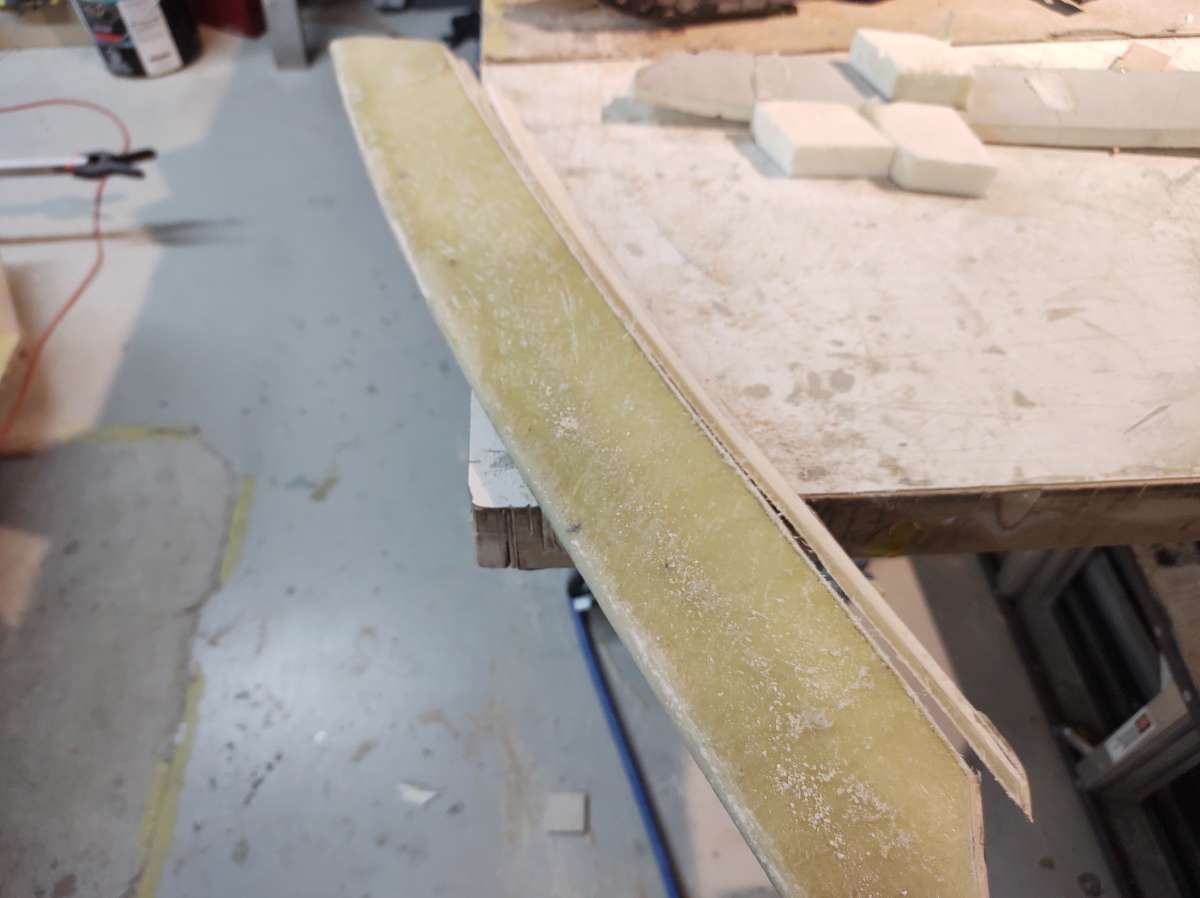
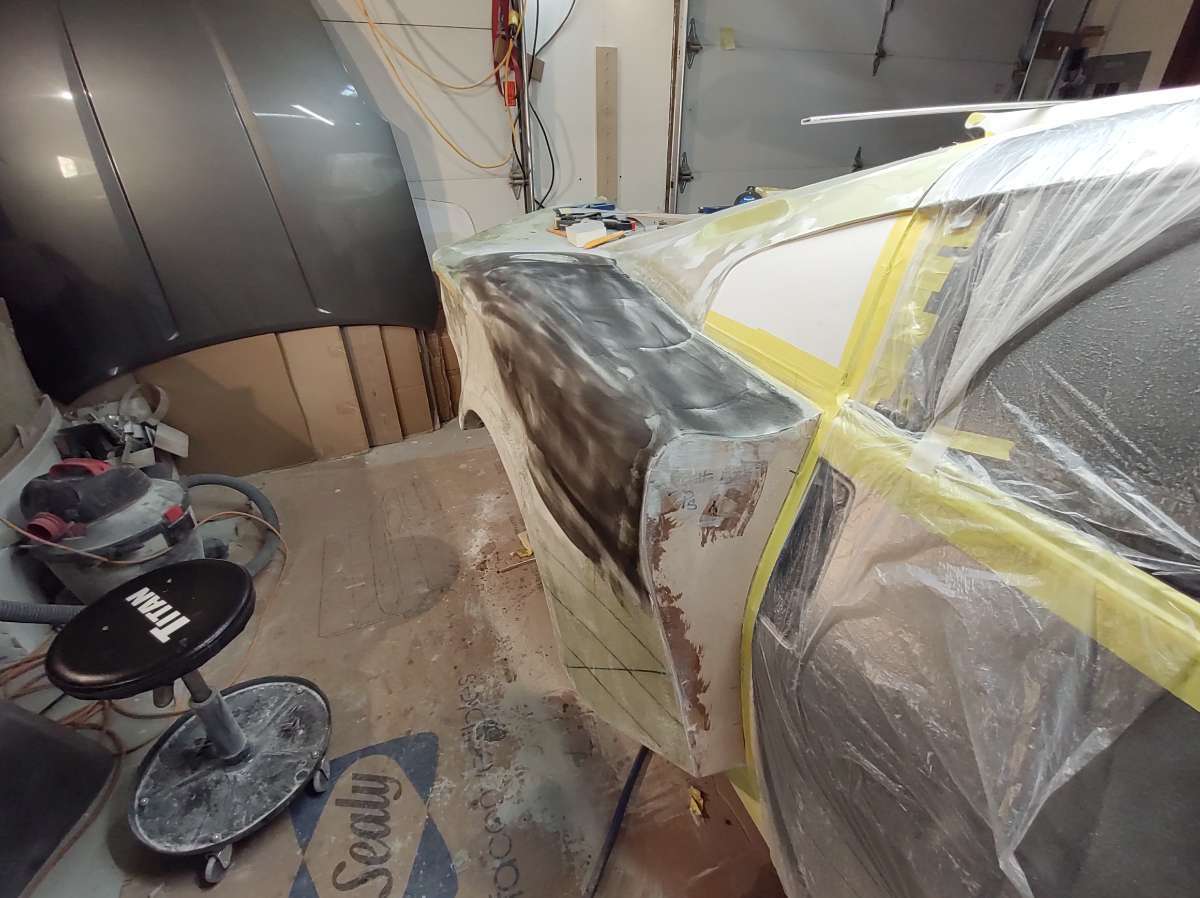
Next is to fix the aero bar foam in the center bottom , will take way too long to fix that mess on the car , so I cut it out and made new parts from the foam sheets .

it's pretty nasty , and I am too old to lay on the floor and do bodywork .
So this is it cut out

yup nasty ....
getting the angle
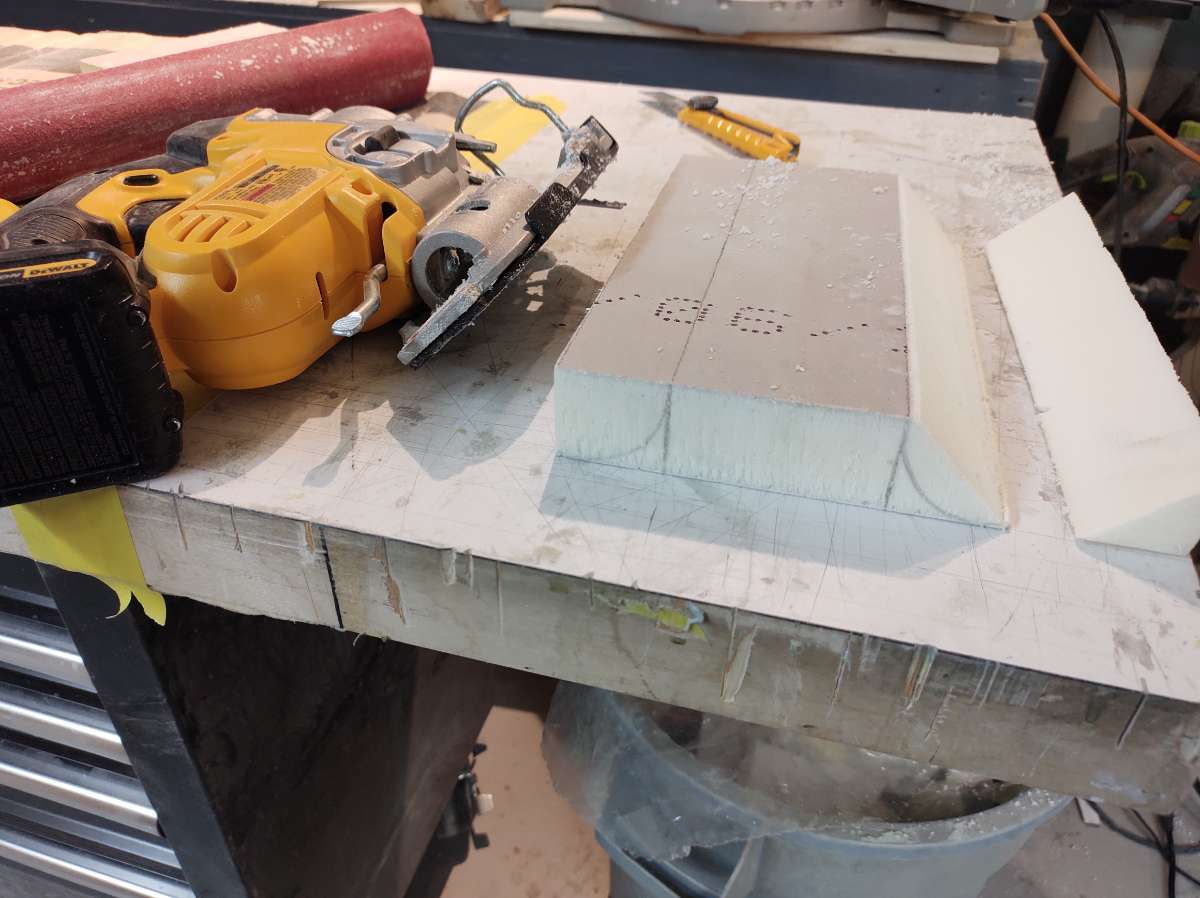
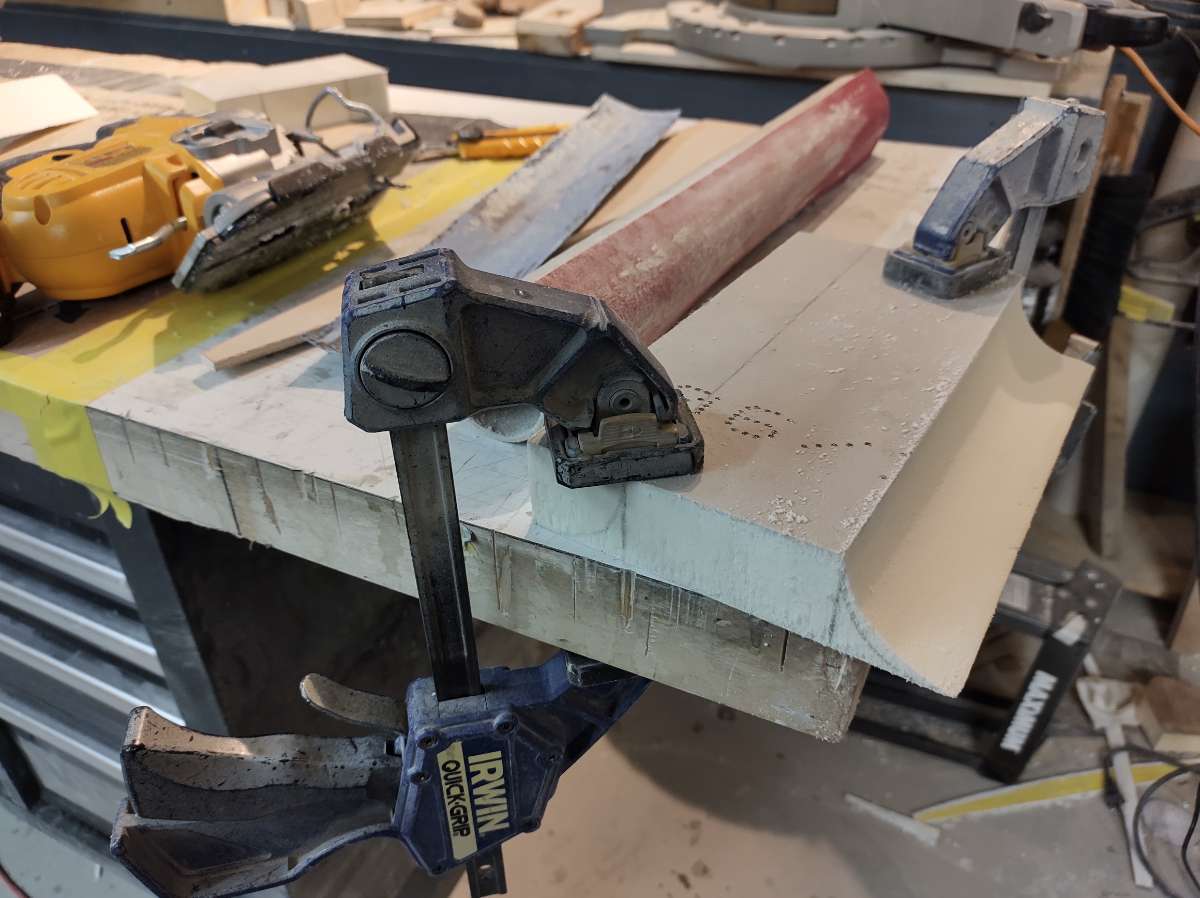
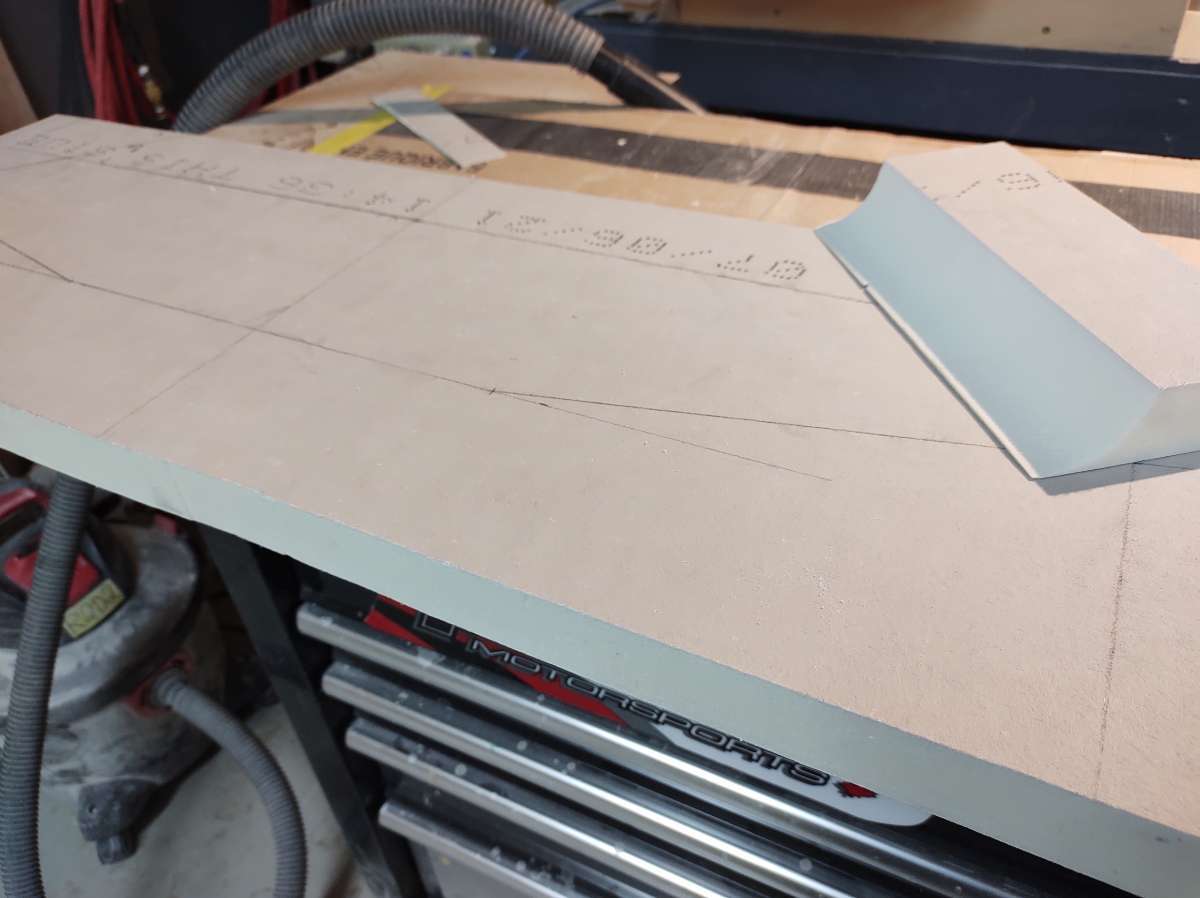
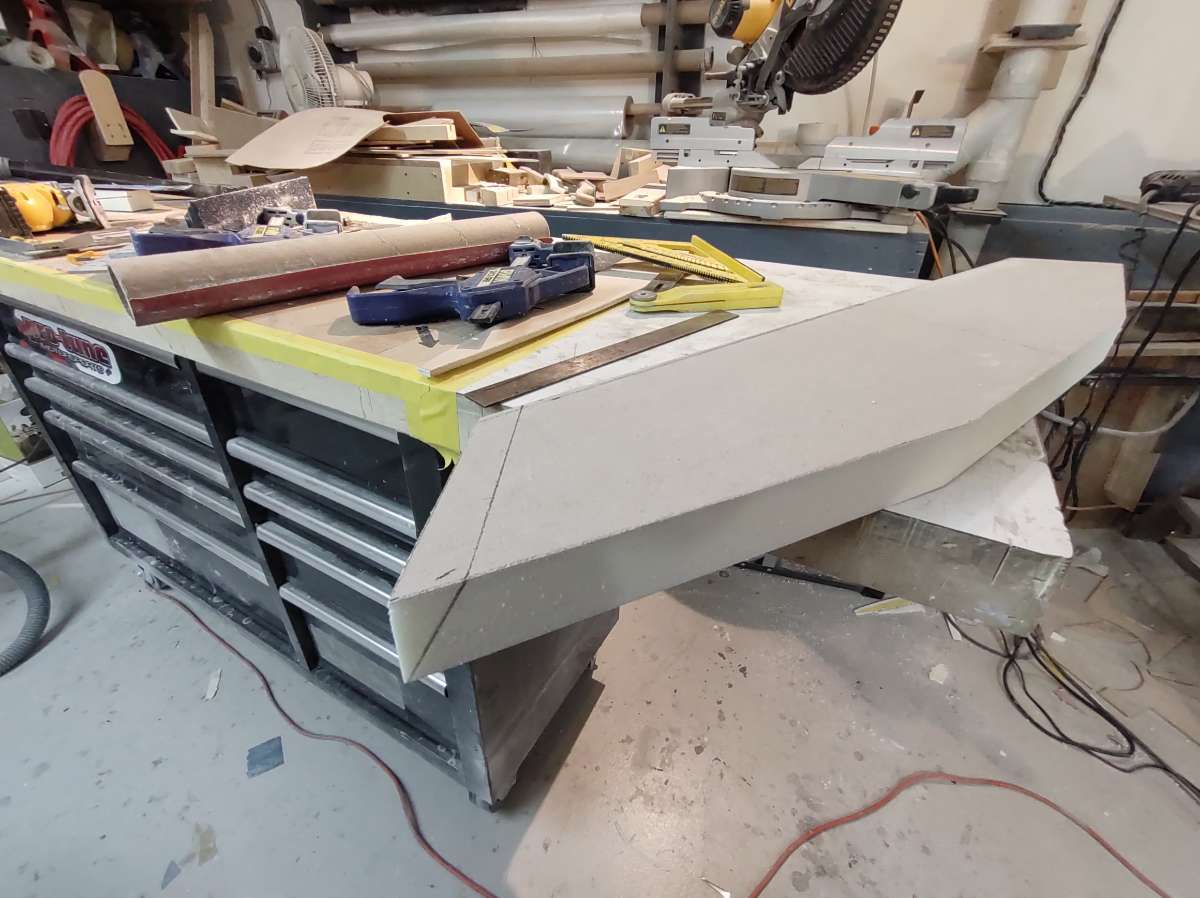
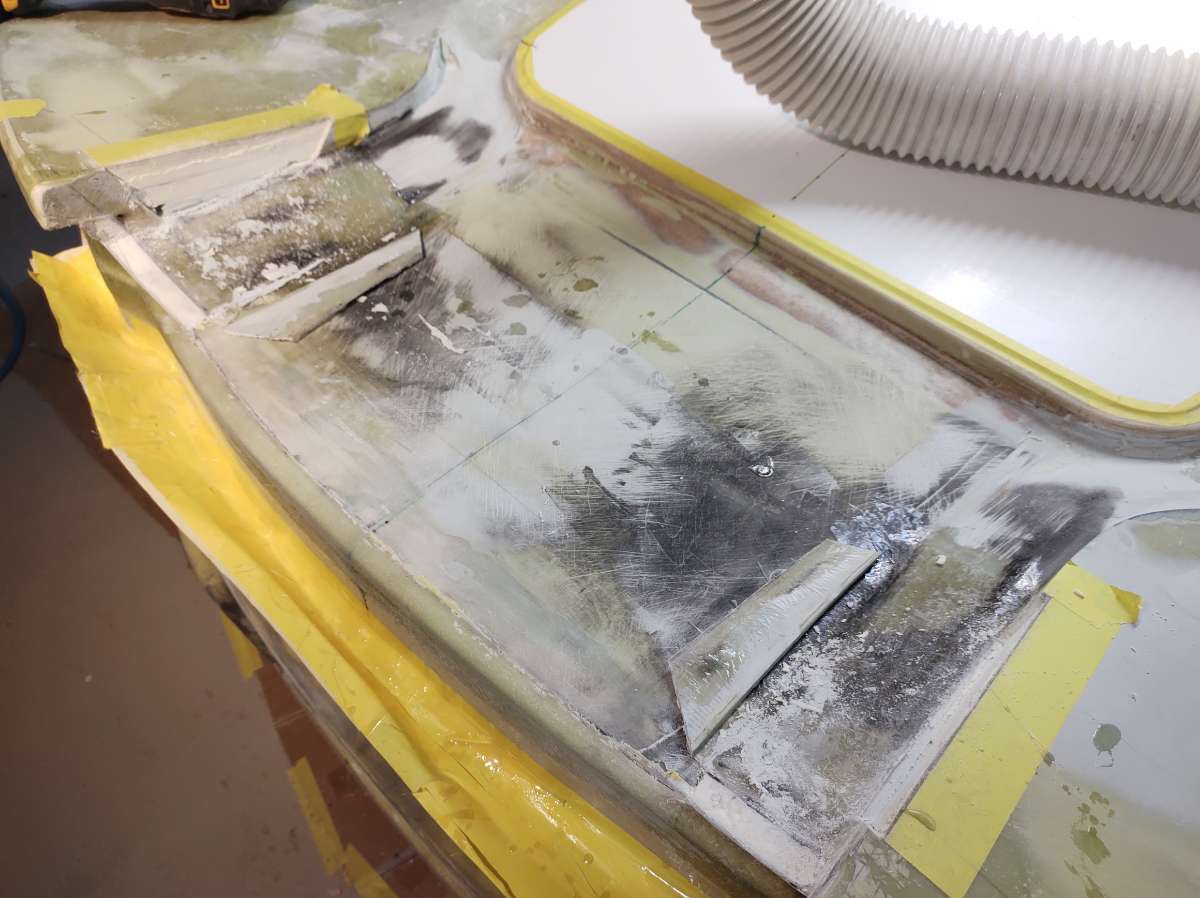
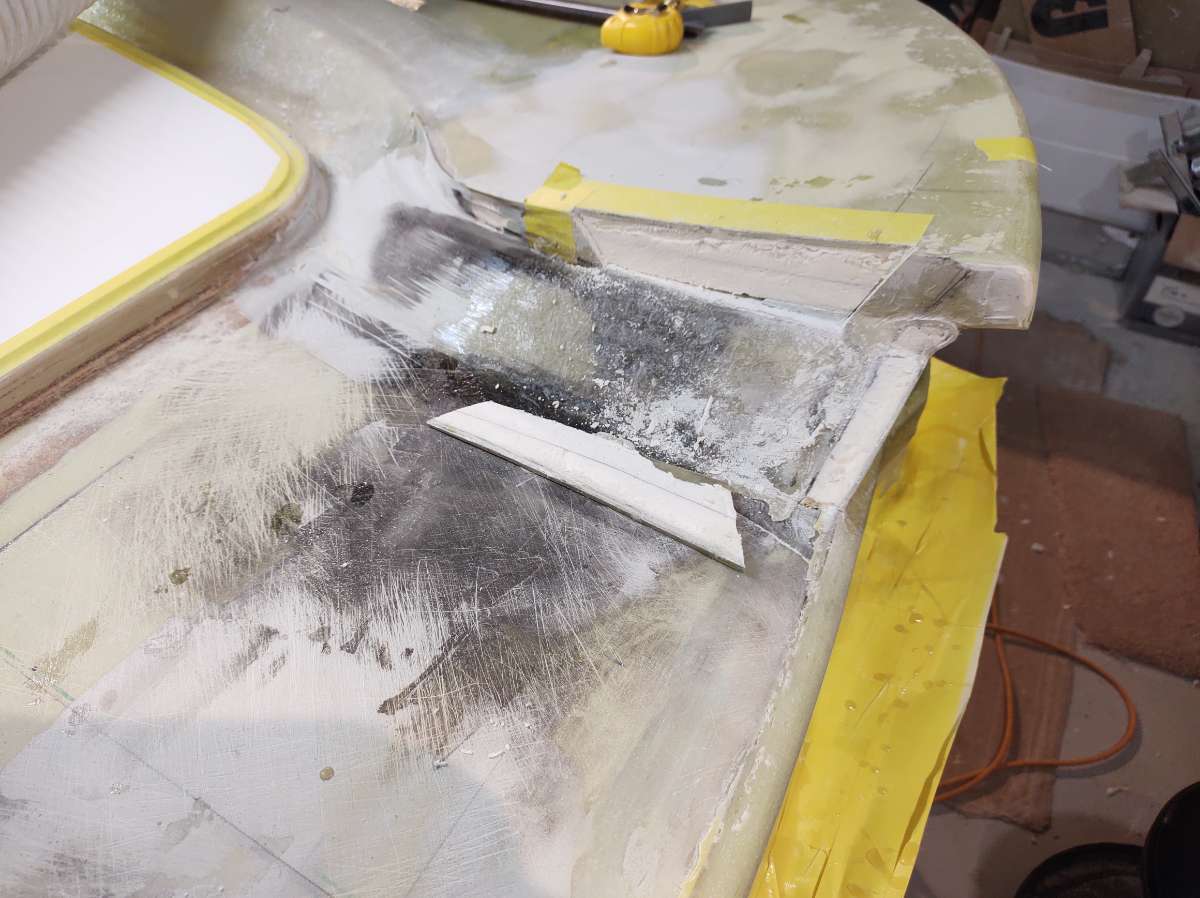
So this will be way better ,I can router the soft edge for the fiberglass and glue the parts in and glass them with less bodywork .
I made a piece for the back with some 1/4 inch foam and then a 3/8 backing to keep it stiff for the glass,
Using old wood paneling for the pattern.
Here I cut the back edge off the bottom part to allow the back piece room to get glued on to the base .
More to come , need to take a small break ( glass of wine or some tequila )
Came home a bit early to start servicing the JapCad ( G35X it's my winter car hasn't run since the end of feb )
My sister is coming for a visit from Toronto soon and would like to use it .
Stay tuned for more tonight or in the morning .
Cheers
-
2
-
-
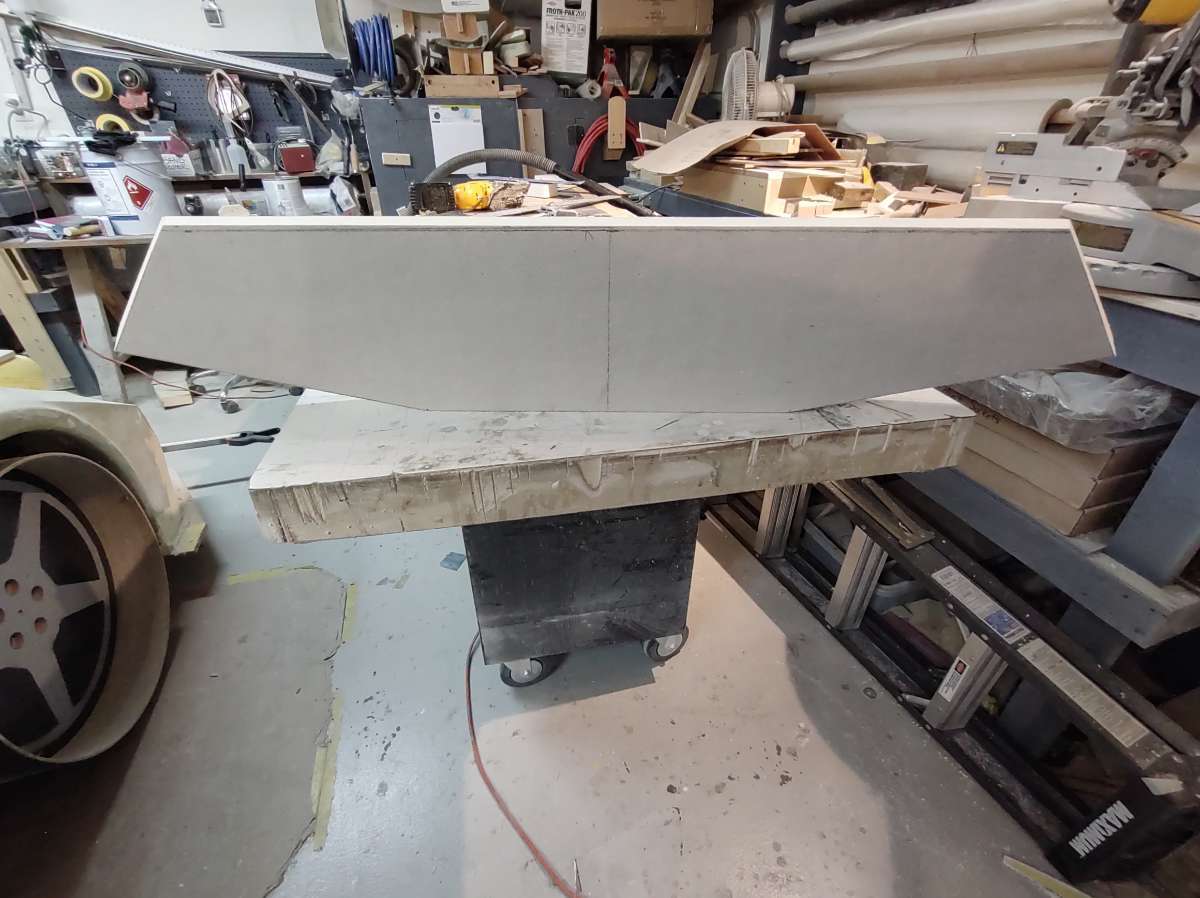
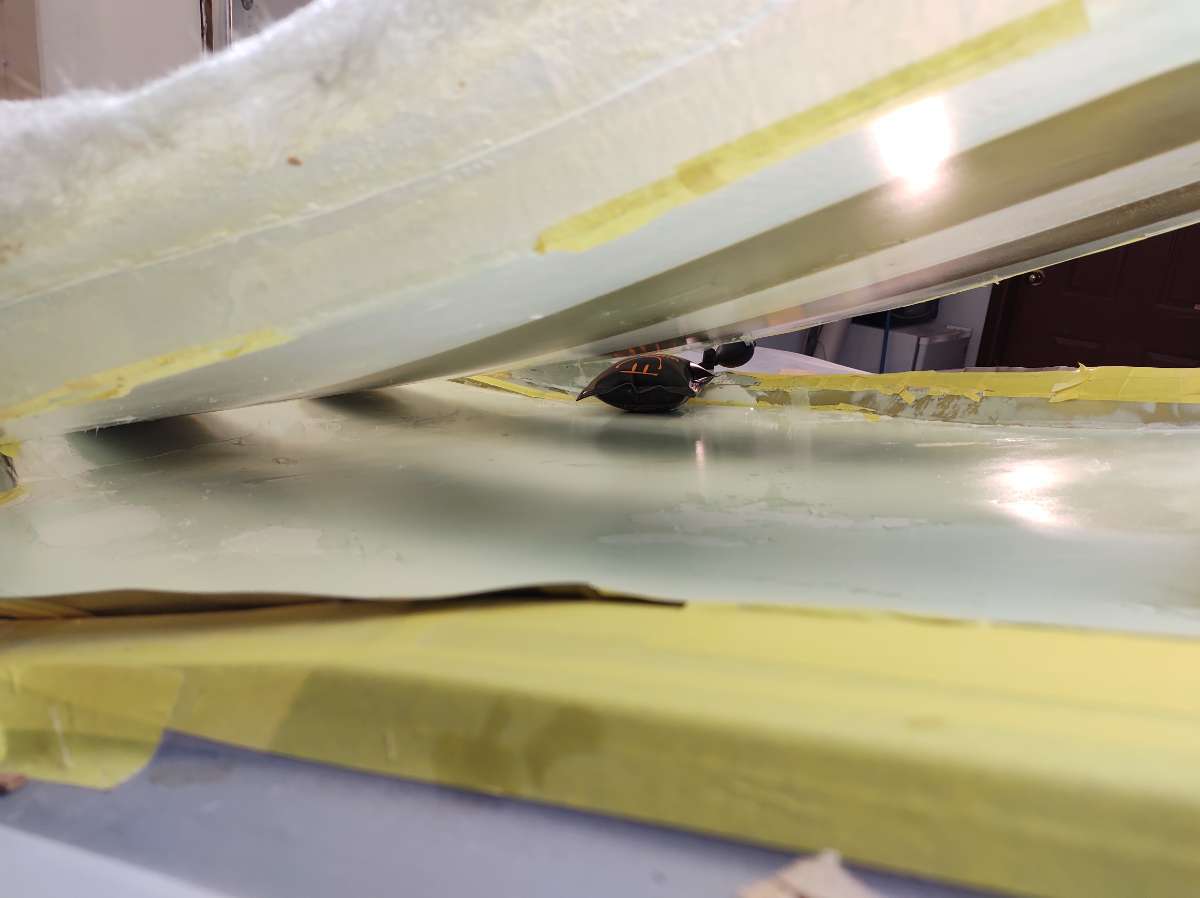
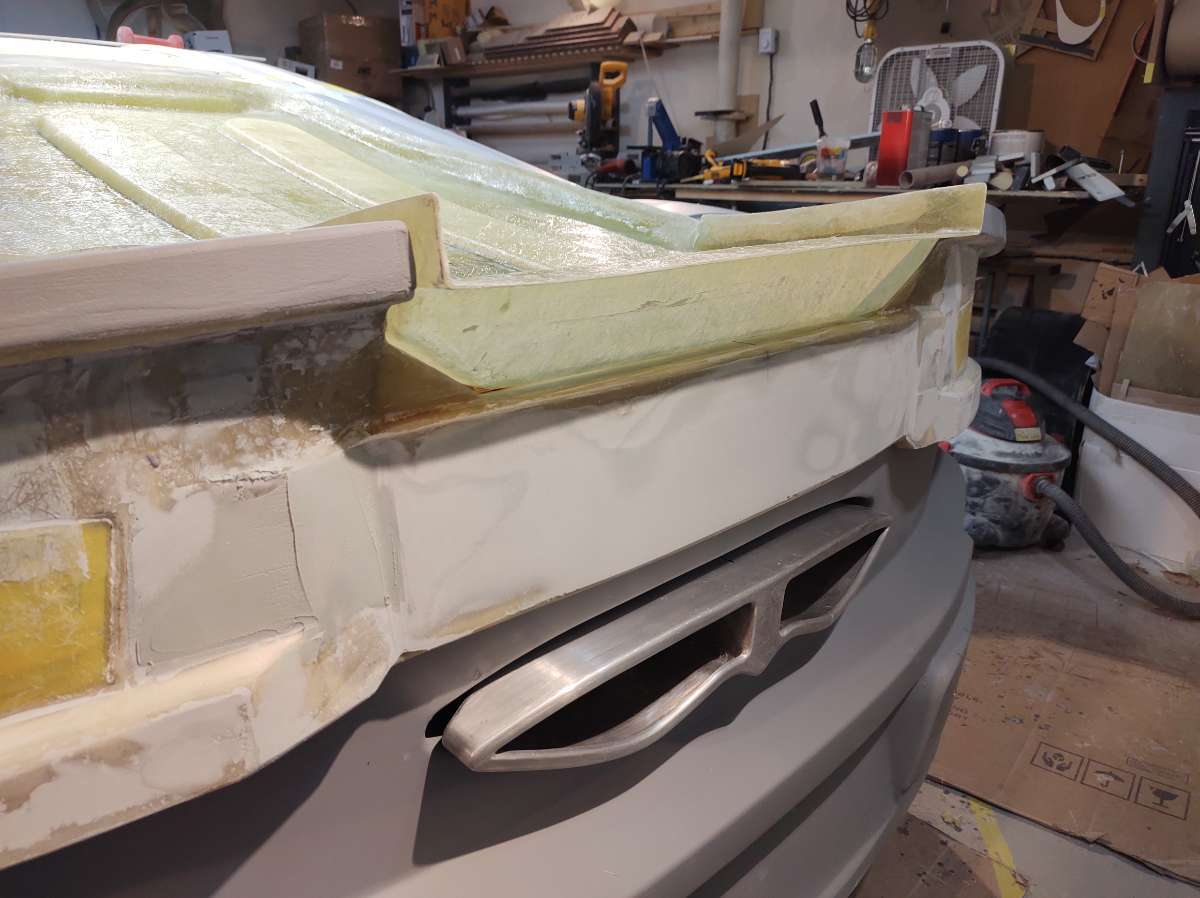
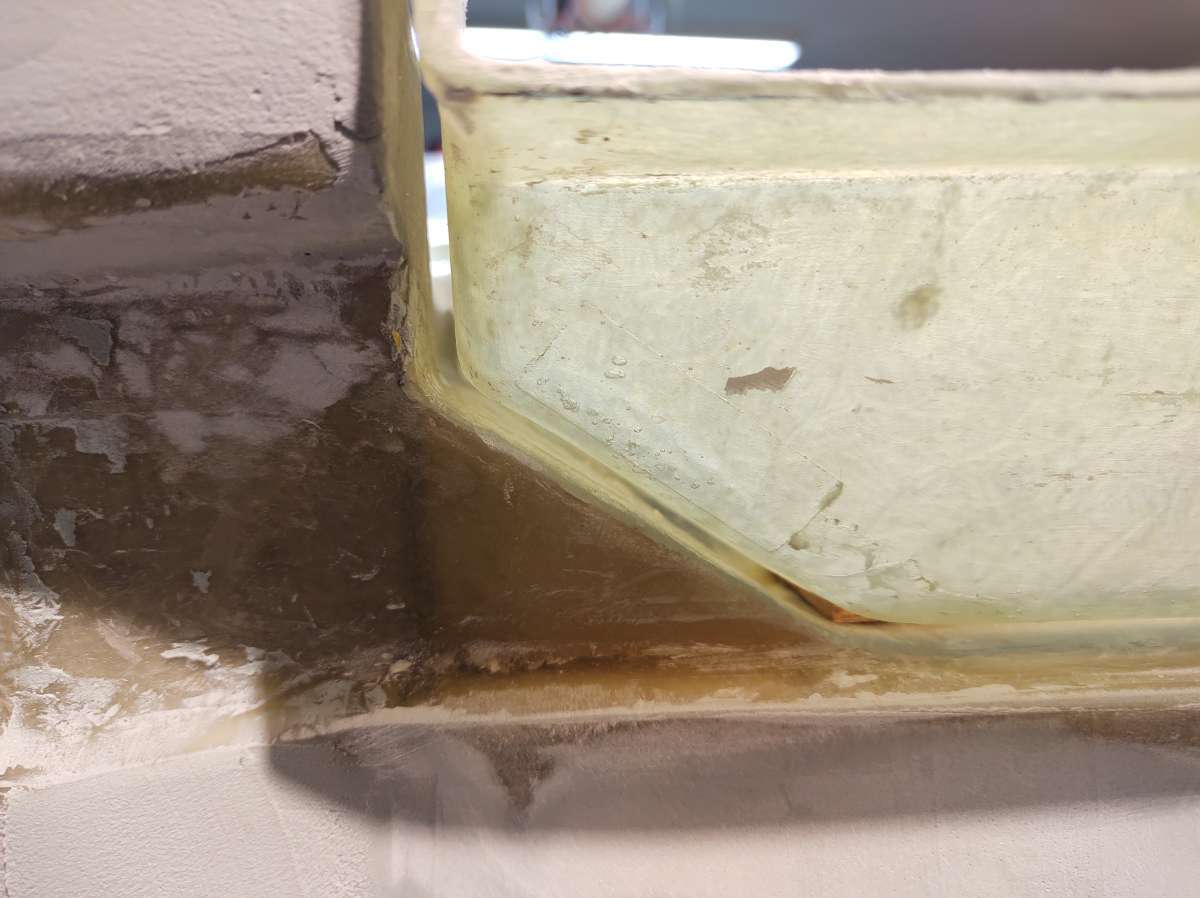
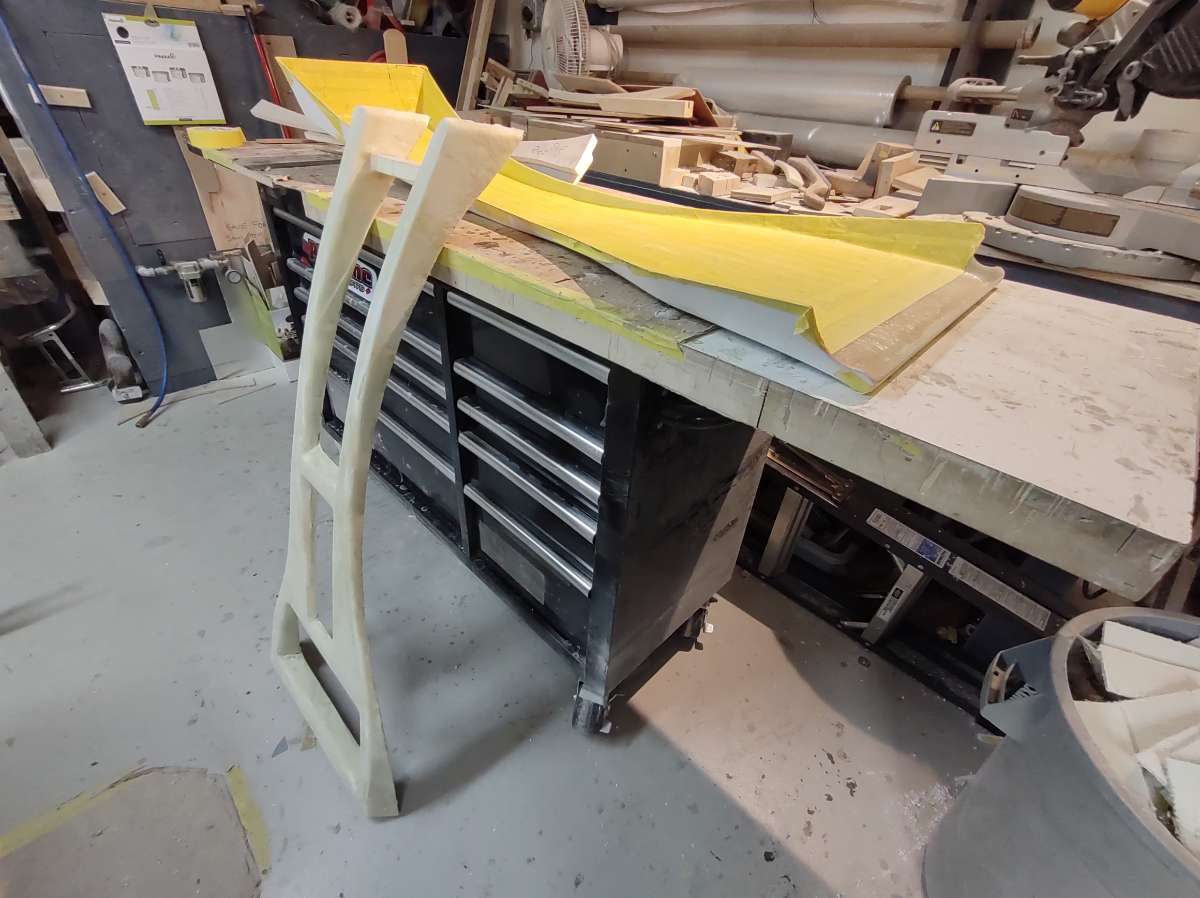
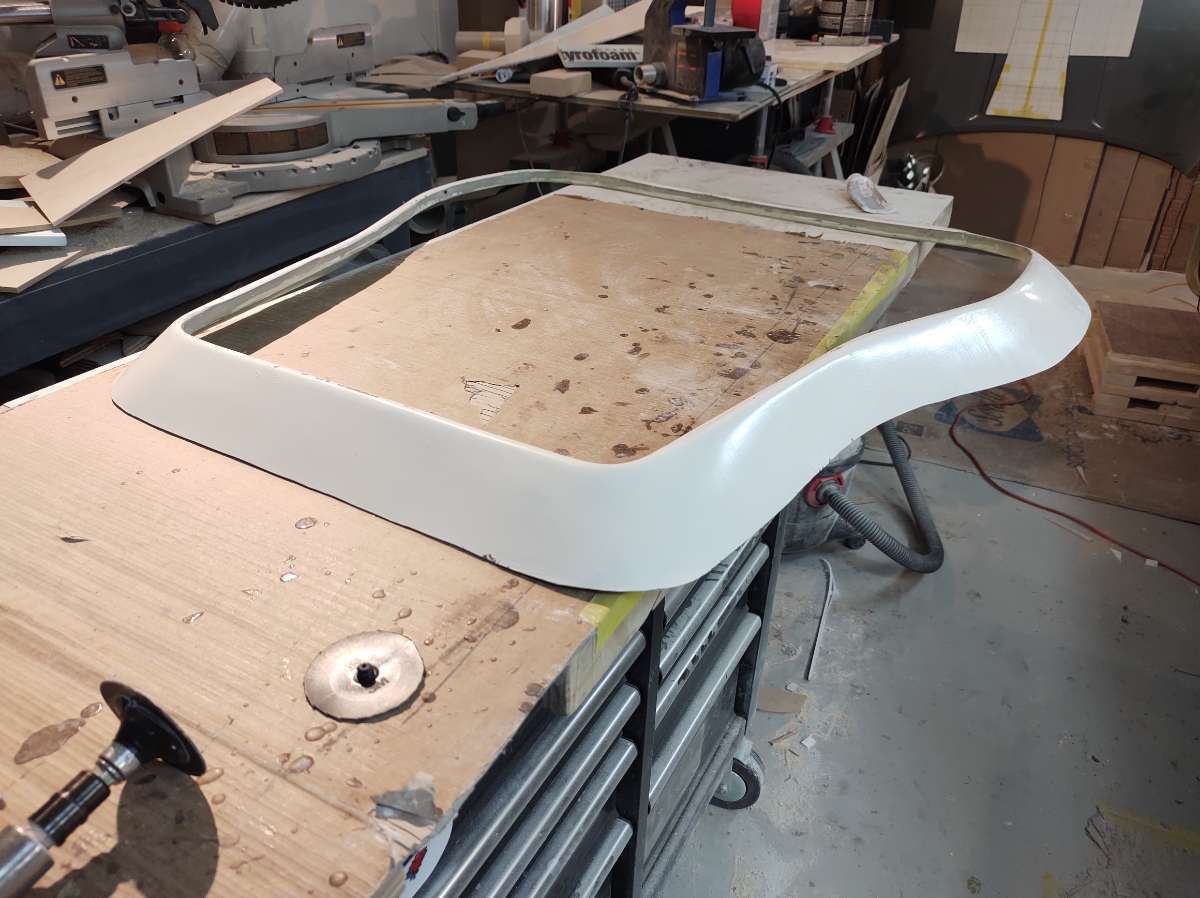
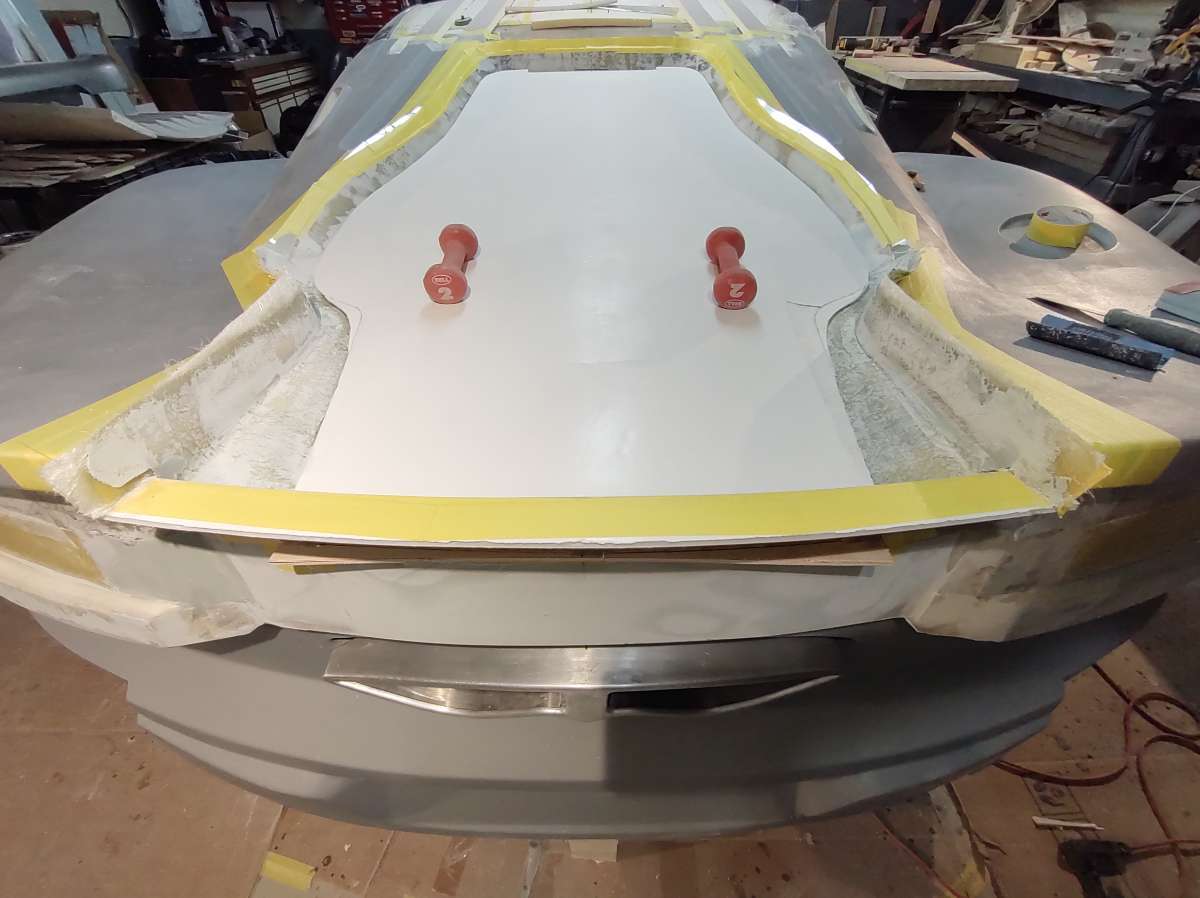
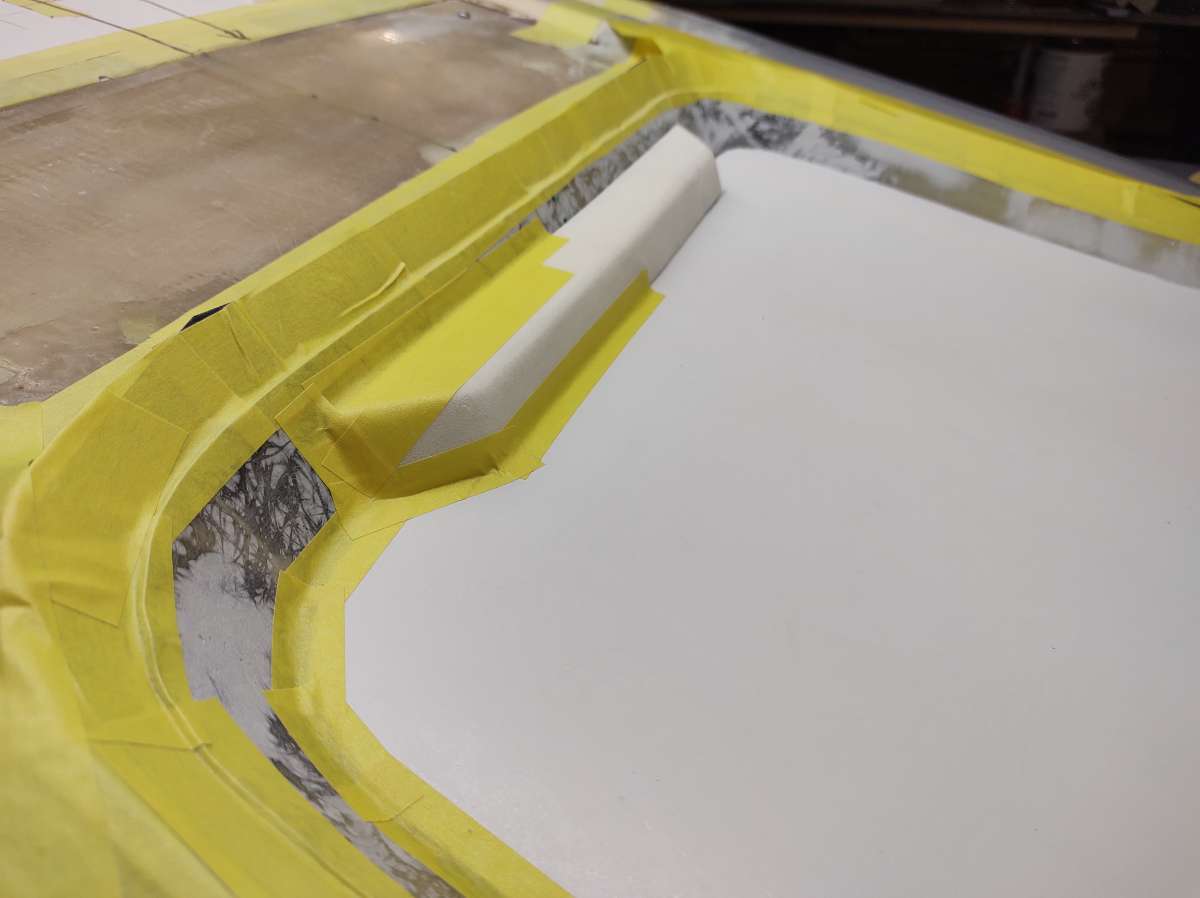
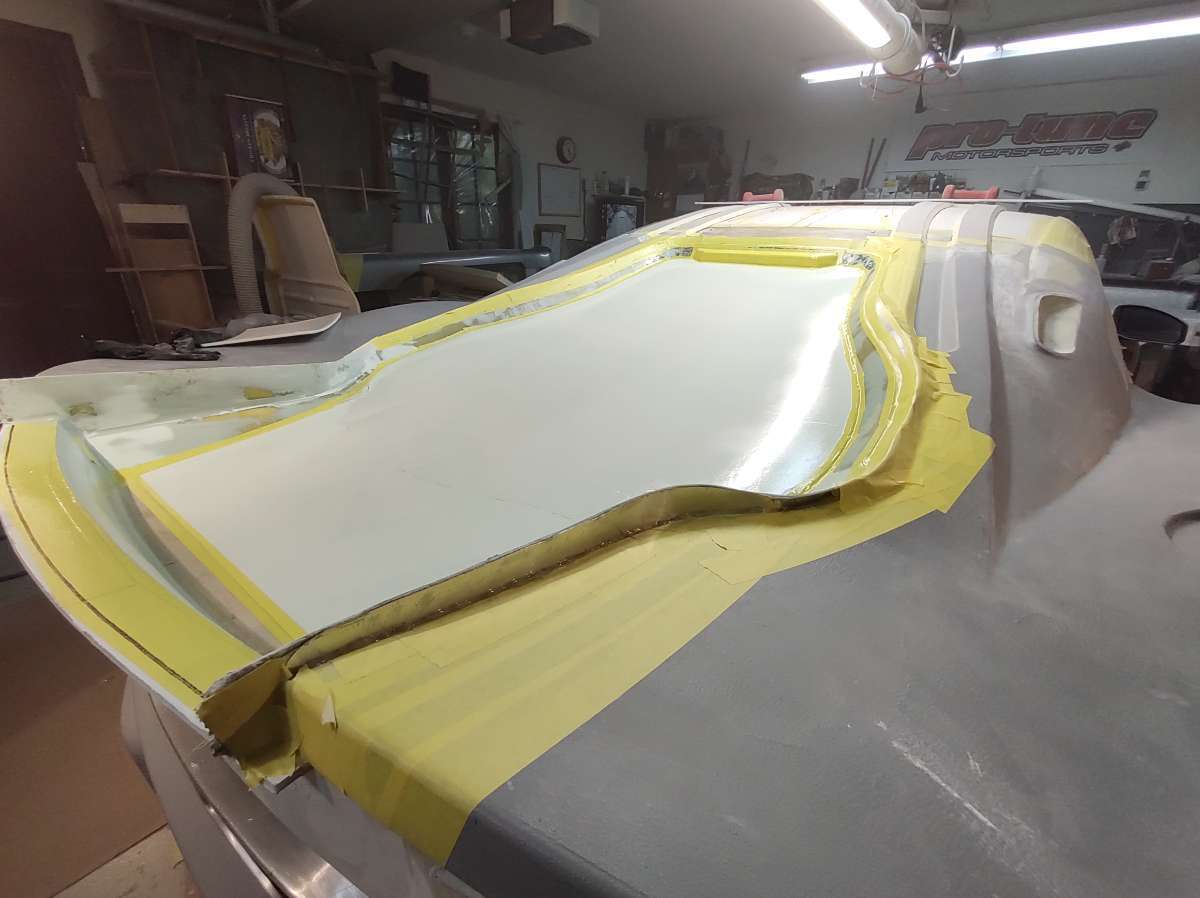
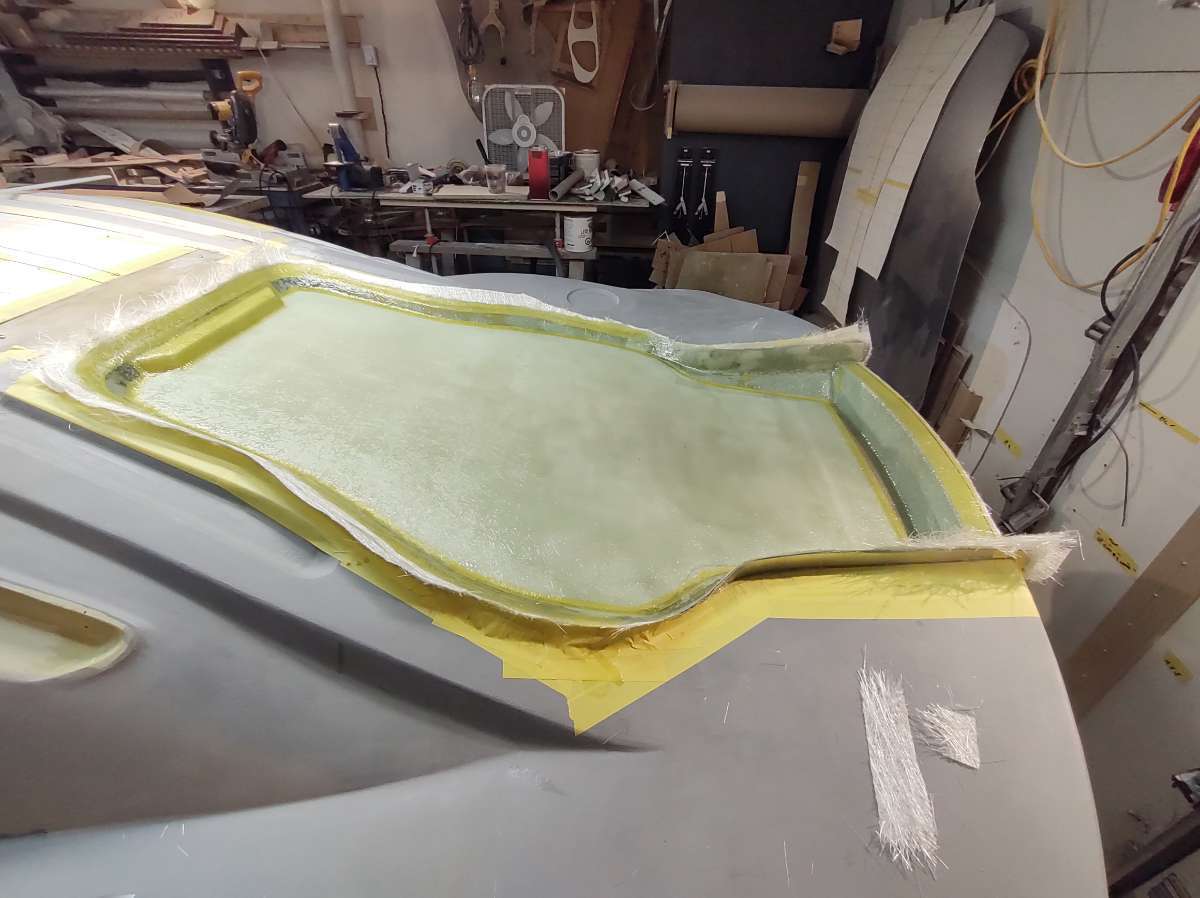
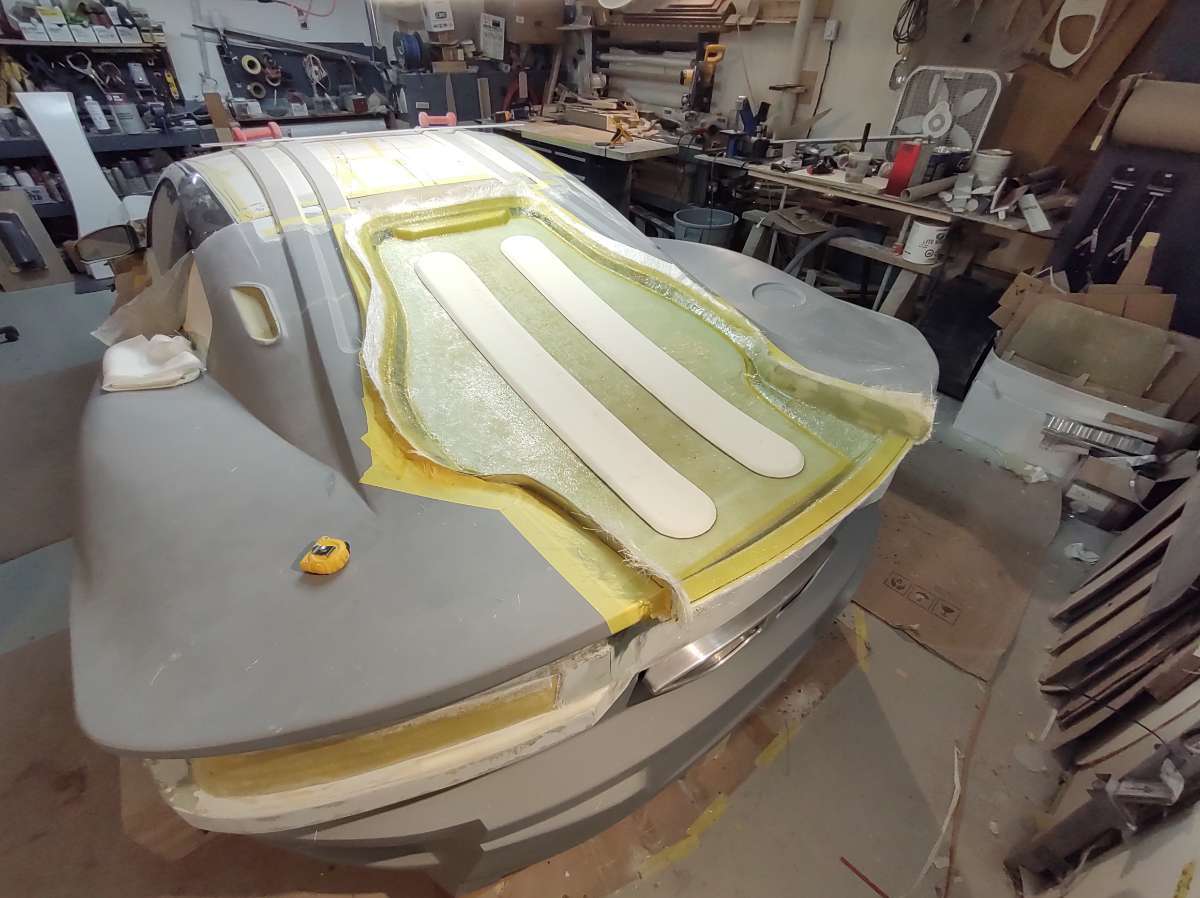
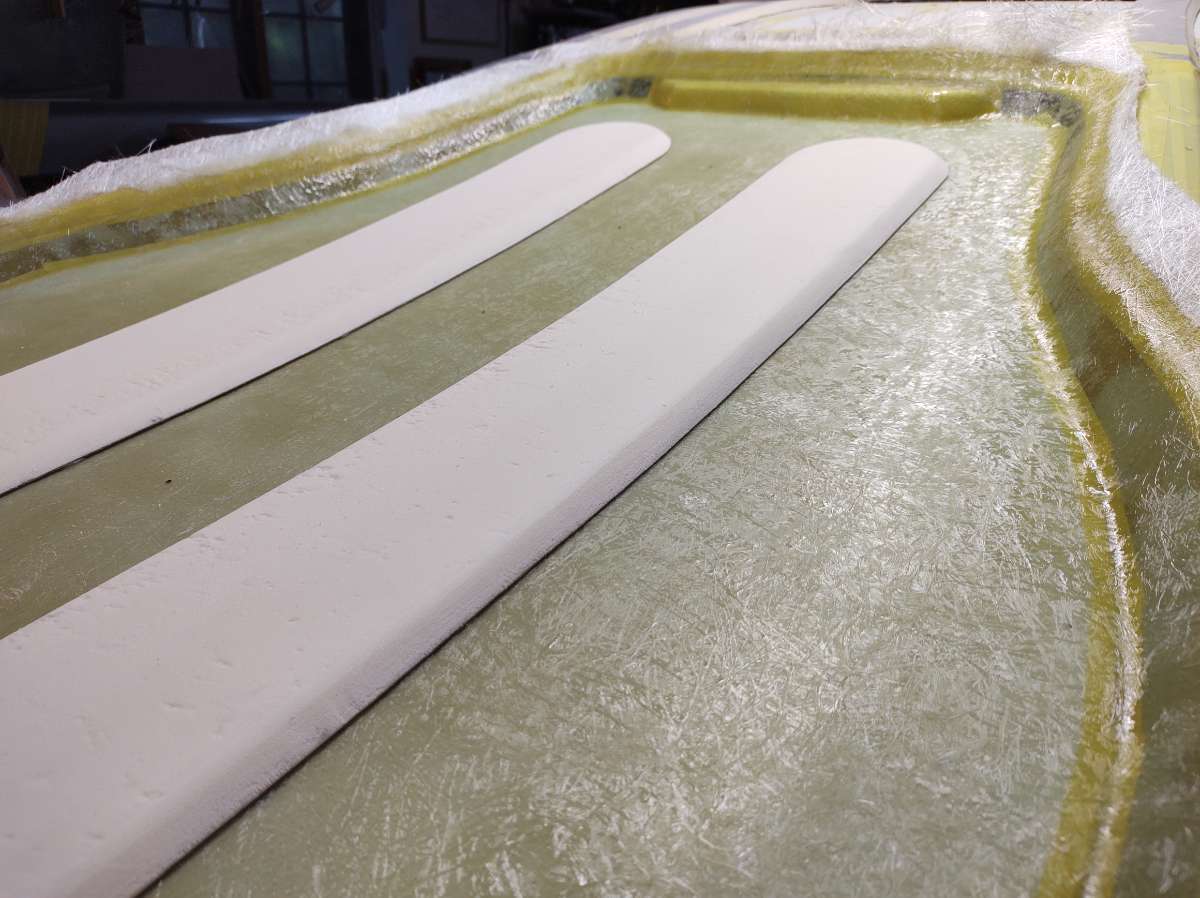
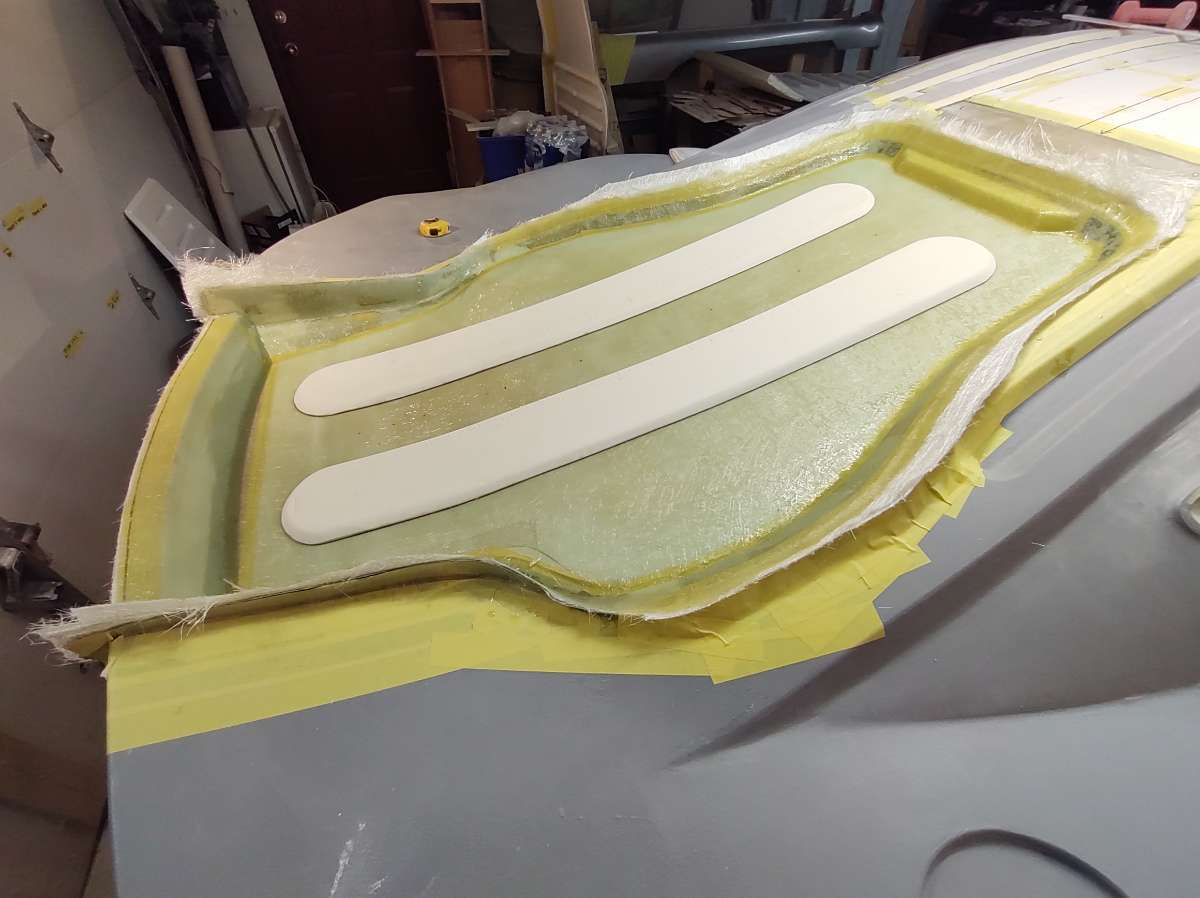
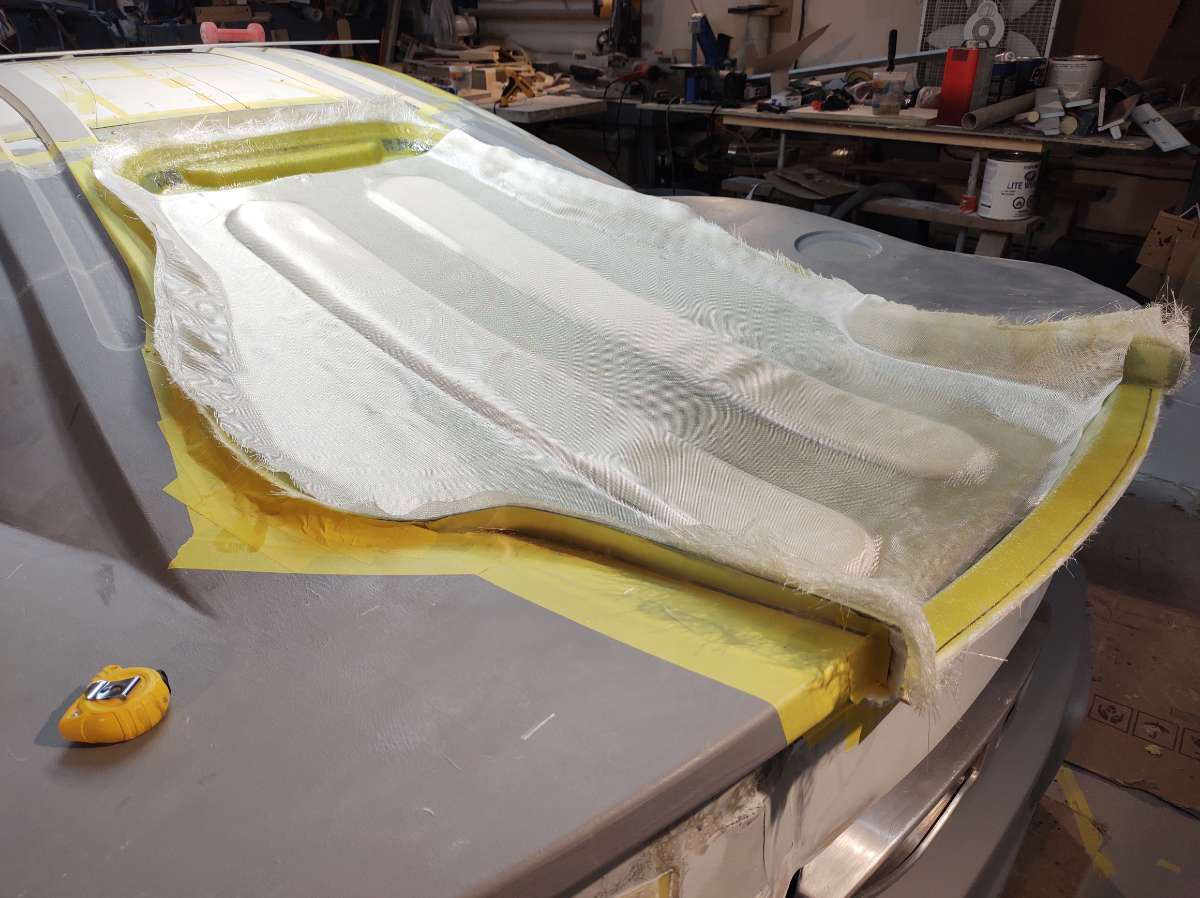
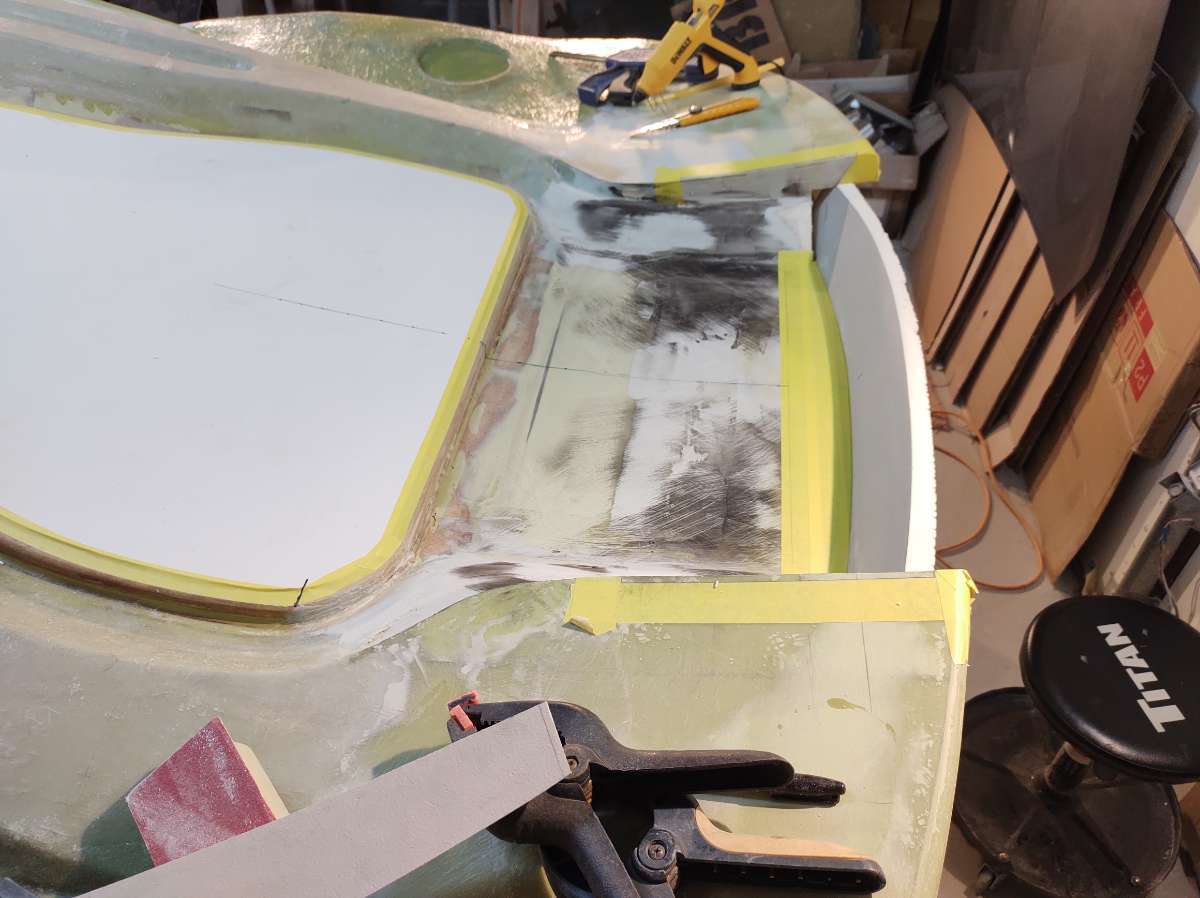
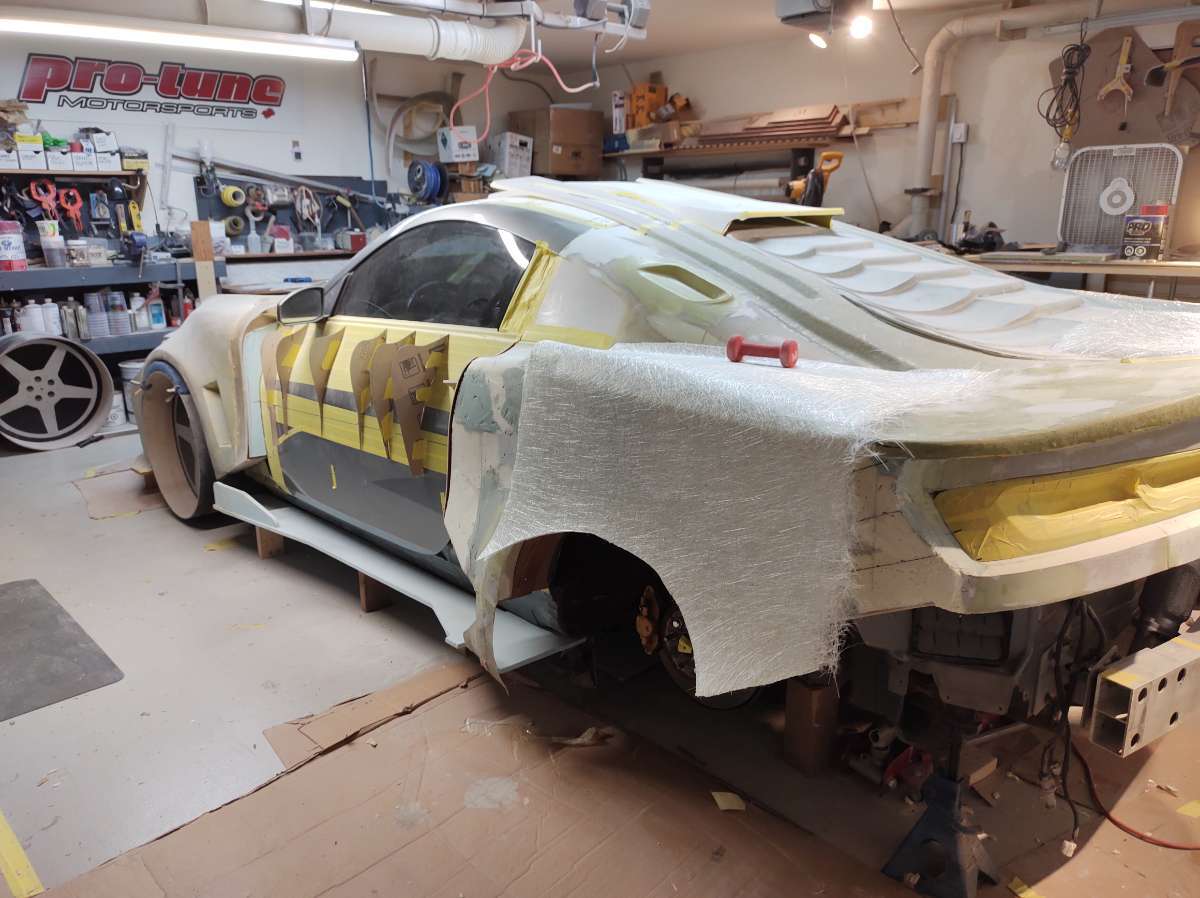
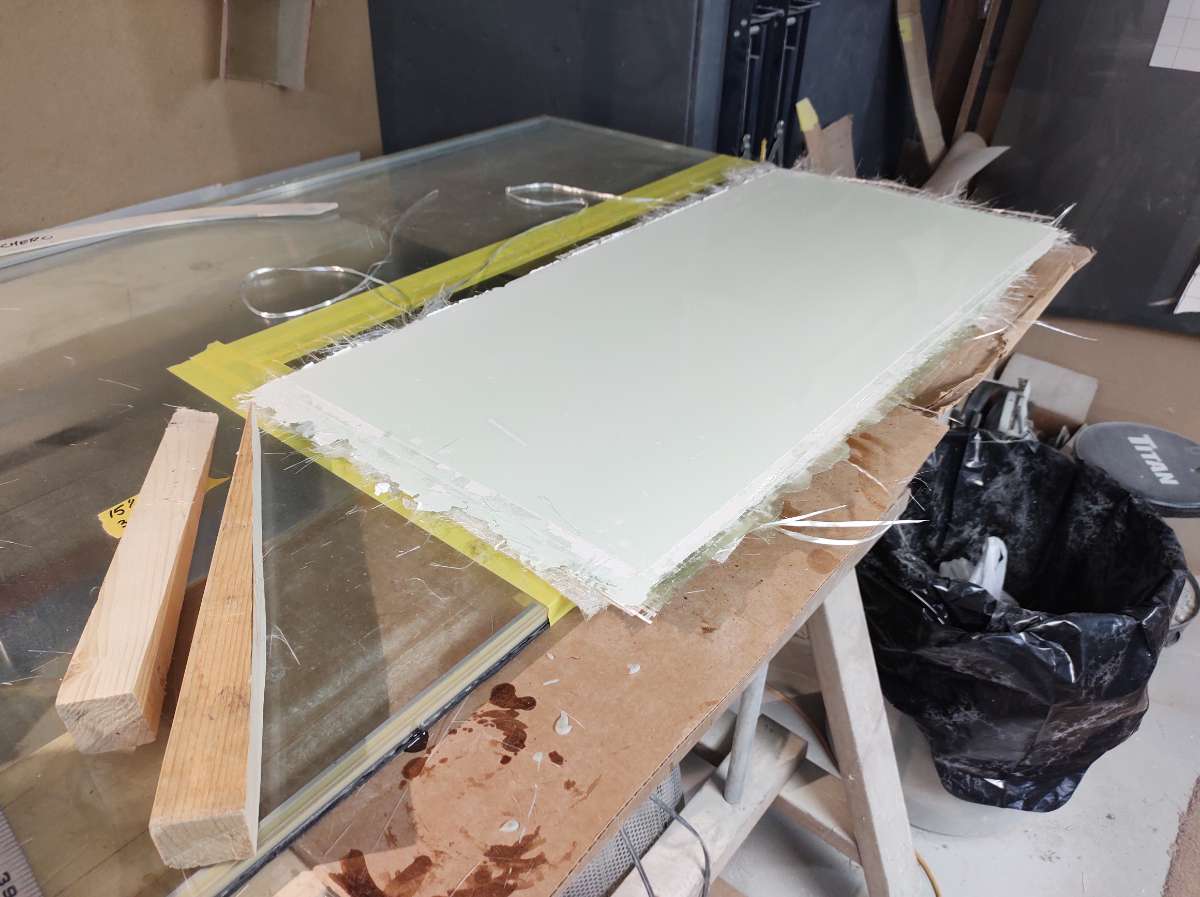
Hi everyone last update on the trunk lid bottom plug .
This is always fun an a bit nerve racking getting the part out !!!
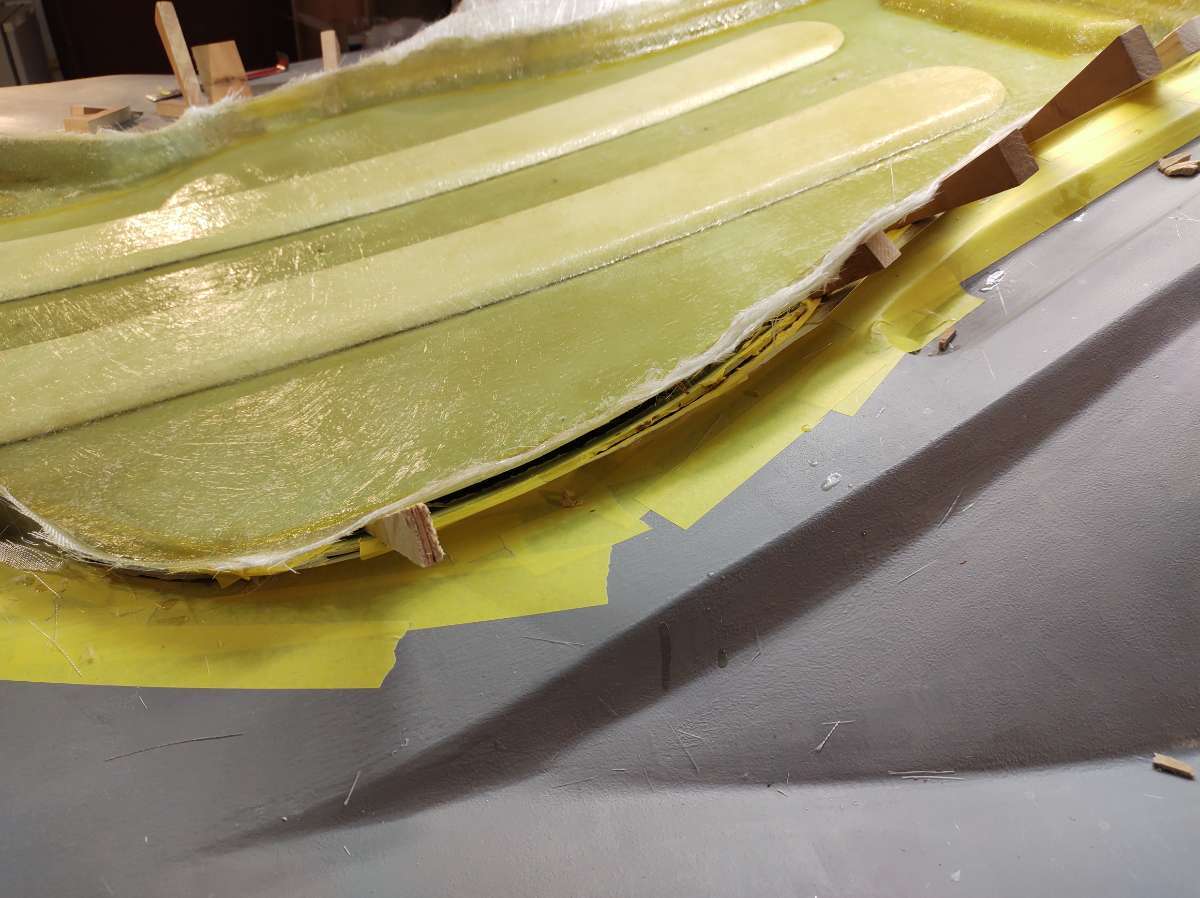
Starting out with a thin flat pry bar it get under the edge , then put wedges in all around where you can
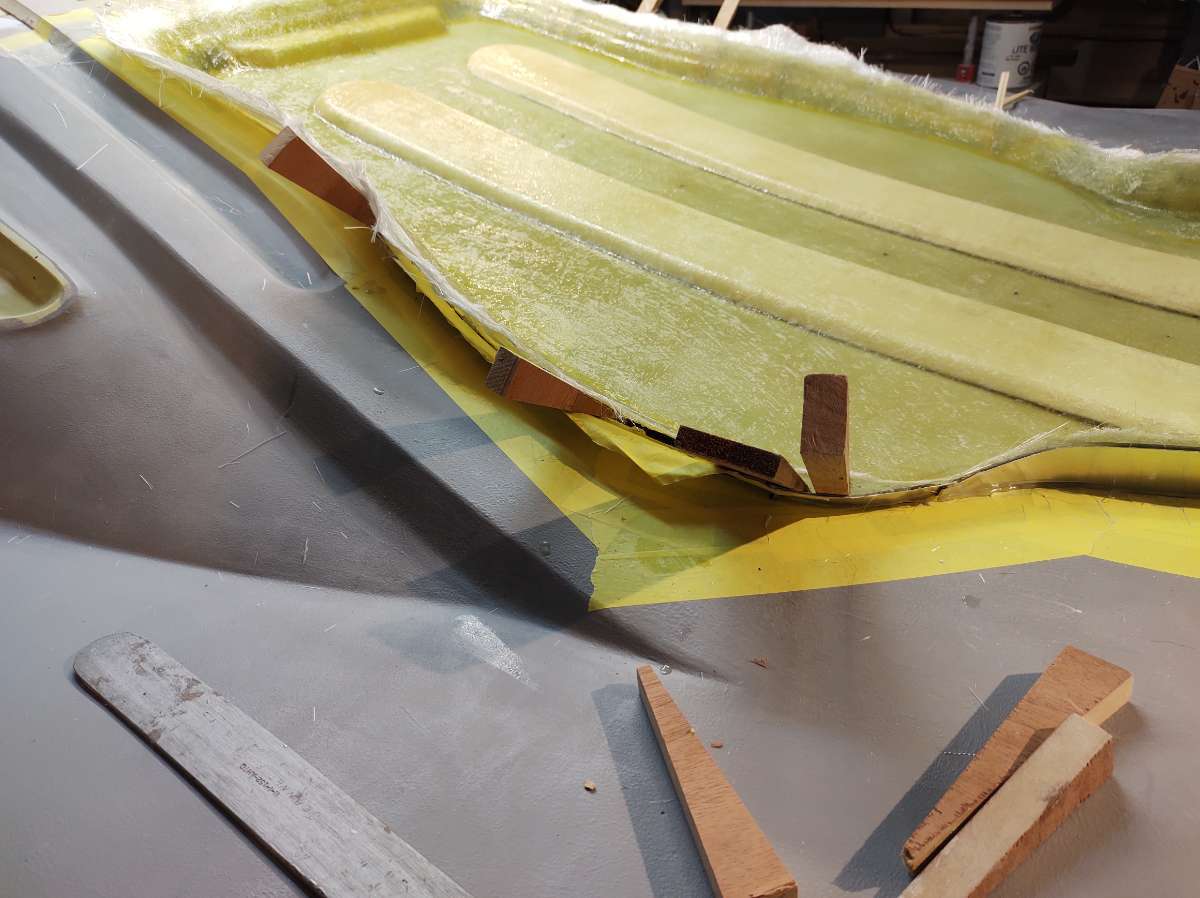
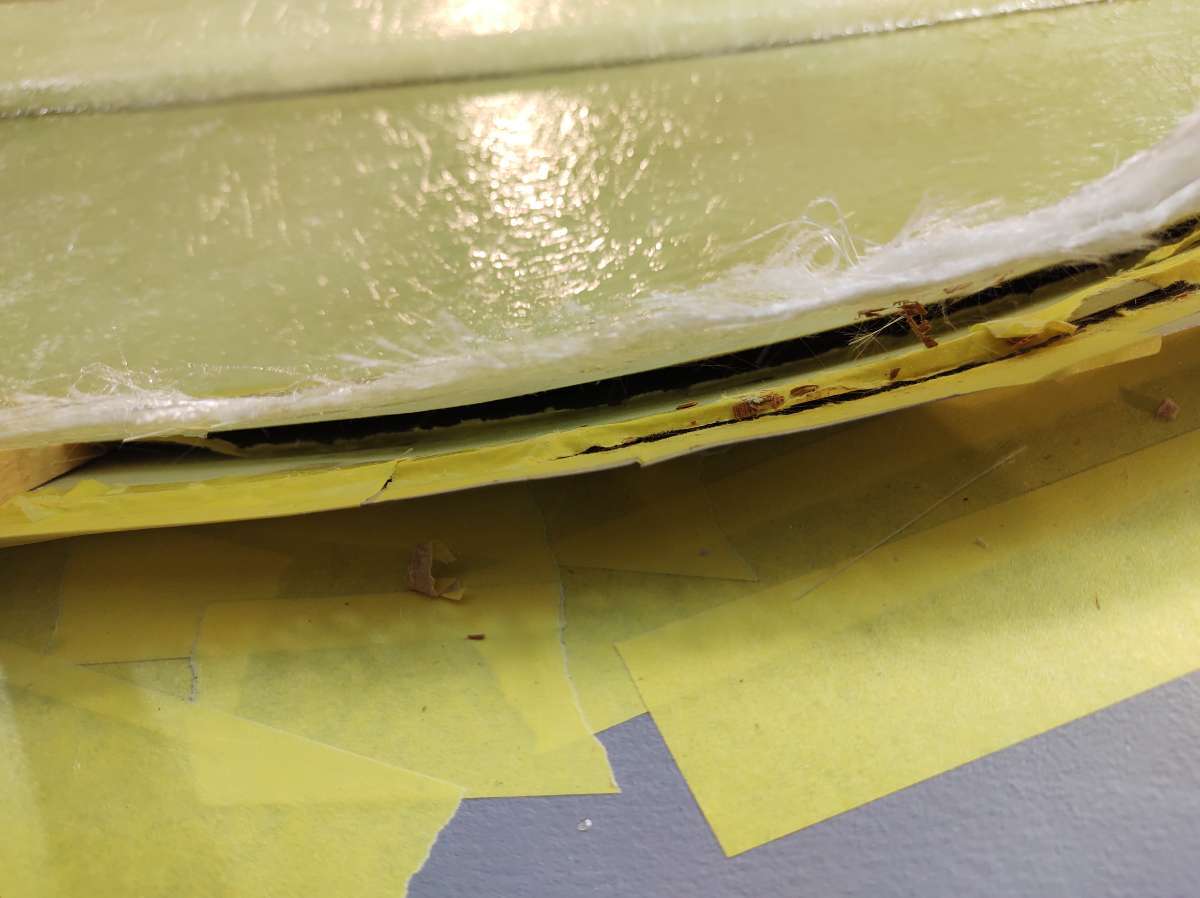

the danger here is breaking something on the car by prying or breaking the part , if it's a finished part coming out that is gel-coated you don't want to scratch it with tools such as screwdrivers .
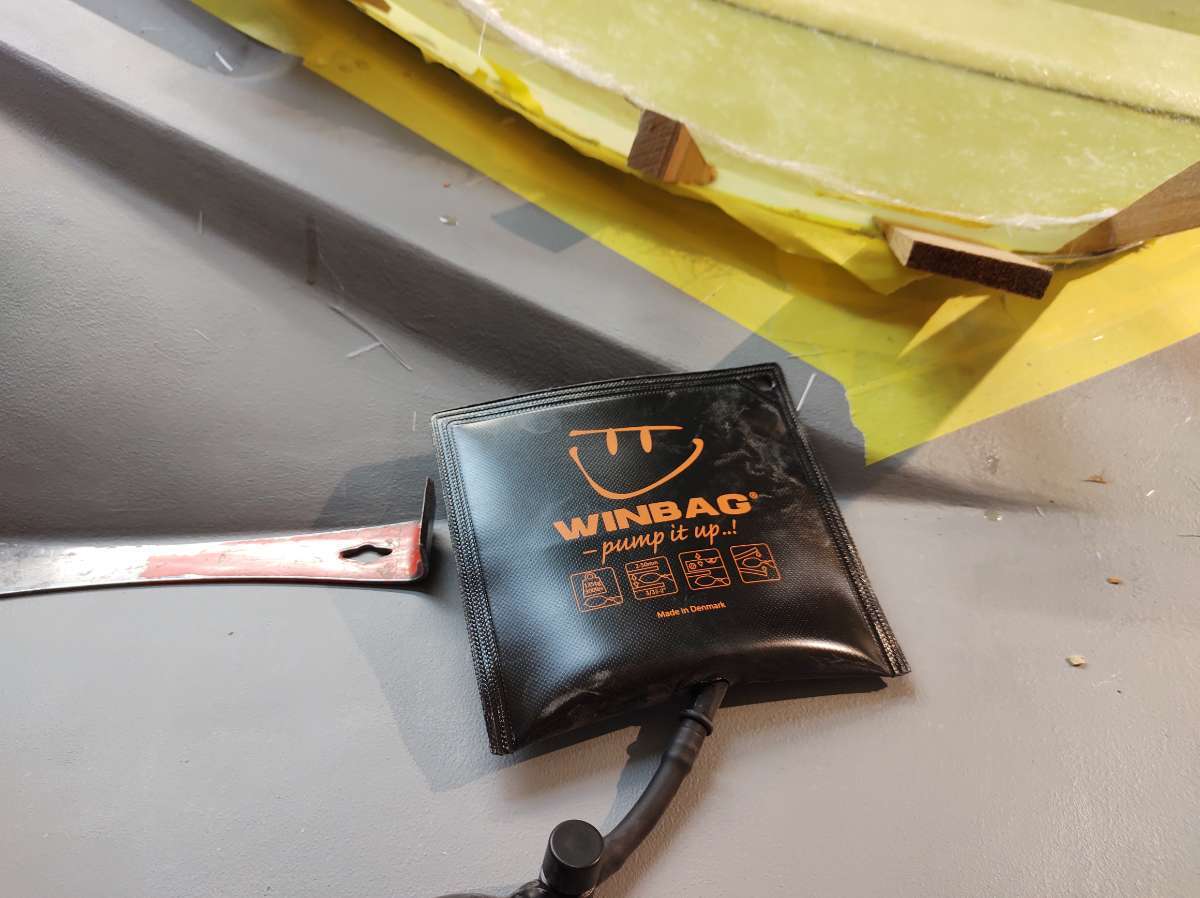
I found this little gem at the tool shop on day in the line waiting to check out , it goes flatter than a piece of regular cardboard and you inflate it , it's very strong , I bought the smallest one to try it out , next time I am there I will get another one for sure .
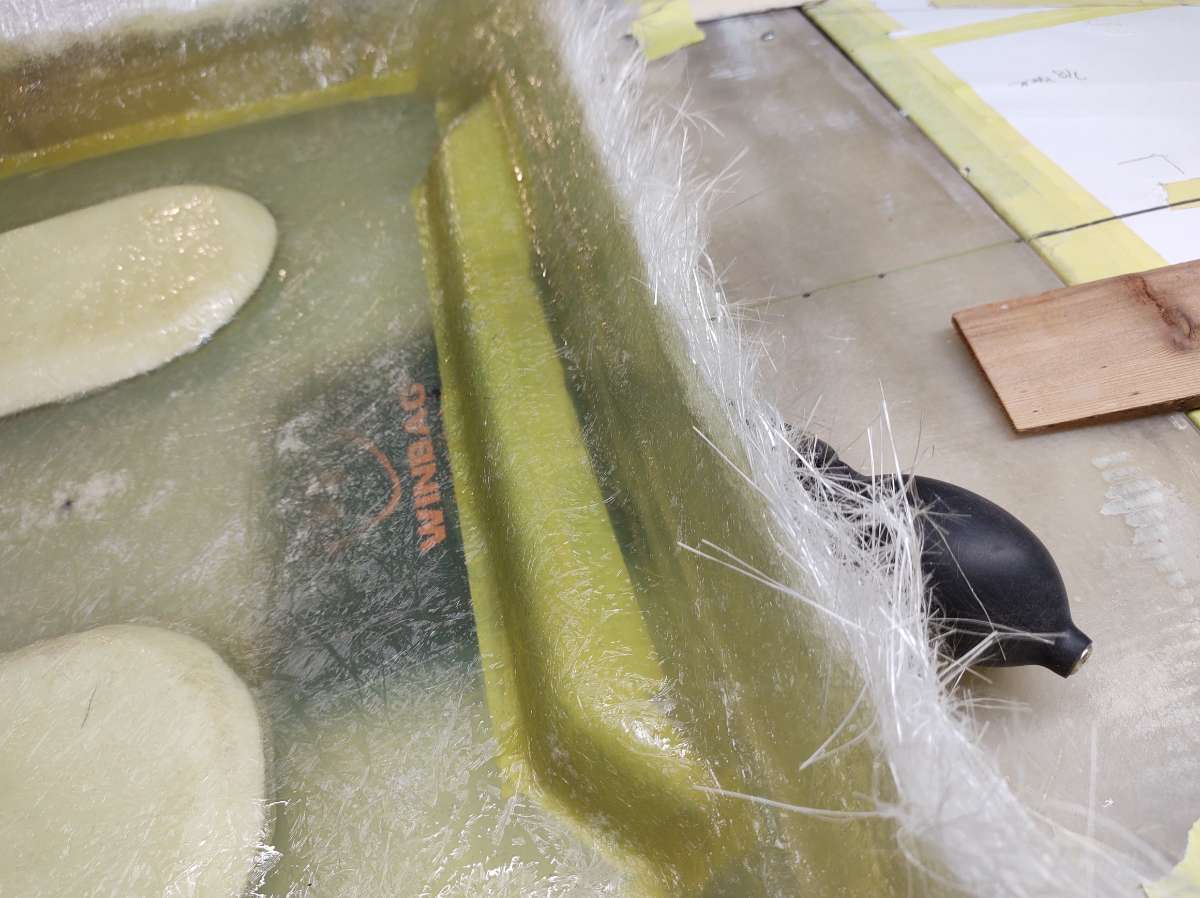
here you see it under the part , it's great because it's not sharp and can press on a larger area .
I took a couple of videos and will try to put them on .
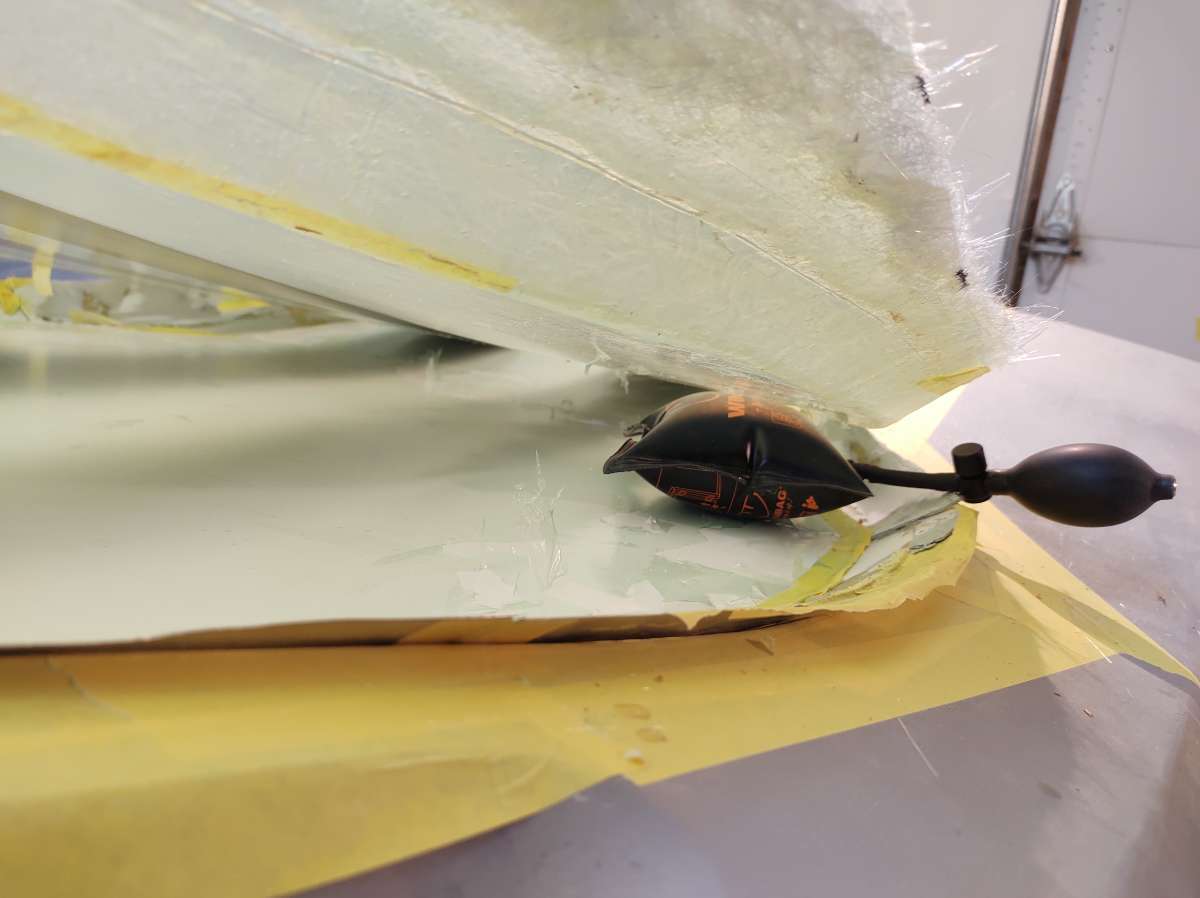
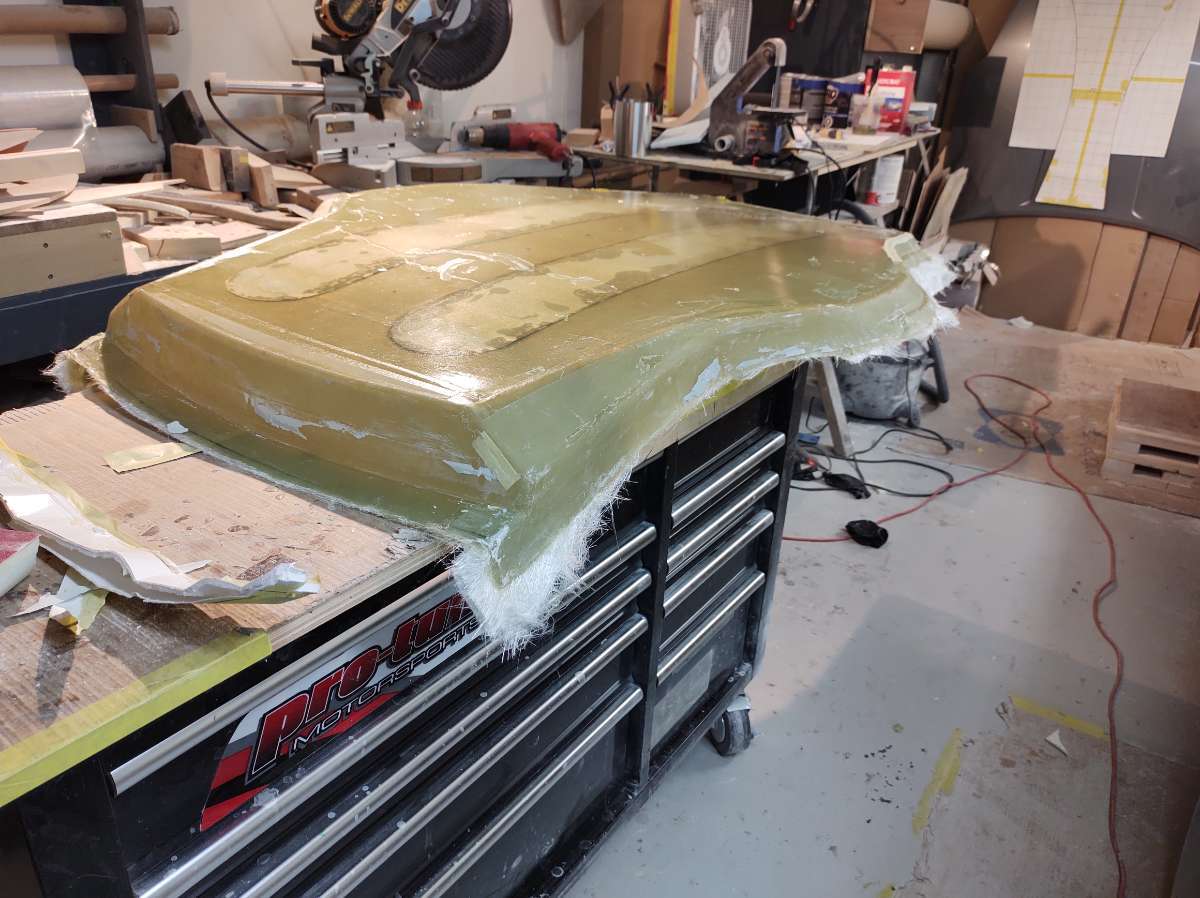
got it off the car ok , now to clean it up , trim the edges and wash the remaining PVA off , it's great stuff also it washes off with water .
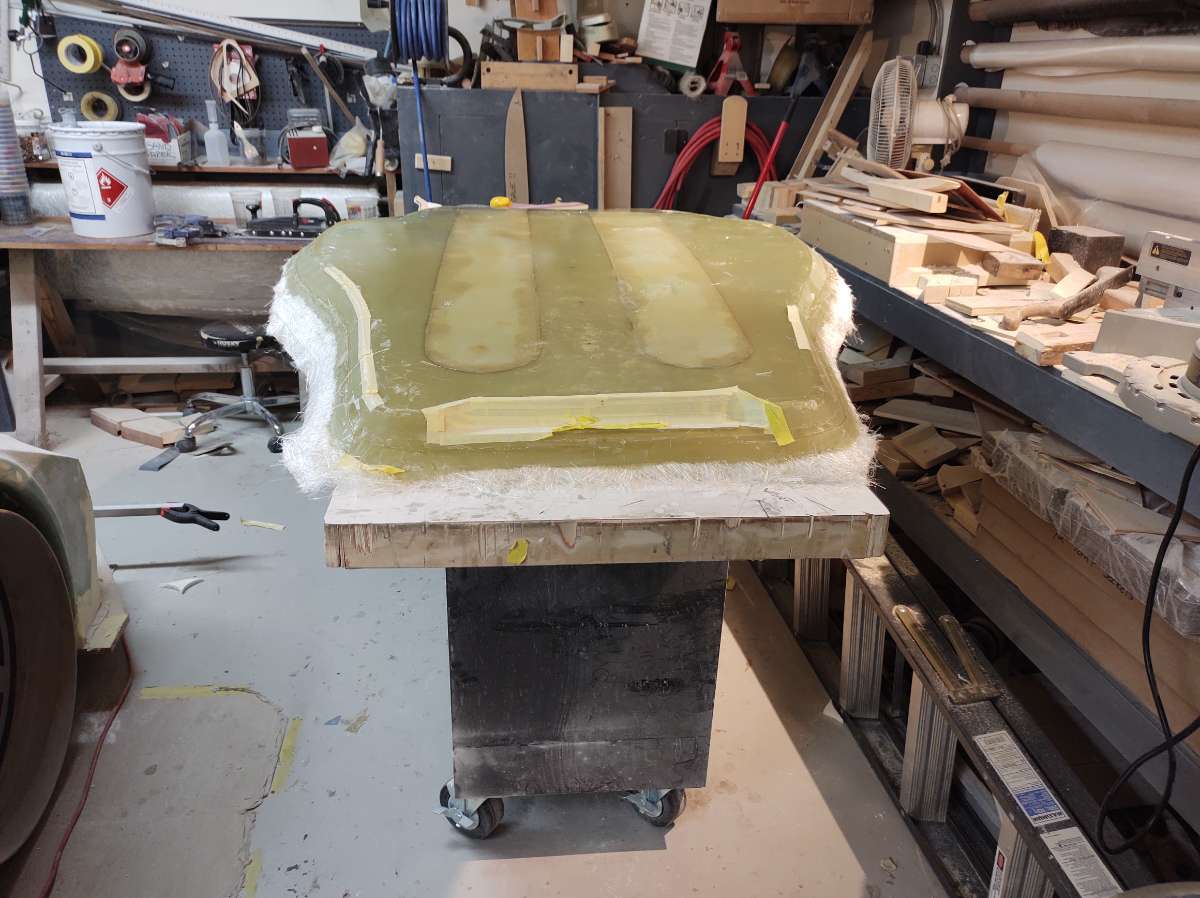
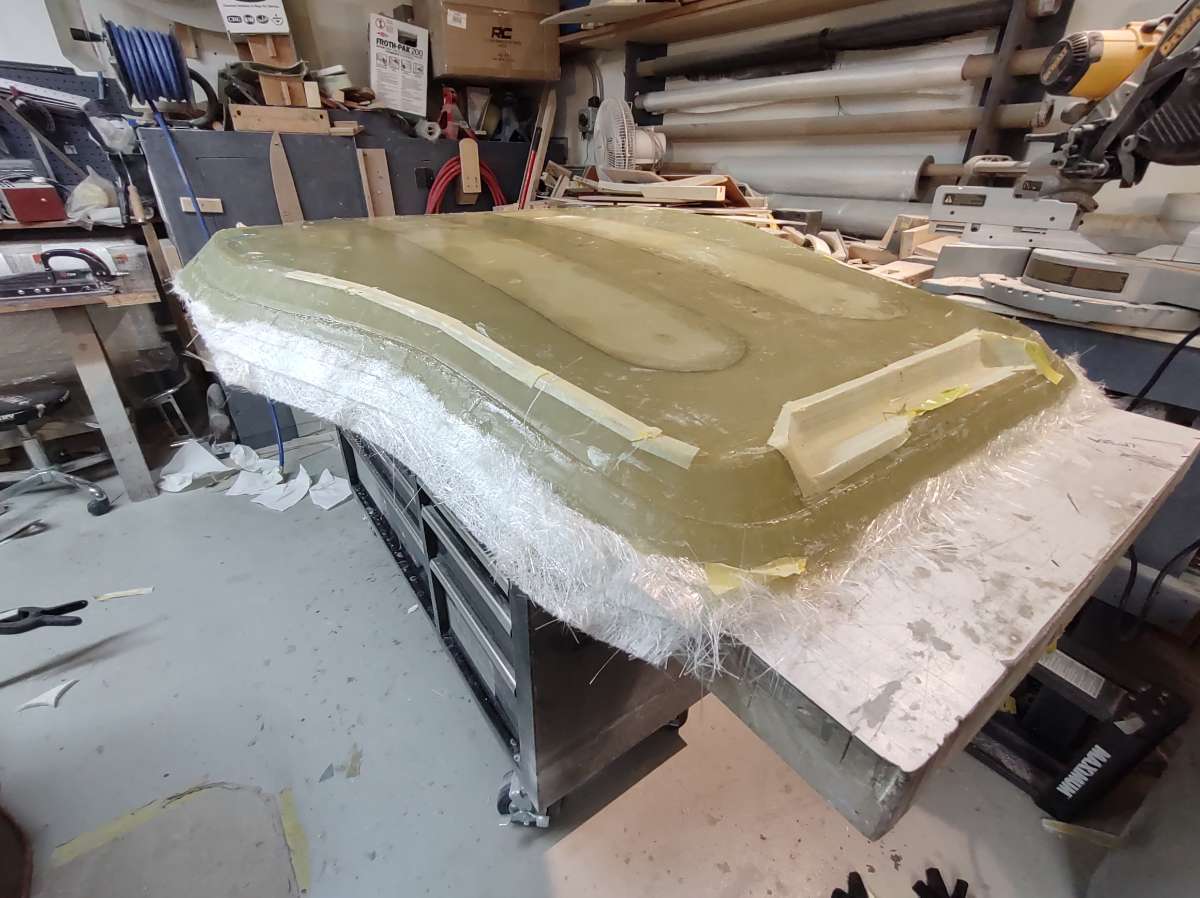
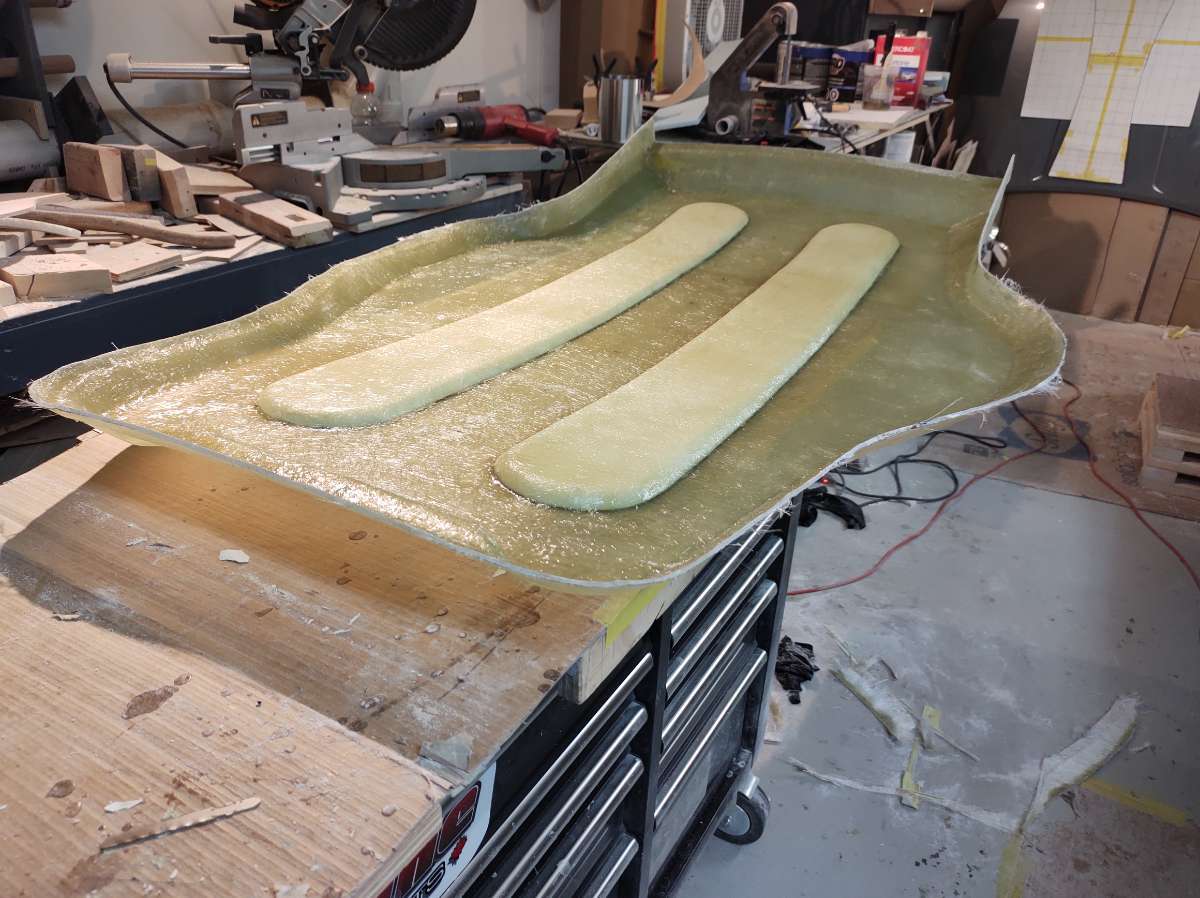
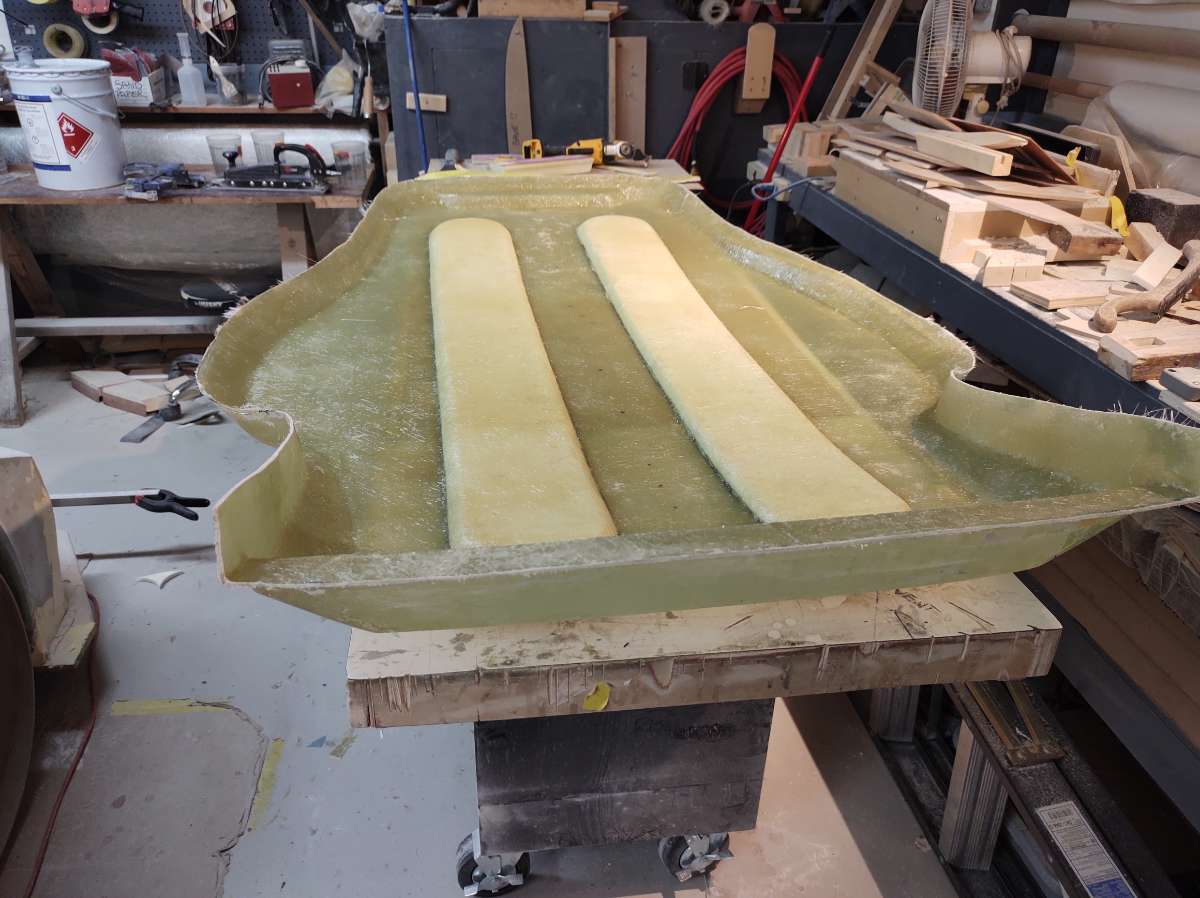
still need to sand the edges
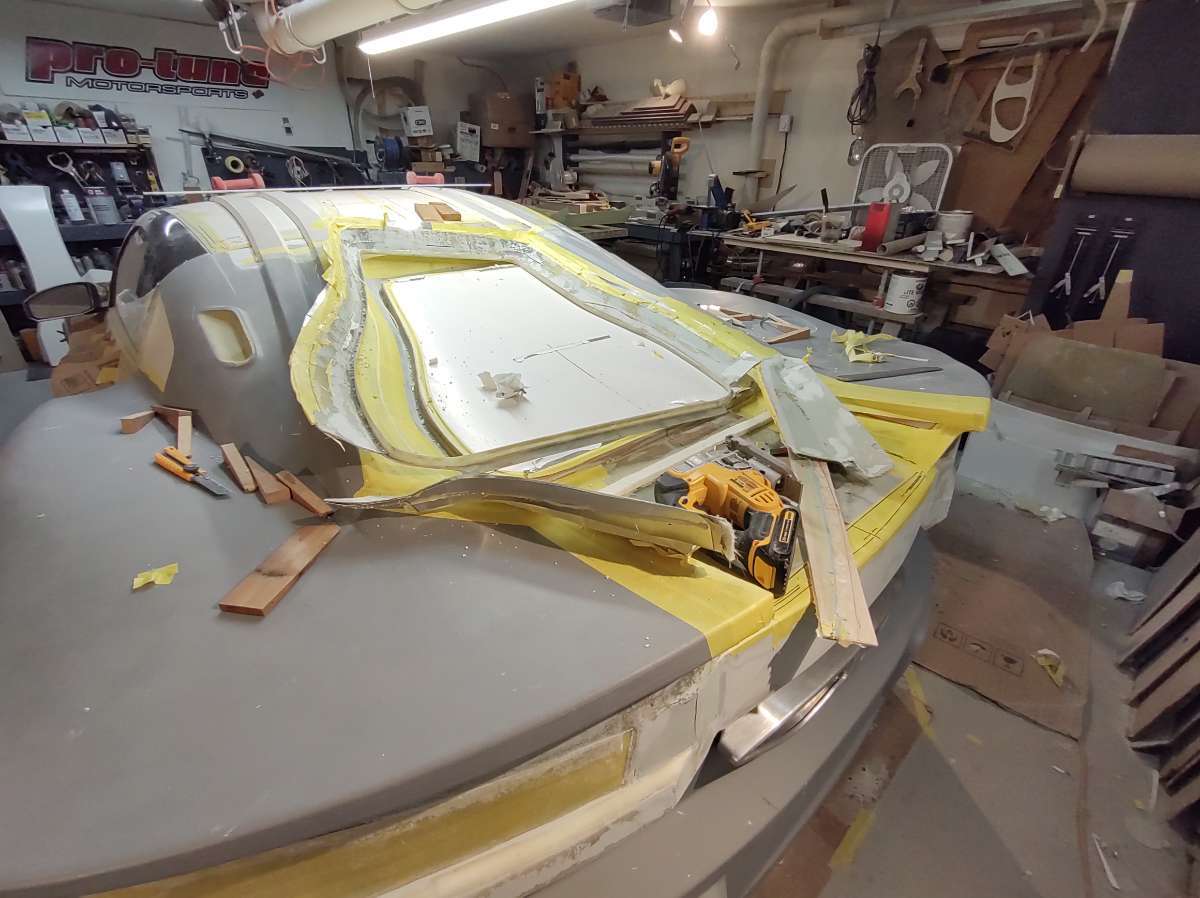
As you can see the carnage from the temp setup to make the part
the back
the front with the pocket for space for the hinges
test fitting looks great !!
It still needs to be bodyworked and then make the proper mold for the part , so the finished part has the finished side on the out side , fiberglass is such a lot of work , you need to make three things to get one .
1 the plug
2 the mold
3 the part
but once you have the mold you can make lots of them .
you see here there is clearance for the part to fit in .
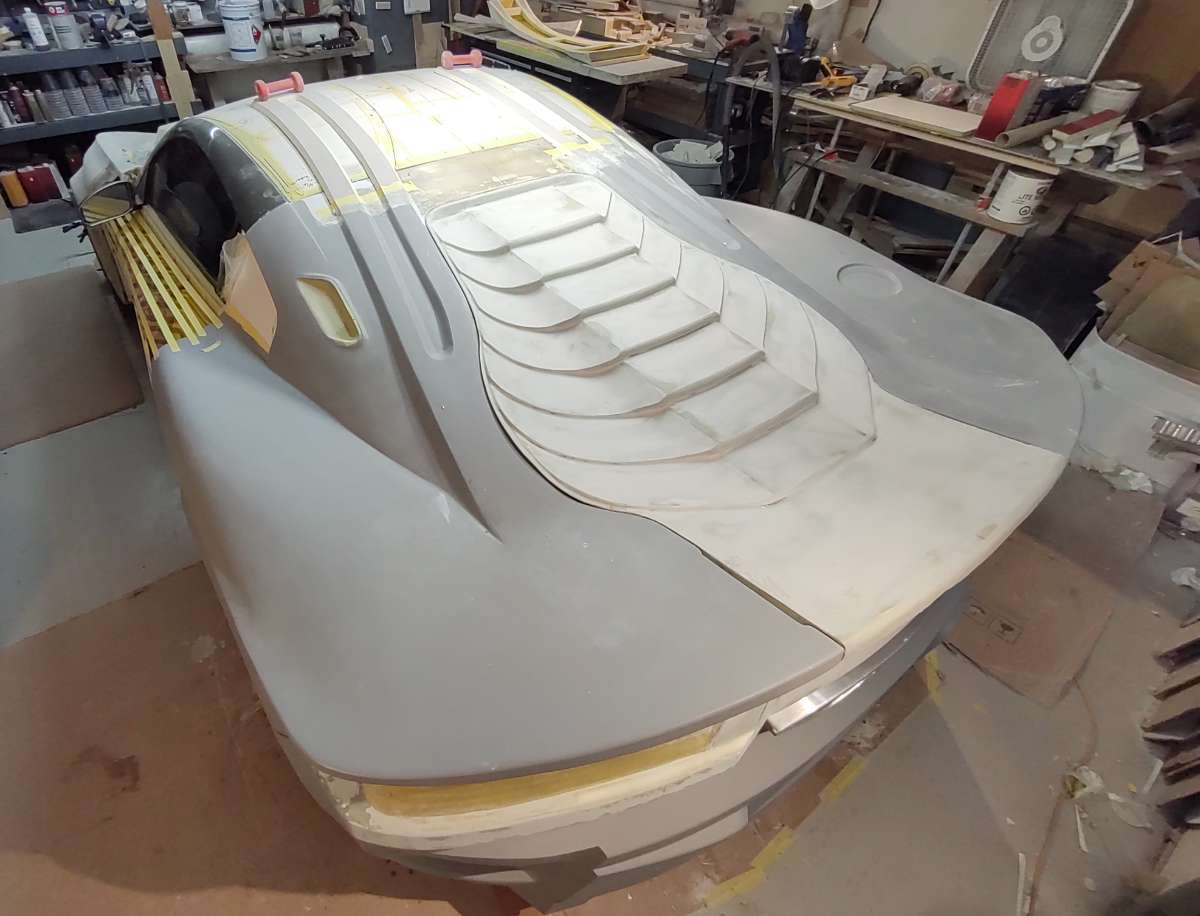
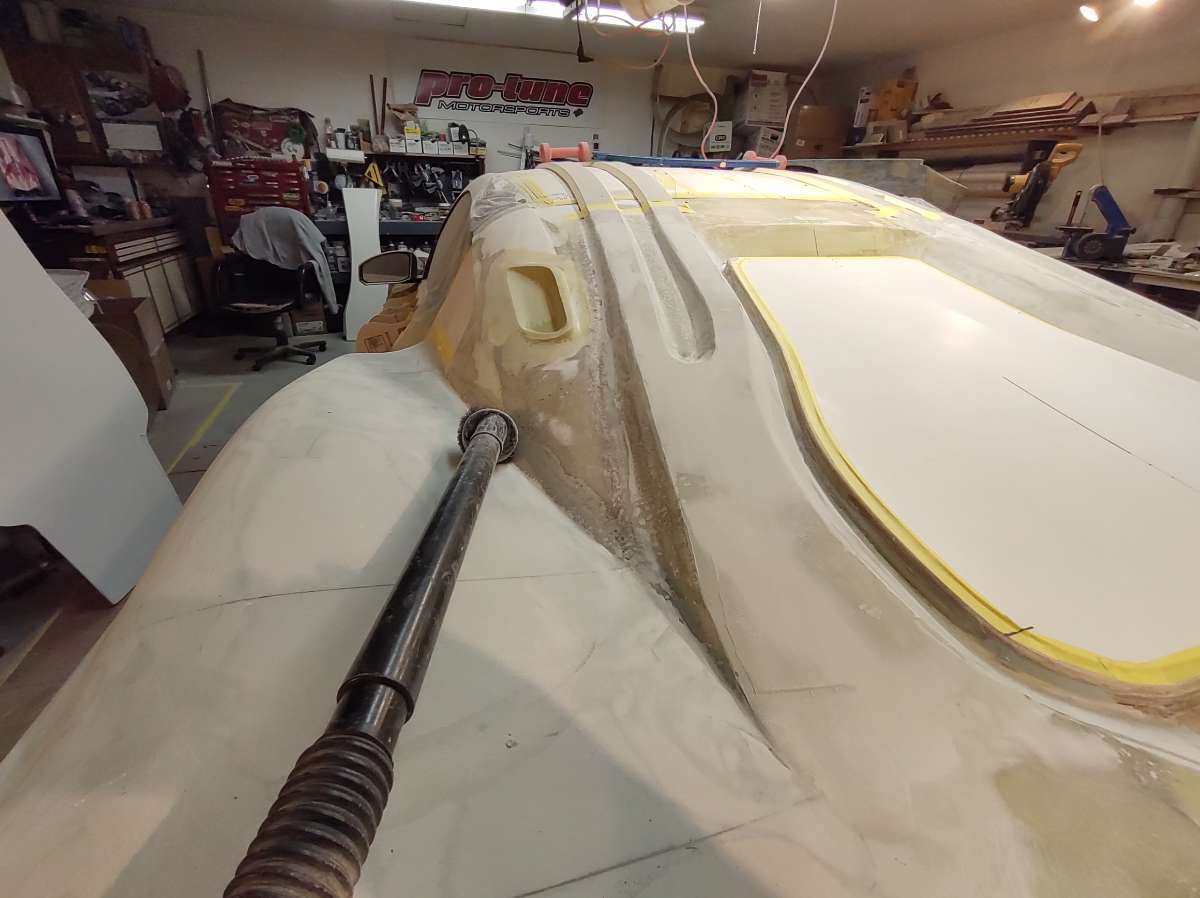
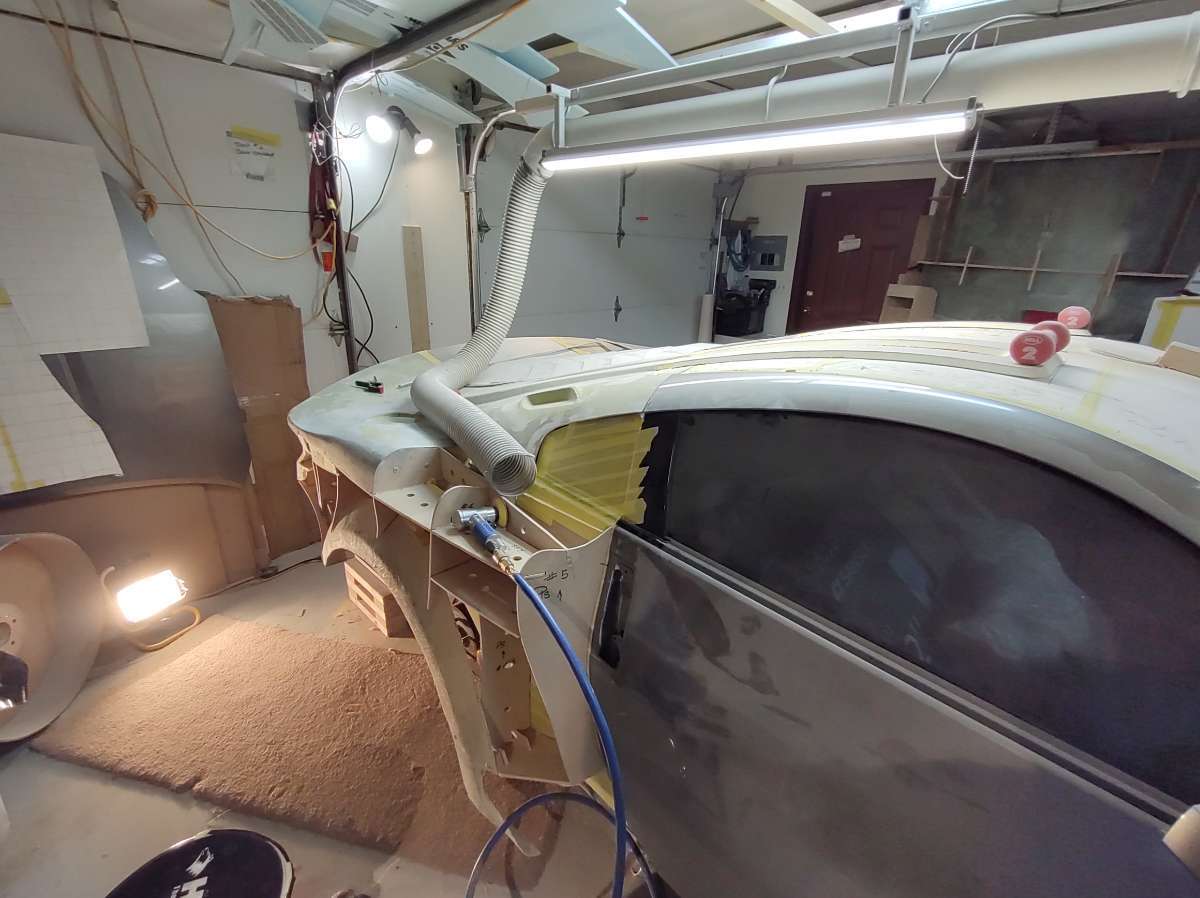
Next will be jumping onto the roof , although I feel like jumping off the roof sometimes lol lol
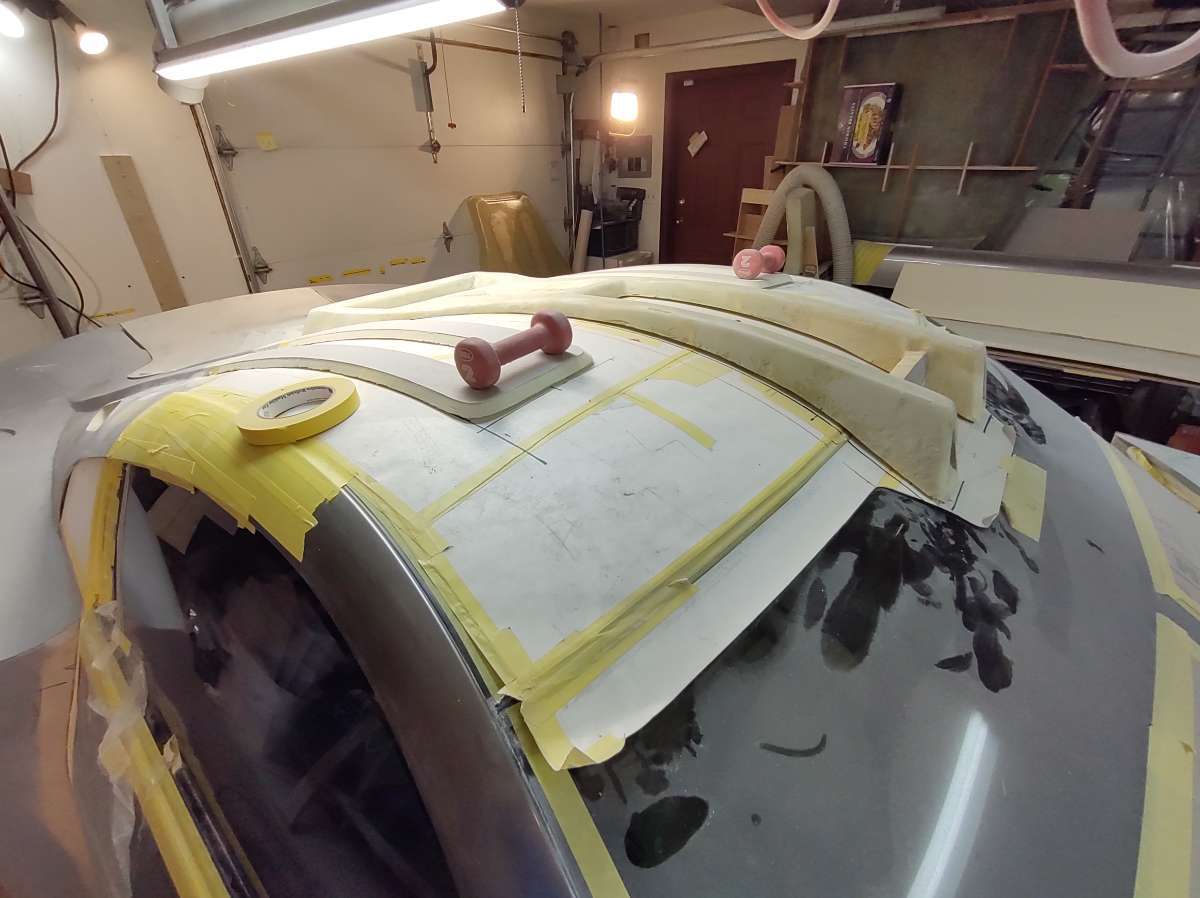
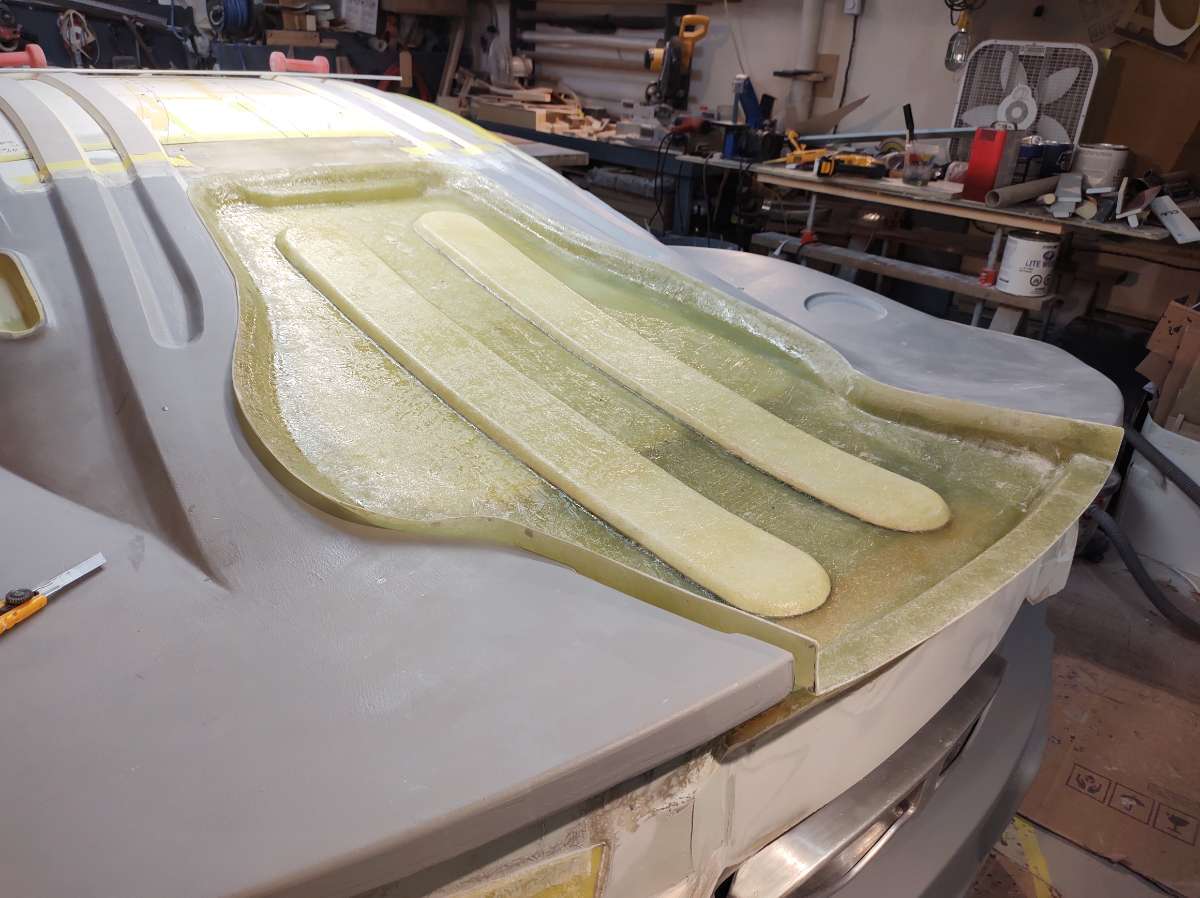
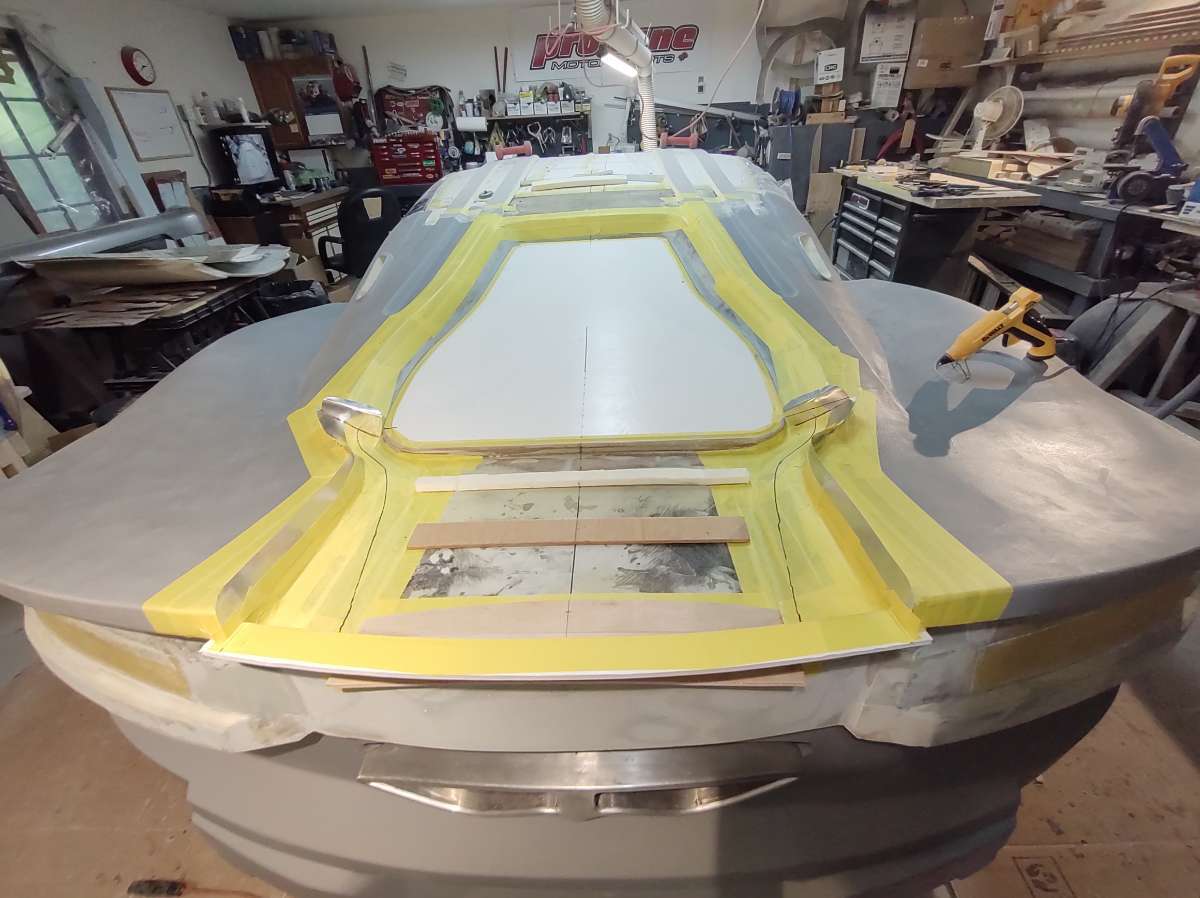
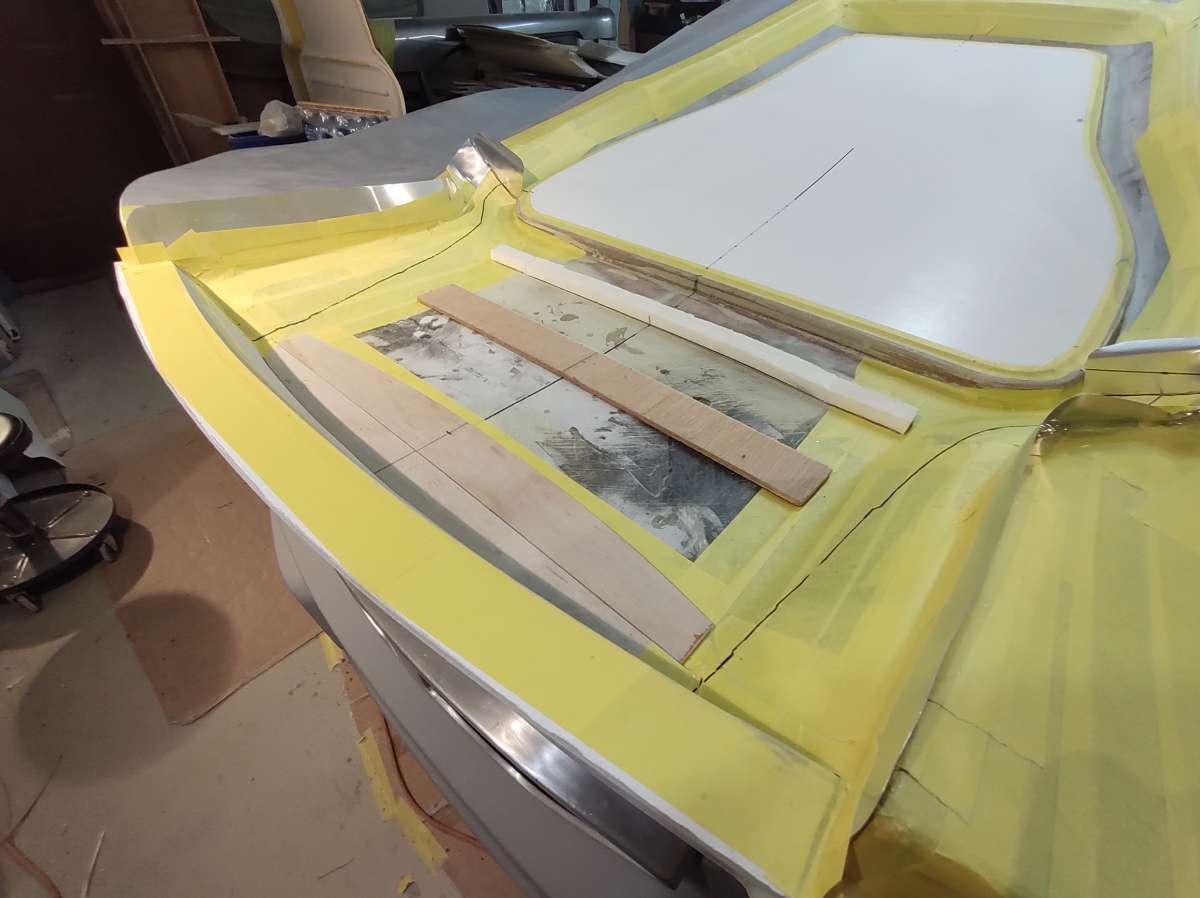
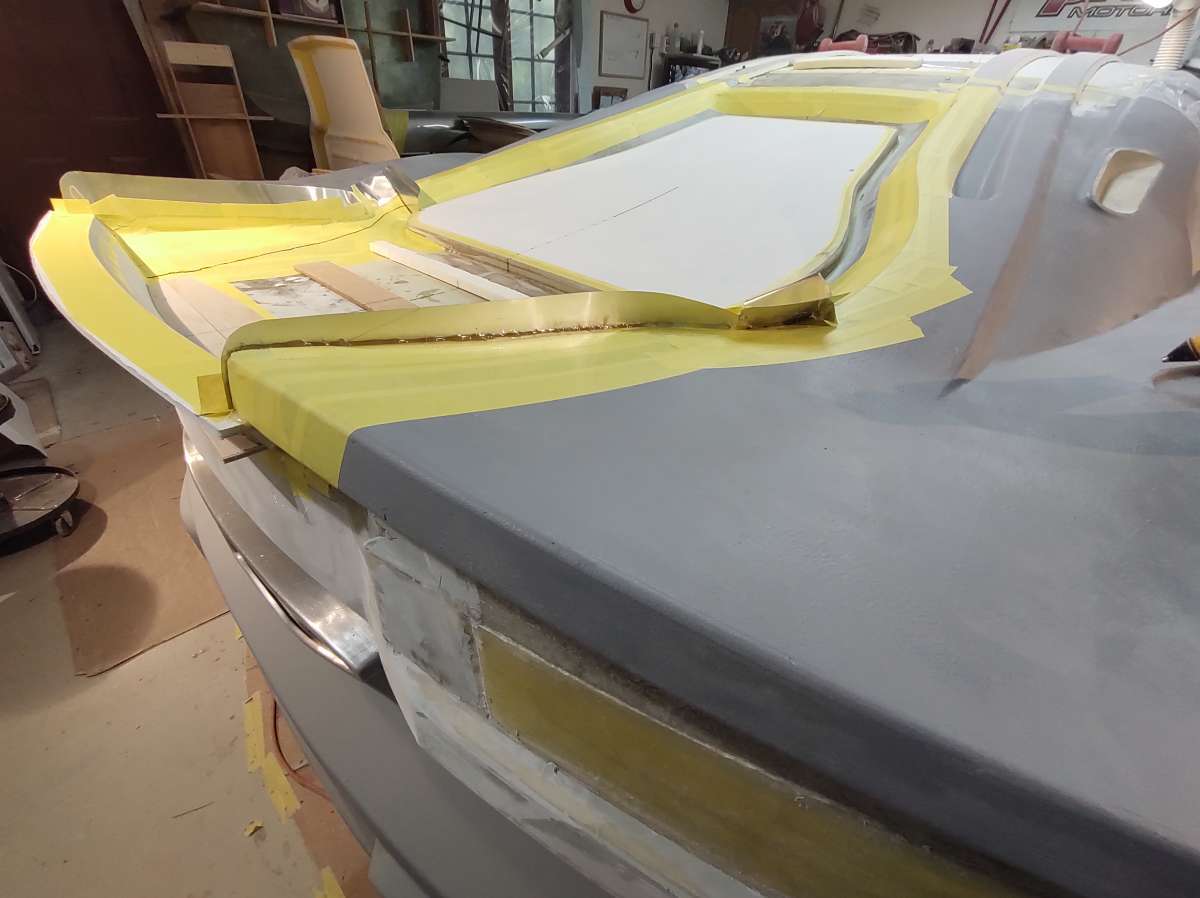
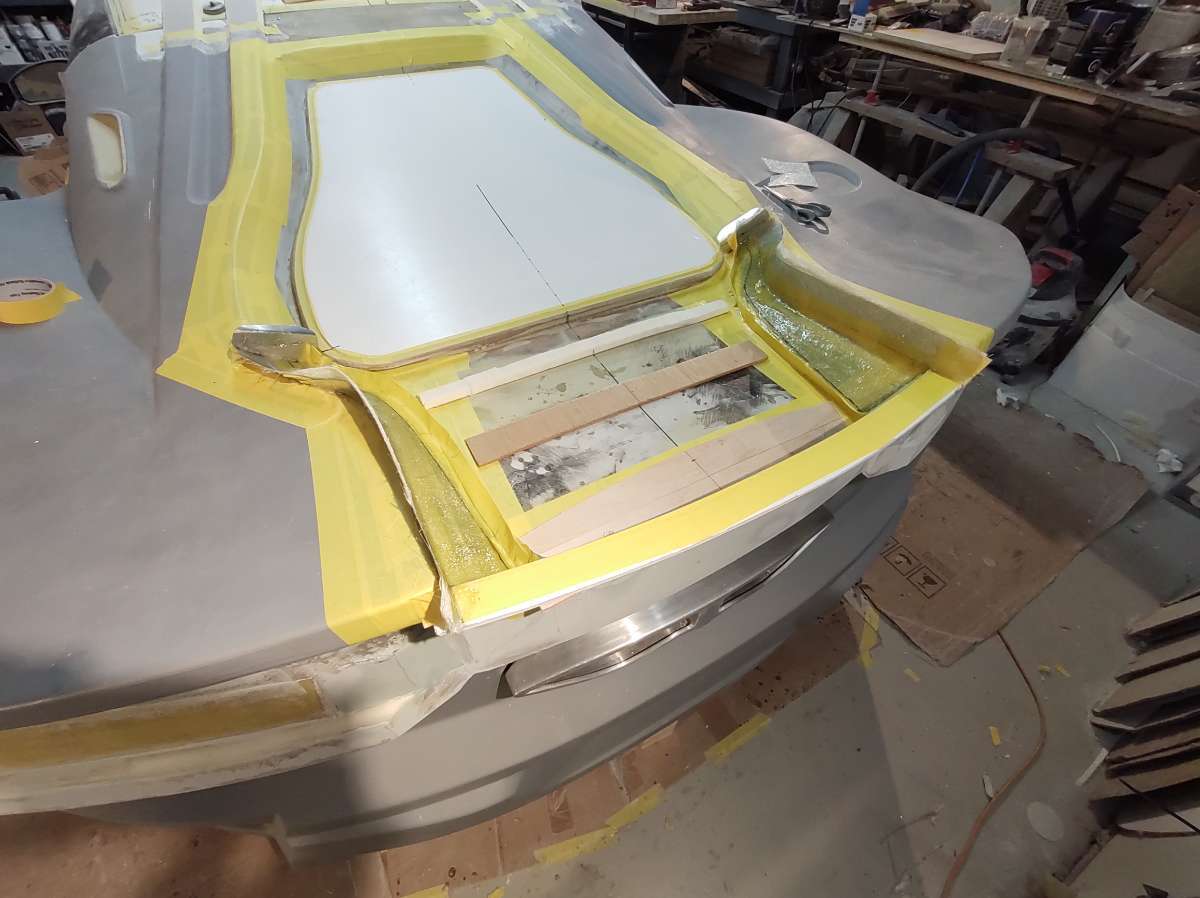
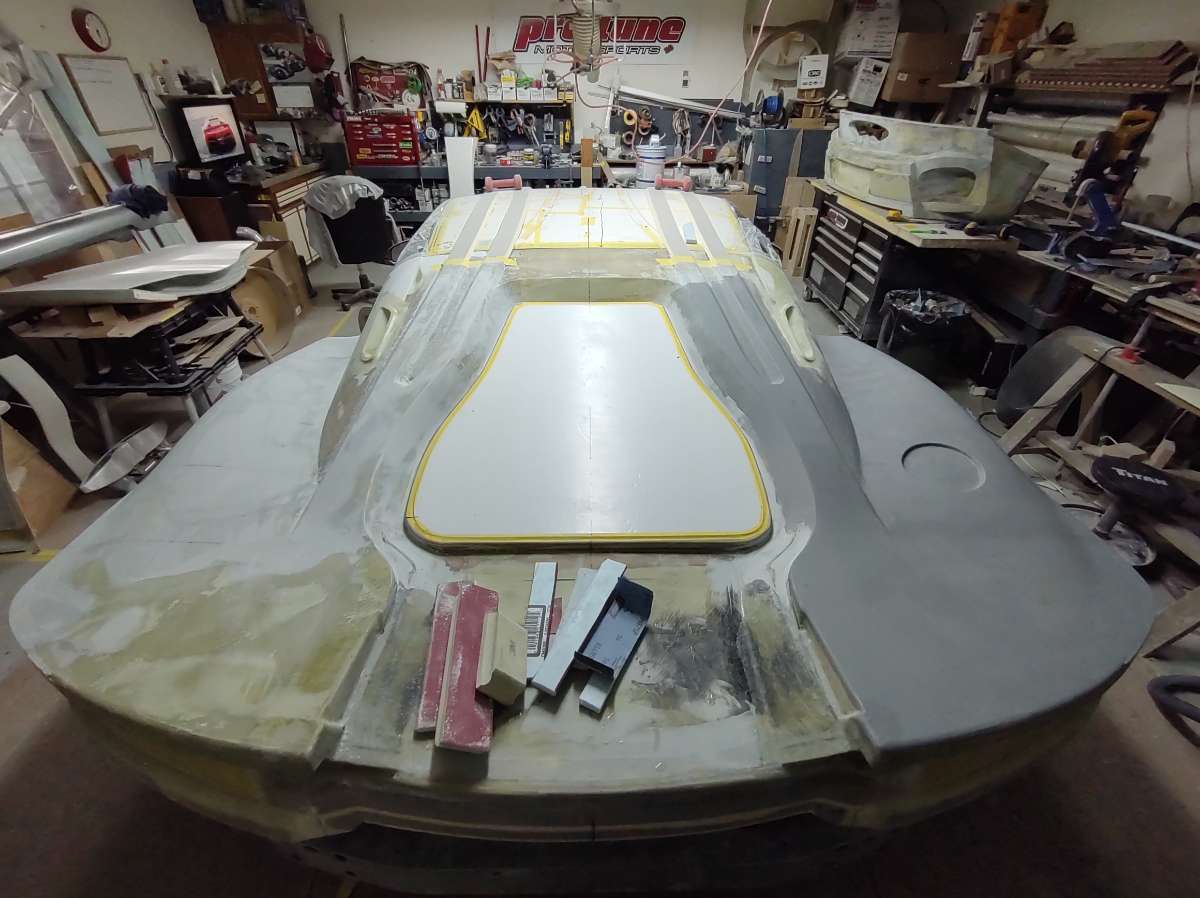
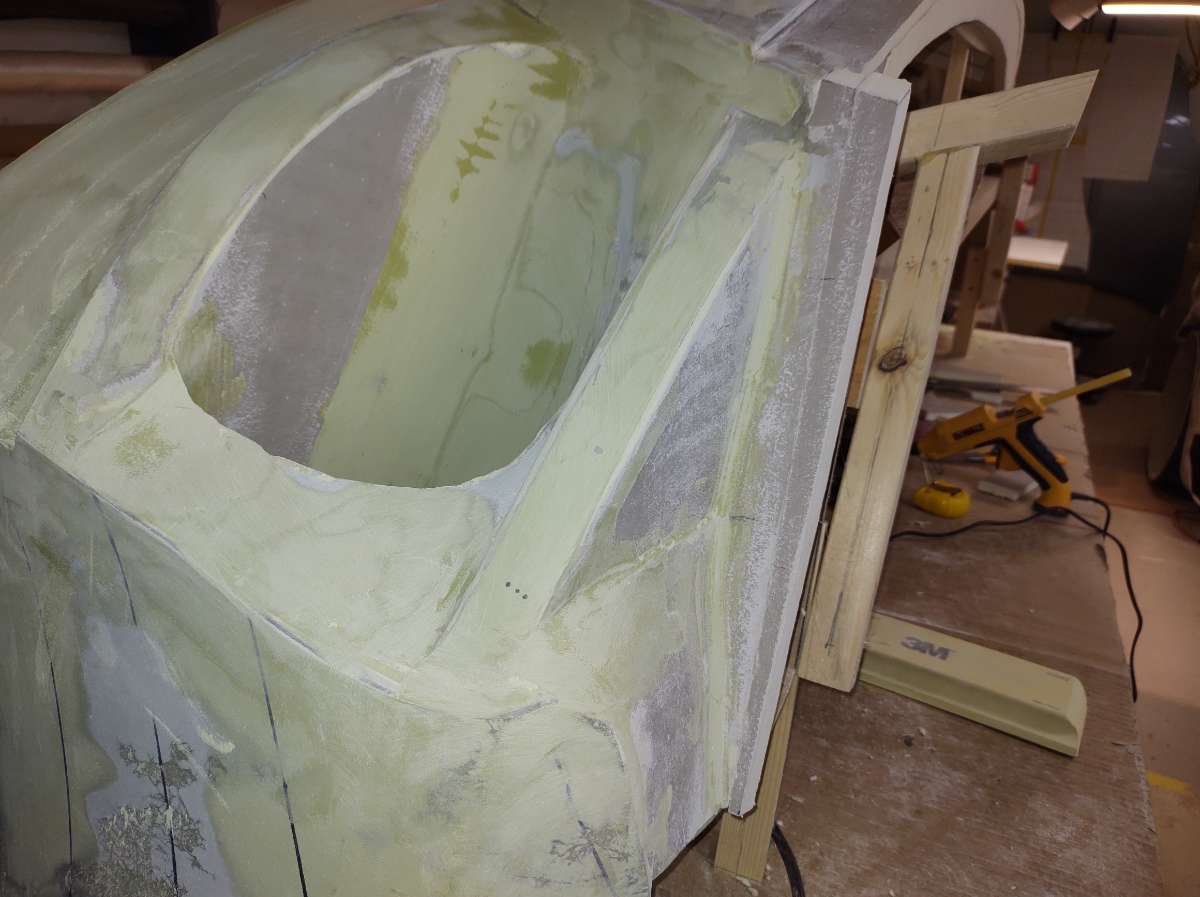
this is the part I started to make a while back too attach the roof scoop , not too sure if I like it , it's going to be a bugger to glass and mold , been thinking of a better way .
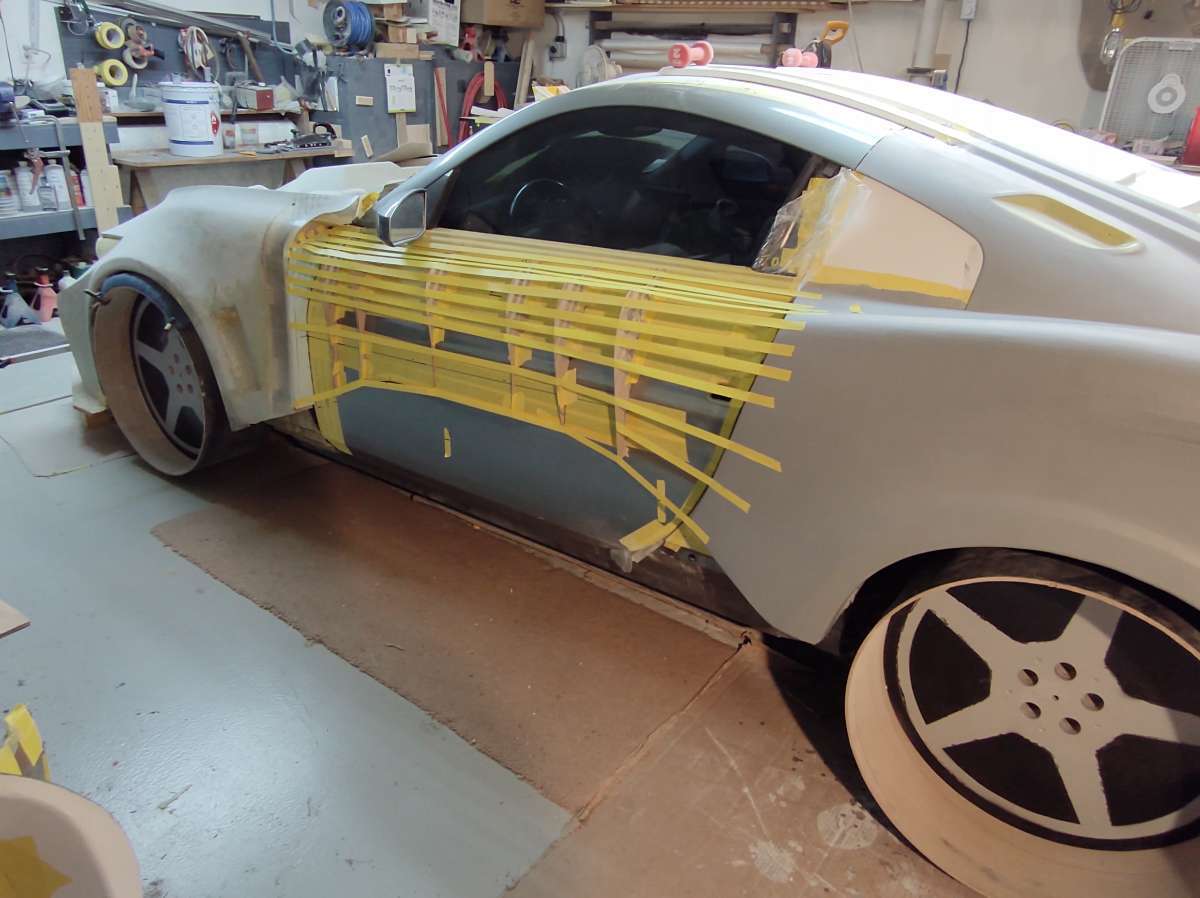
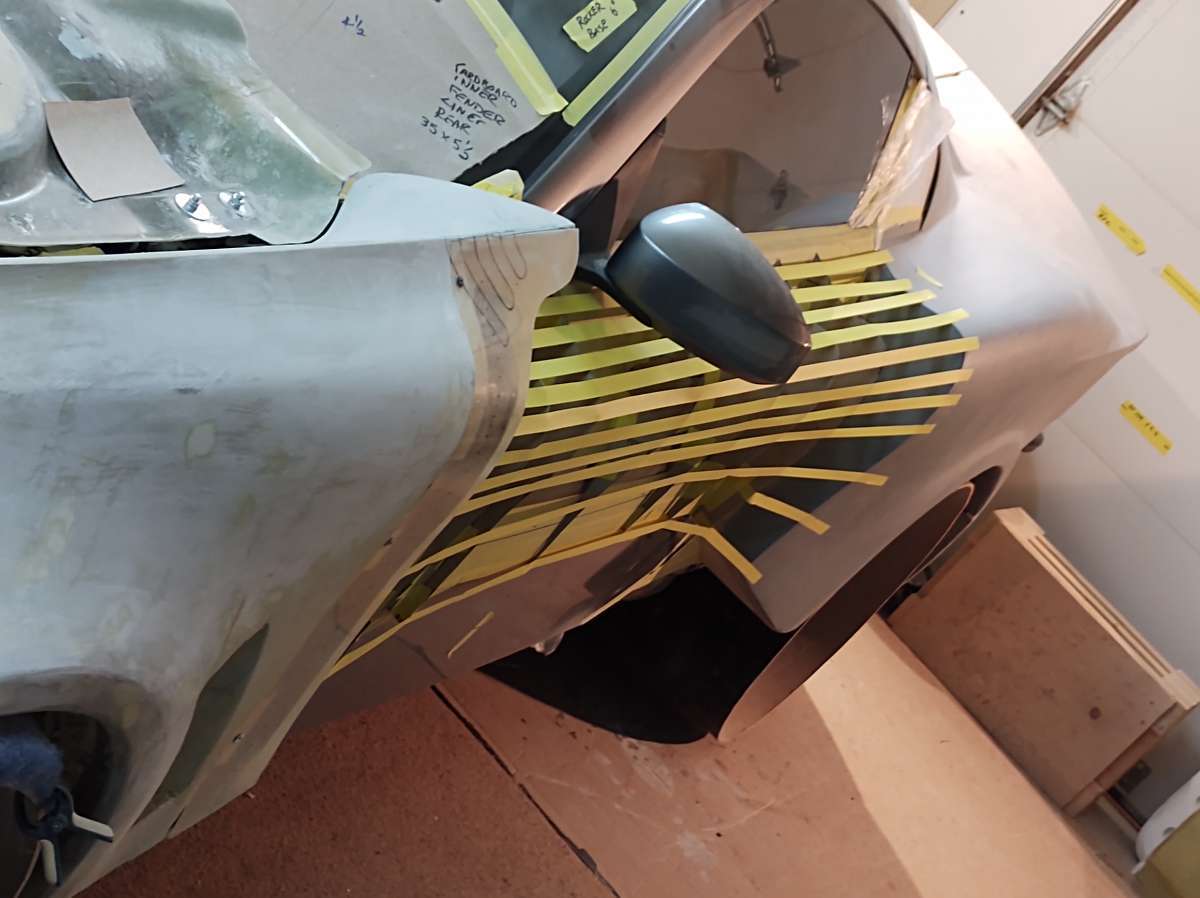
While I was sitting thinking about the roof I got out the masking tape and laid some on the side of the car to get an idea of it filled in .
Wow Can't wait !!! to do the doors now ......

Enjoy !!
Stay Safe and Stay Tuned In !!
Cheers Phil
-
7
-
-
Hi everyone back with a teaser until tomorrow
-
4
-
-
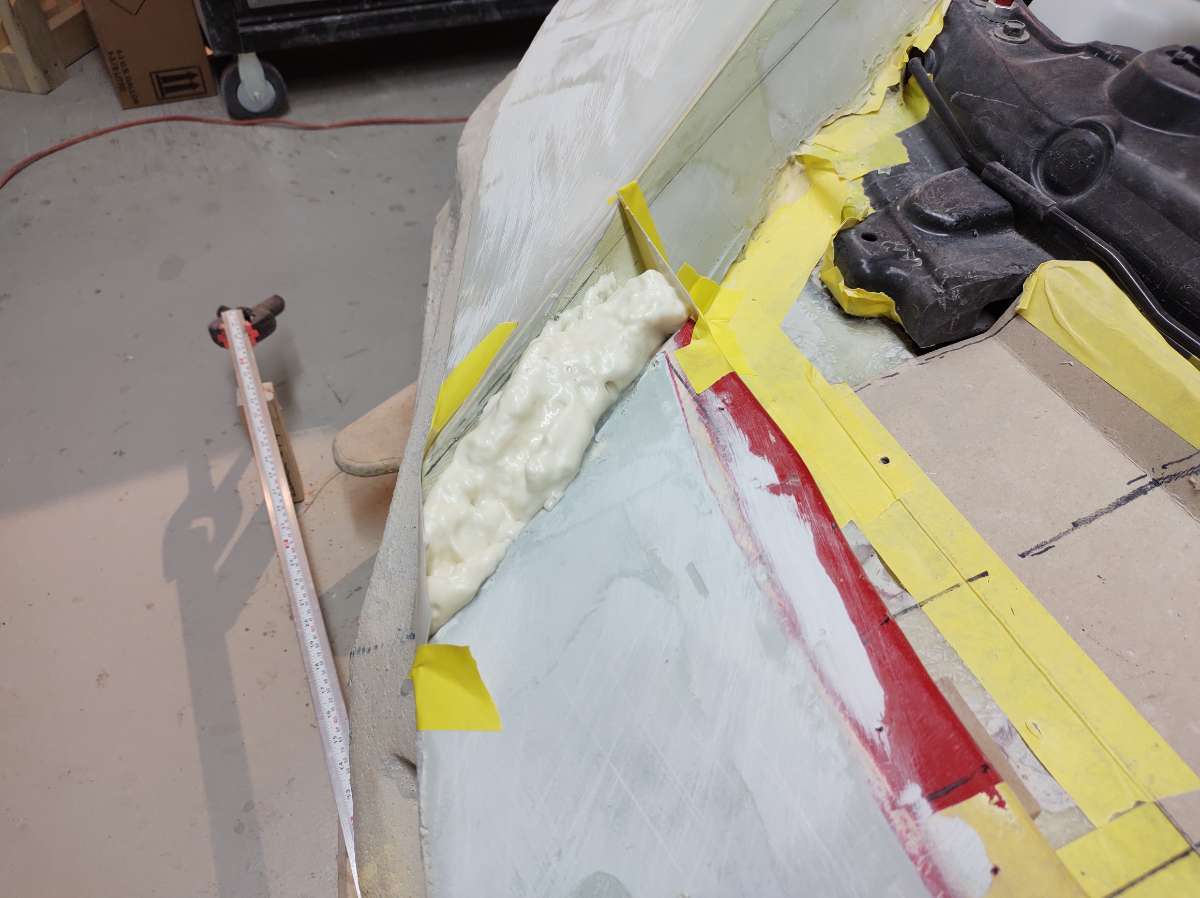
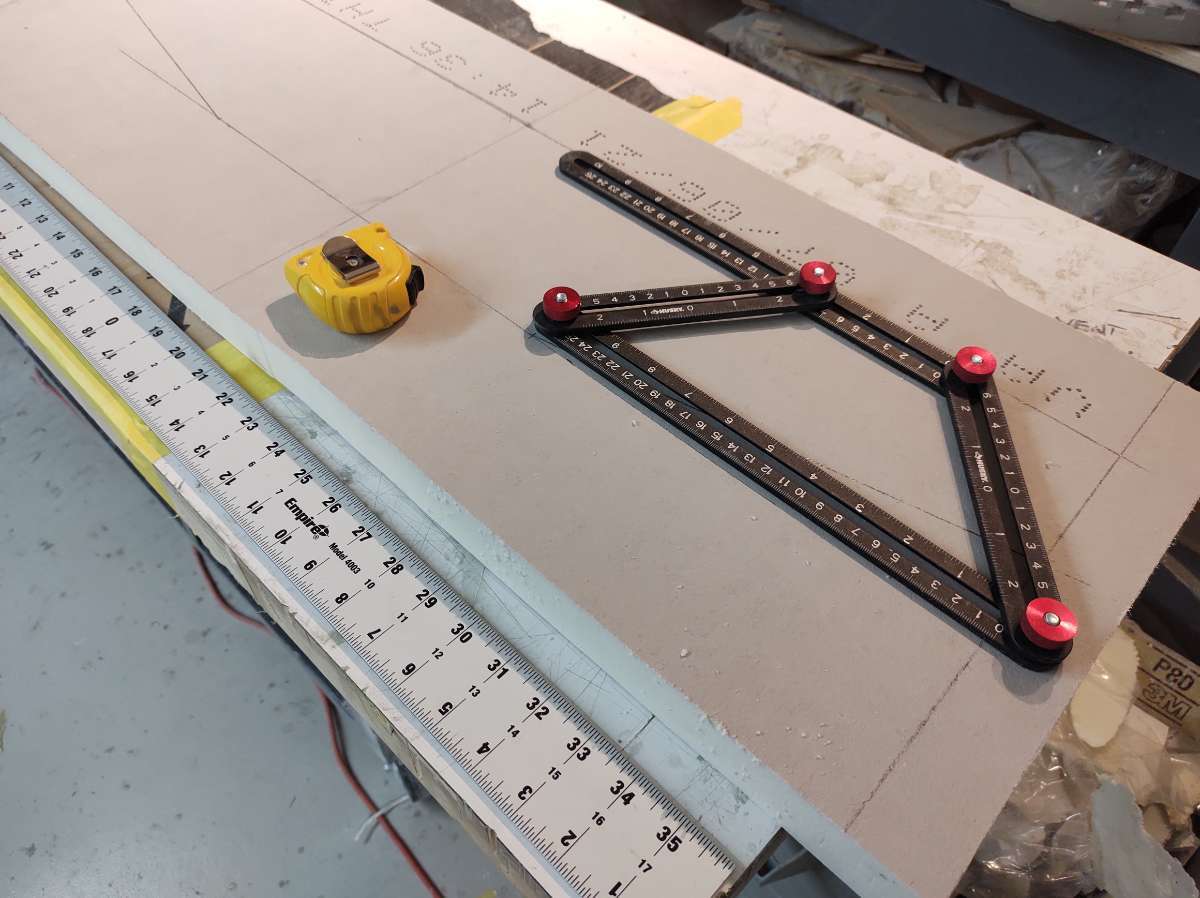
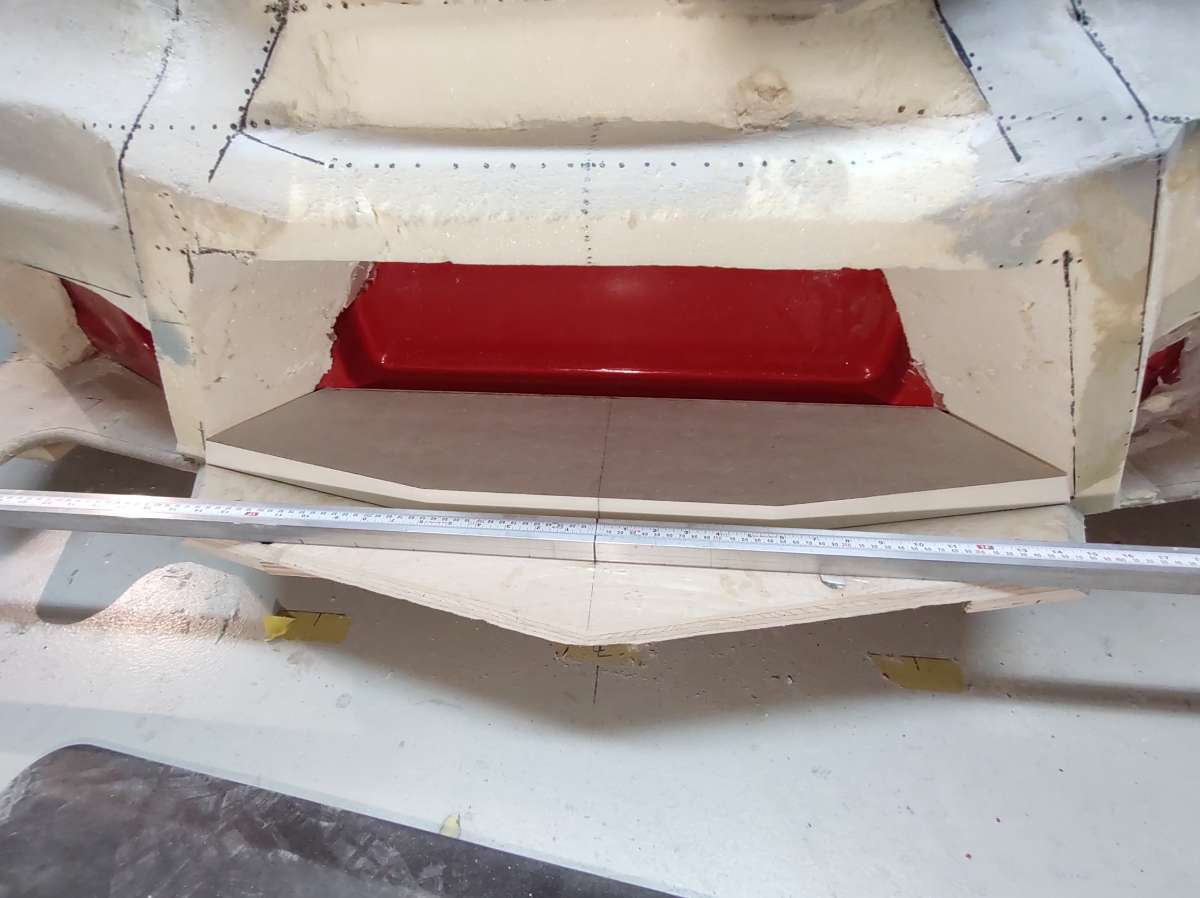
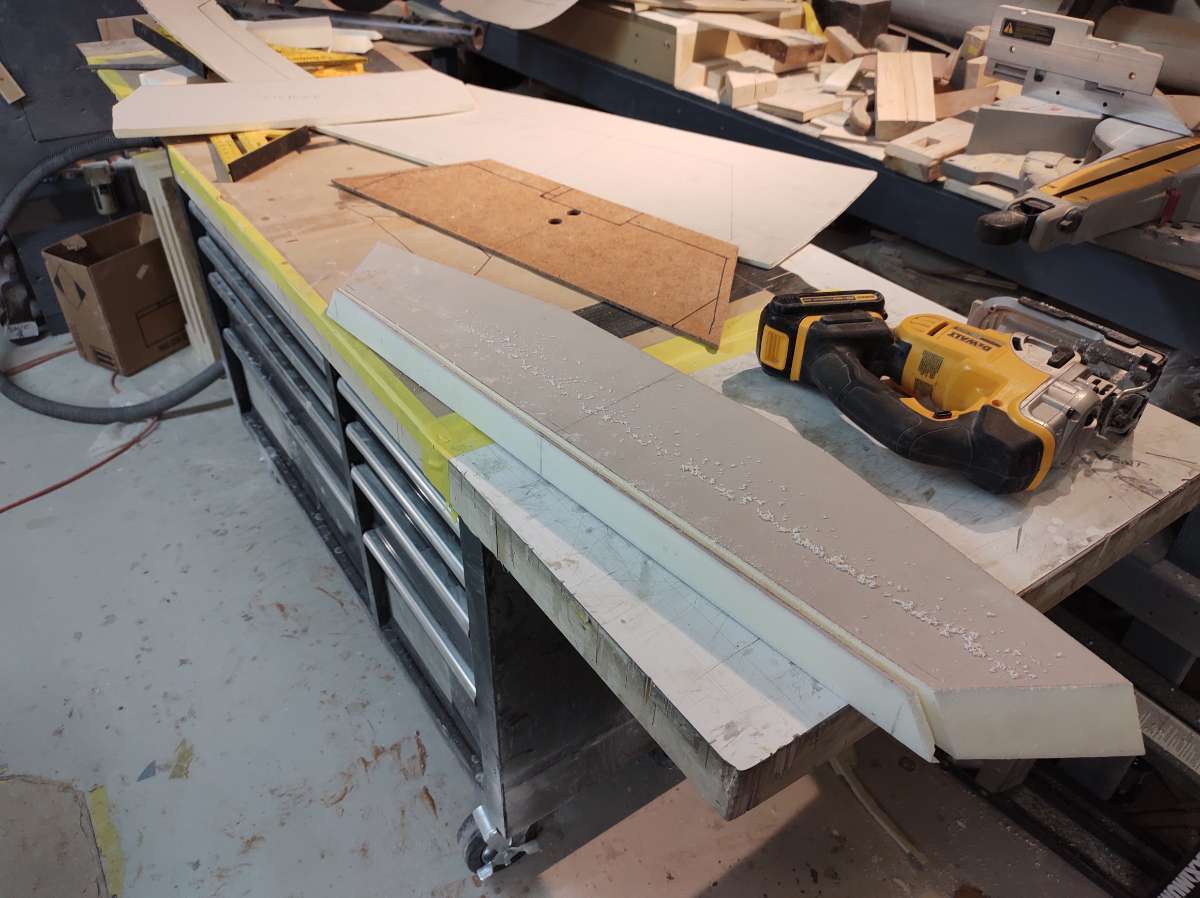
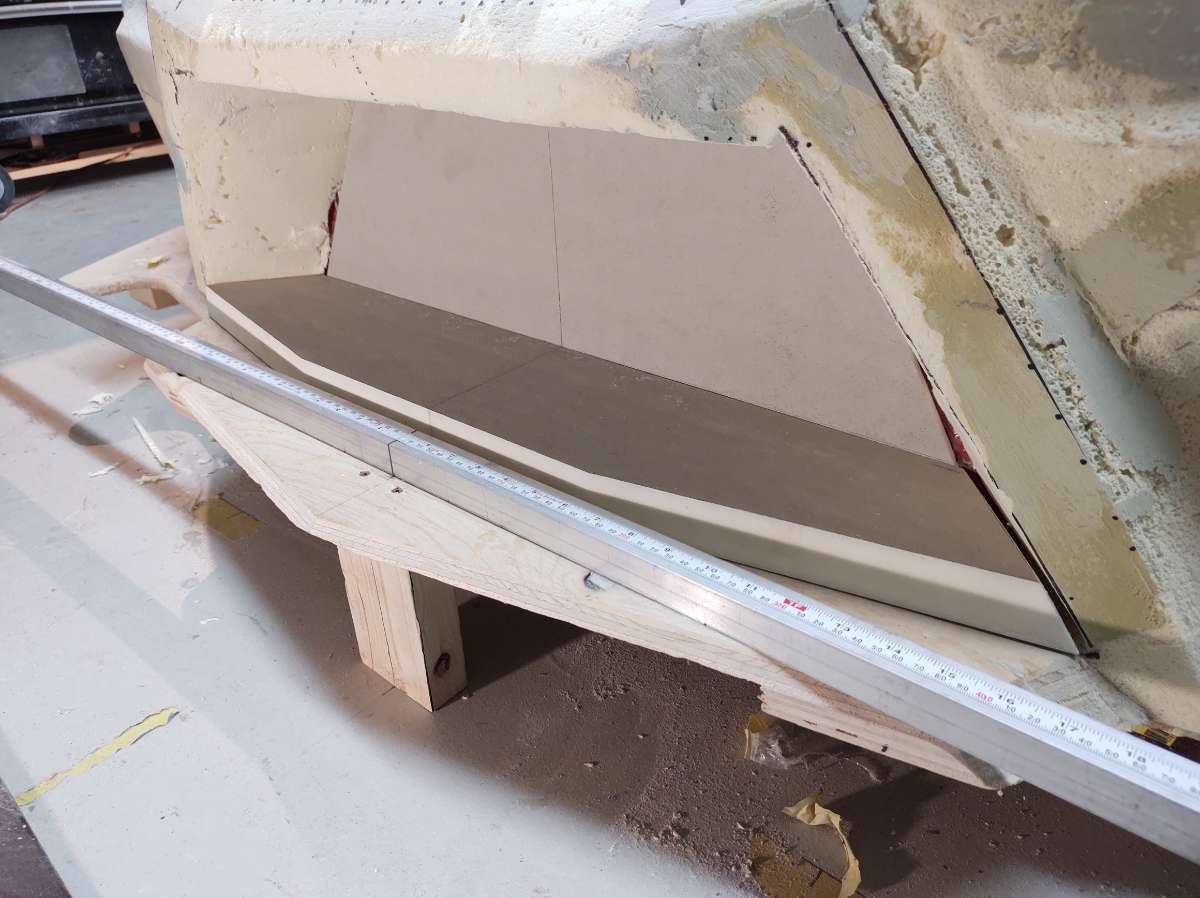
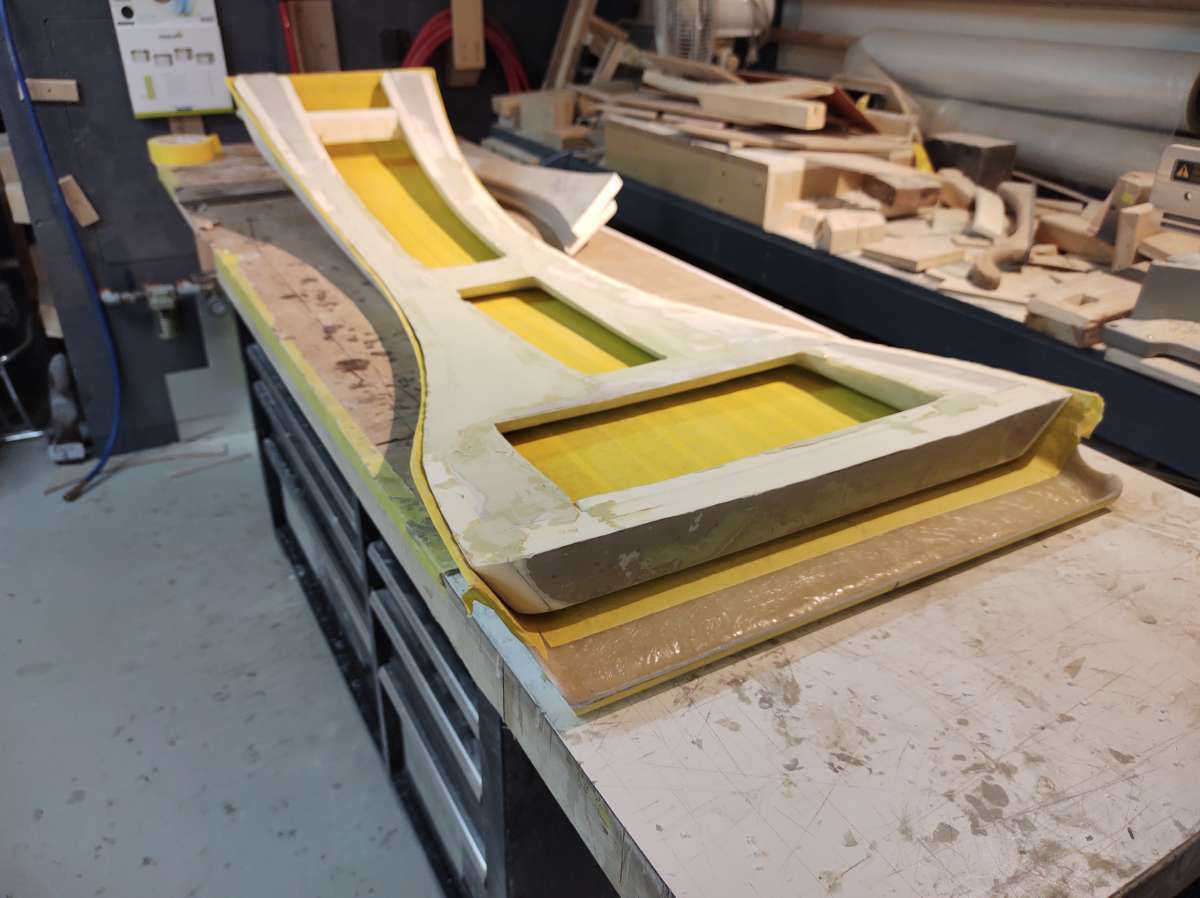
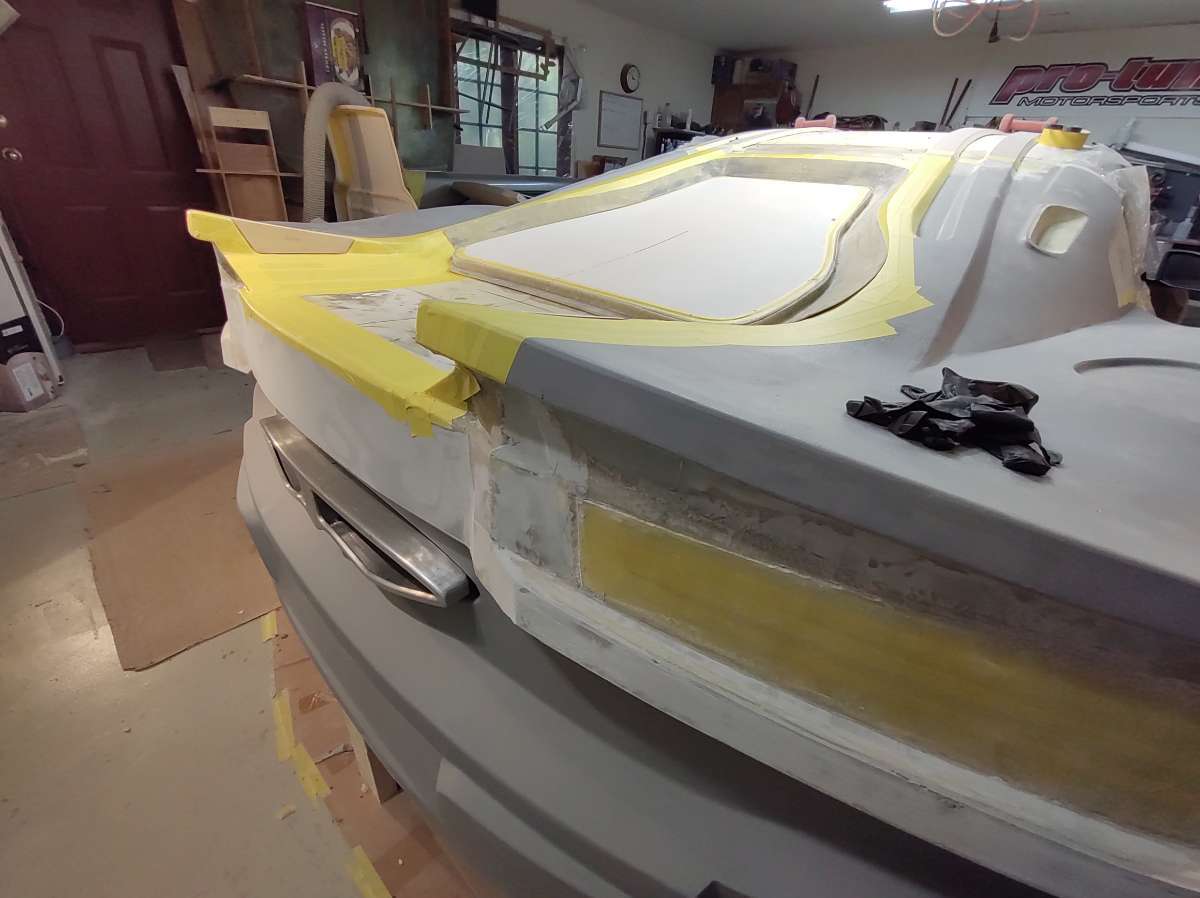
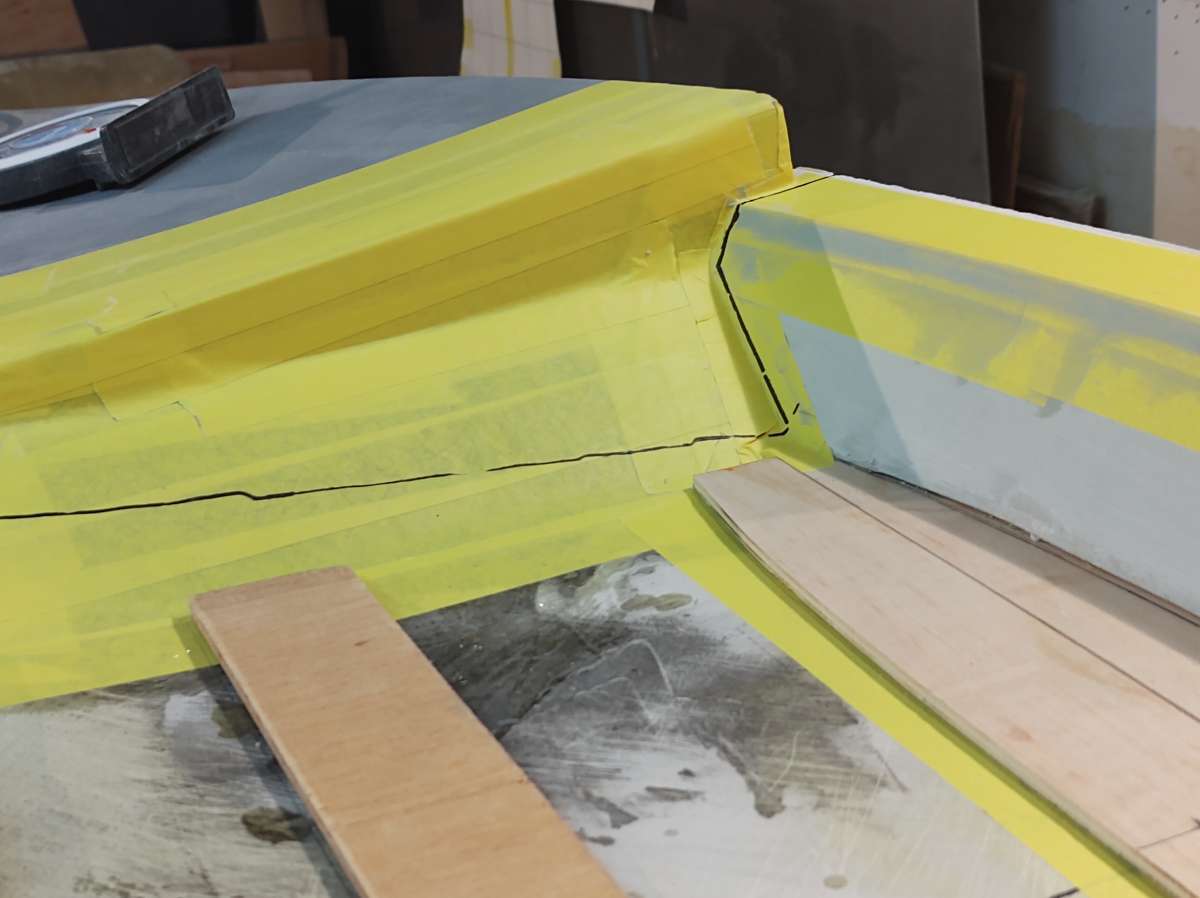
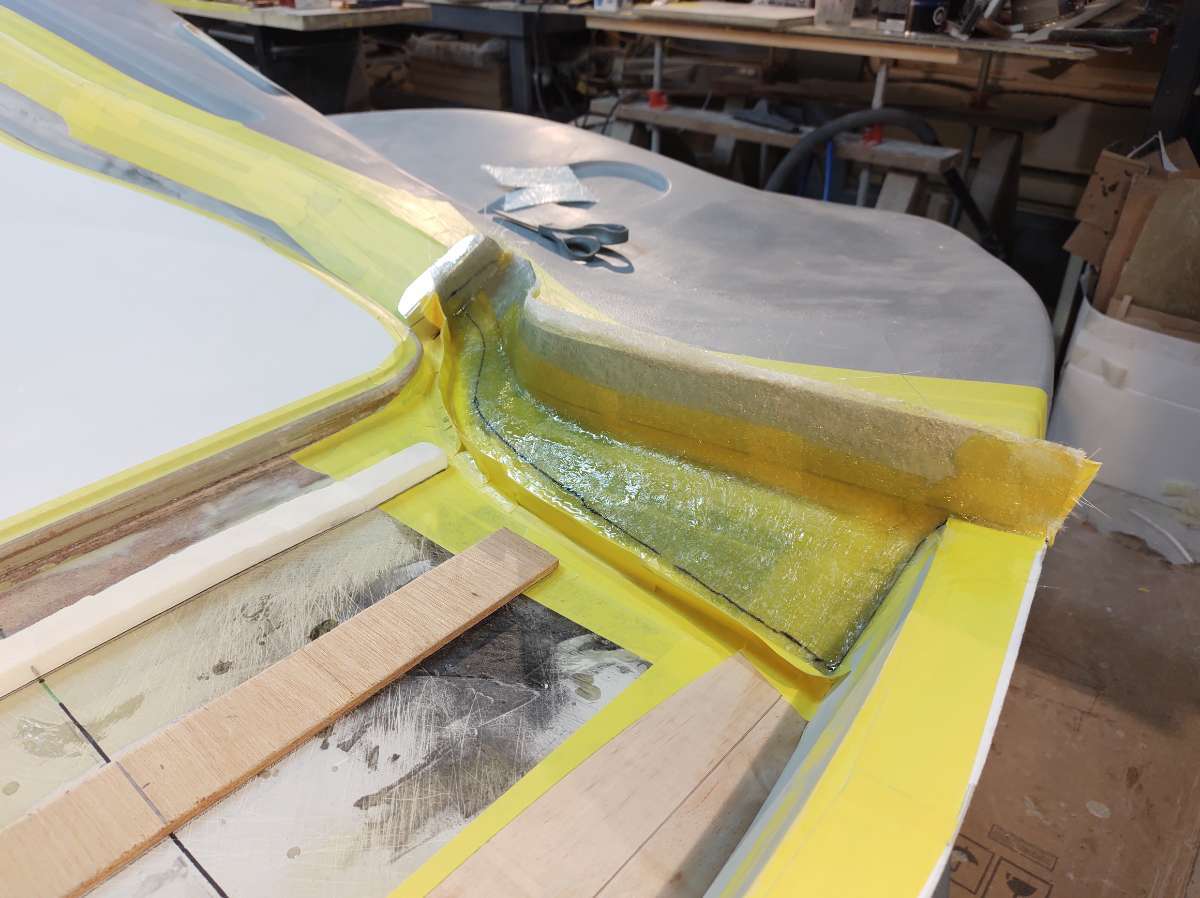
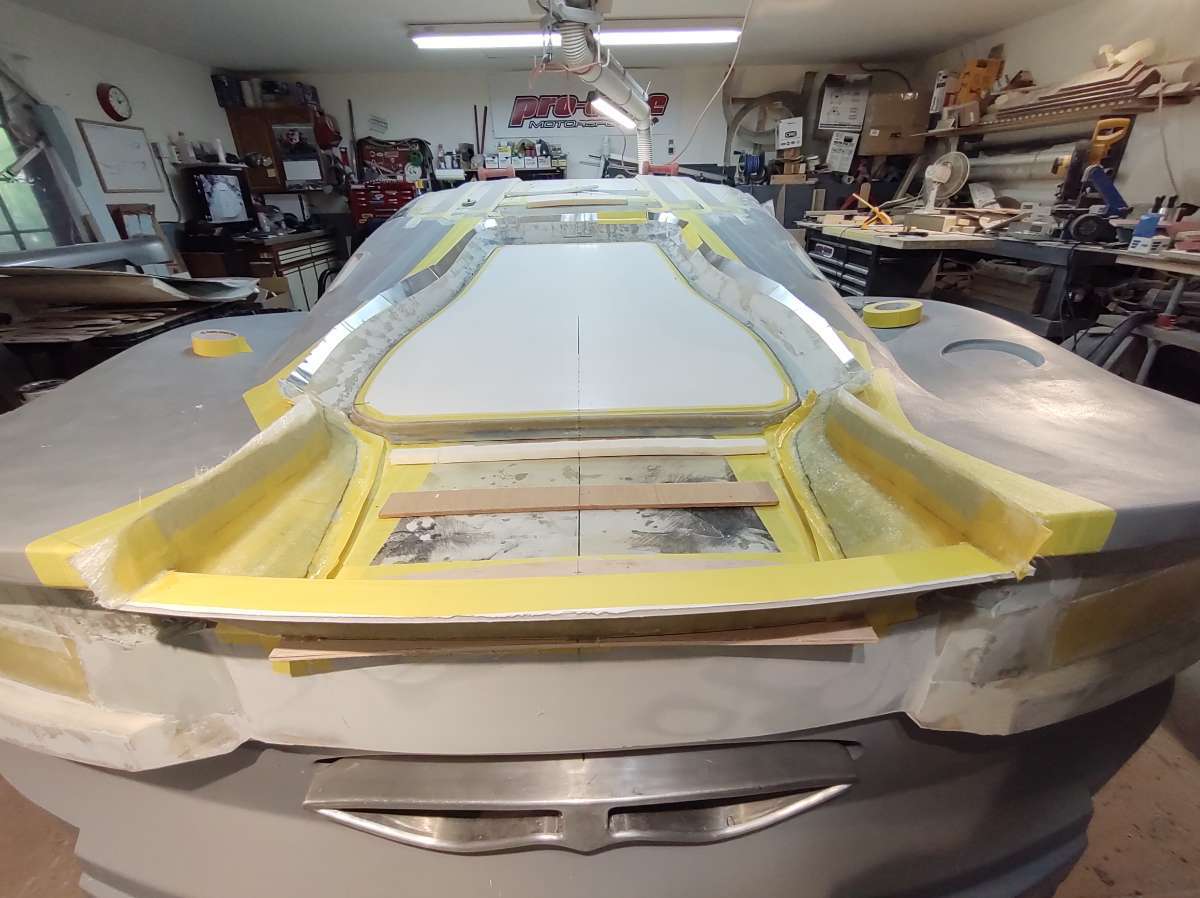
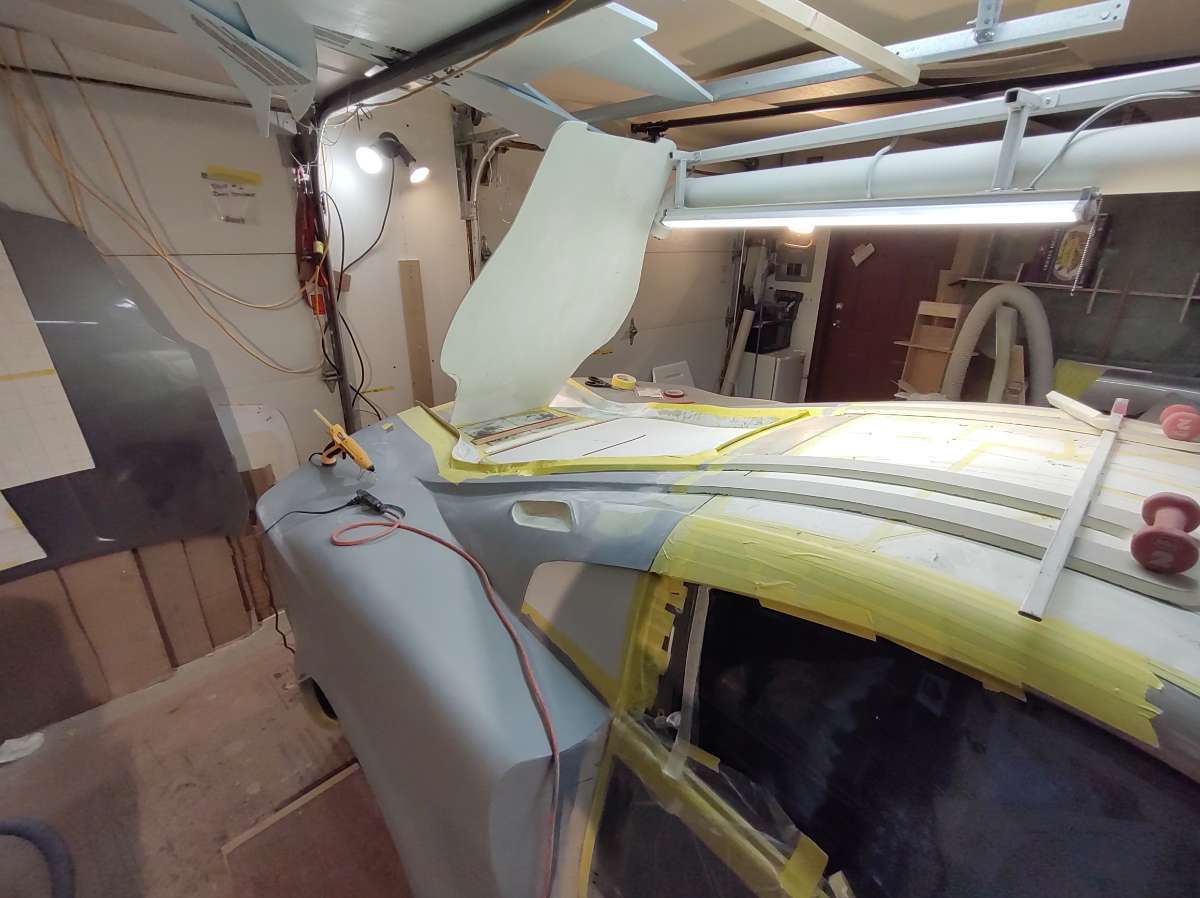
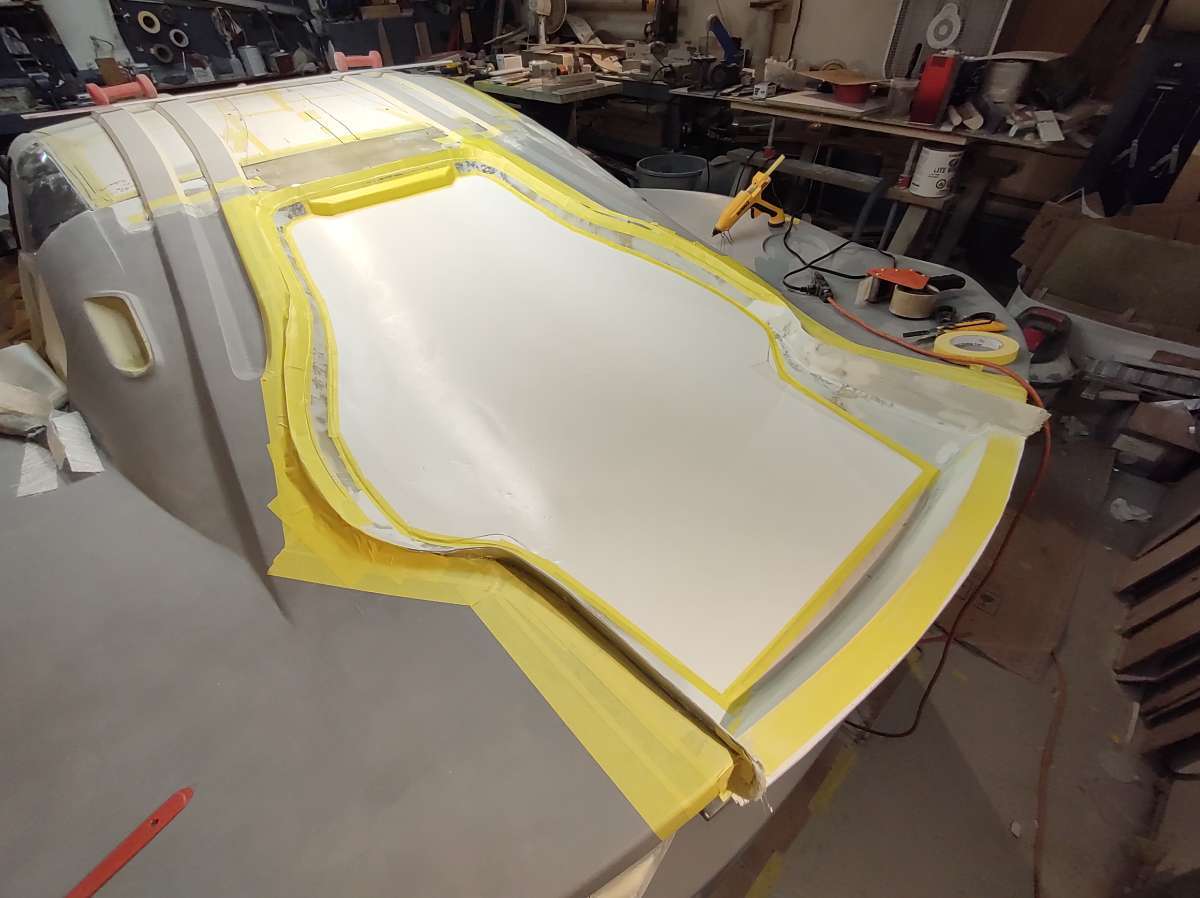
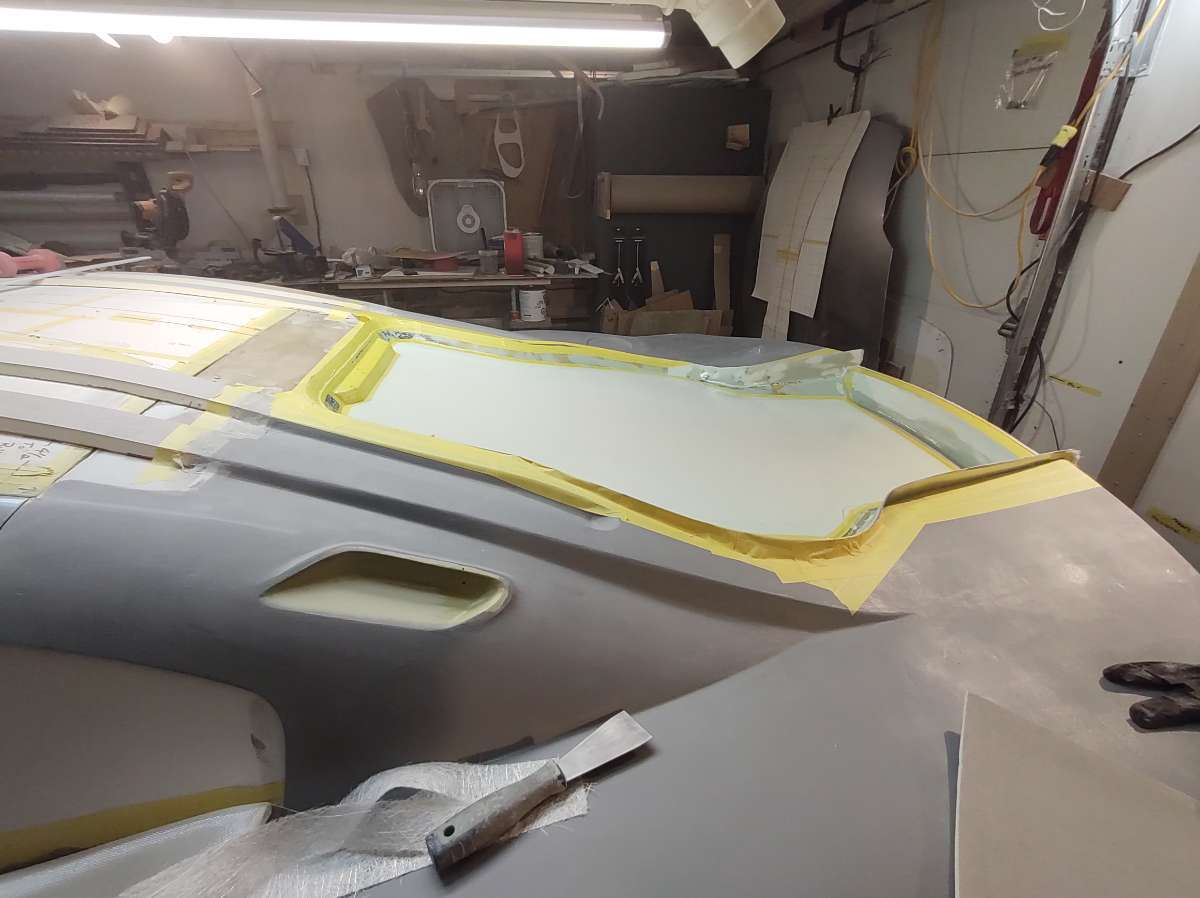
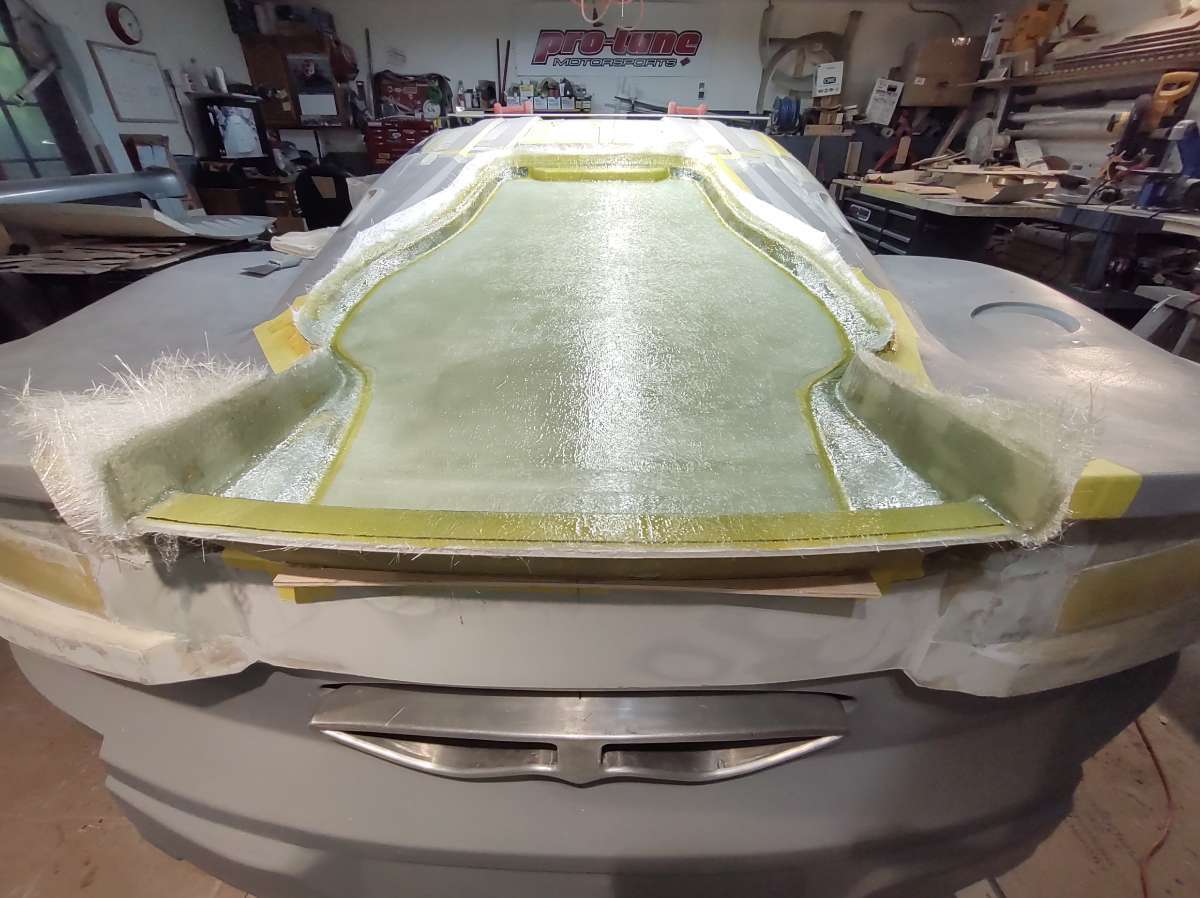
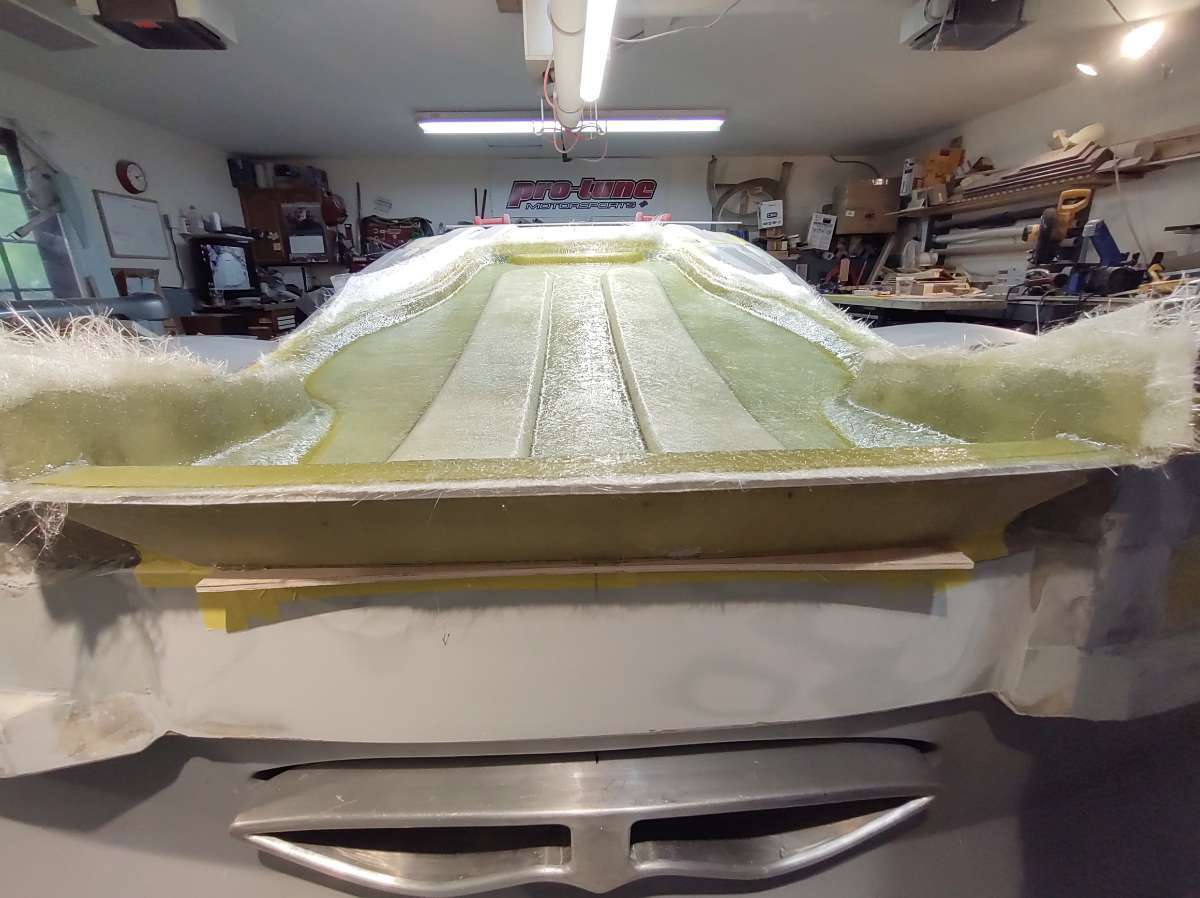
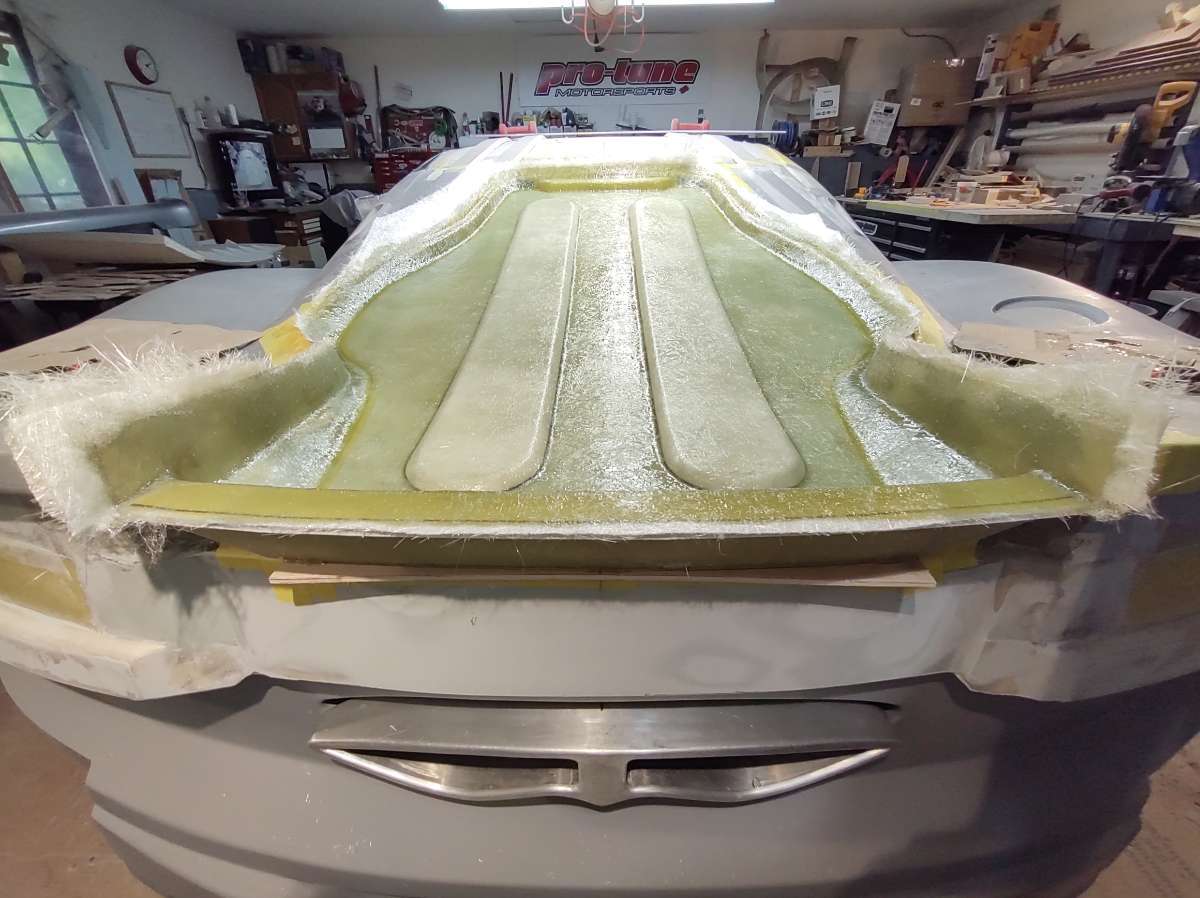
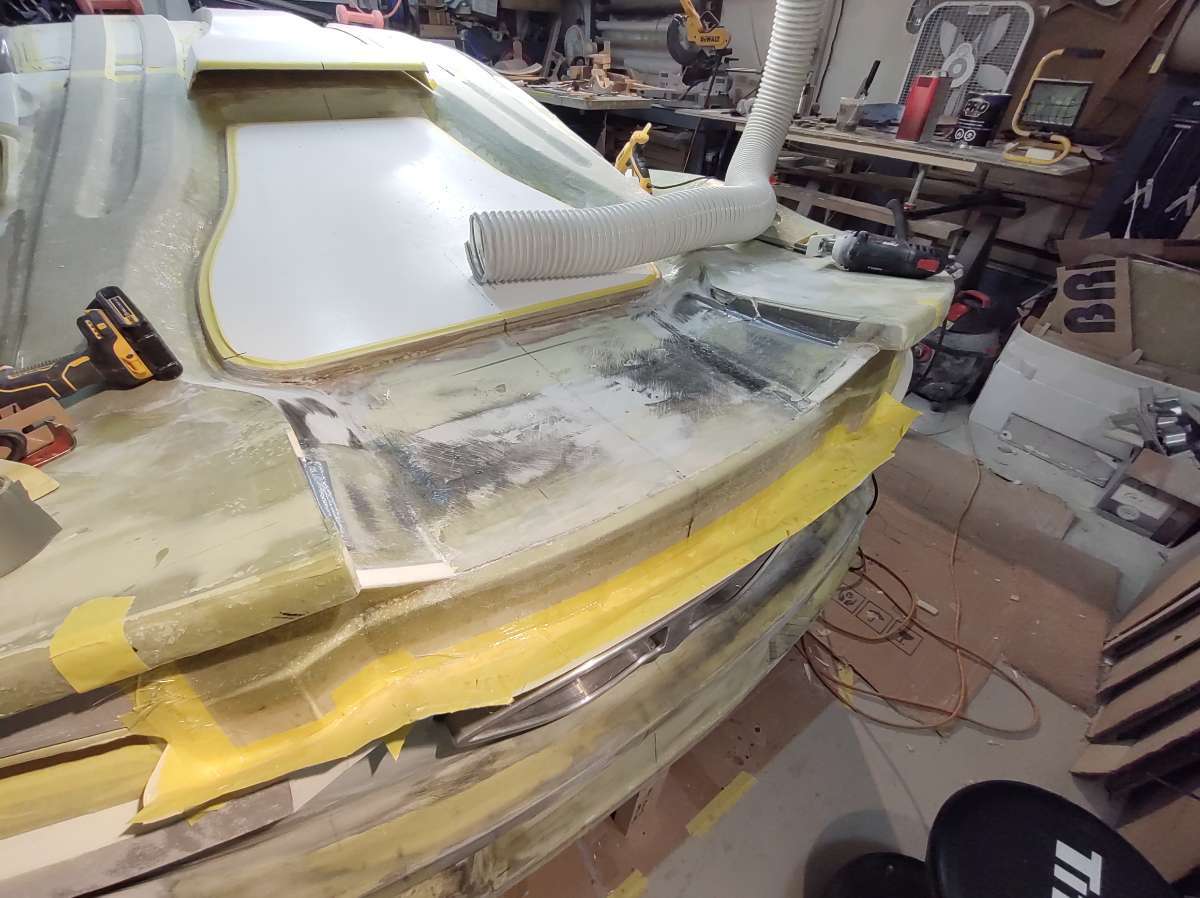
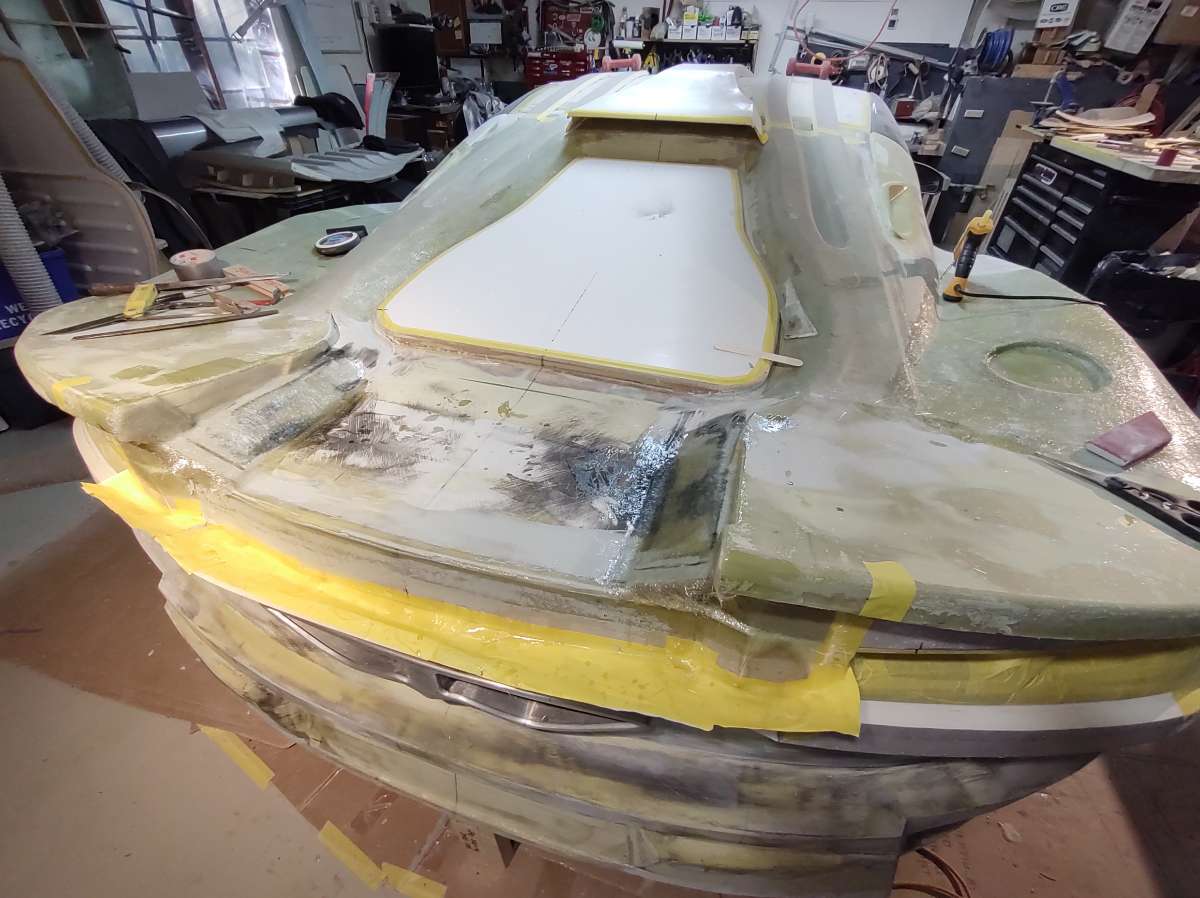
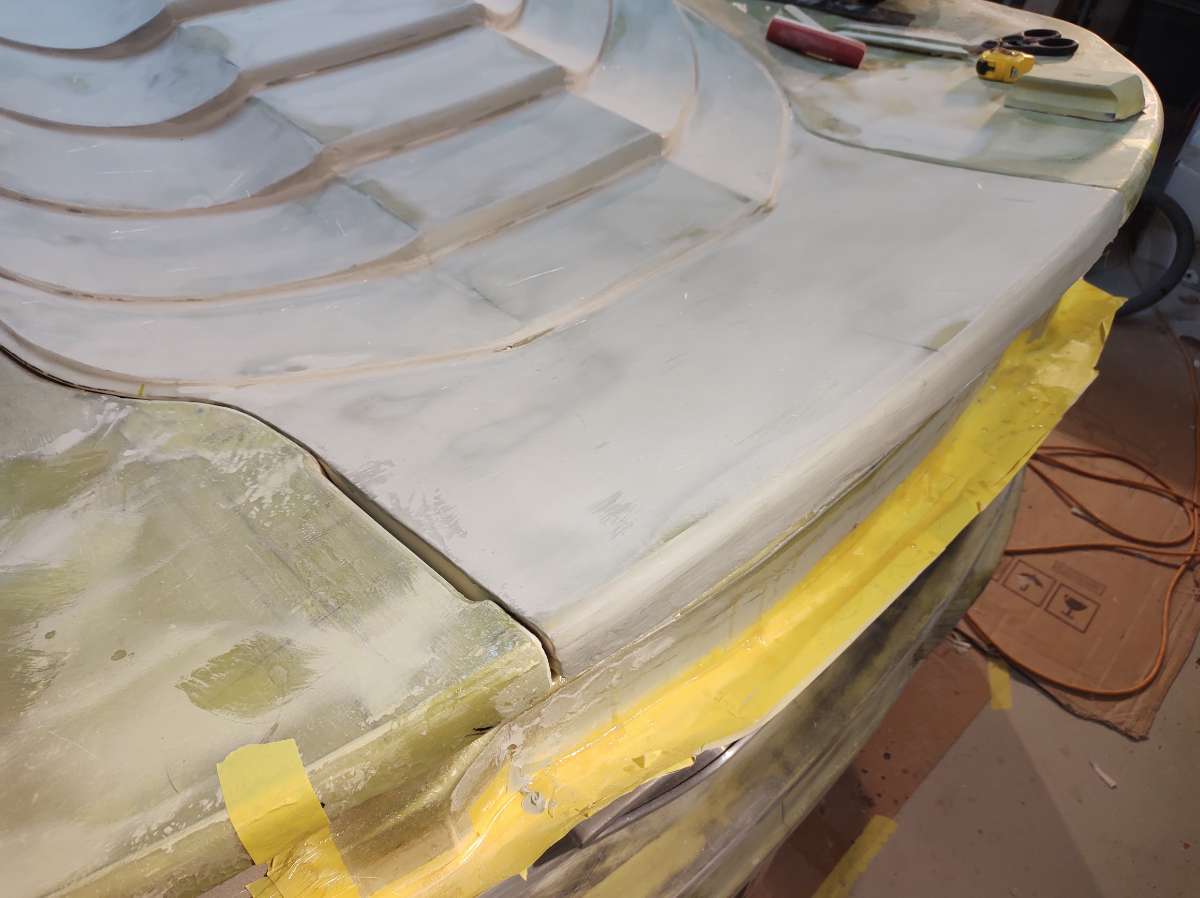
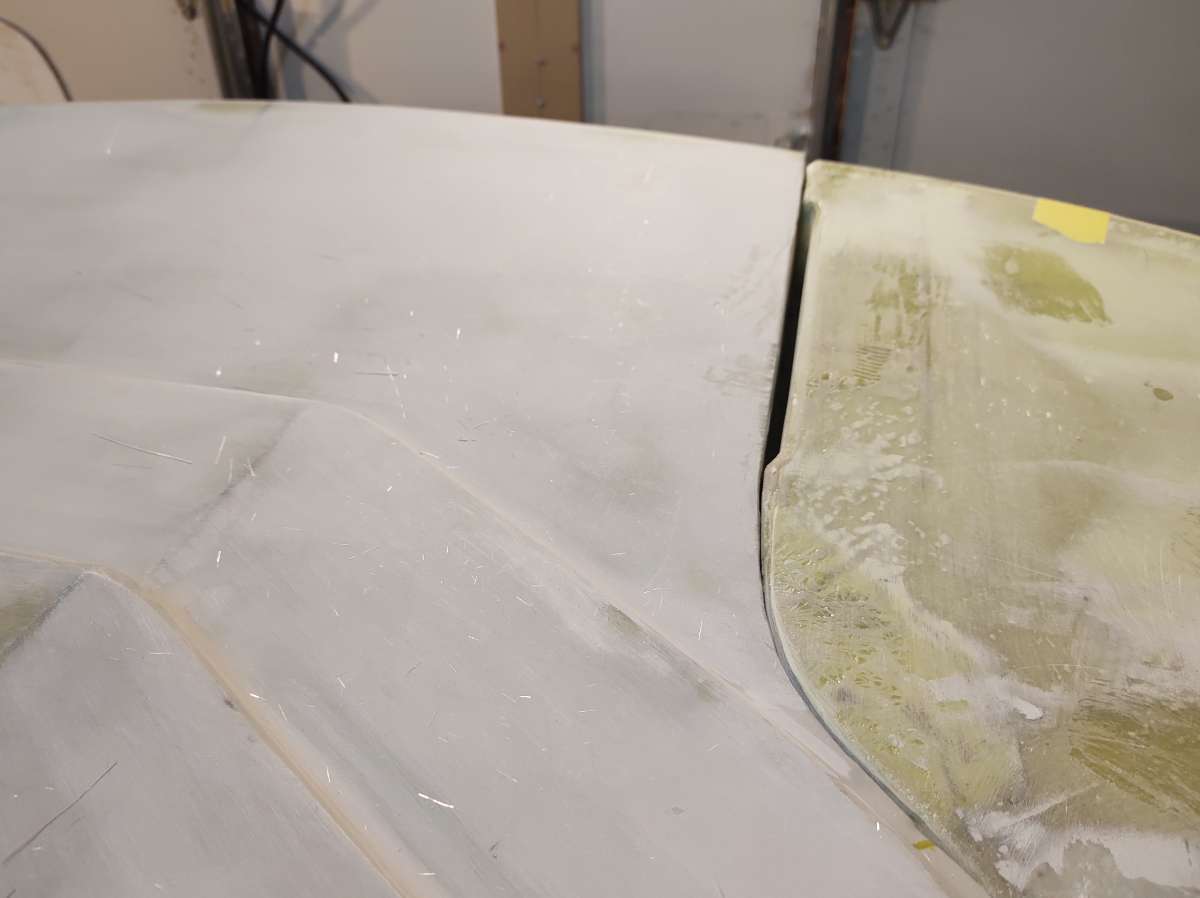
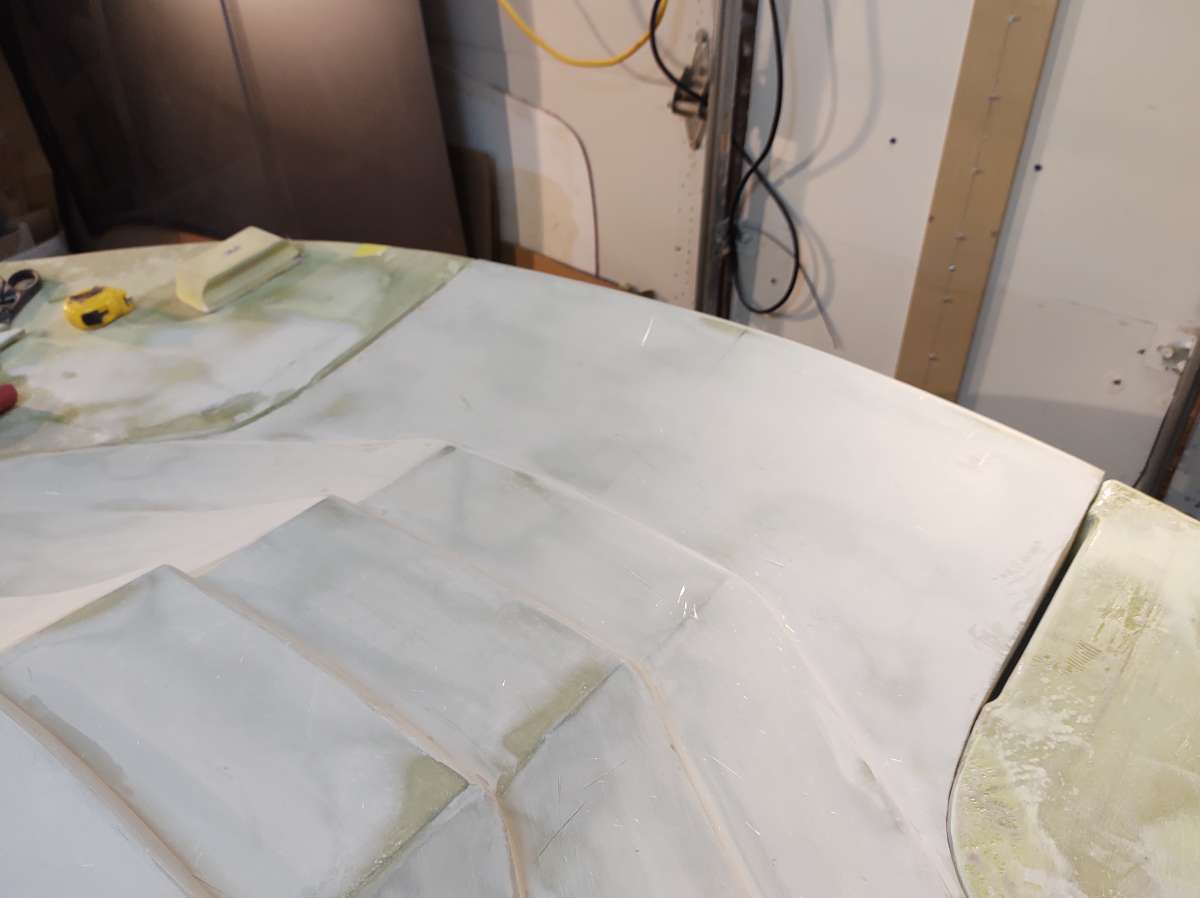
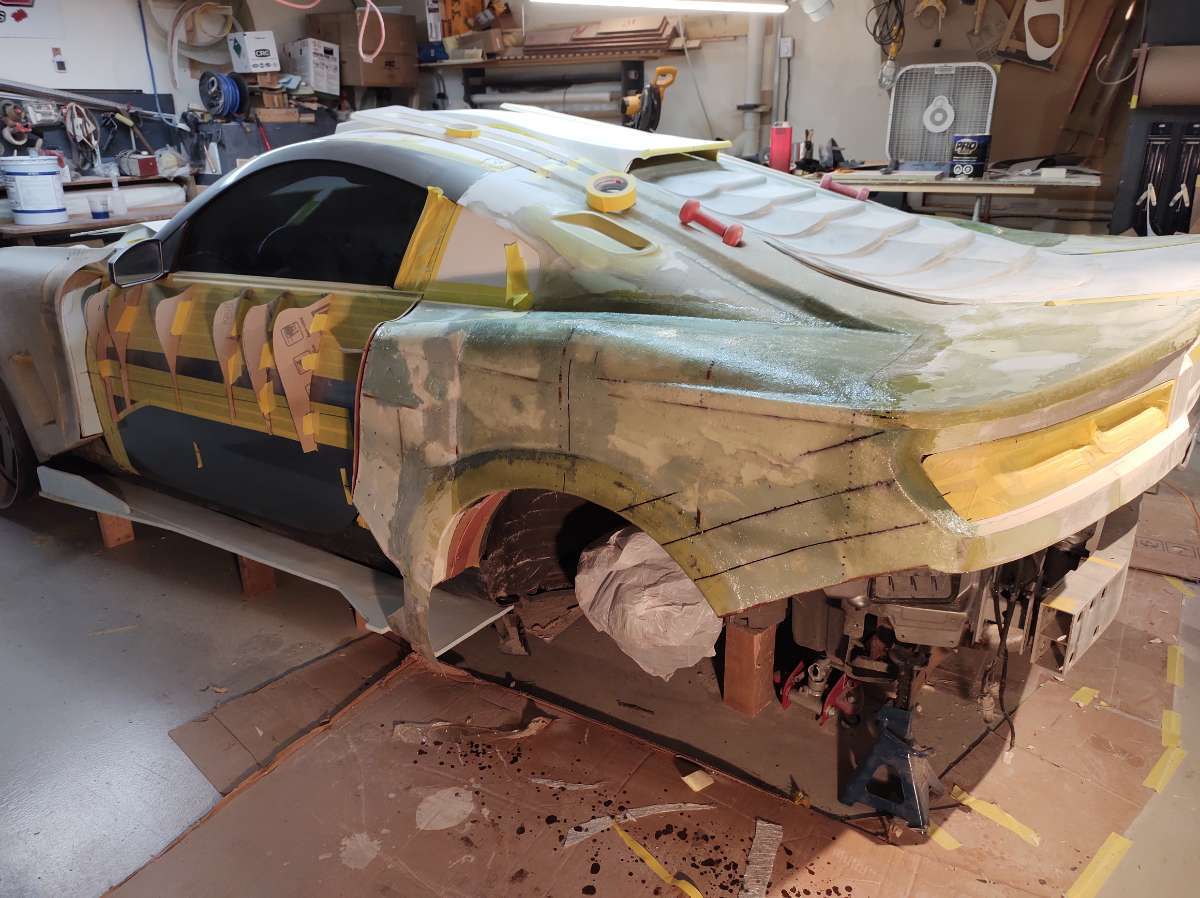
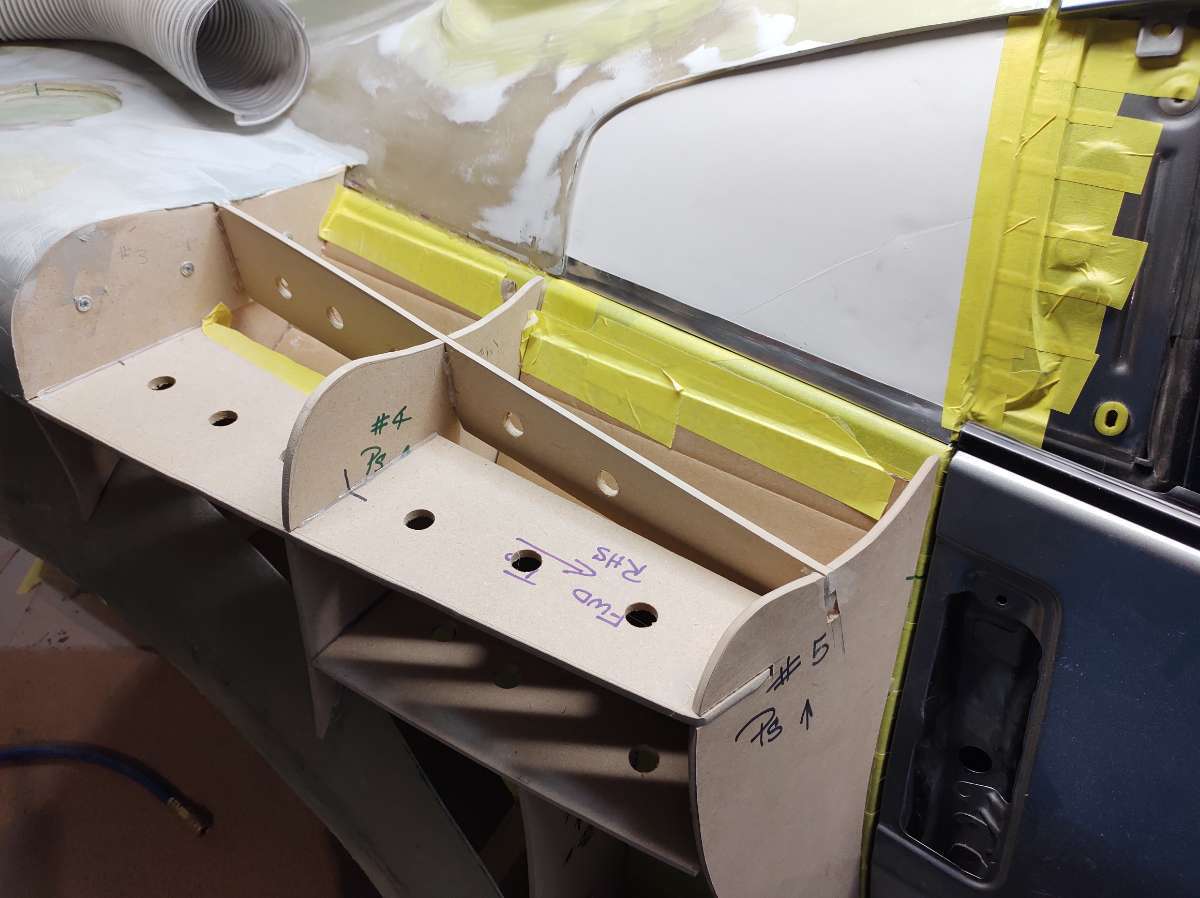
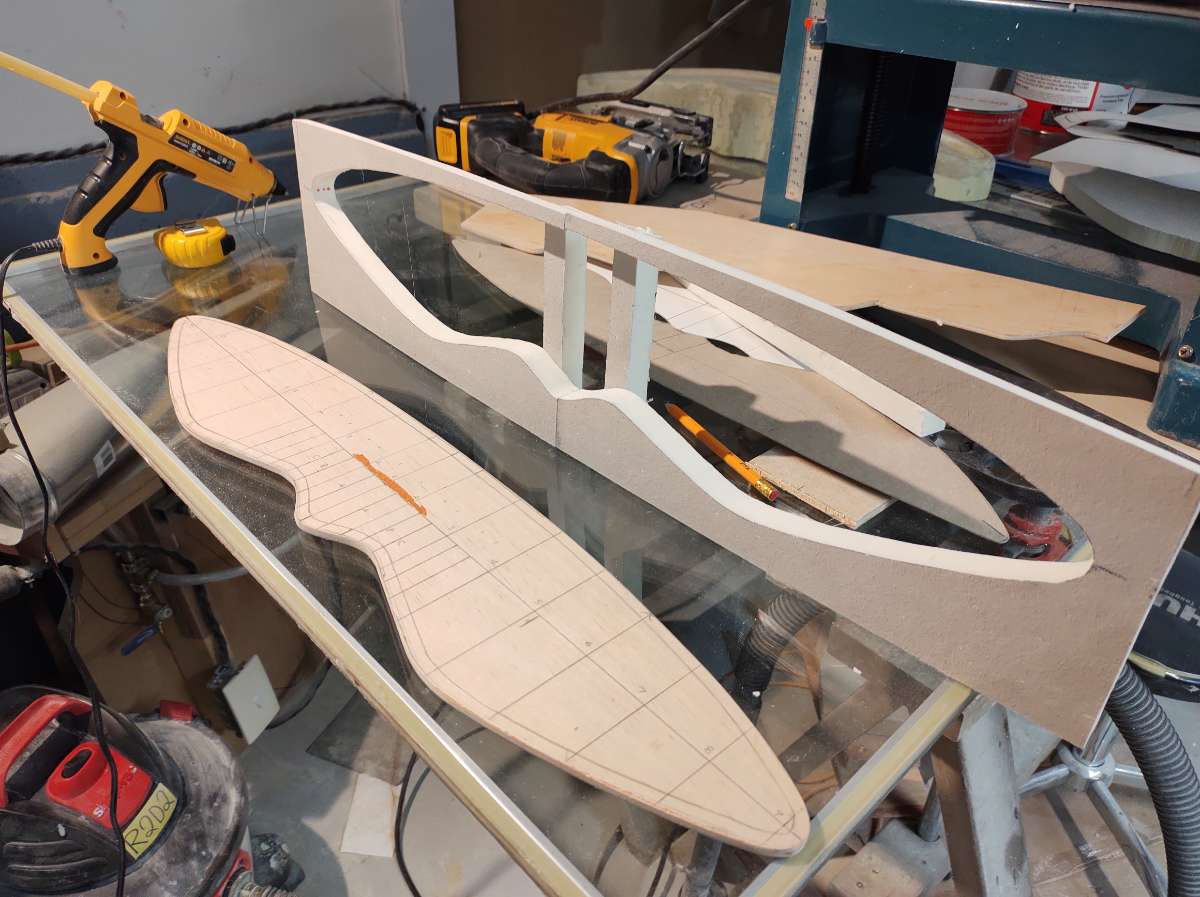
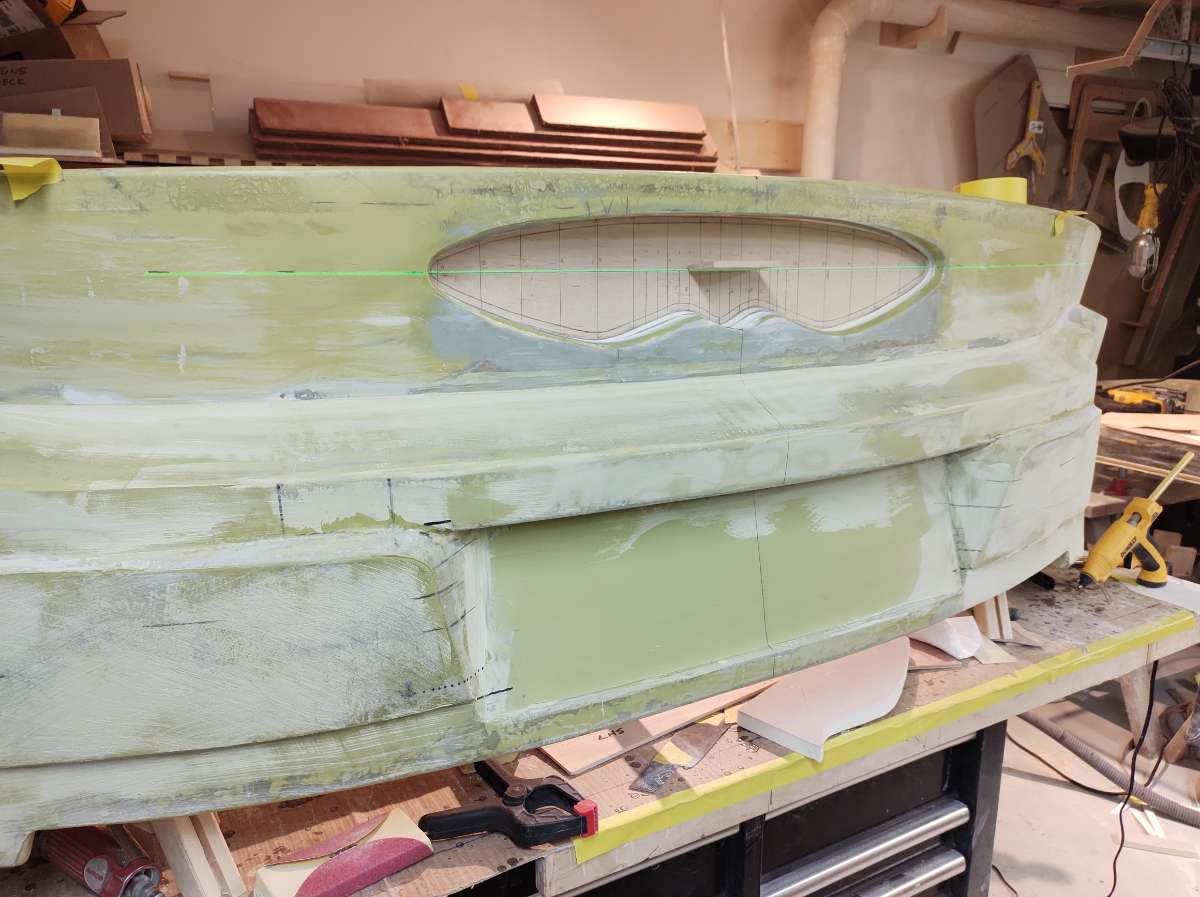
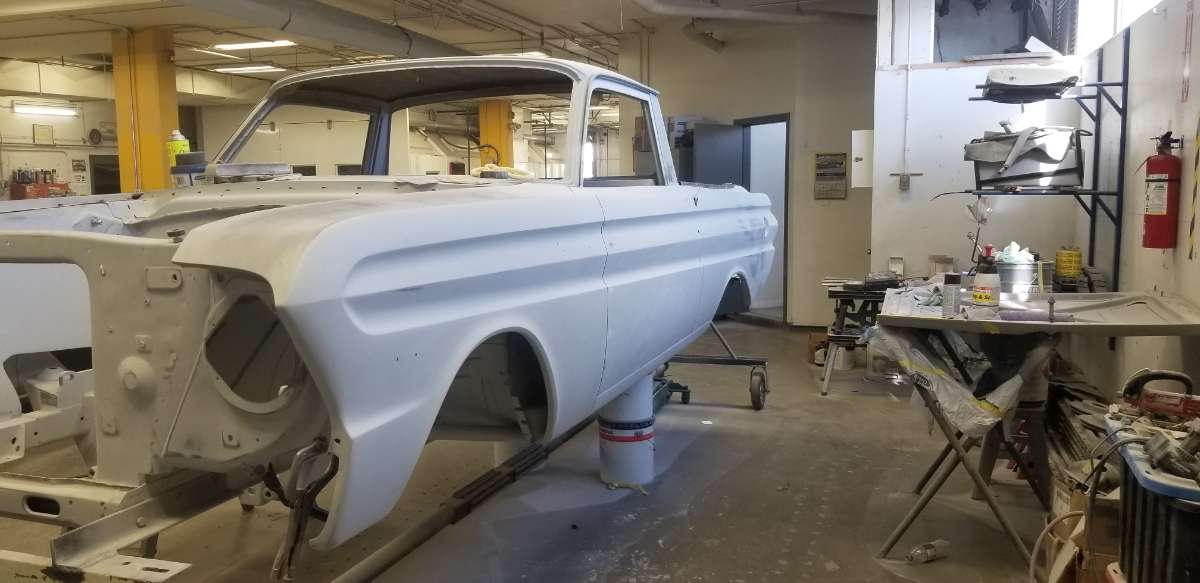
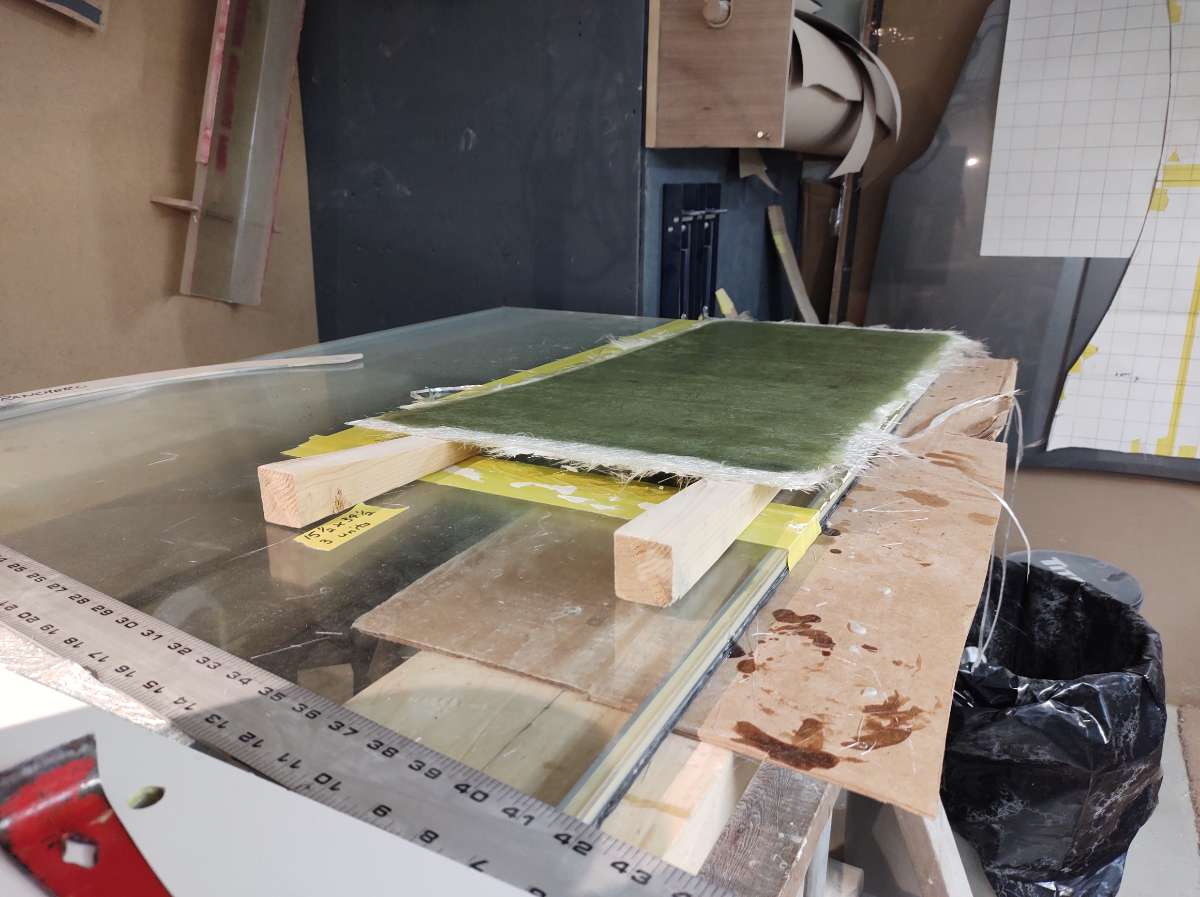
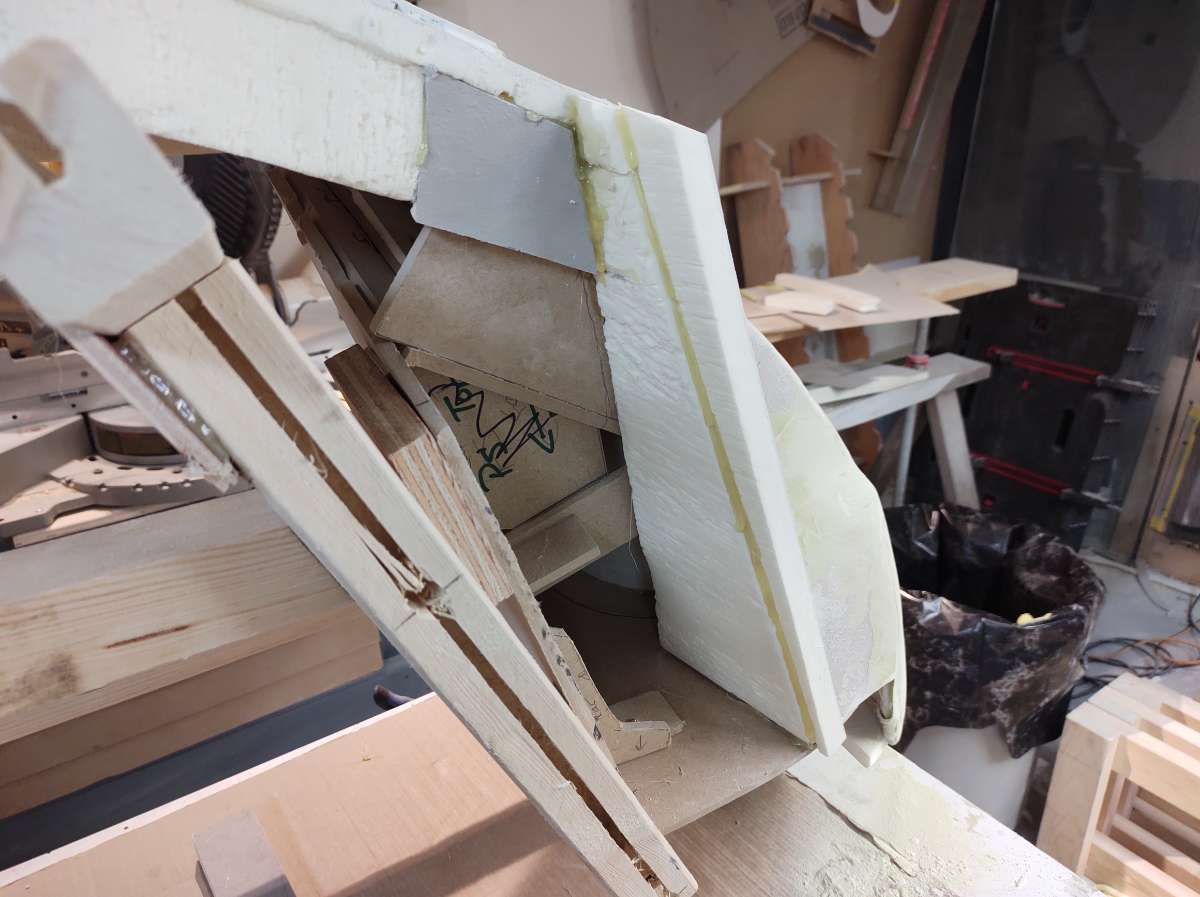
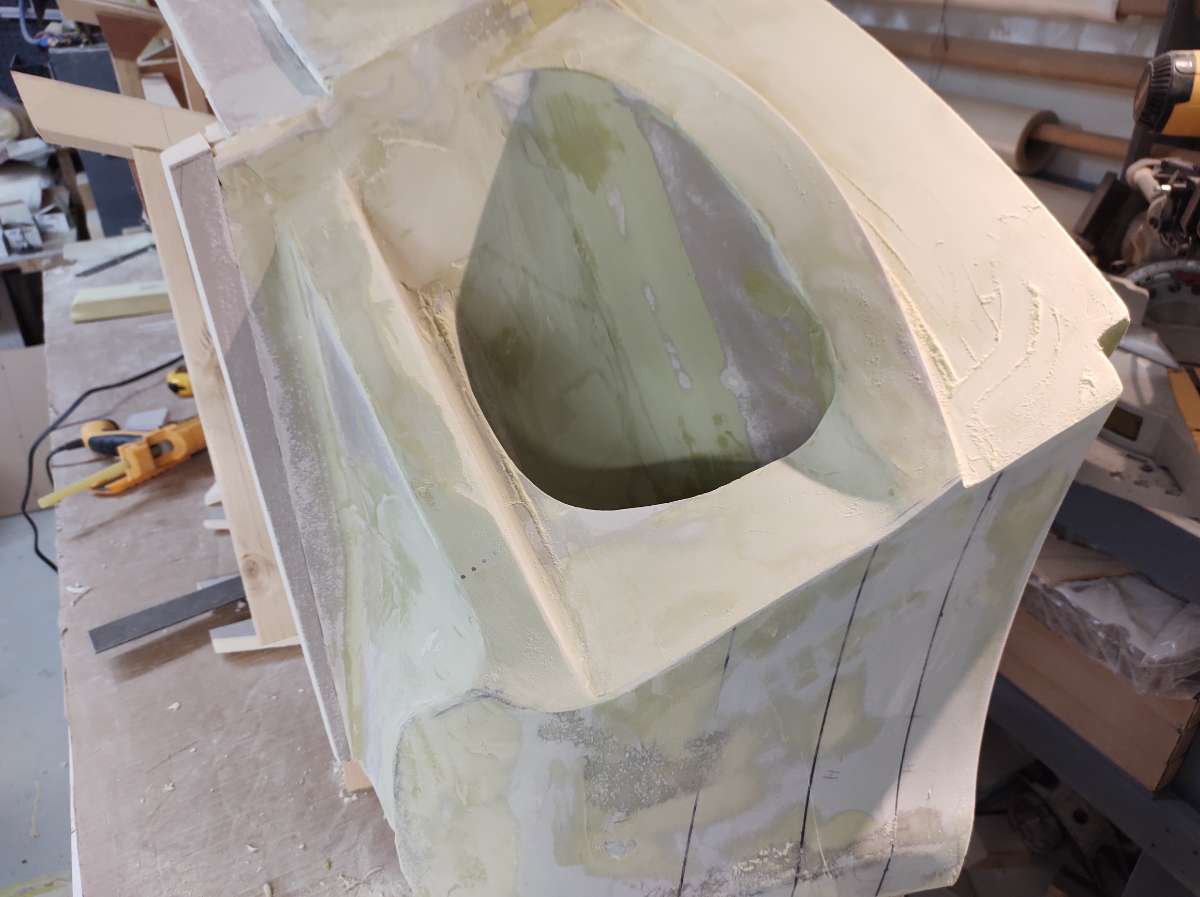
Hi everyone as you know I am losing the fiberglass shop soon , not sure exactly when , I am going to ask for an extension to get the molds done on the big parts , like the whole back and front of the cat before having to move it .
Ok enough of that depressing thought .
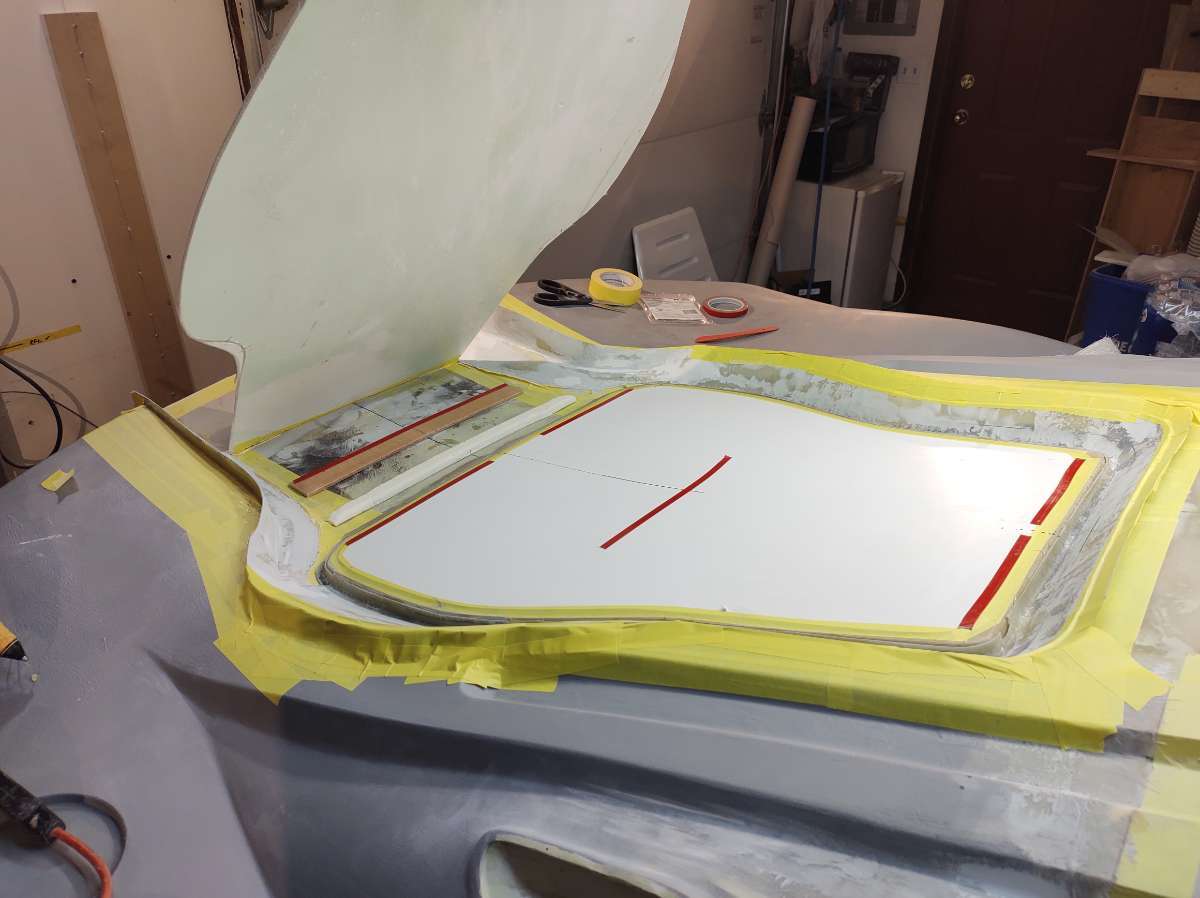
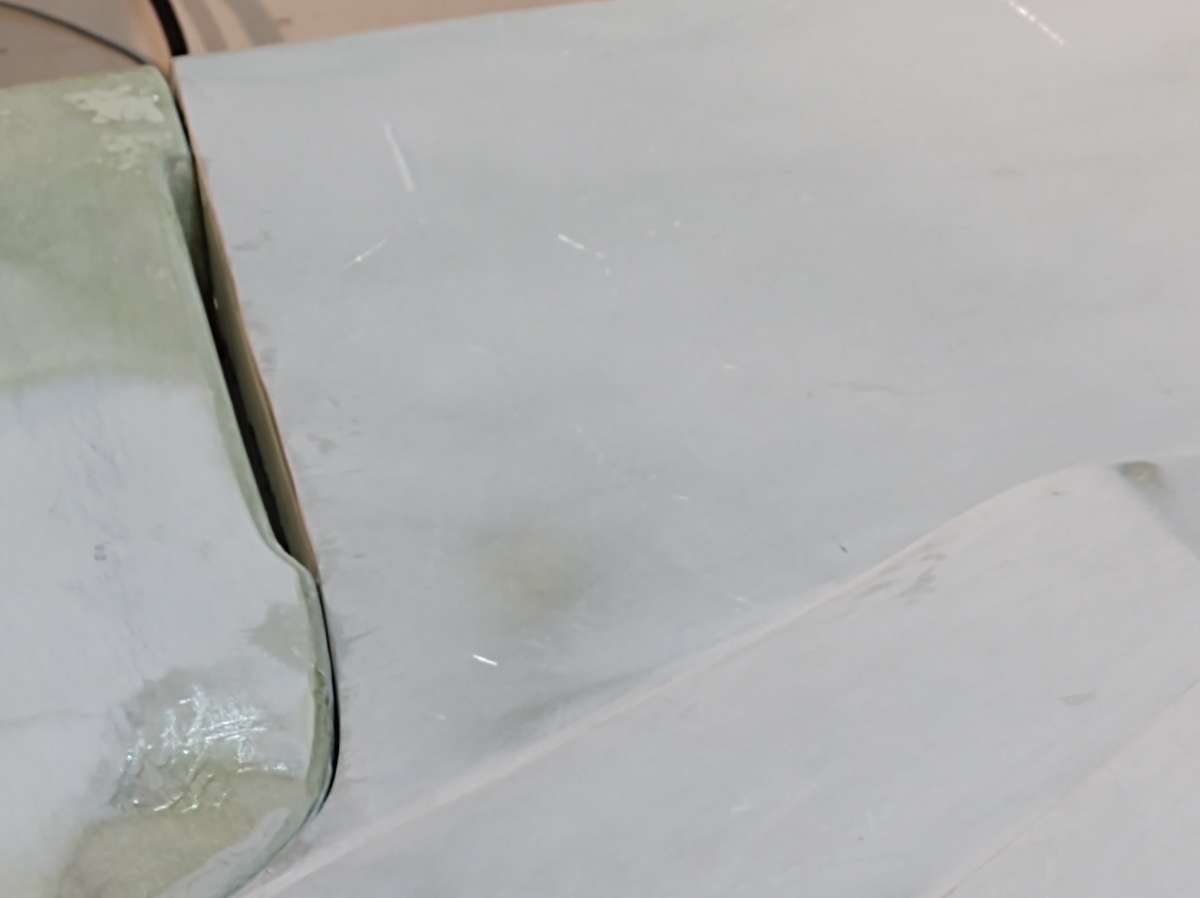
Alright a while back I had to change part of the trunk area , i thought it was too tight a curve and might be a problem or a weak spot in the trunk lid , it's a bit confusing even for me lol so I will try to explain as it goes along .

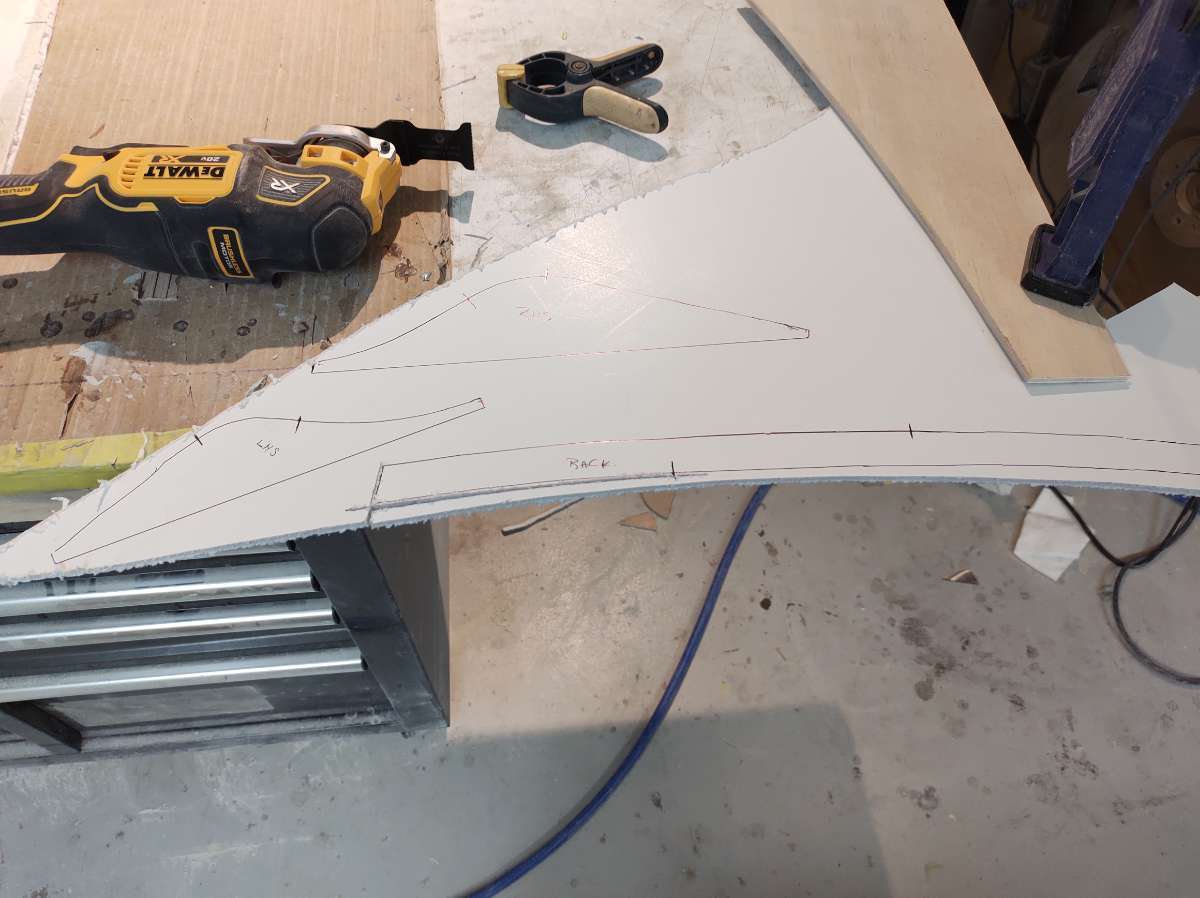
So now I have to remake the part that goes to the back of the car ,from where I cut it off .
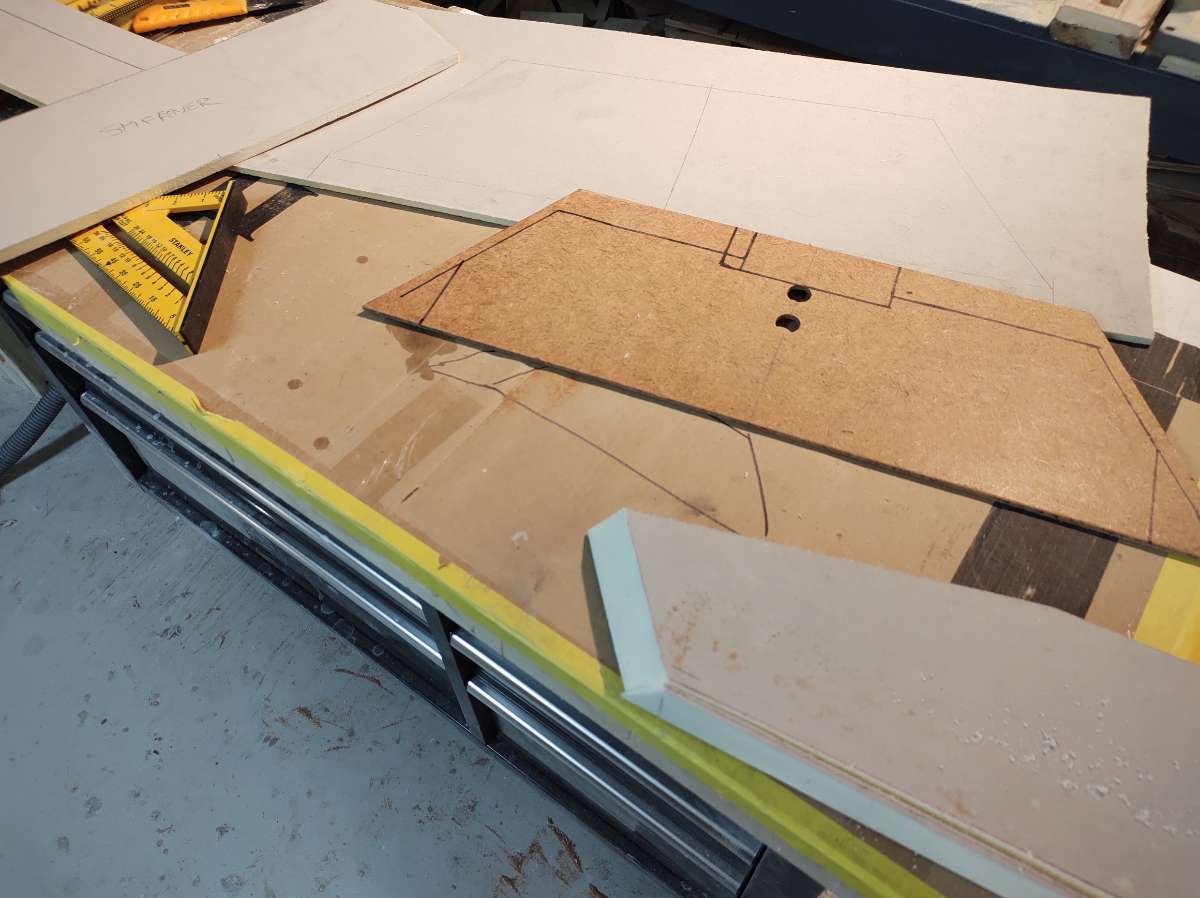
This is this going to be the new plug for the new bottom of the trunk ( boot ) lid
( I have to temporarily fill in the slots for the wing )
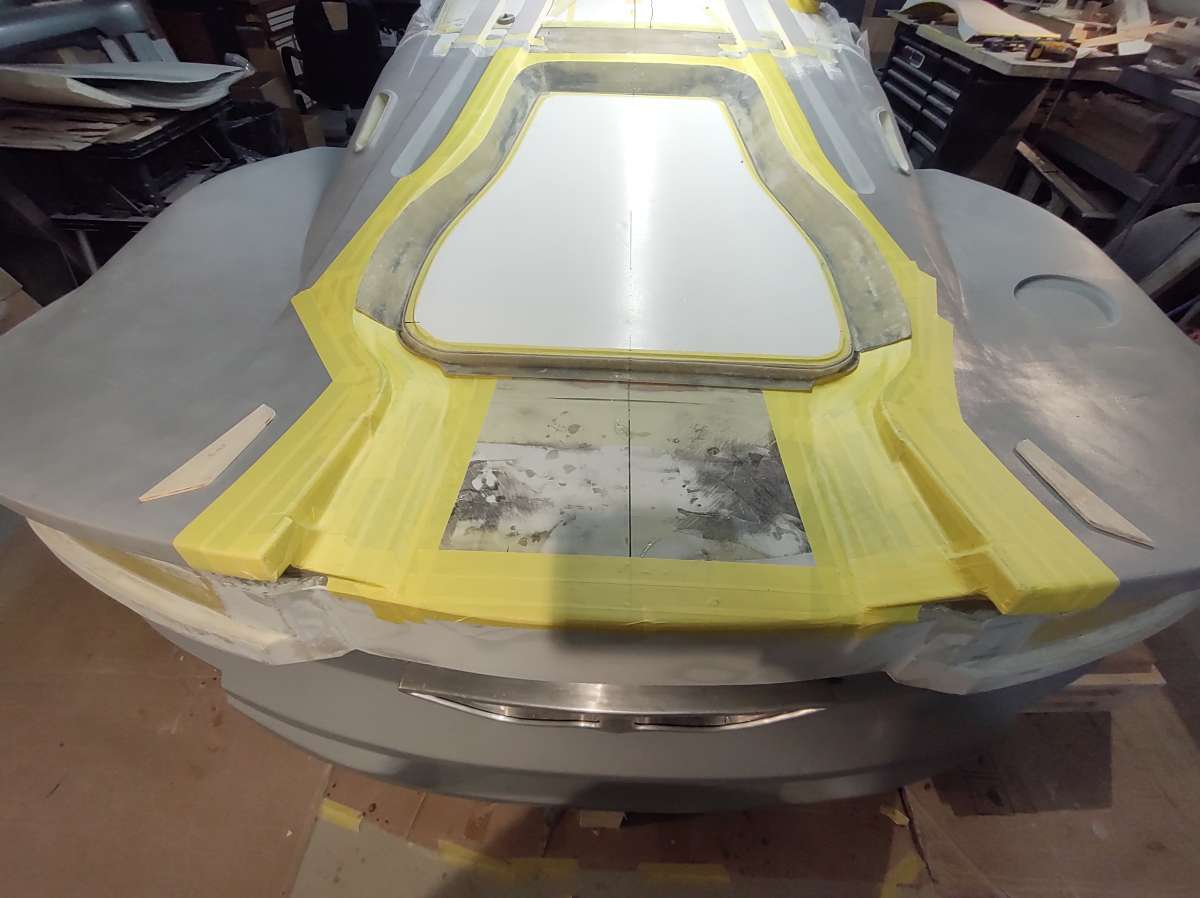
Ok you see the part on top of the yellow tape around the trunk opening , well that from the original one I made .
But where it turns at the bottom it was too tight and I didn't like it , it got too thin in ths area and i was afraid it would break .
So I made the turns softer right where you see it cut off .

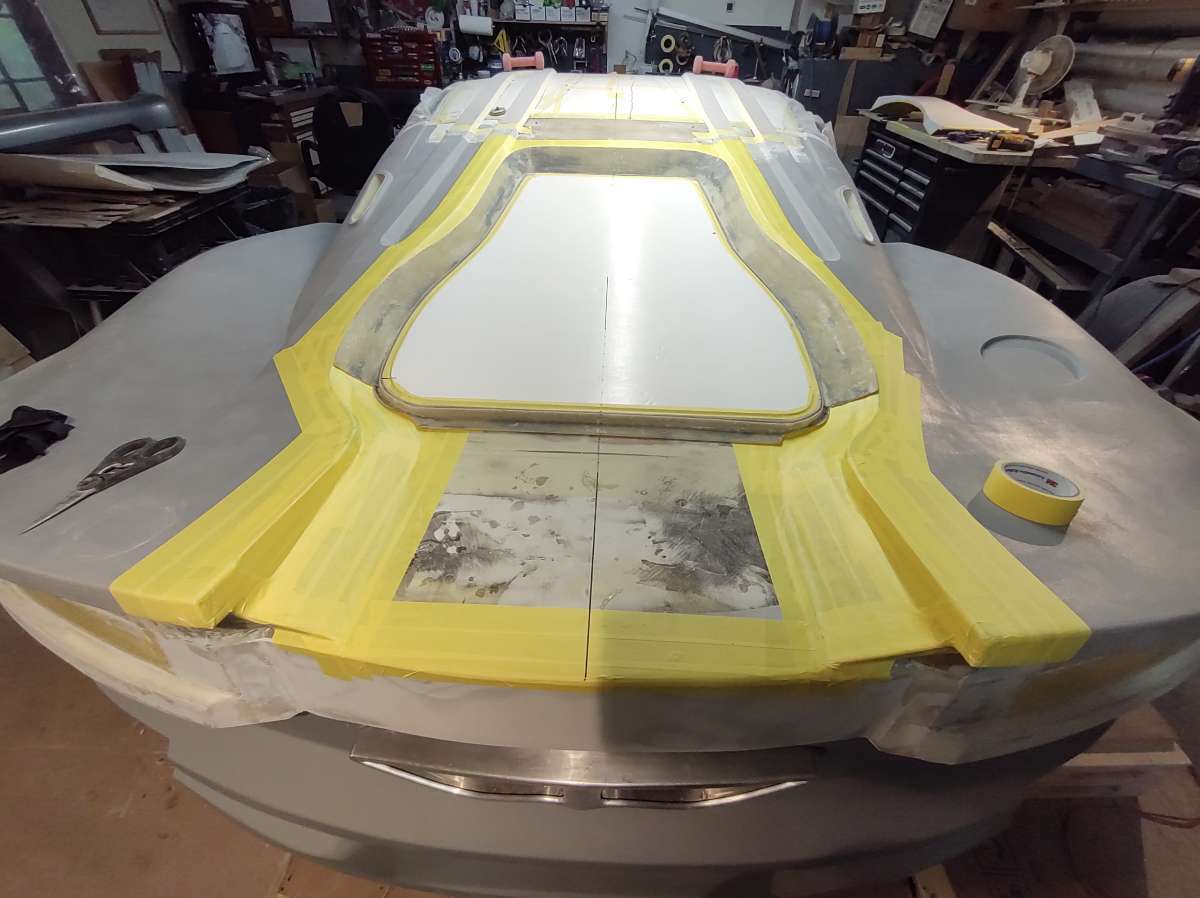
I glued in a piece of wood and just taped over it
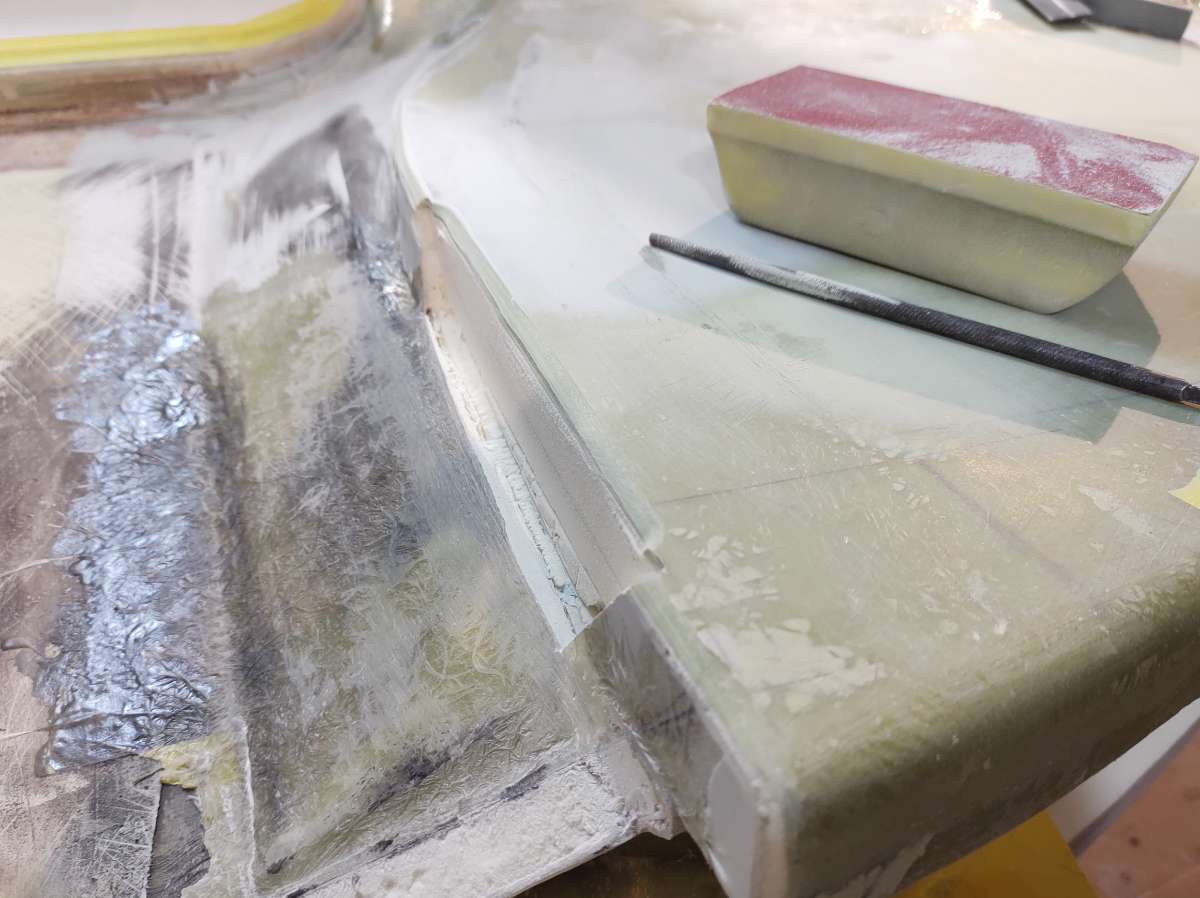
next is to simulate the back outside edge of the trunk lid with the piece I made earlier for this reason .
Here I glued 2 pieces of 3/16 ths together to mark the edge ( couldn't use a square because it's on an angle )
This get cut off , as it represents the gap for the bottom of the lid to make clearance
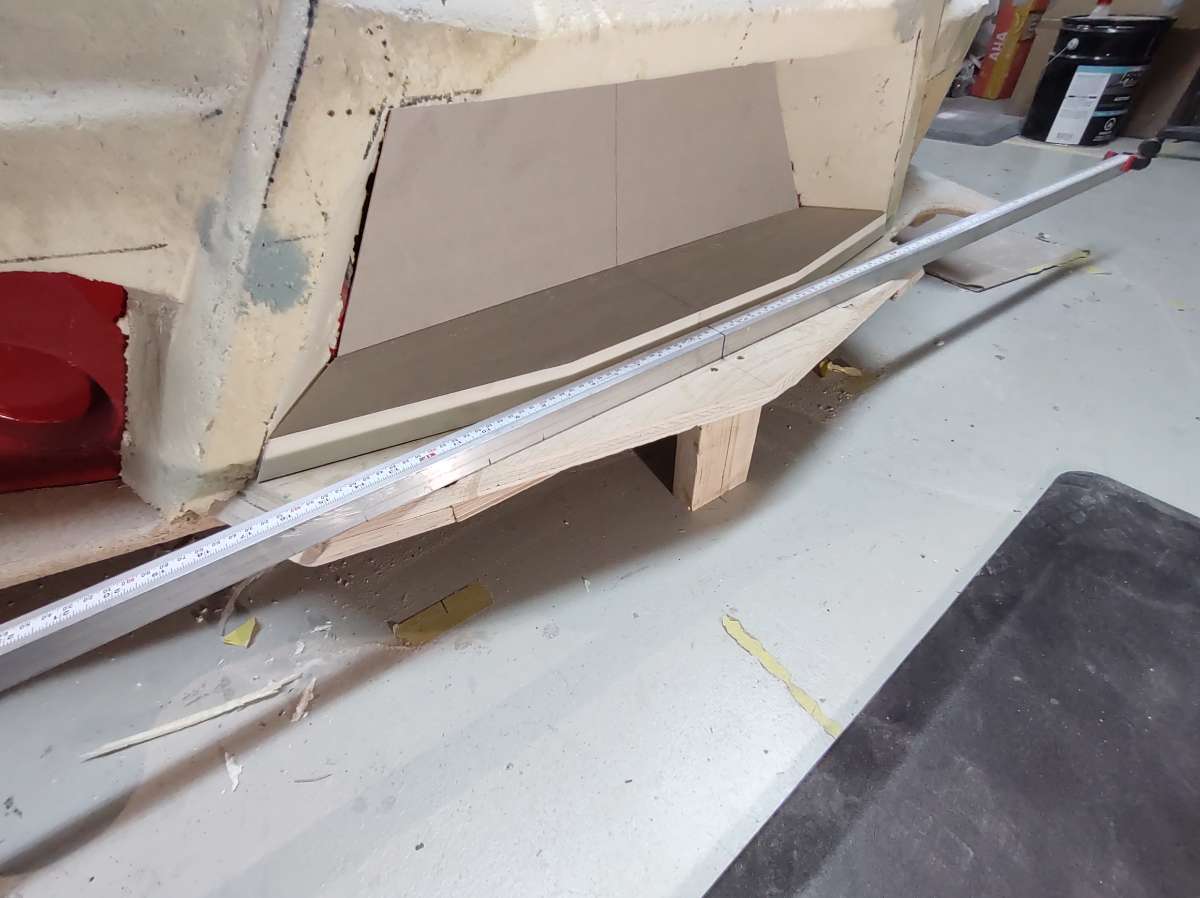
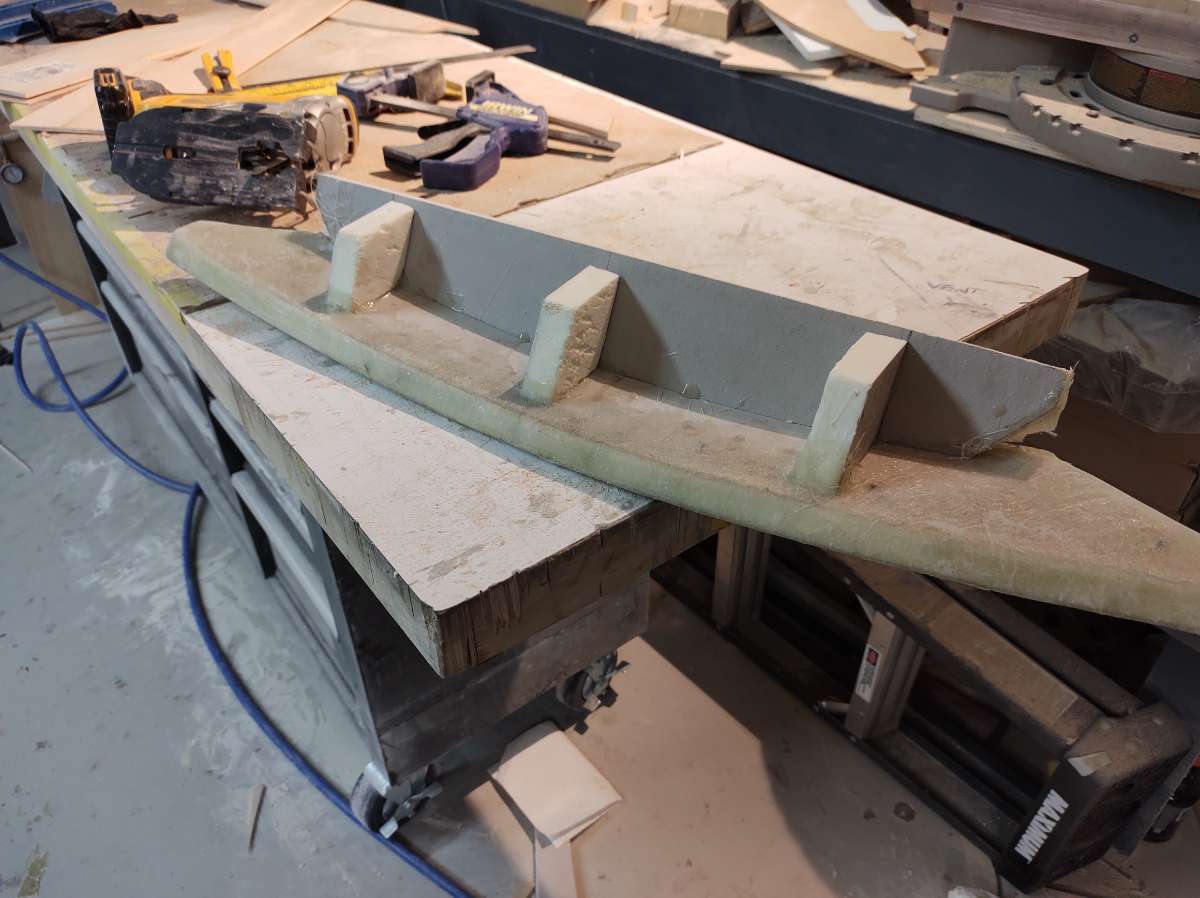
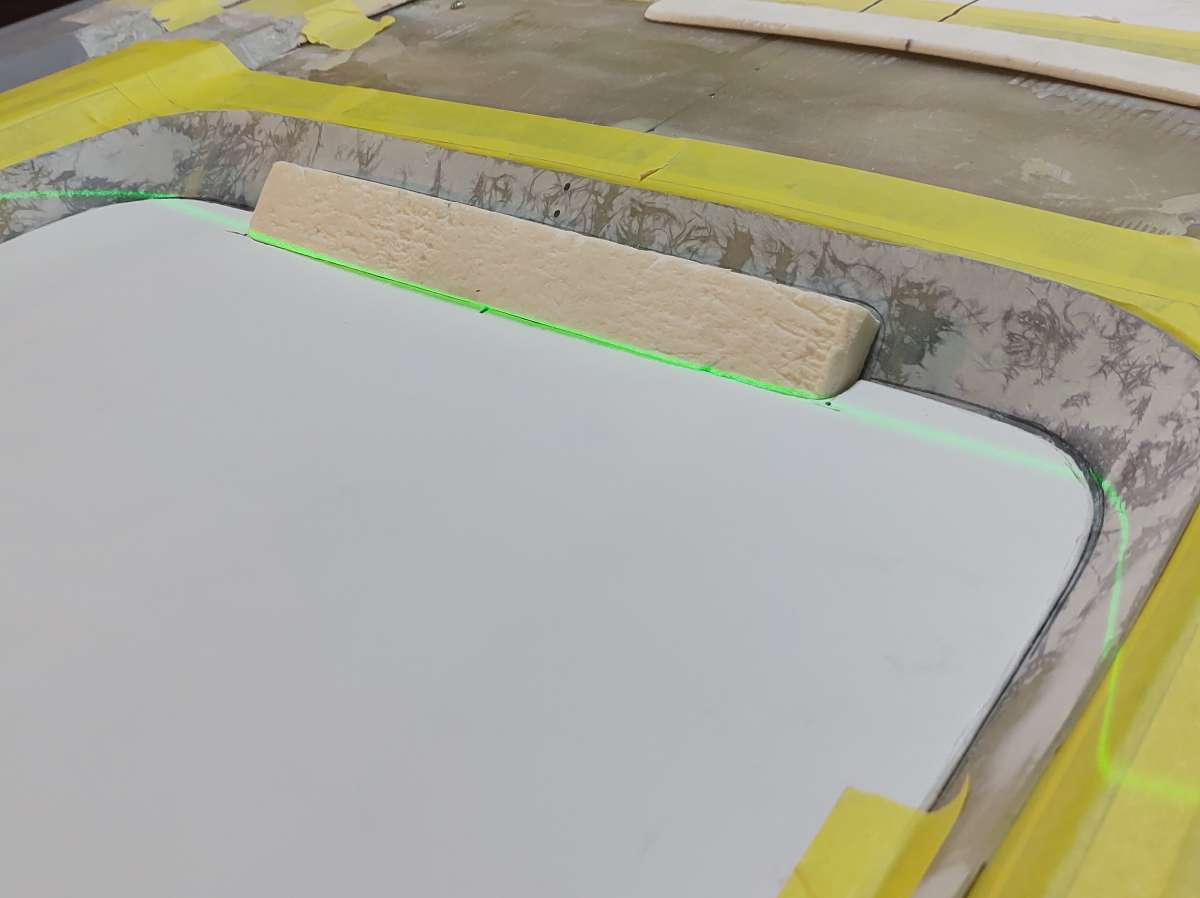
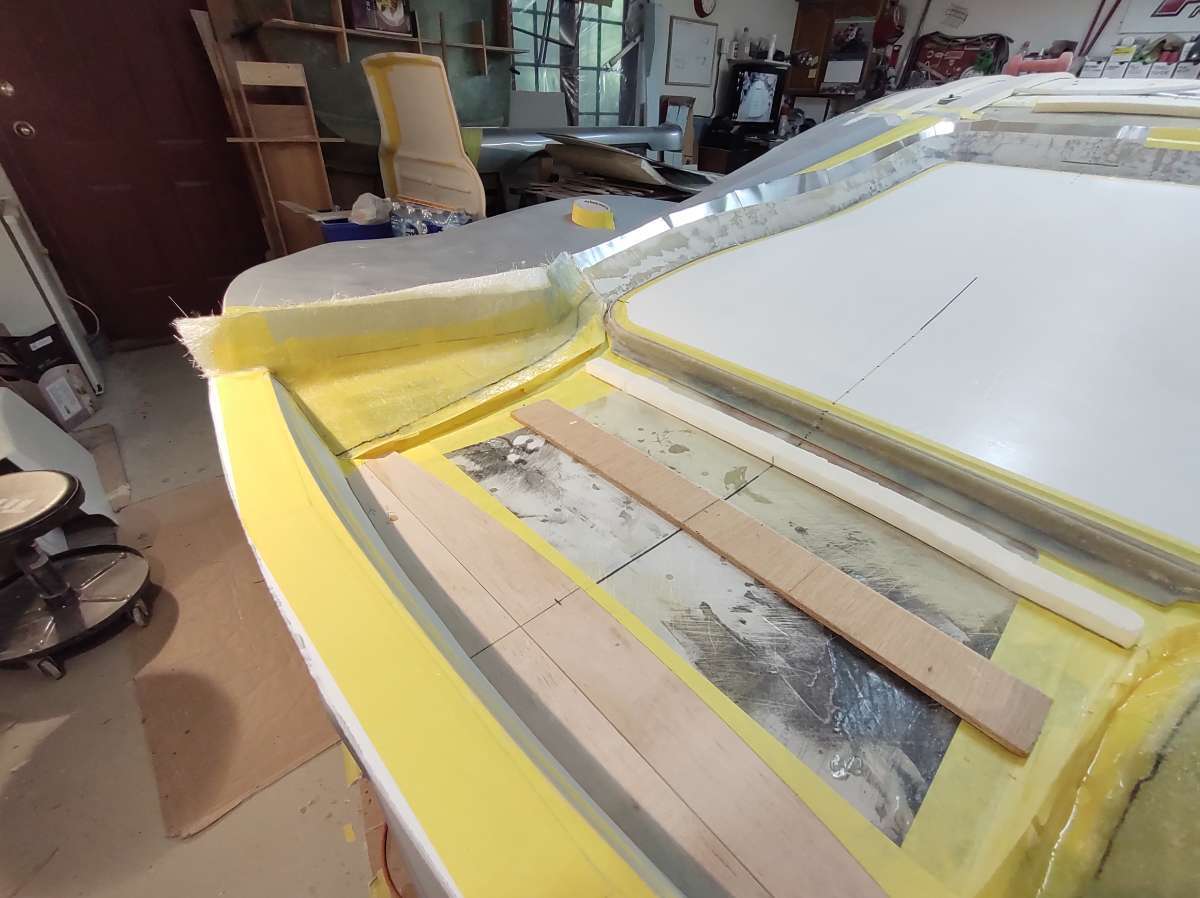
next is the foam core to make the bottom , now this was cut for the previous version , so it will need to be modified
these are spacers to support the foam core underneath , and will give clearance for the rain water escape , they get glued down temporarily
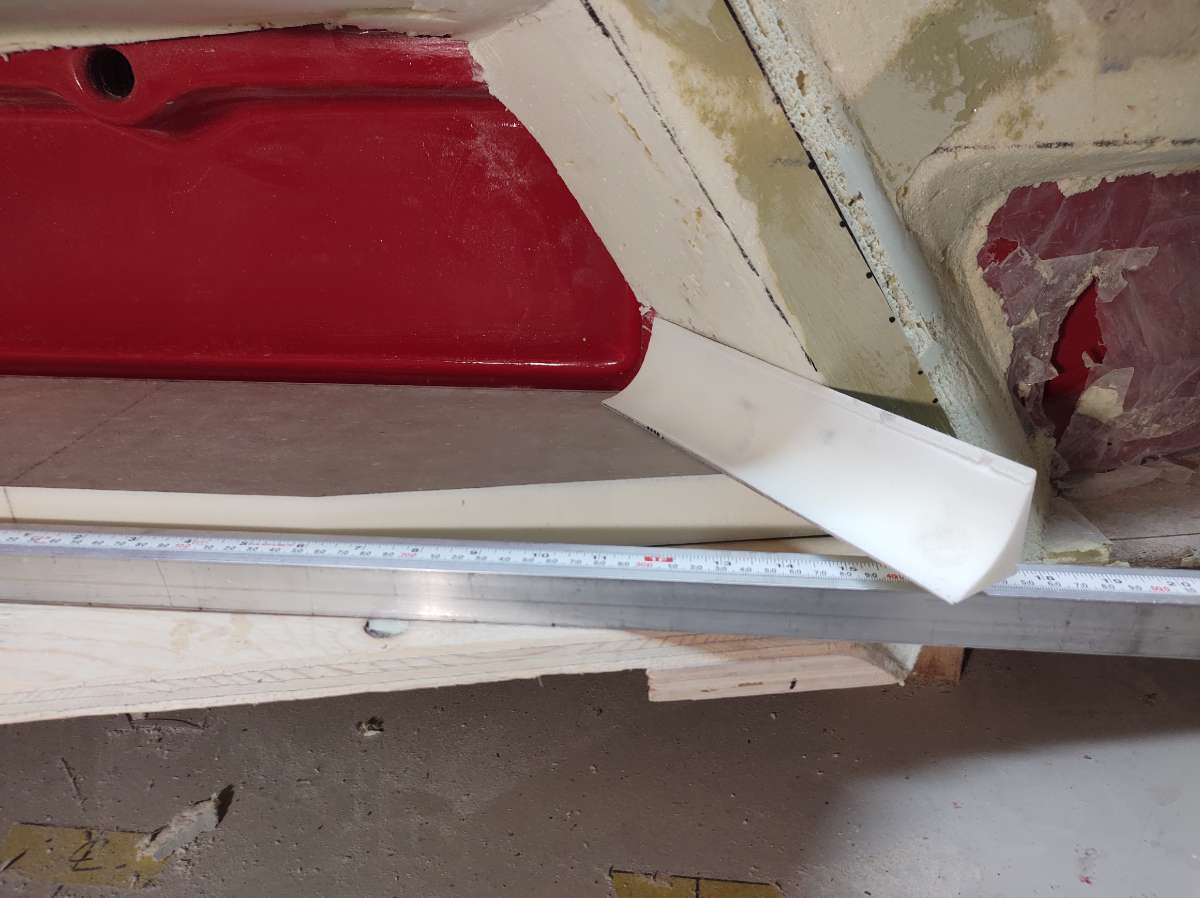
Hear you see the back piece is set back so the inside face will become the finished face , I know confusing ....
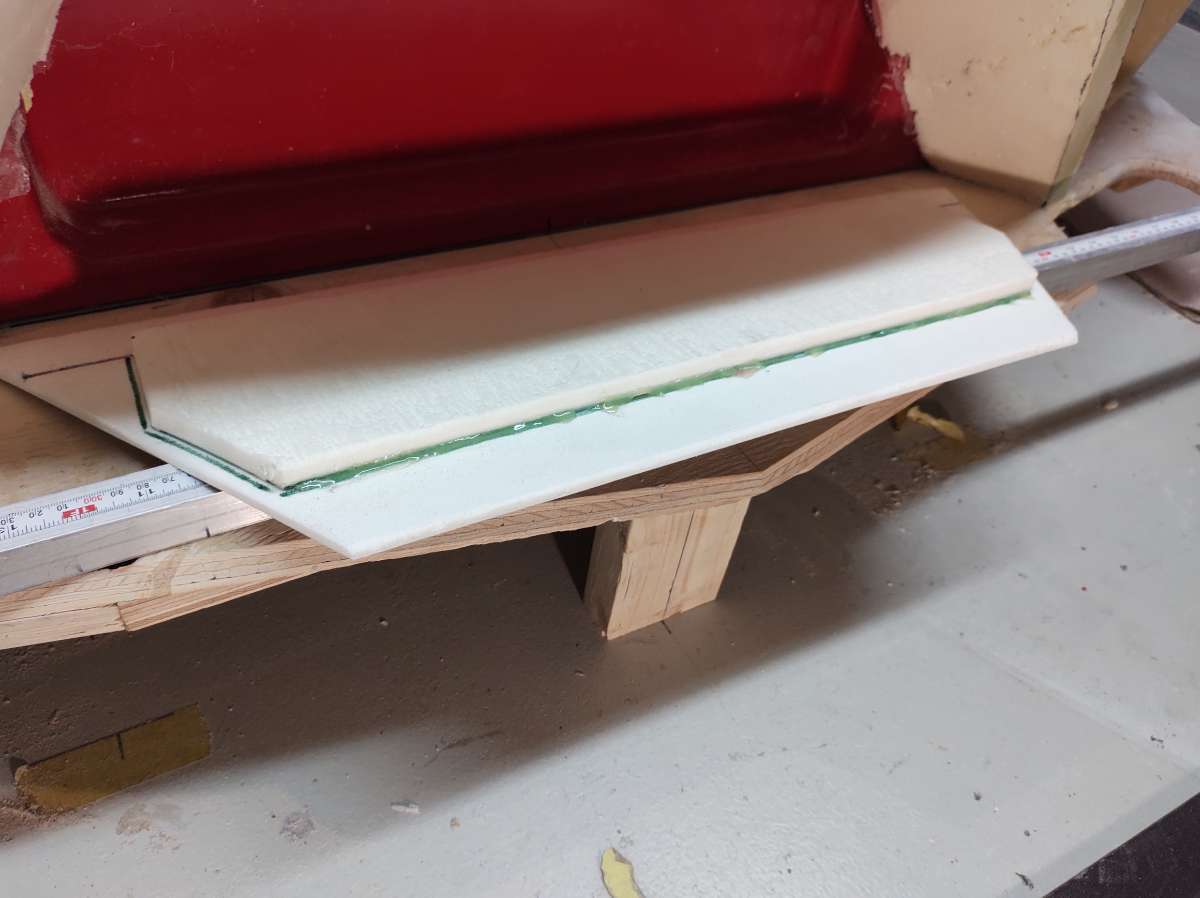
next is gluing a piece of foam core to the top of the back edge to make the bottom flange to bond to the bottom of the top part of the lid .
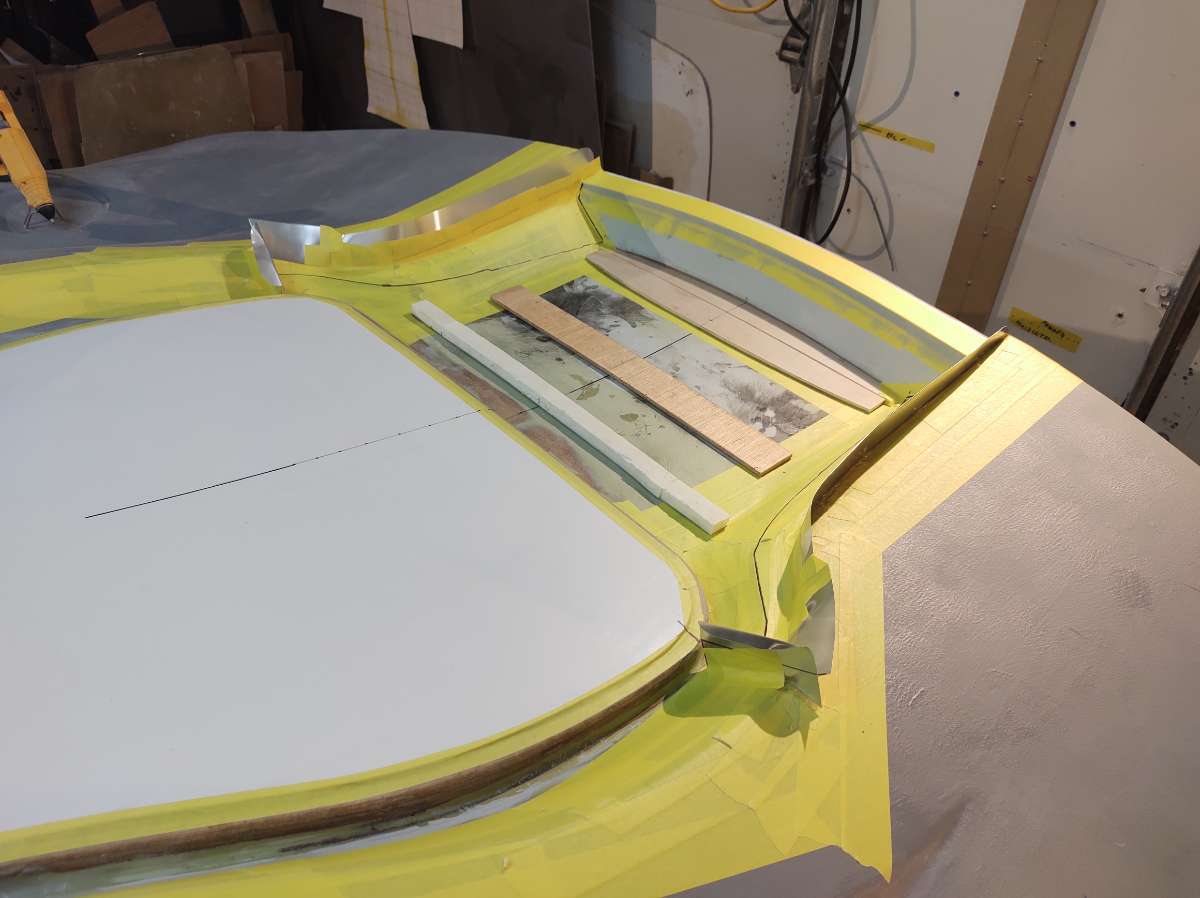
it gets taped to seal the edge of foam core , and you can see I am making some patterns to add foam core to the large base cover where I changed the corners .
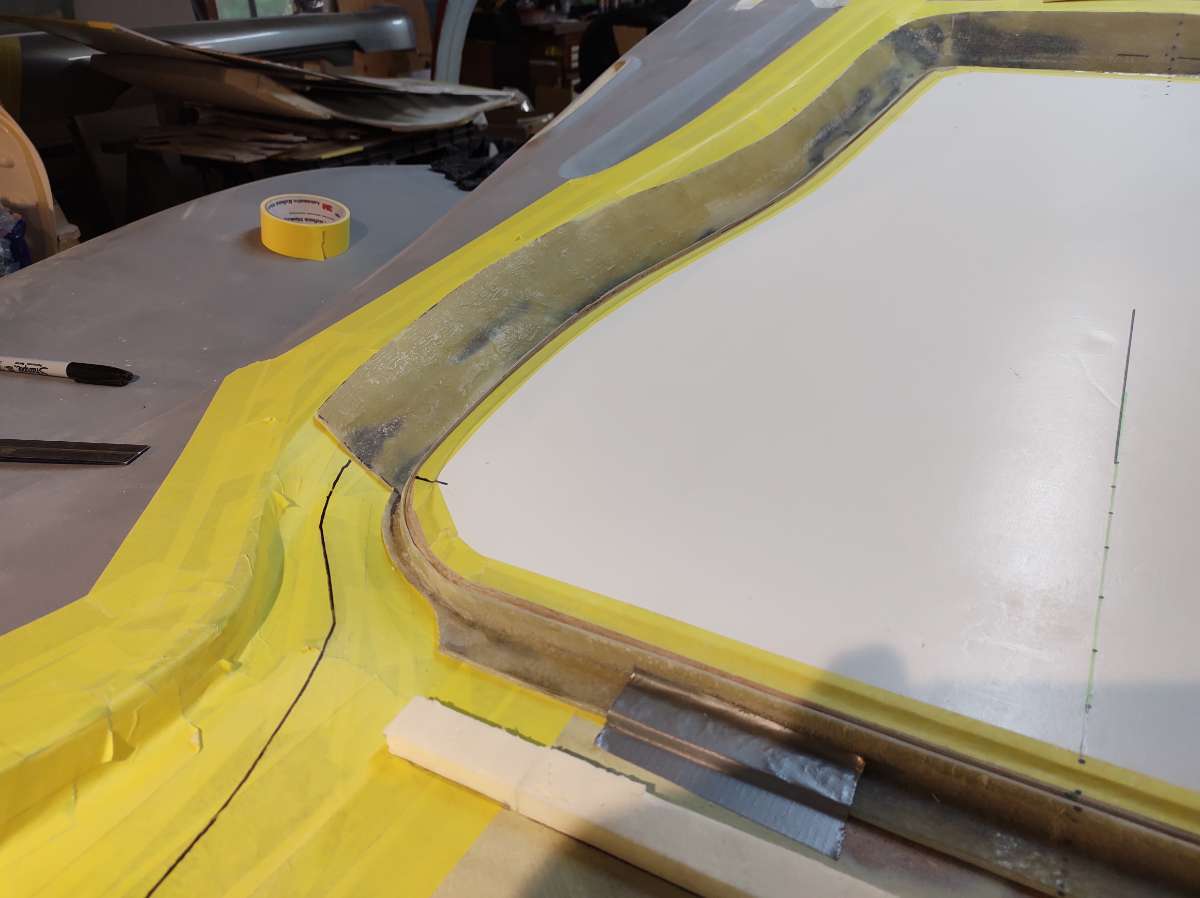
the black line represents the edge of the base cover , so I need to fiberglass this area to match the top part around the opening .
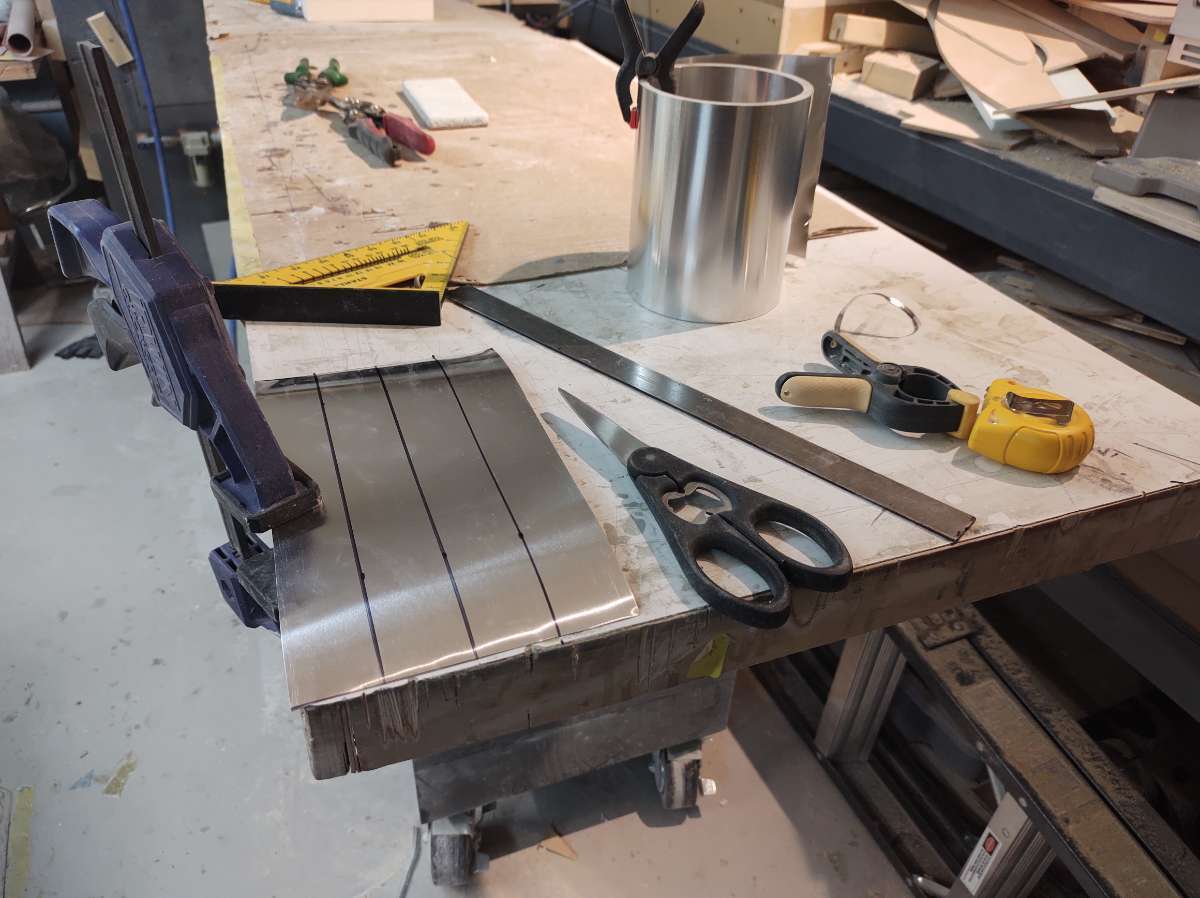
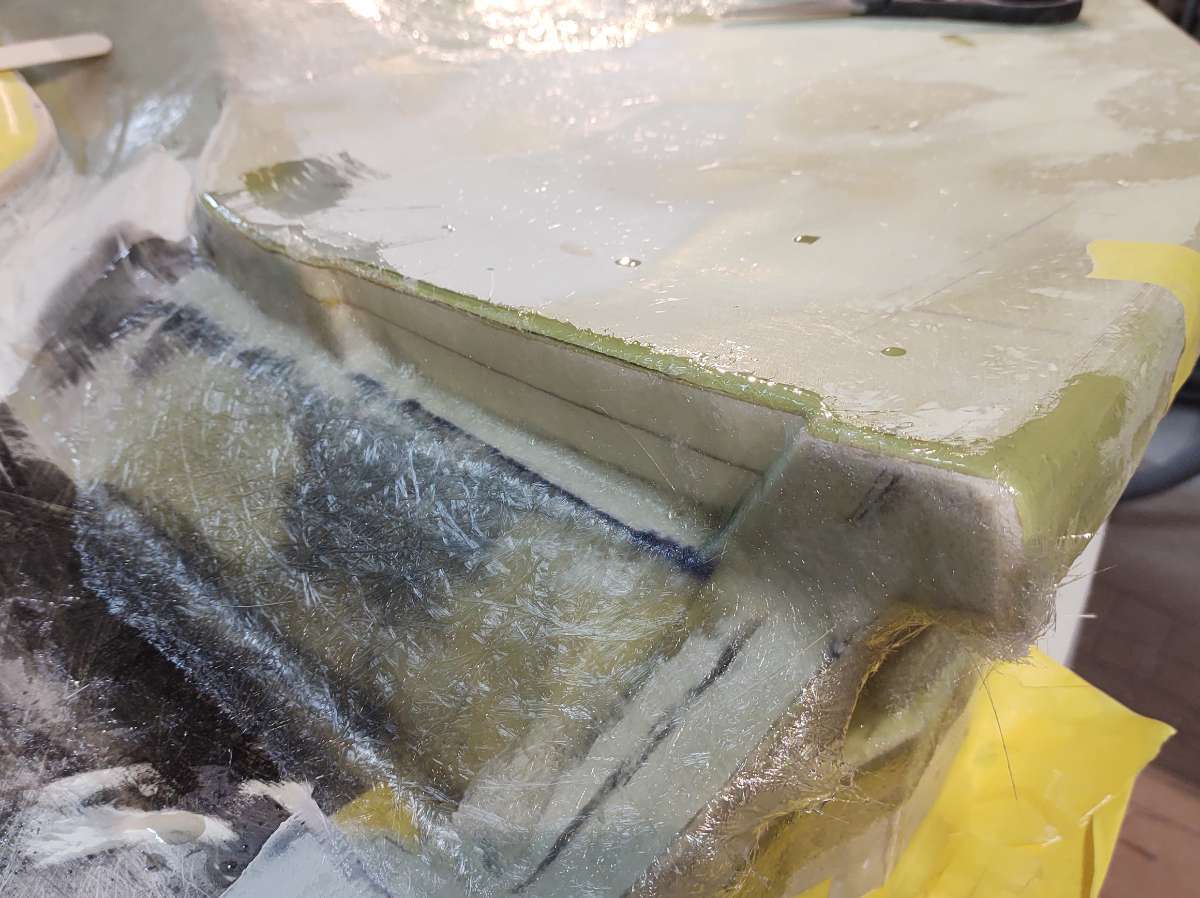
Here I am adding some thin aluminum flashing to the upper part to run the fiberglass on , this will allow extra space for an even thickness later when making the part .
( I know I don't have a pic crazy ) you will see when its back on the car .
the bottom side
this line shows me how thick the fiberglass needs to be to form the proper gap
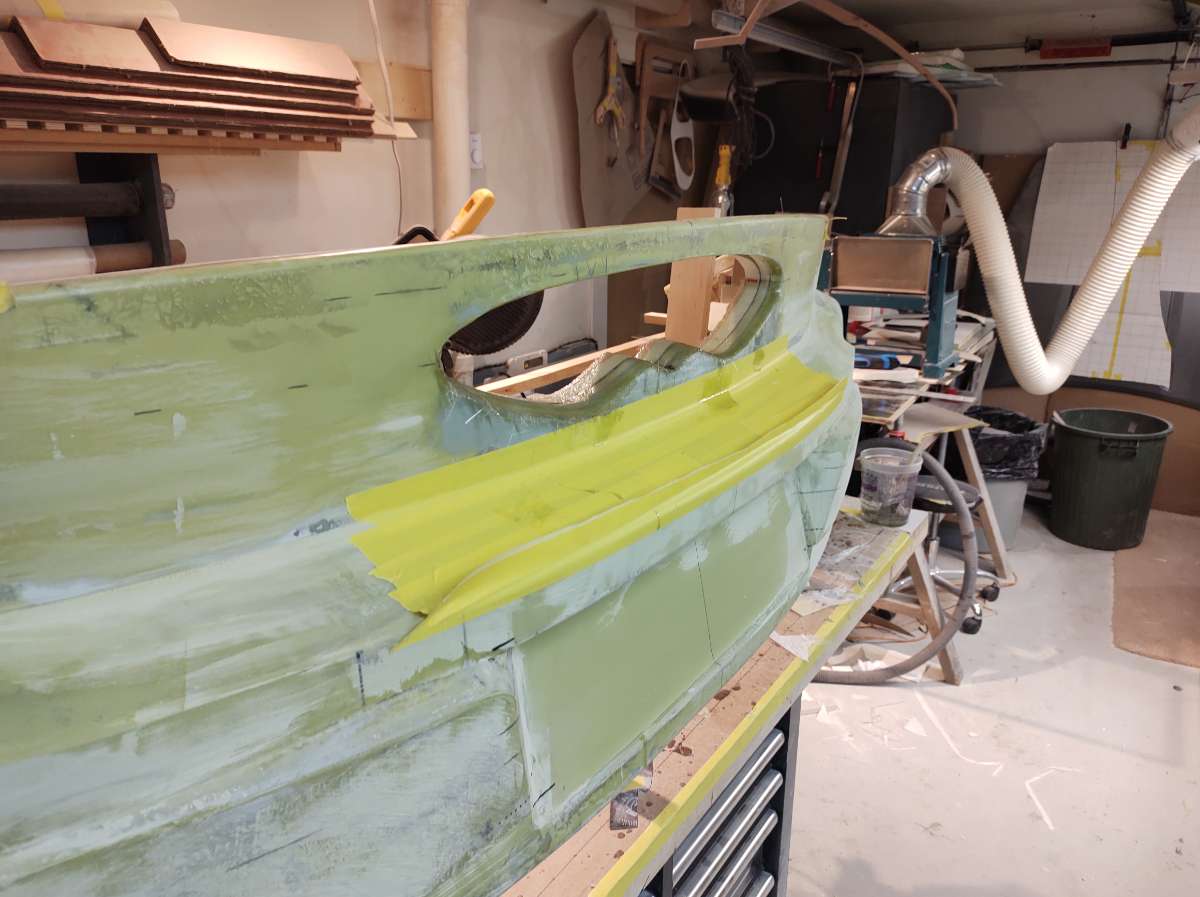
checking to make sure it level and figuring out a pocket for the Hinge to go in .
flashing to make the form extensions for the back sides
they have little dams where the new piece needs to terminate
these will get waxed so it will release after .
a few layers of glass

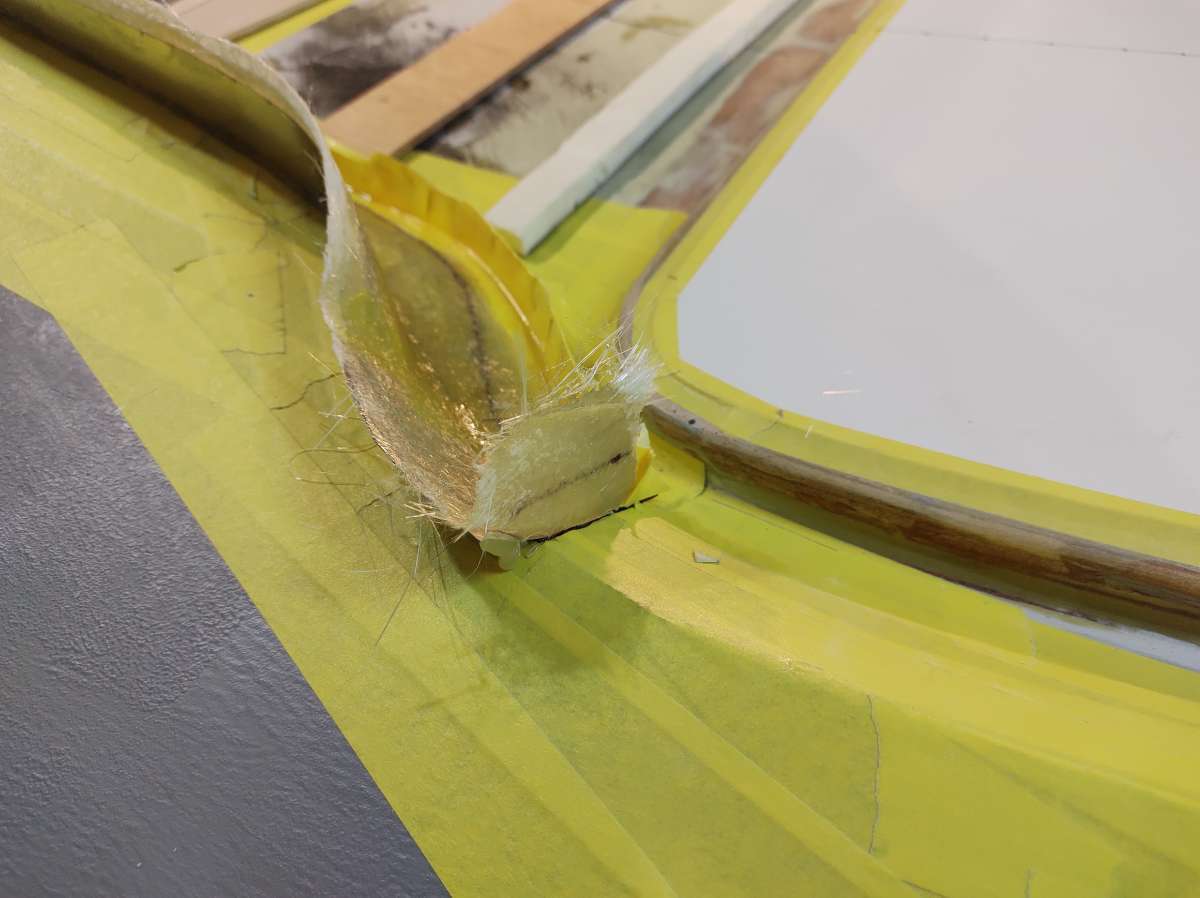
here i remove the end dam and the turned up part will get trimmed off to match the top
trimmed
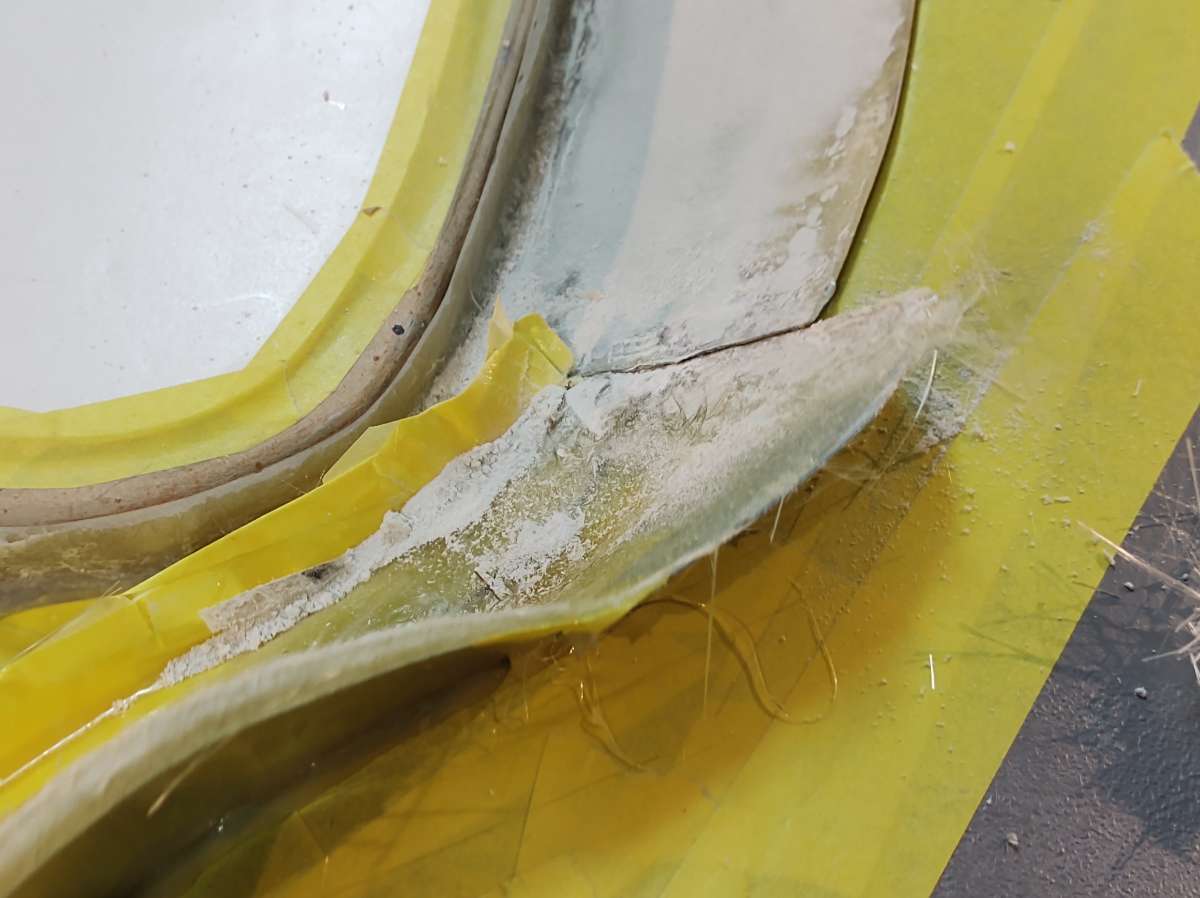
and the RHS


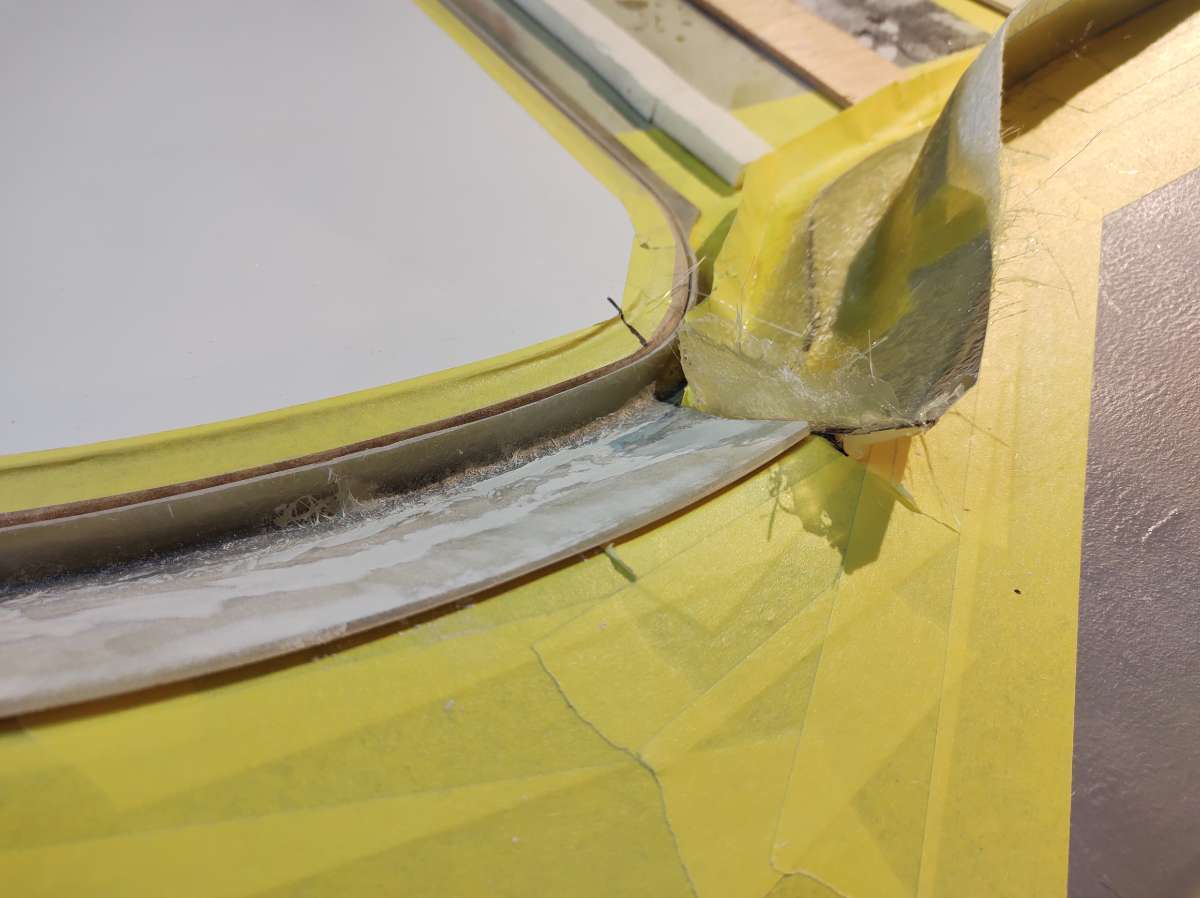
test fitting the foam core base before adding to corners that nee to be altered
here you see the flashing on the upper part , which now get temp glued to hold for glassing .
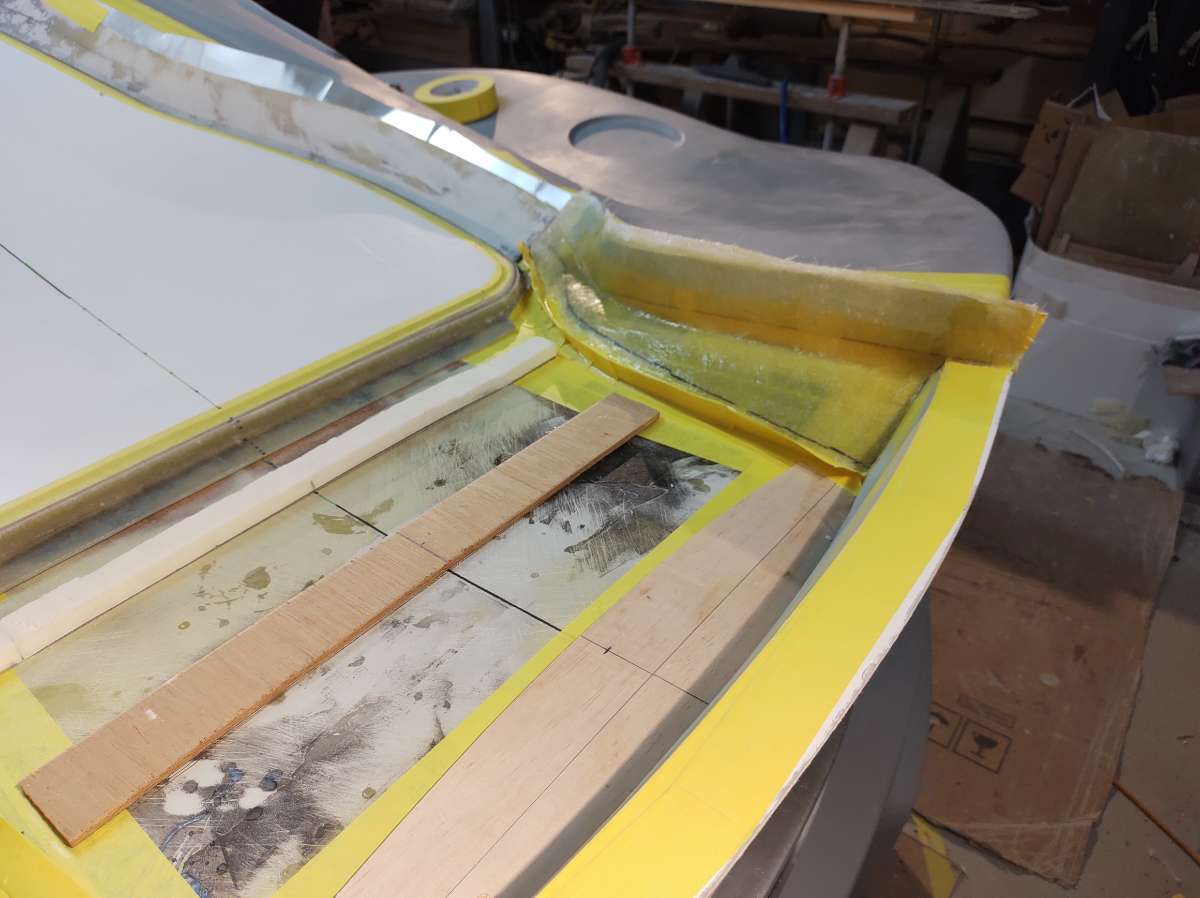
making the addons for the foam core .
testing the addons
it's good so the base gets held down temporarily with 2 sided tape ,can't fasten from the top , no access after it glassed to remove it from the car
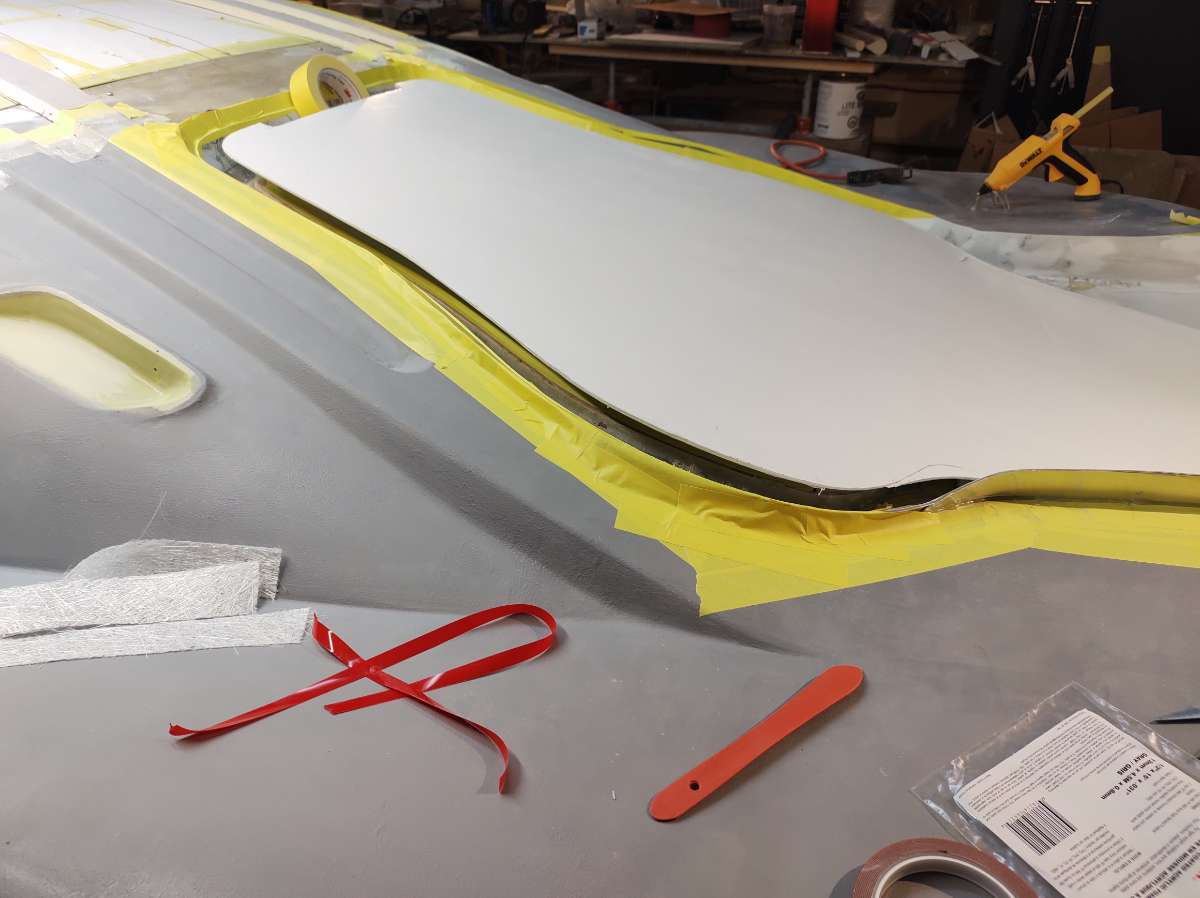
when it\s lined up and ready just press down evenly only one shot at it !!!
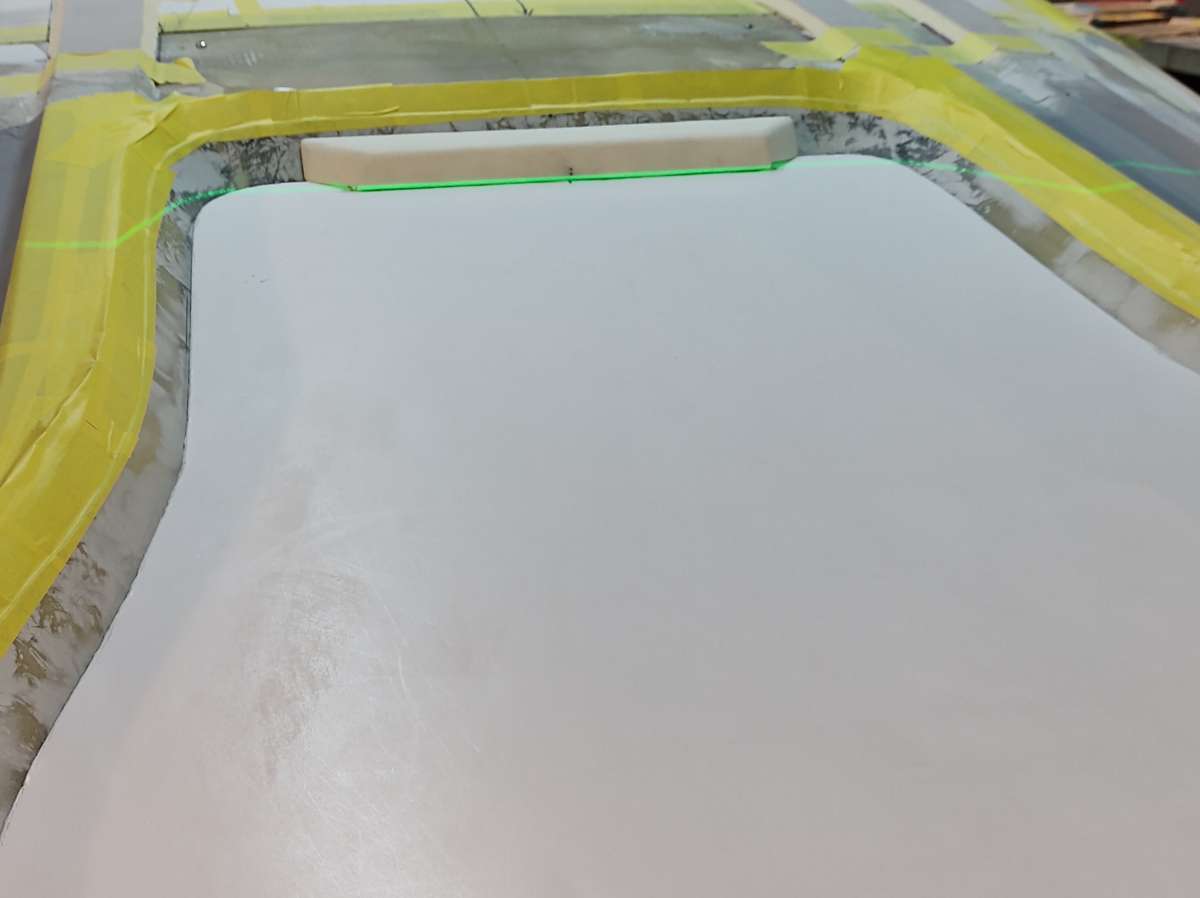
next is to add the foam block which will be the pocket for the hinge
I am kind of cheating here , normally you would glass over this and bodywork it etc before glassing , but I am under the gun to get everything glassed now that can't be done off the car , because of the move and it will be easier to bodywork from the other side and off the car . so I am just taping the foam and the edge seams , kind of an experiment , hope it works !!!! what could go wrong lol
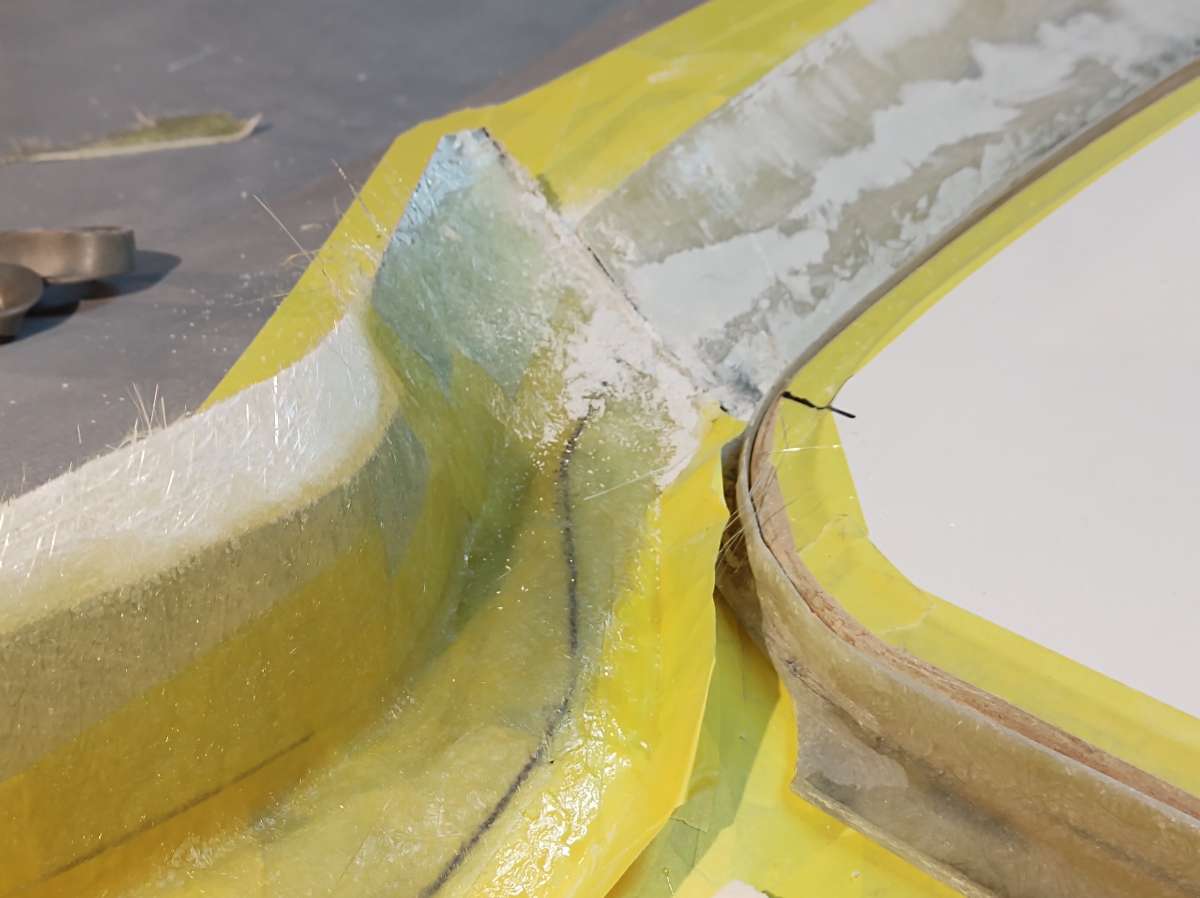
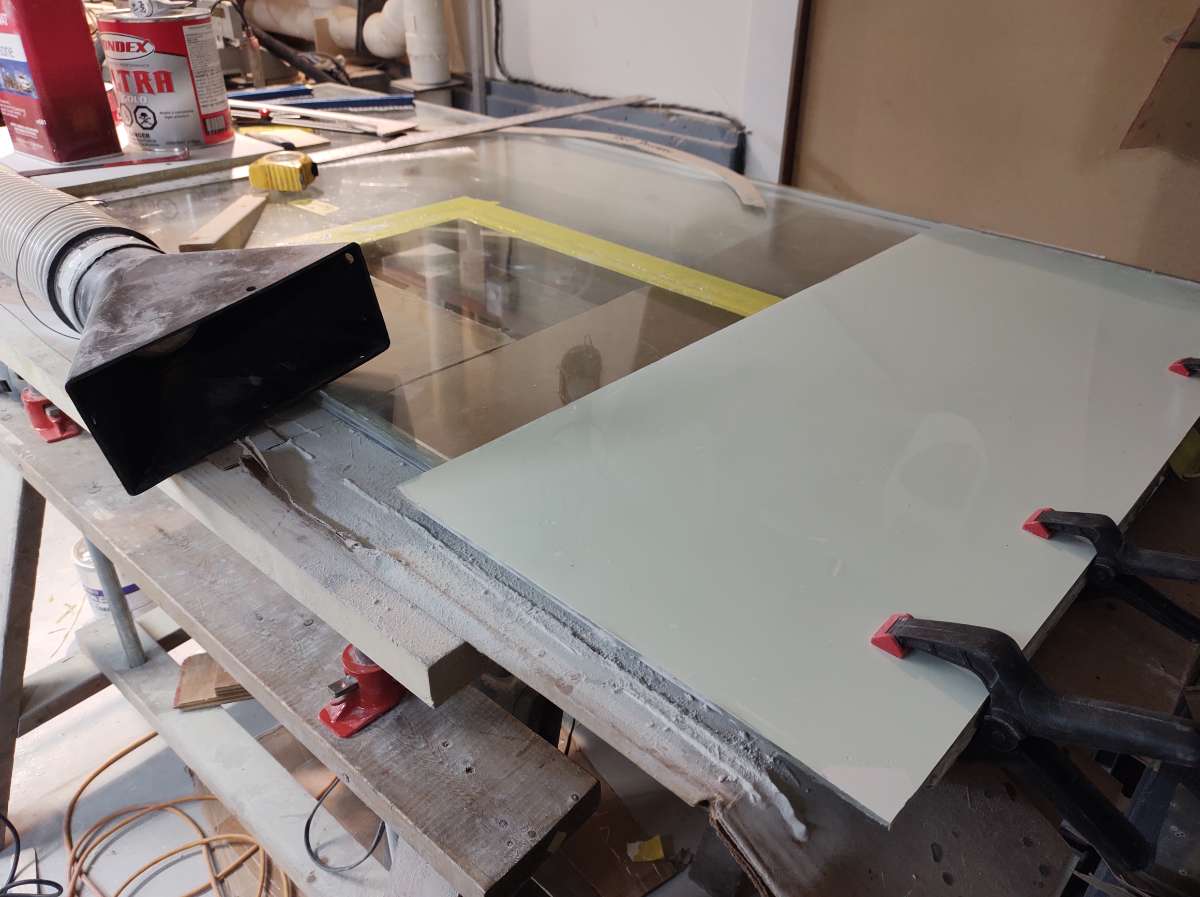
next is a few coats of wax and spray with PVA mold release
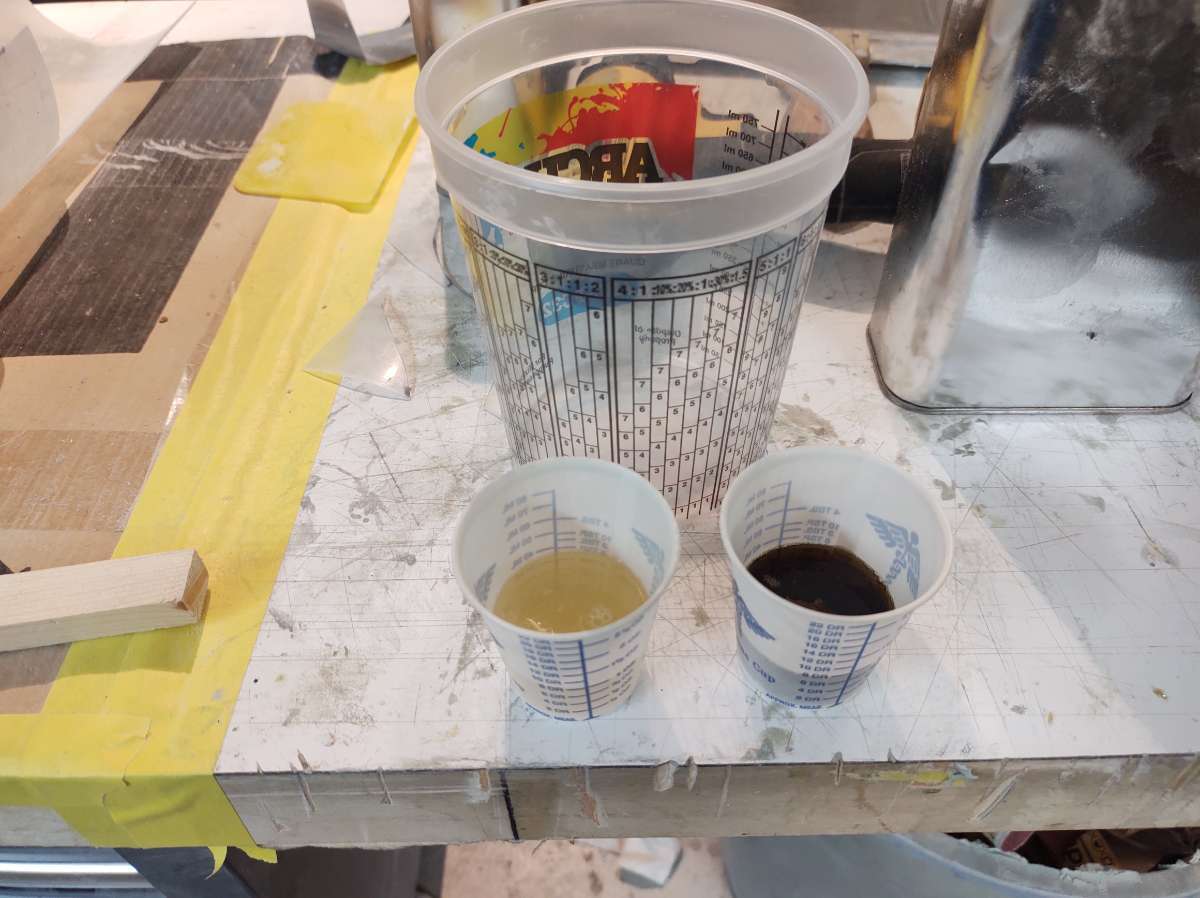
cut all the material before getting sticky
a few coats of PVA
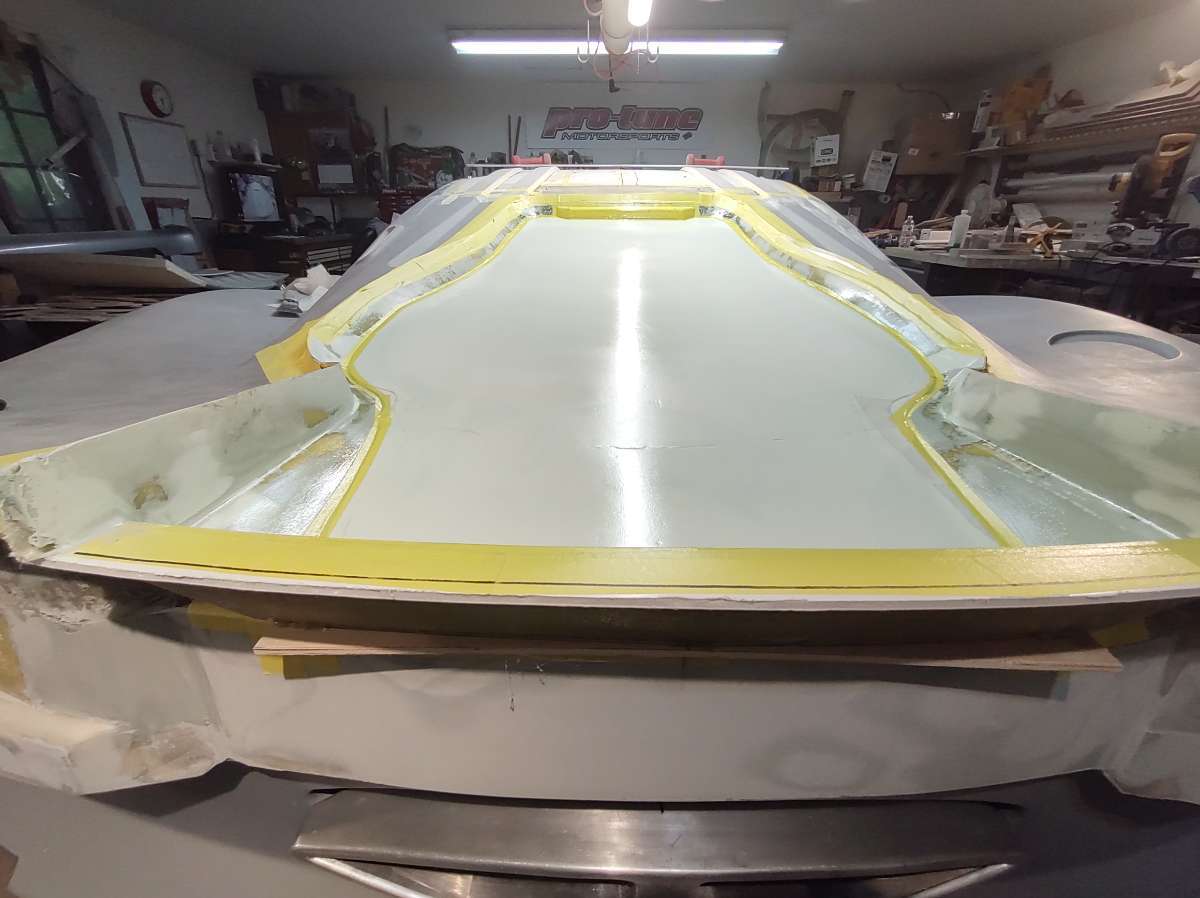
and we are ready to glass stage one
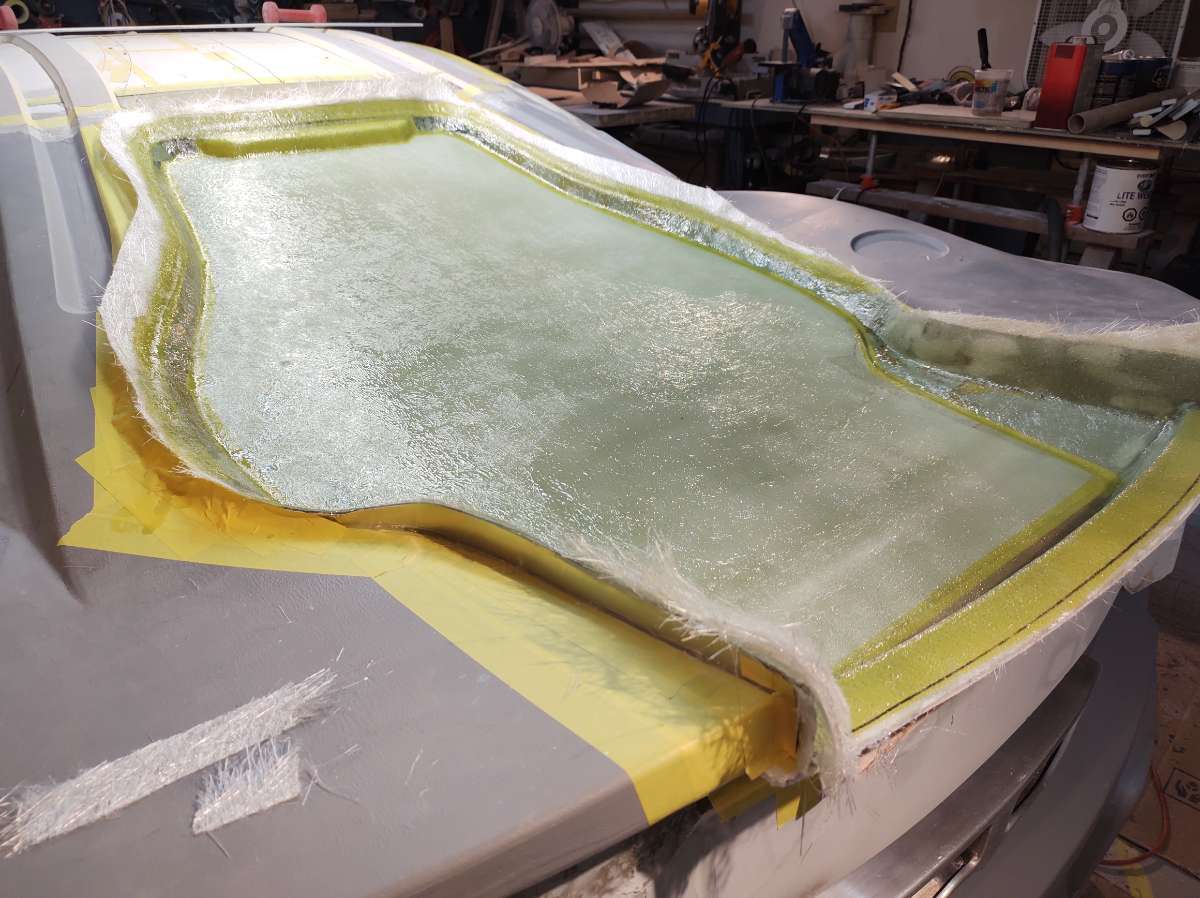
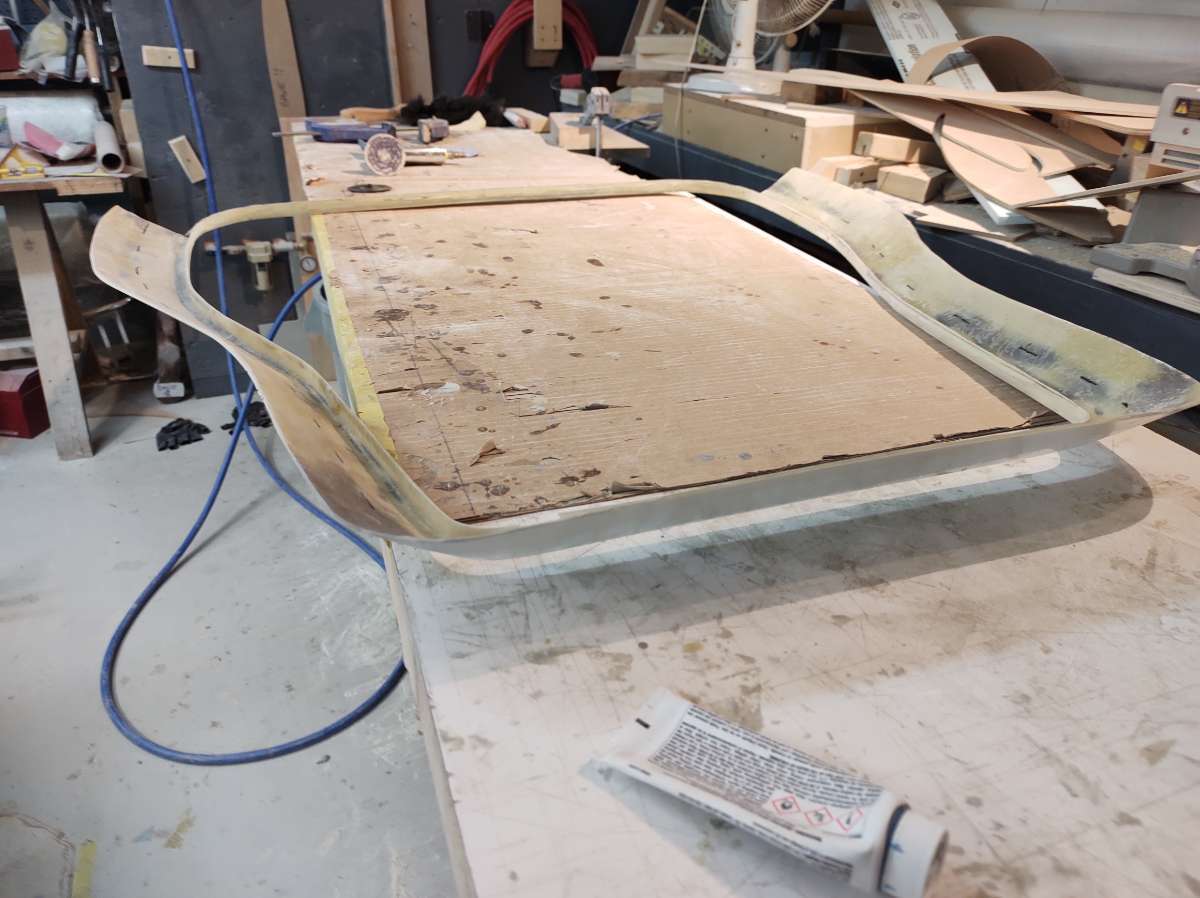
Ok looking good , on to stage two some stiffeners to keep the base in place and firm for body working the other side , going to make them out of foam with a 45 degree edge that's easy for the glass to go over
if I tape them back to back I can bevel them in the router table
a quick sand and they are ready
next is to lay them out and glue them down
next is to prep some material and glass them
Well I am happy with how it turned out , I know its probably a little boring but its all part of it .
This morning I will pop it off the car and trim the edges
thanks again for all the comments and support , would have loved to do a YouTube series on the build but I would have needed someone to shoot the vids and help produce it it takes about 3 hours a day , unfortunately I just don't have the time , maybe I will do one on installing the body on the car , let me know what you think .
Cheers Phil
-
3
-
-
On 06/05/2022 at 04:30, Stutopia said:
This is so close now I can smell fresh lacquer. Absolutely stunning build mate, thanks for detailing it on here, been a fascinating follow.
I may have missed it (or forgotten), what colour will it be?
Hi it will be mostly white with red , Black and silver graphics , I have the livery in my mind but I am not talented enough to do a rendition sorry , I would love it though .
Thanks for fallowing along .
Cheers Phil
-
2
-
-
22 hours ago, LRF4N said:
Really starting to take shape now, looking forward to seeing paint on it
At risk of having the first negative sounding comment on this thread so far, I wonder if the exhaust would’ve looked better lower down in the bumper. Look forward to seeing seeing it complete and proven wrong
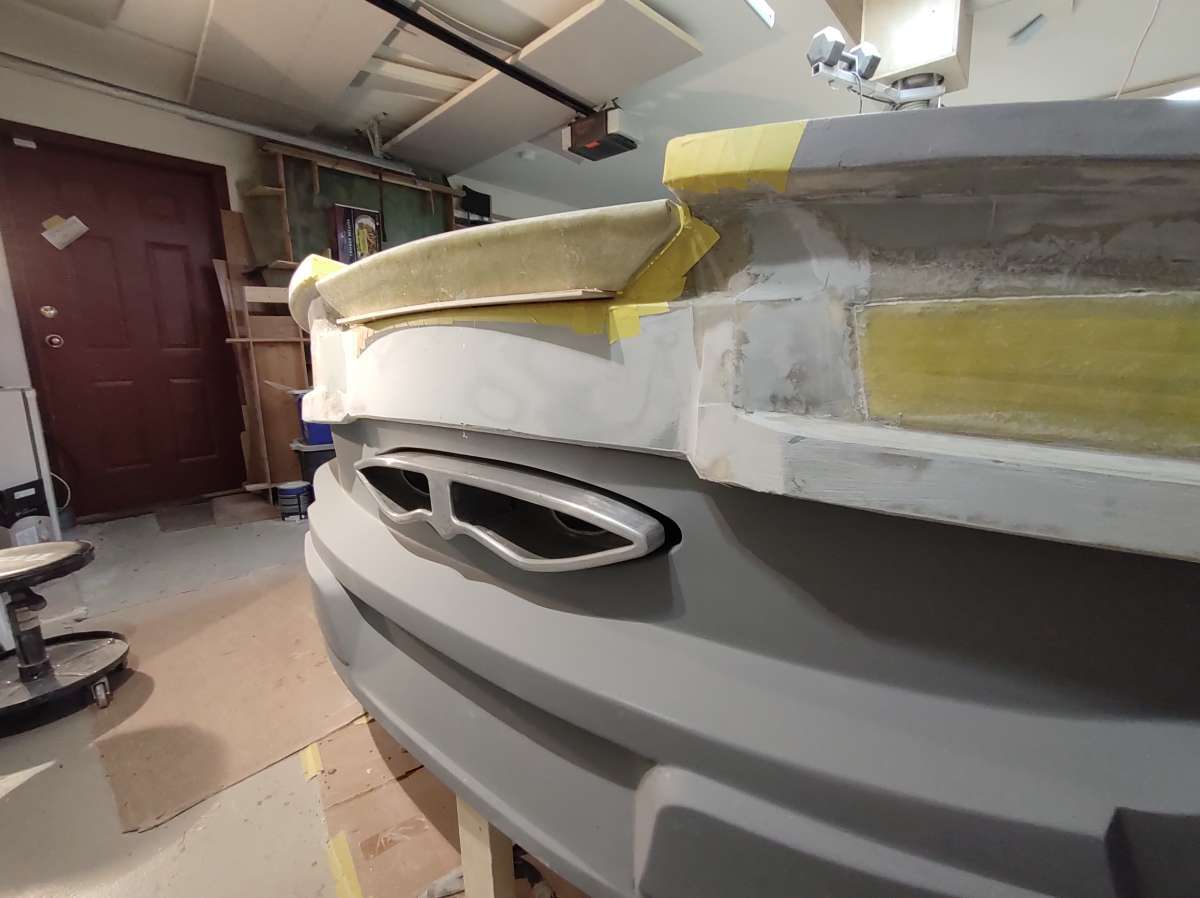
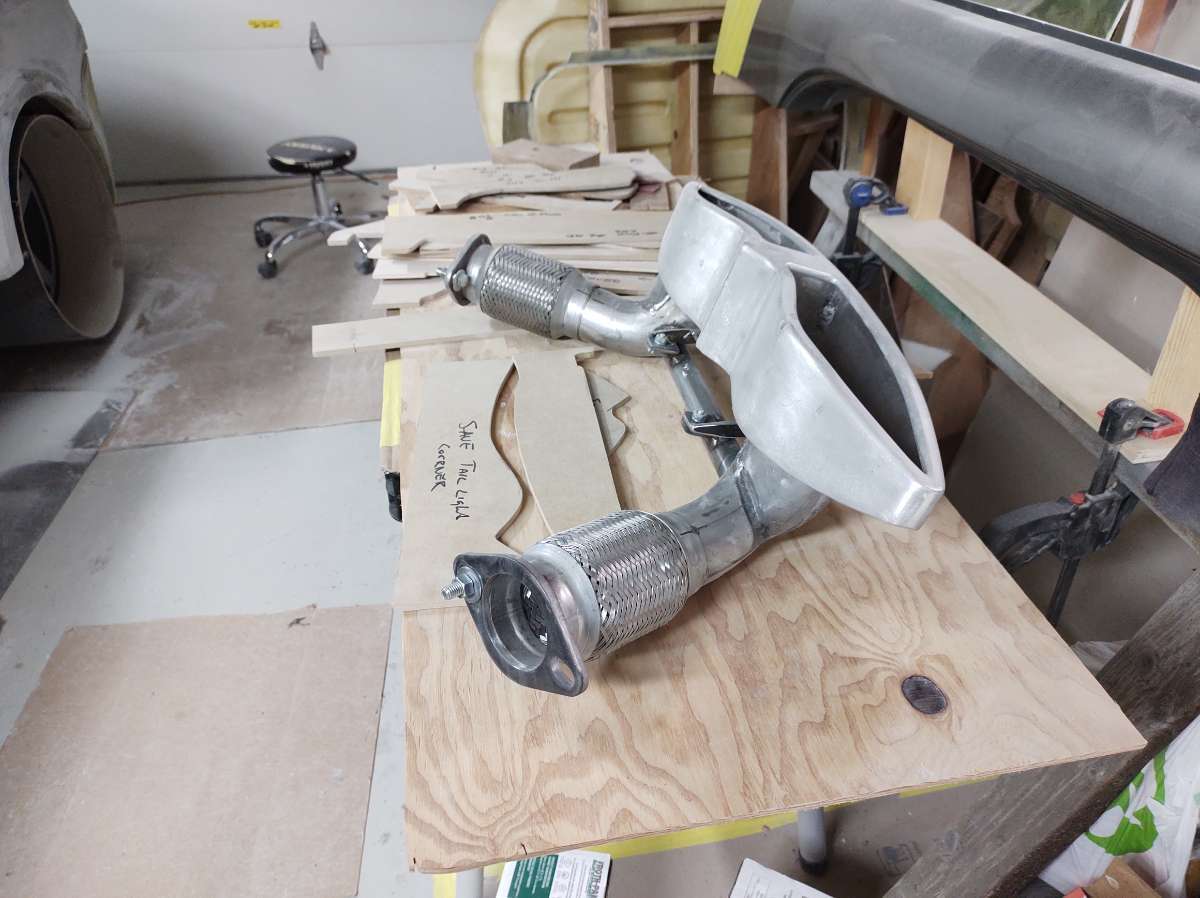
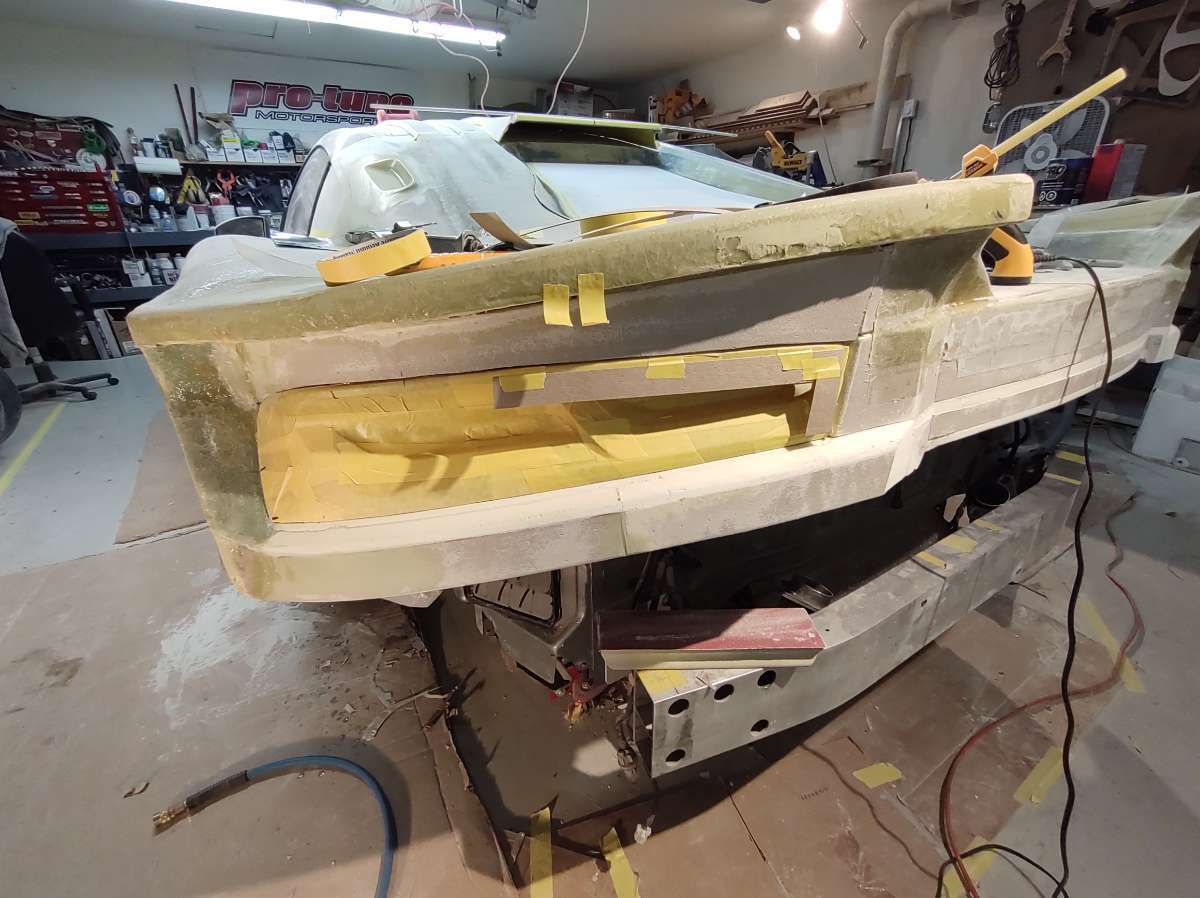
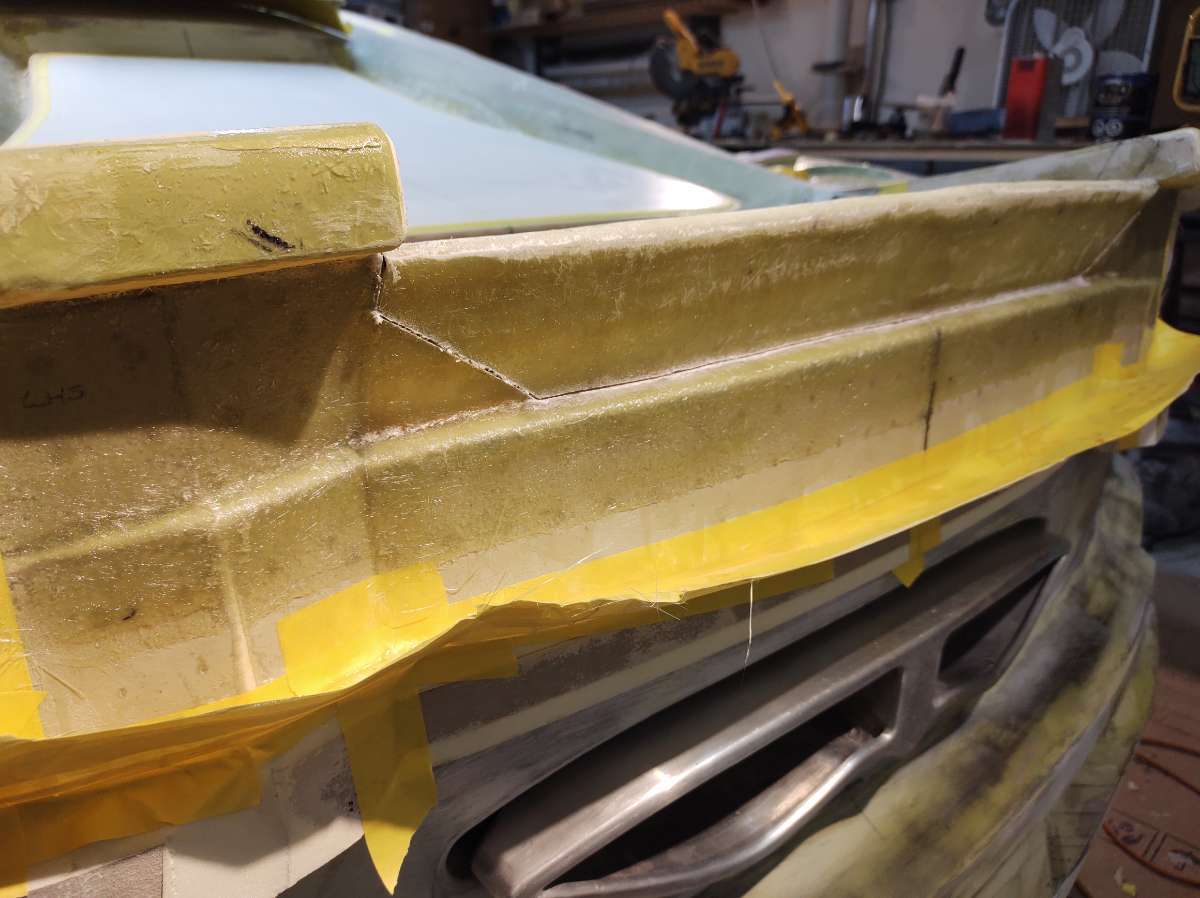
Hi don't worry about thinking a bout a negative comment , I have had a few on my350z.com , at least you took the time to post your thoughts , yes I would have liked to have the Exhaust tip be lower also .
The reasons for it being where it is are , 1st the perfect place is where the factory bumper is and I don't want to mess with the safety features of the car by moving the bumper up or down , the only safe modification to me was to extended the bumper brackets to allow room for the exhaust pipes to go behind it .
2 there wasn't really enough room below the bumper for the exhaust tip without it being susceptible to curb damage or making the tip and mounting brackets any more complicated than they are already .
3 I didn't want the signature exhaust tip to be lost down in the weeds lol , more in your face and the license plates don't deserve the focal point .
Thanks for your interest and comments I hope this helps answer why.
Cheers Phil
-
3
-
-
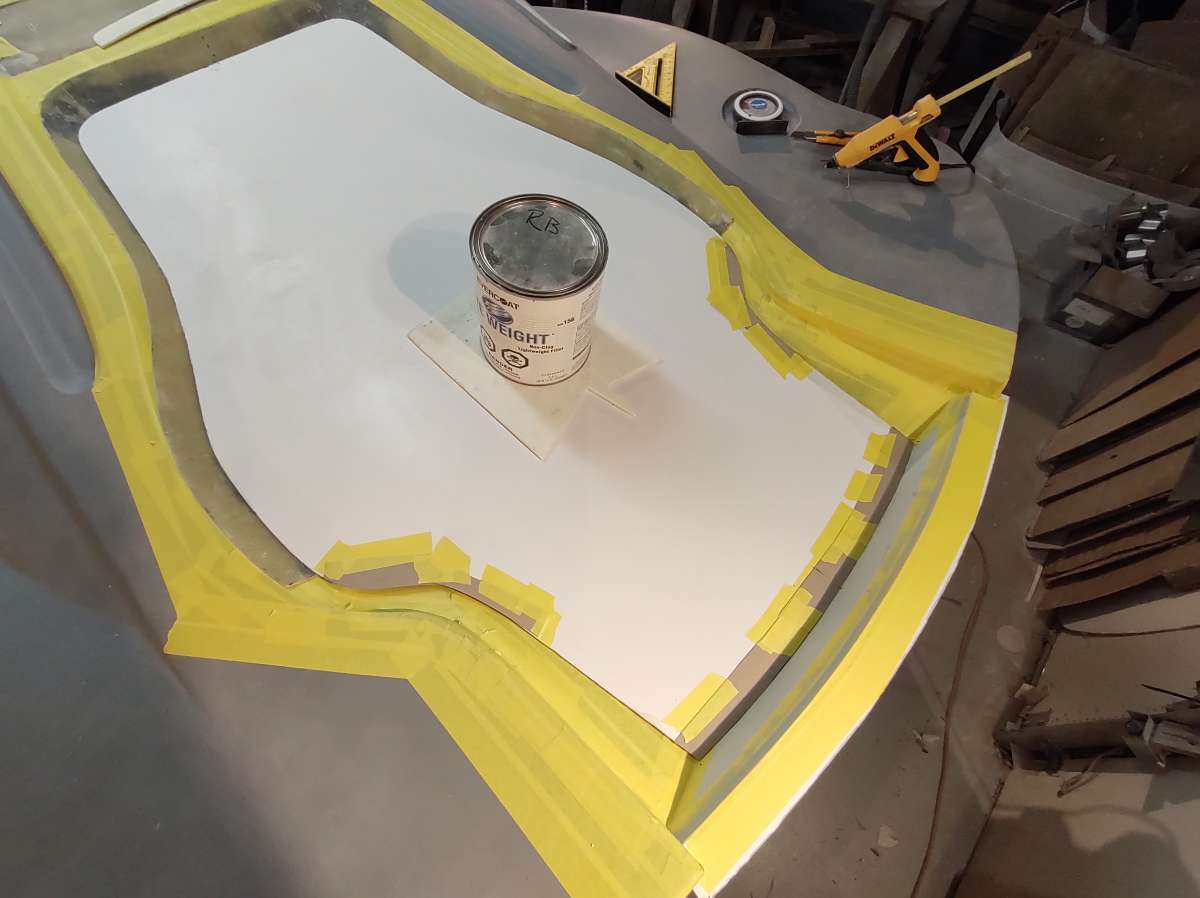
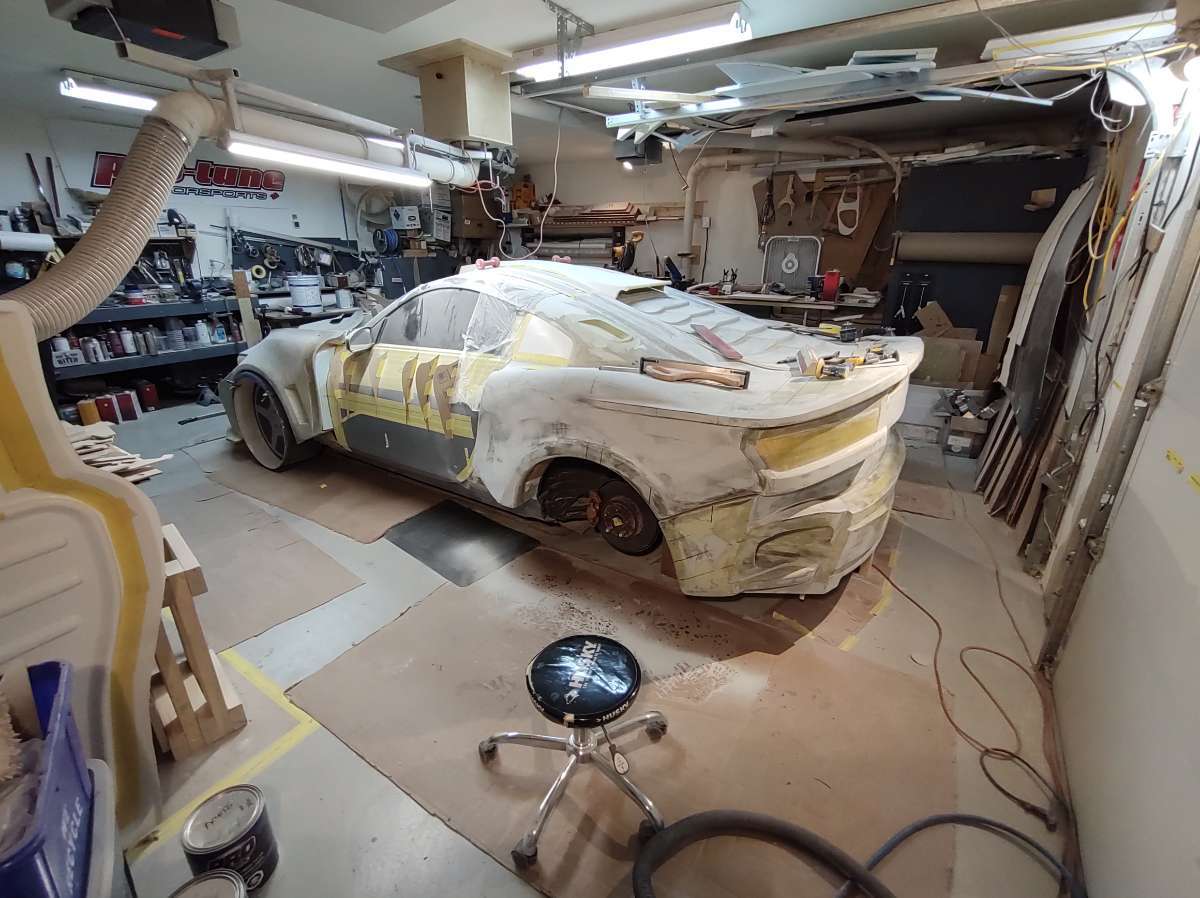
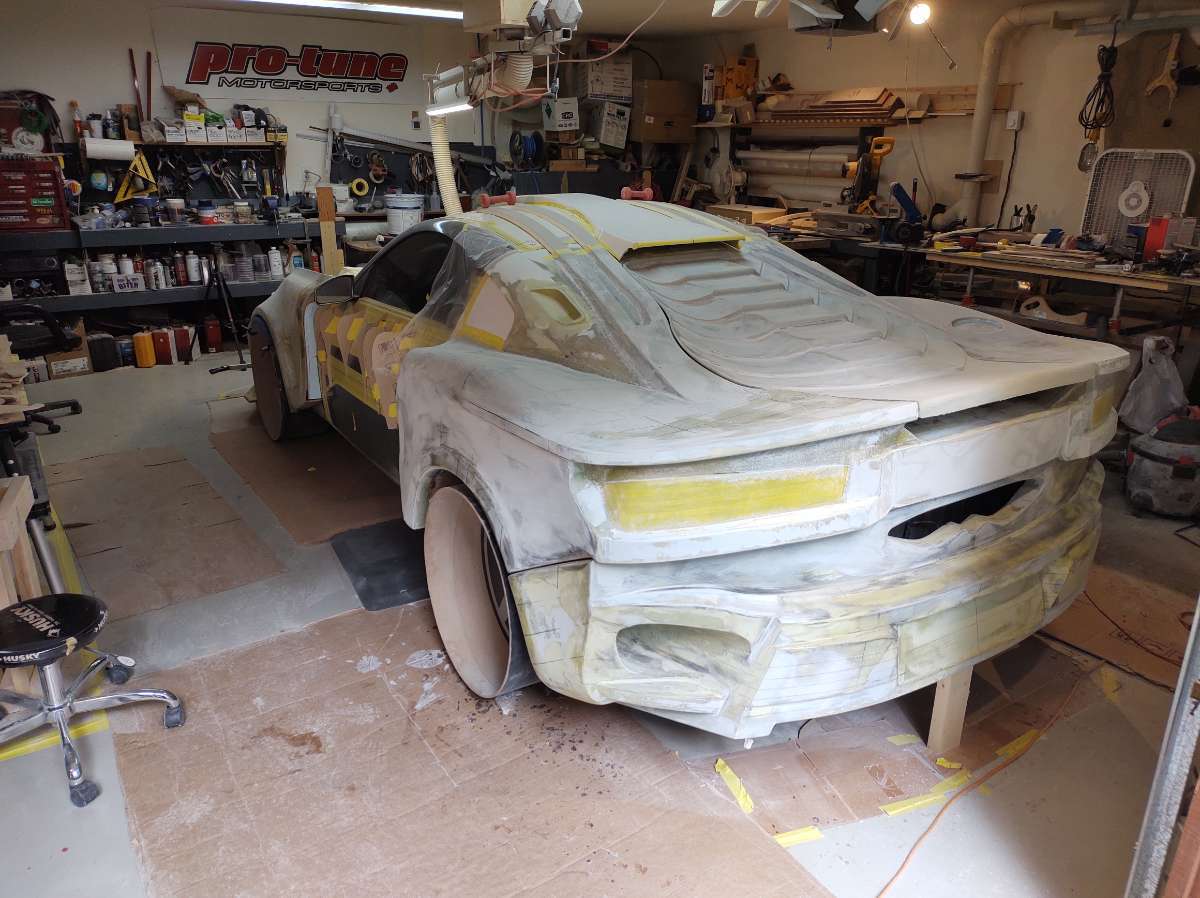
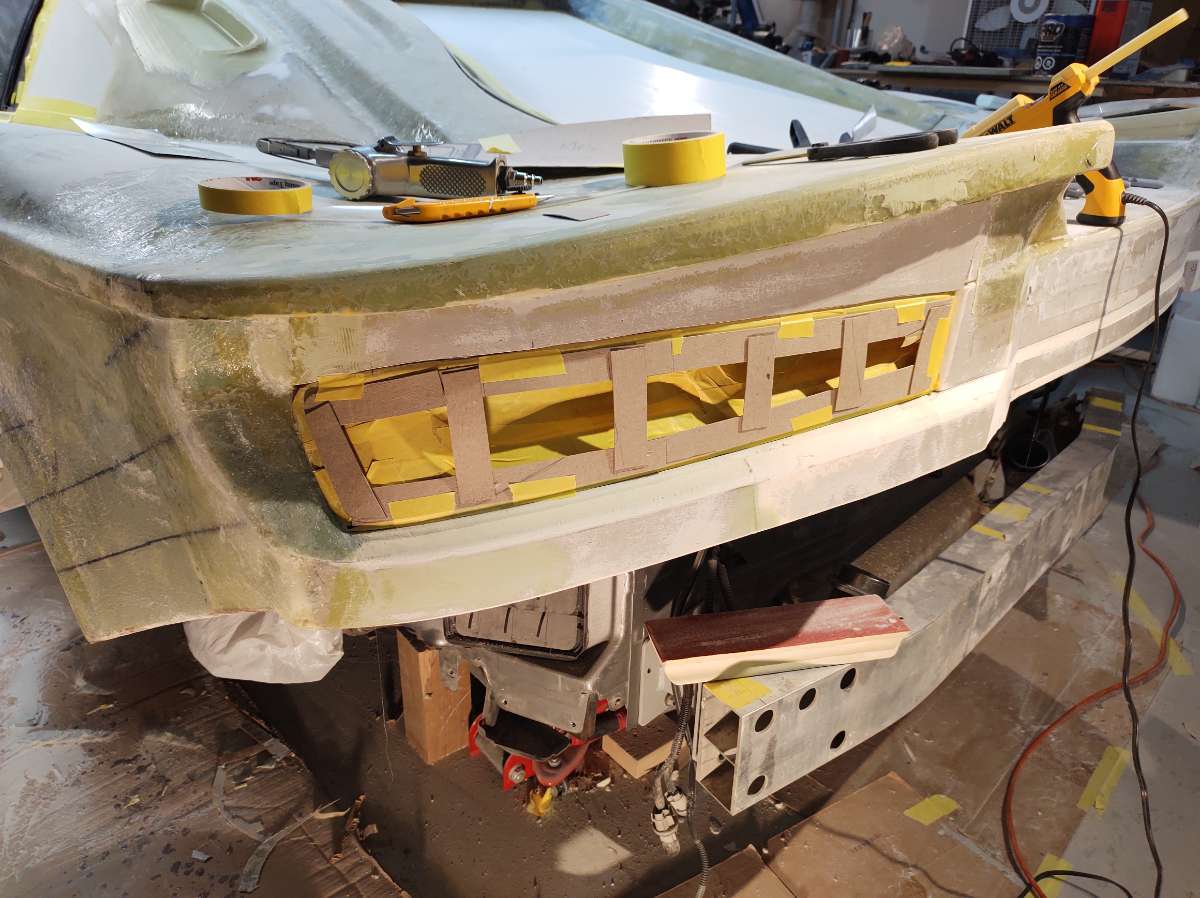
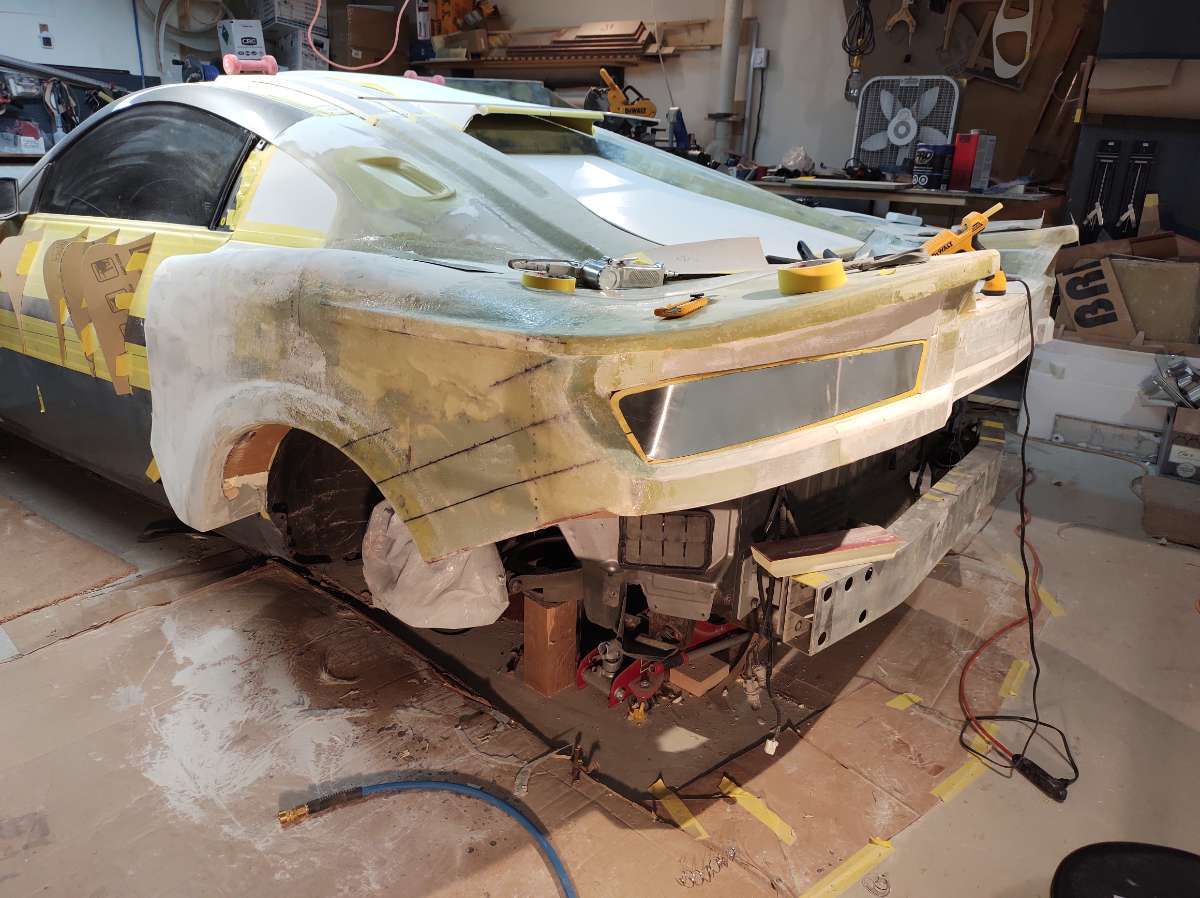
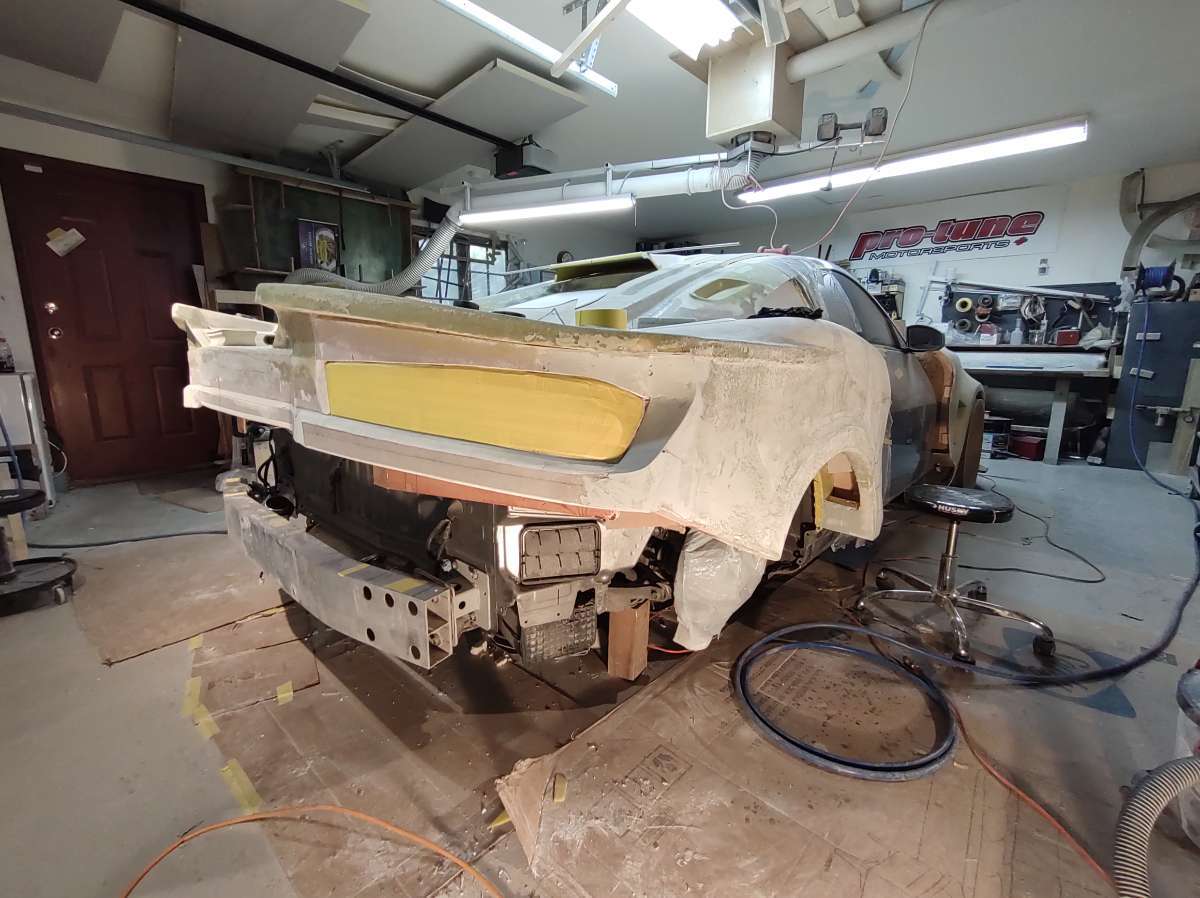
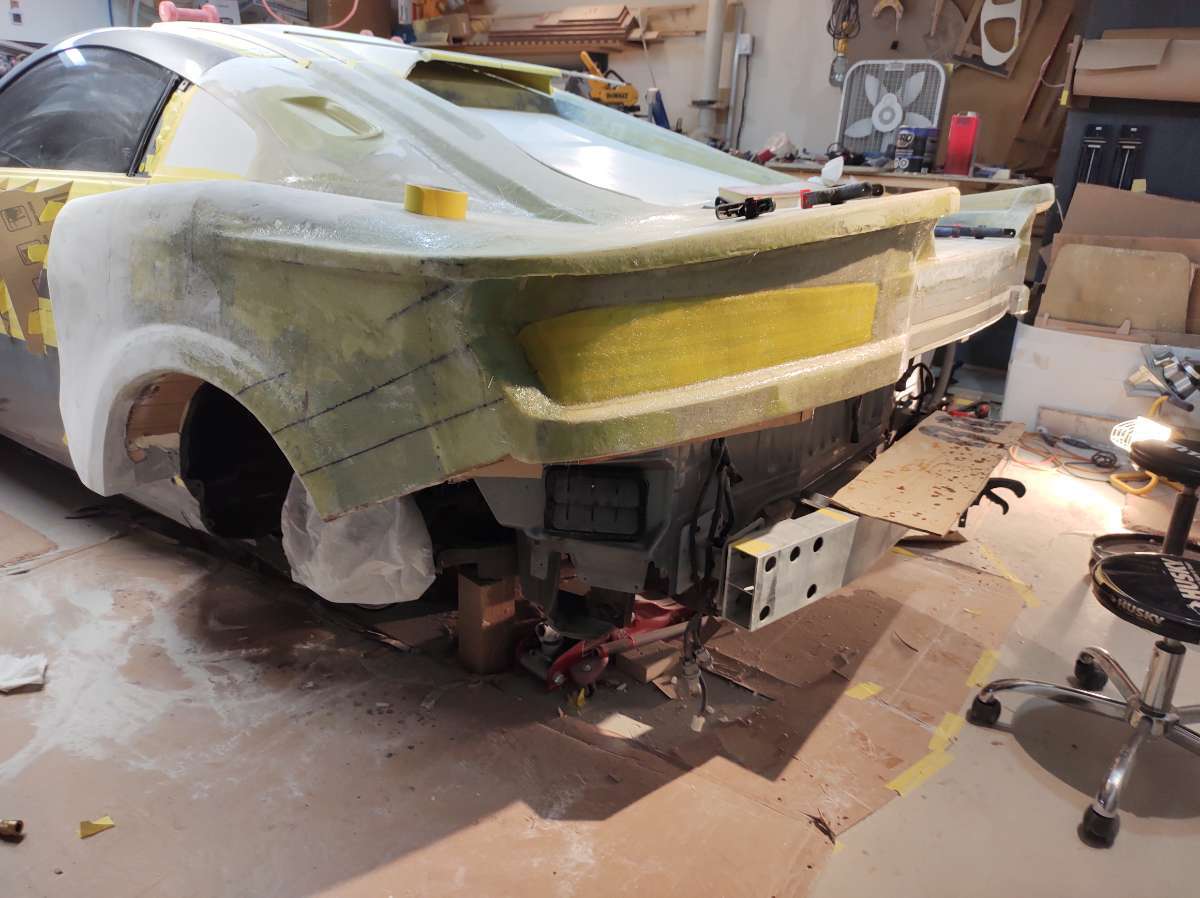
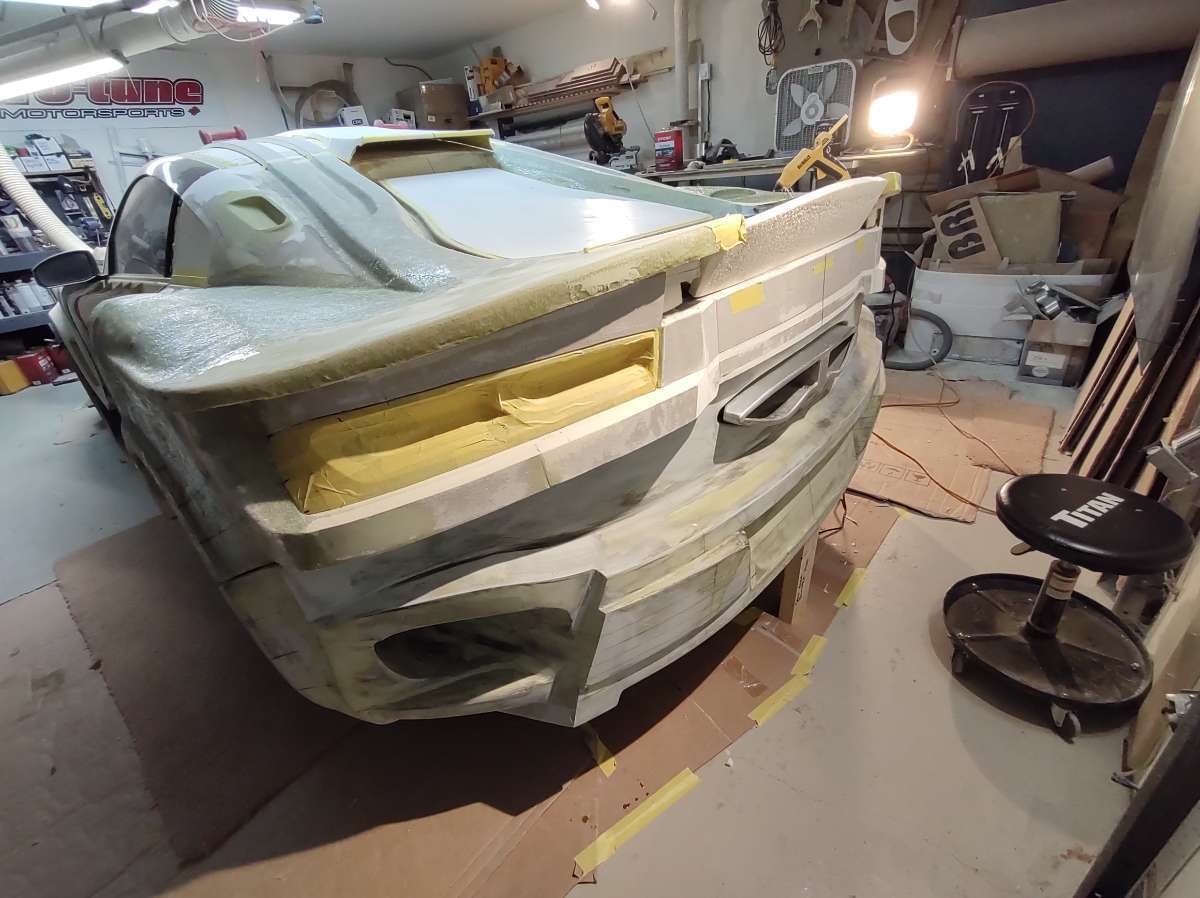
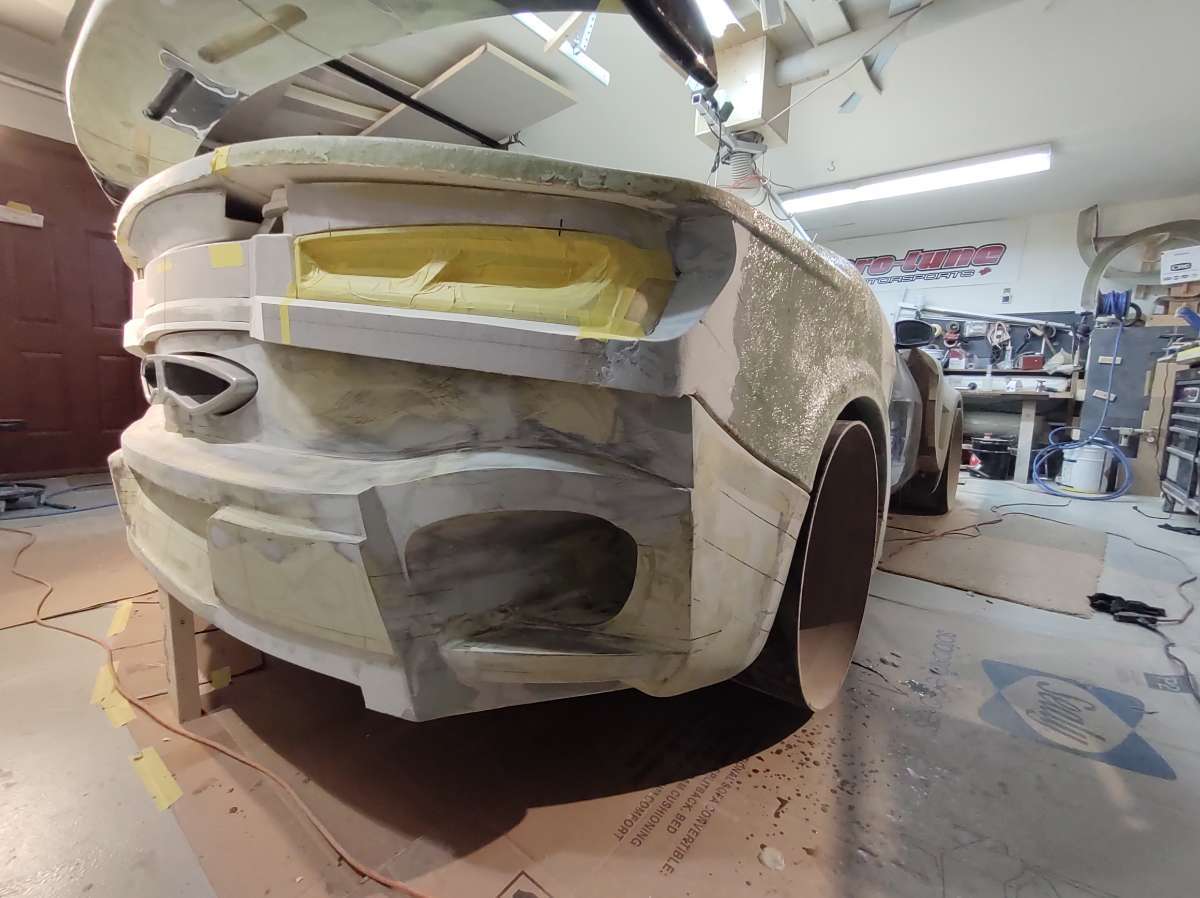
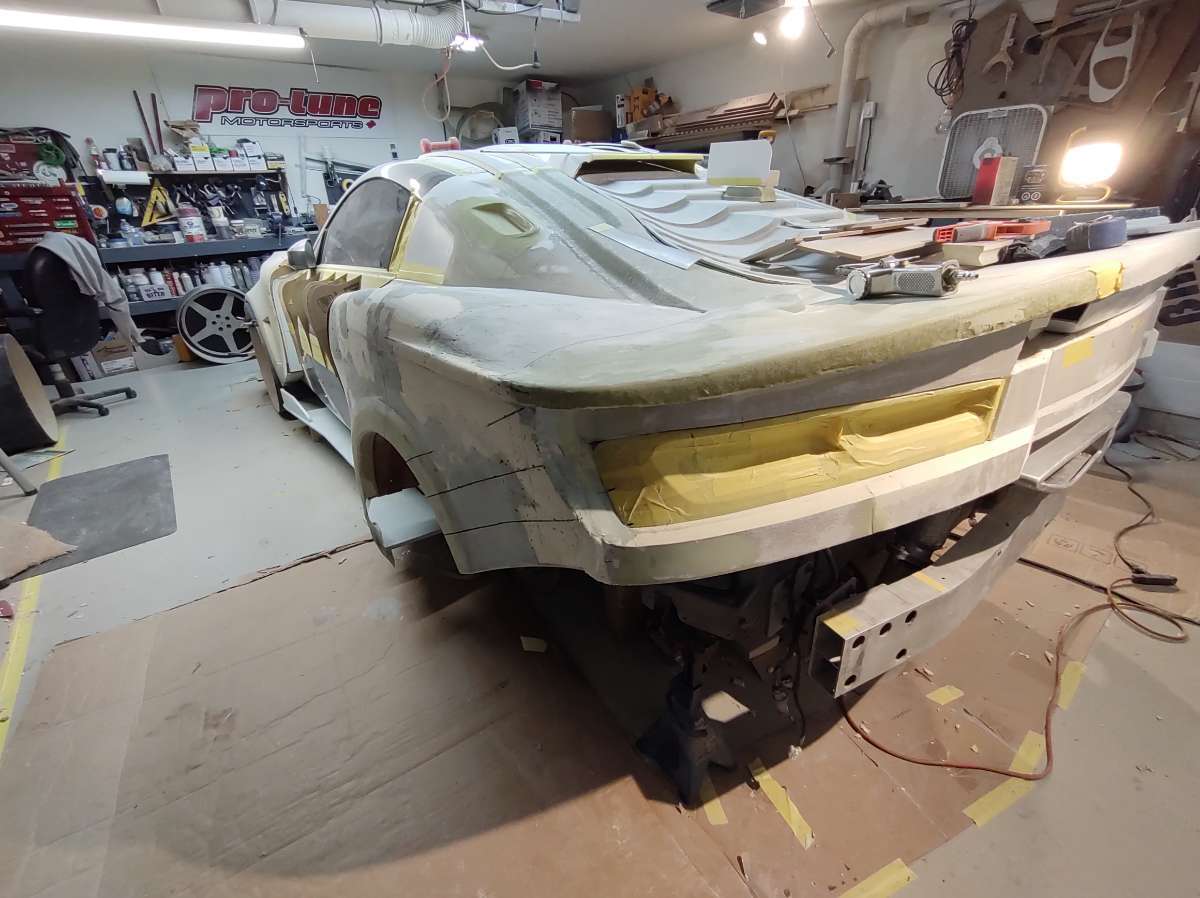
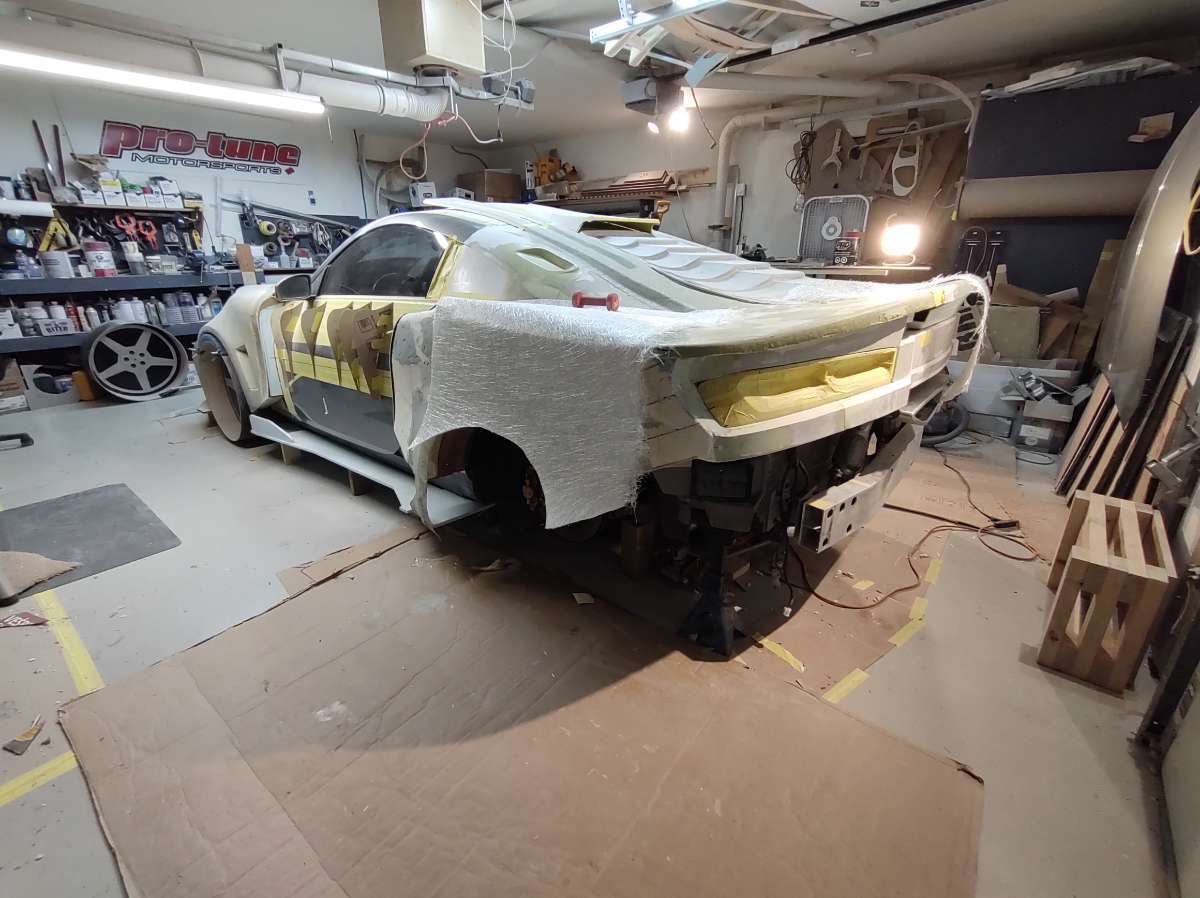
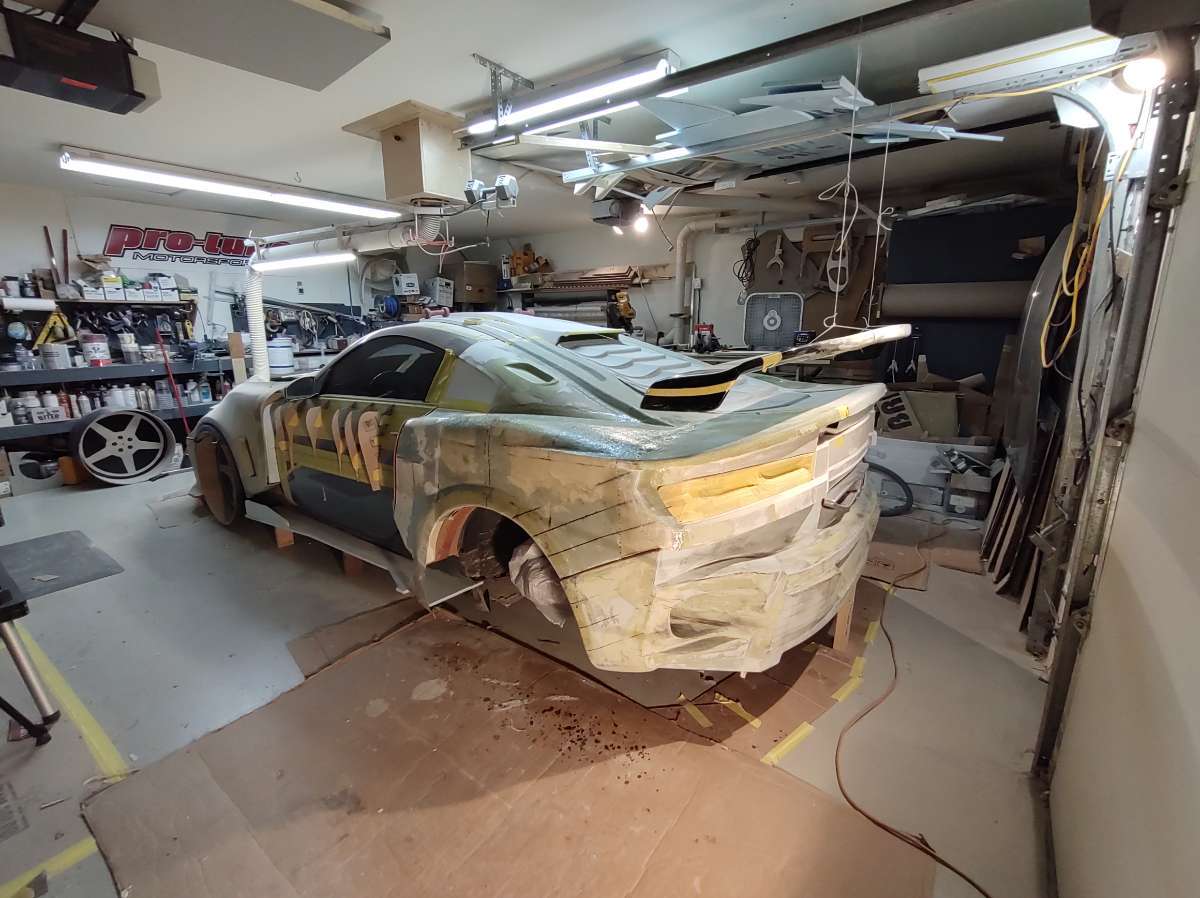
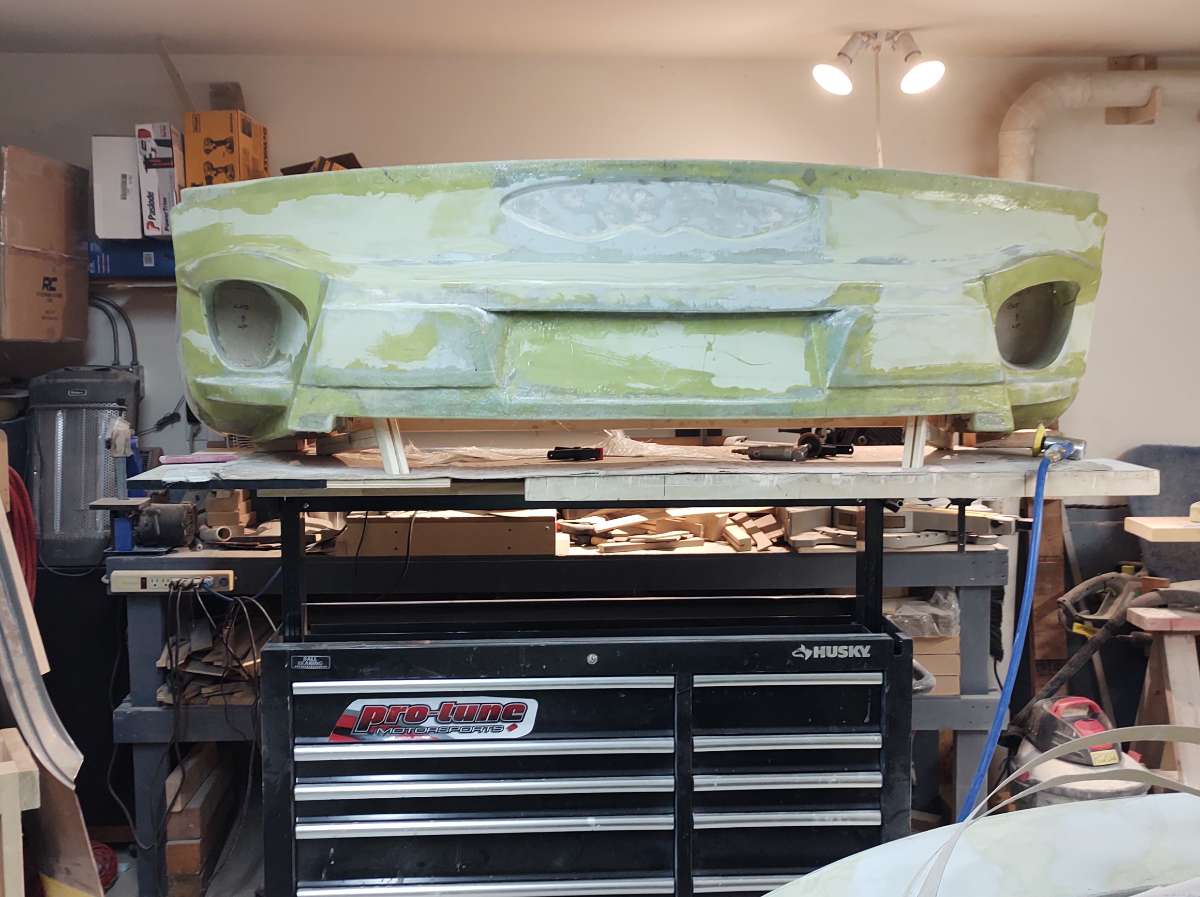
Hi everyone , it's time for another quick update .
I decided to prime the rear bumper yesterday , there was a brief gap in the weather to spray it outside , it wasn't
100 % perfect but I was dyeing to see it in one color .
I went for it and only got one coat of high build on it before it started to sprinkle rain .
But I must say I am very please with the look and the lines .
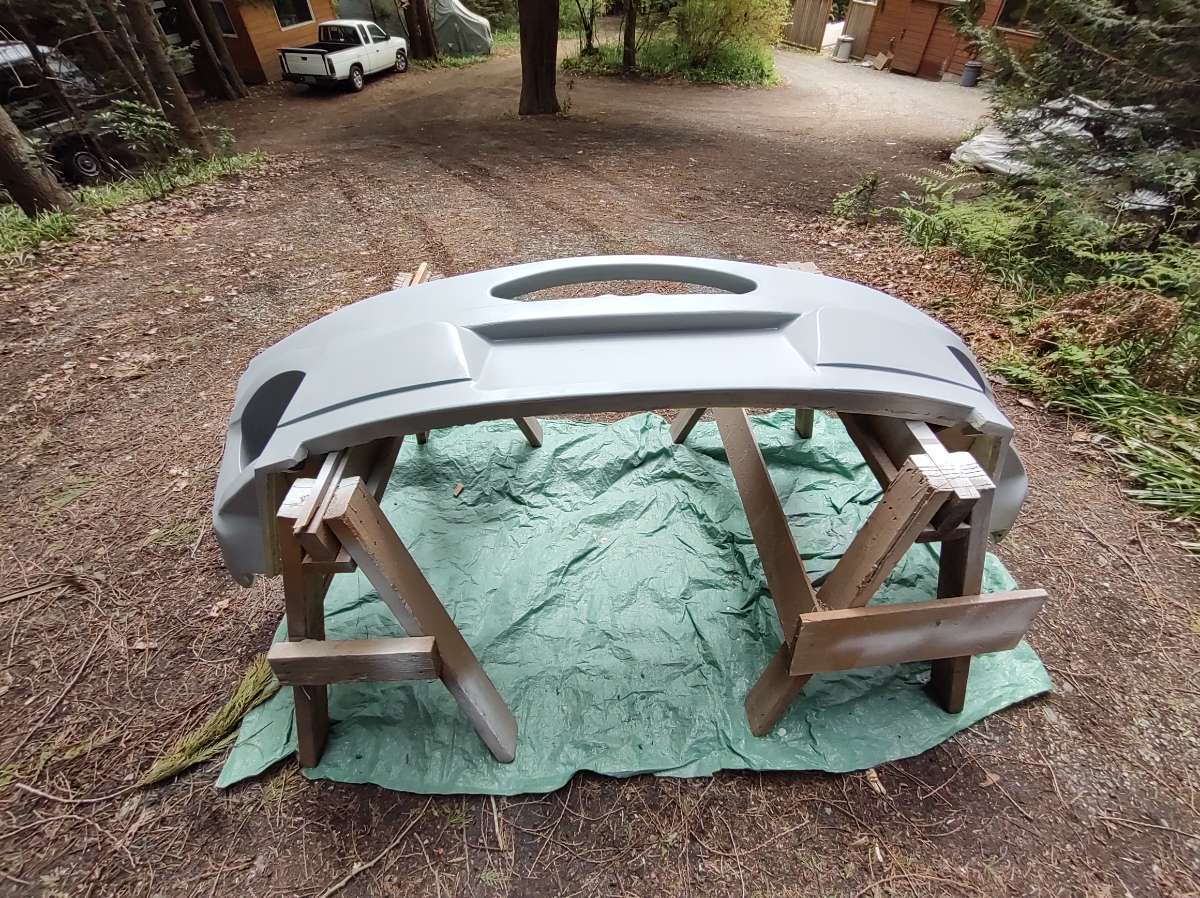
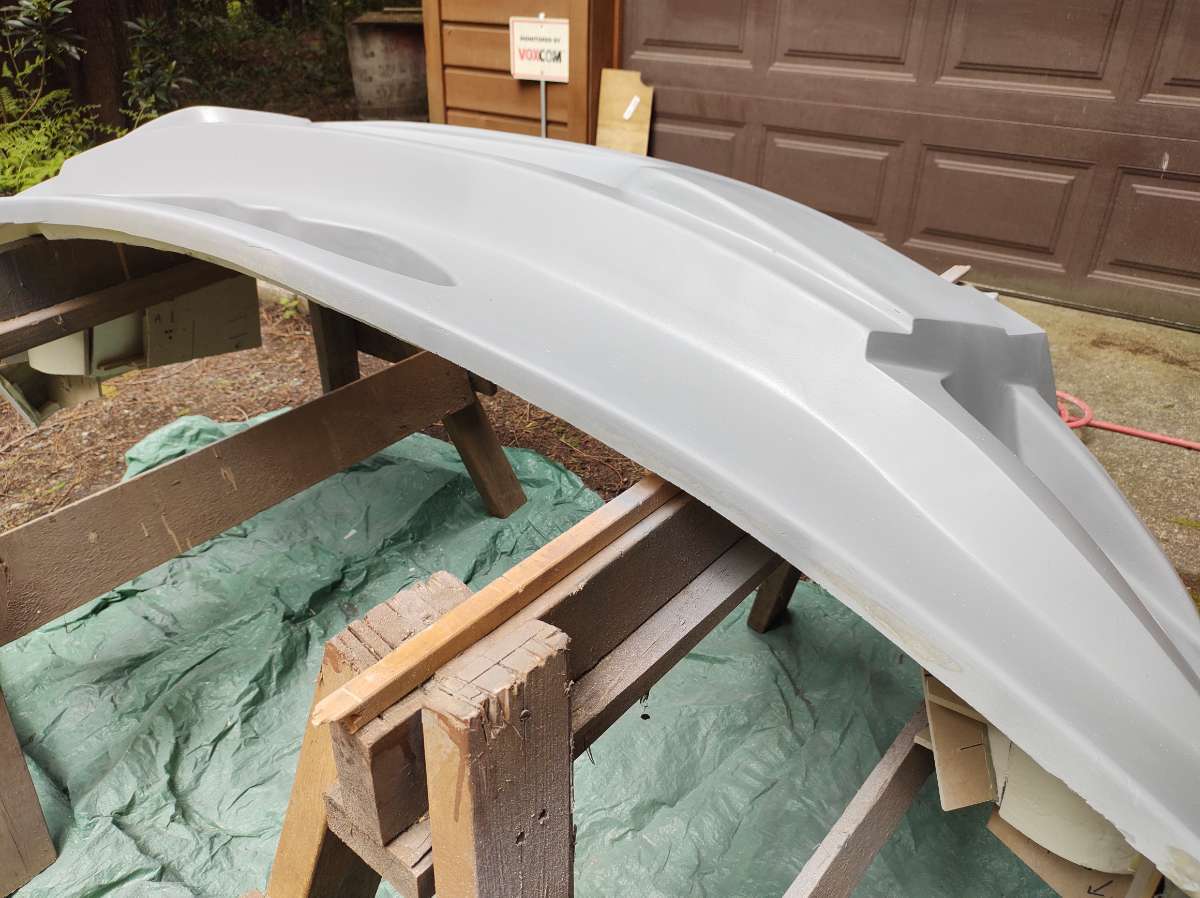
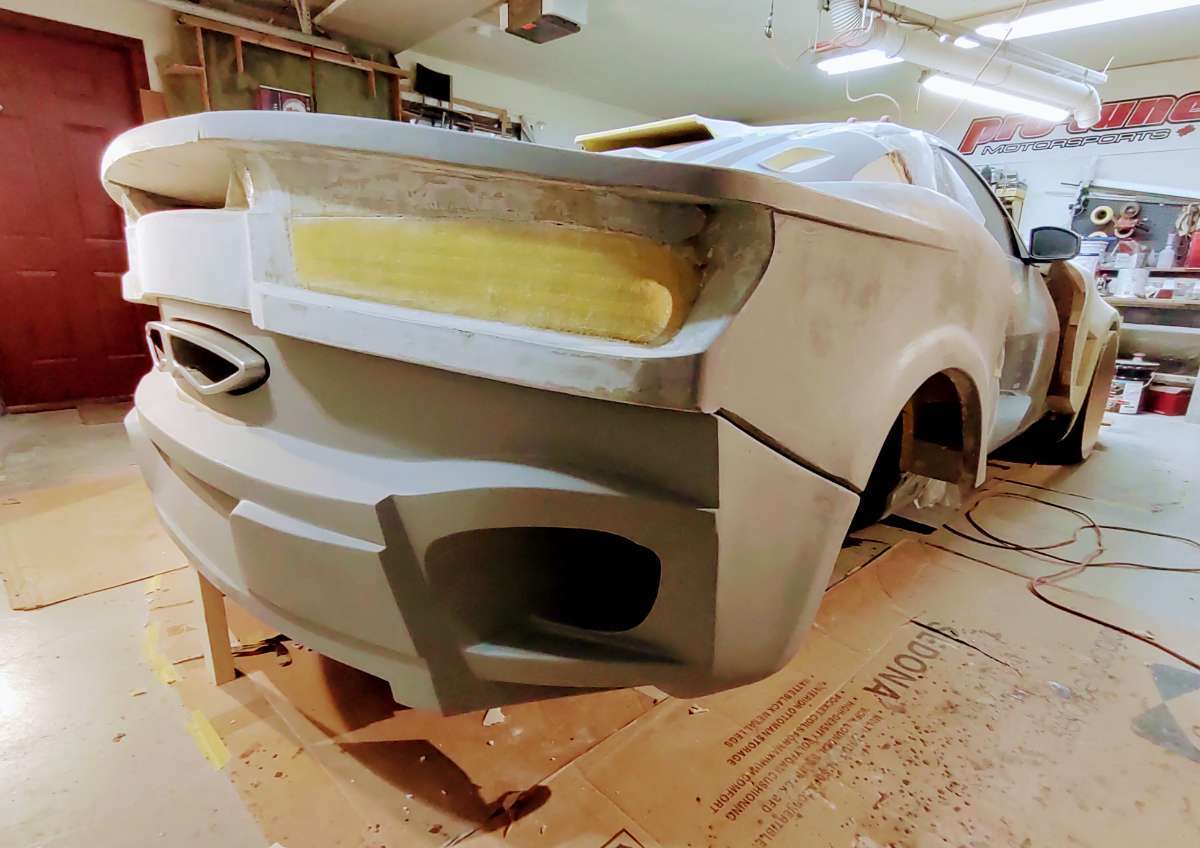
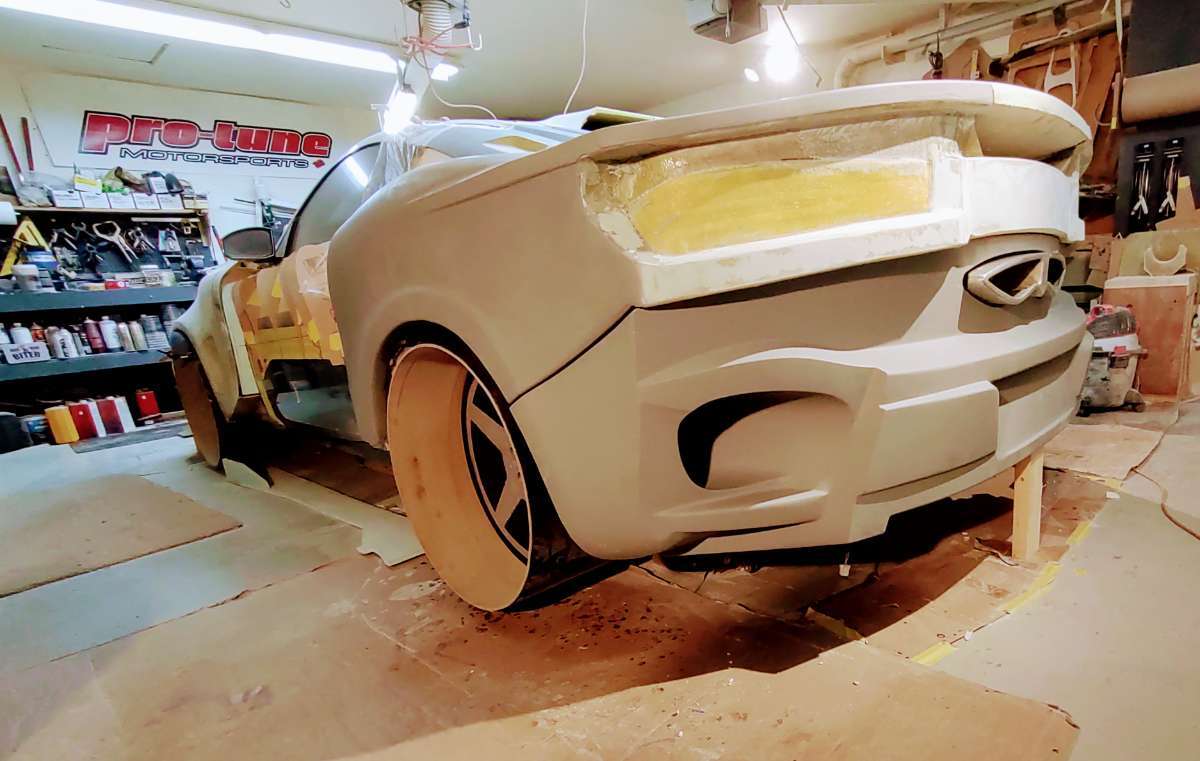
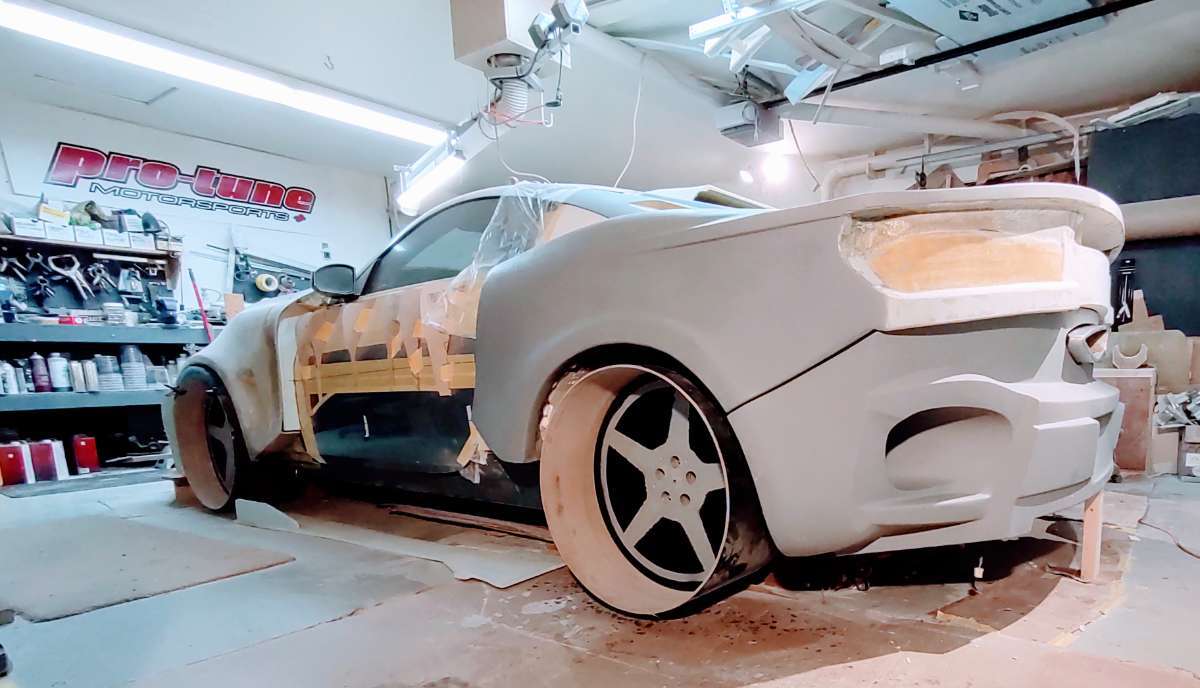
Like I said it's not perfect just yet , still a few spots to touch up and the bottom edges
Thanks for fallowing and the great feed back .
Stay Safe and Stay Tuned for more to come !!!
-
4
-
-
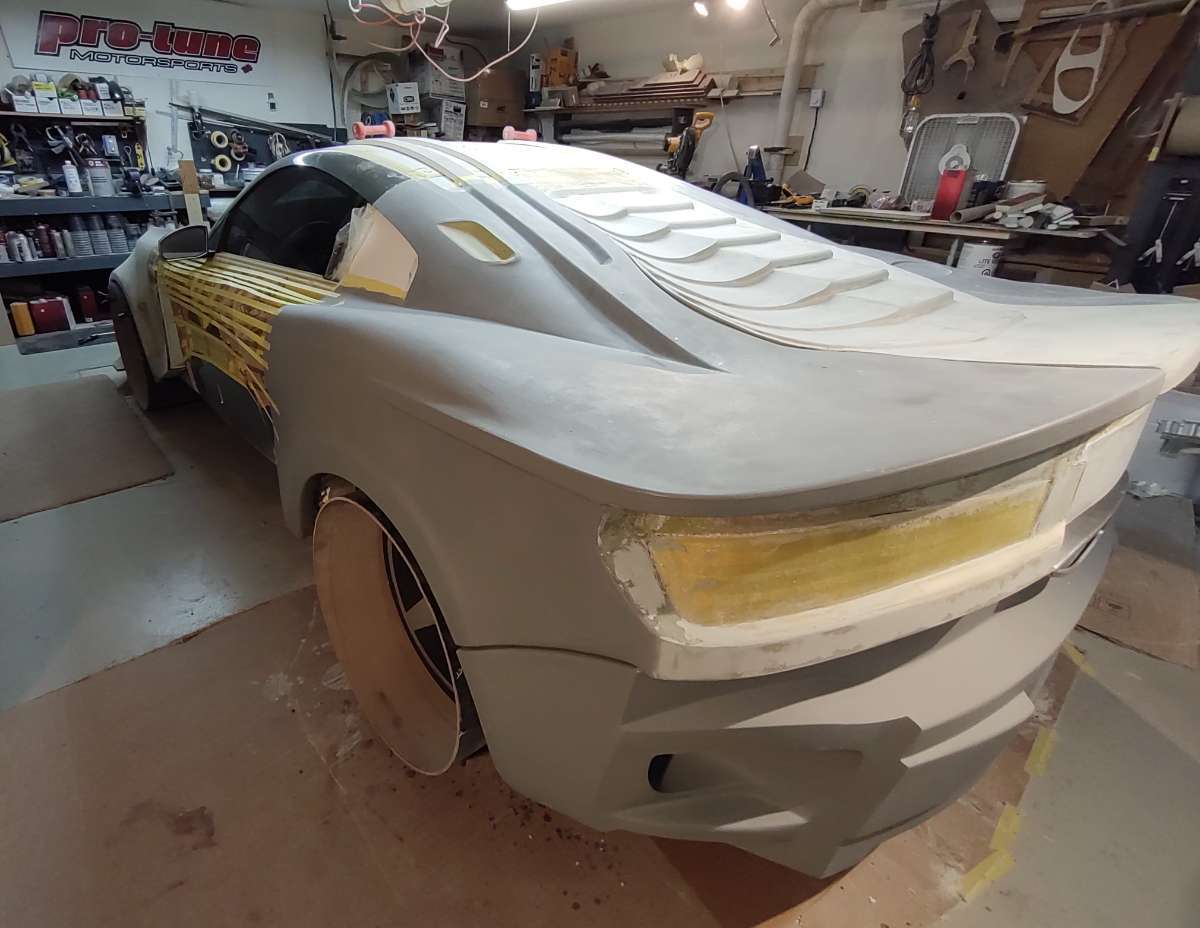
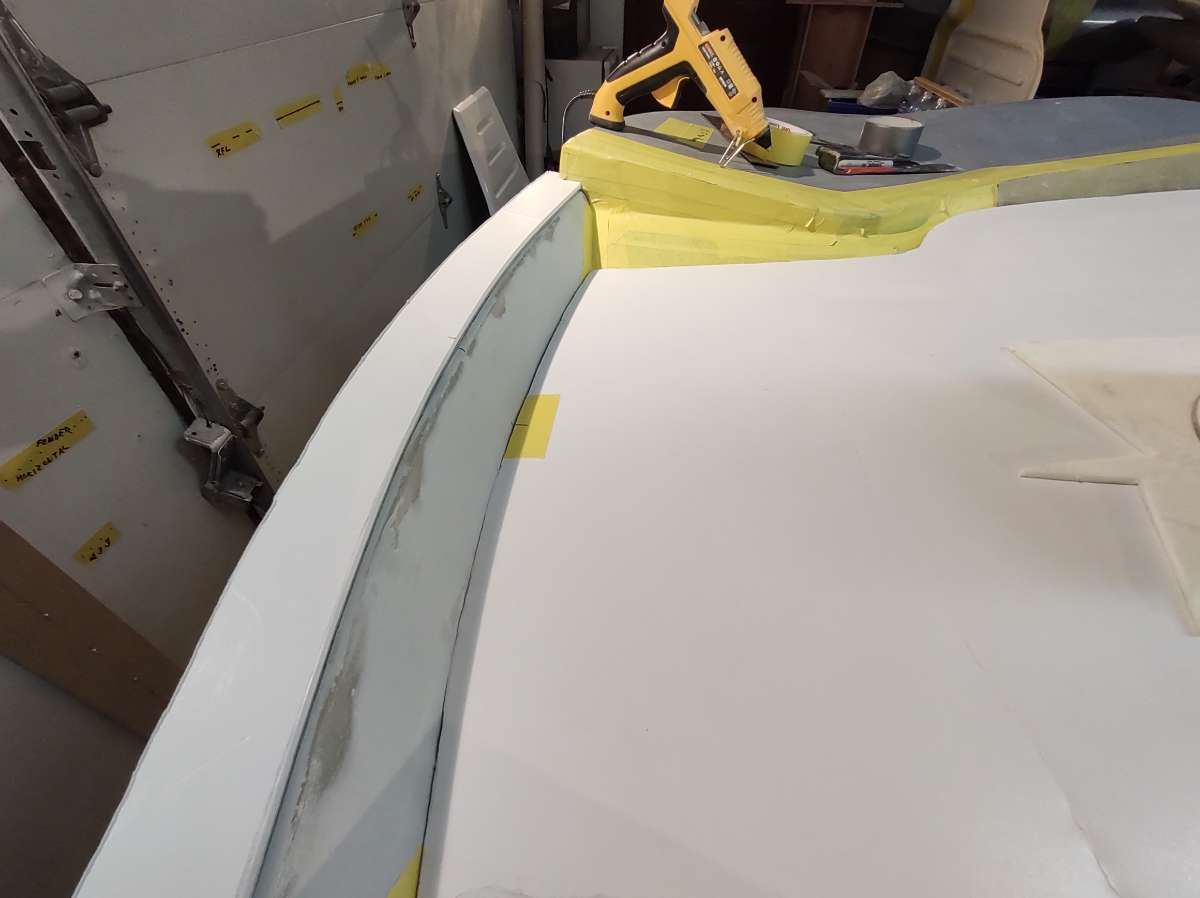
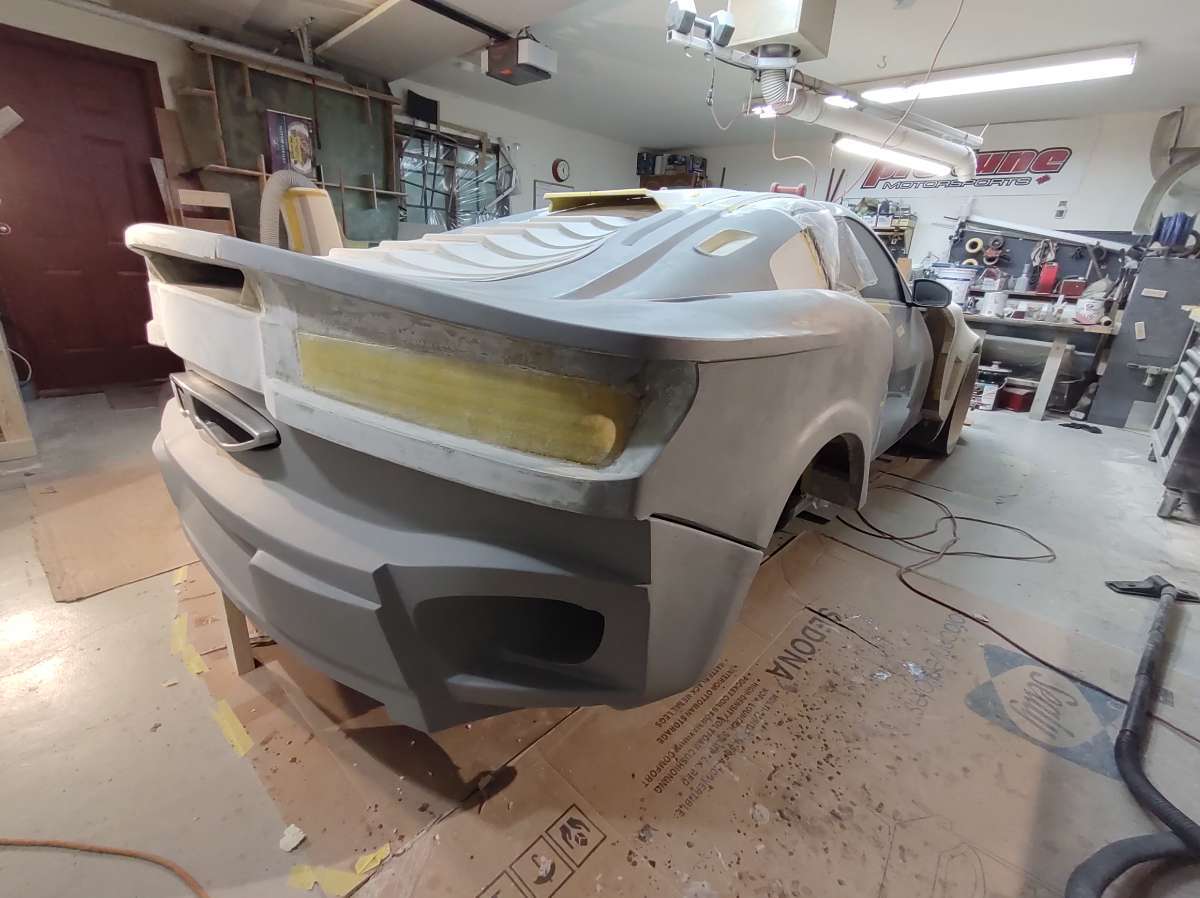
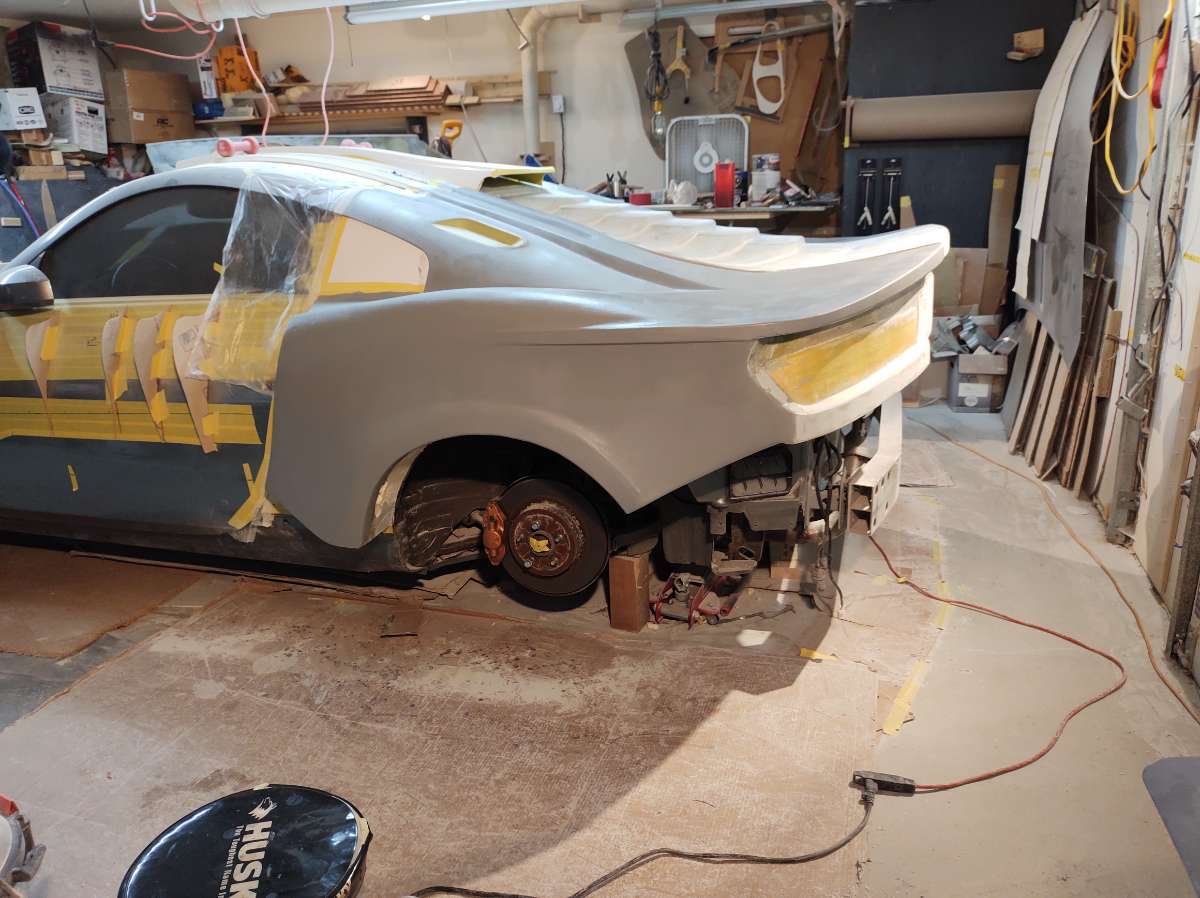
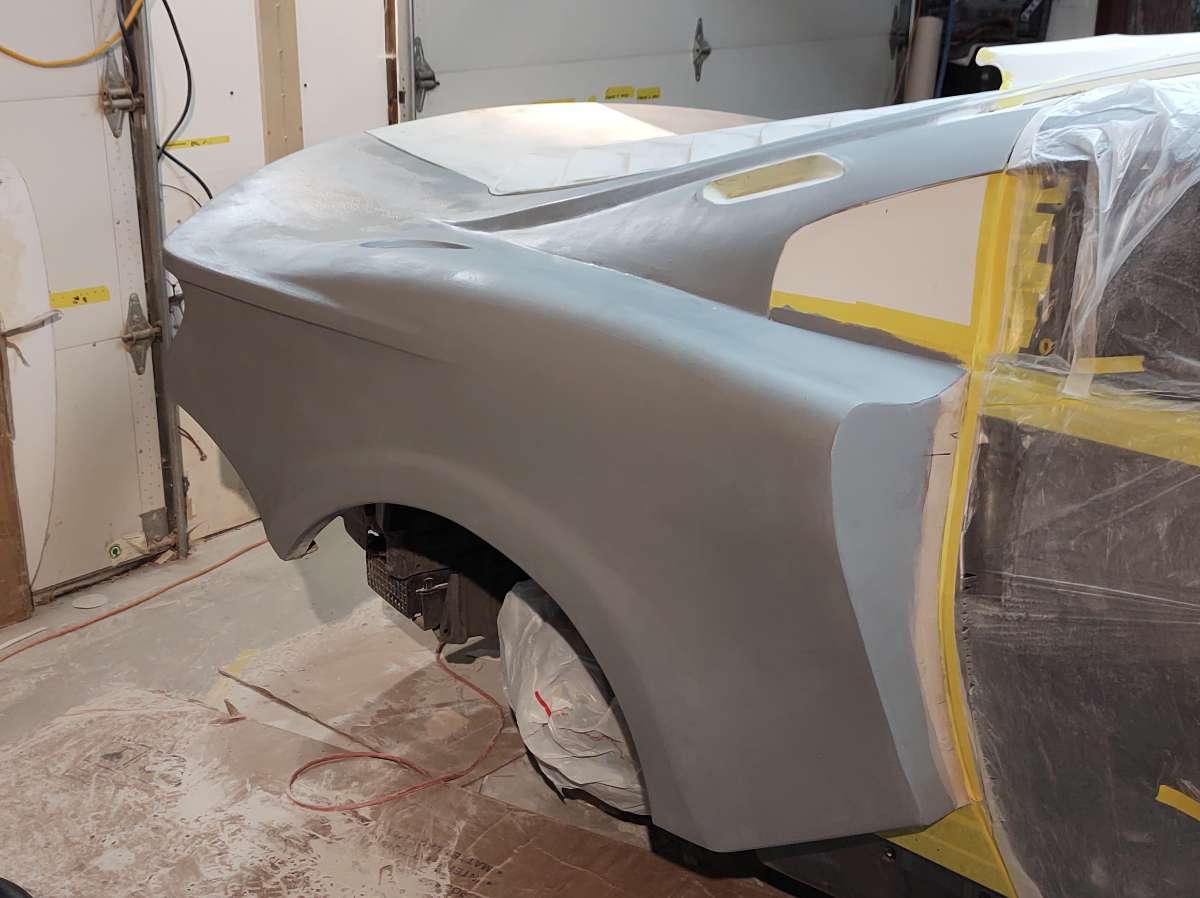
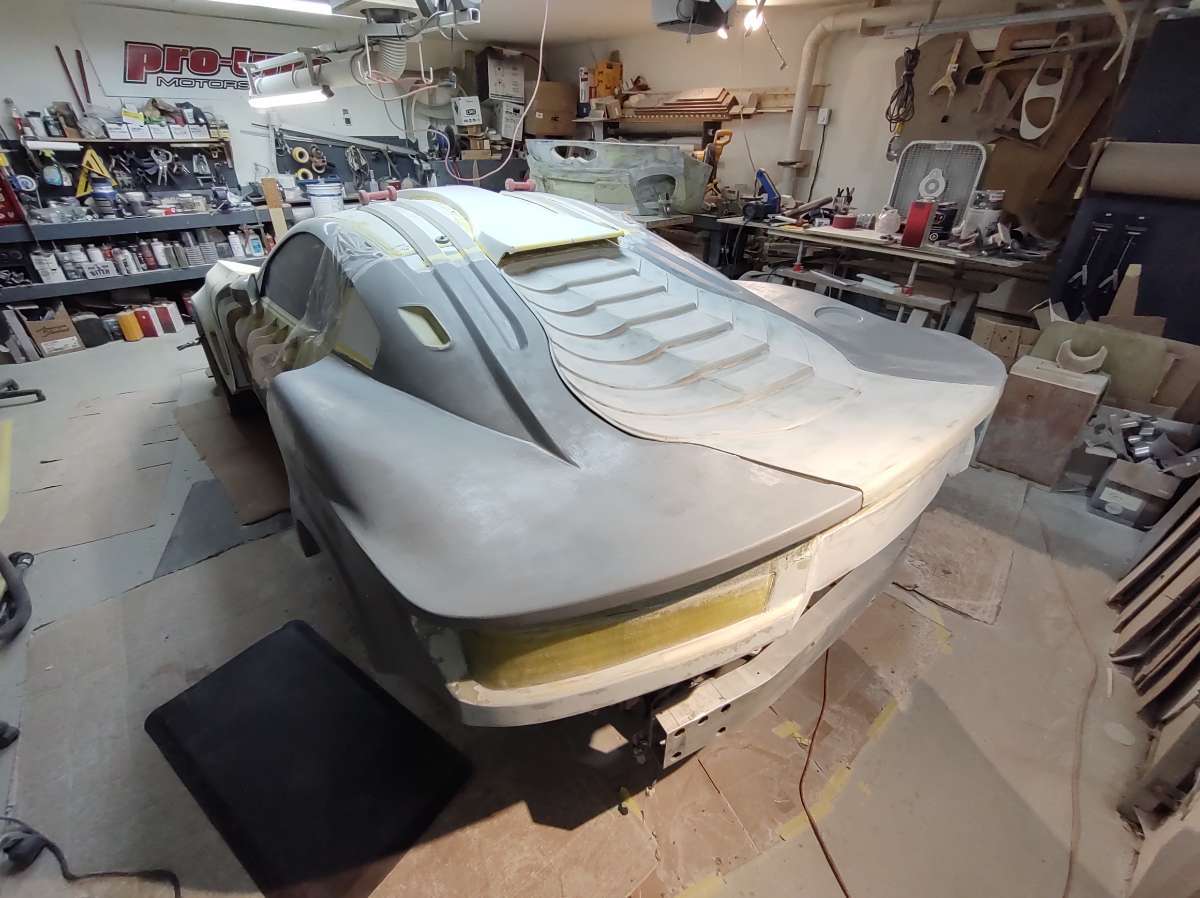
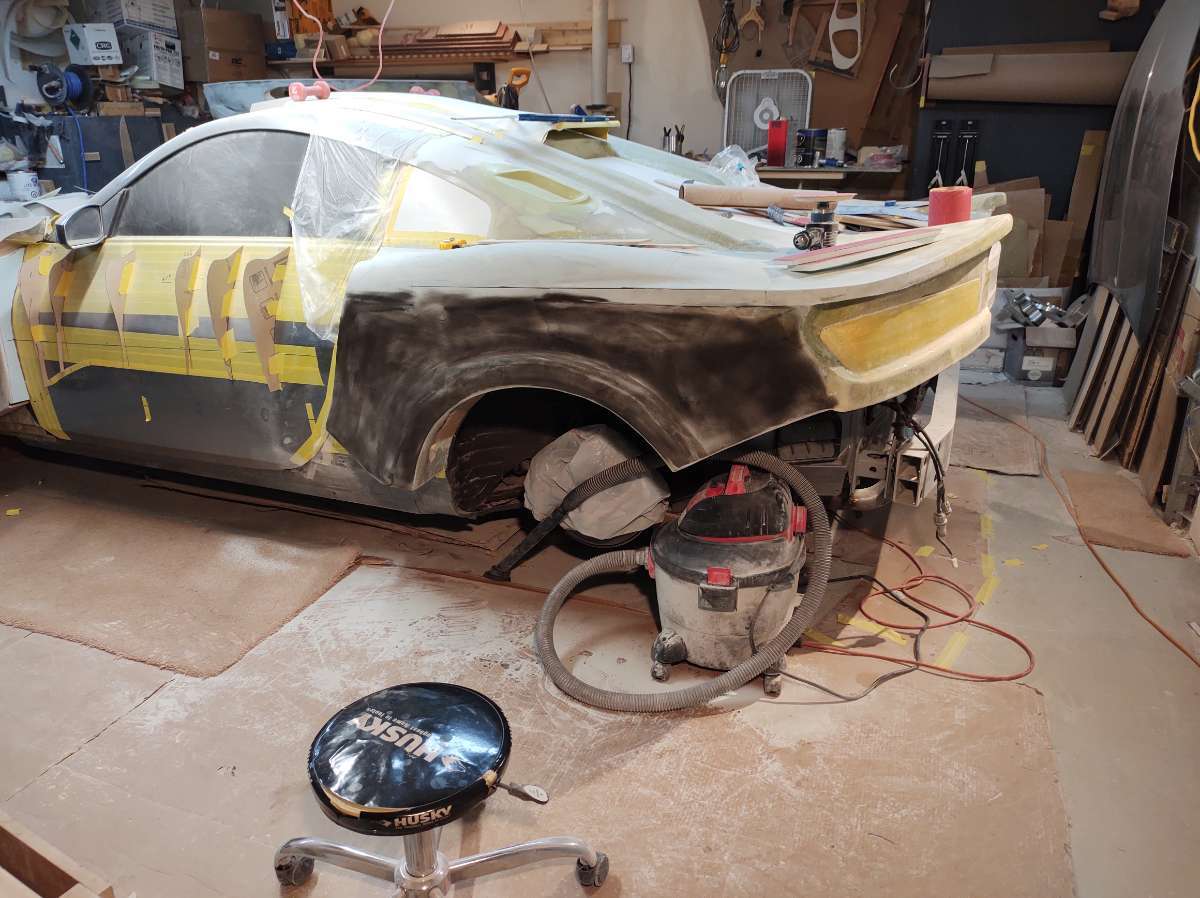
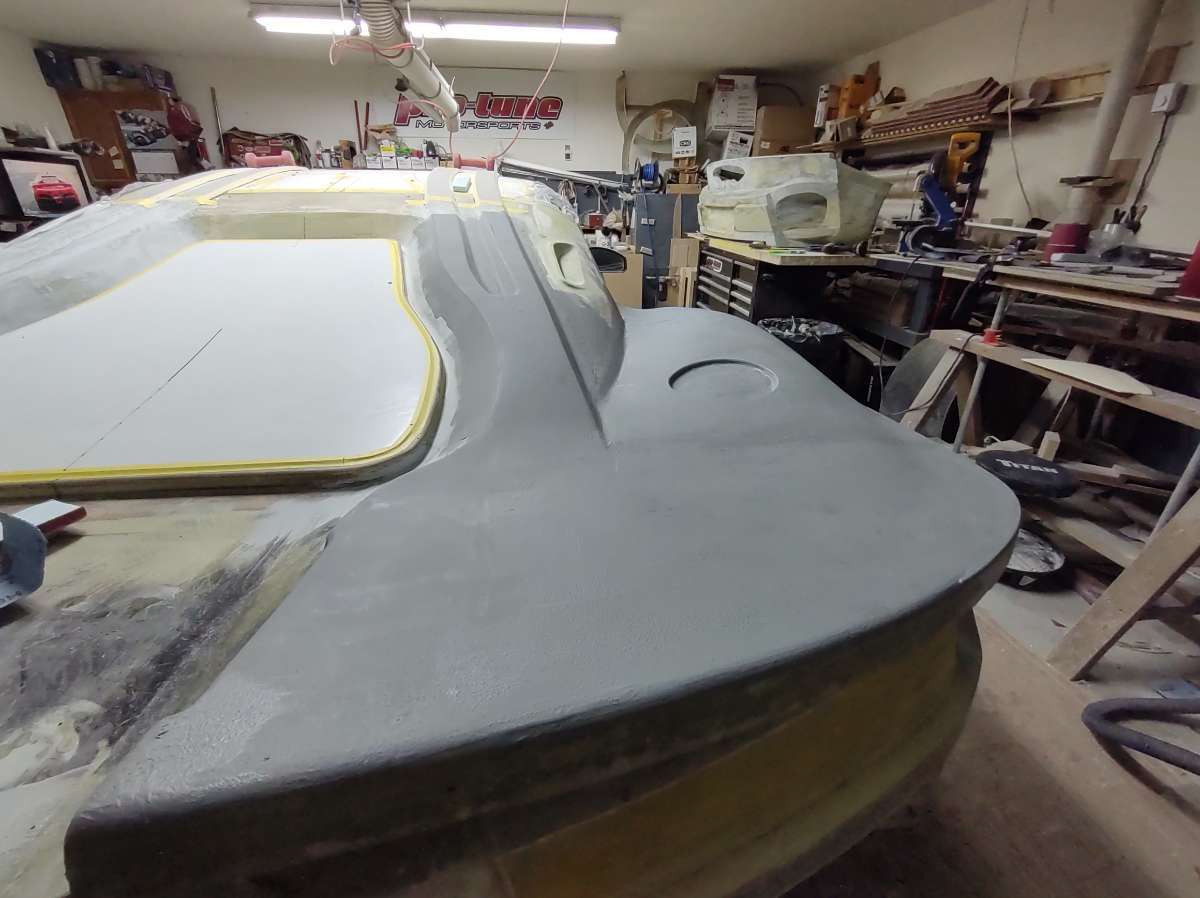
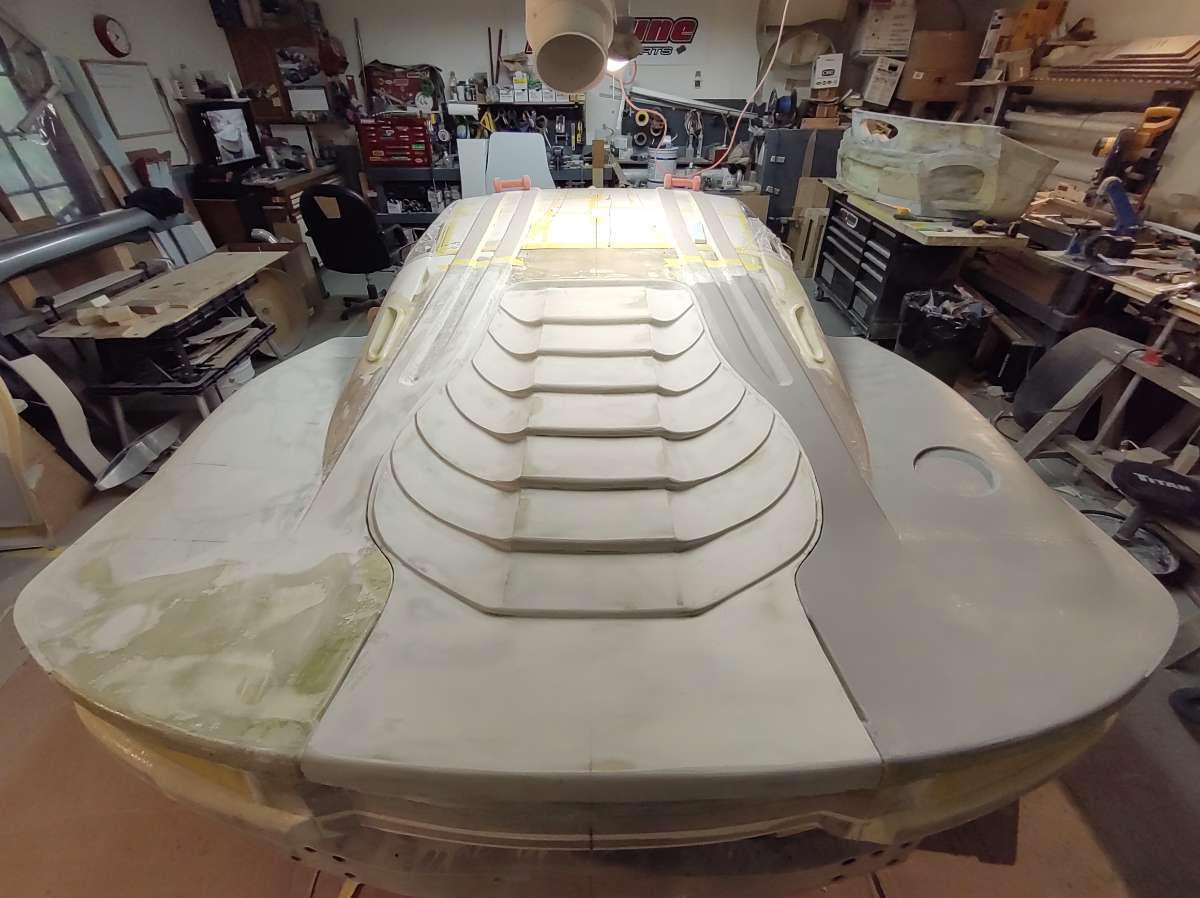
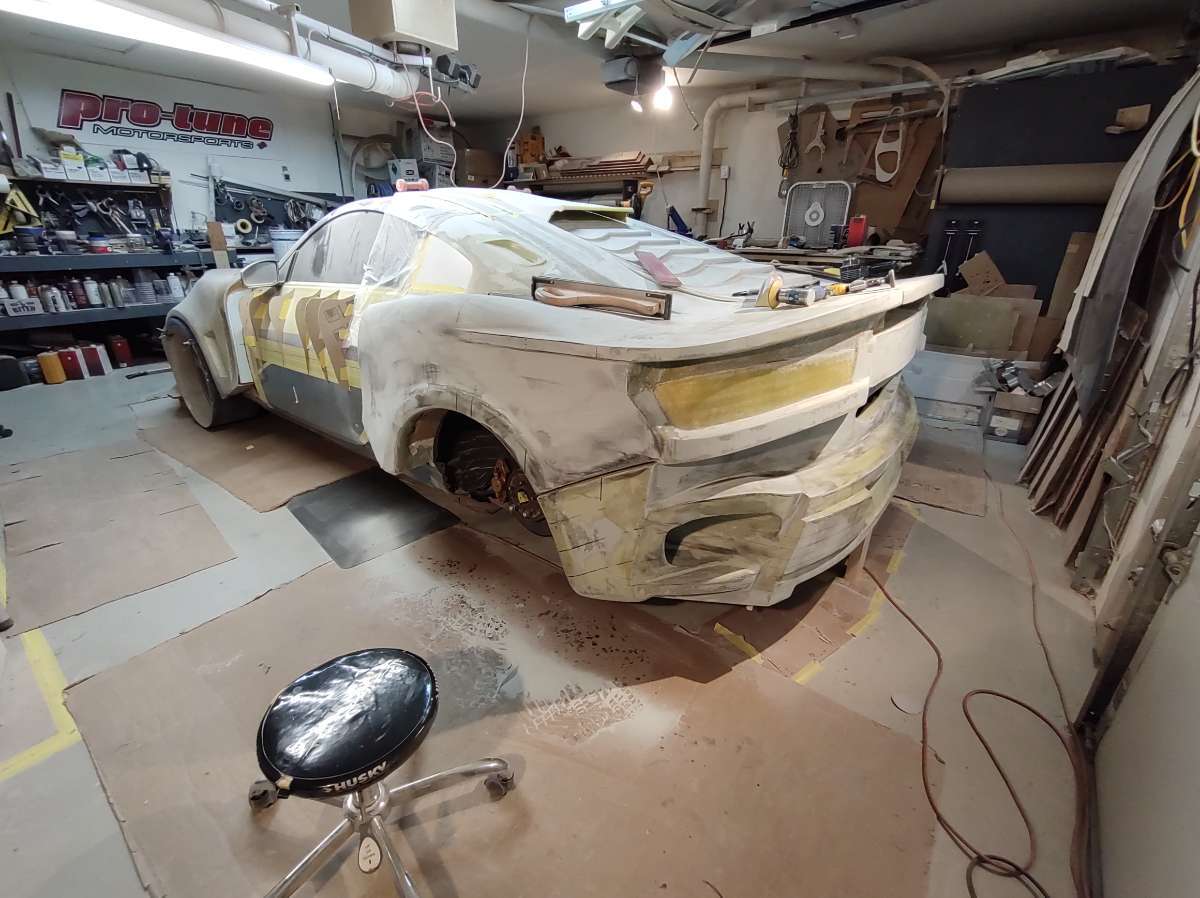
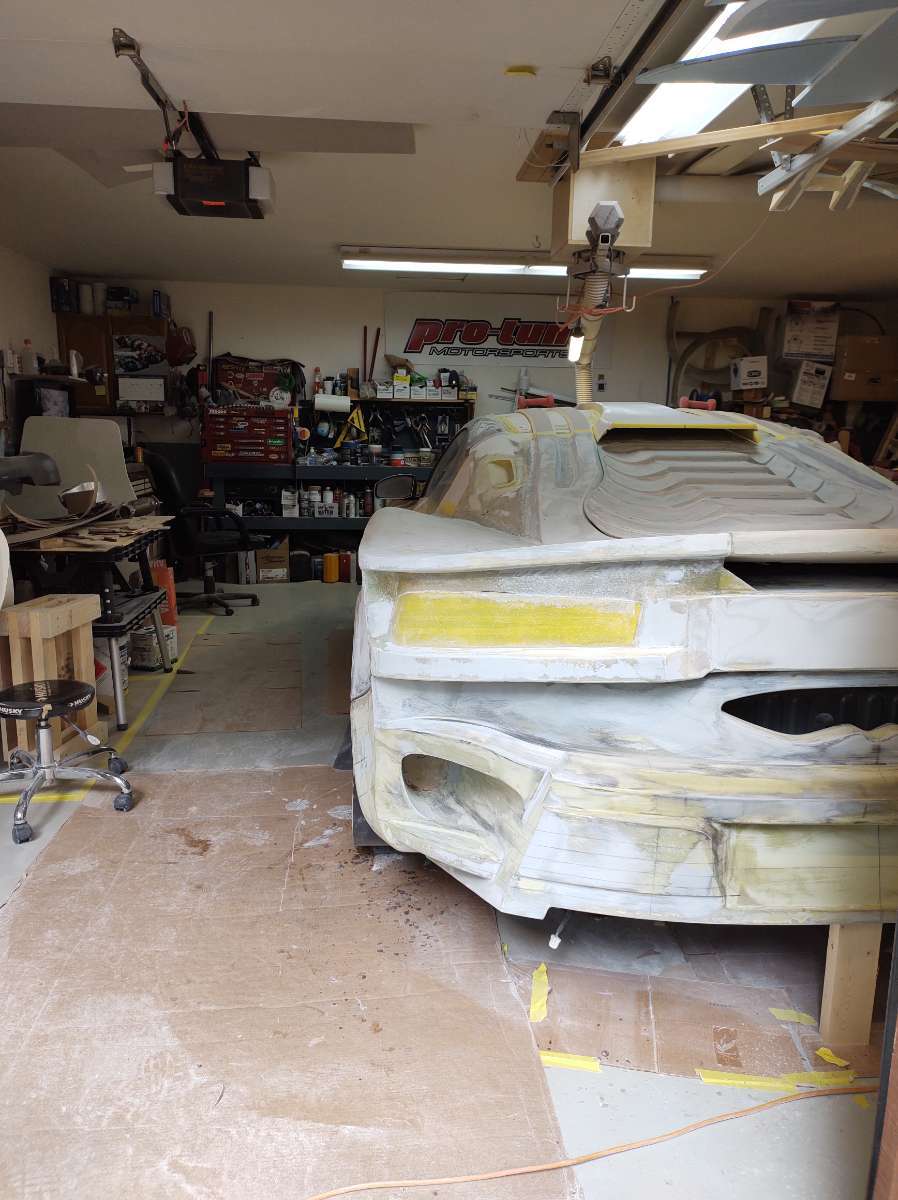
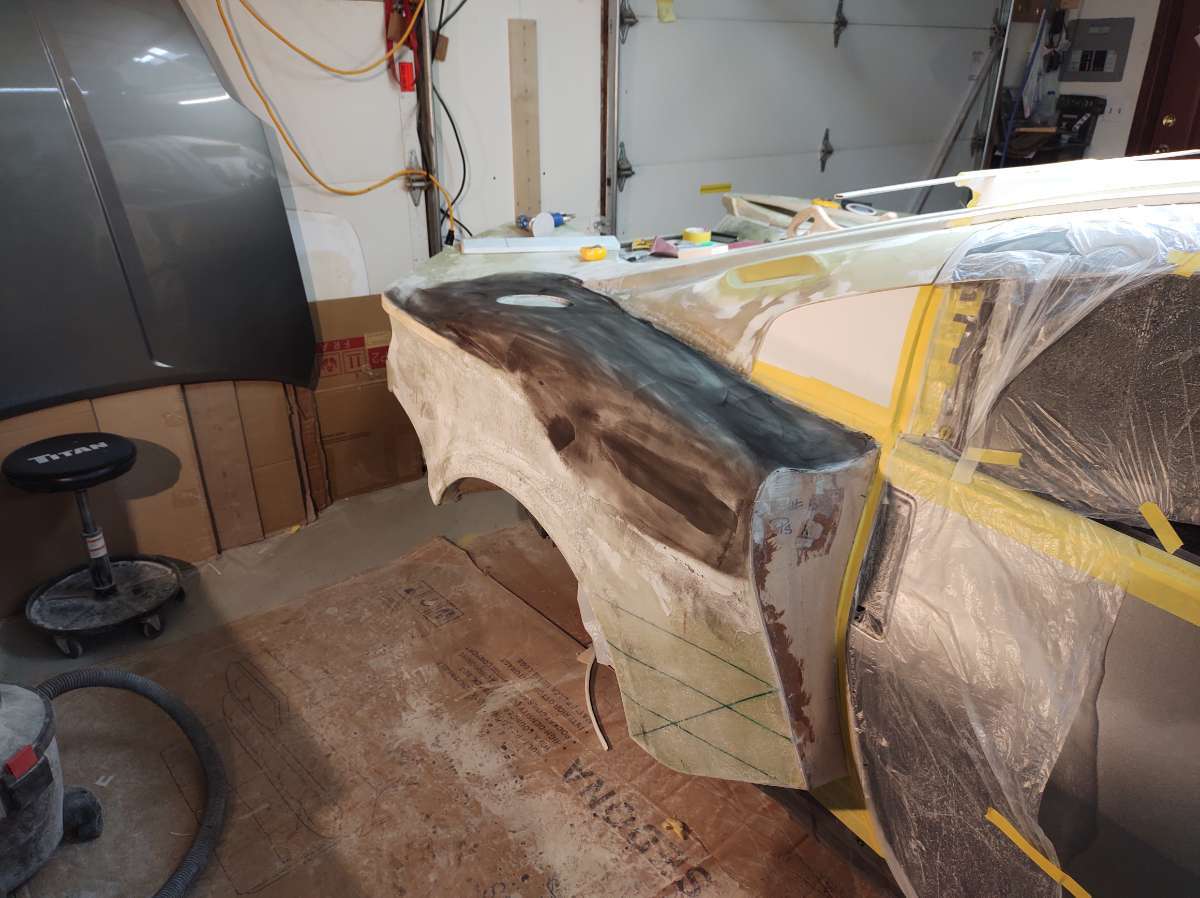
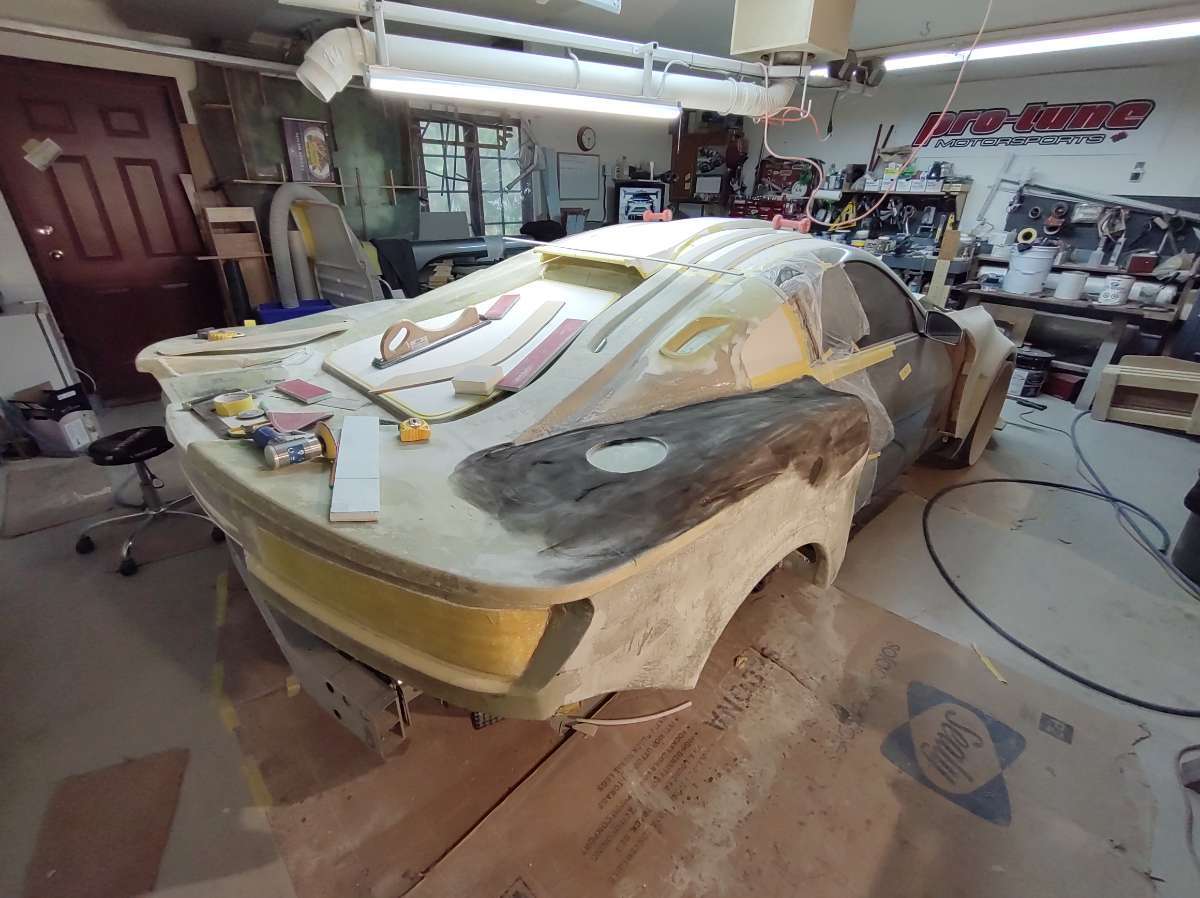
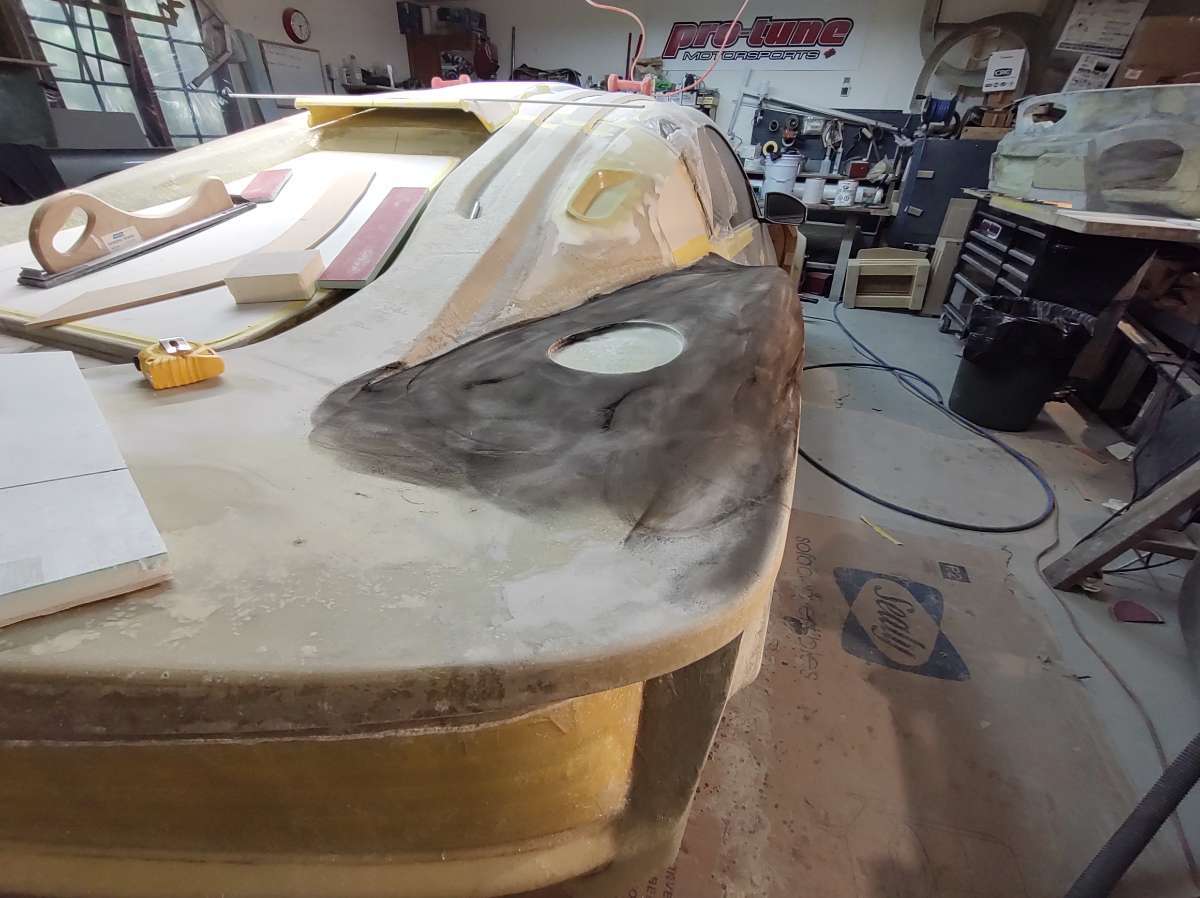
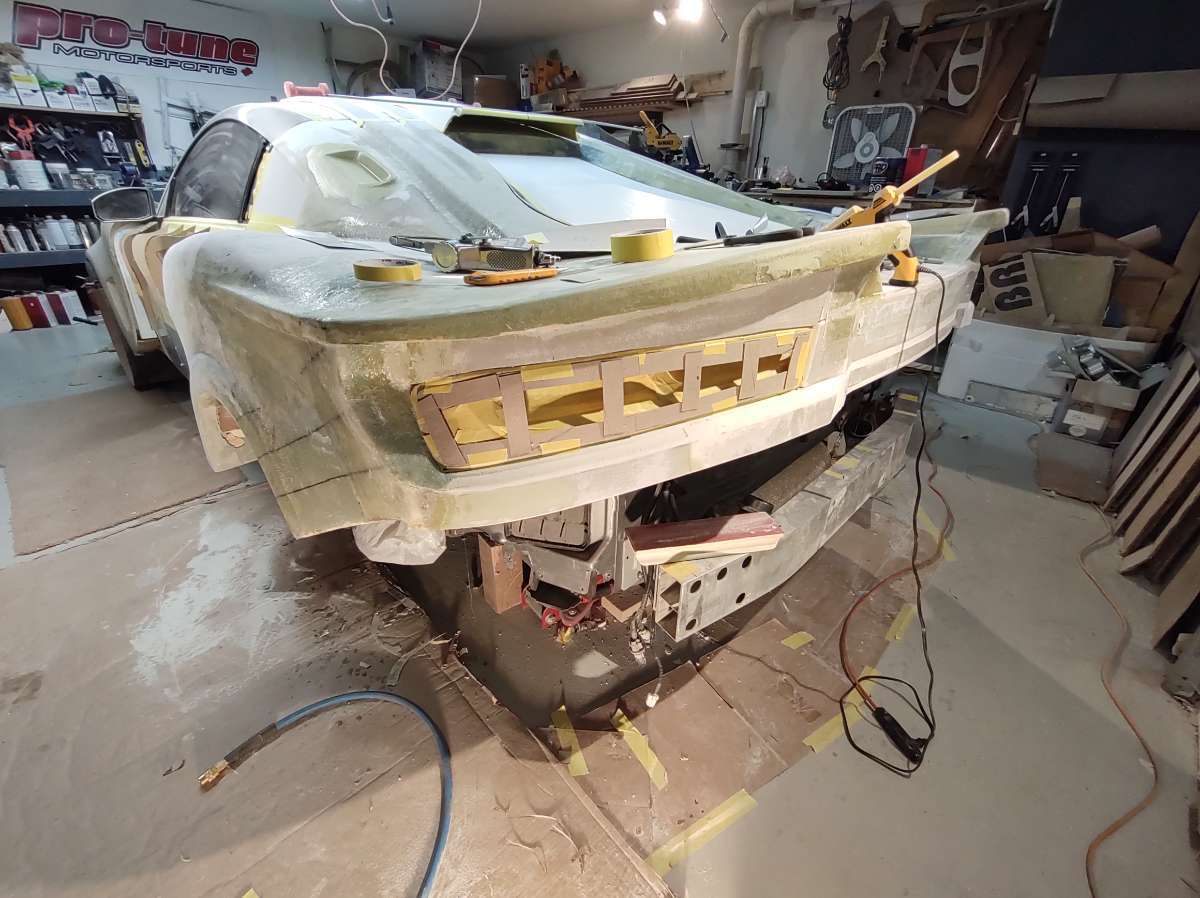
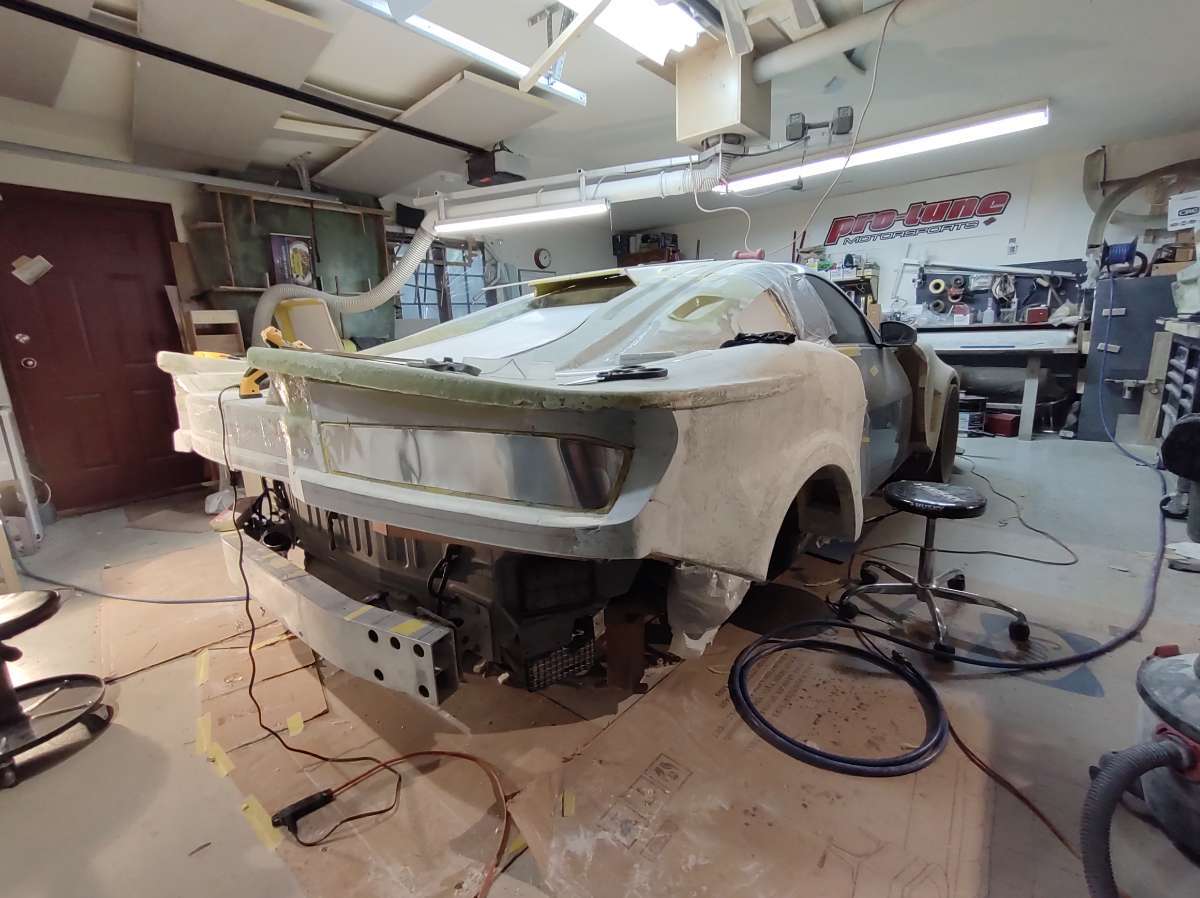
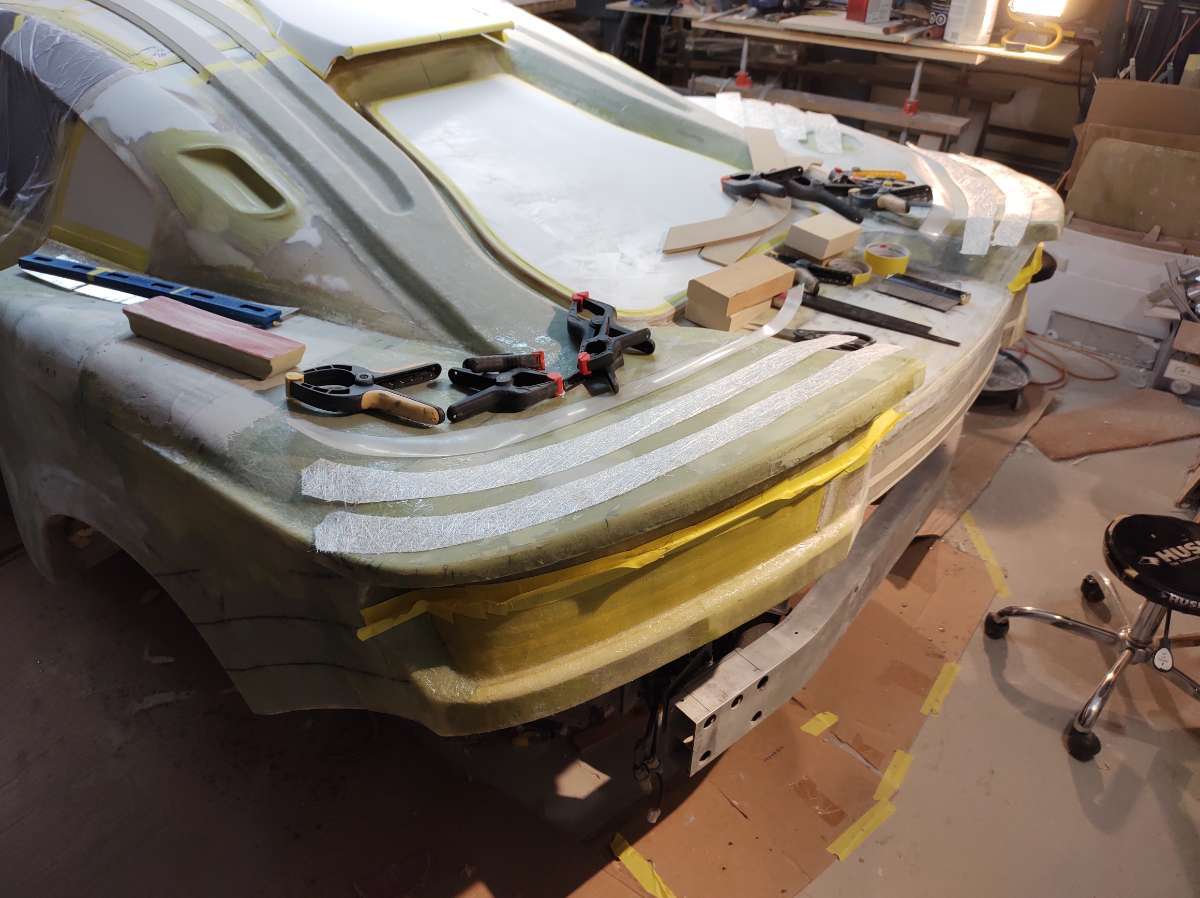
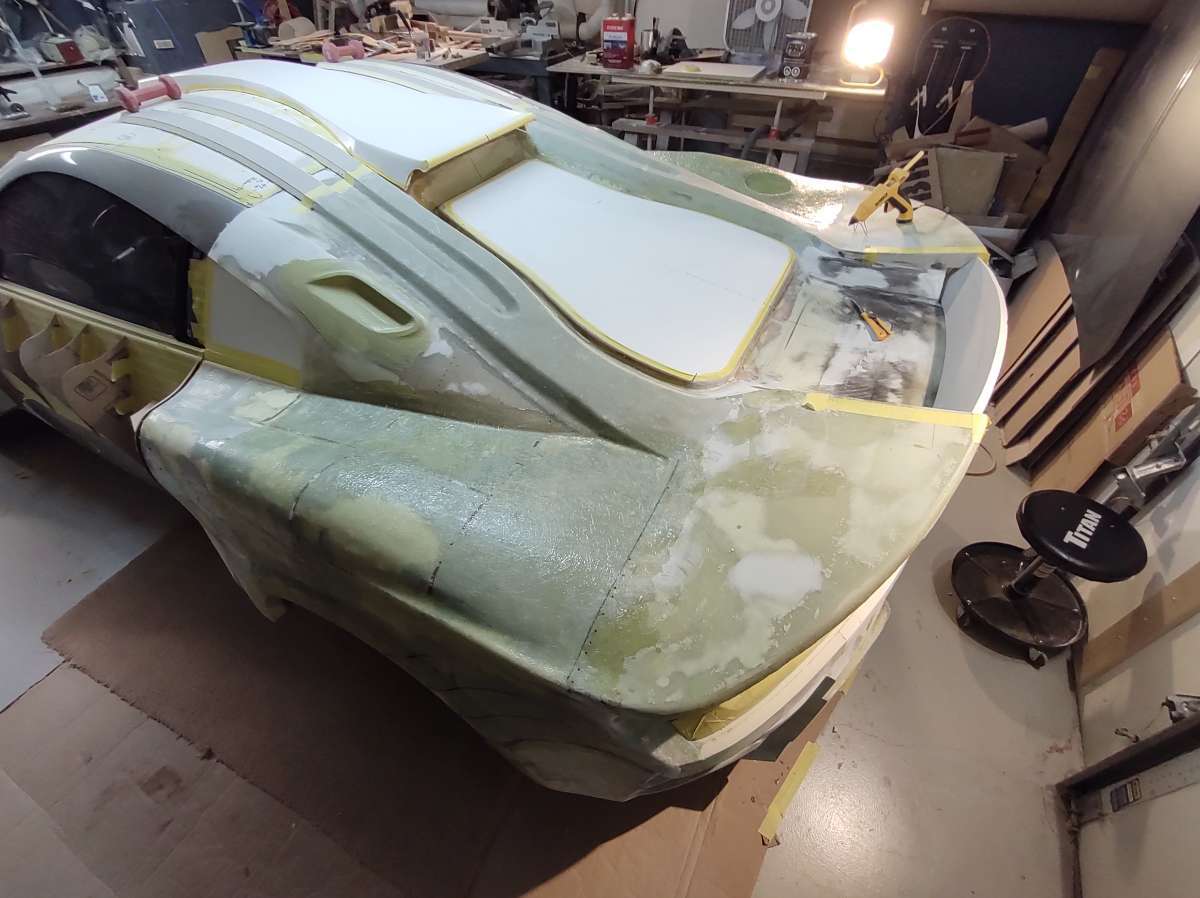
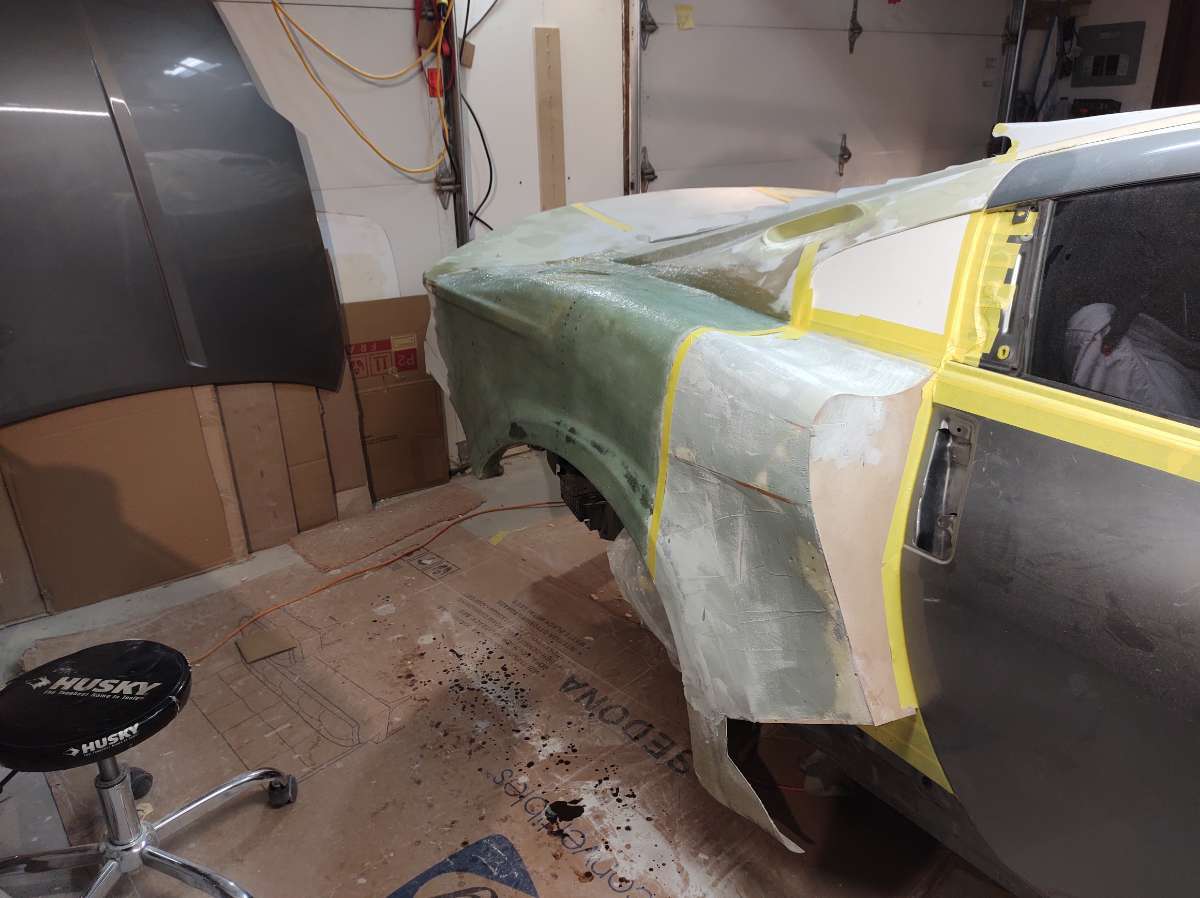
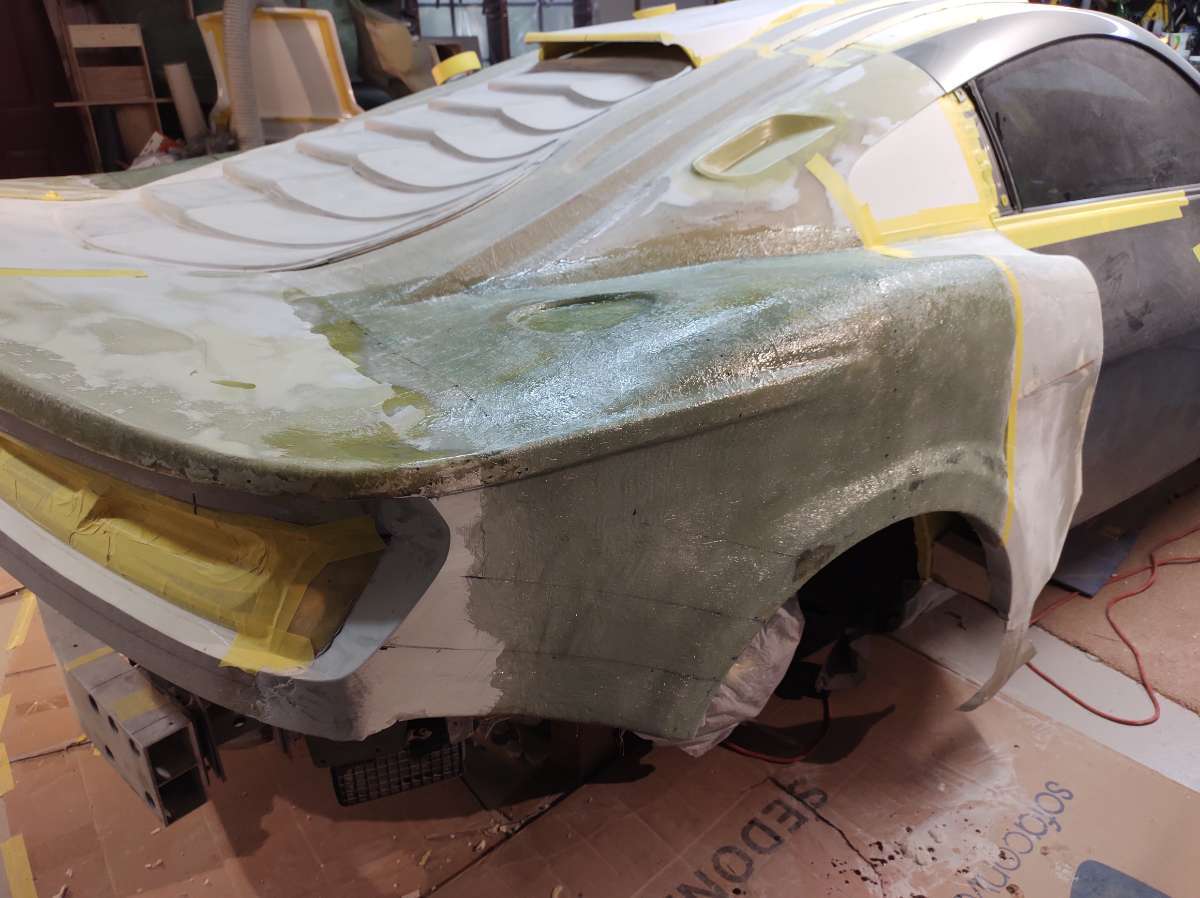
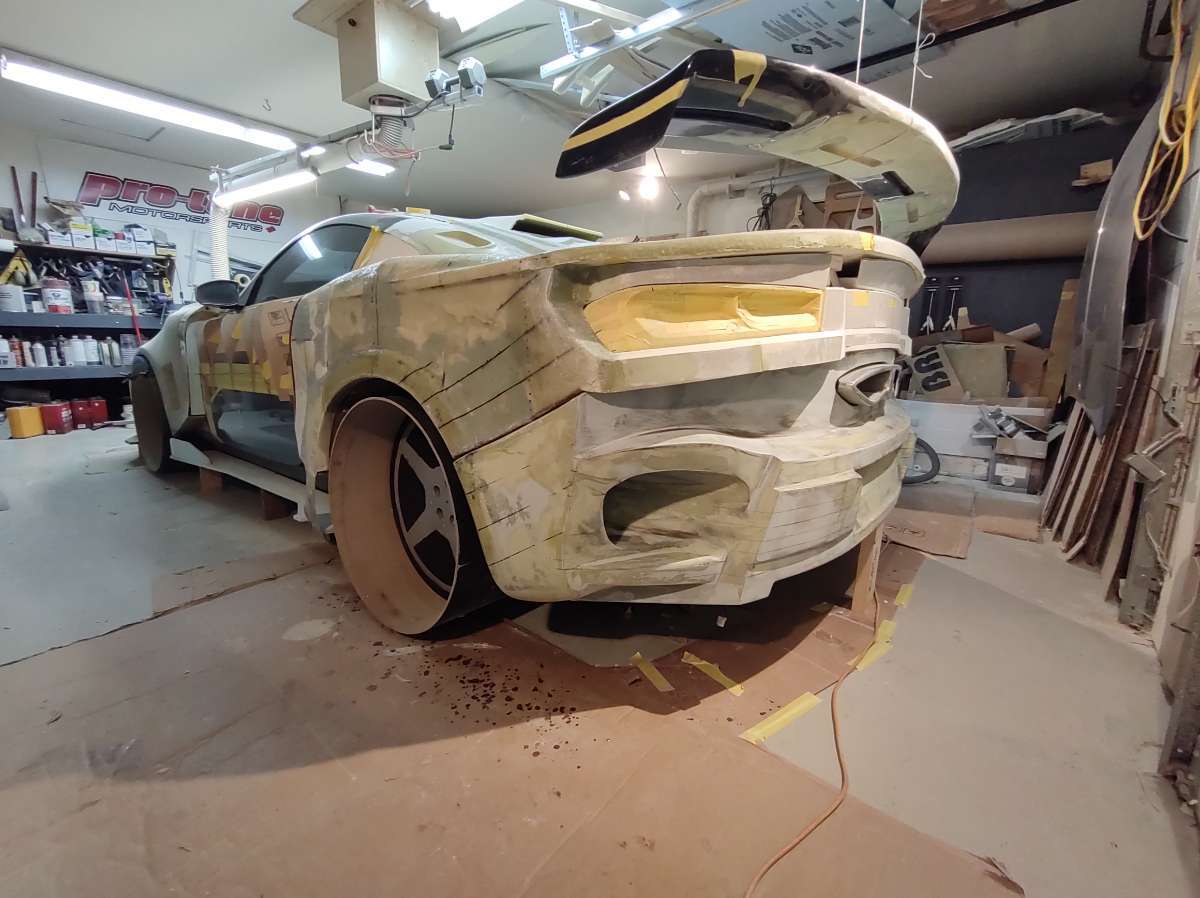
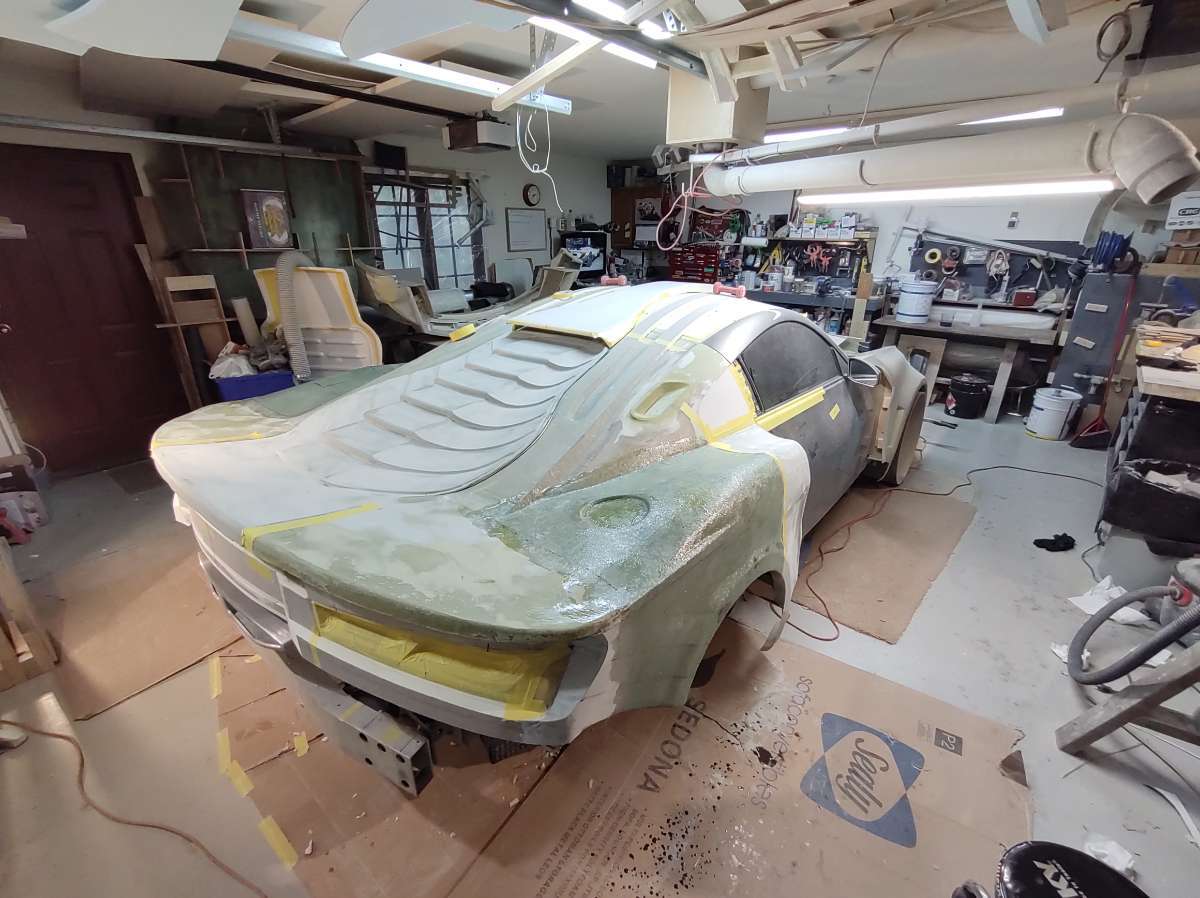
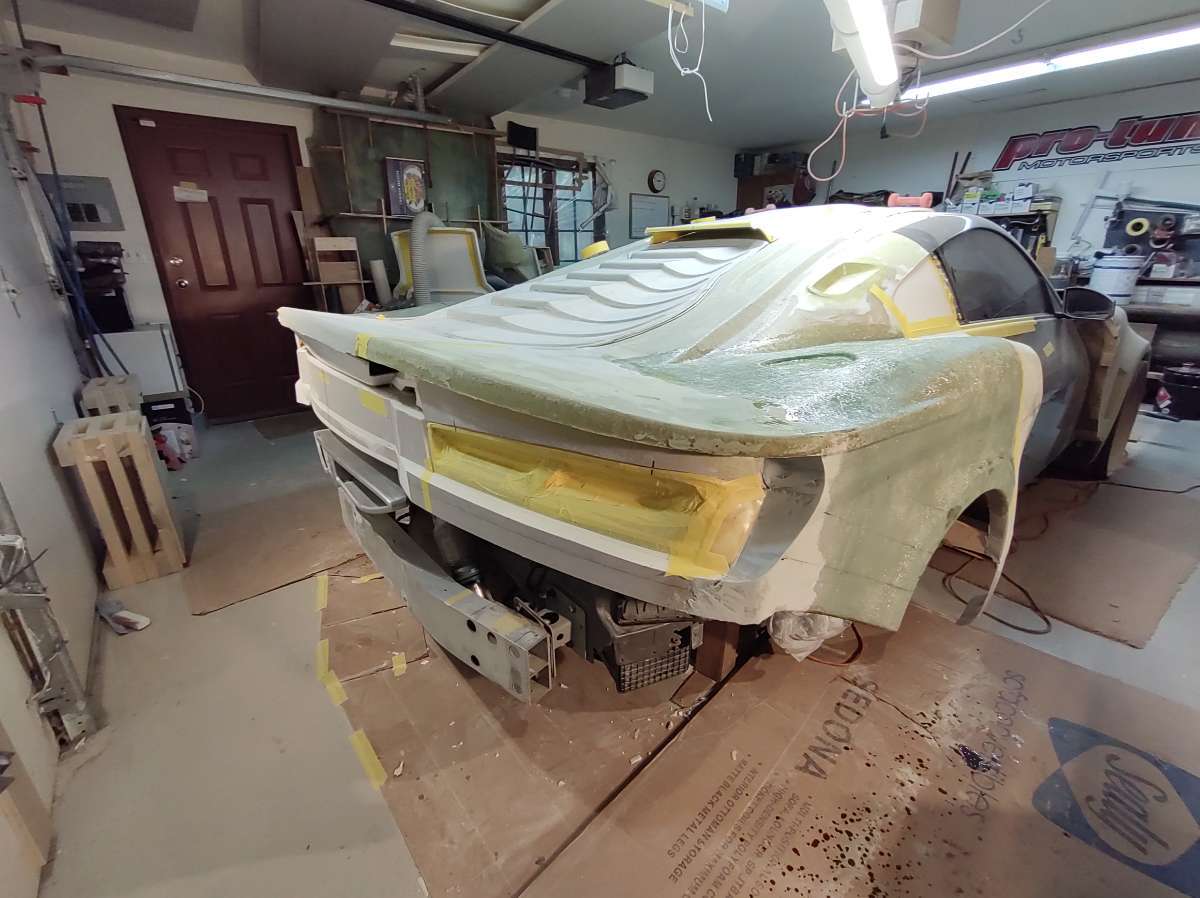
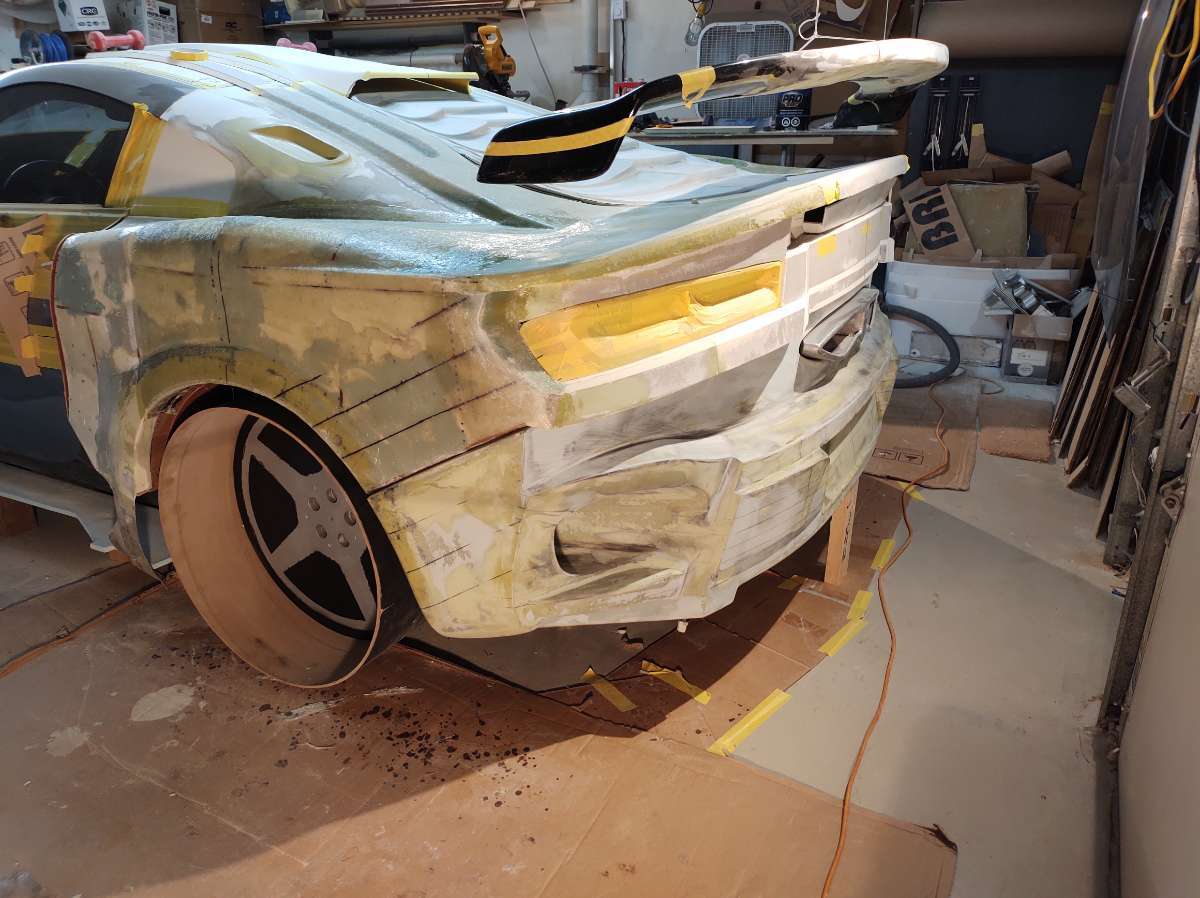
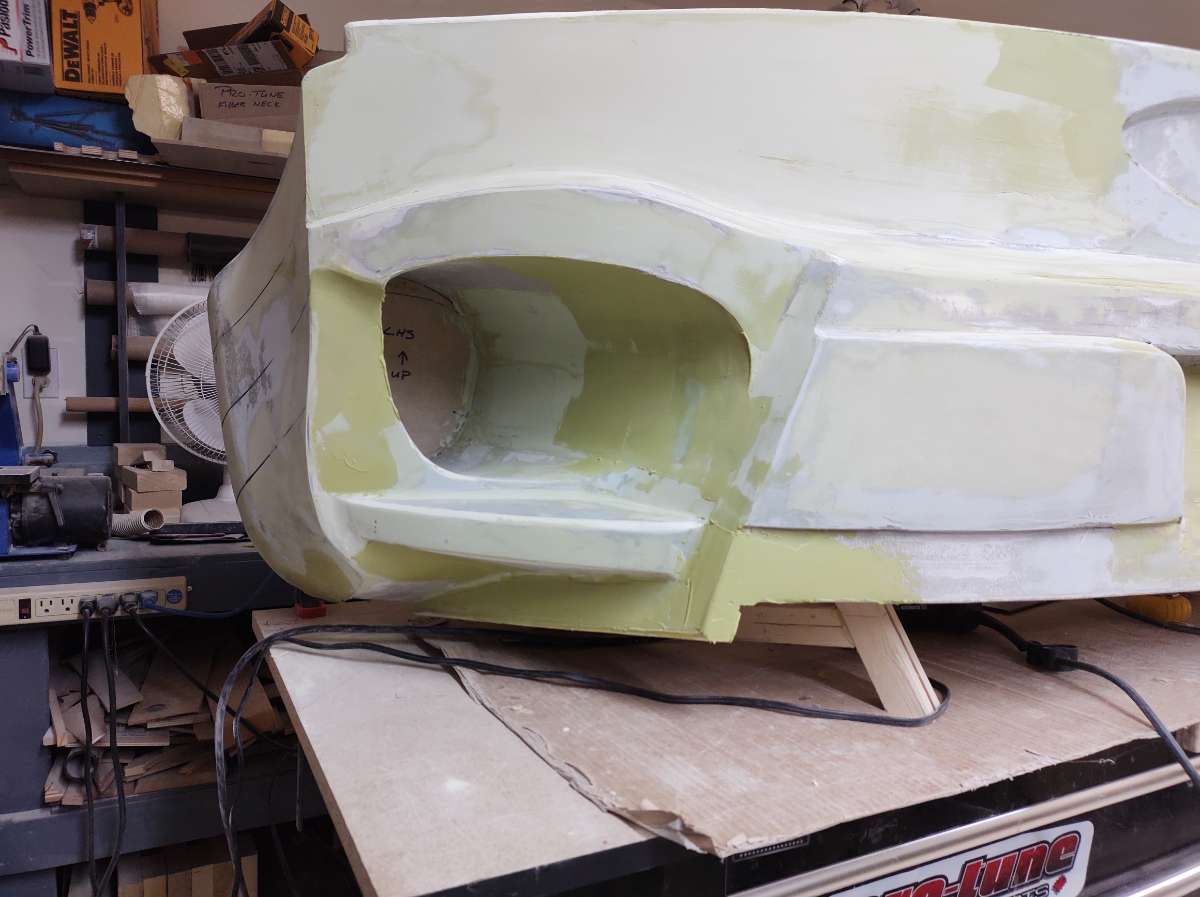
Hi everyone had a great day yesterday , got a couple coats of high build primer on the back of the car .
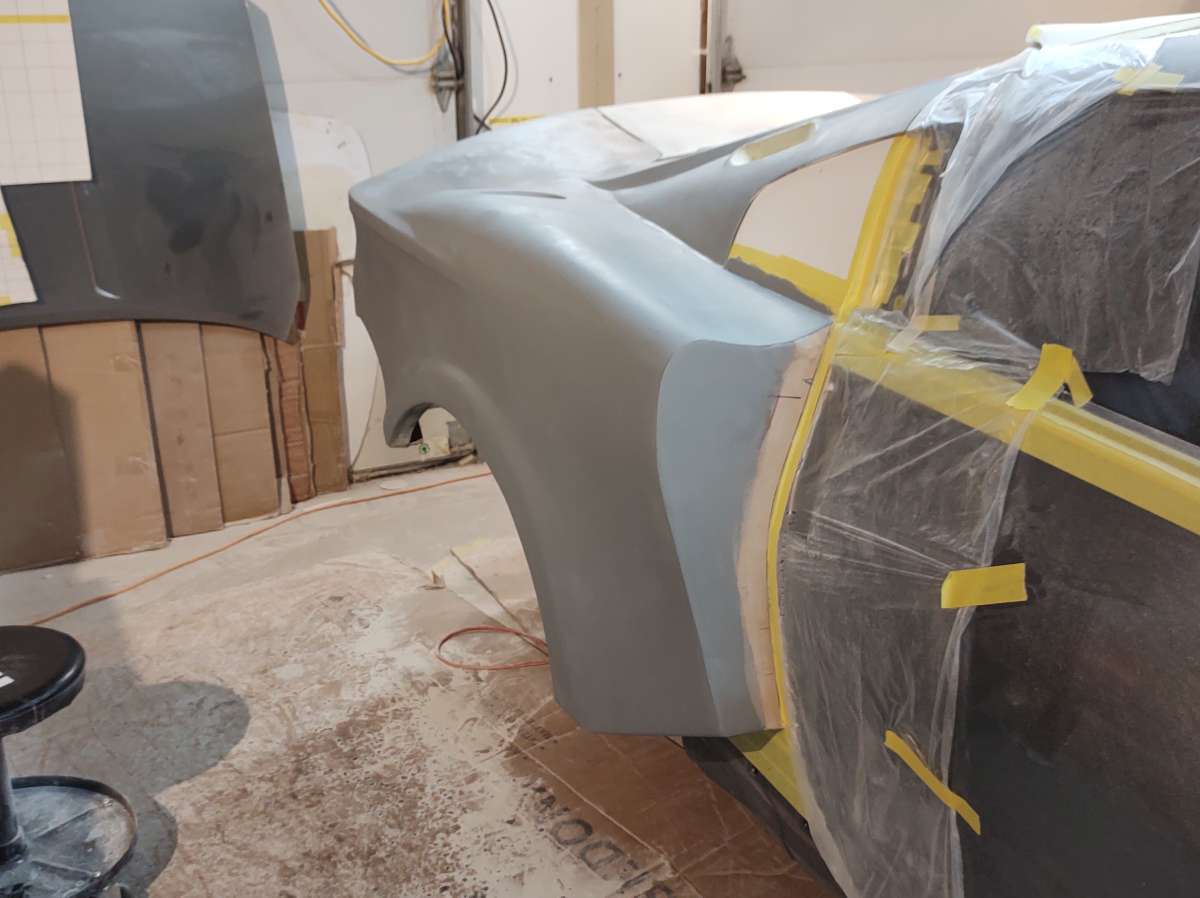
Its still wet here
It is a high build to take out imperfection's when block sanded
You can finally see the shape , I must say I am happy !!!

Still wet in this shot , it was almost 7 pm and I was nackered will a couple more pic today with it flashed off .
Well off to the shop for more fun !!!!
Stay Safe and stay tuned for more
Cheers
-
6
-
-
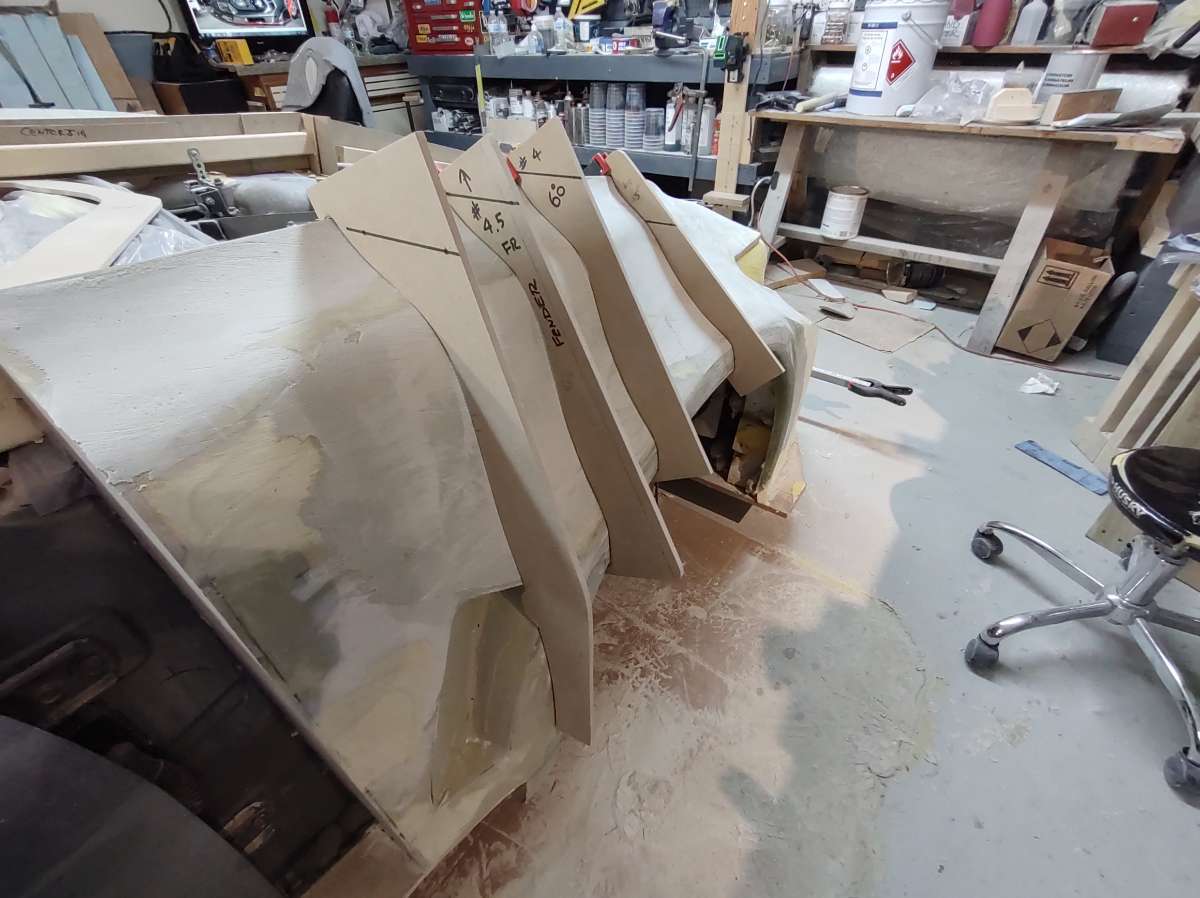
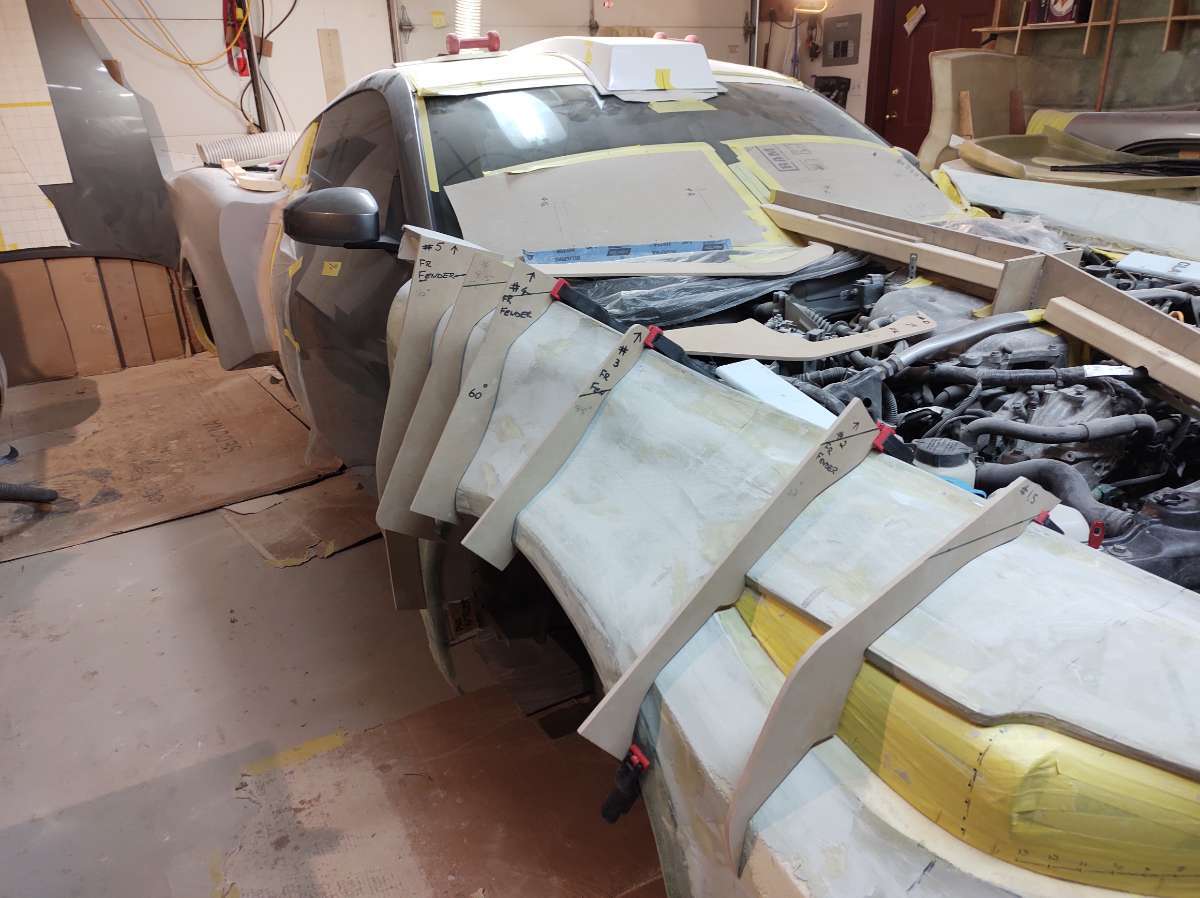
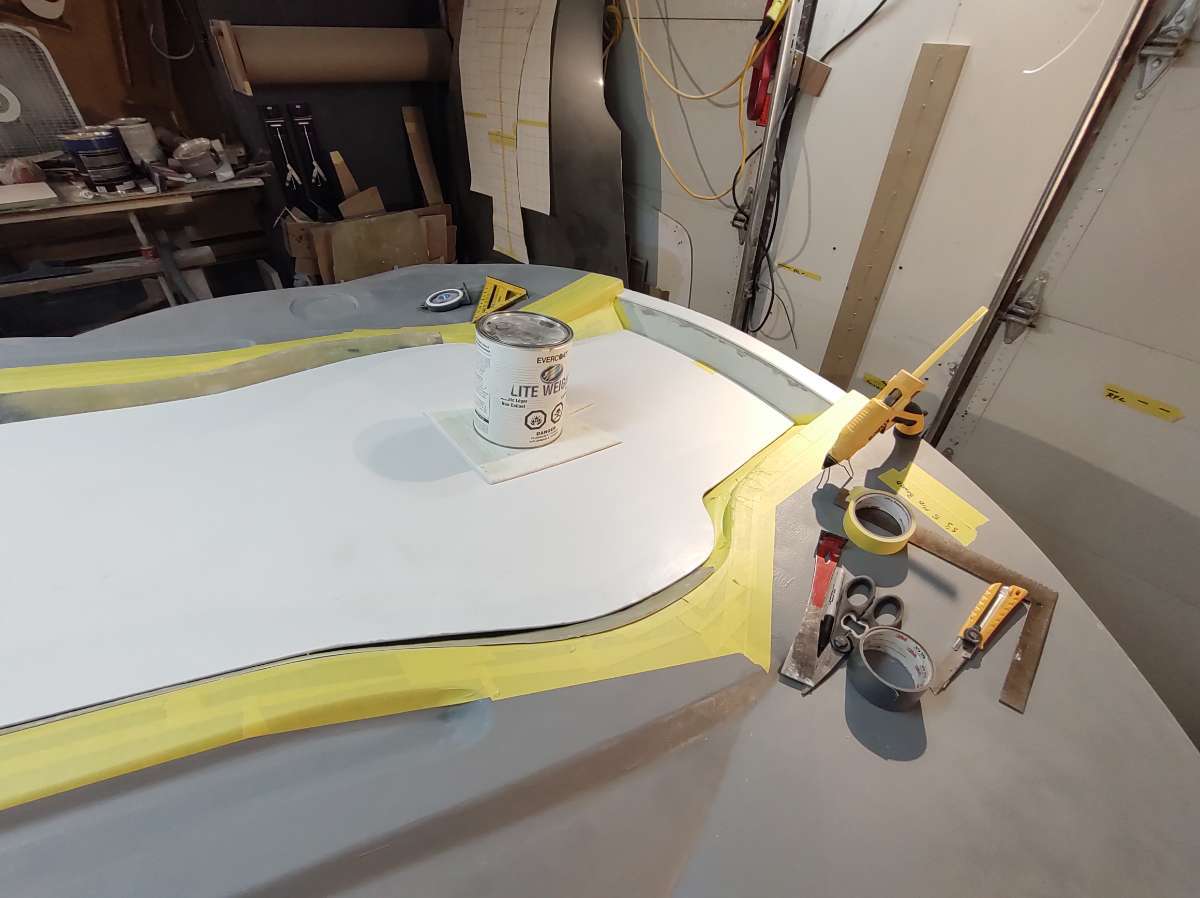
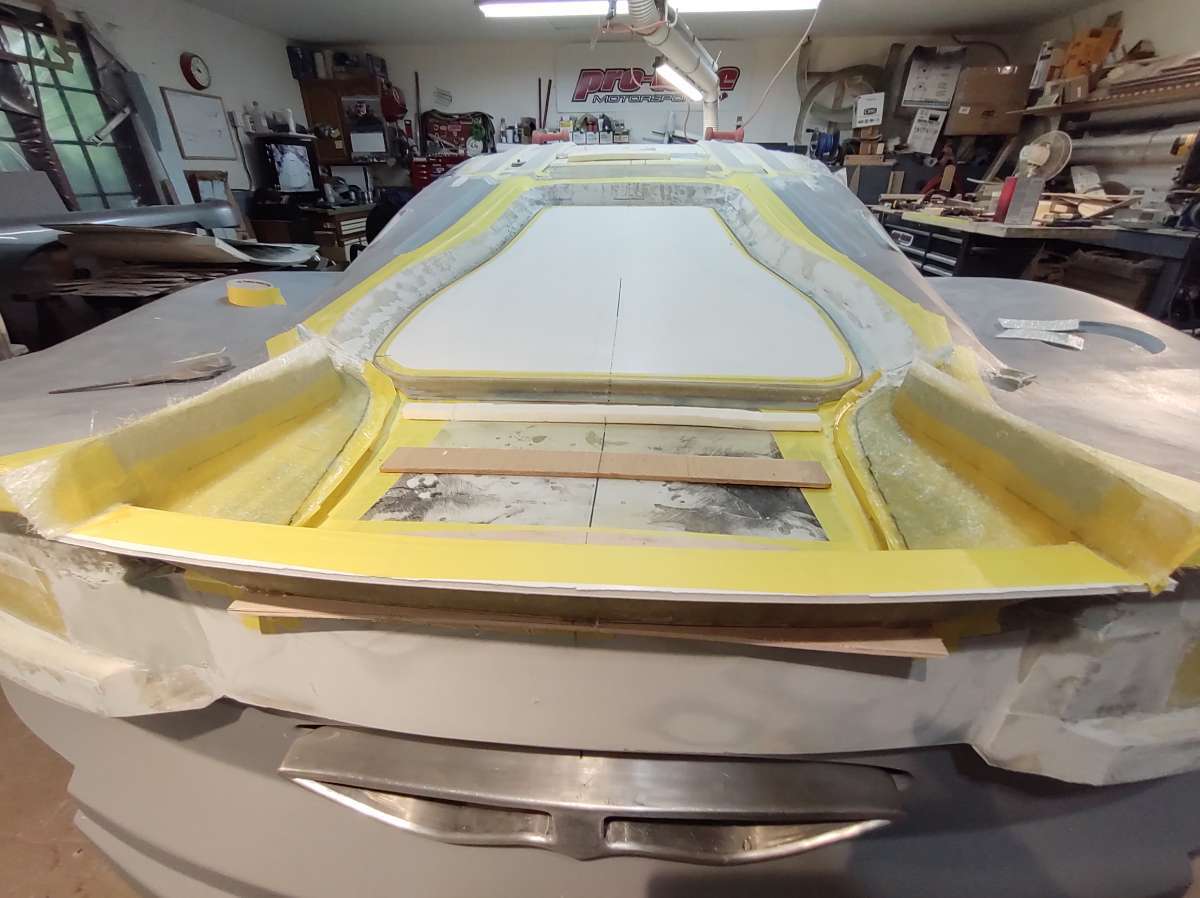
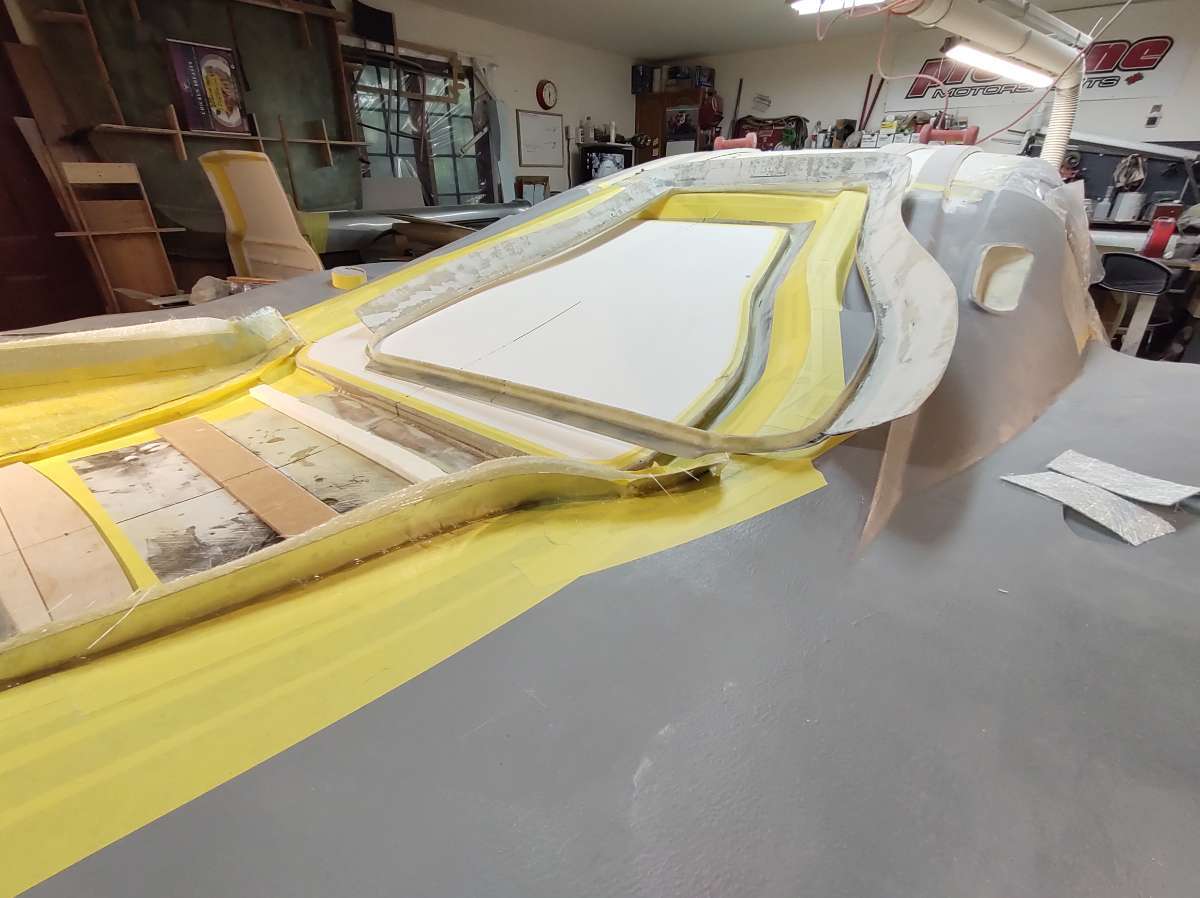
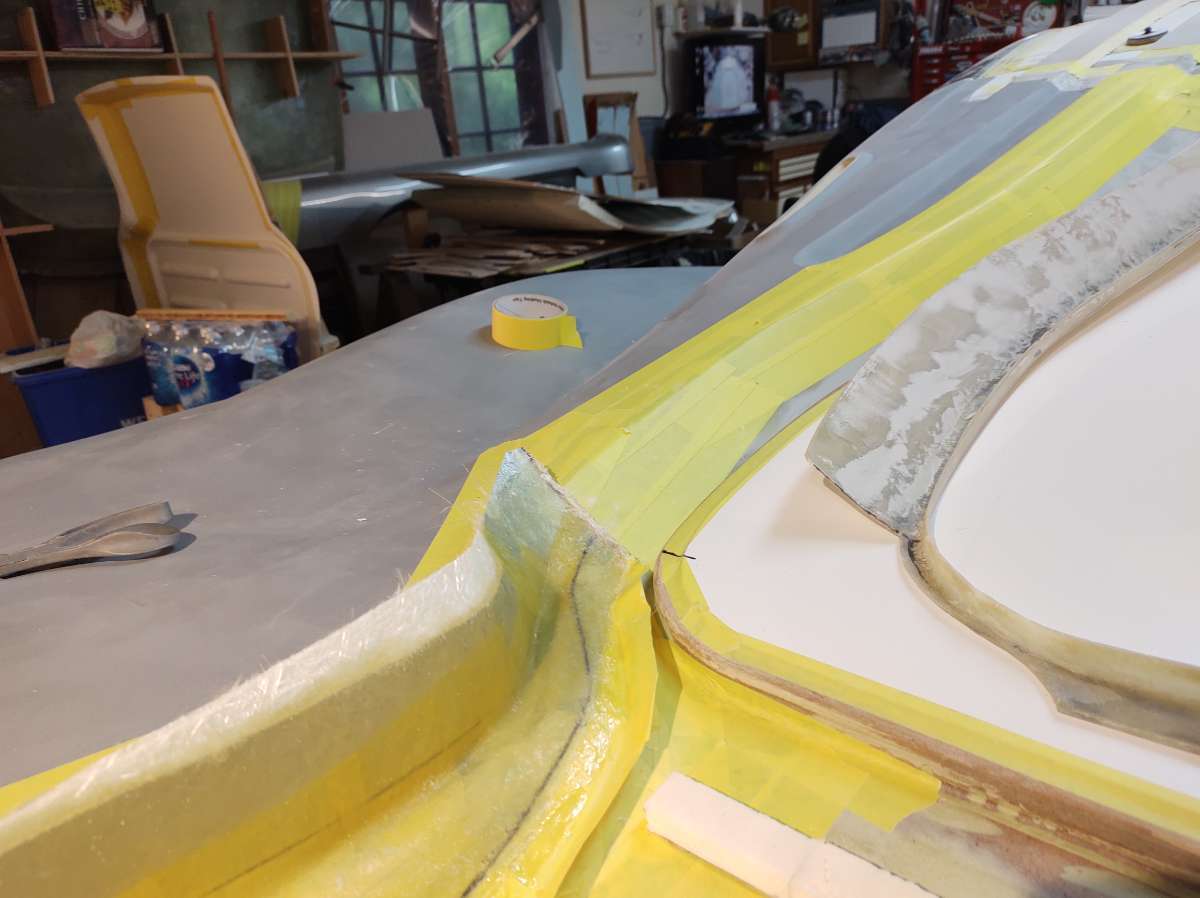
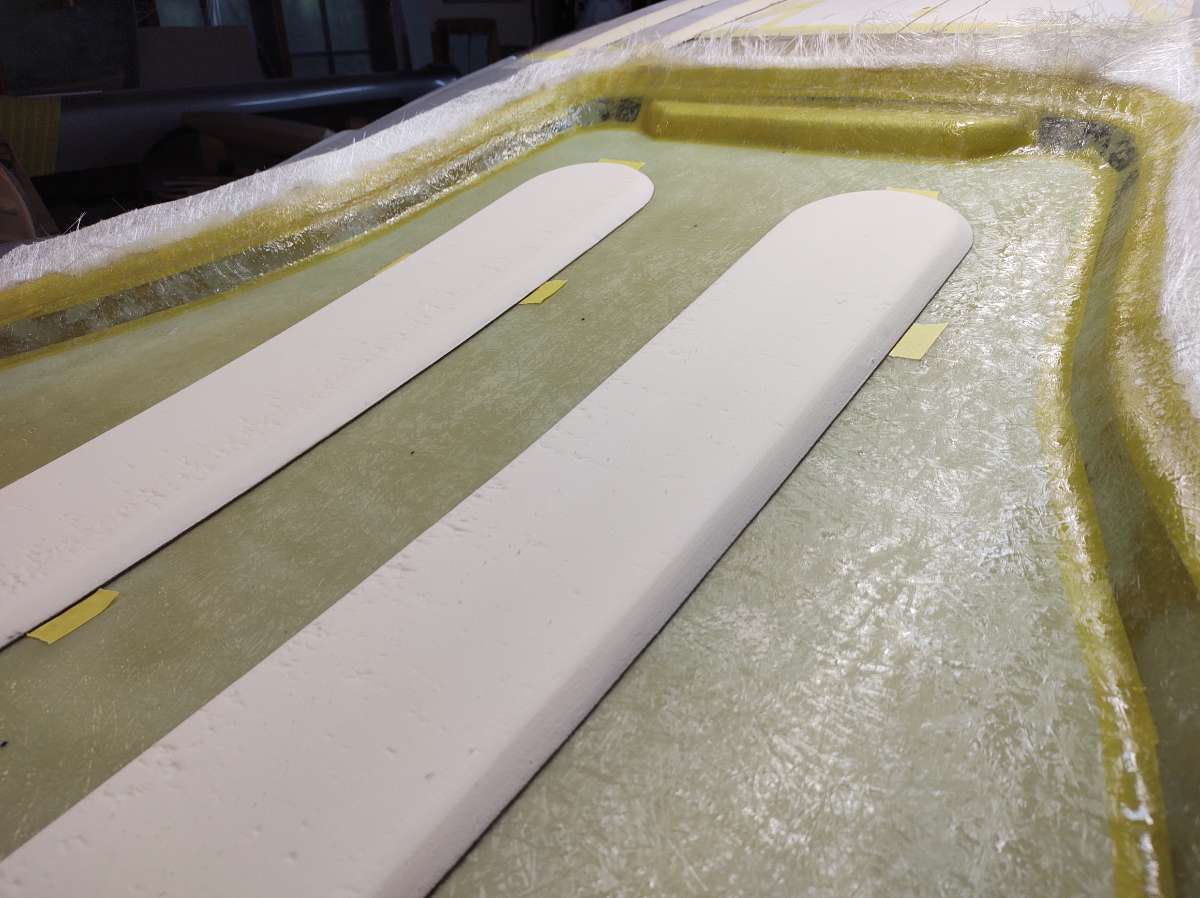
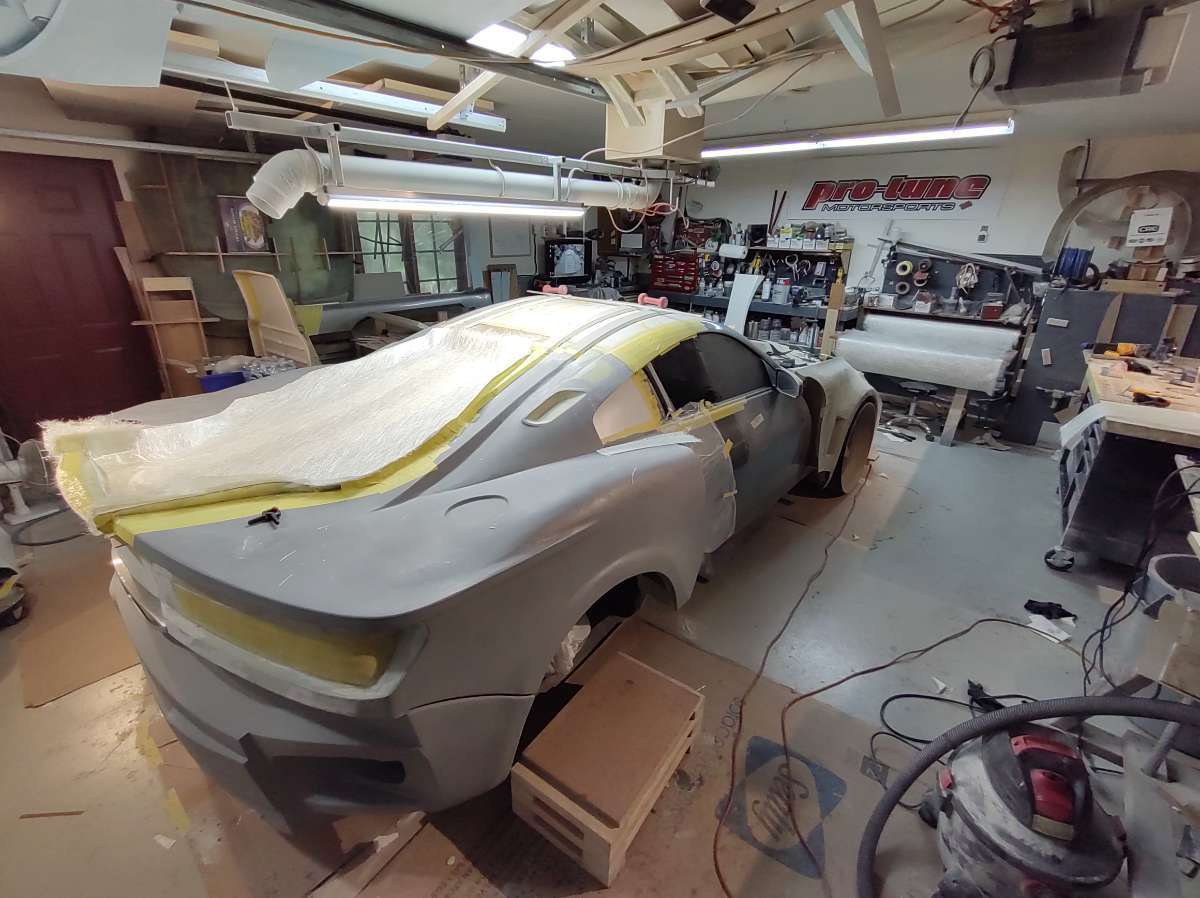
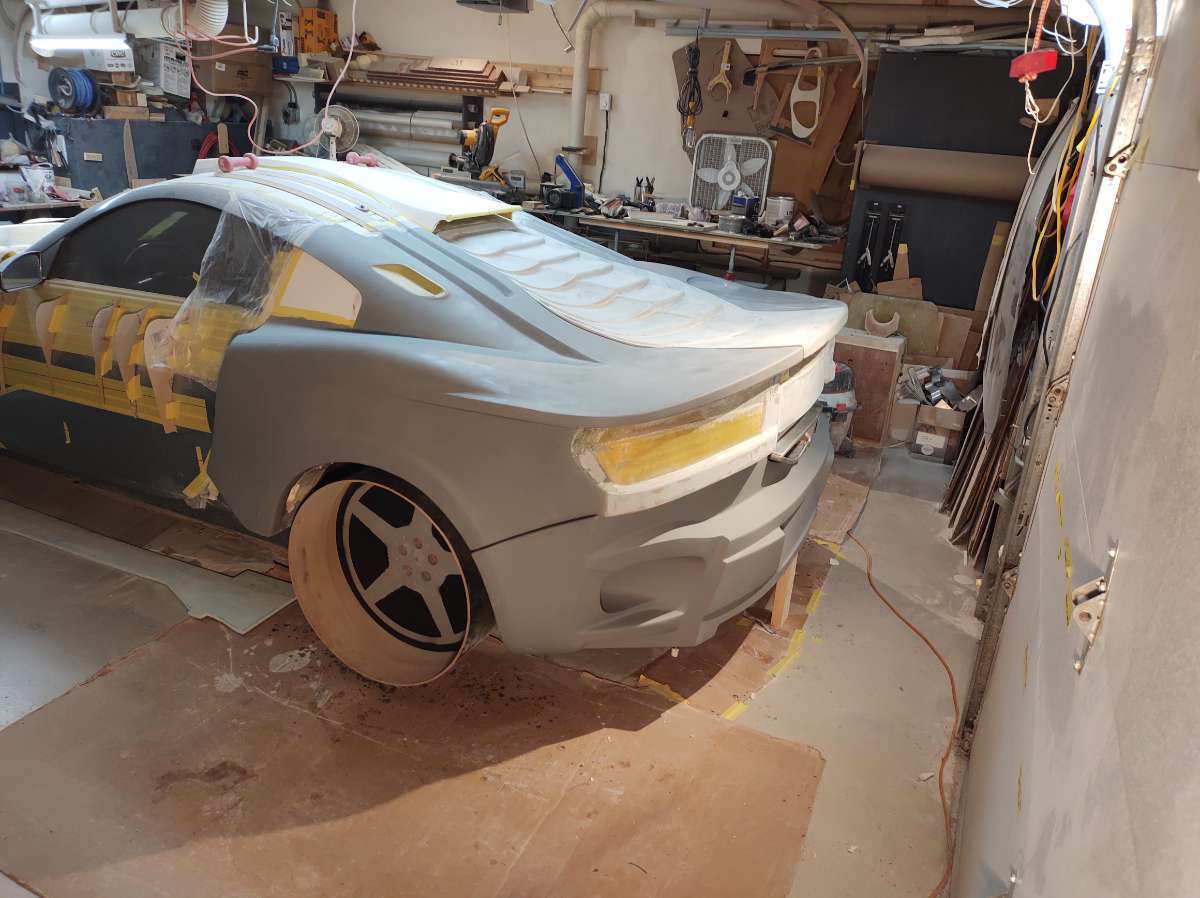
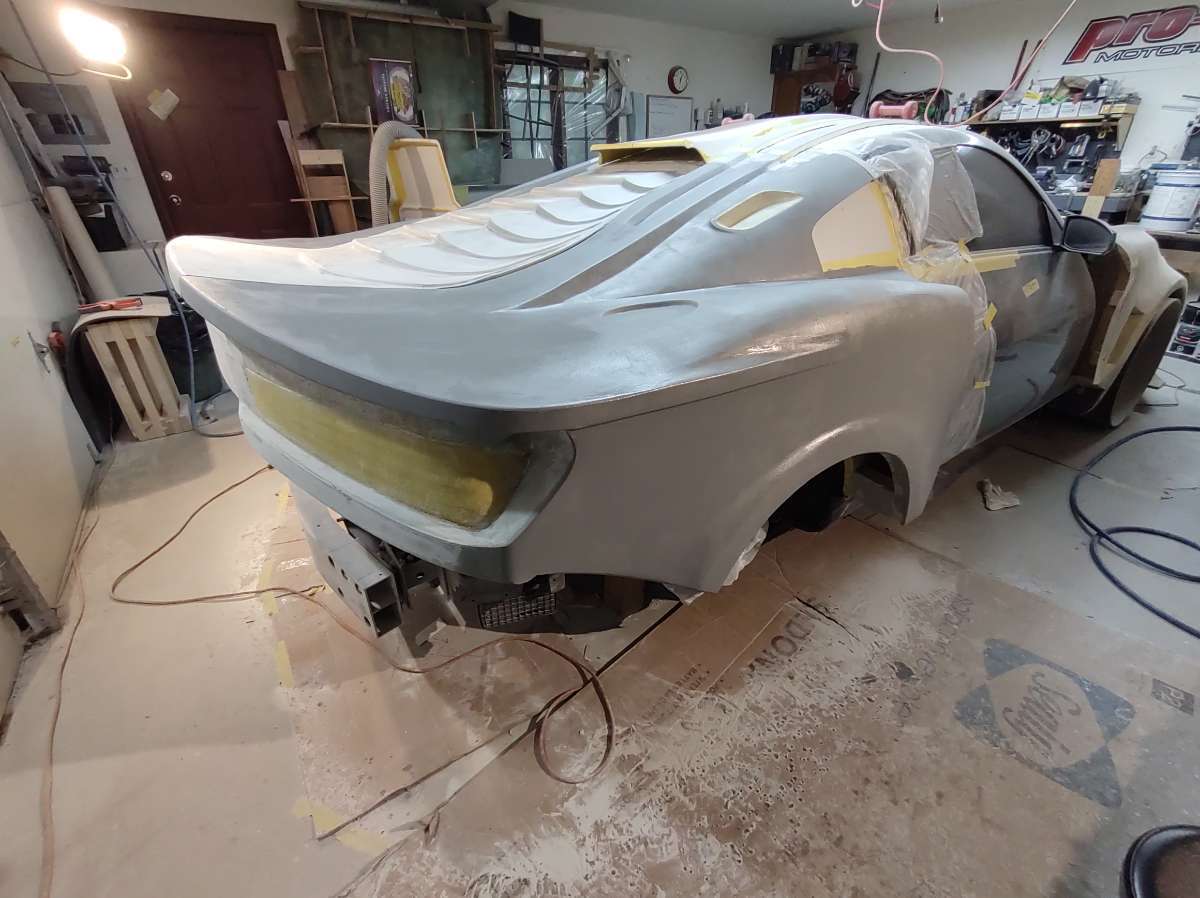
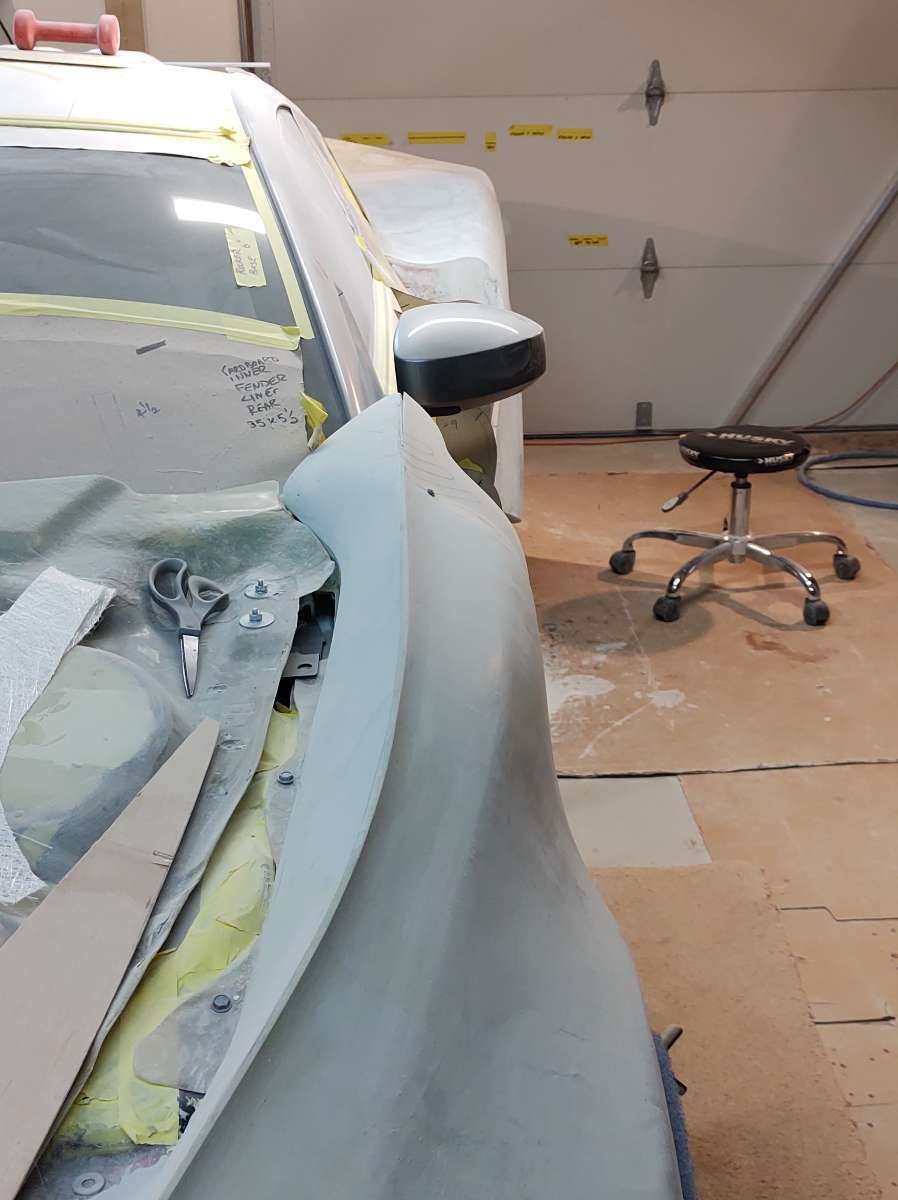
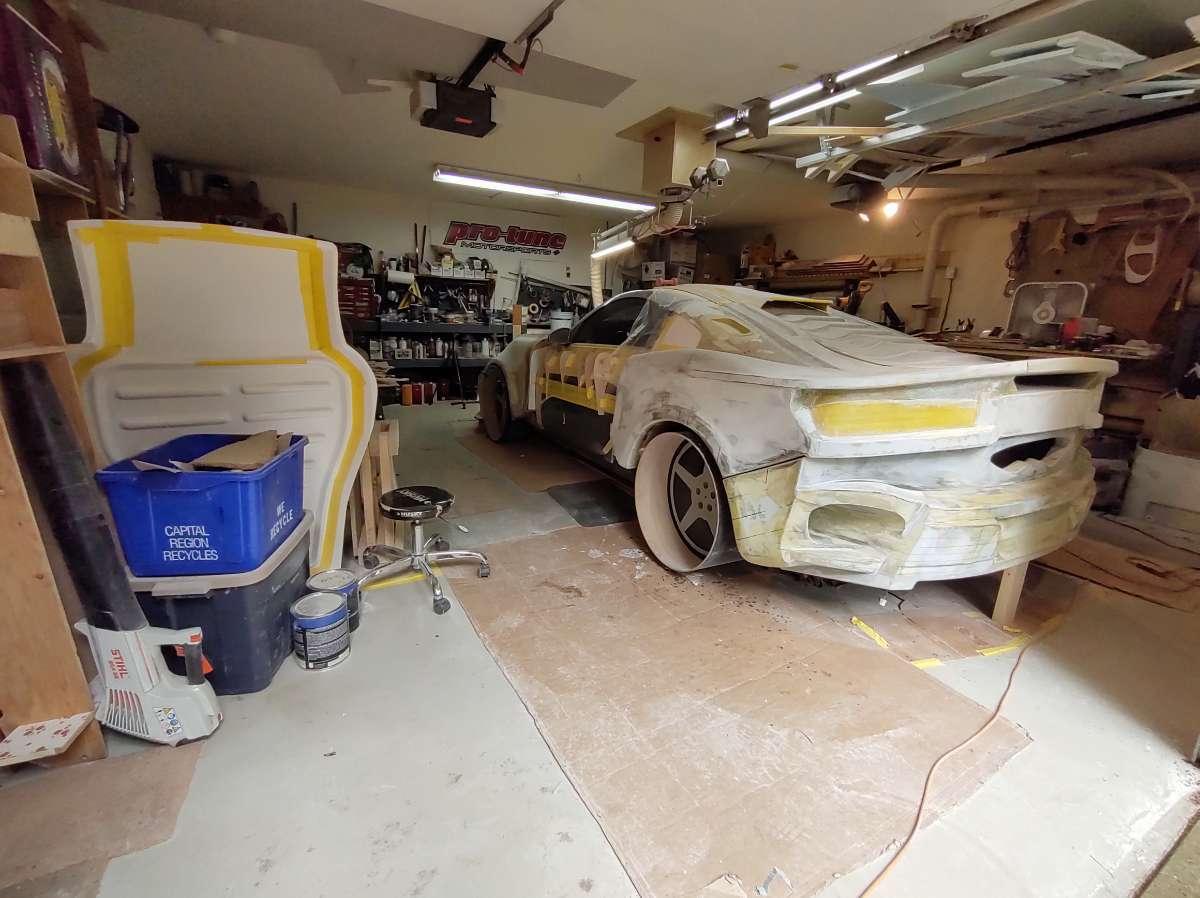
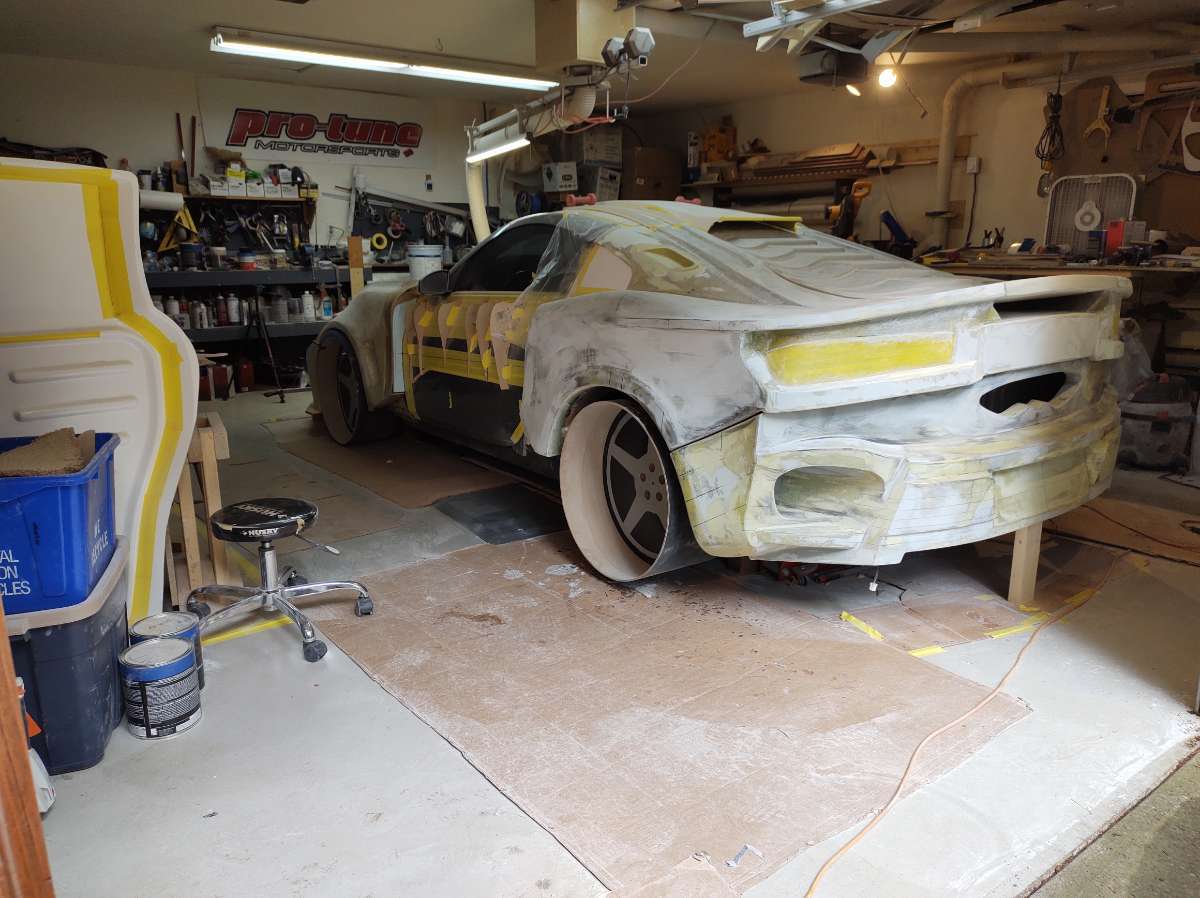
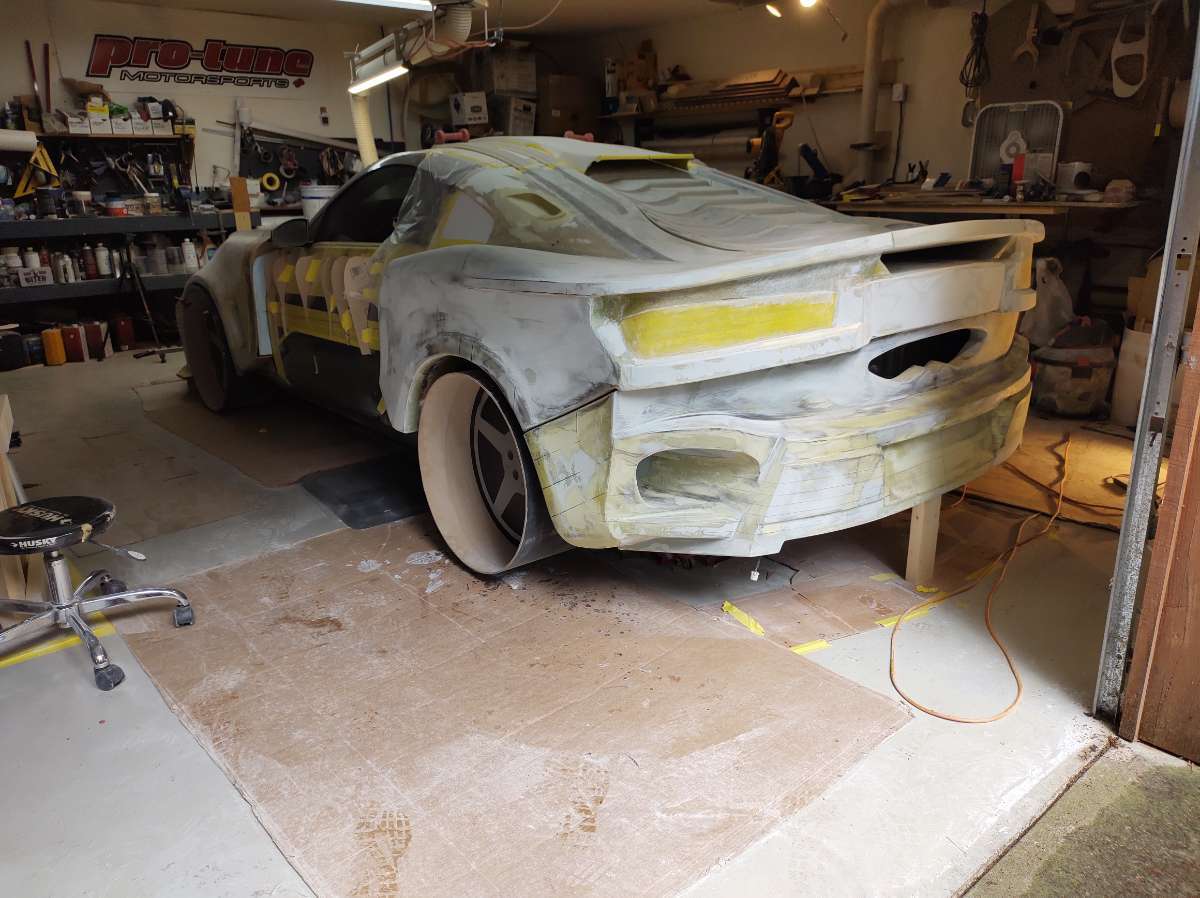
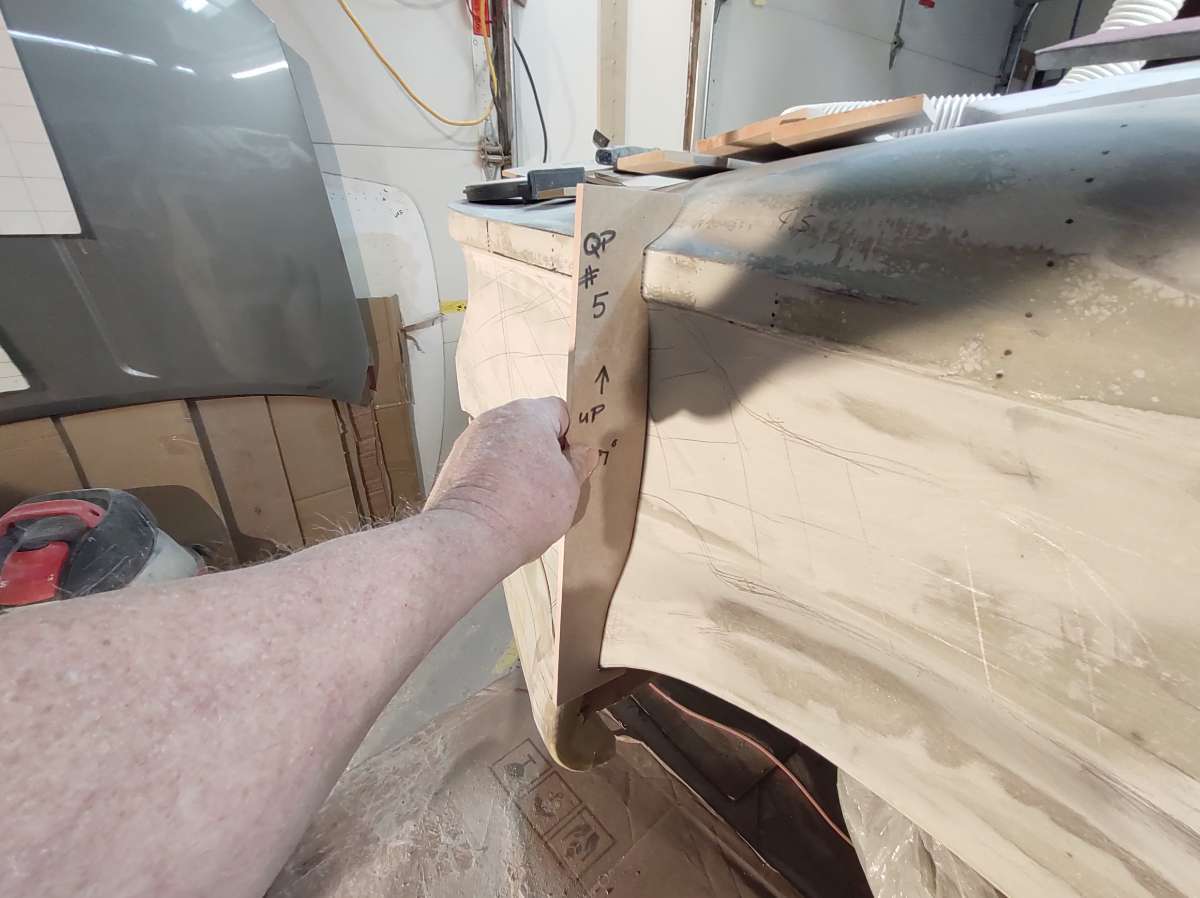
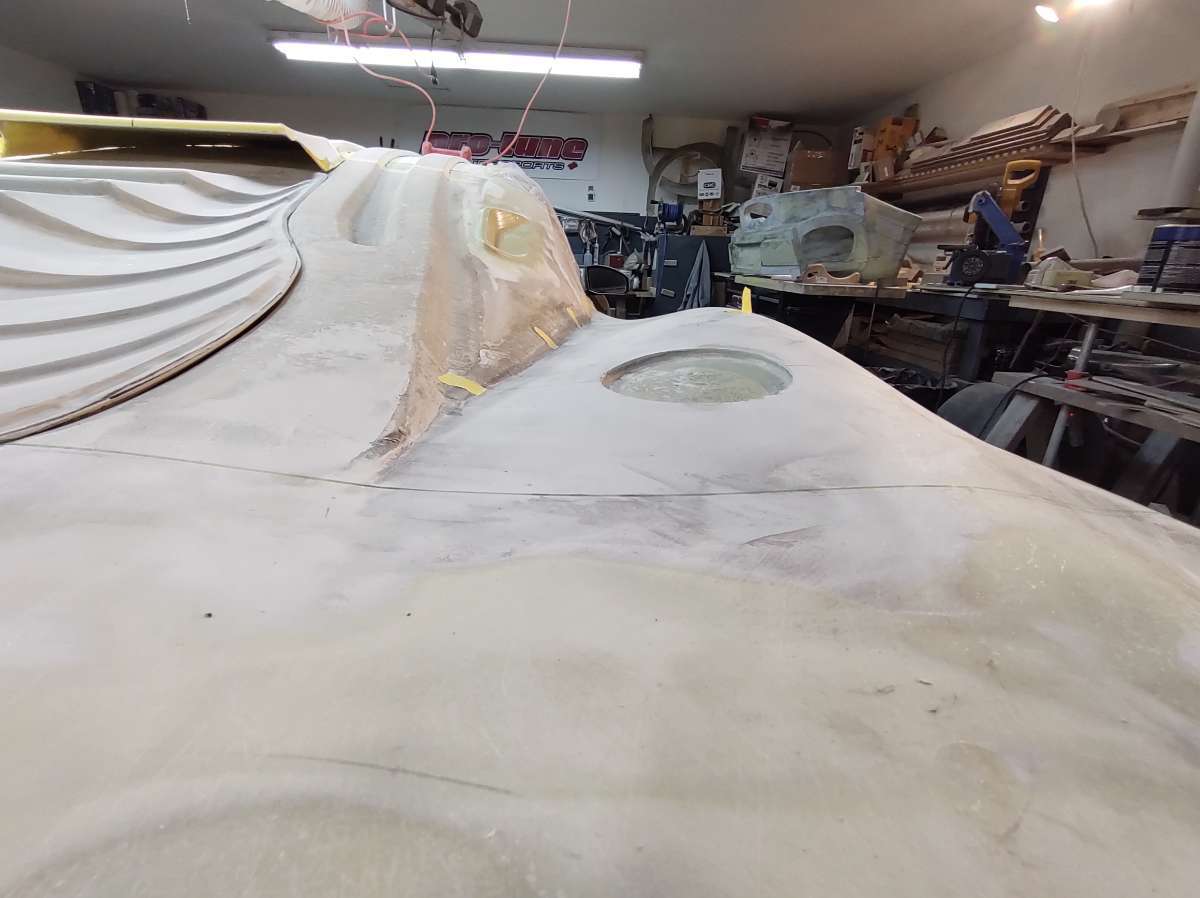
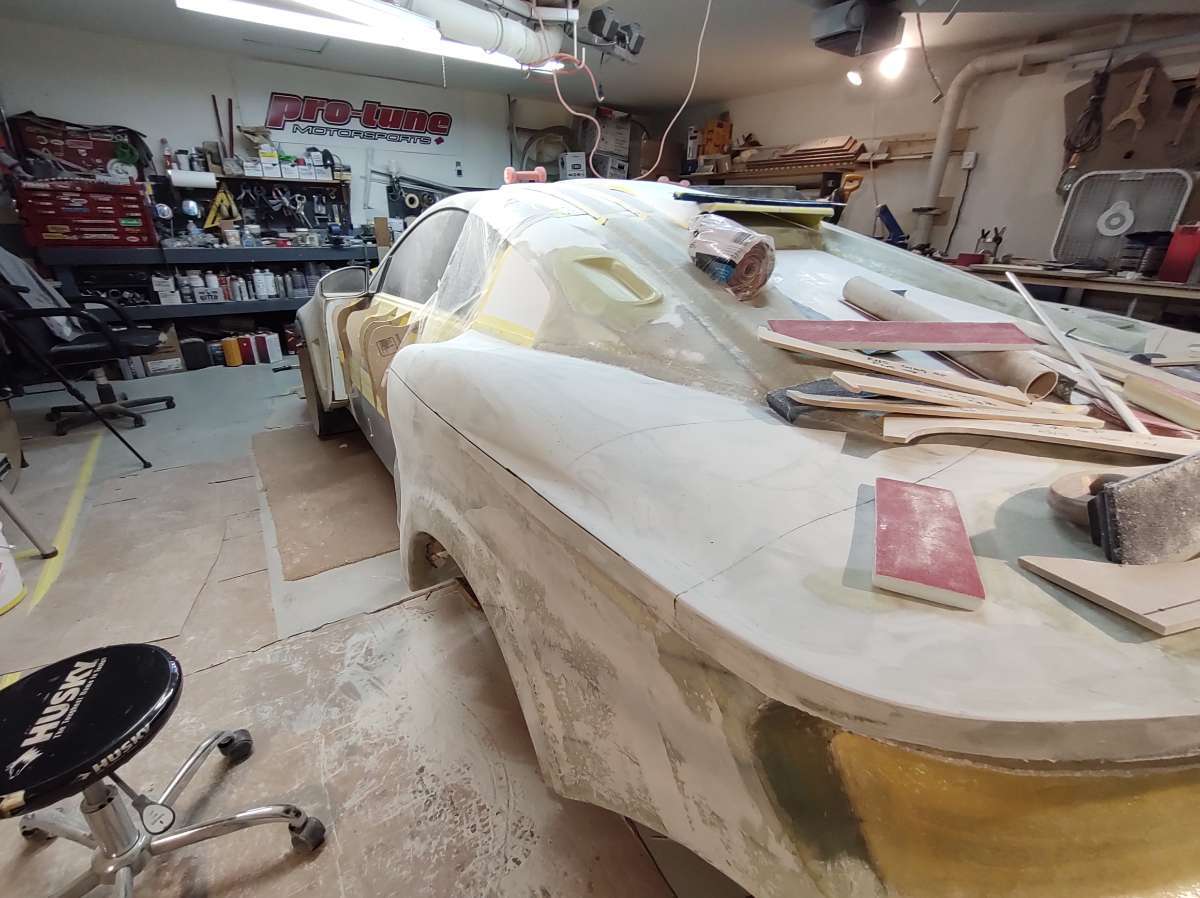
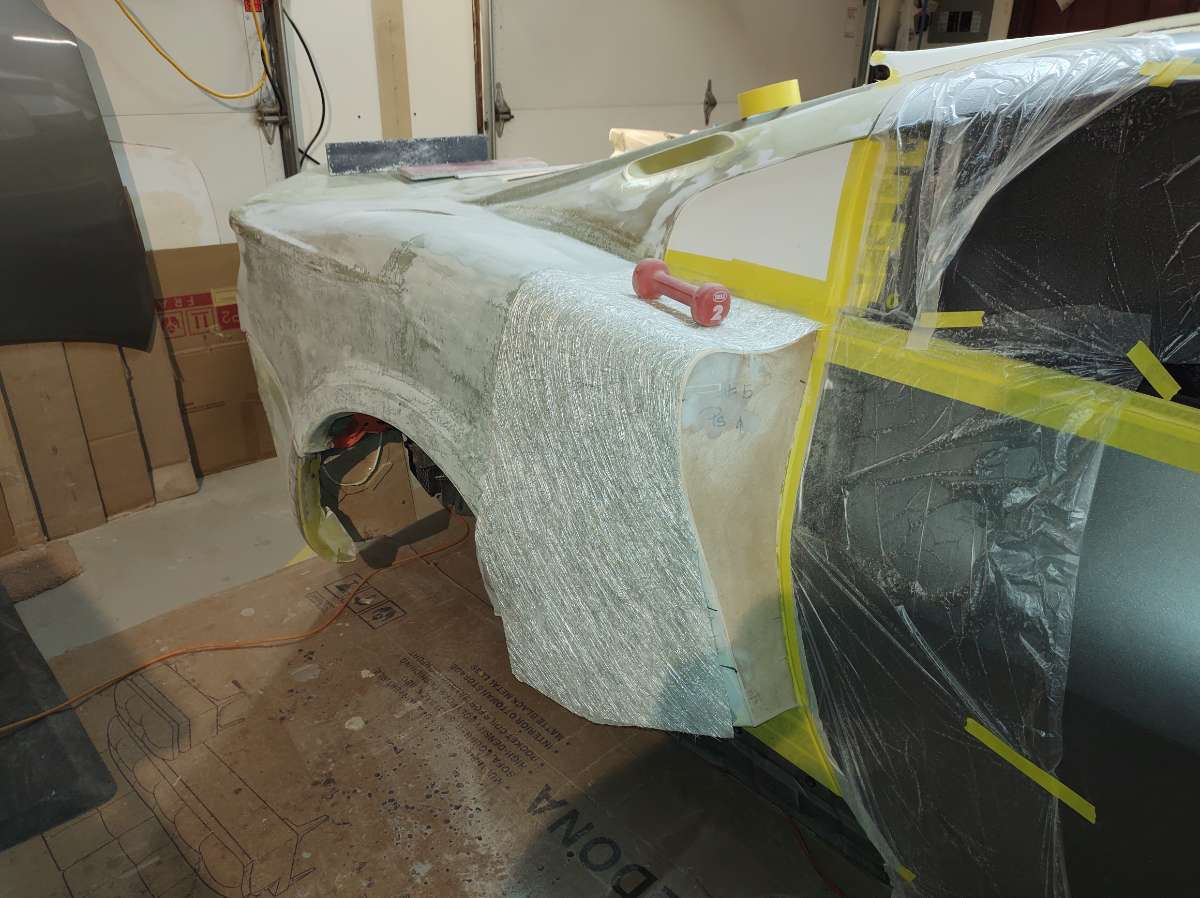
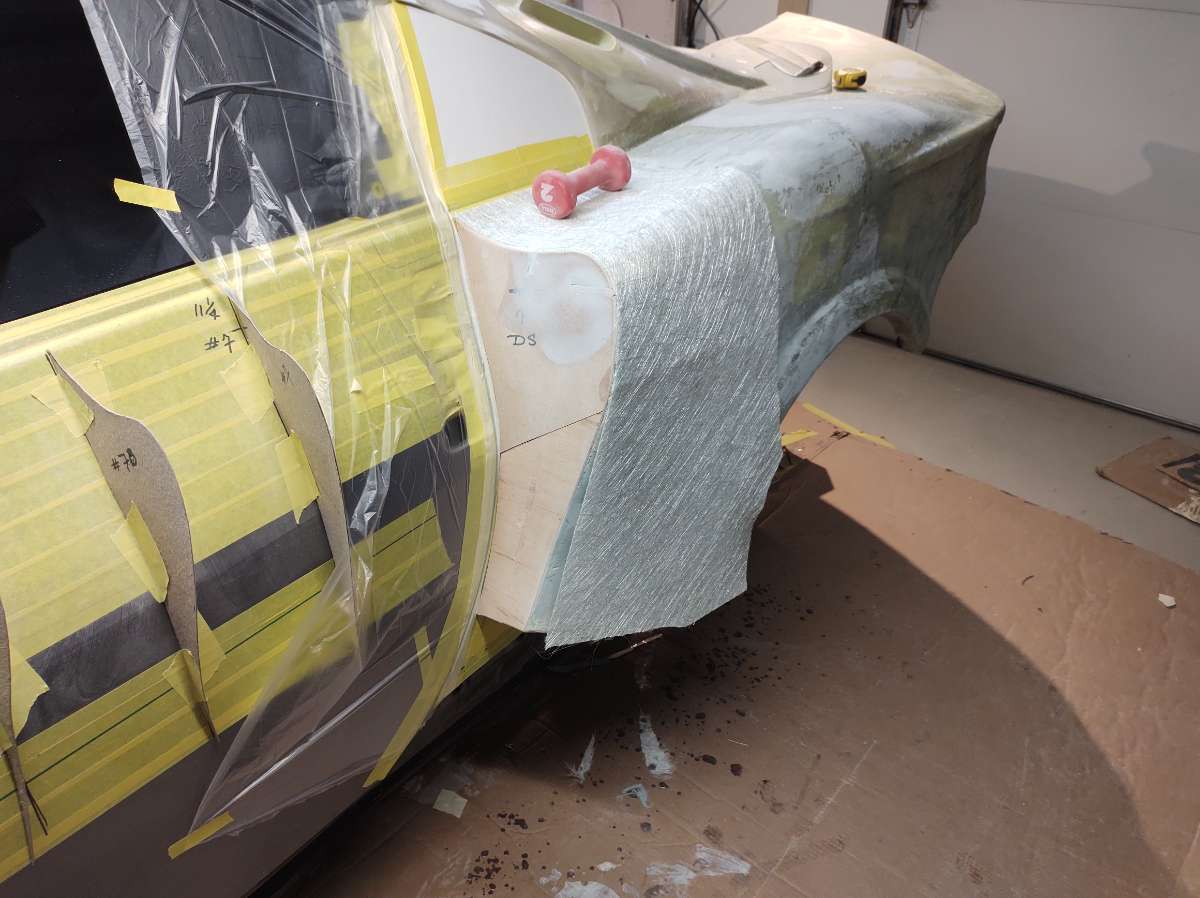
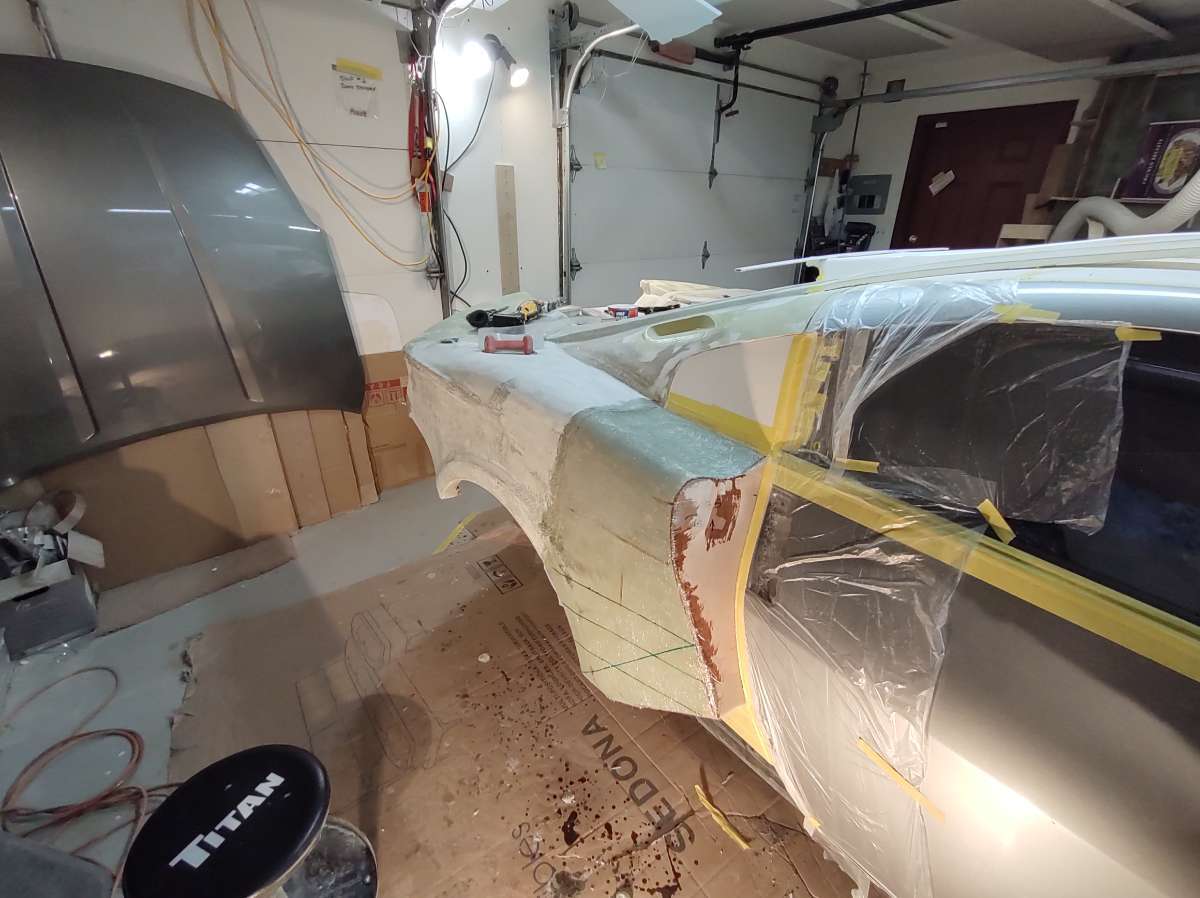
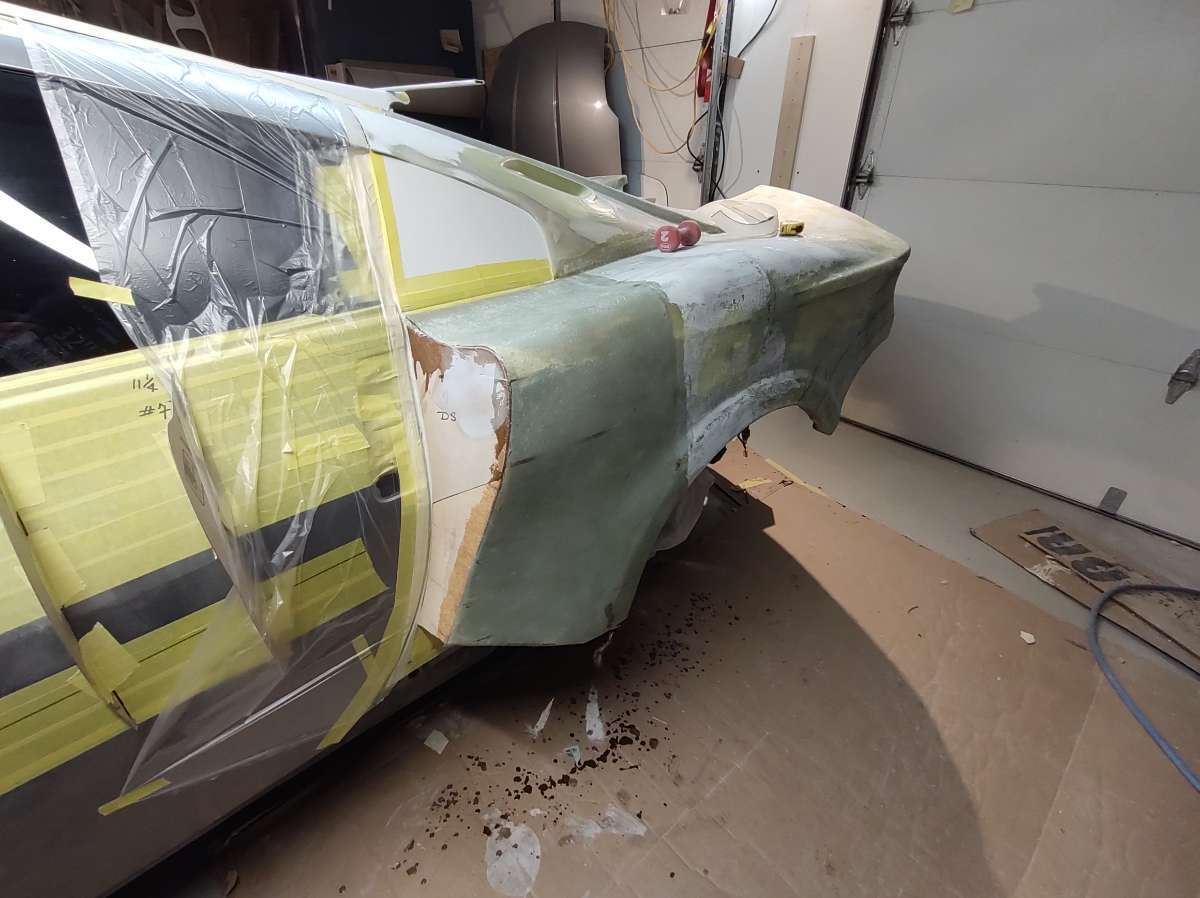
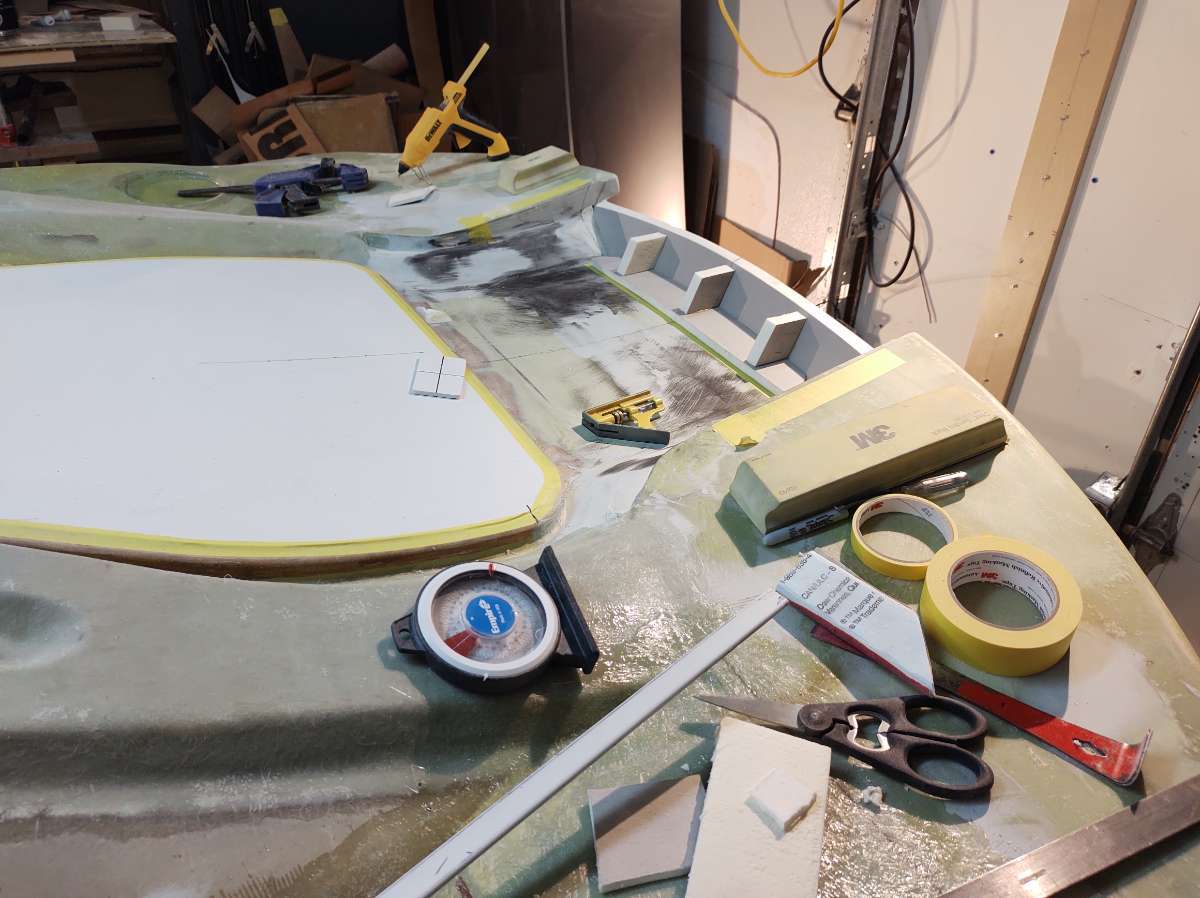
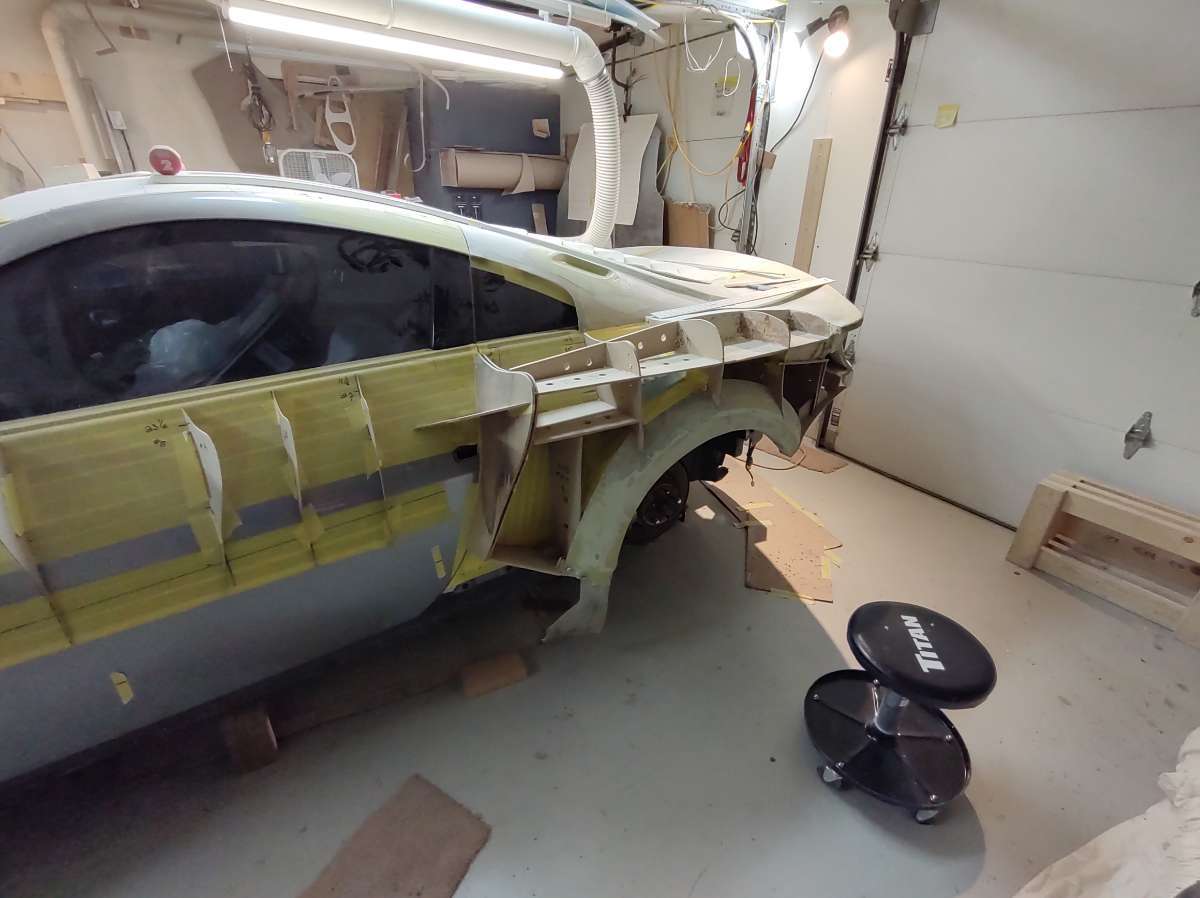
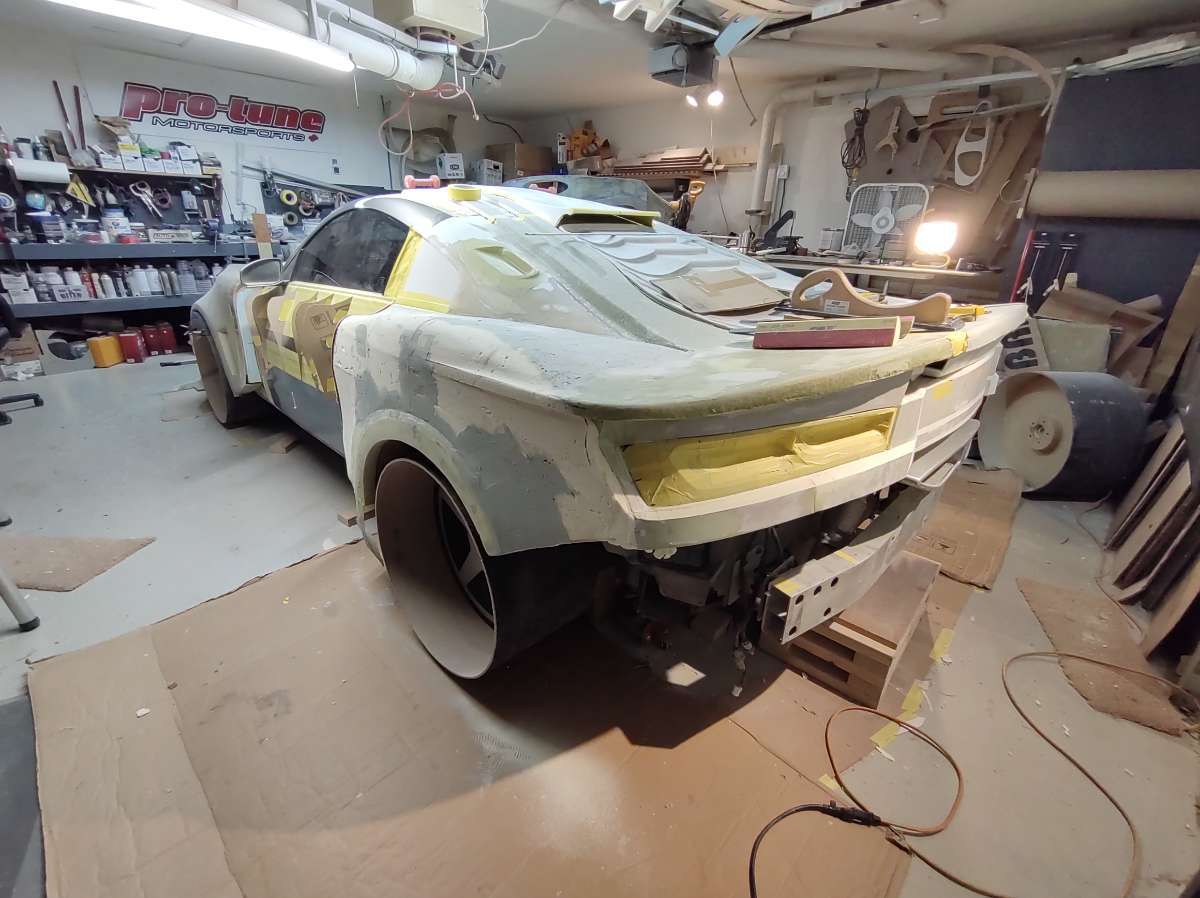
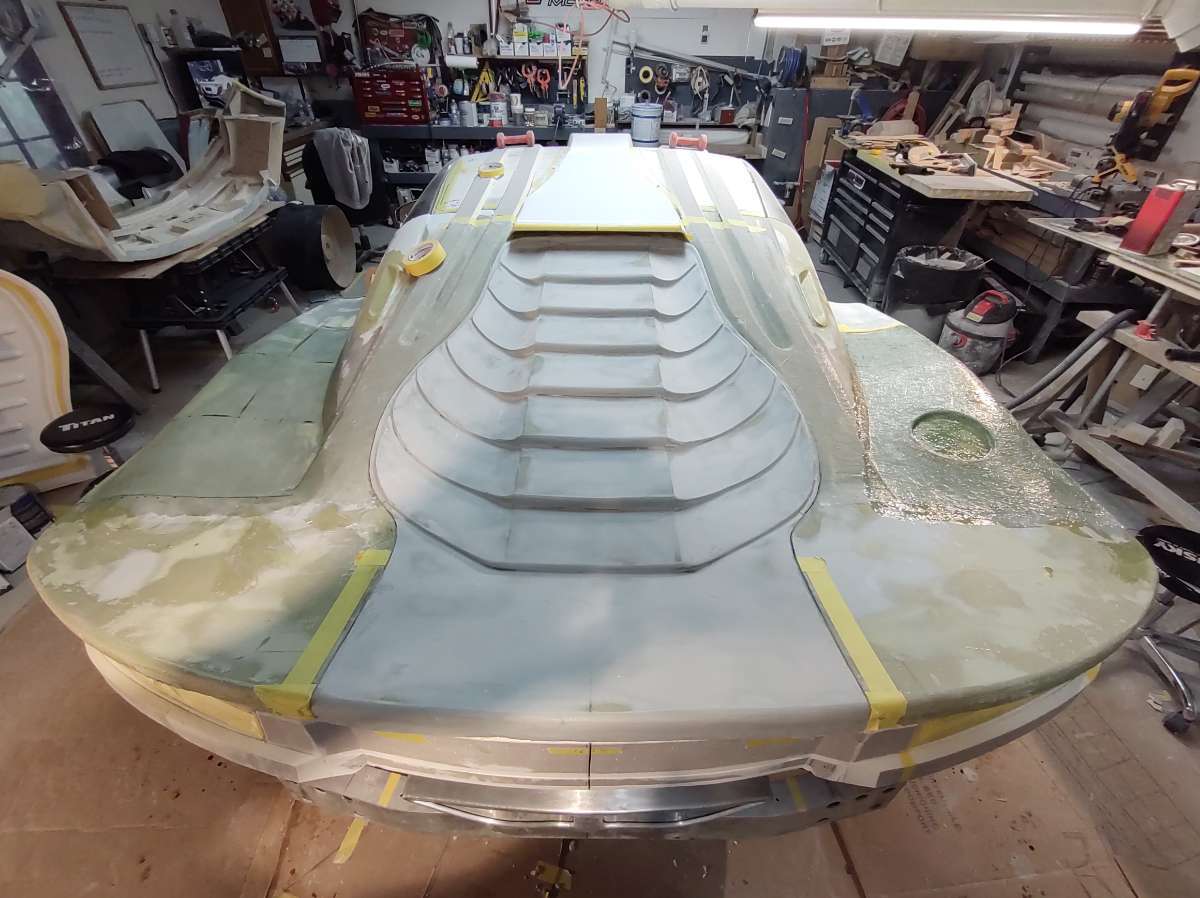
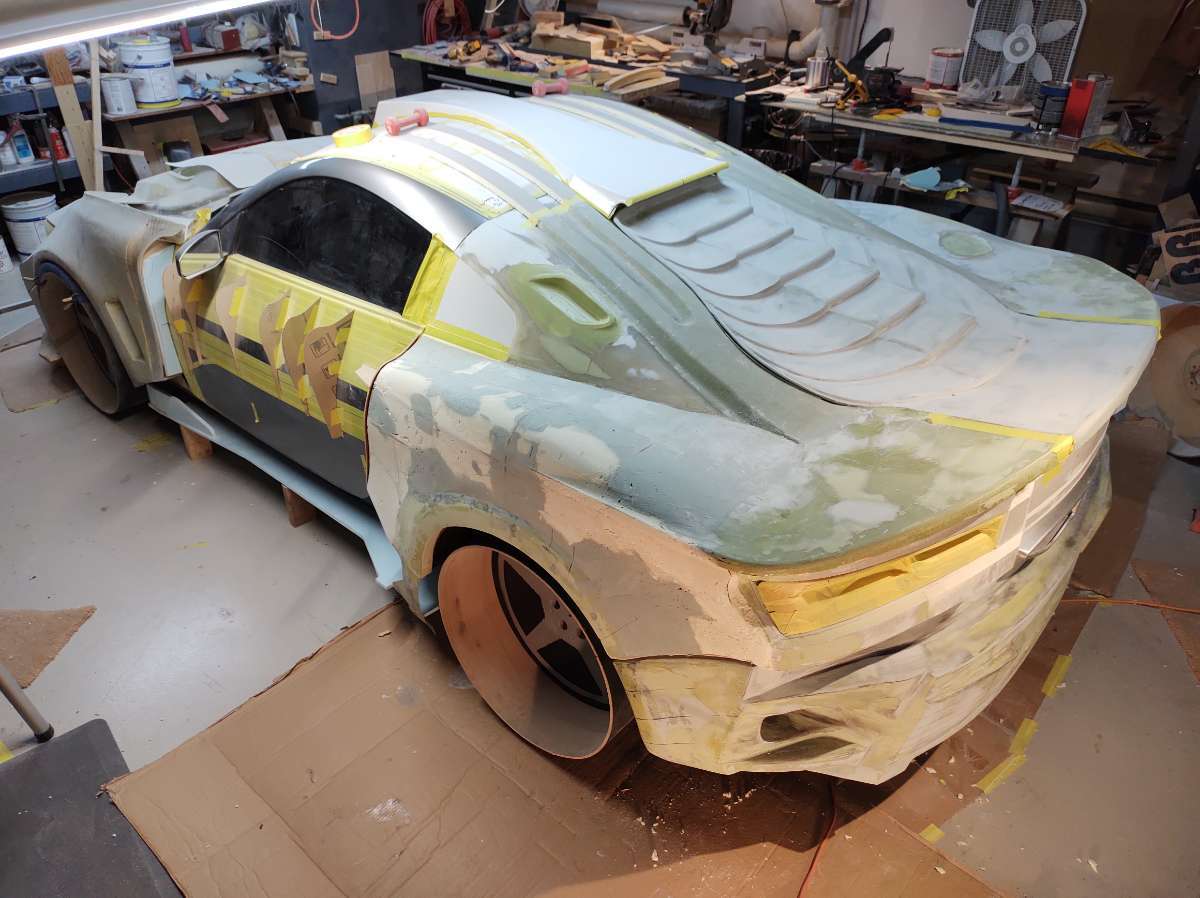
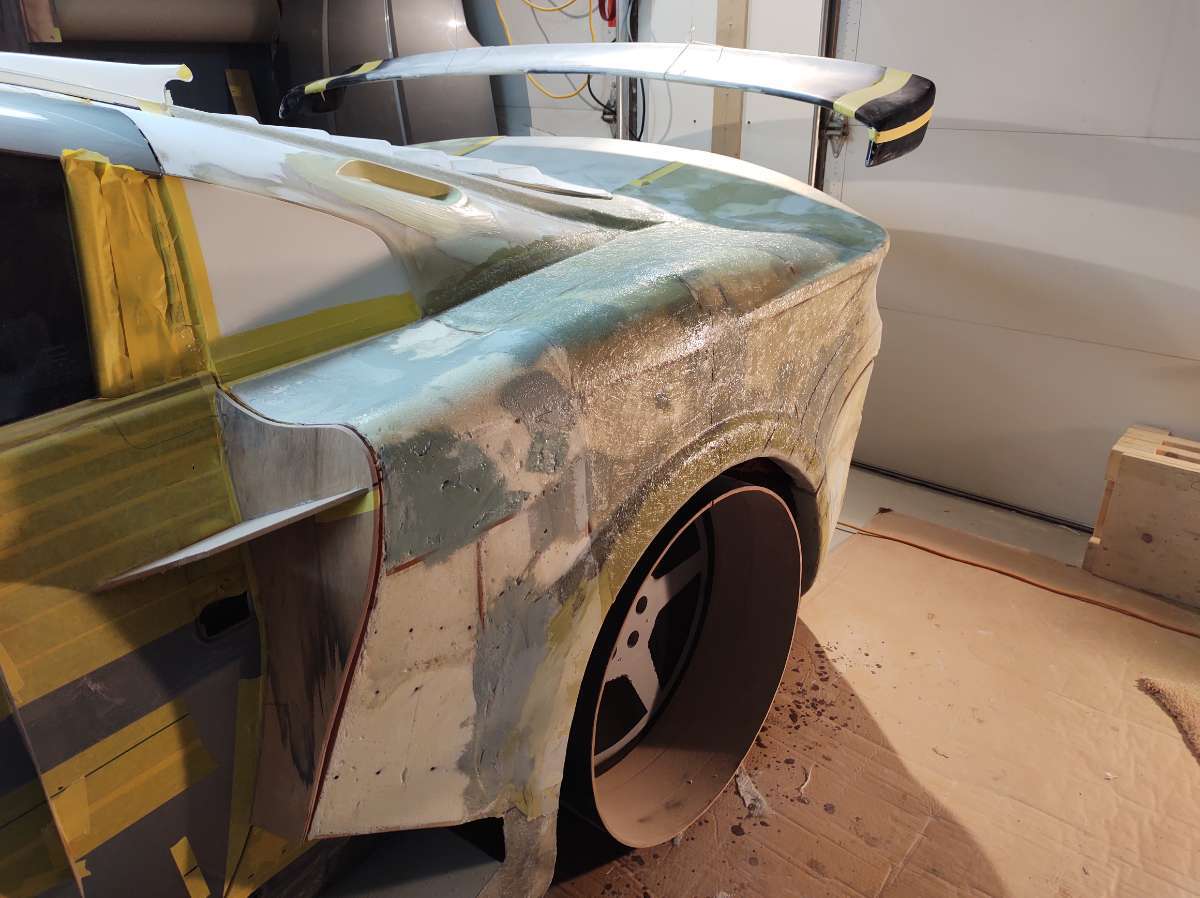
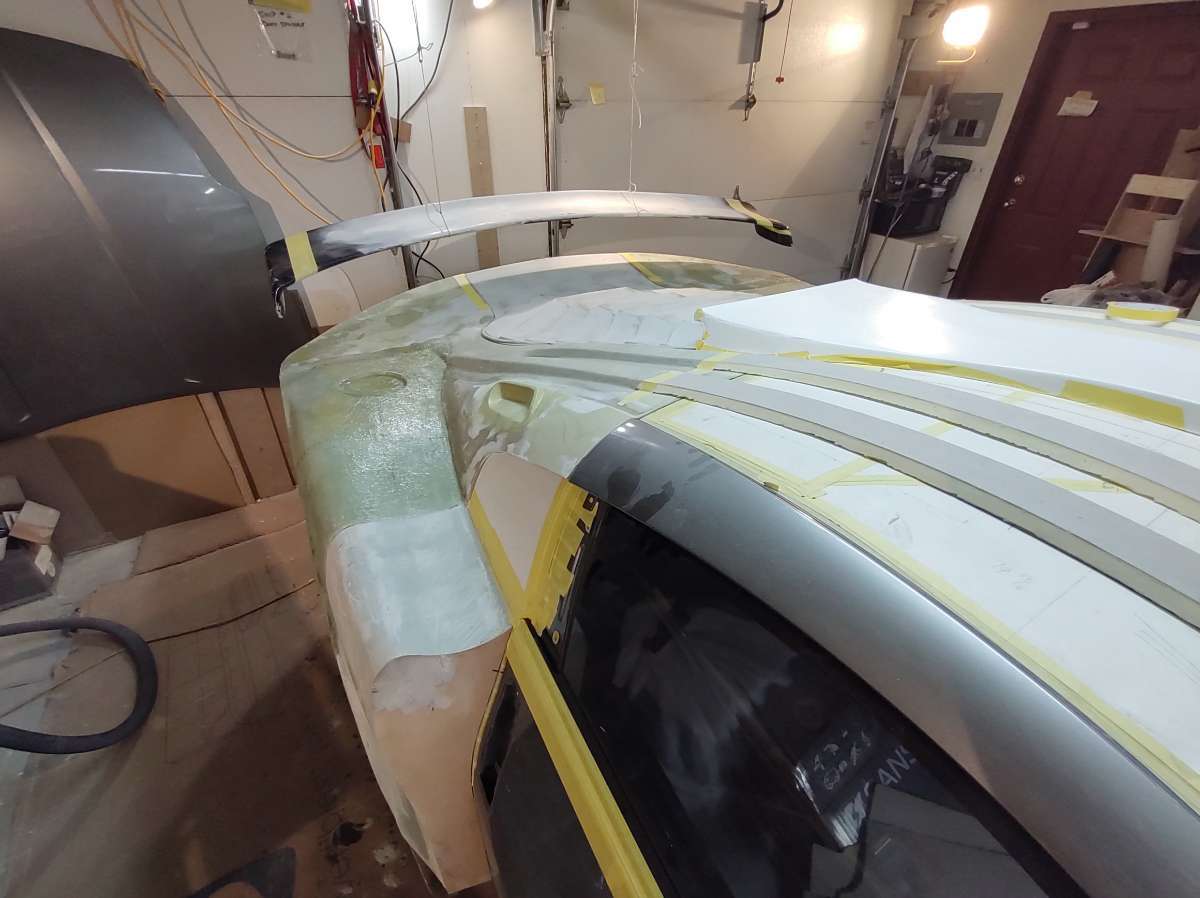
Hi everyone time for another update .
And I must thank you for fallowing my build , the feedback is fantastic !! much appreciated .
Still on the back of the car .......... I keep slaving away at it , so here's what's been going on.
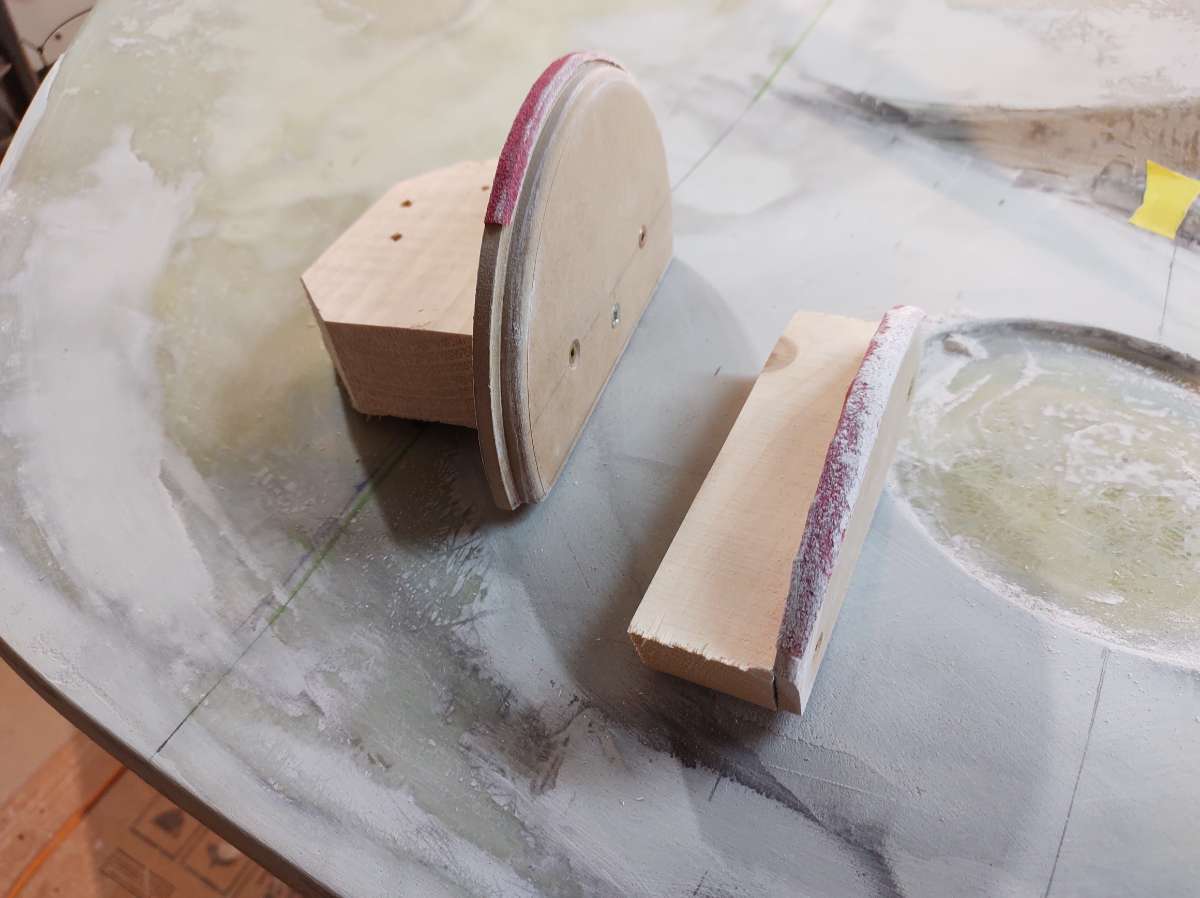
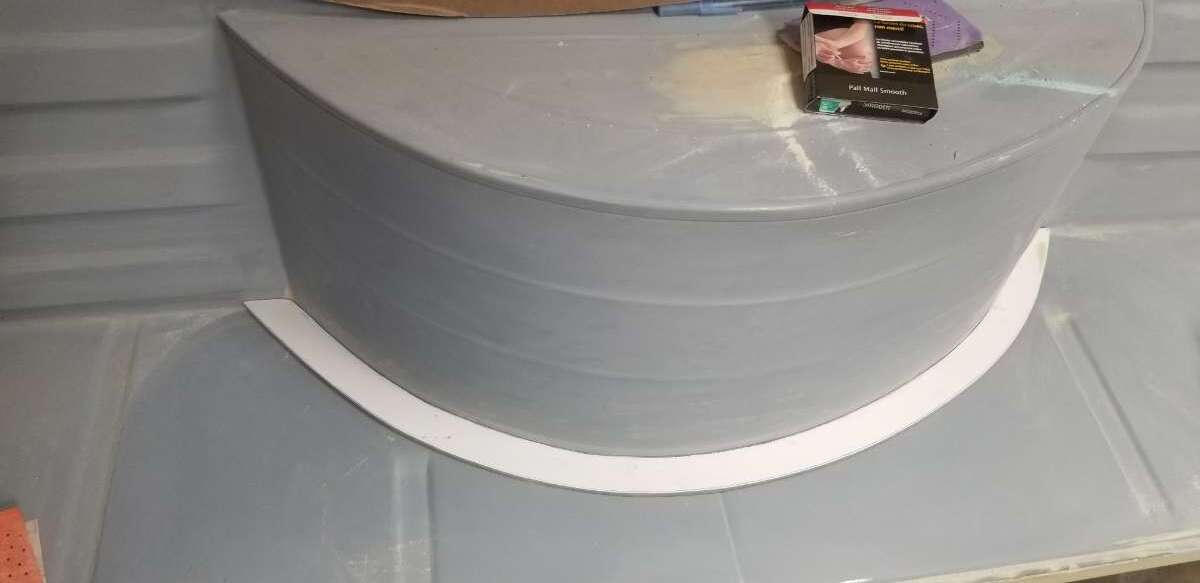
Here I am making a quick tool for sanding the gas filler opening , very hard to keep the reveal correct .
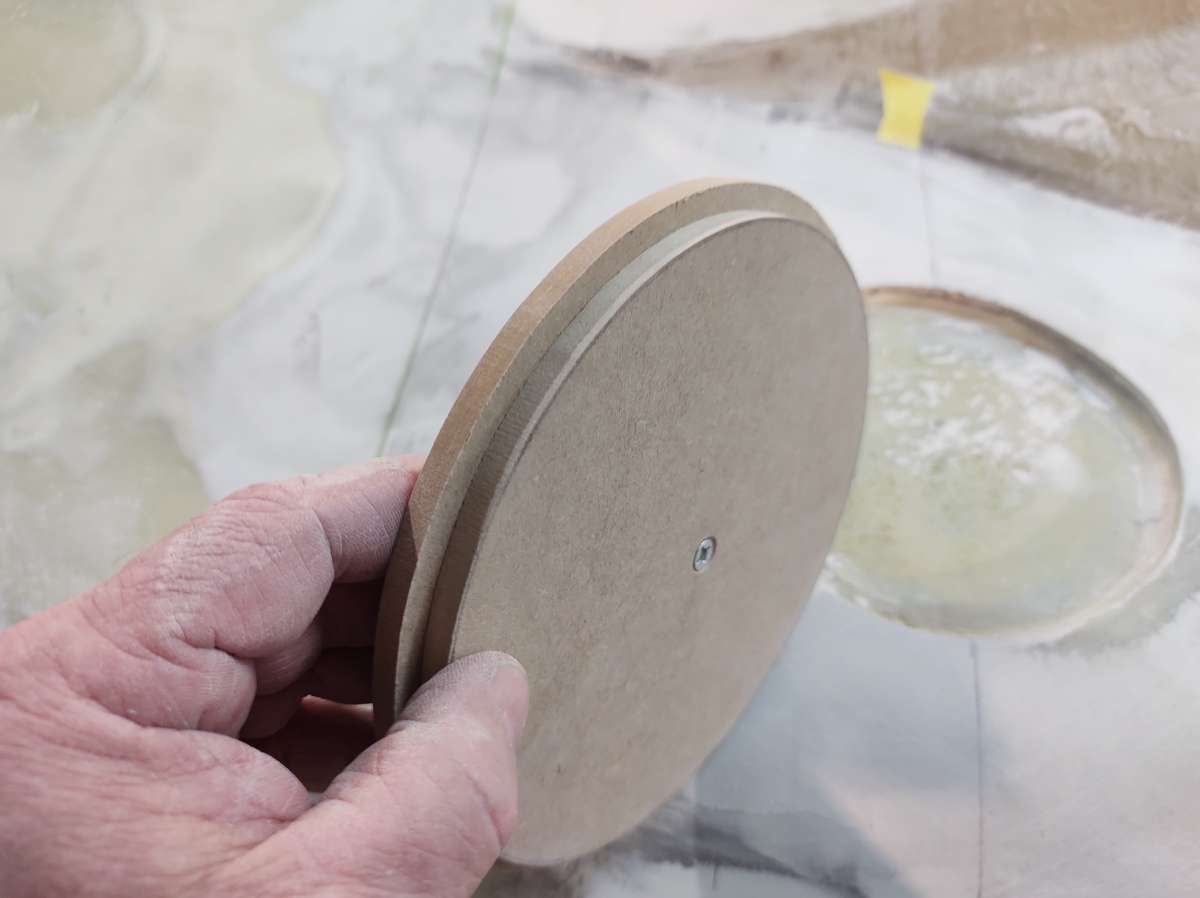
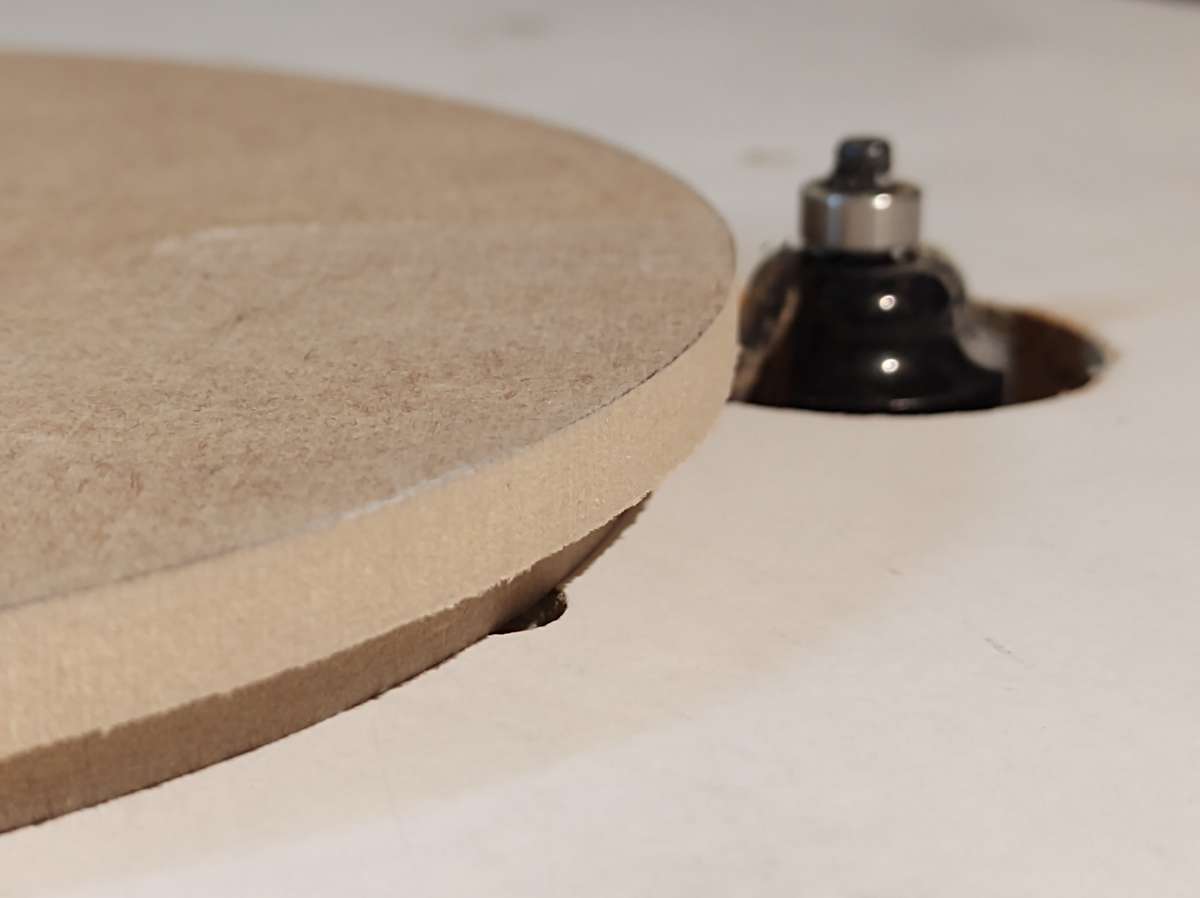
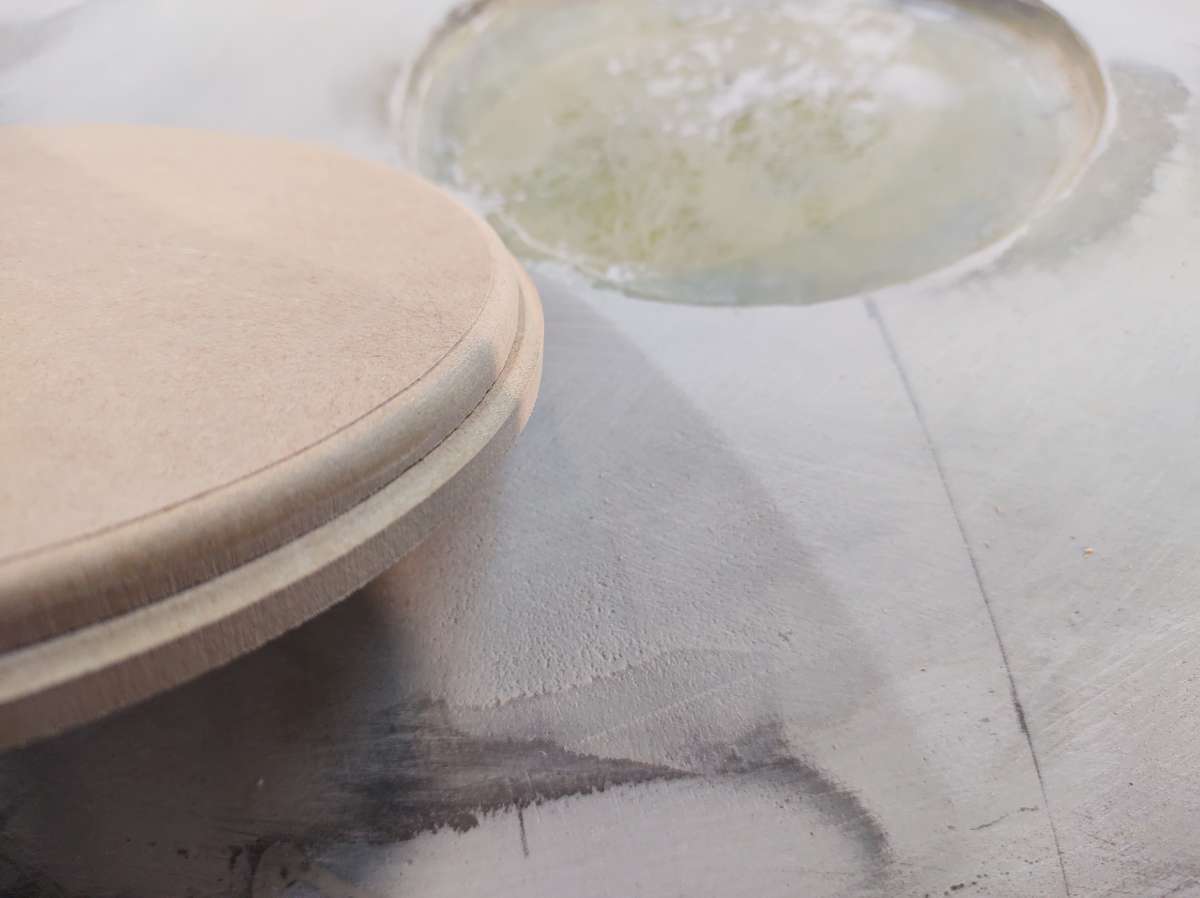
one part to keep the top radius in check
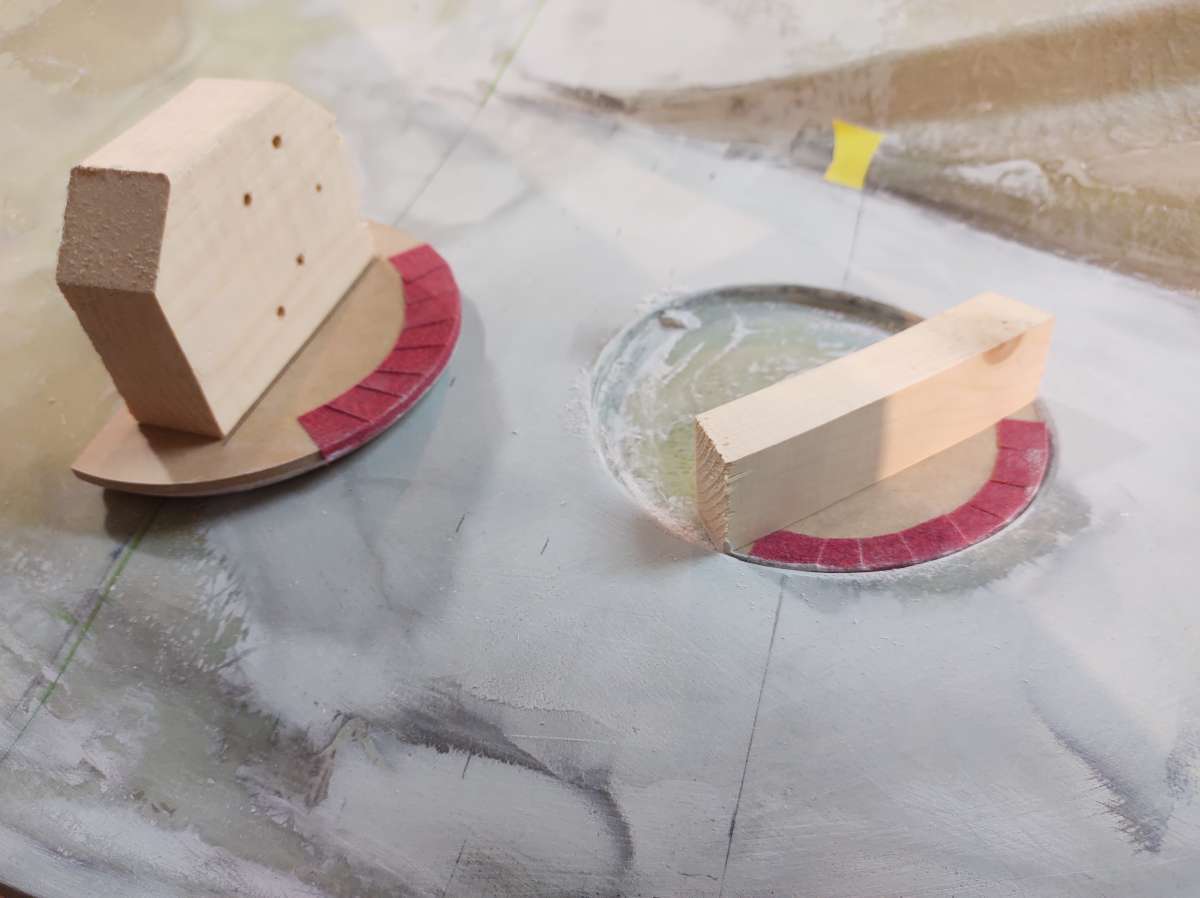
and one for the bottom
I can attach the sand paper to them and try to keep a nice edge
guide coat
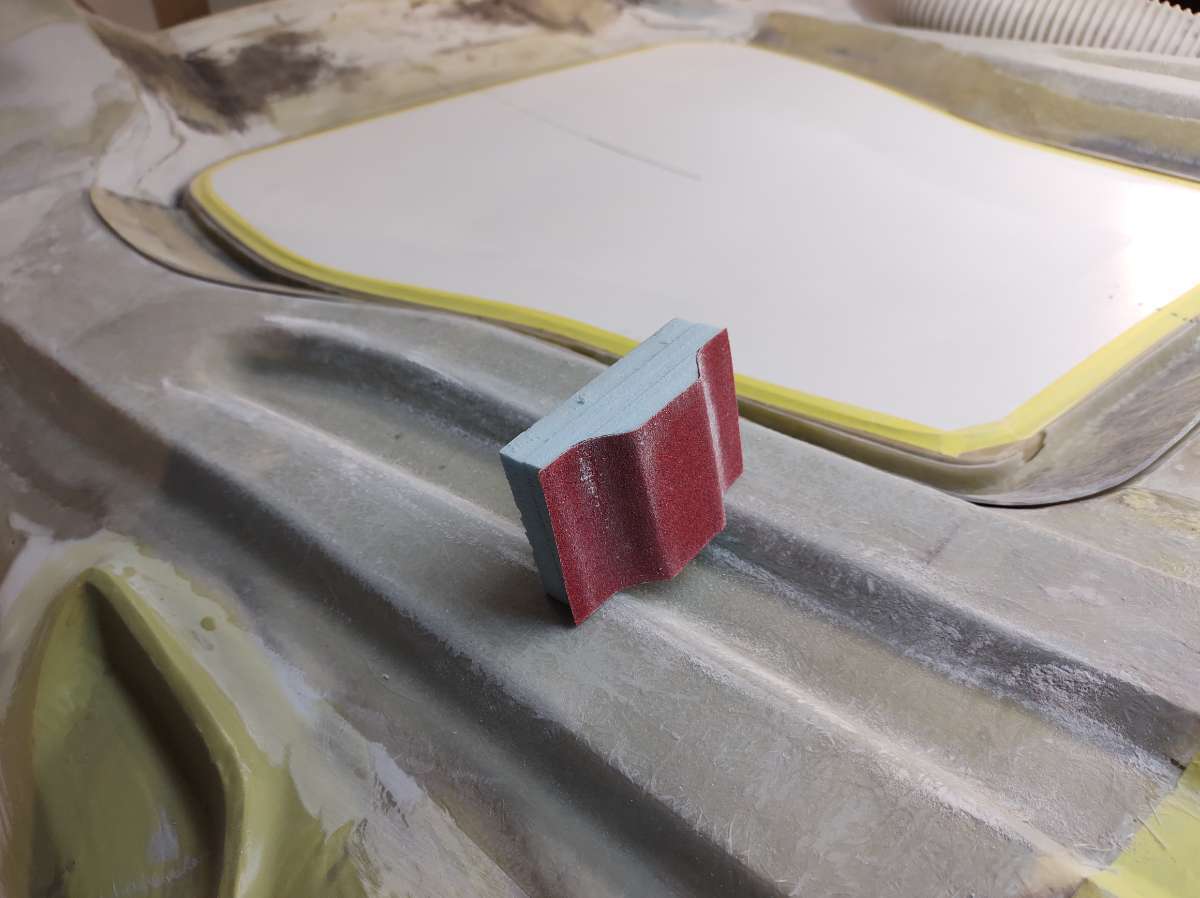
Another quick sanding block to help things , these are very easy to make
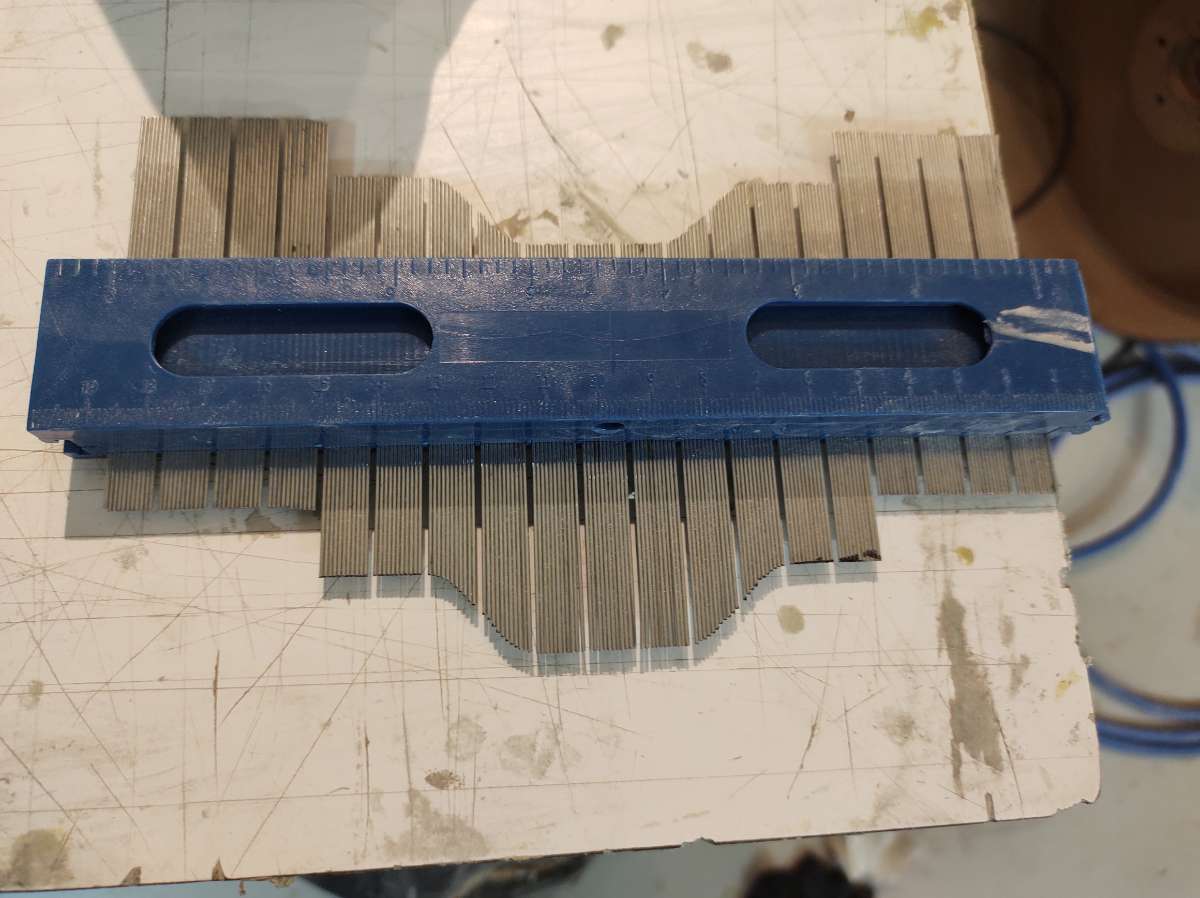
i use a contour gauge , then trace it and cut it out
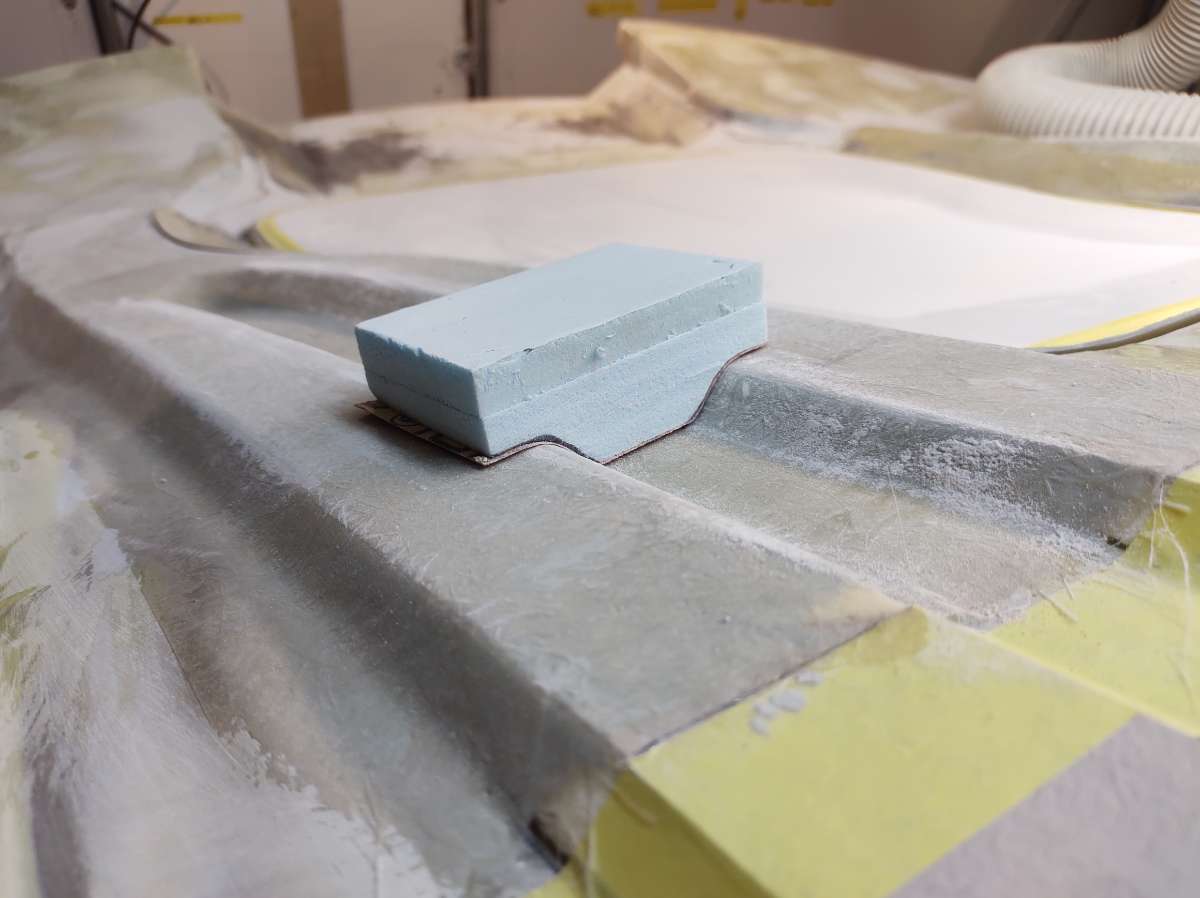
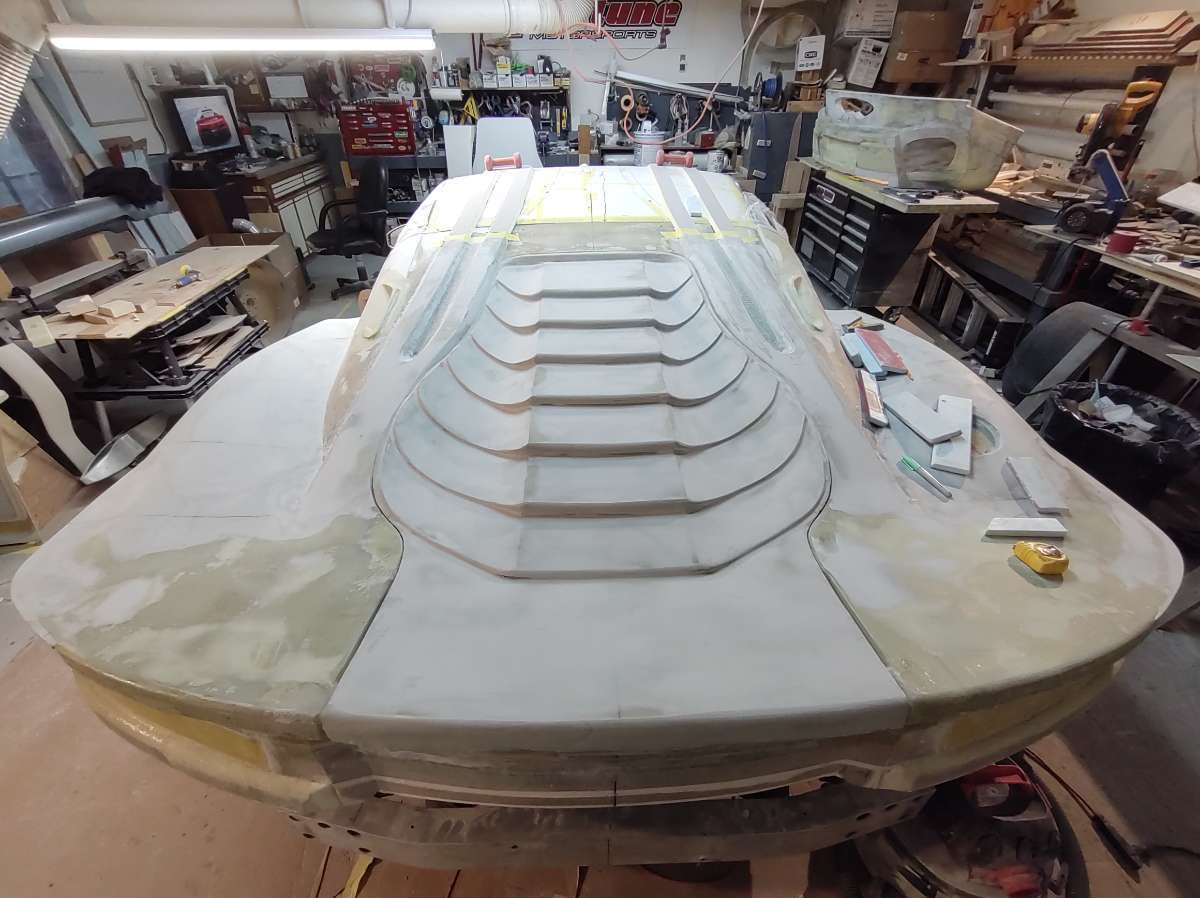
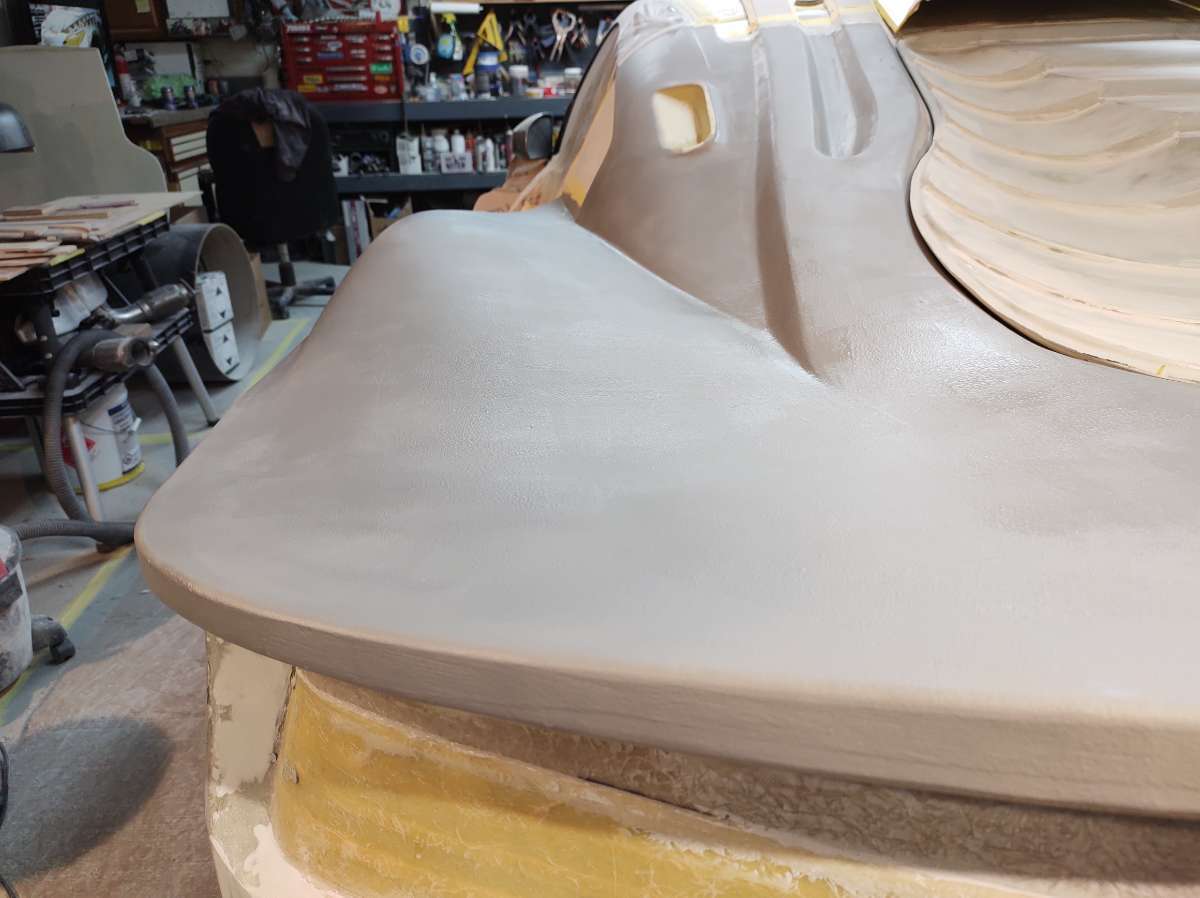
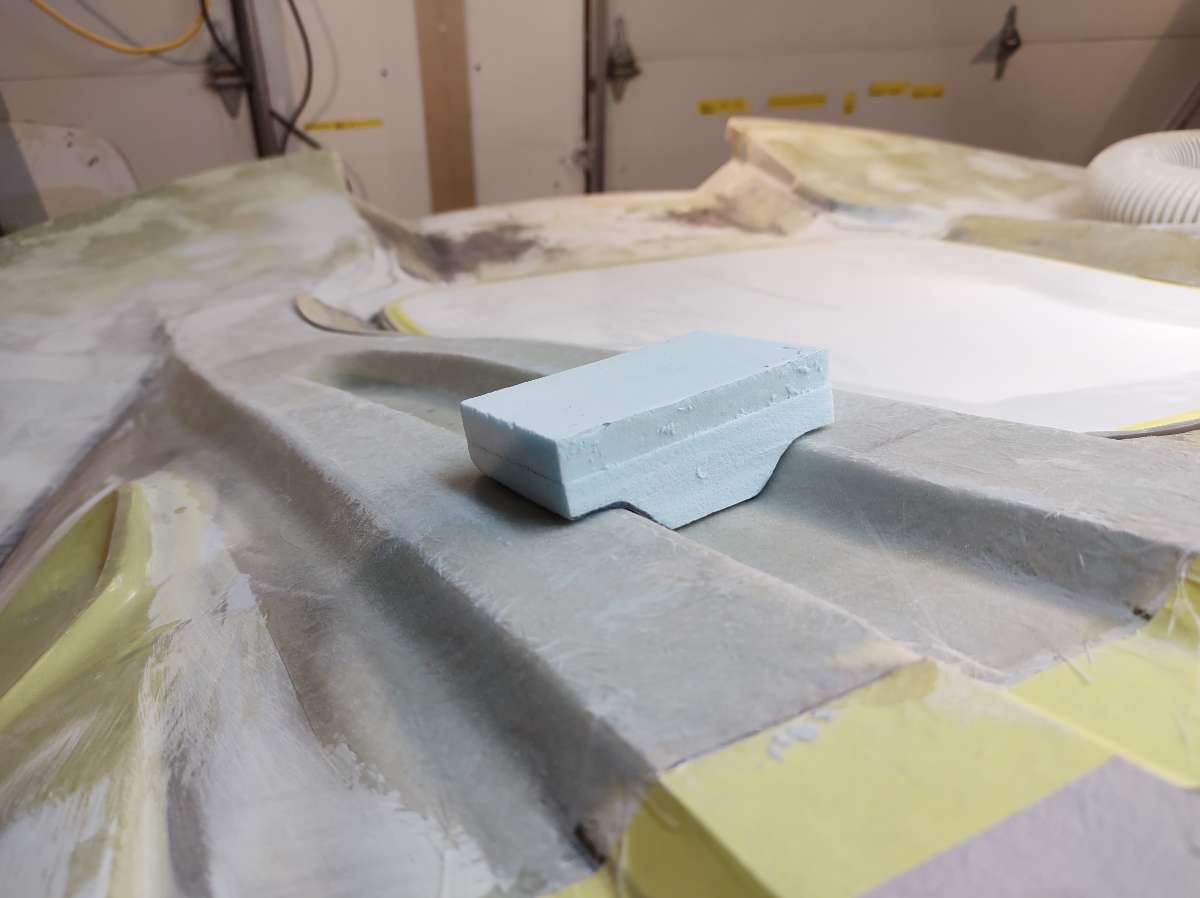
the radius on the back deck is too large for my liking , so I am building it up with some filler and will router it with a .25 round over bit .
Here is a couple of coats of High Build Primer , so good to see some solid color on it , even if it gets sanded off
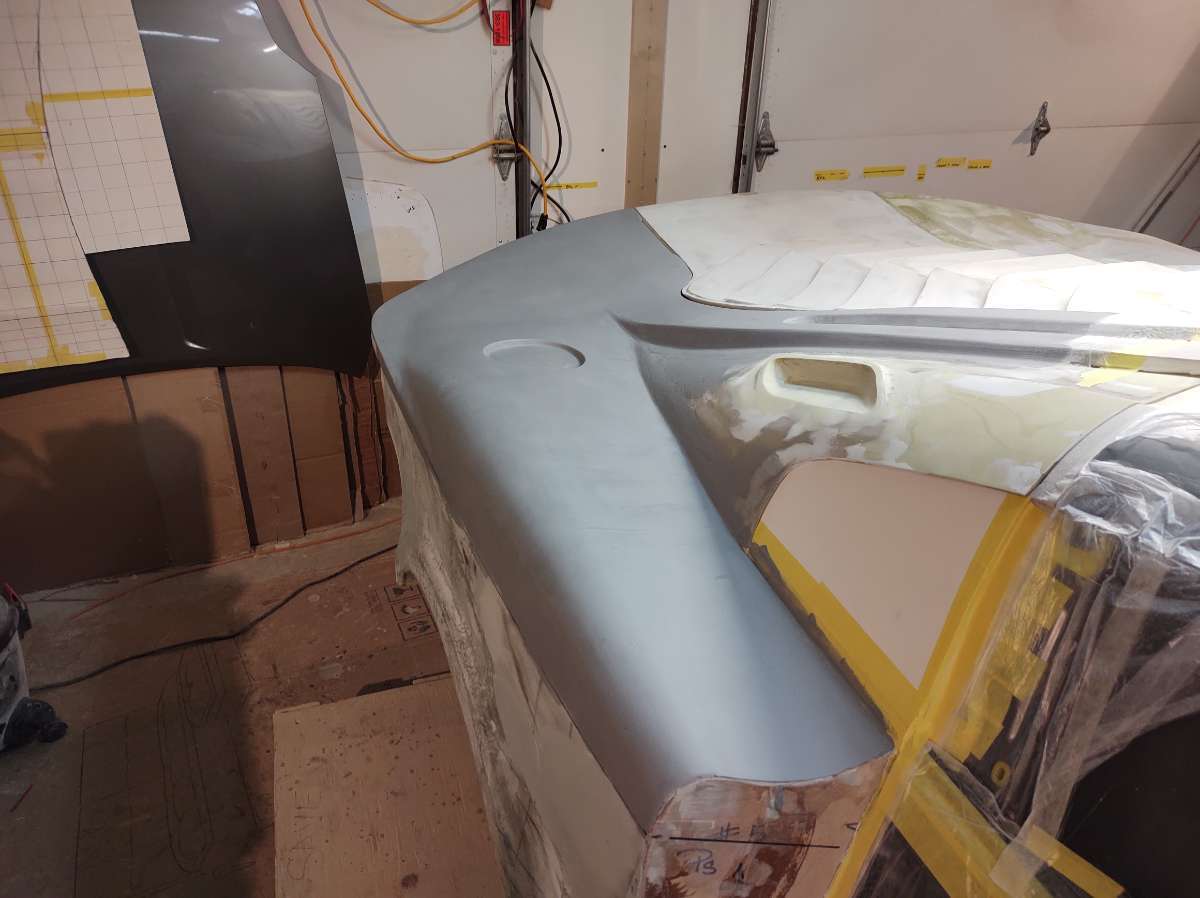
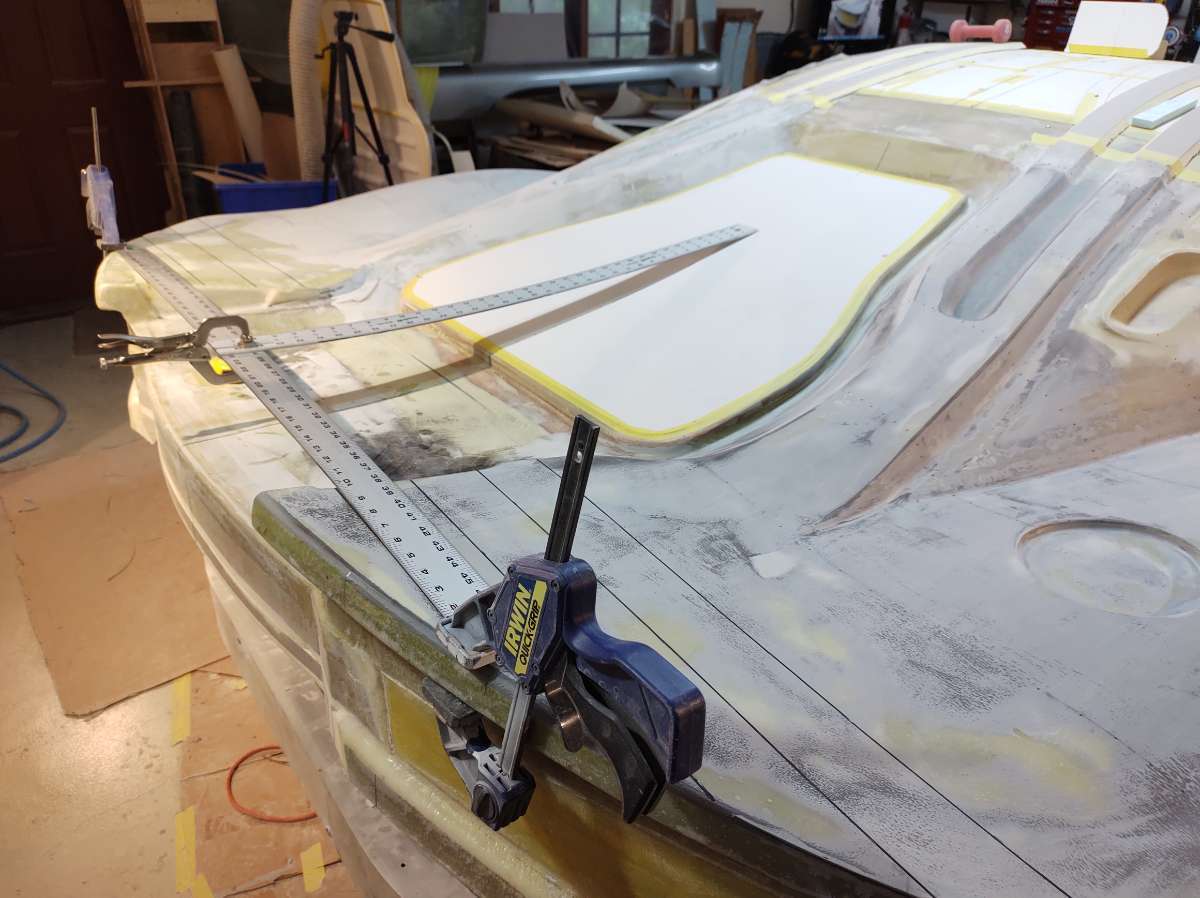
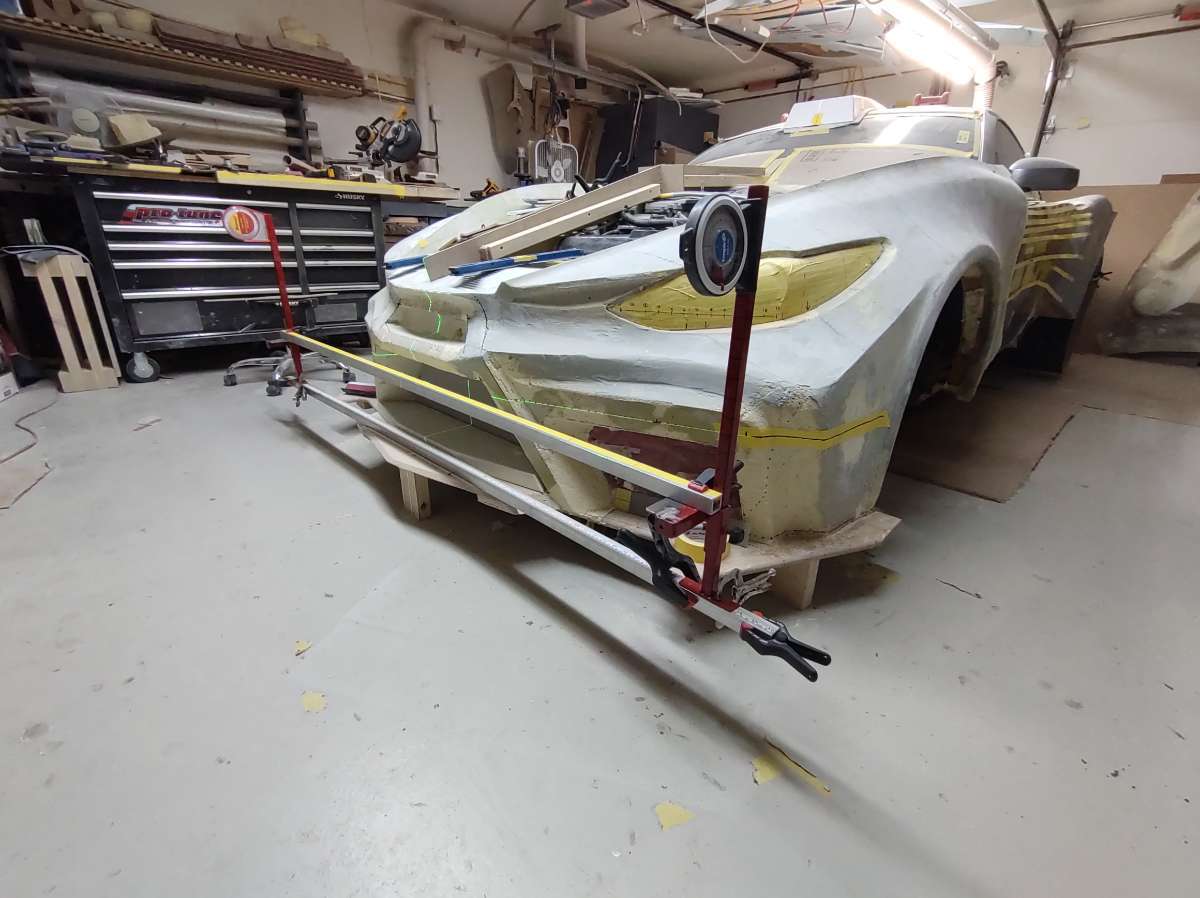
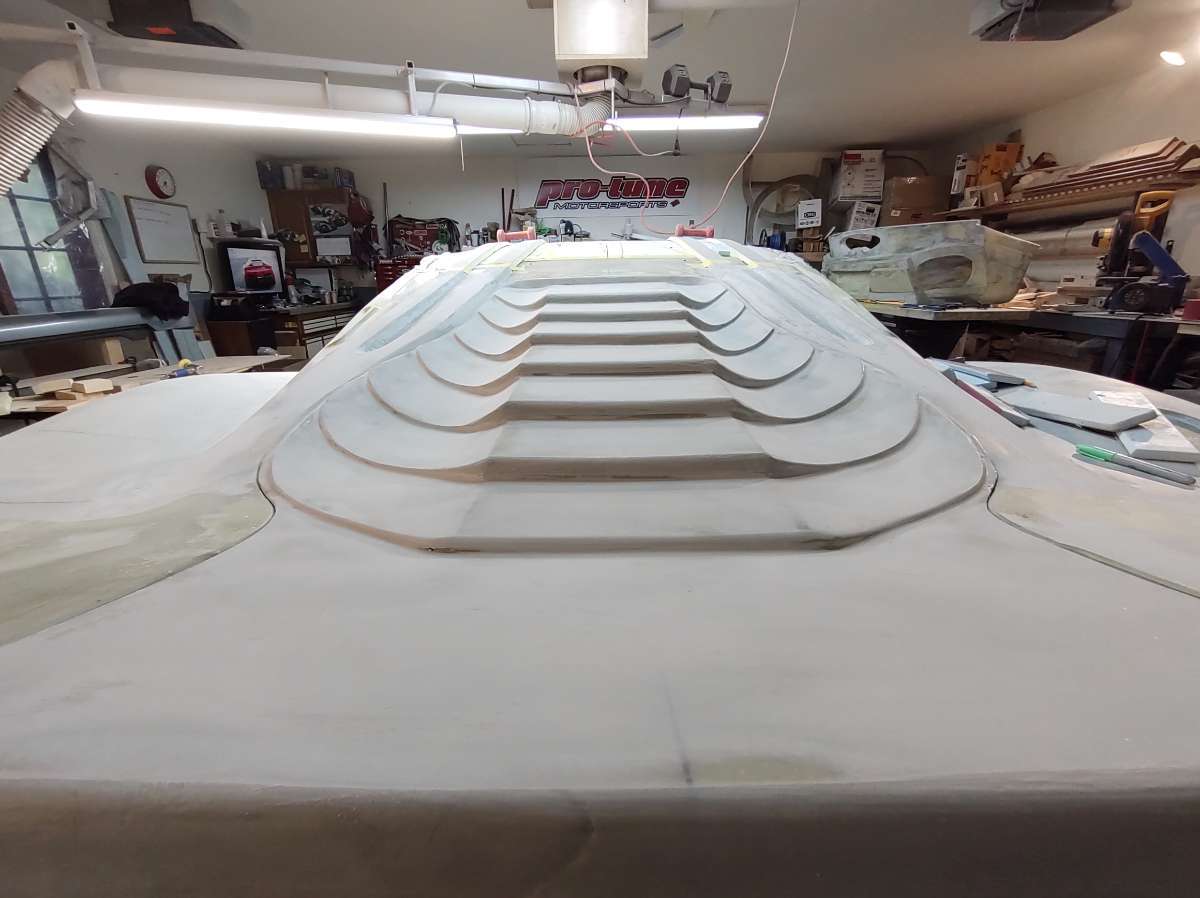
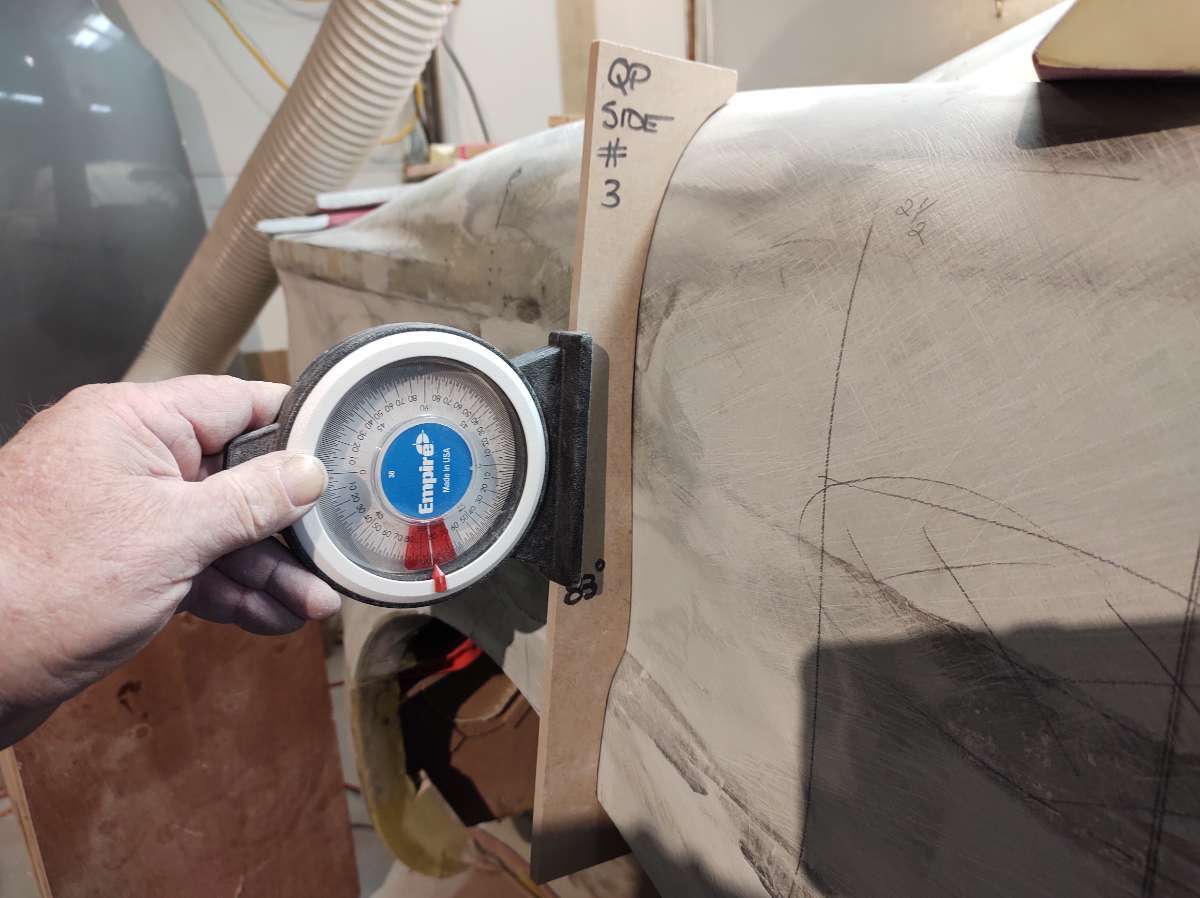
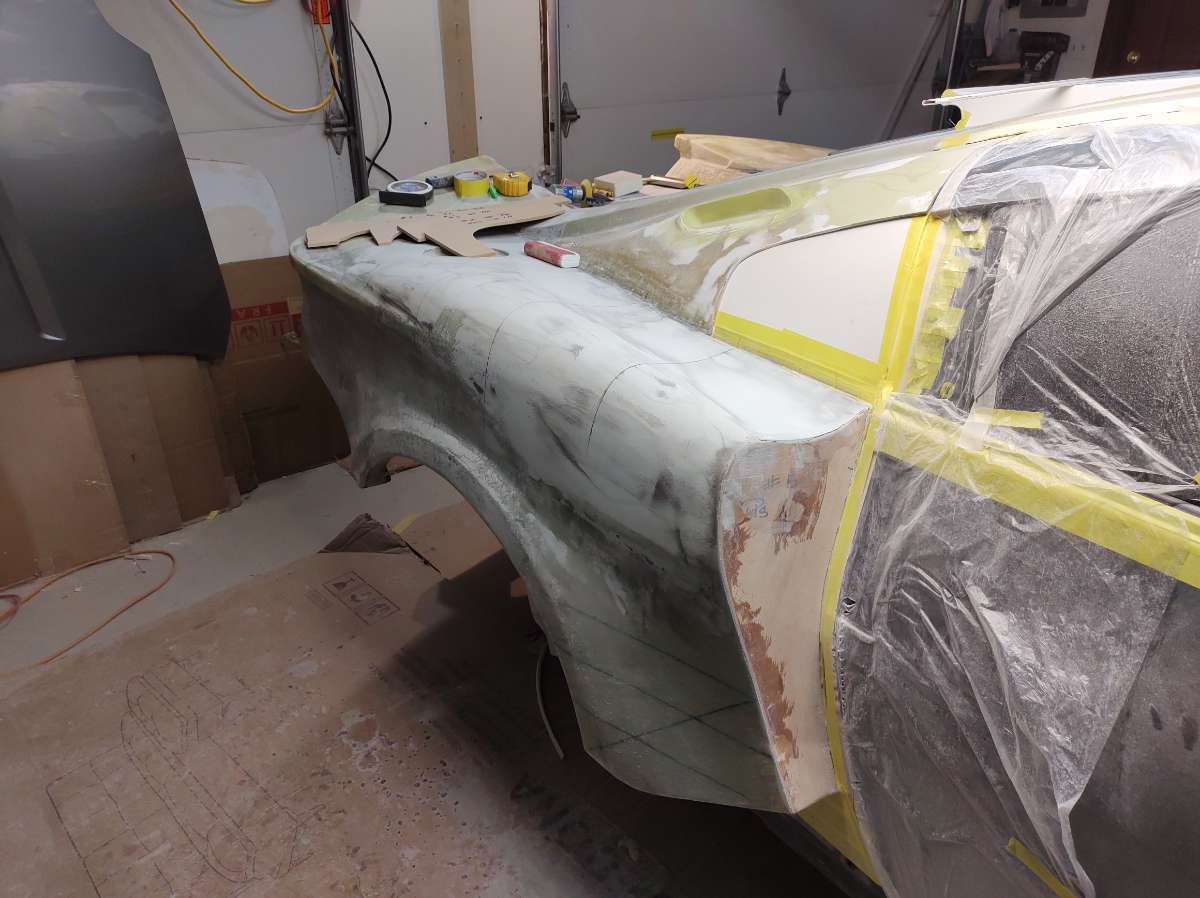
more checking for symmetry ......it's like measuring an egg ........... what a pain


tons of work to keep these quarter panels the same .........
the exhaust tip off the car , its hard for me to put the bumper cover on and off by myself with it on

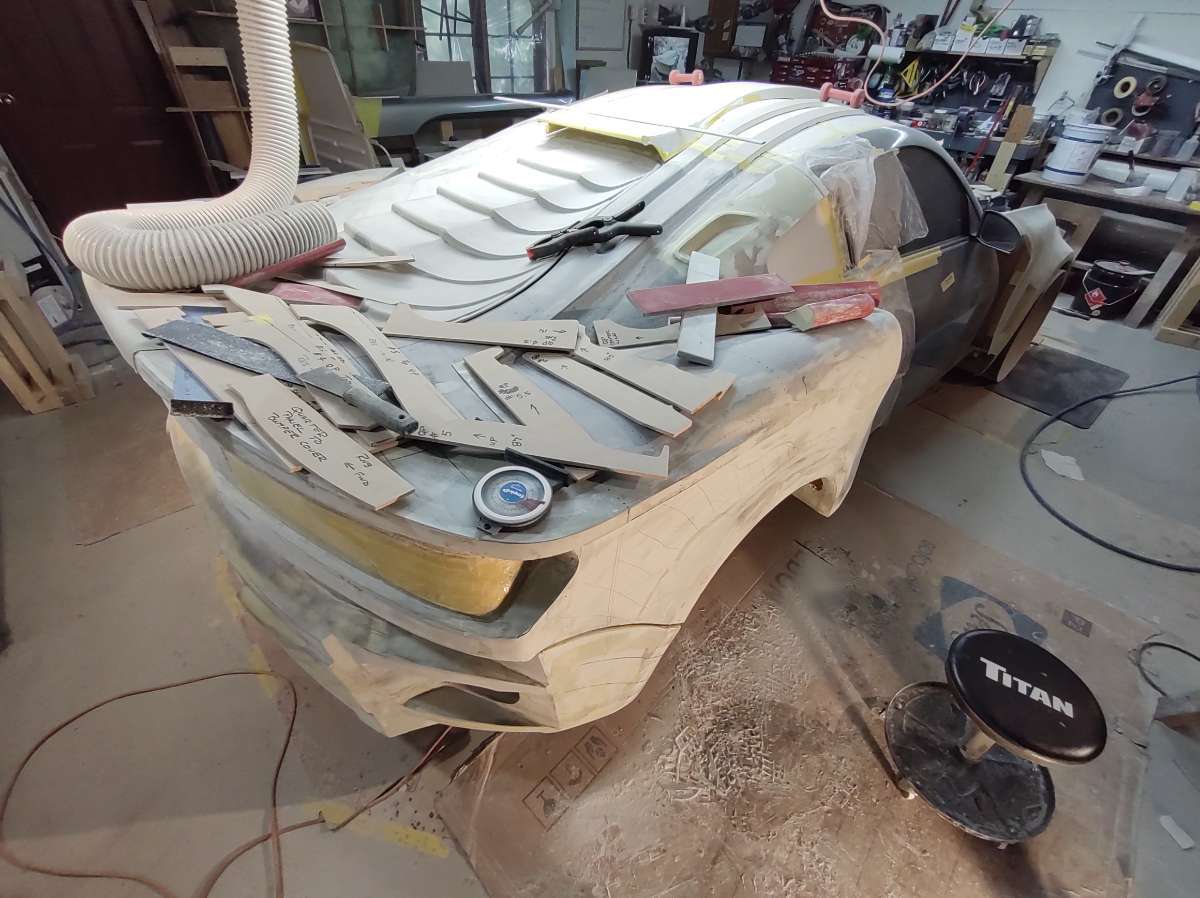
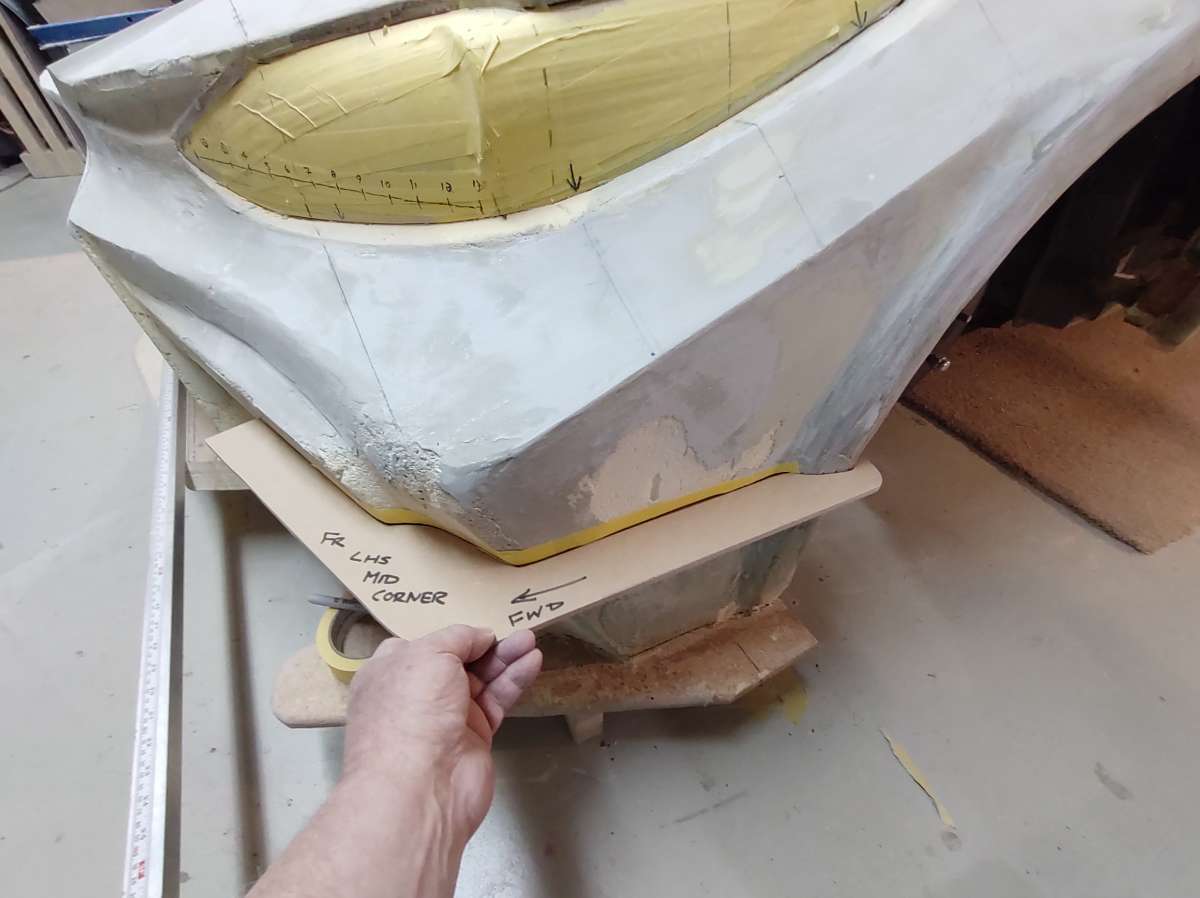
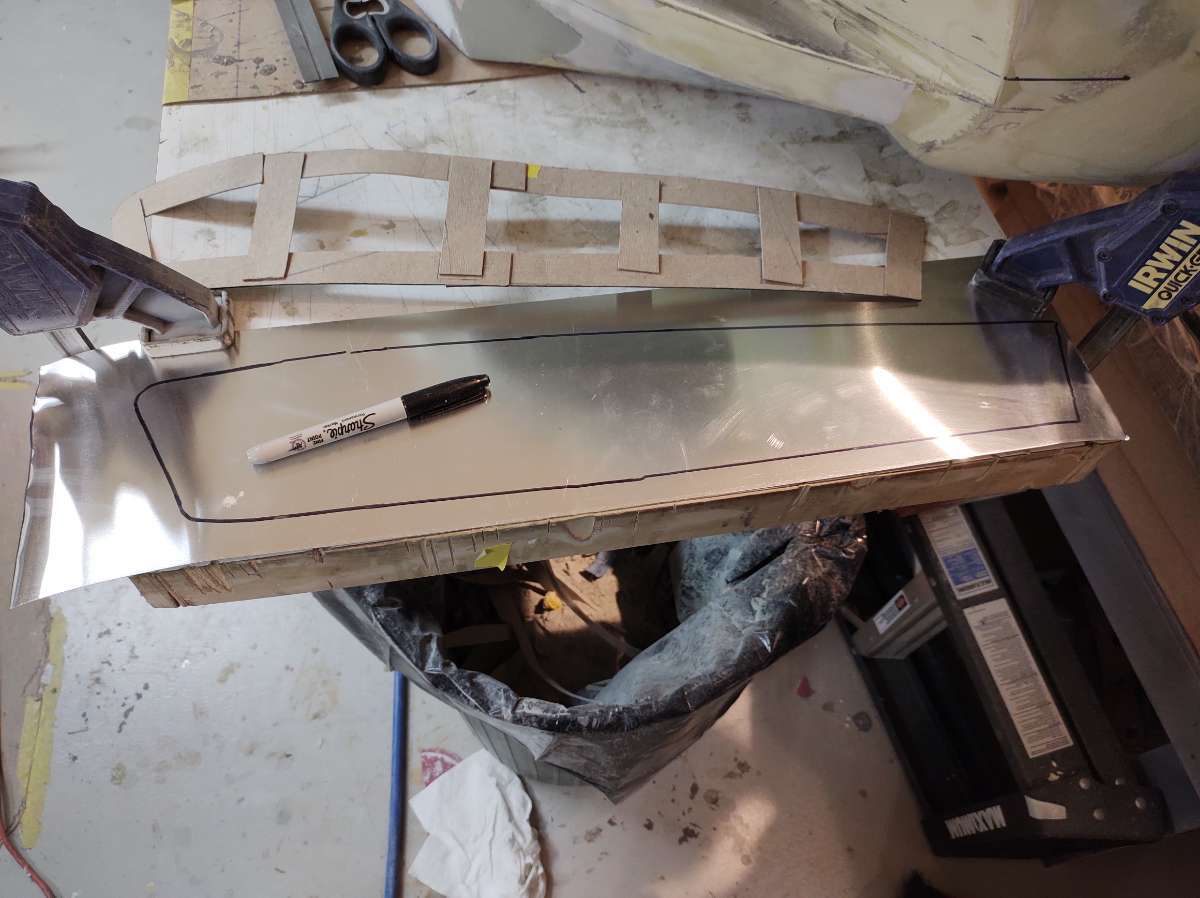
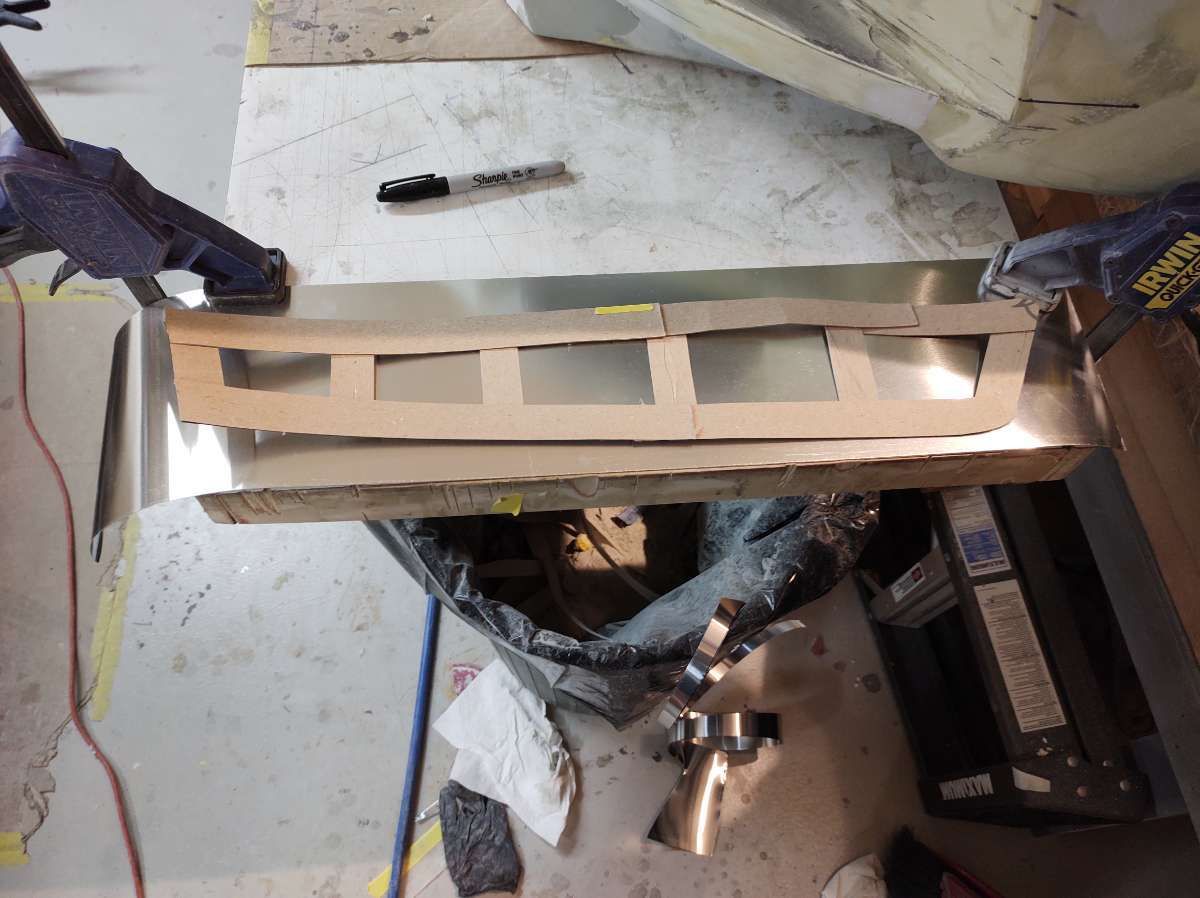
more templates I start with them every 8 inches apart to get the main shape the every 4 inches to dial it in .
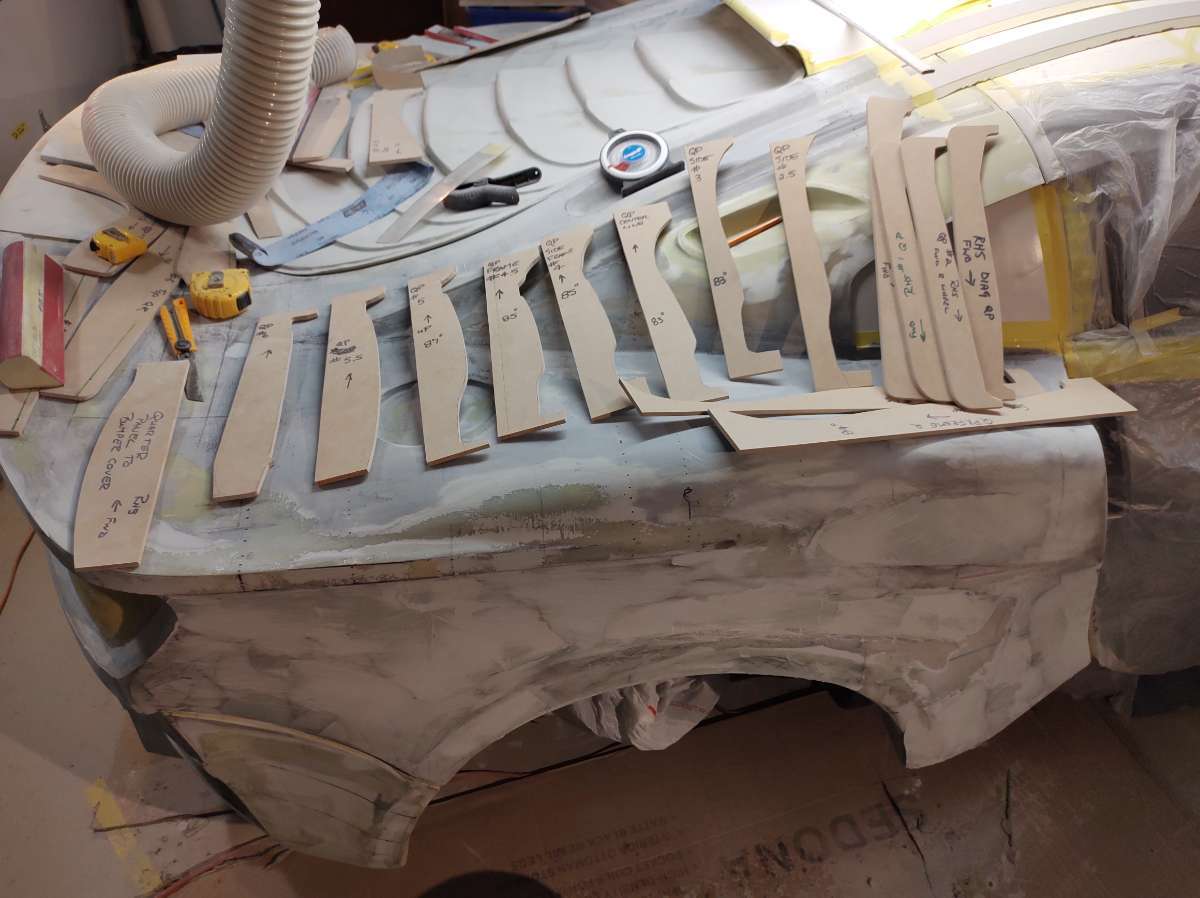
yup tons of work indeed
hoping to get the quarters primed today or tomorrow .
Thanks again for all the support .
Cheers
Stay Safe and Stay Tuned In
-
7
-
-
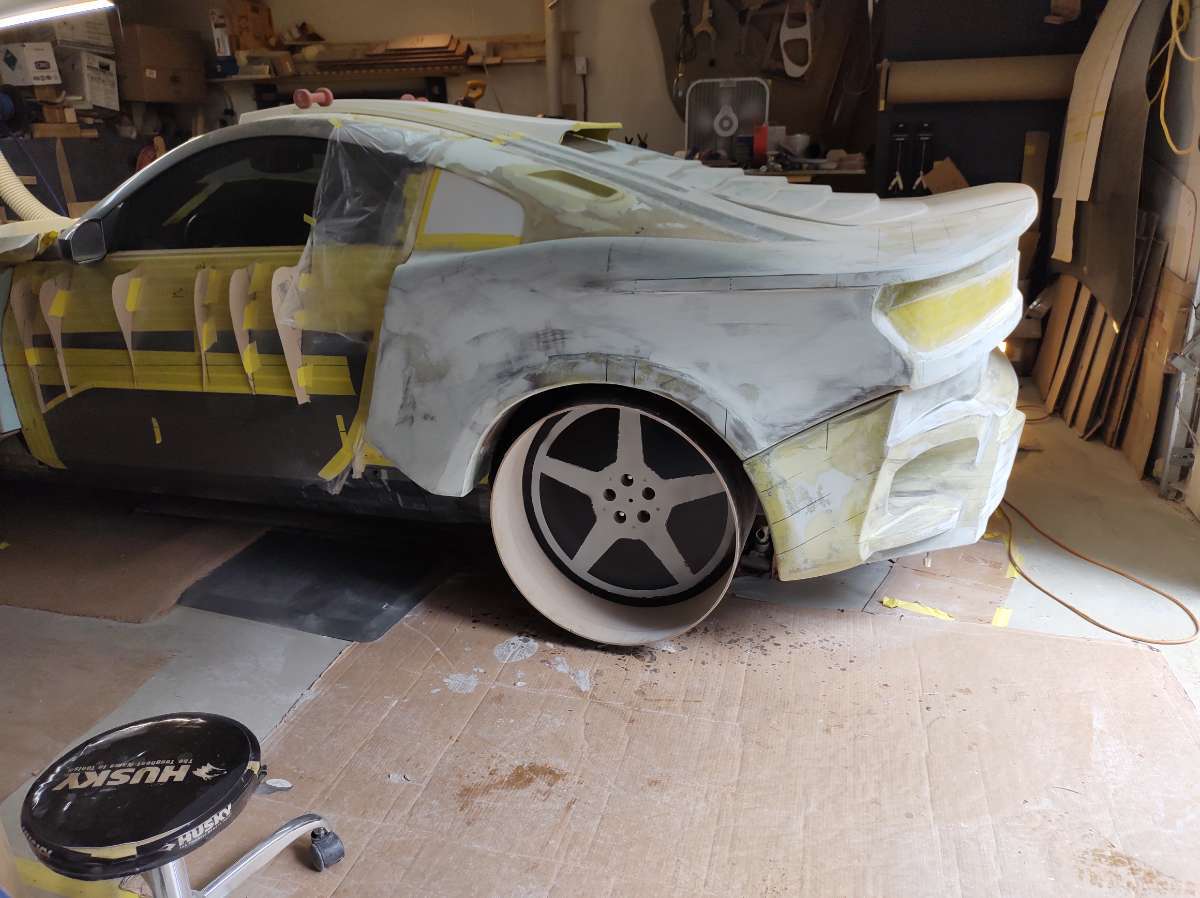
Hi everyone another update .
This is called a guide coat , it's for sanding to show you where the low spots are or scratches , you can spray it on , which takes time to dry and some brands clog up the sand paper , I have started using this powder version , it's a graphite and works very well .
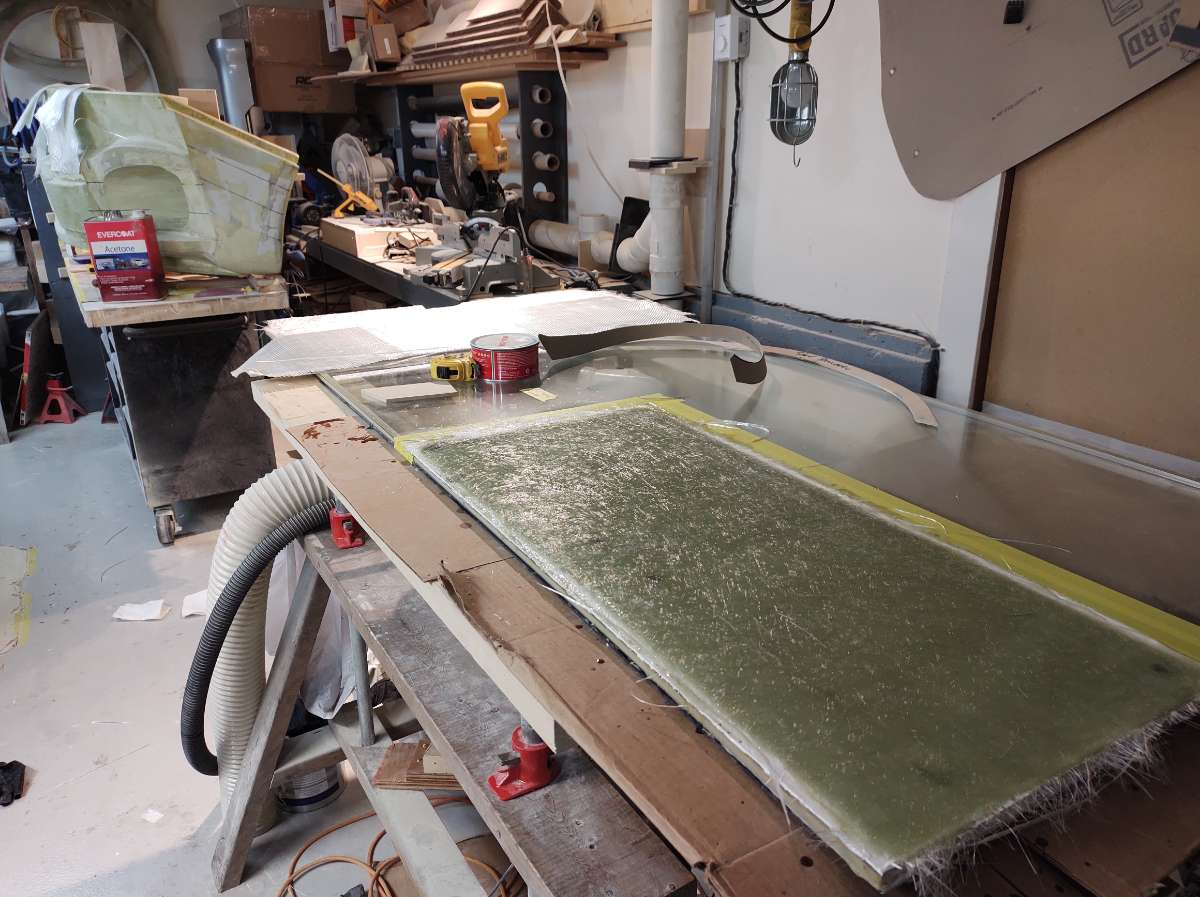
This is how I get both sides as close as I possible can to match up , after the wooden bucks on the car get filled with foam , they get roughed out with a long sanding board , this tends to make the foam flat between the bucks and you loose some of the curves .
So after the foam is close in shape it gets 2 layers of fiberglass mat for a base to add filler without damaging the foam.
I did the passenger side firs for the final shaping because the filler cap for the gas is going to be the original from the Zed , so it has to fit properly .
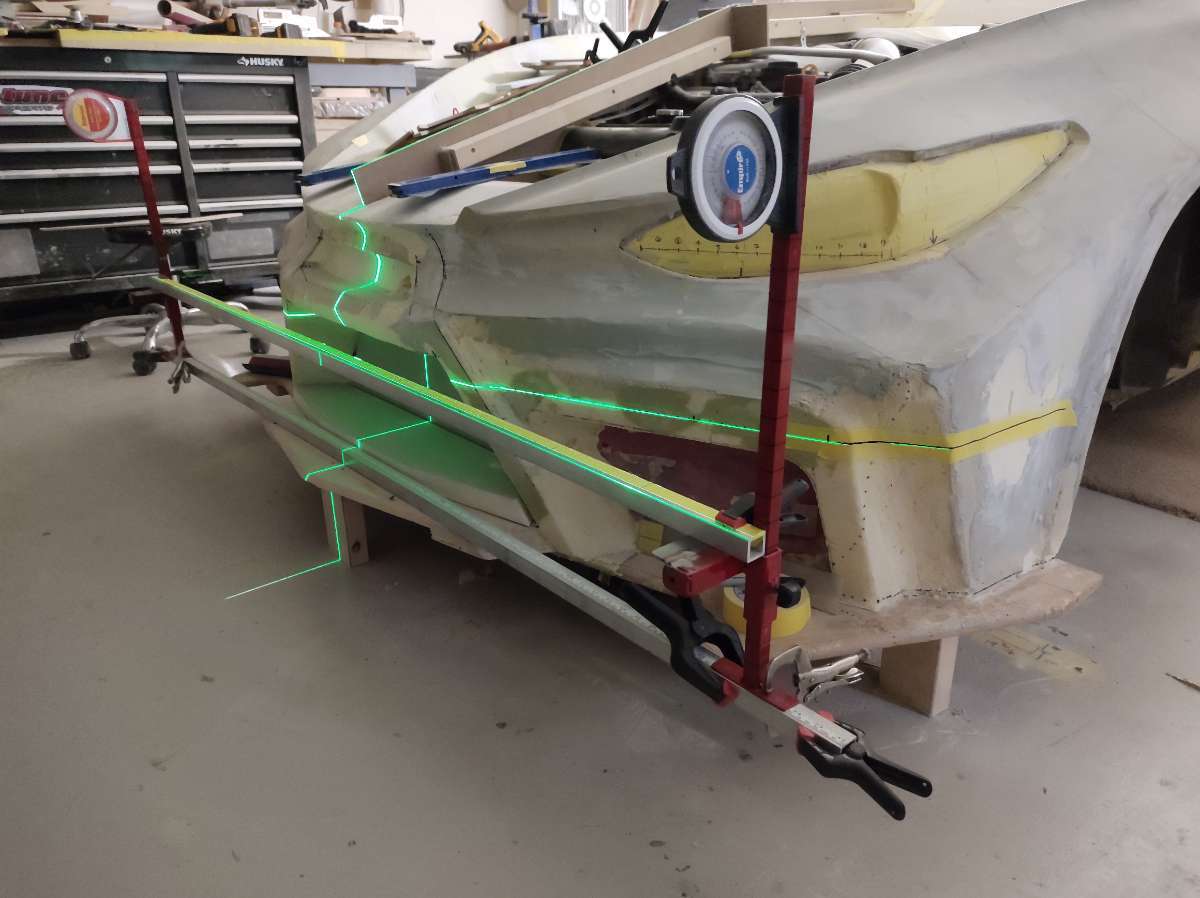
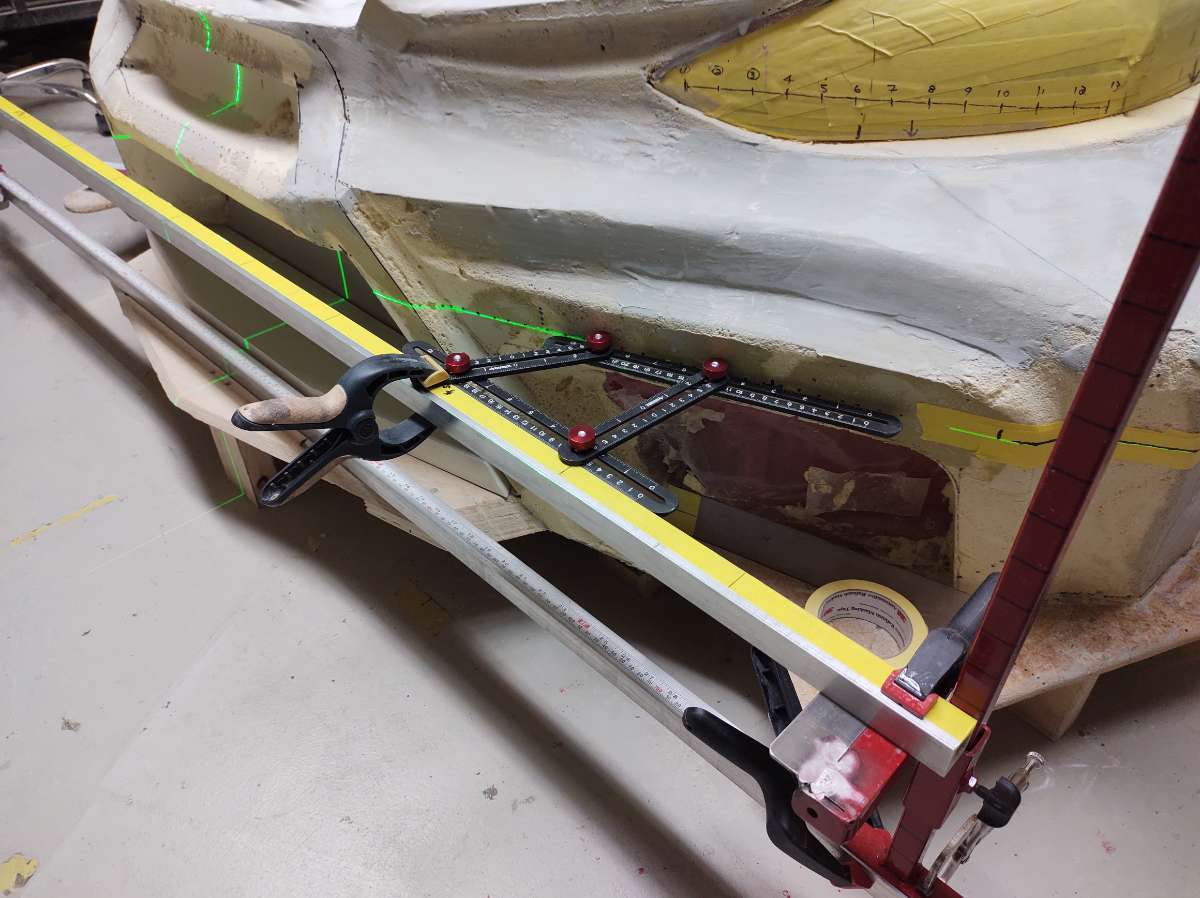
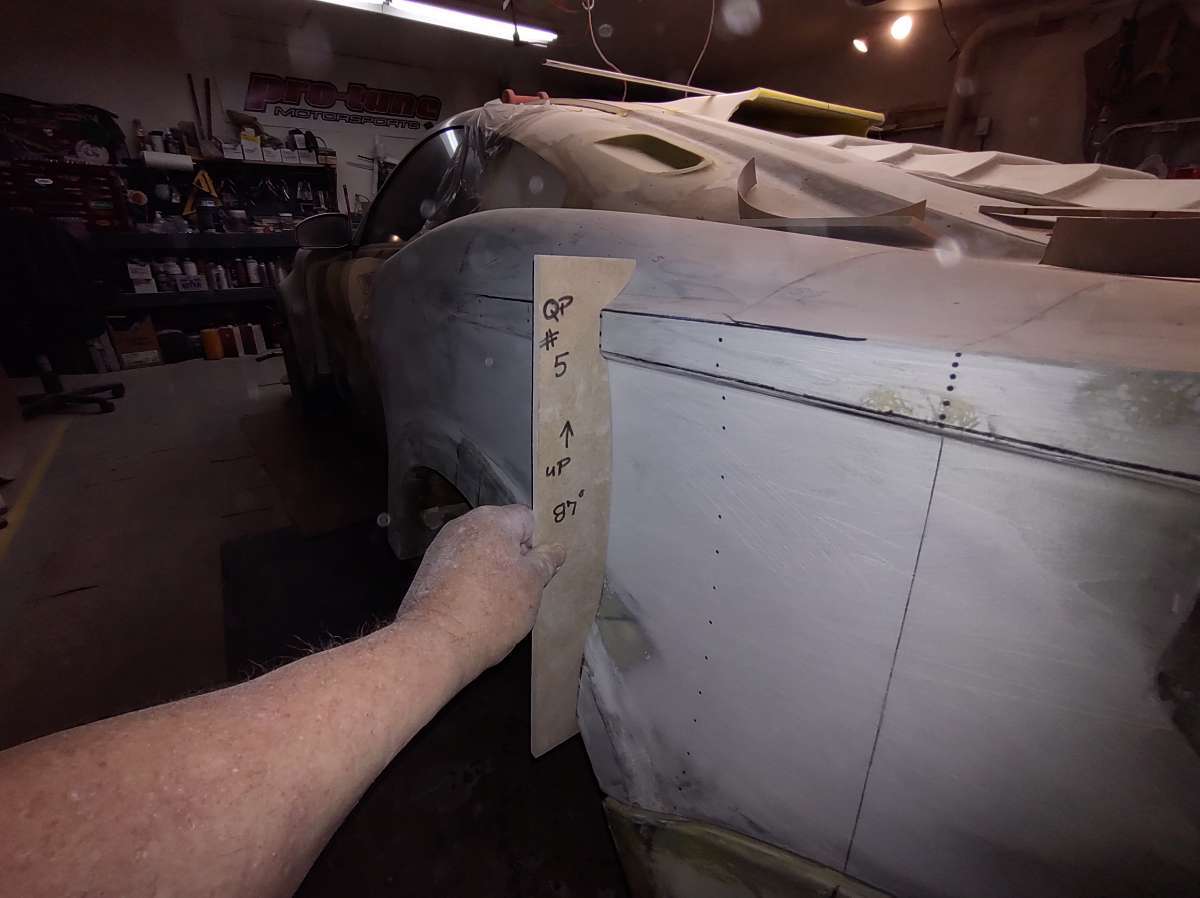
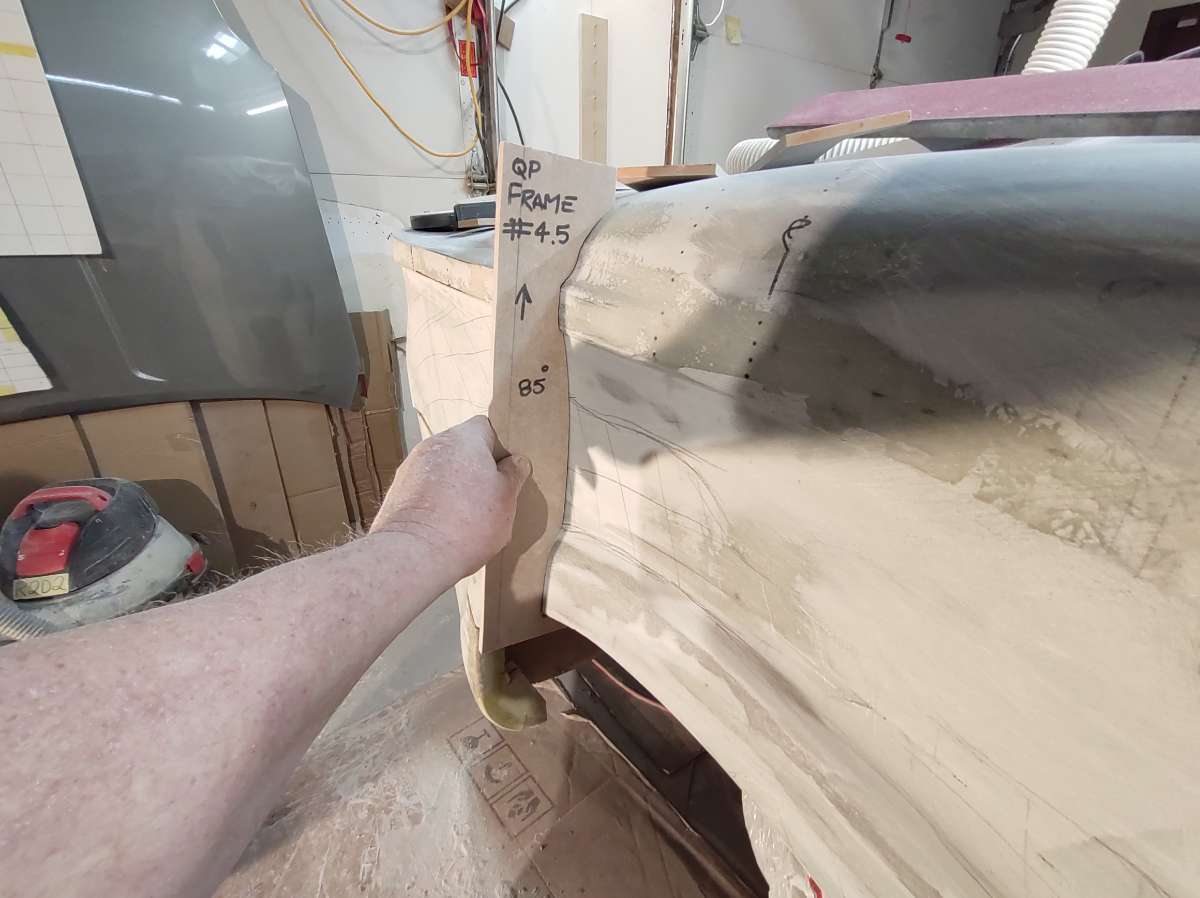
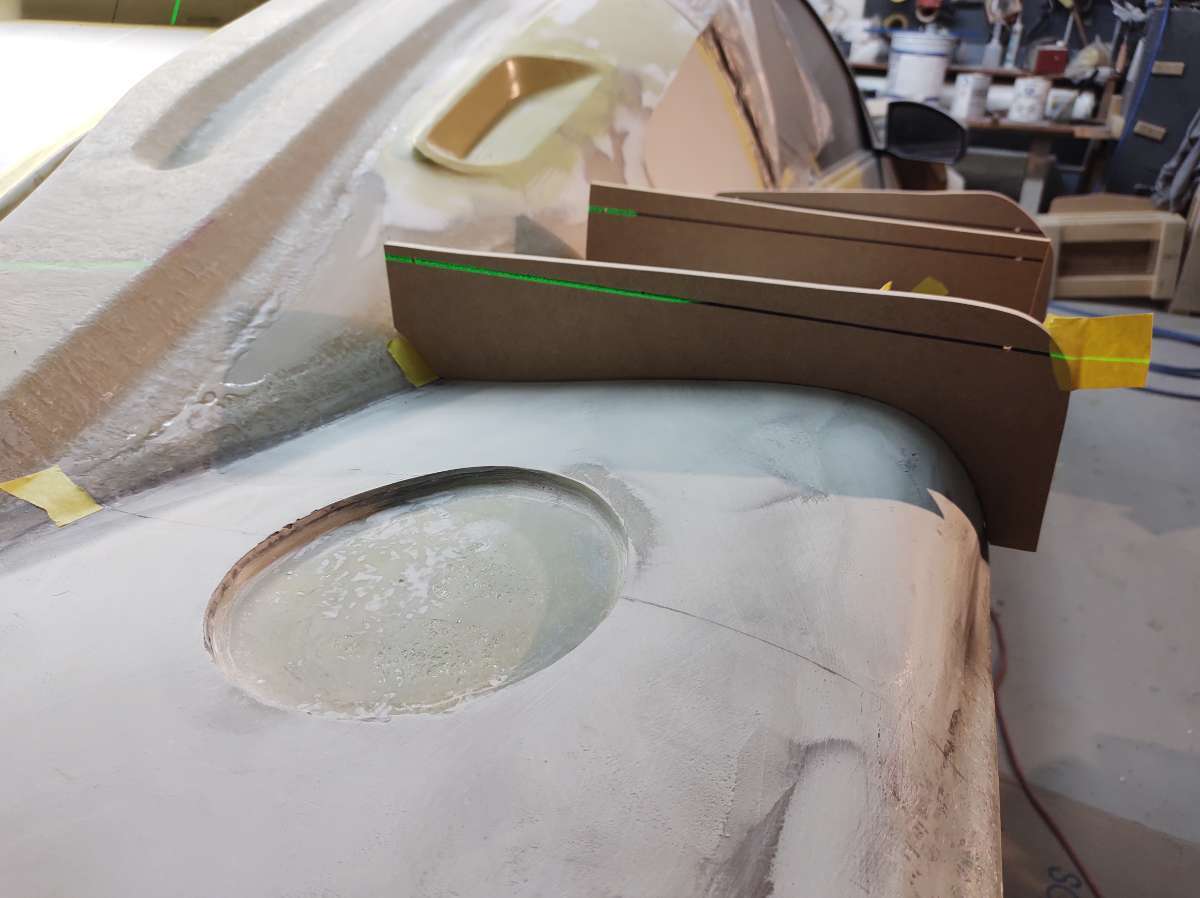
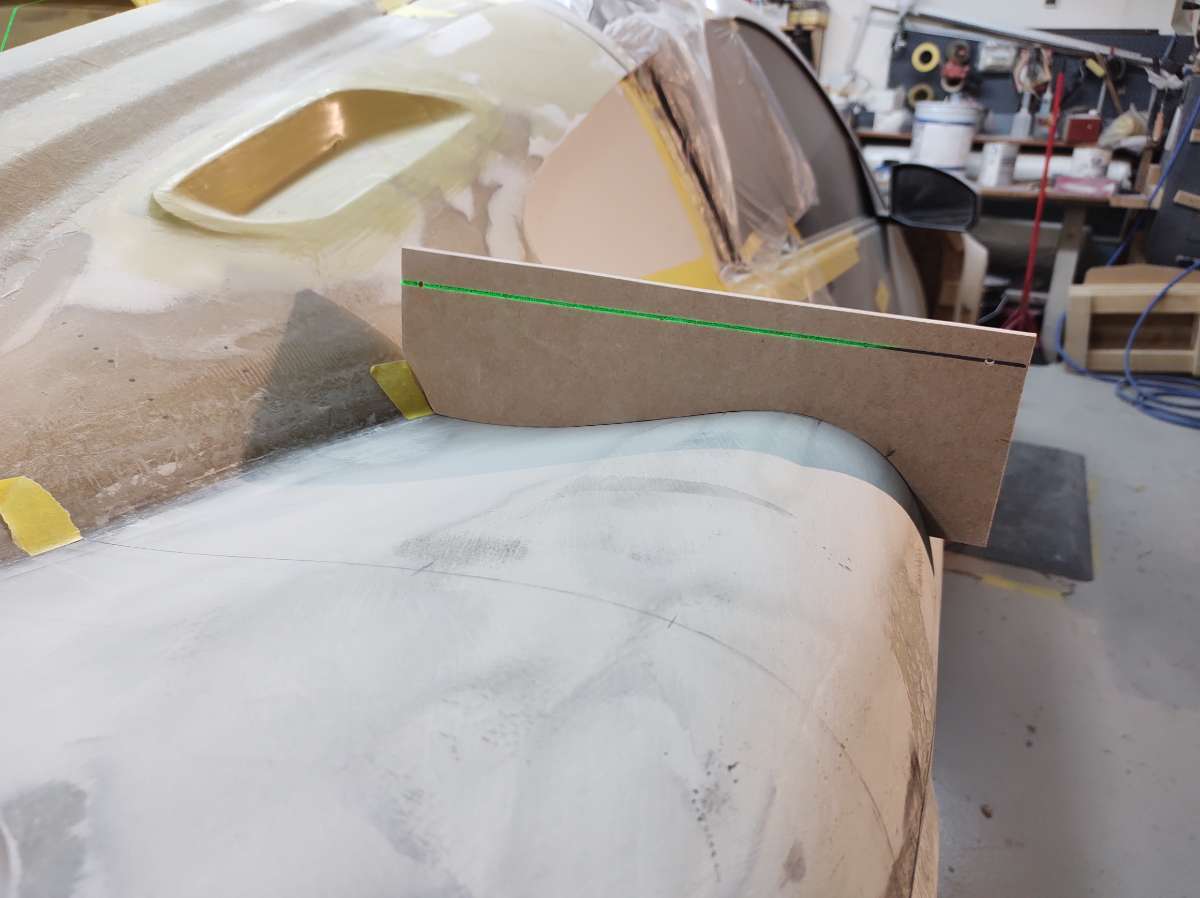
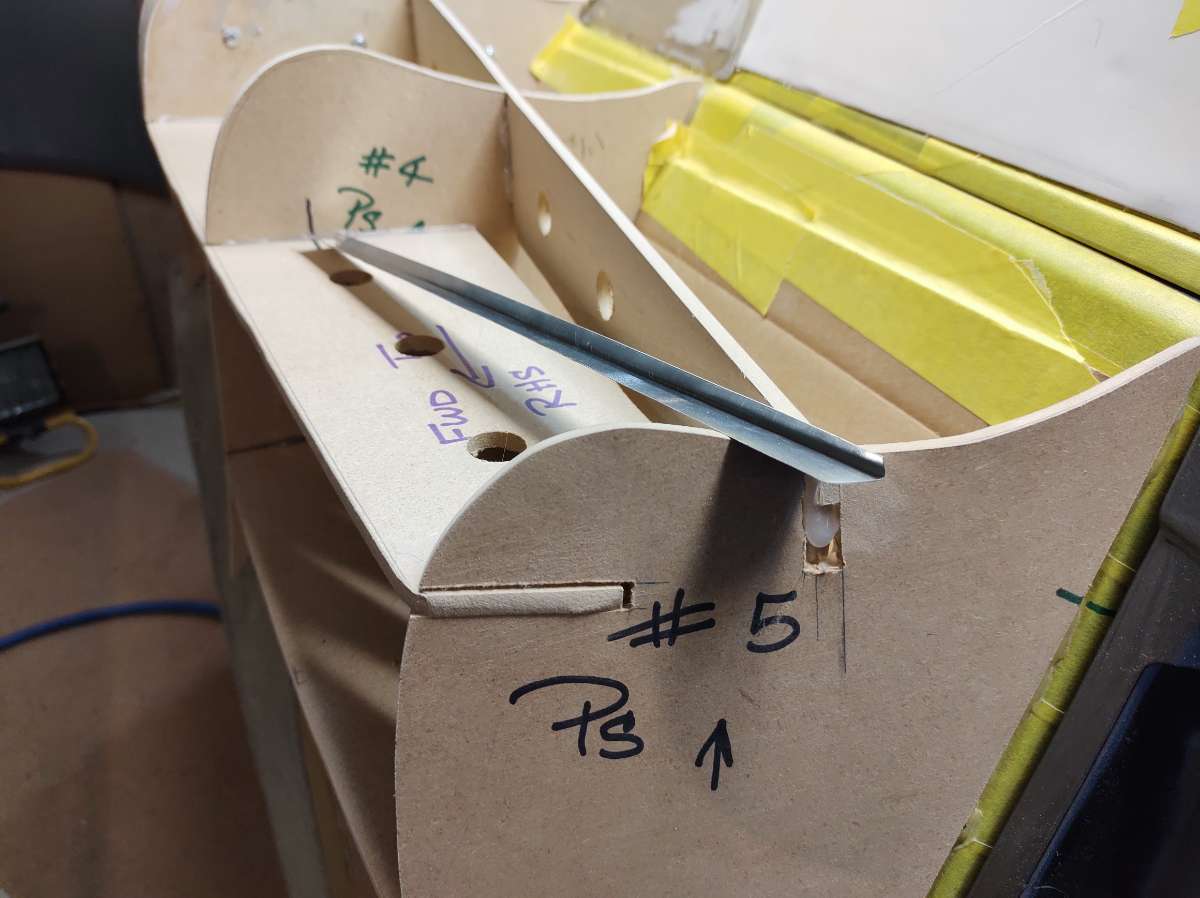
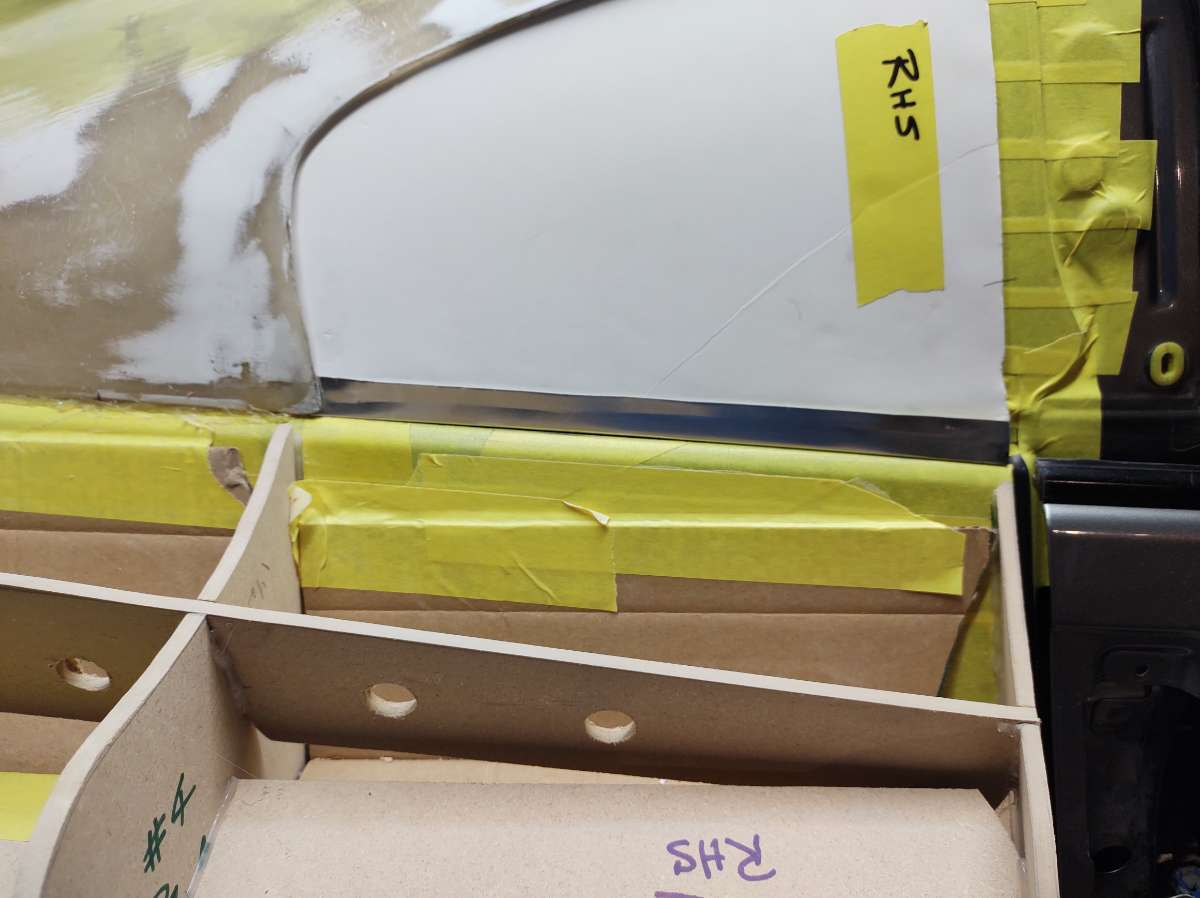
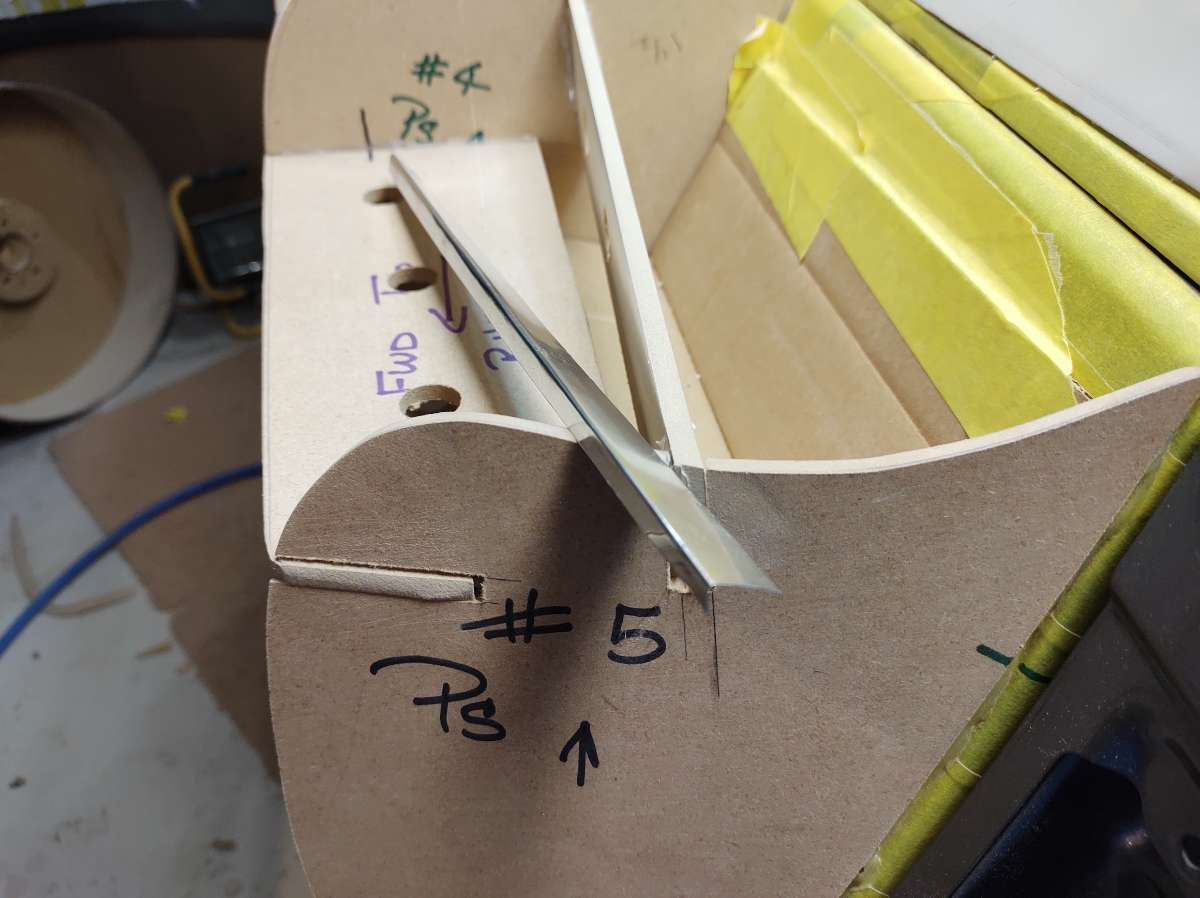
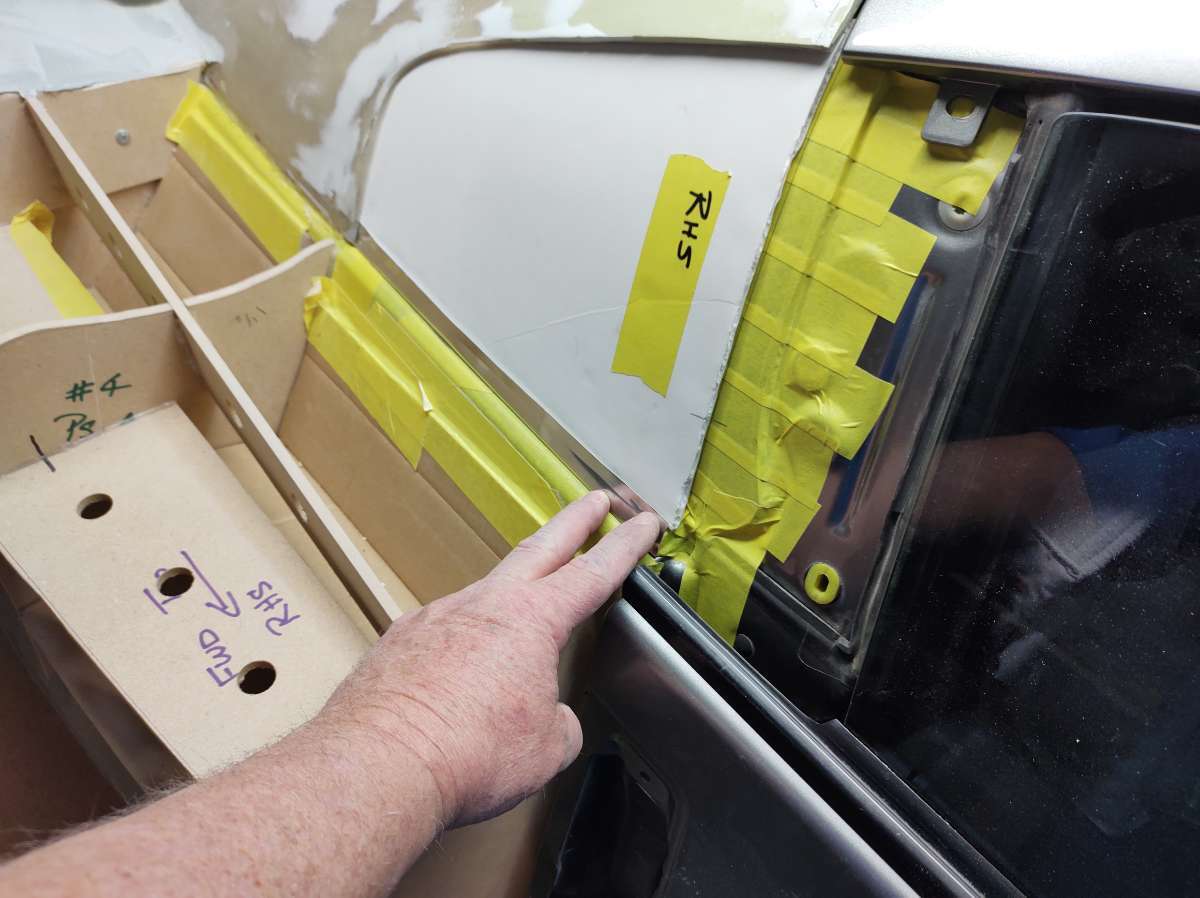
Next I lay out some lines on the car to keep a reference , then make templates to transfer the shap to the other side of the car using the laser to ensure the height .
they all get numbered and I drill a hole at each end of the level line to transfer the line to the other side of the template .
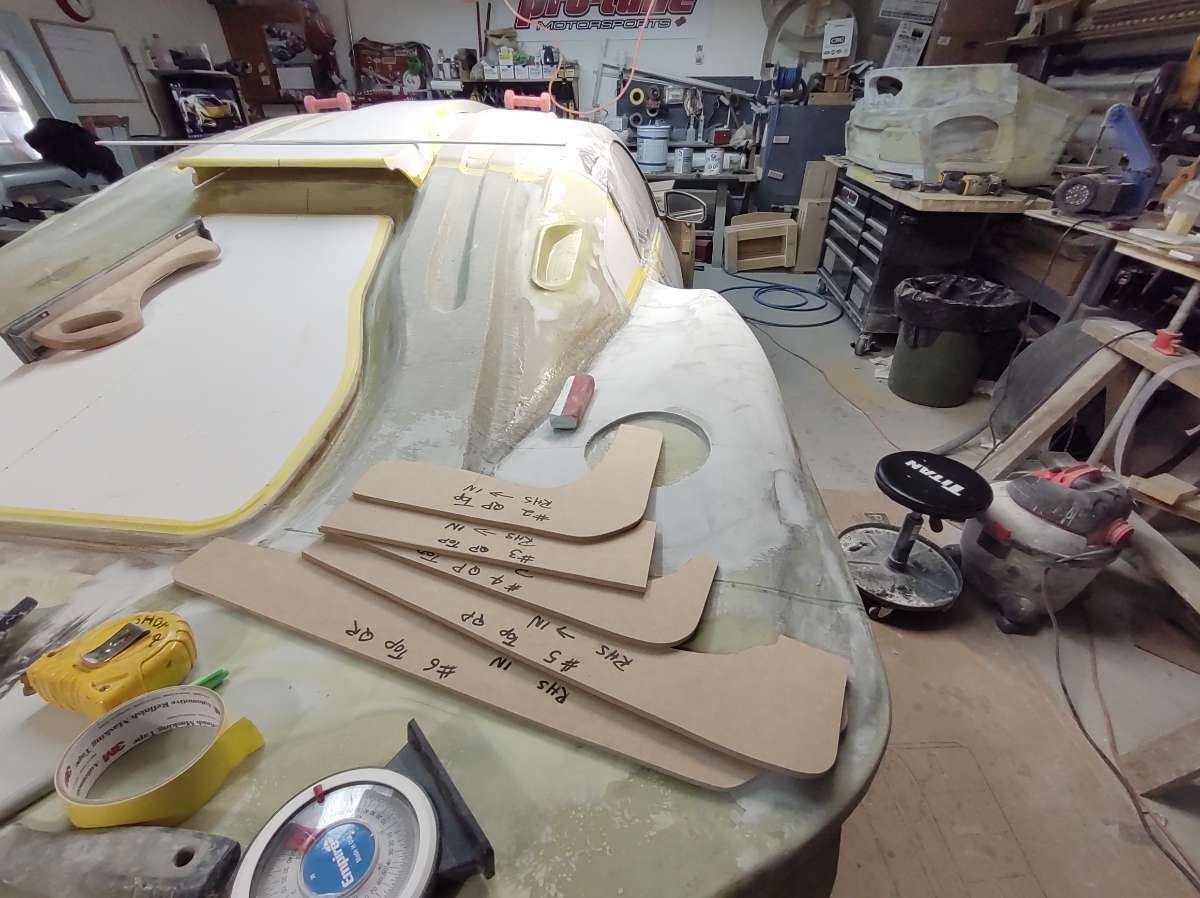
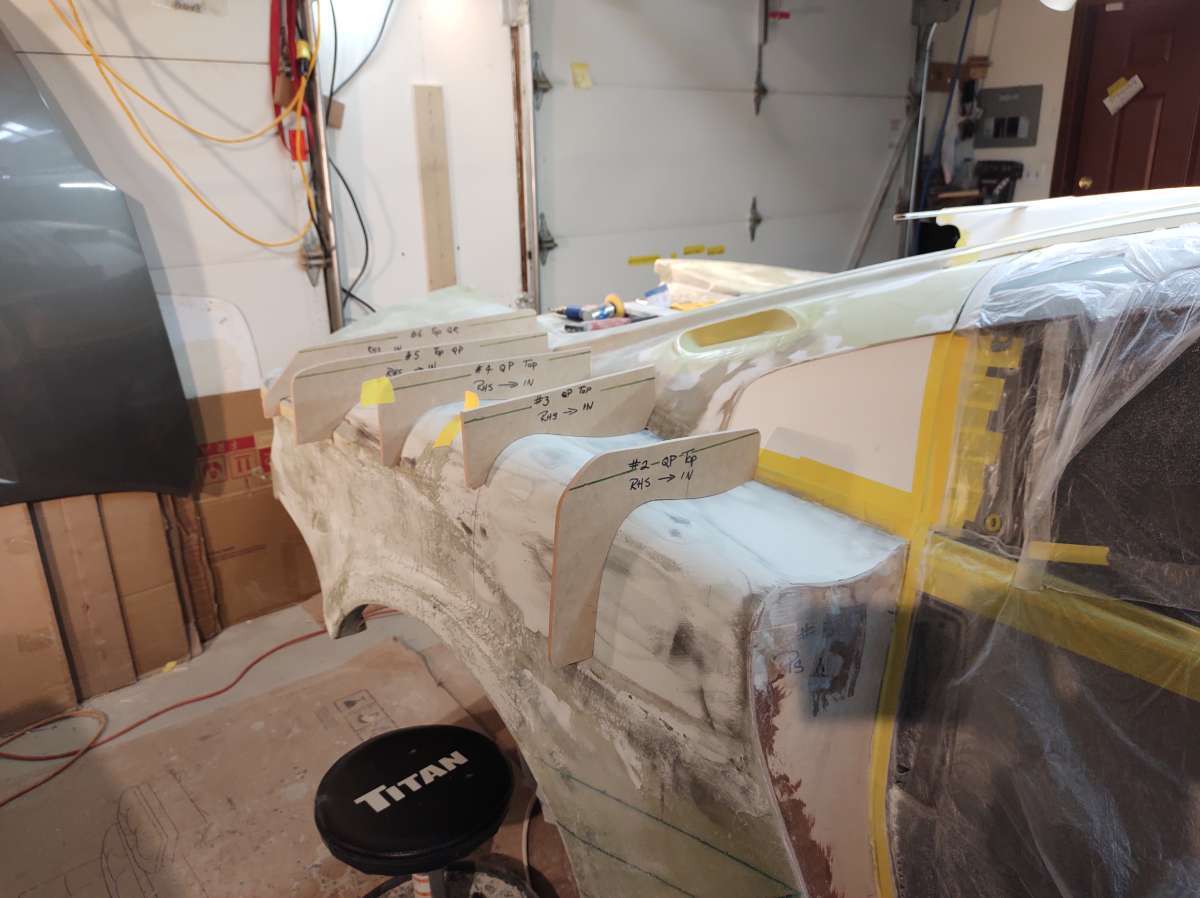
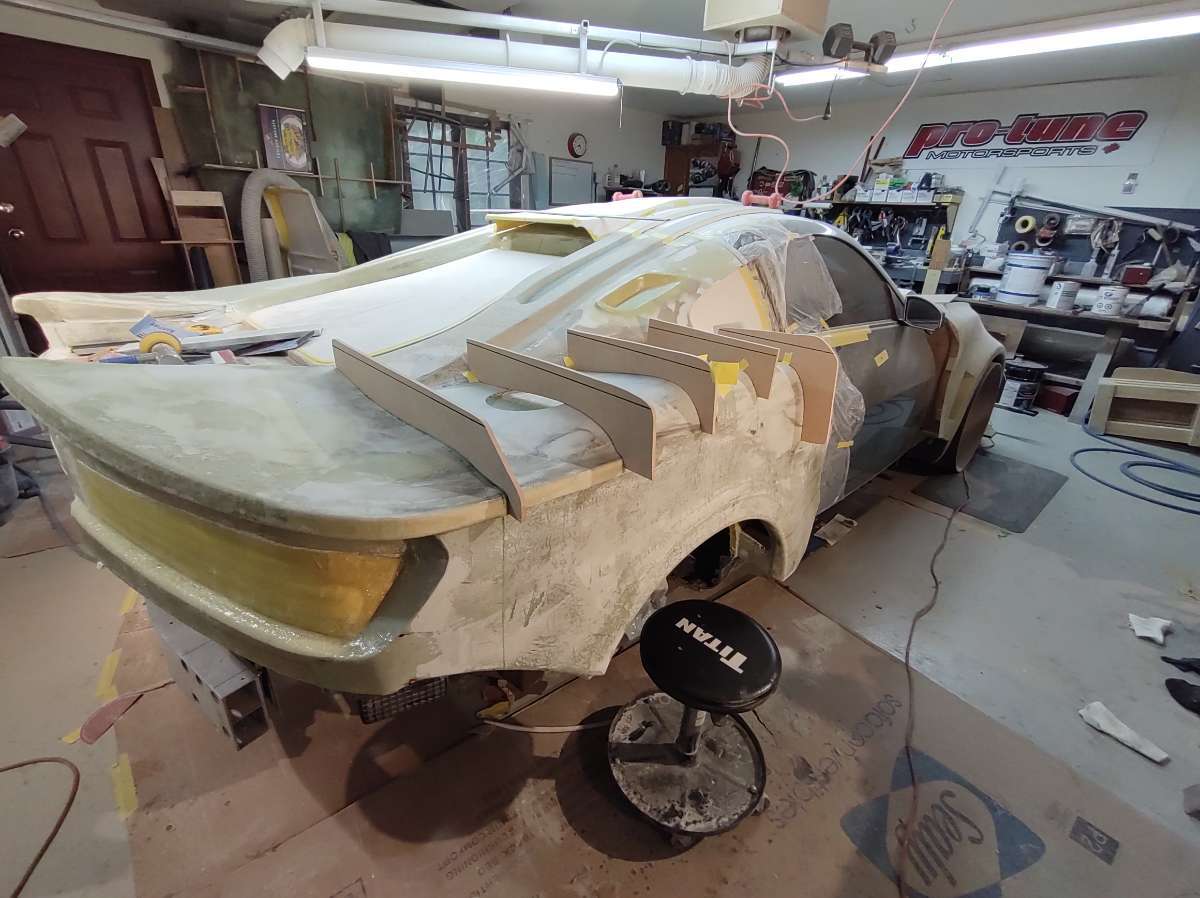
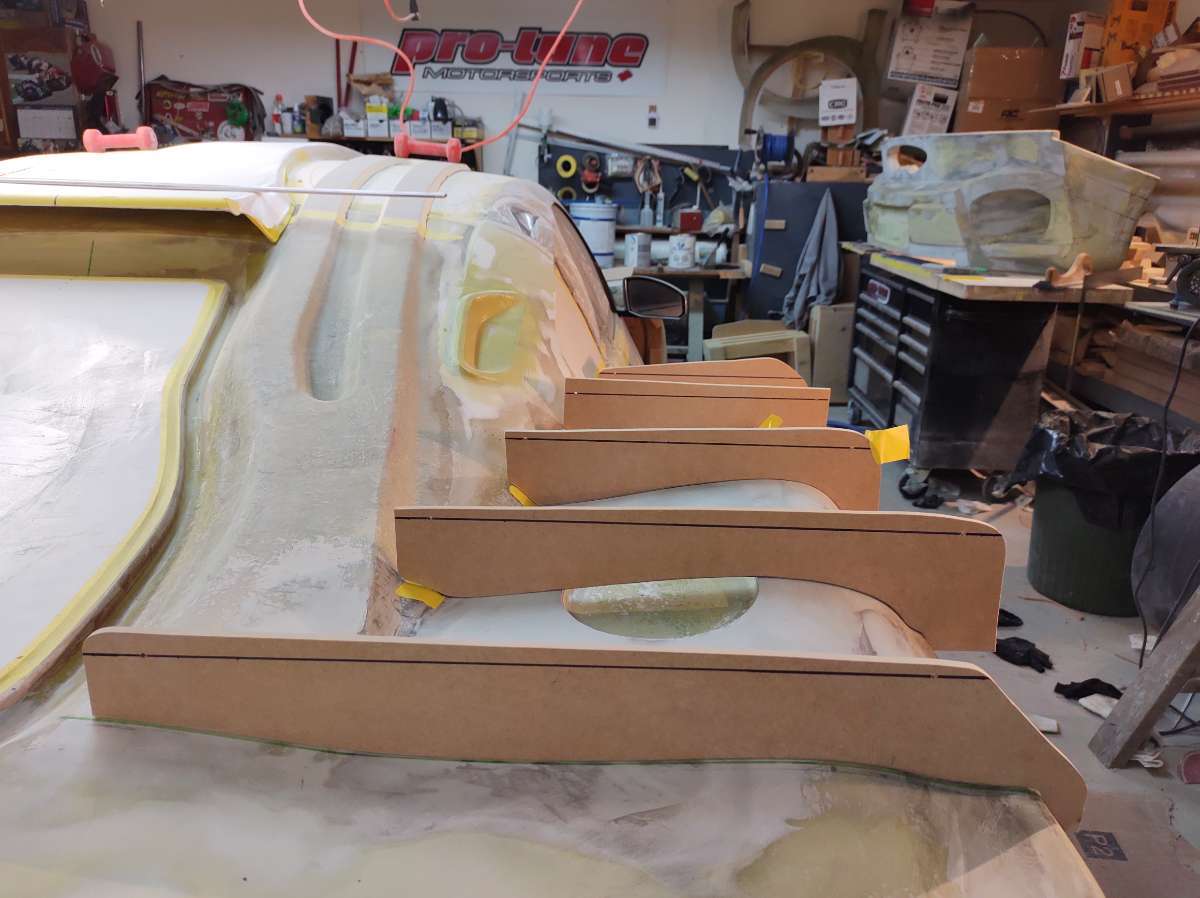
As you can see there is a ton of shape in these quarter panels
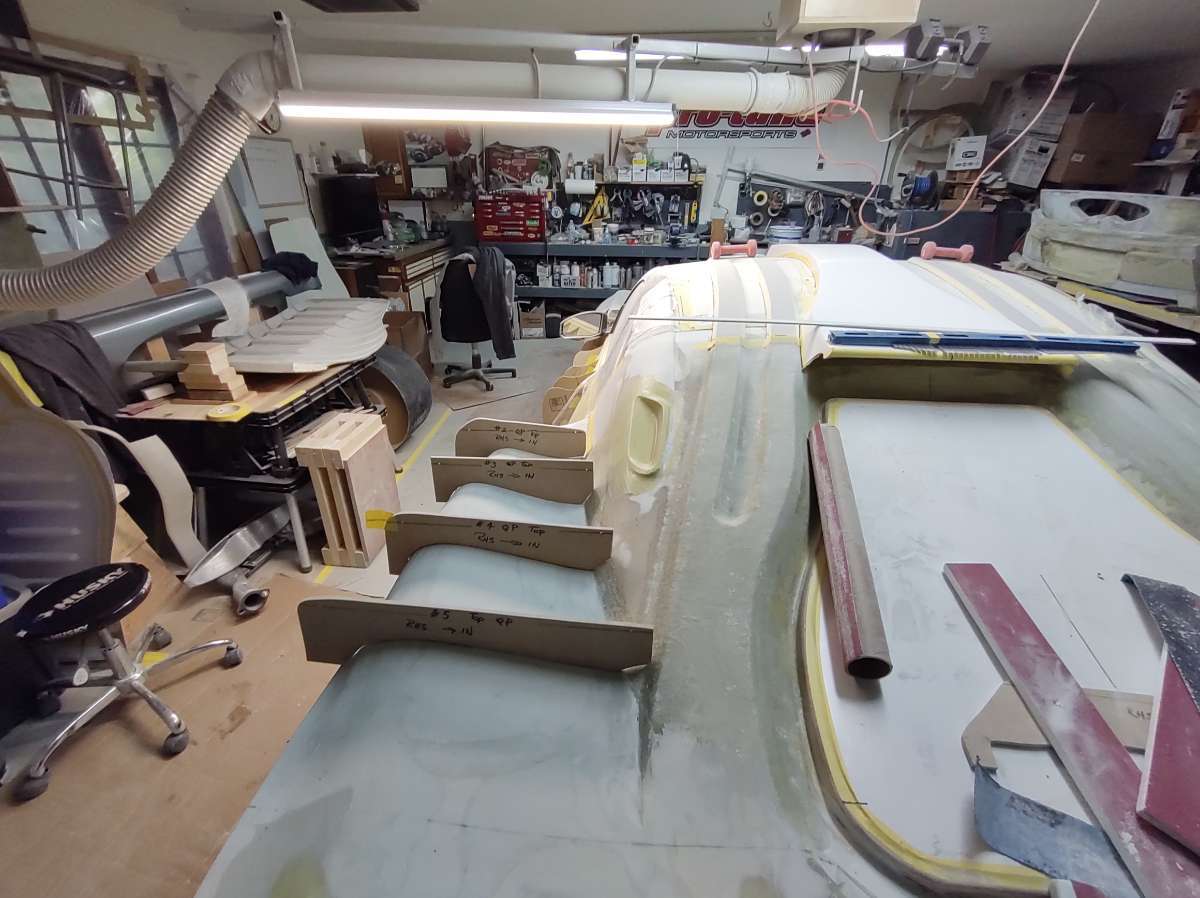
here on the drivers side you can see it's getting close !!!
this is frame #3 passenger side
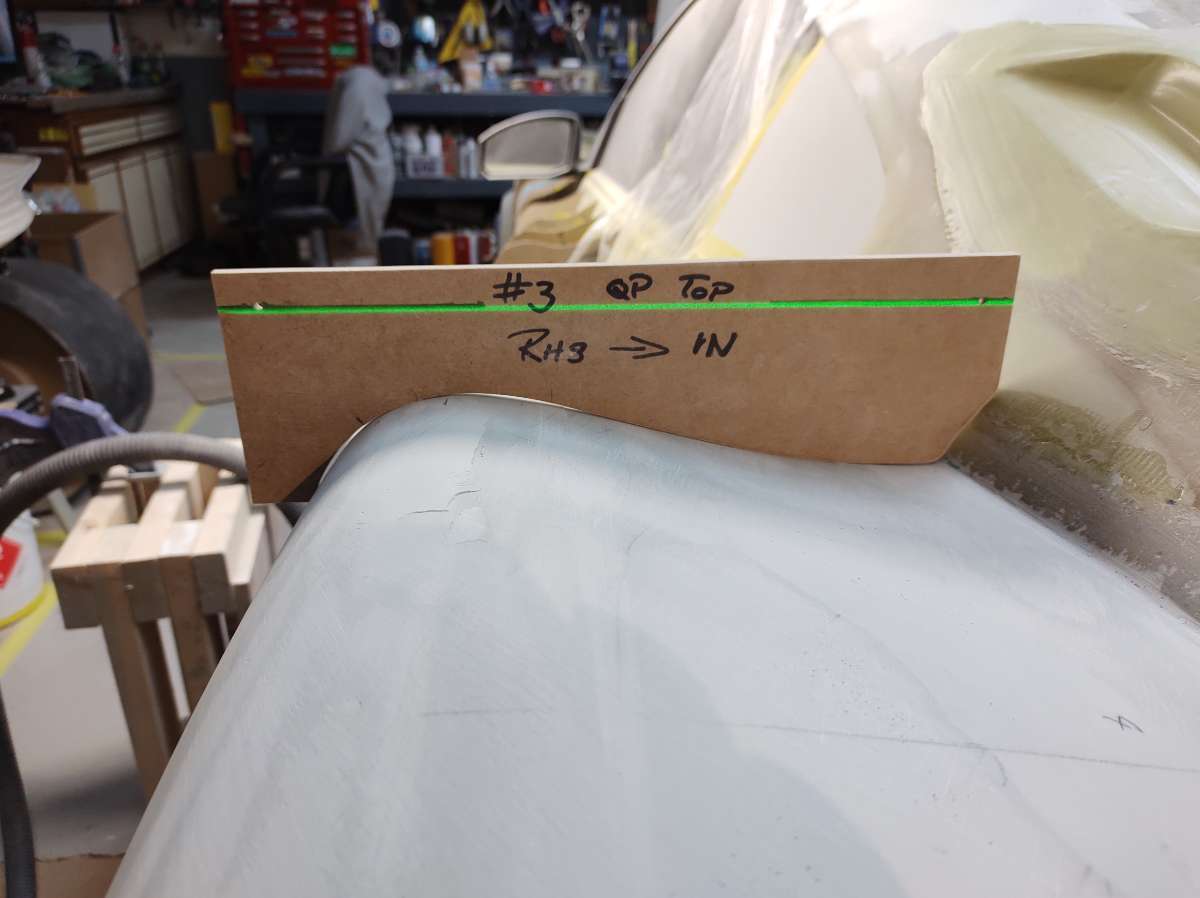
As you can see here the laser line on frame #3 drivers side , the outboard end of the template needs to go down a bit , so some more sanding .
Ah too much fun !!!
Stay tuned and stay safe !!
Cheers
-
7
-
-
Hi
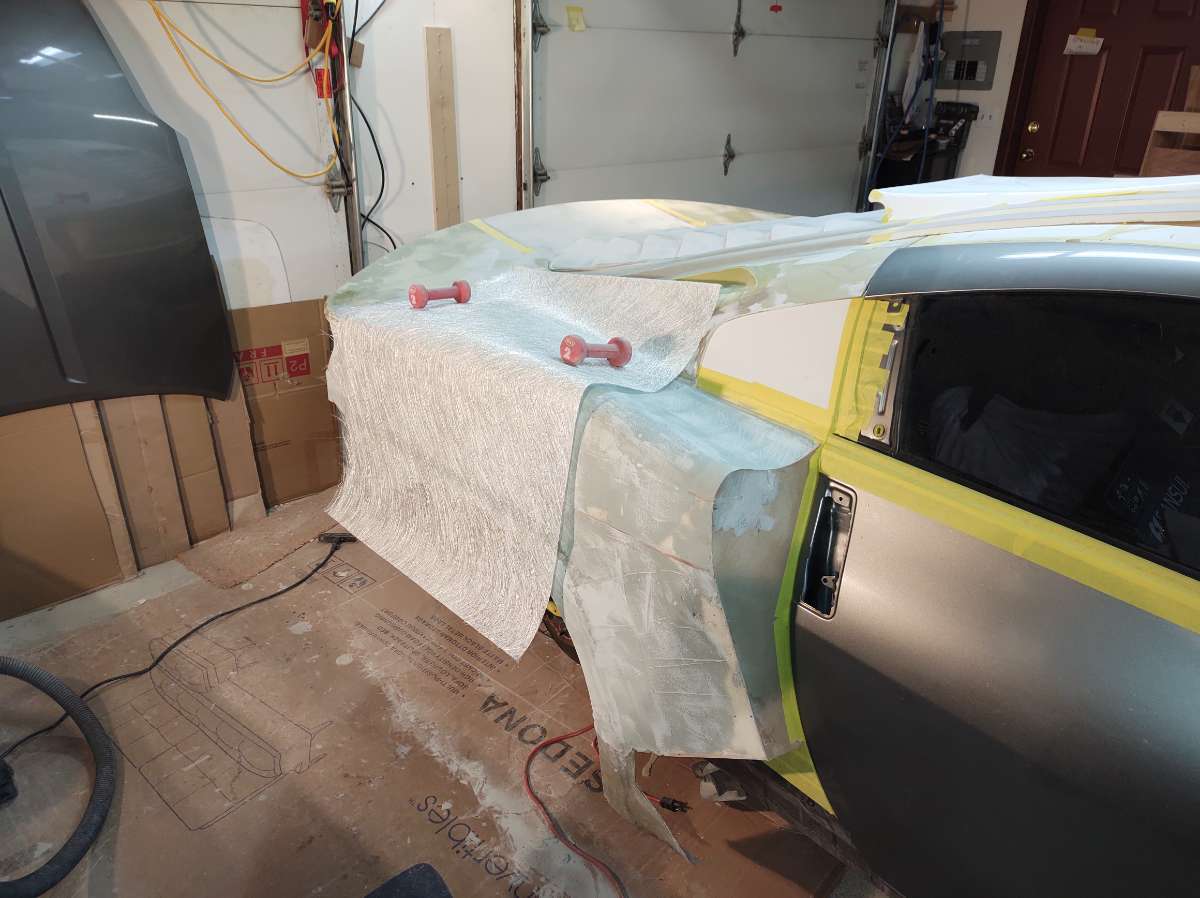
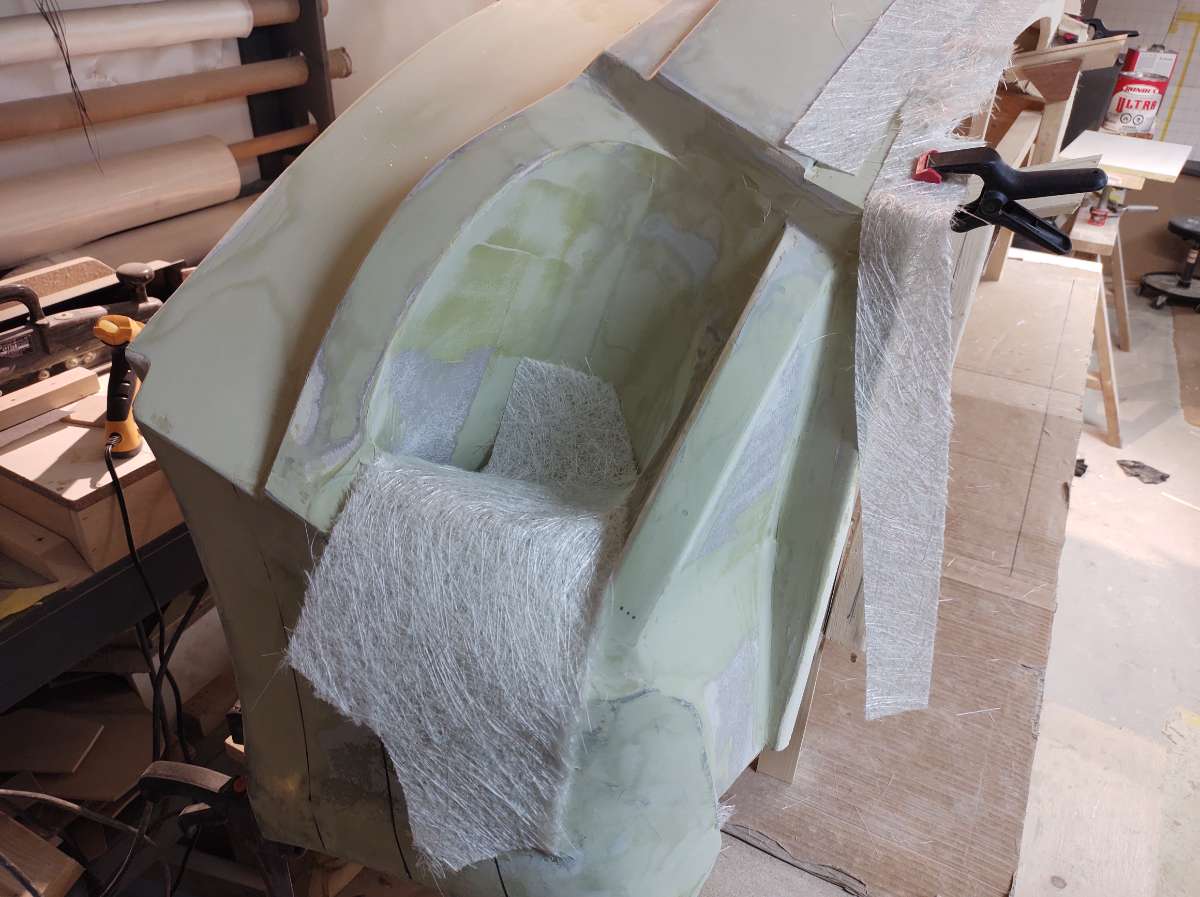
More on the back of the beast .....
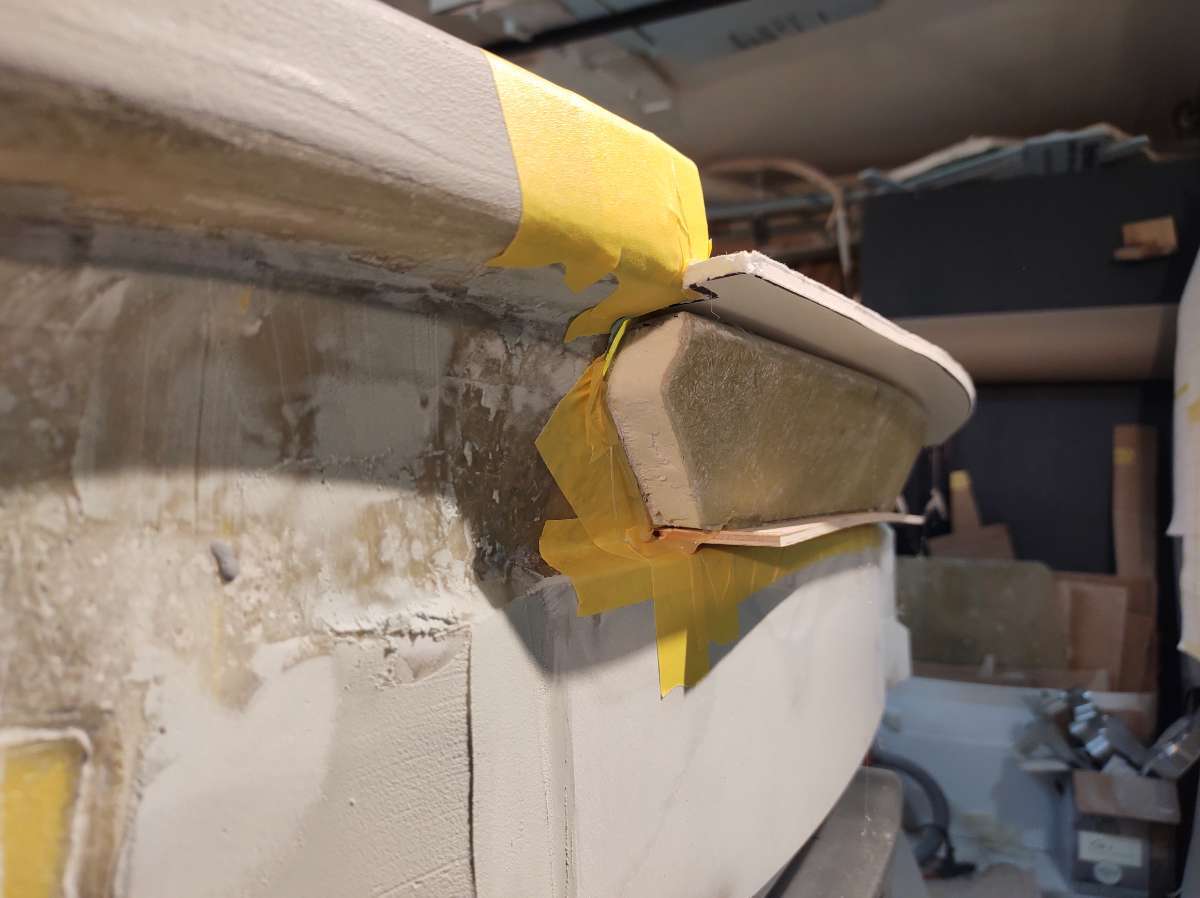
As you can imagine these tail lights would be hell to fiberglass over , so I made some quick covers for them .
Made a pattern with some thin strips of light cardboard and glued the strips together.
Used some thin aluminum flashing .
Then taped them over to stop the resin from getting in and a couple of coats of wax .
So when I take all this apart it wont be stuck to the lights
Then the fiberglass
More to come , out of time to post stuff . off to work on the car .
Stay tunes and stay safe !!!
Cheers
-
7
-
-
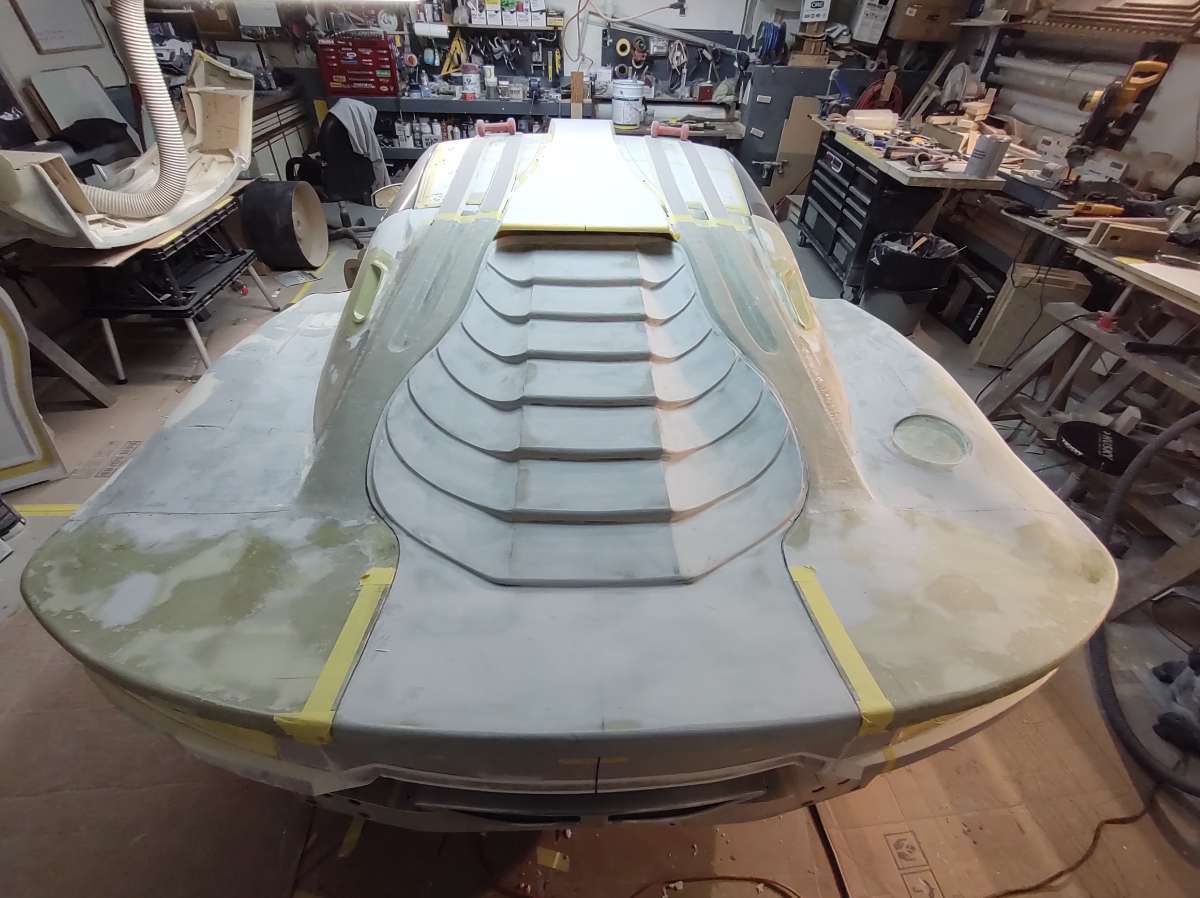
Hi everyone I hope your enjoying this , I am going as fast as I can , they say quality takes time ............well that's for sure .
I also want to thank all the fallowers for your support , the kind words really help stay motivated .
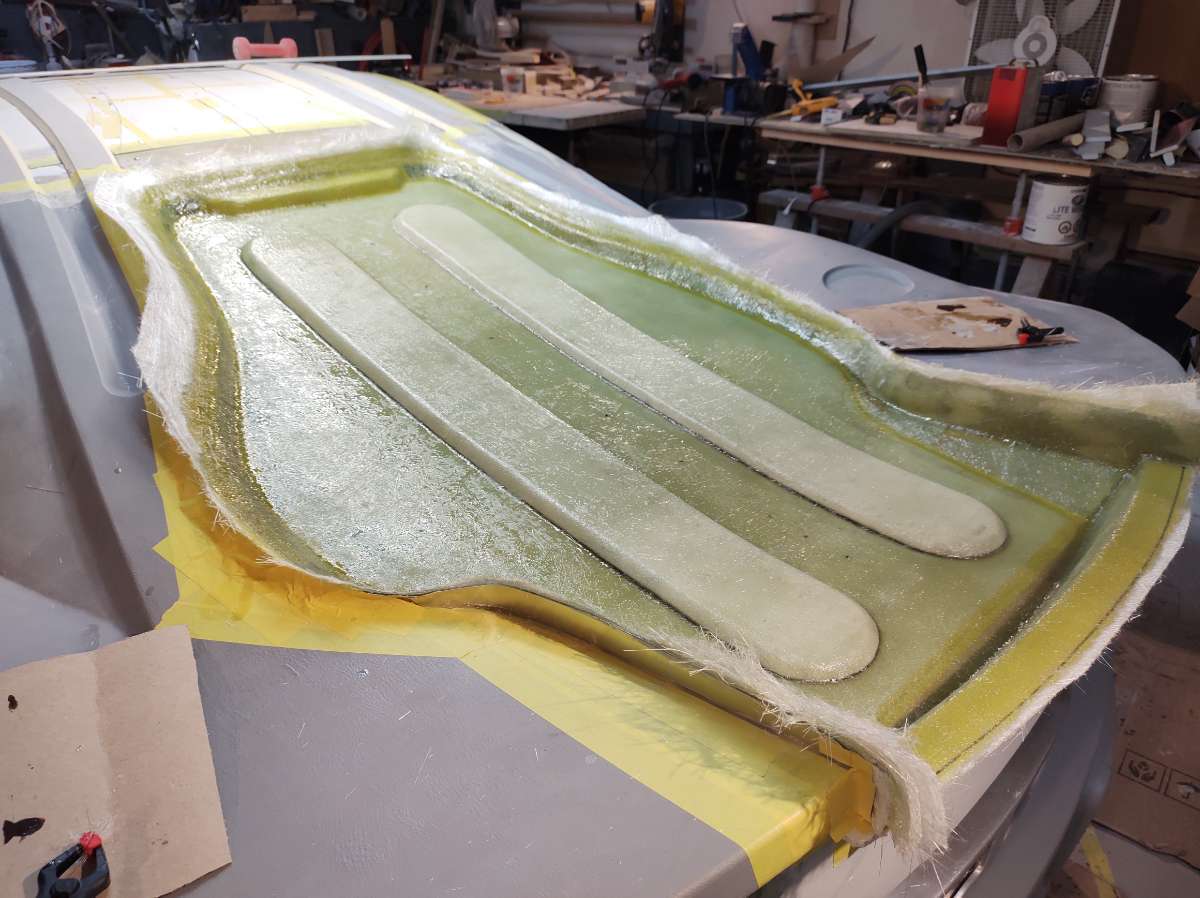
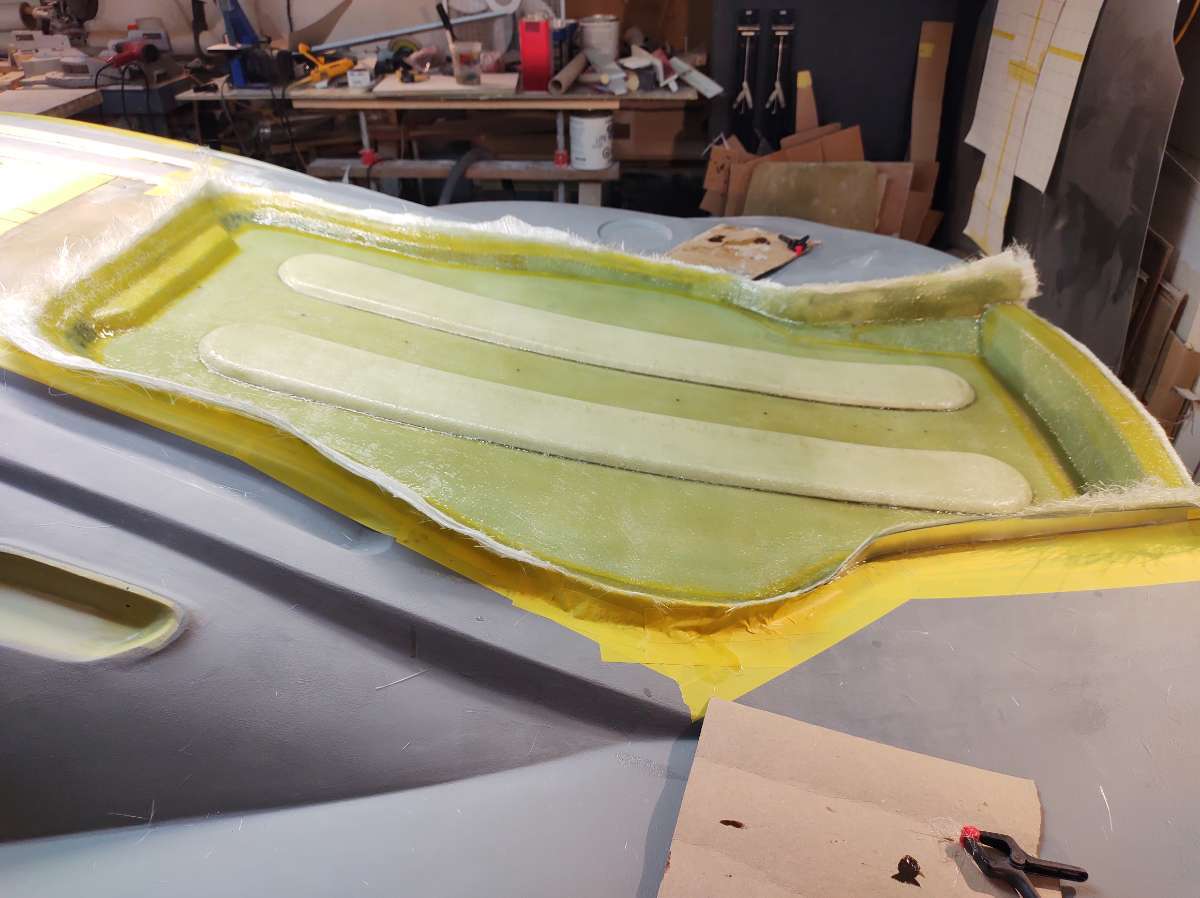
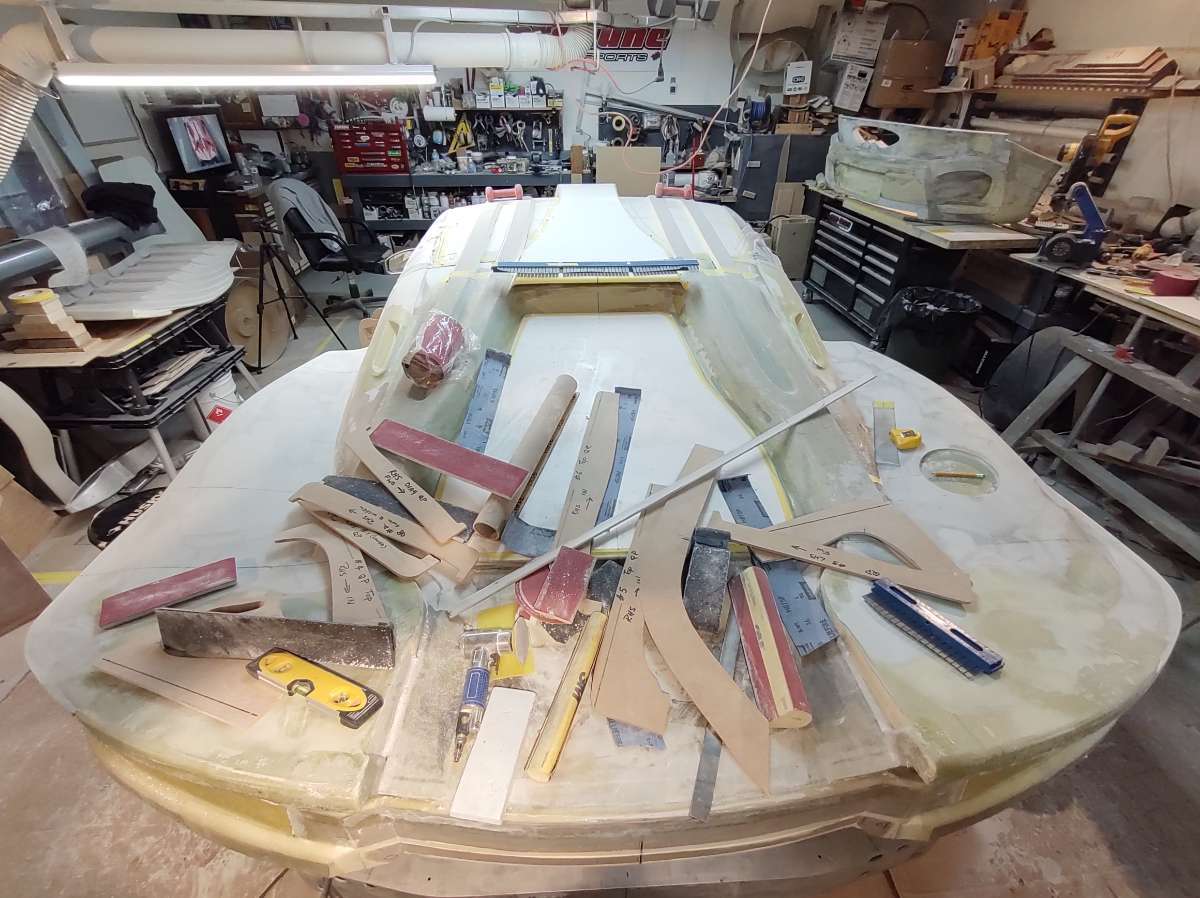
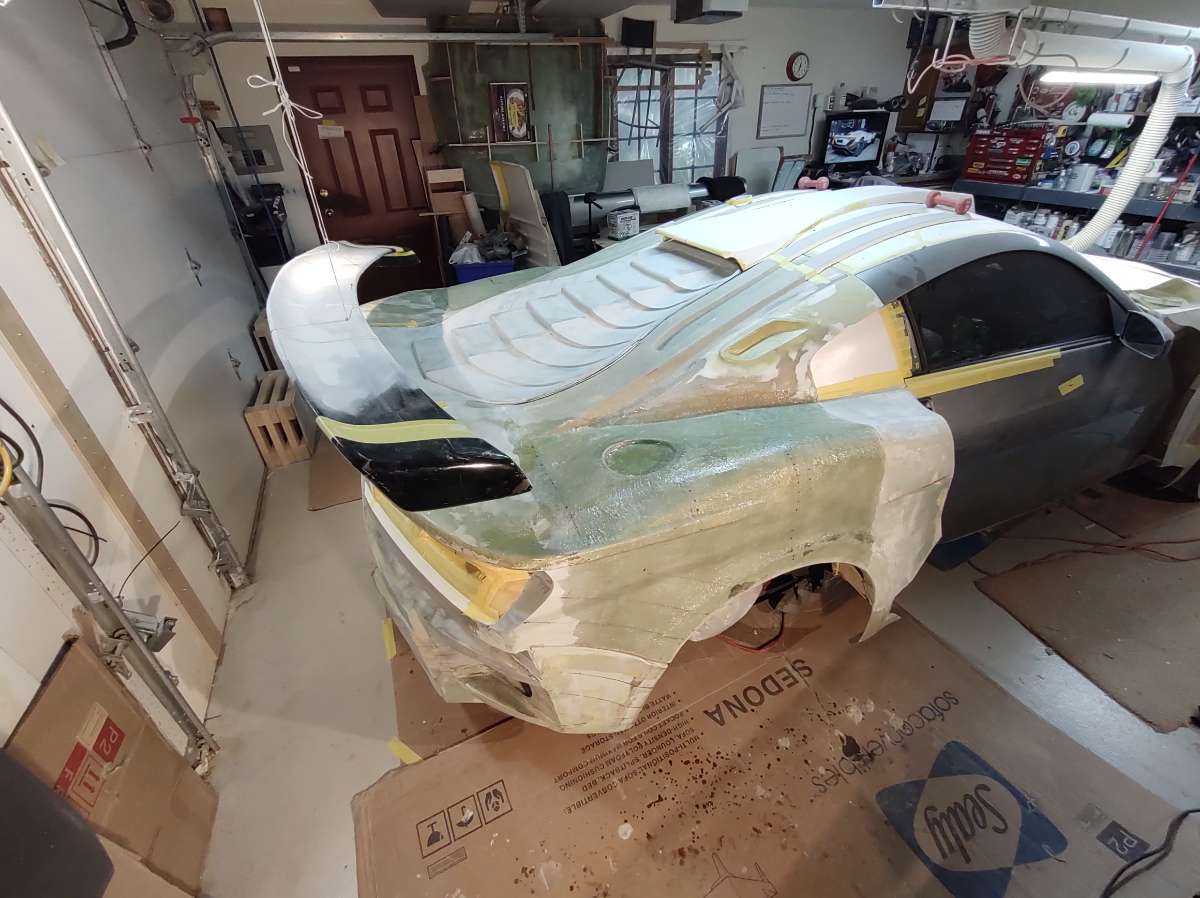
Next is more work on the quarters , really taking shape now .
I make templates to keep things in check , it's exceedingly hard to to measure and to keep both sides the same .
It's like trying to measure an egg !!!
so I just flip the the template to check the other side . that's why you see lines on the car .
Glassing the front sections of the quarters .
you have to glass over the foam for strength , and so I don't sand the filler too far , the foam sands like butter

These glass strips go under the back edge
-
5
-
-
Hi
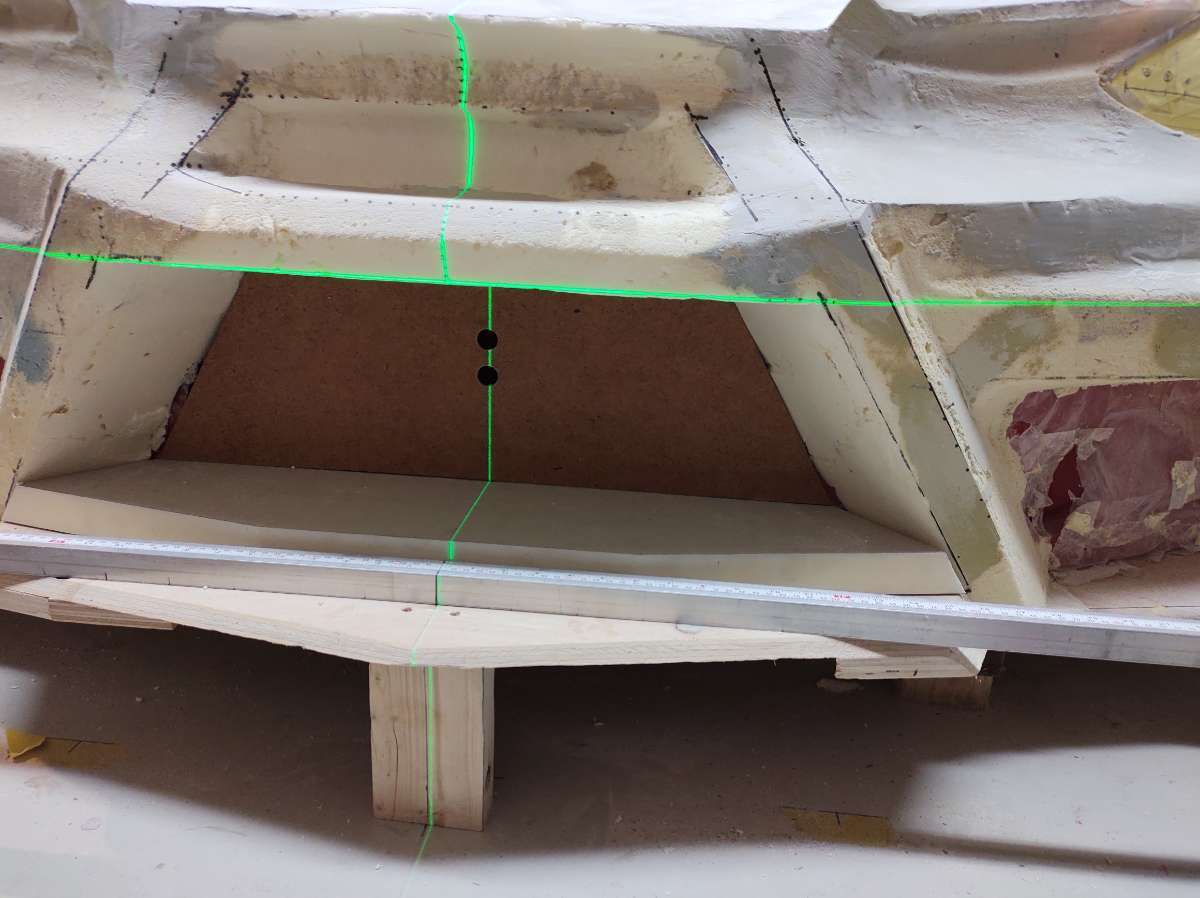
Next is to cut the slots in the deck lid for the wing brackets to clear .
These slots will allow the win brackets that attach to the trunk lid sides to clear when the trunk is down , this also allows there to be options , no wing or winglets that go on the car and not on the trunk lid .
-
6
-
-
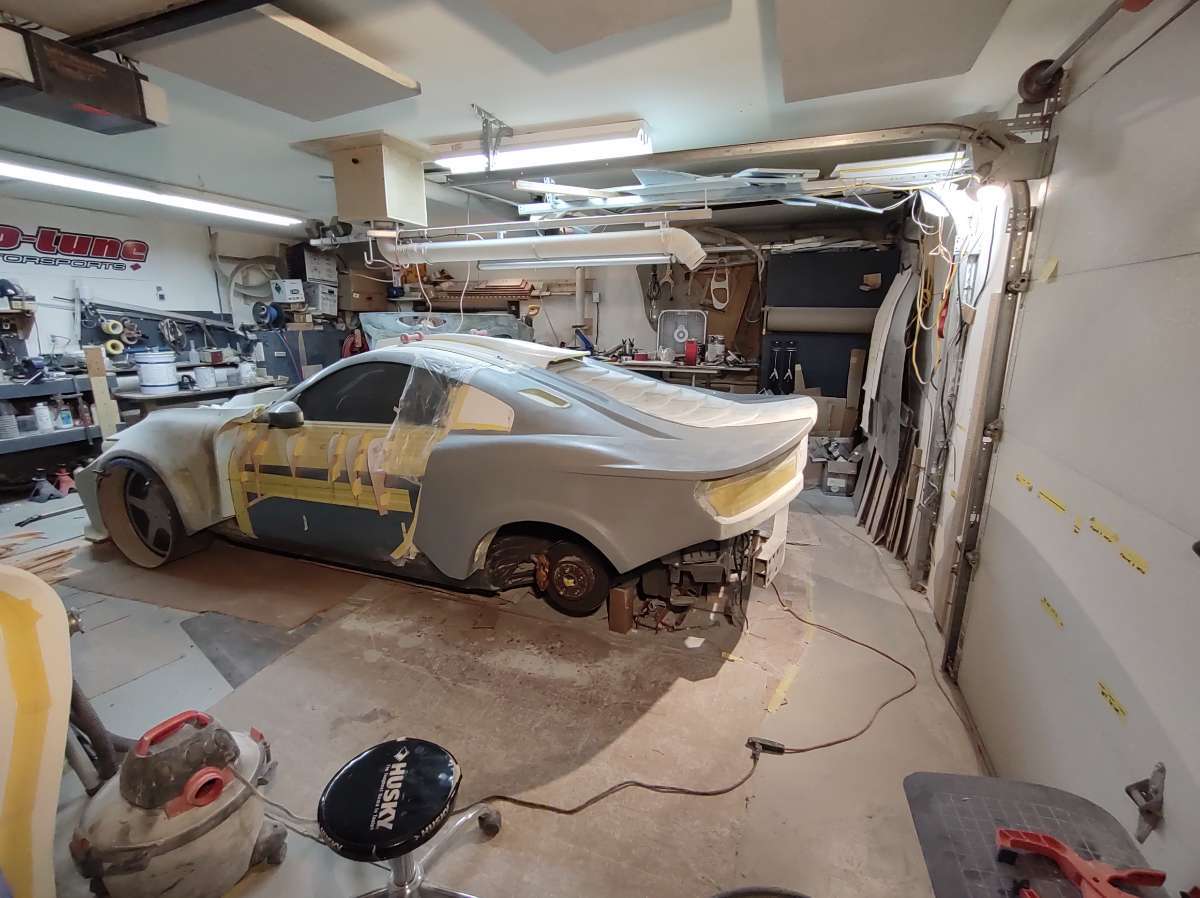
Hi everyone
Been busy , here is an update
Glassing and bodywork on the rear quarters , some work on the back part of the trunk lid bottom , and some slots on the rear deck for the wing brackets to clear .......... yes have to think ahead all the time .
First thing is the back of the deck lid and the back bottom of the trunk lid
Shaping the piece to form the back of the trunk
Adding some gussets to keep it in place while glassing
filling in the gaps on ether side
cutting the trunk part out
-
2
-
-
Hi everyone
It's time for an update !!!
As I said I am going full steam ahead , so not much time for anything else but the car . a couple of reasons , 1 I want it done and 2 I am losing the Shop in the forest , possibly as soon as the end of May or sooner .
So enough about that !!!!
been busy .
Getting the quarter panels read for foam , had a hard time finding the 2 part spray foam and it's tripled in price ....
Made some protective trim for the opera window rubber so it doesn't get destroyed by sanding
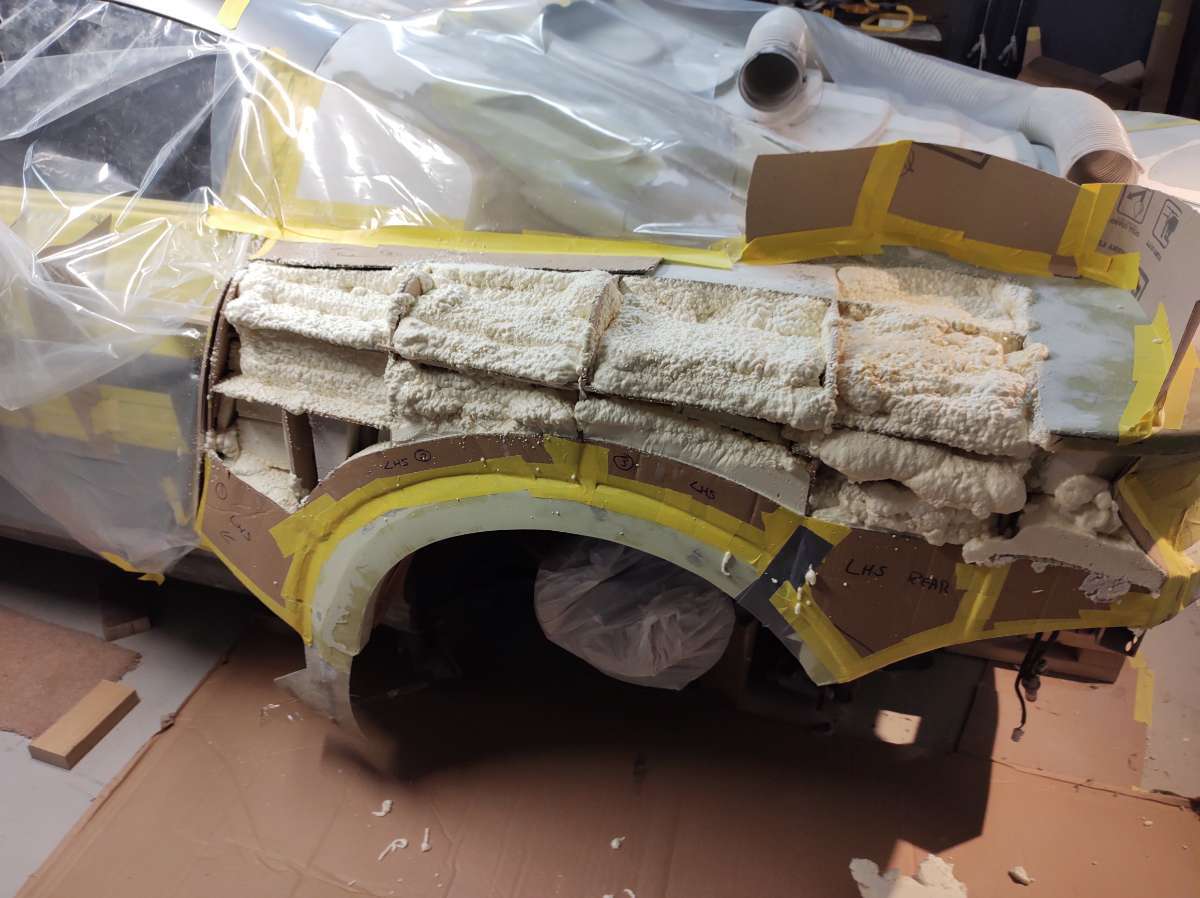
The line from the top of the head light ties into the feature line off the rear deck lid
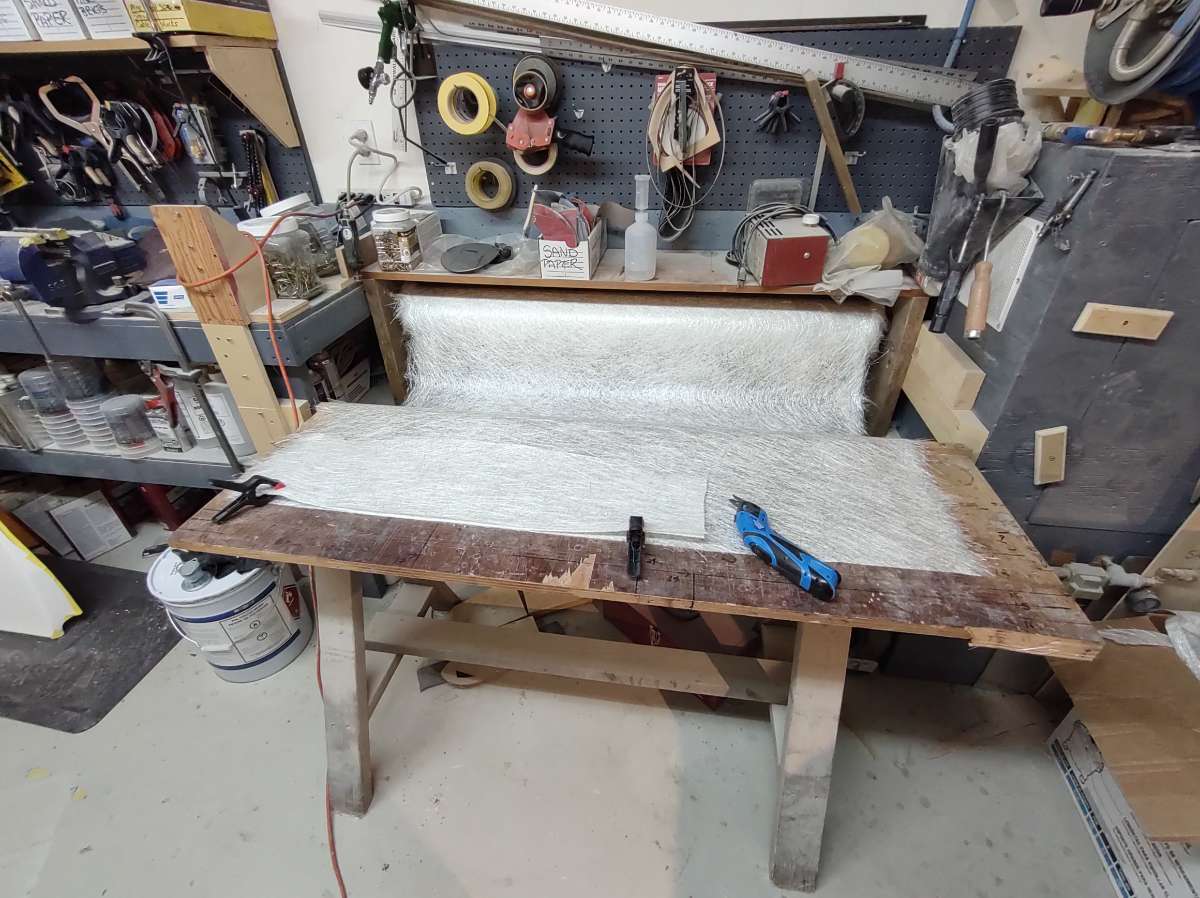
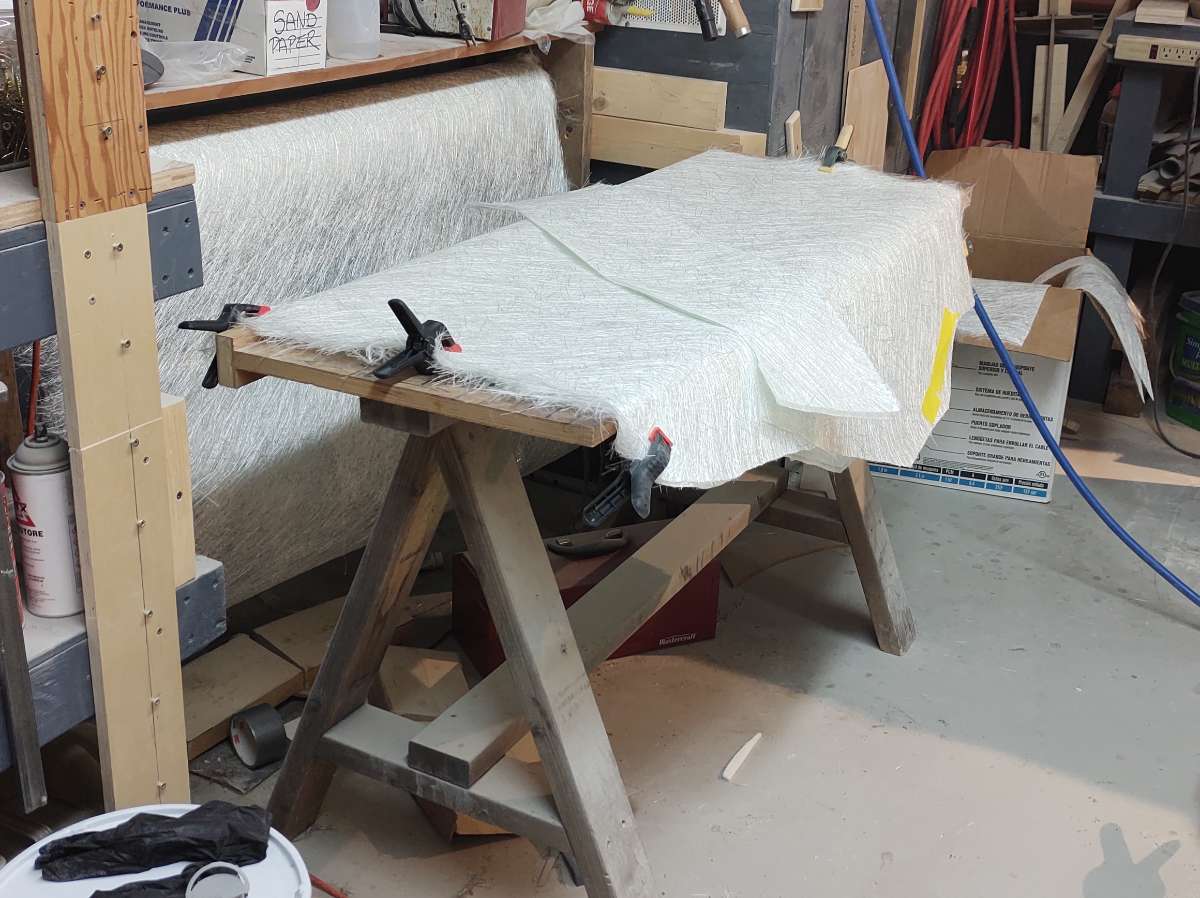
cutting layers of Mat to put on the quarter


-
9
-
-
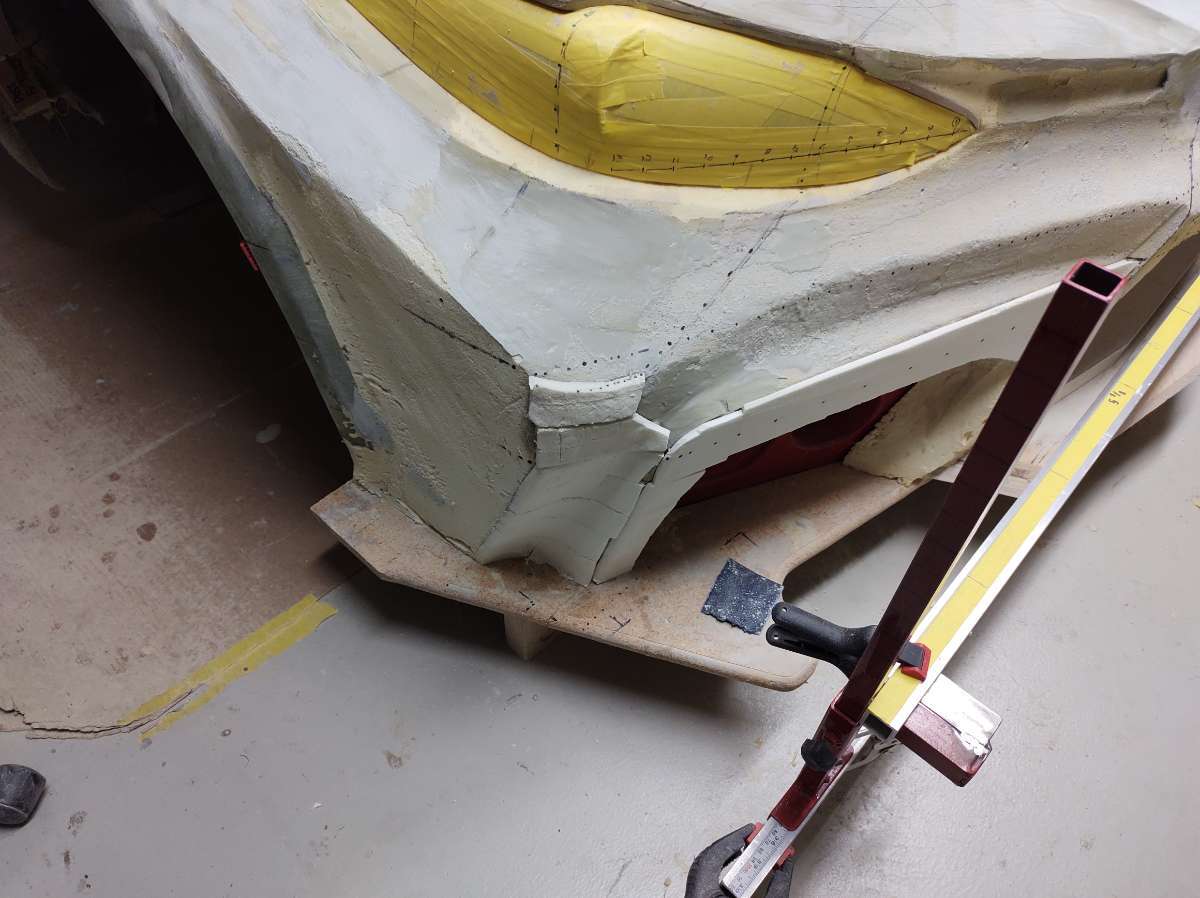
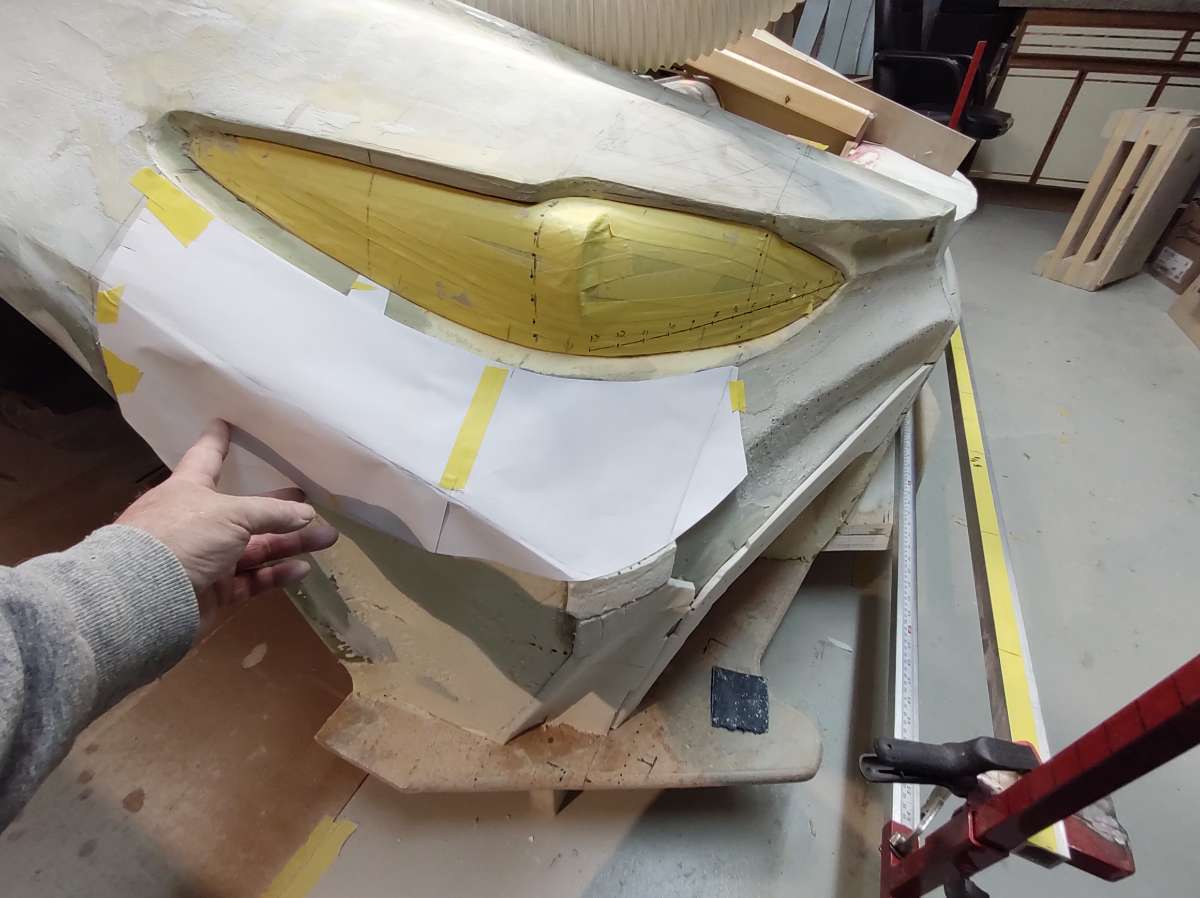
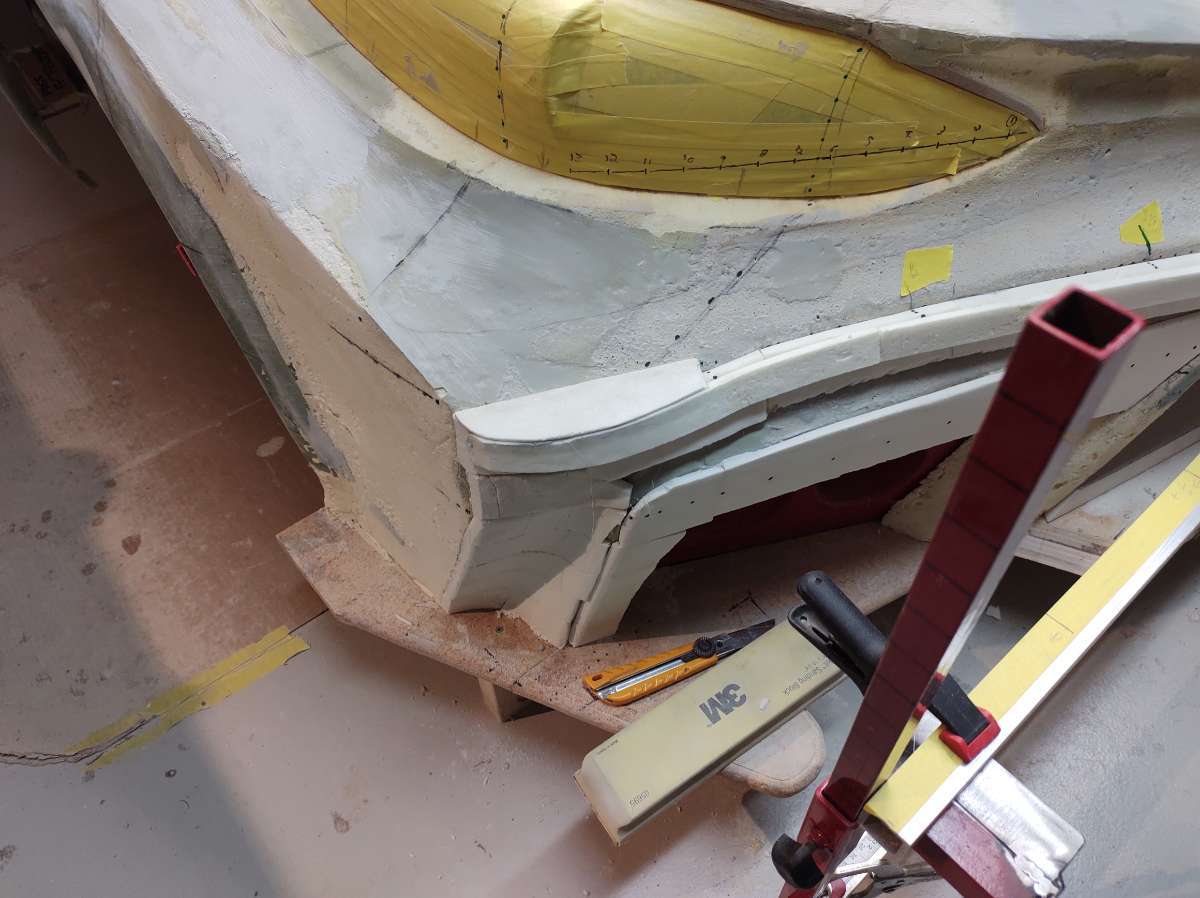
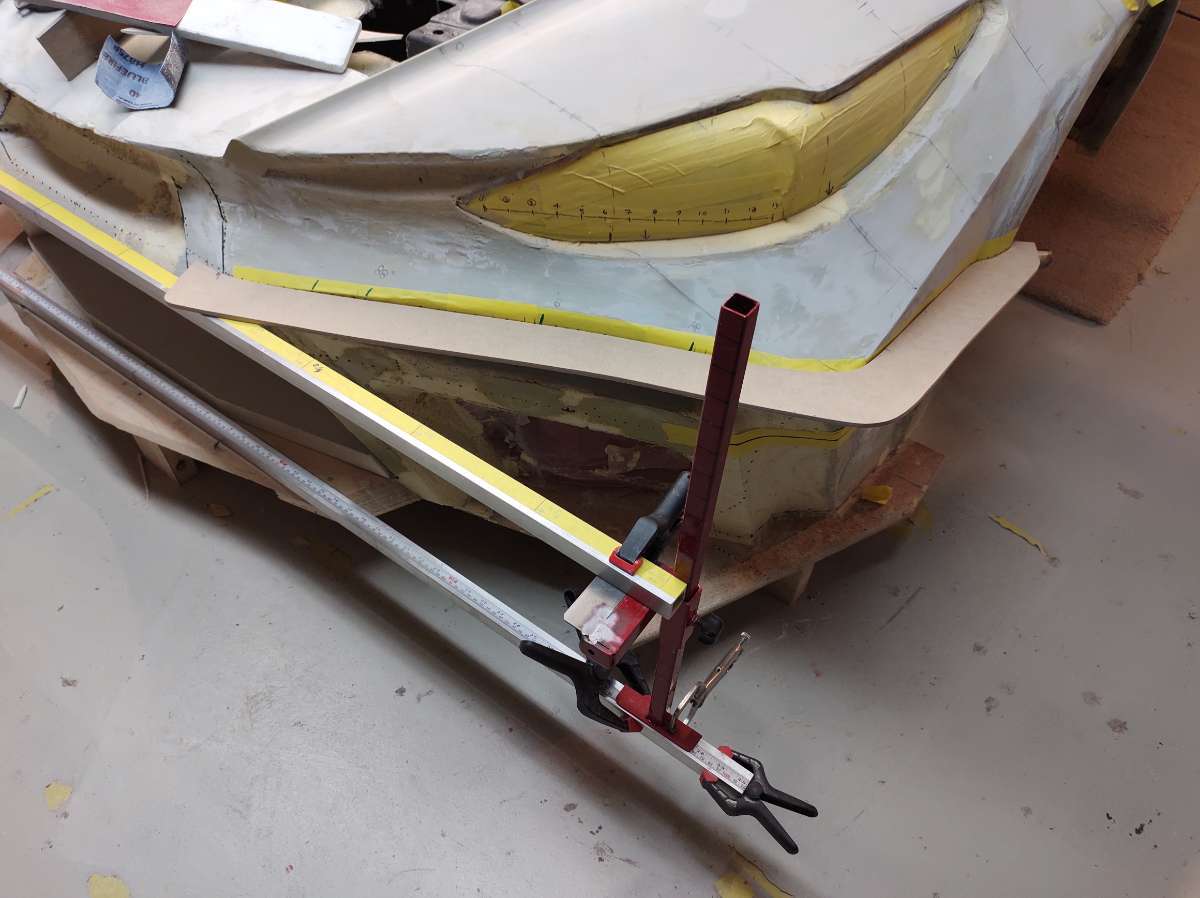
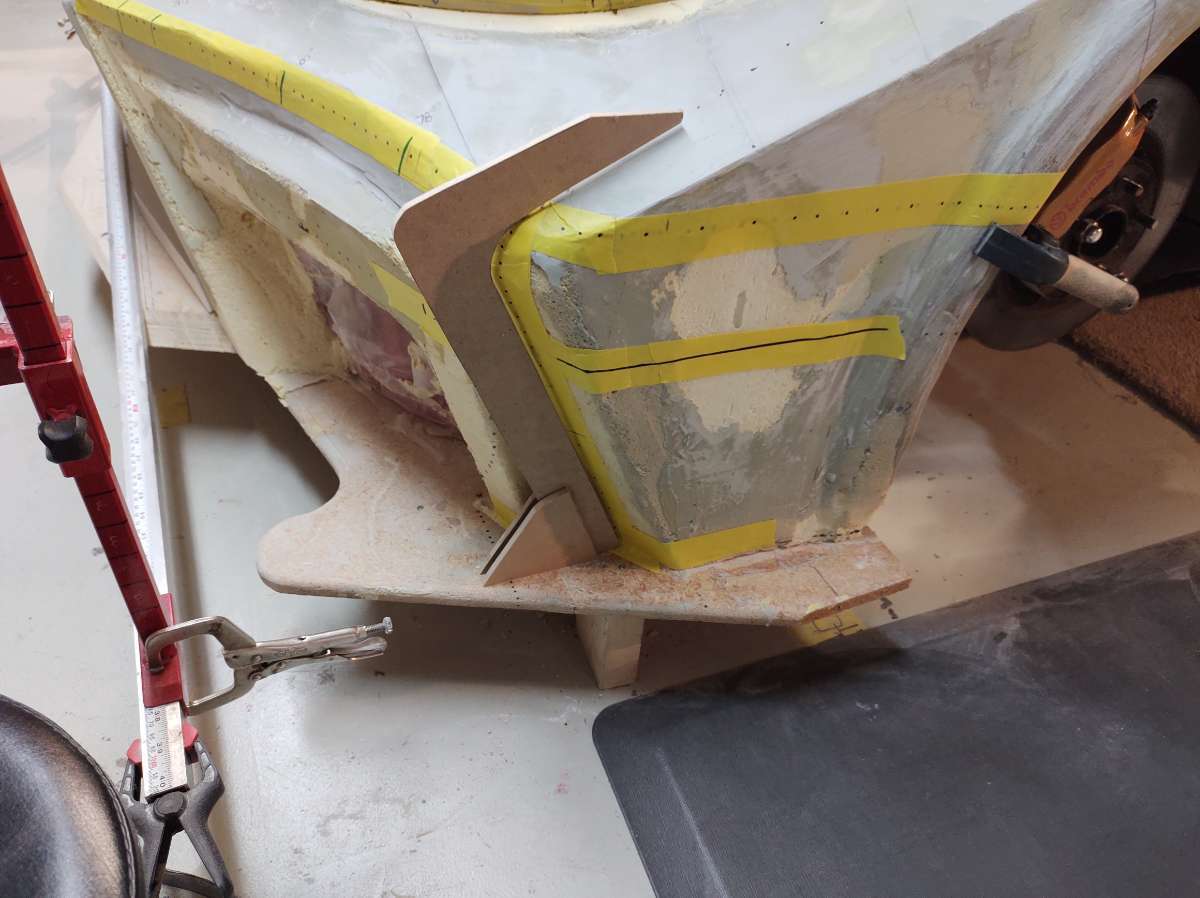
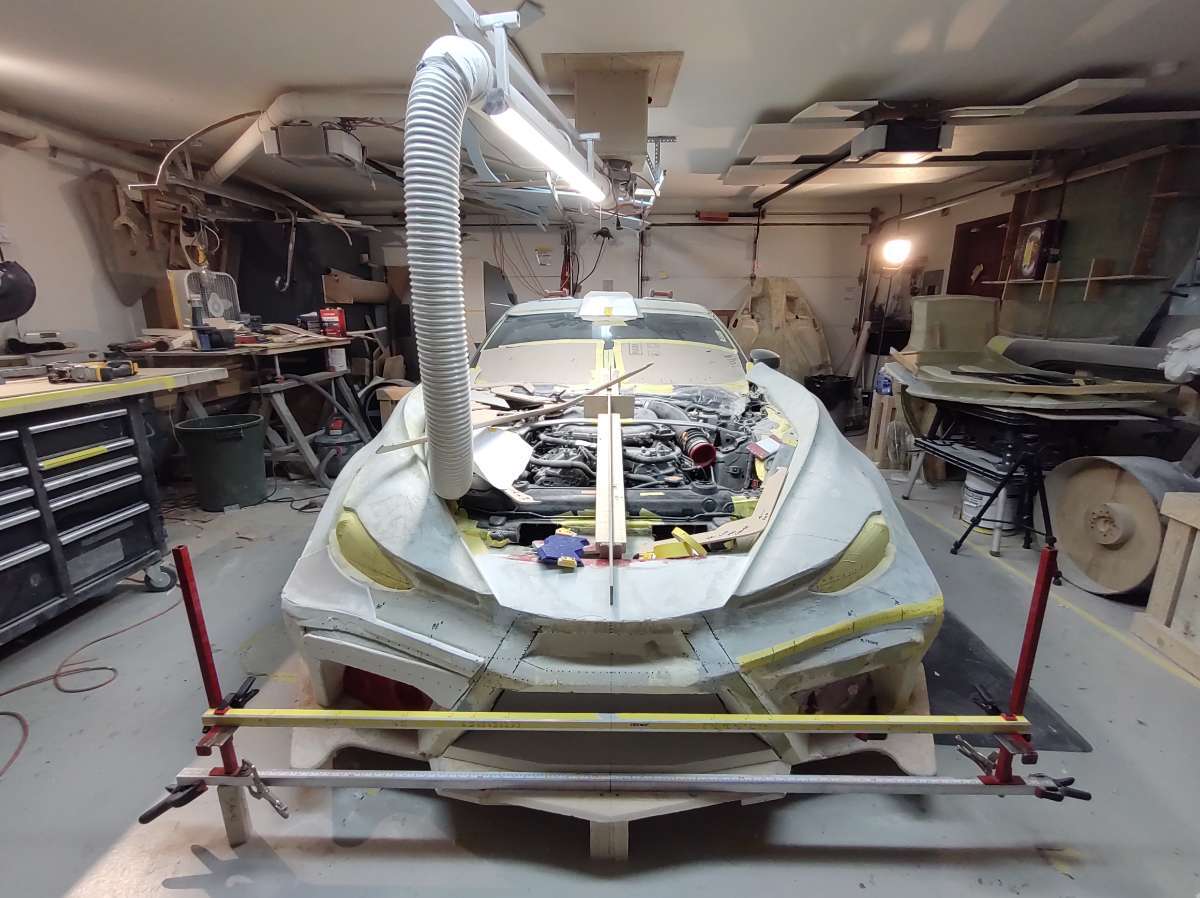
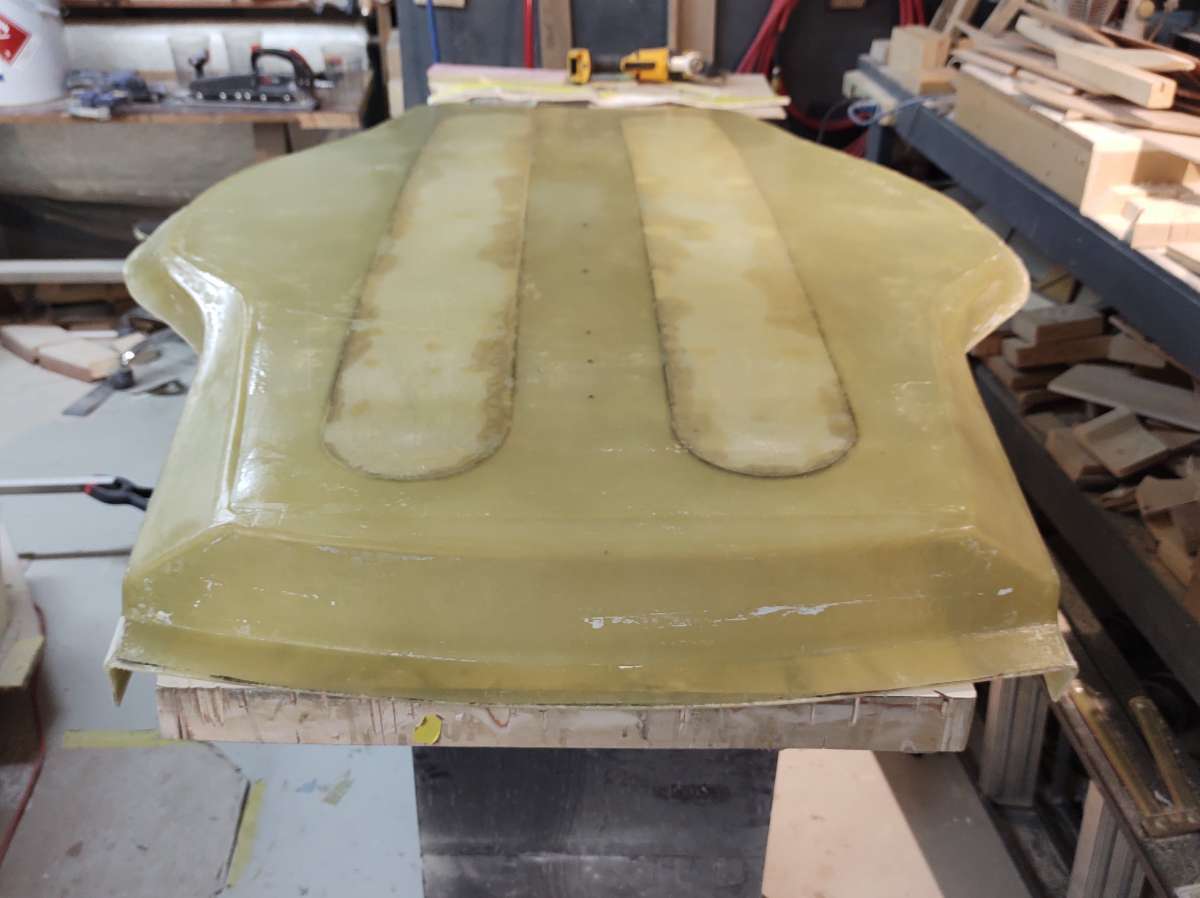
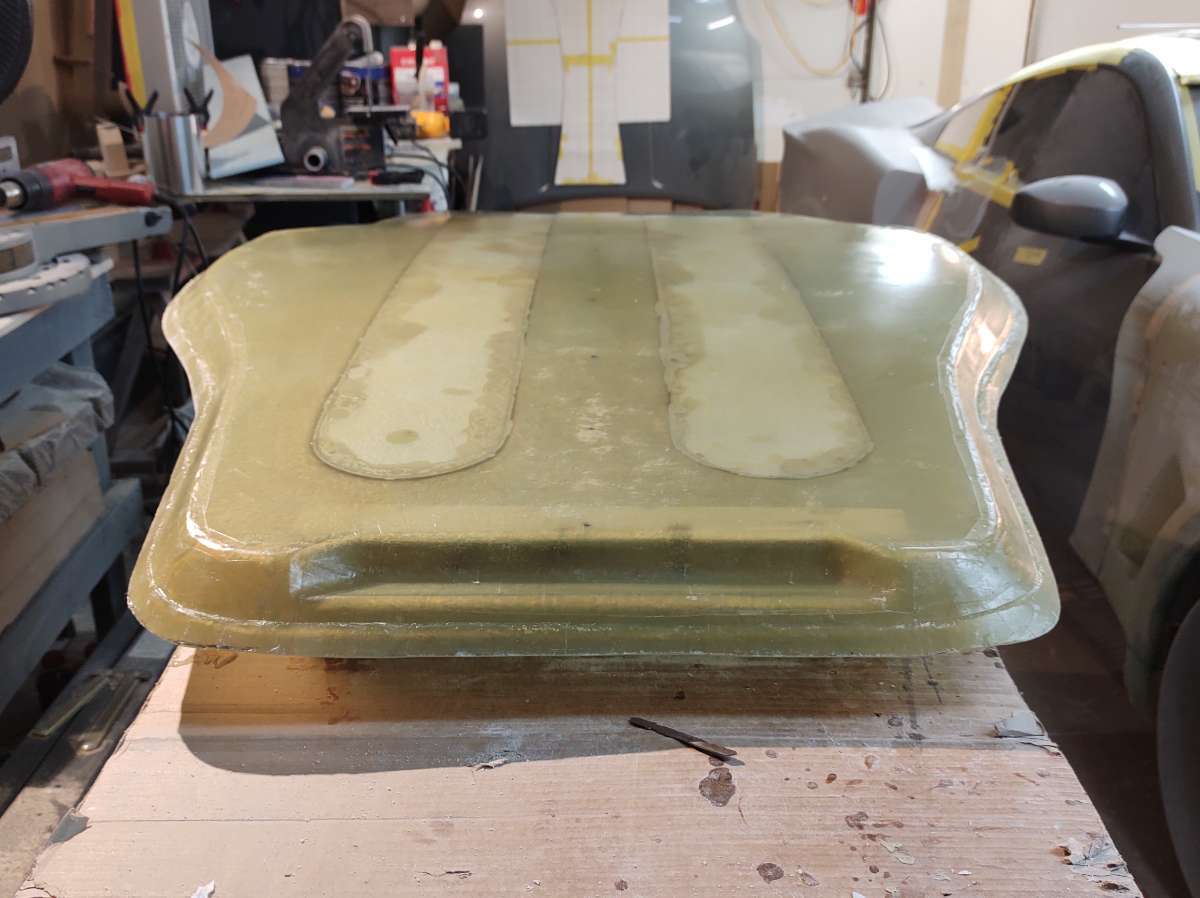
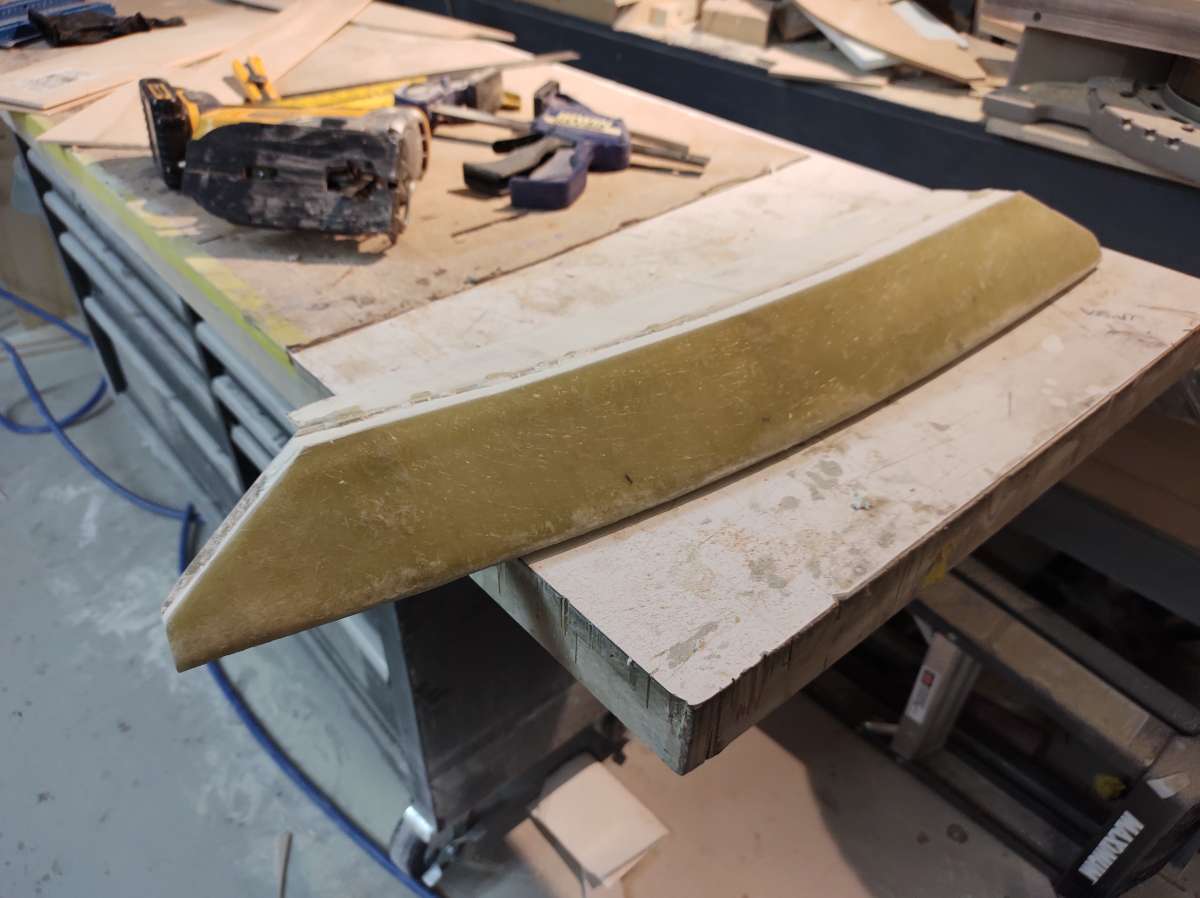
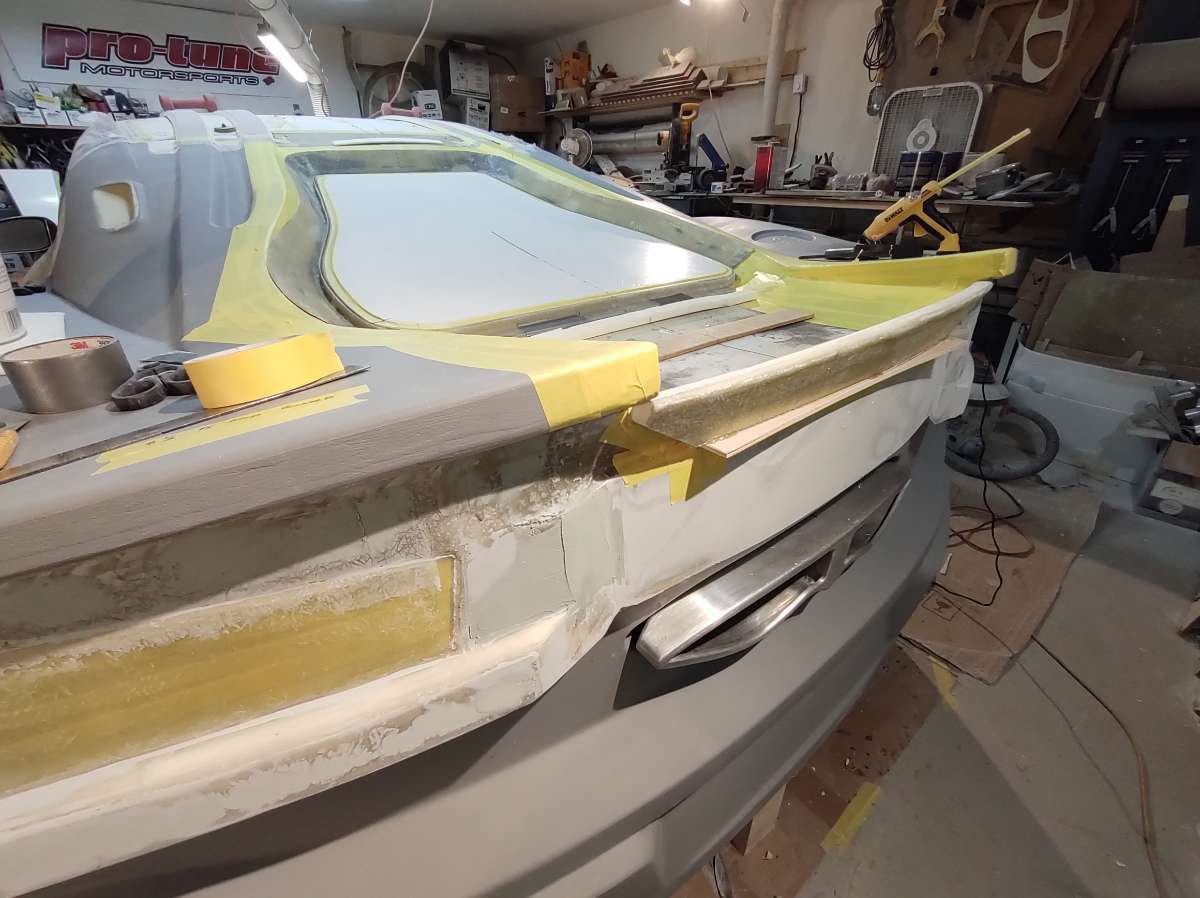
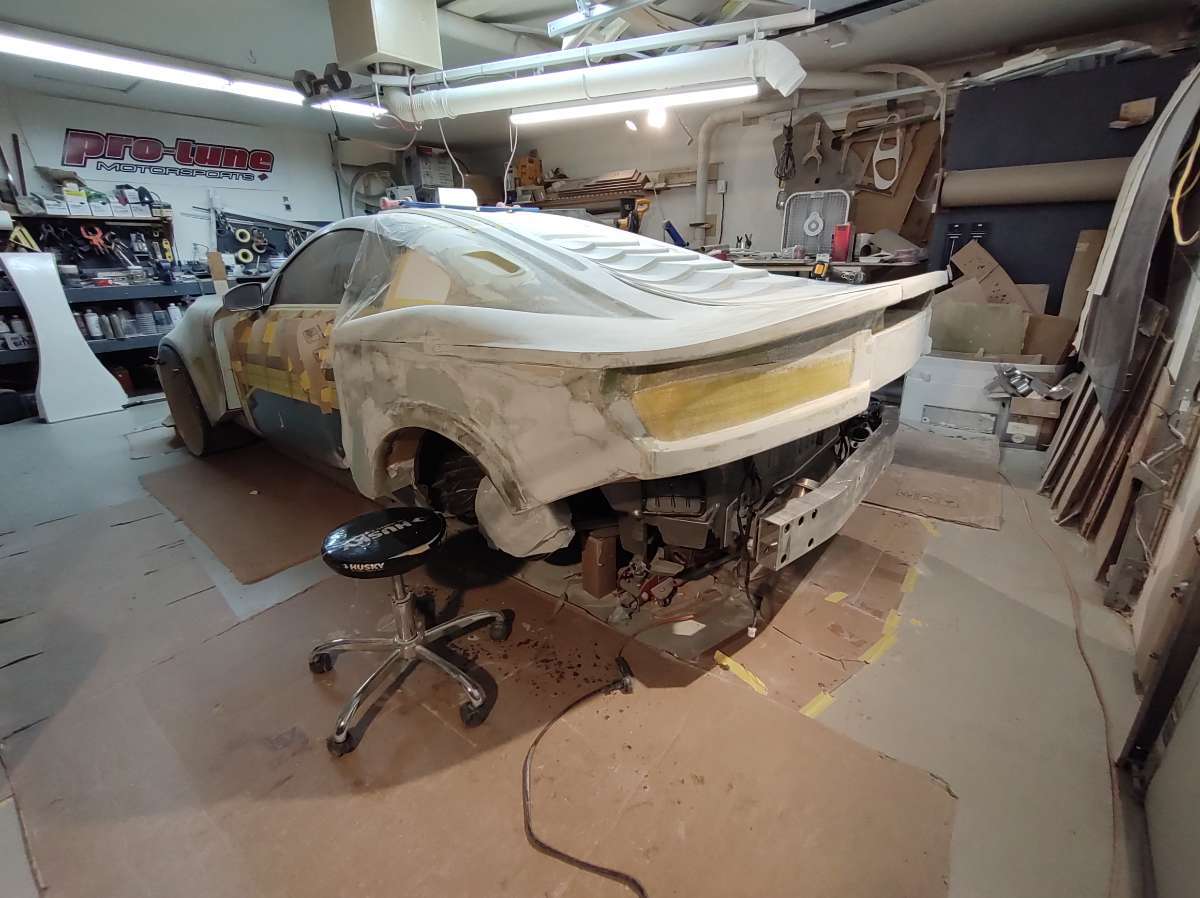
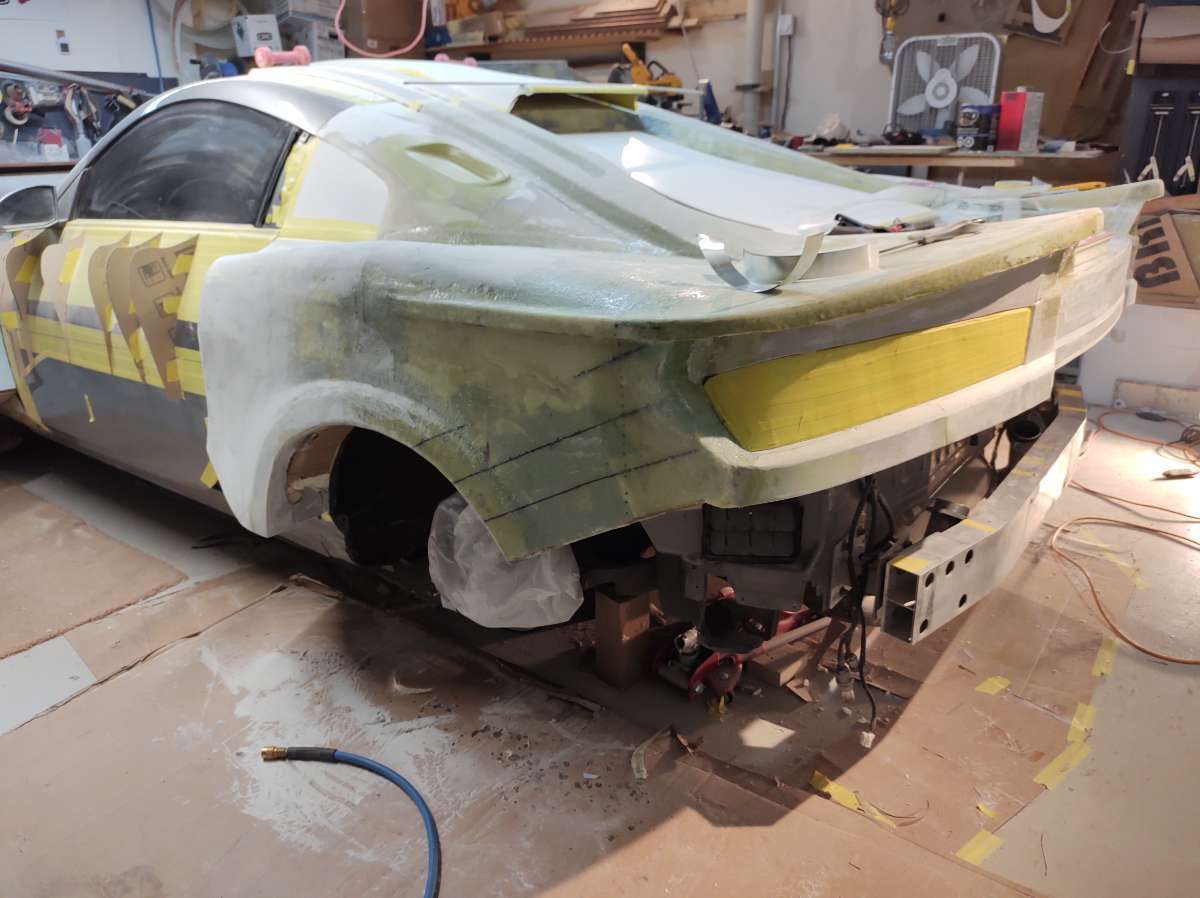
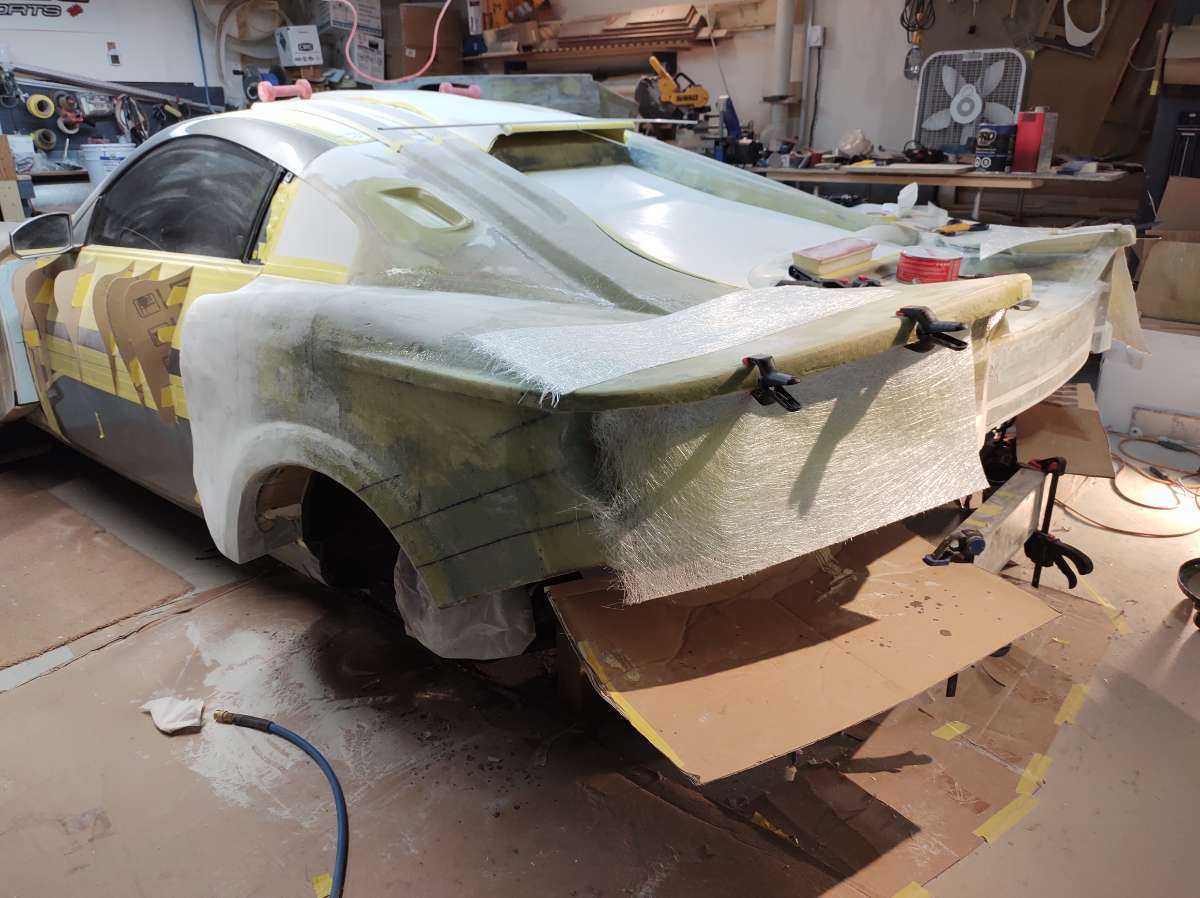
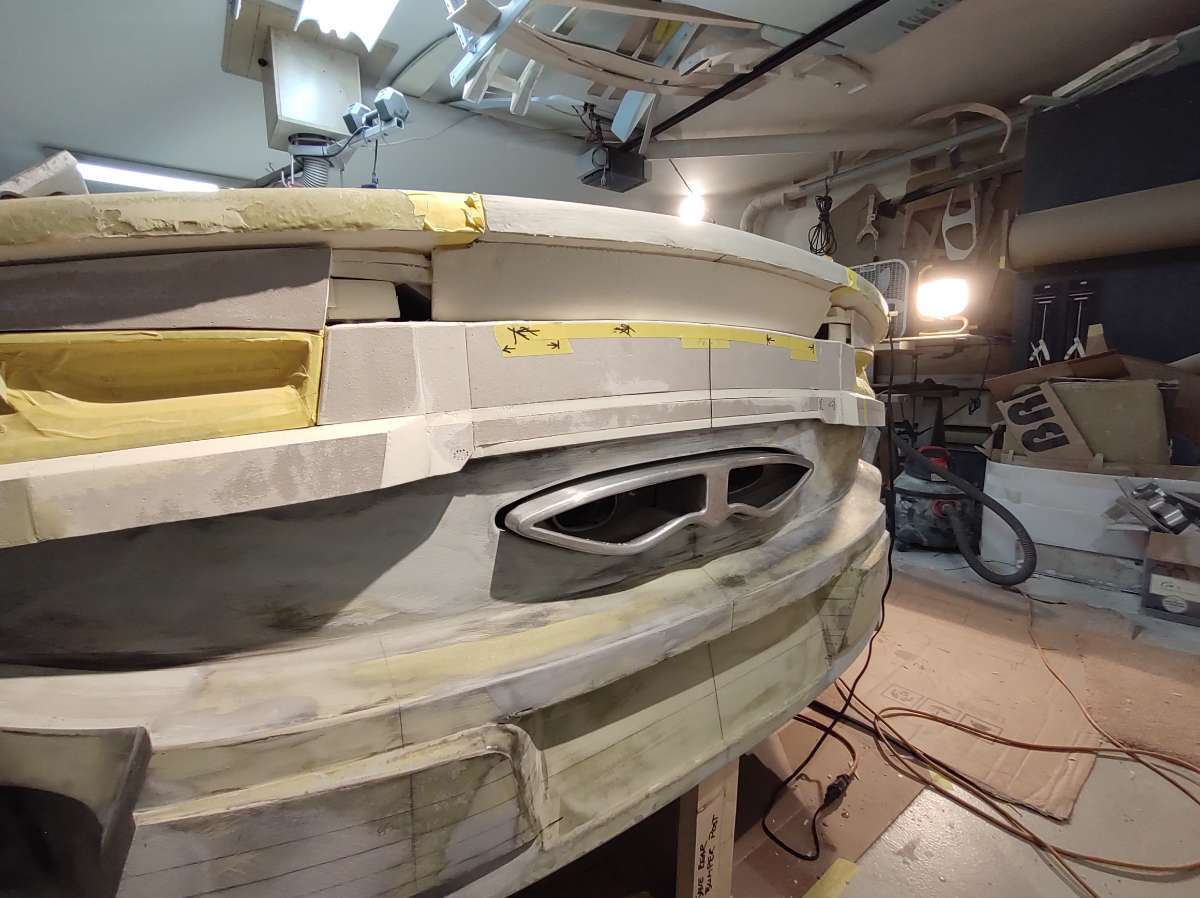
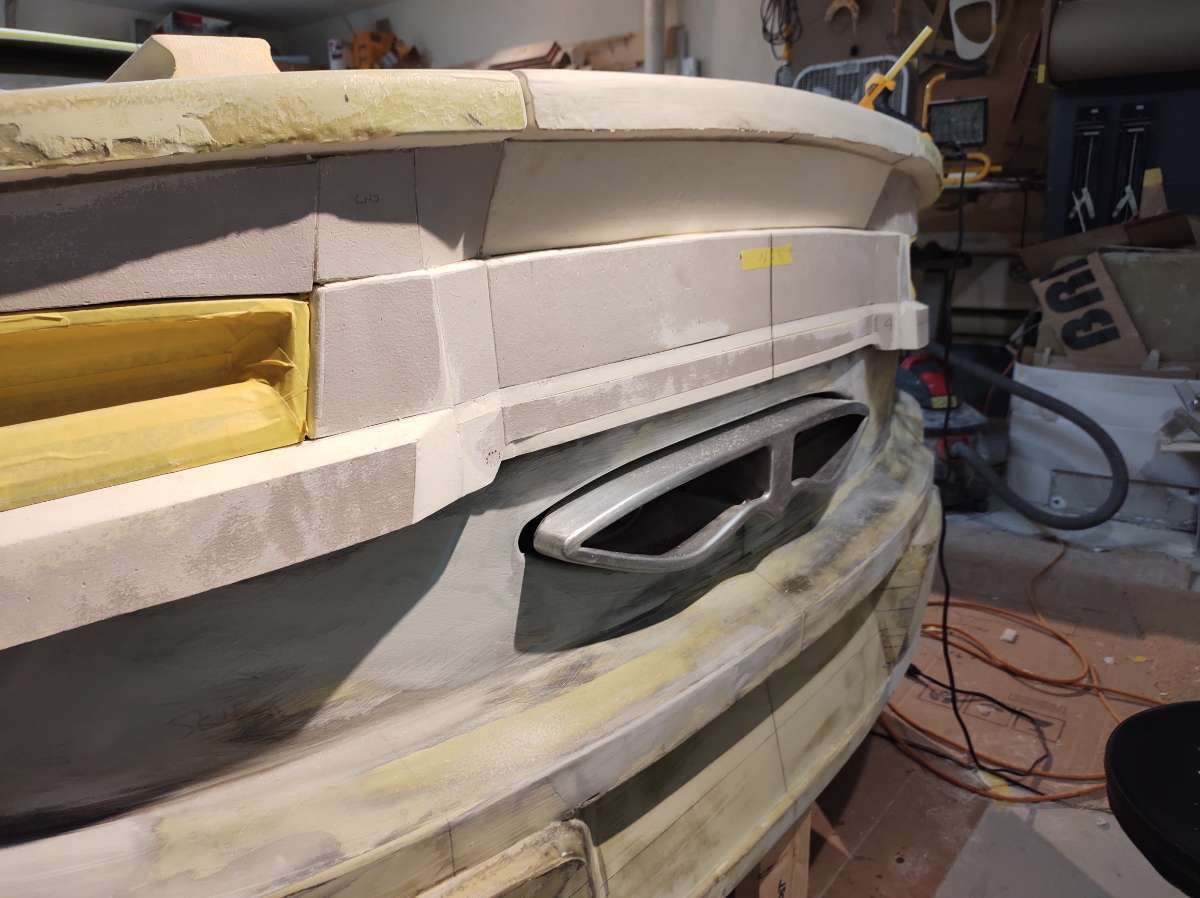
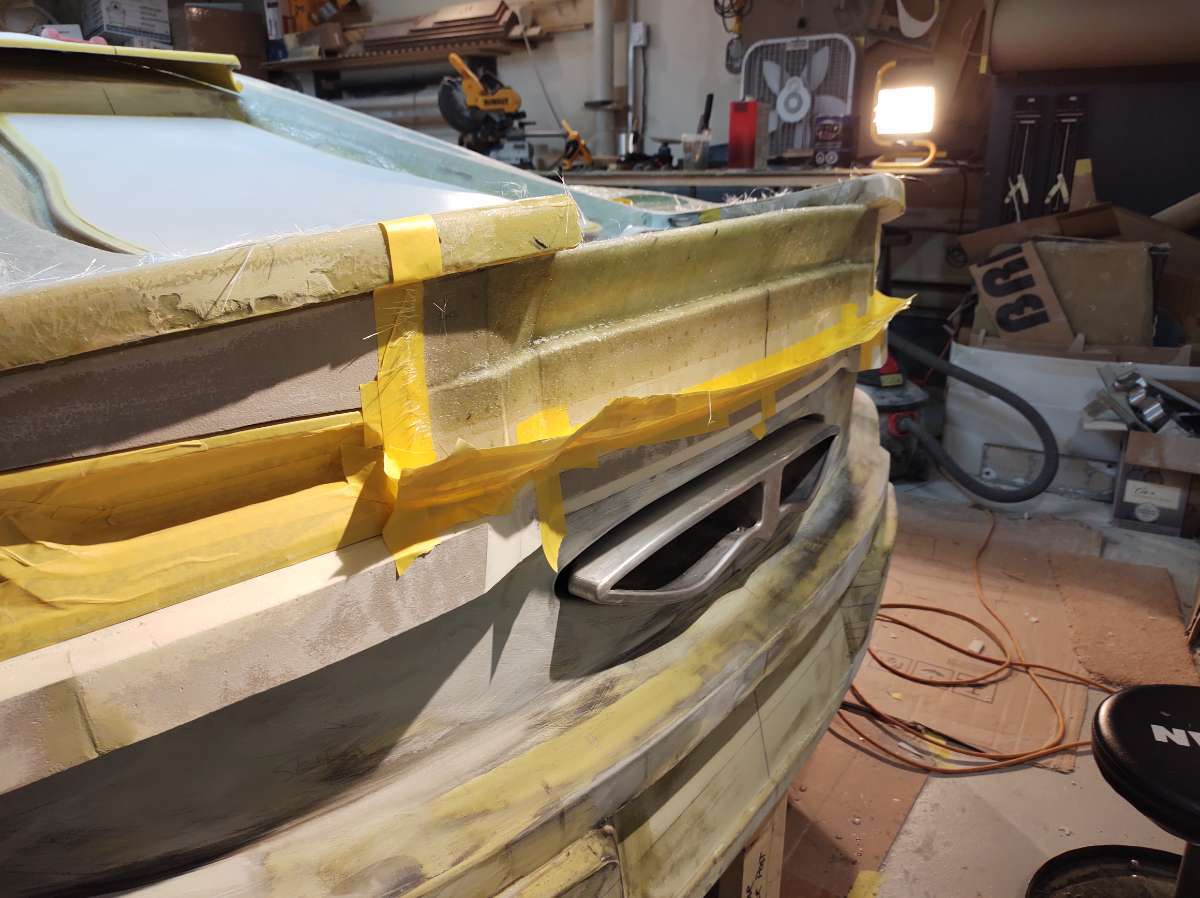
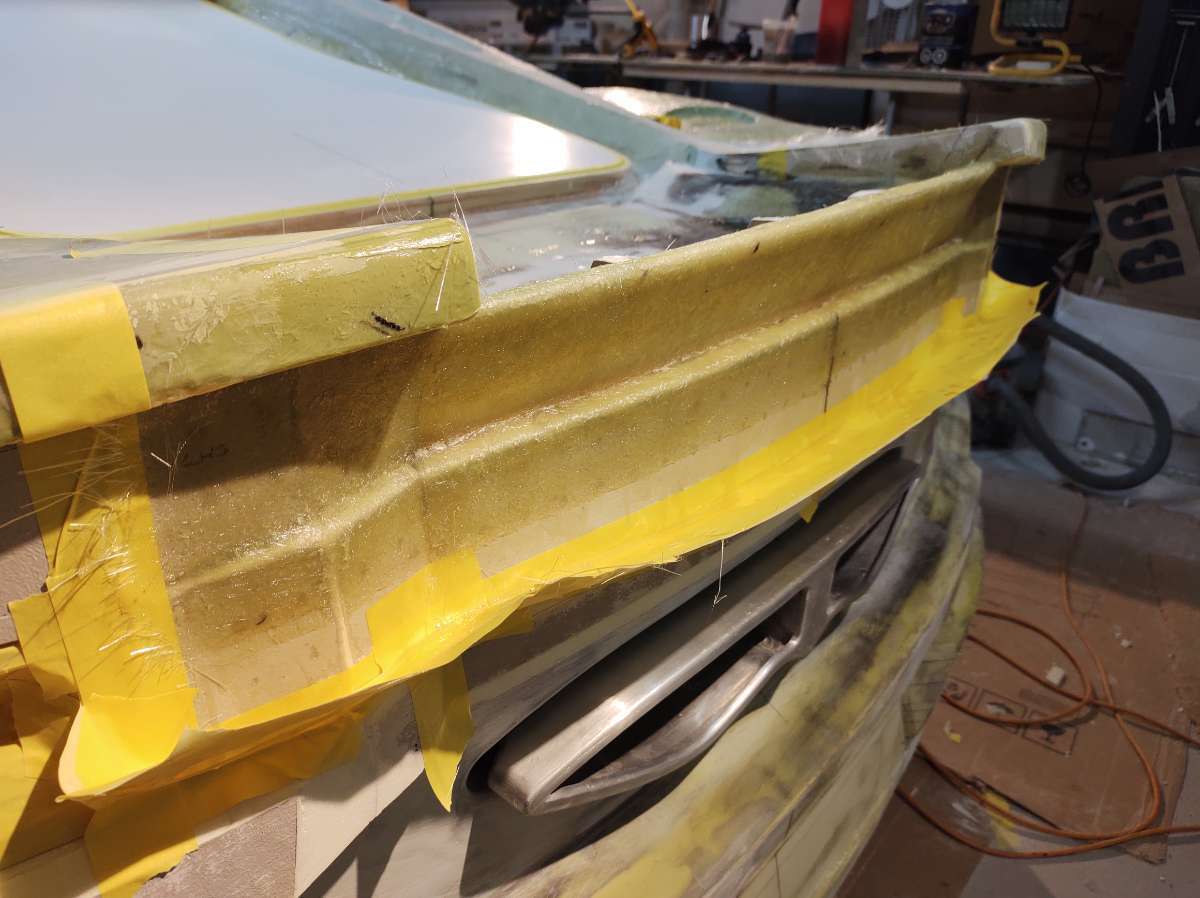
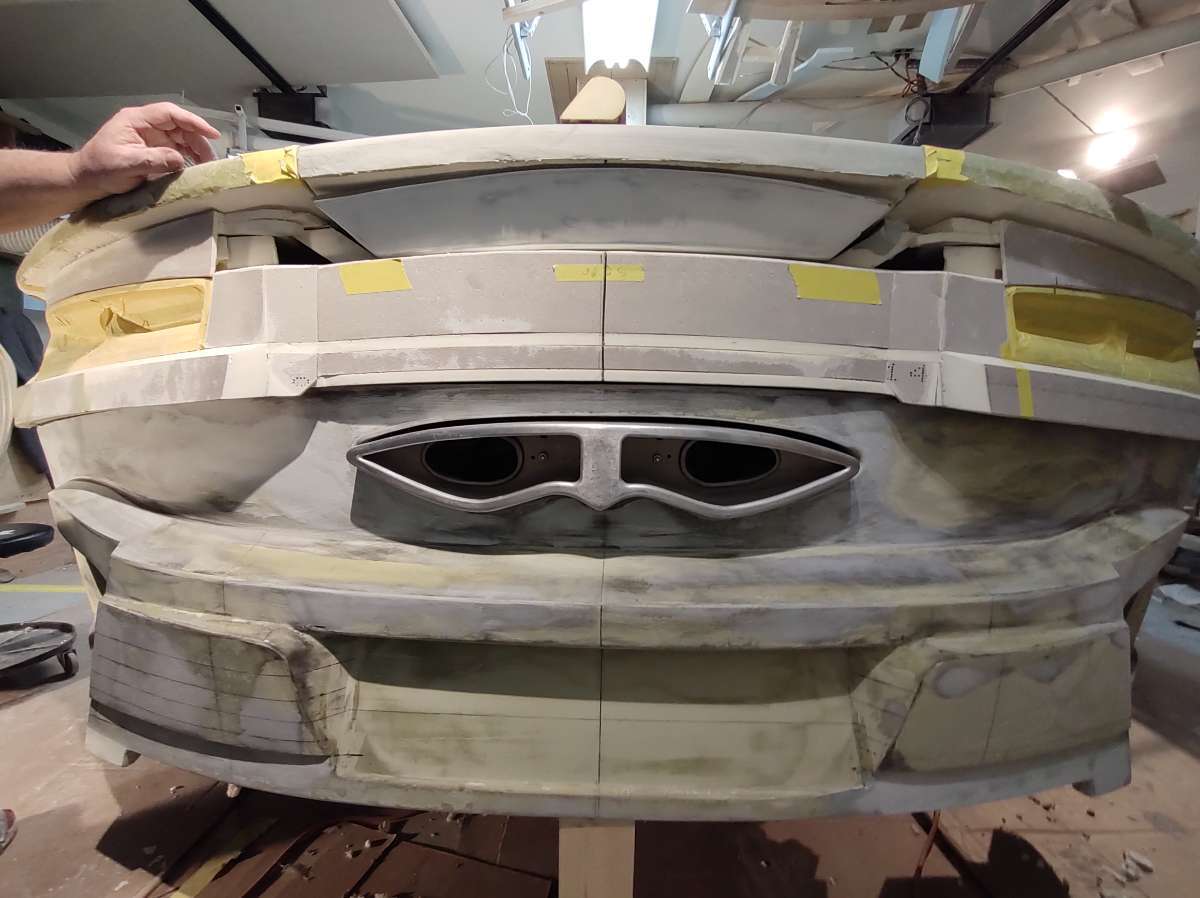
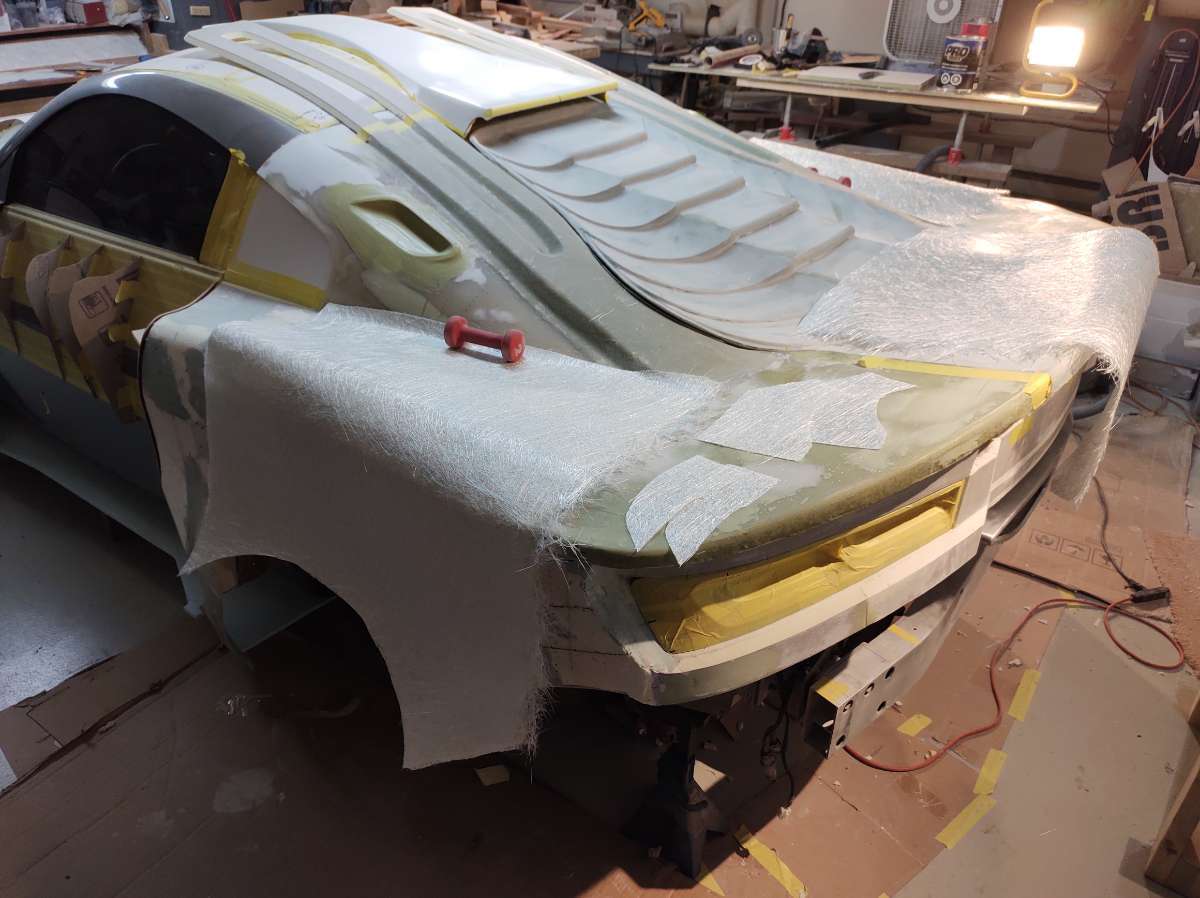
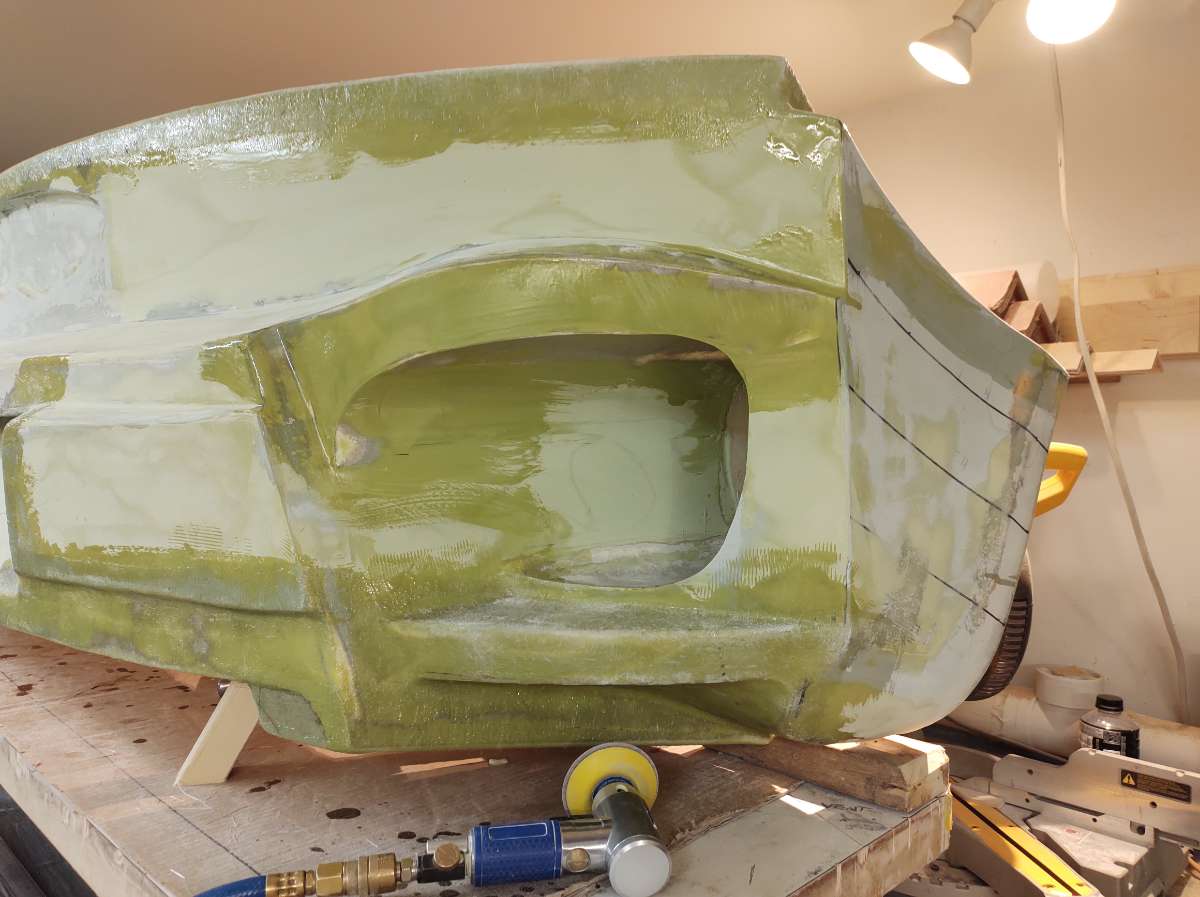
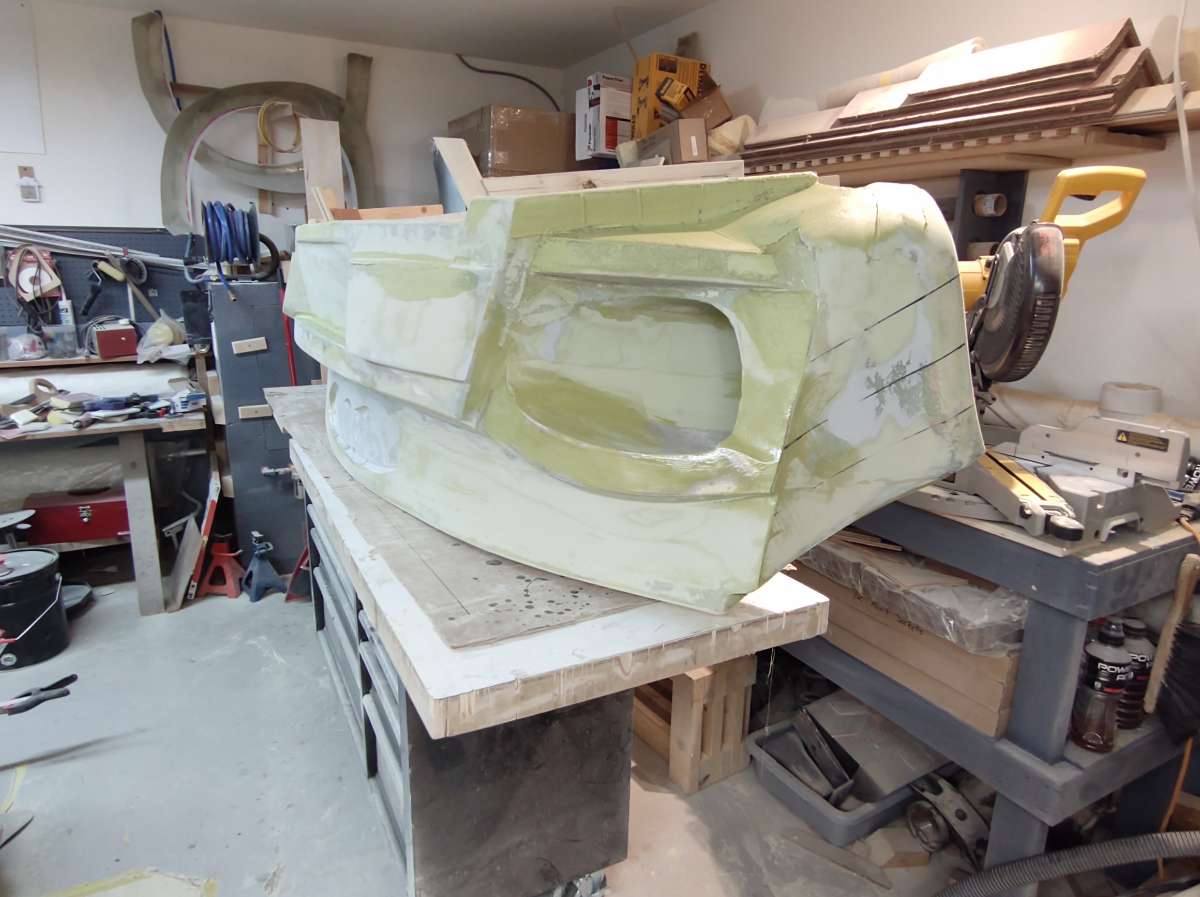
Back to the Falcata
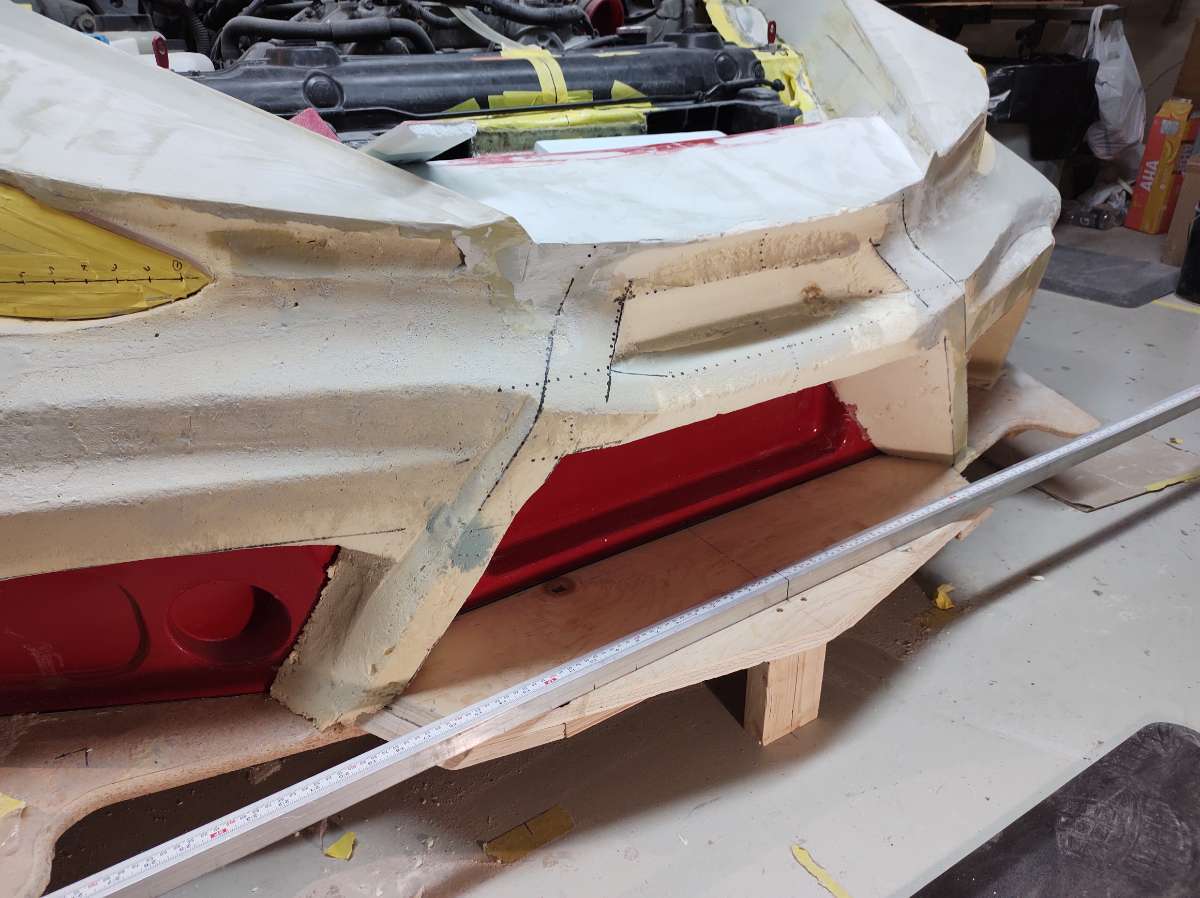
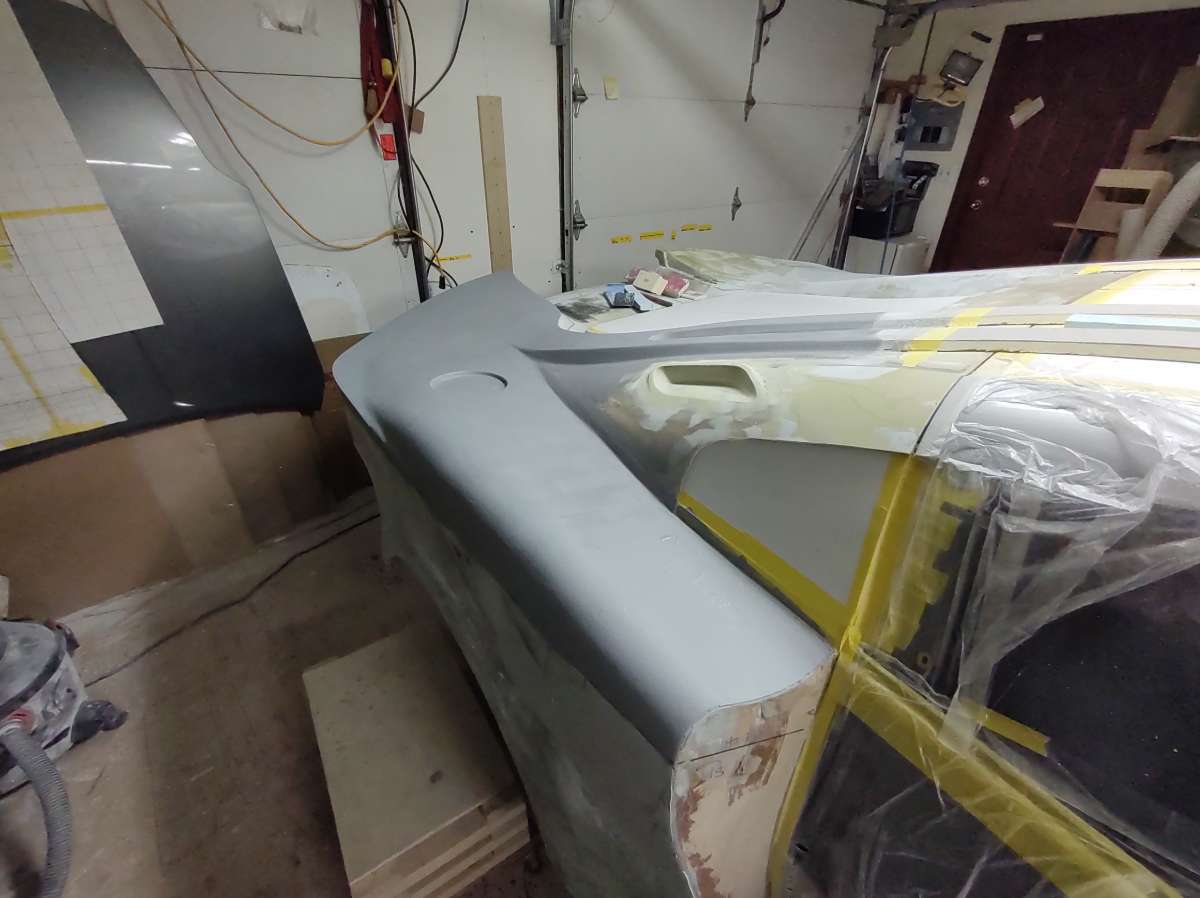
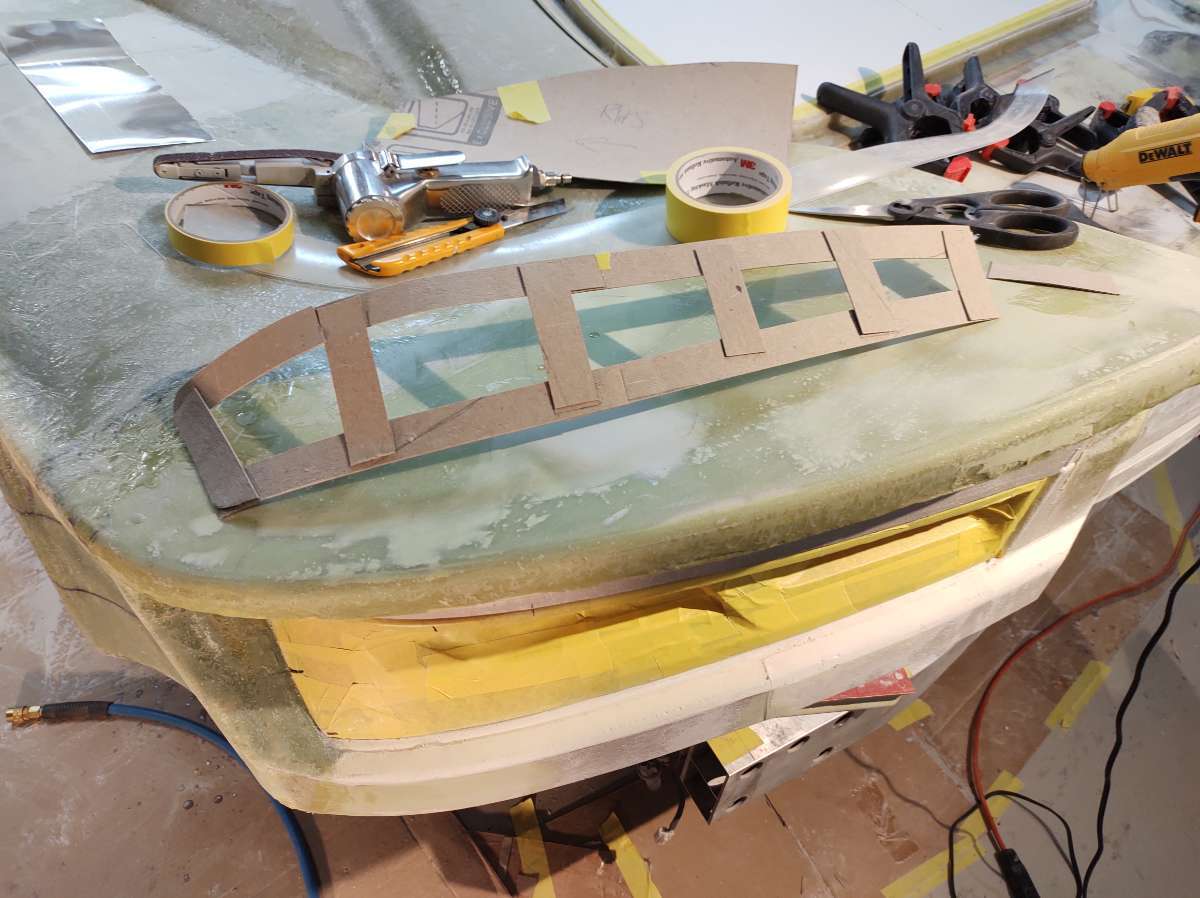
Some more on the rear bumper cover .
More quality control
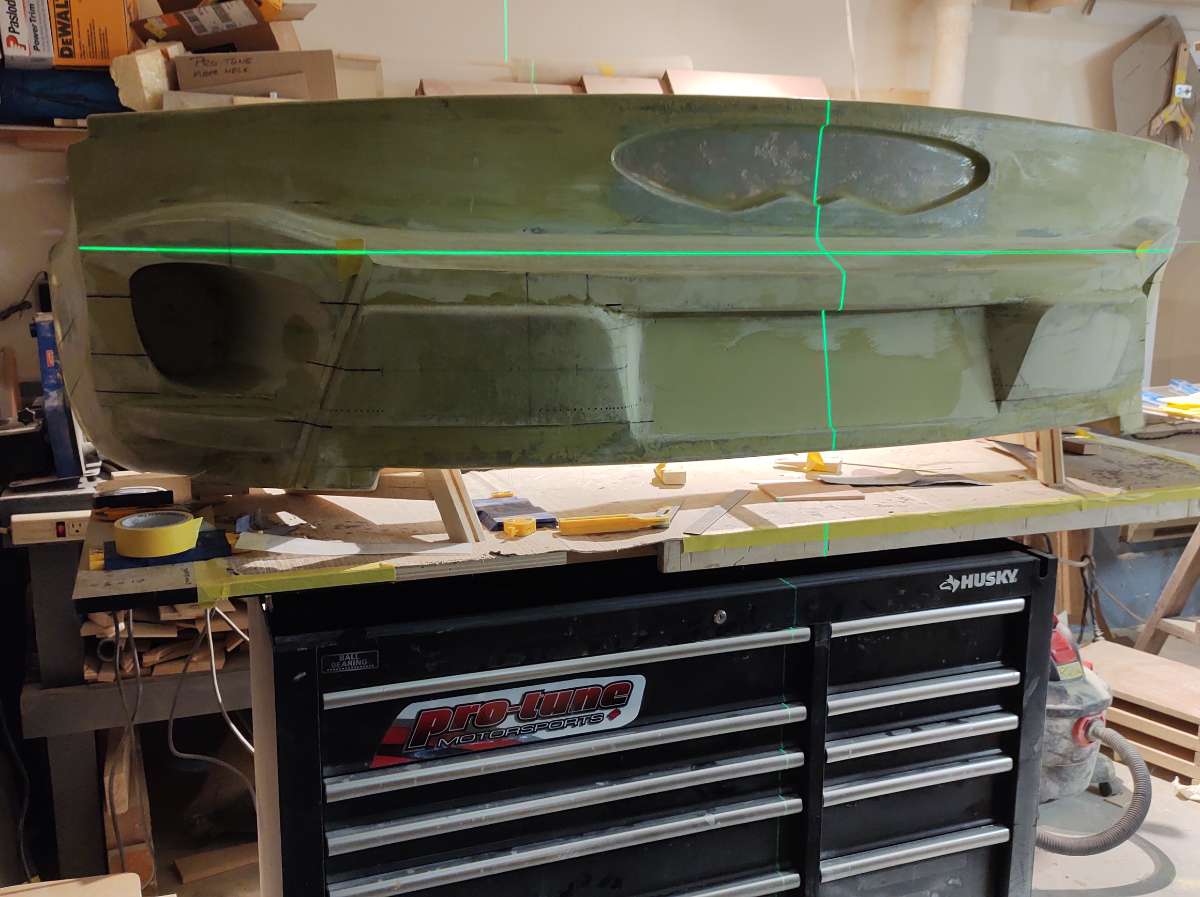
Compound curves ...... so much fun
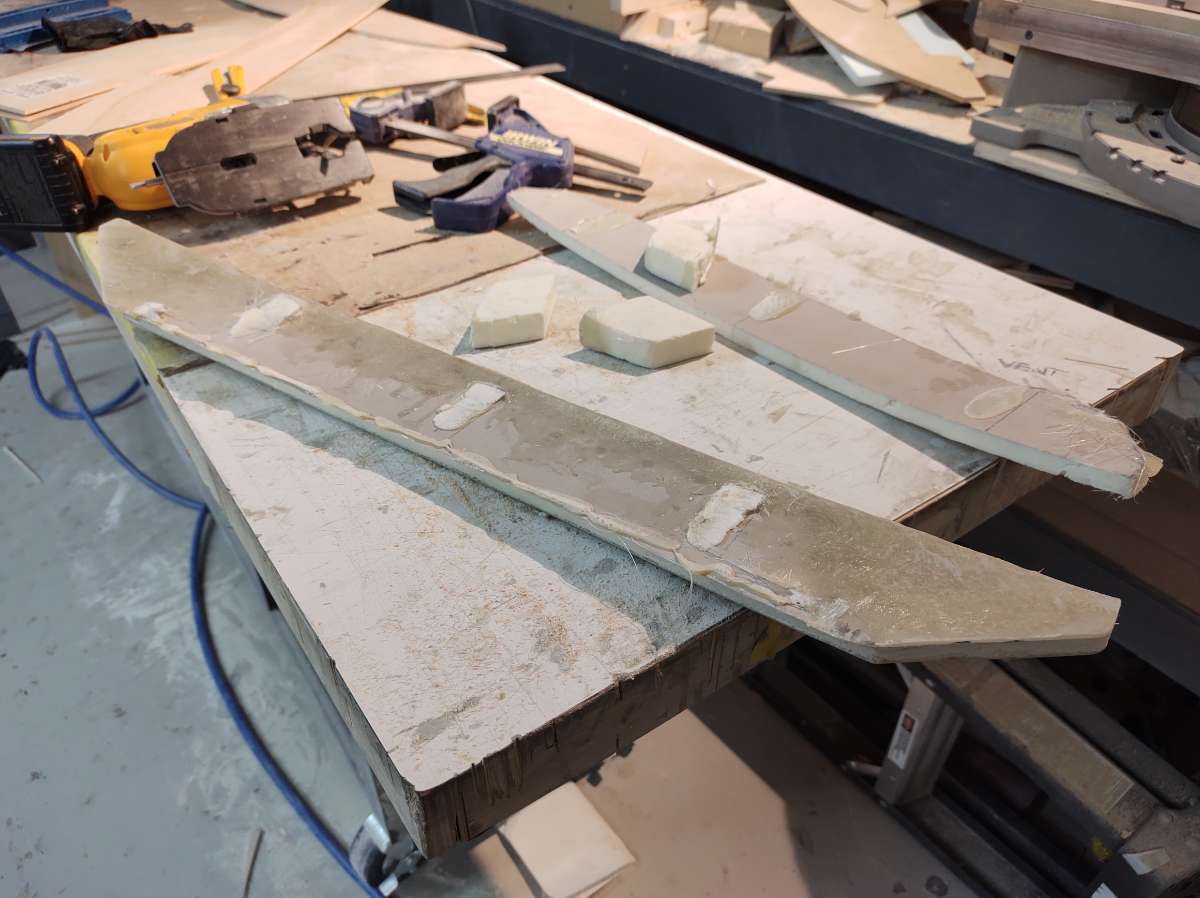
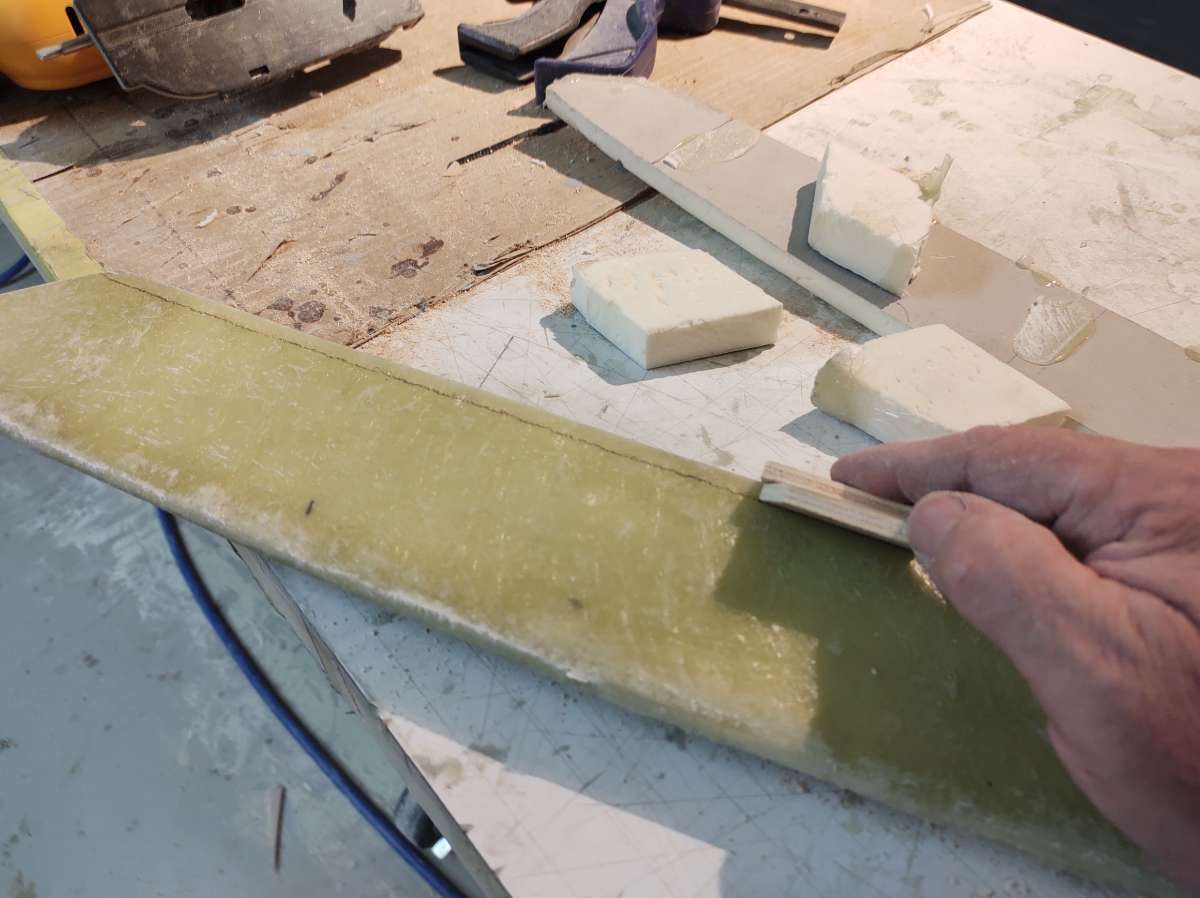
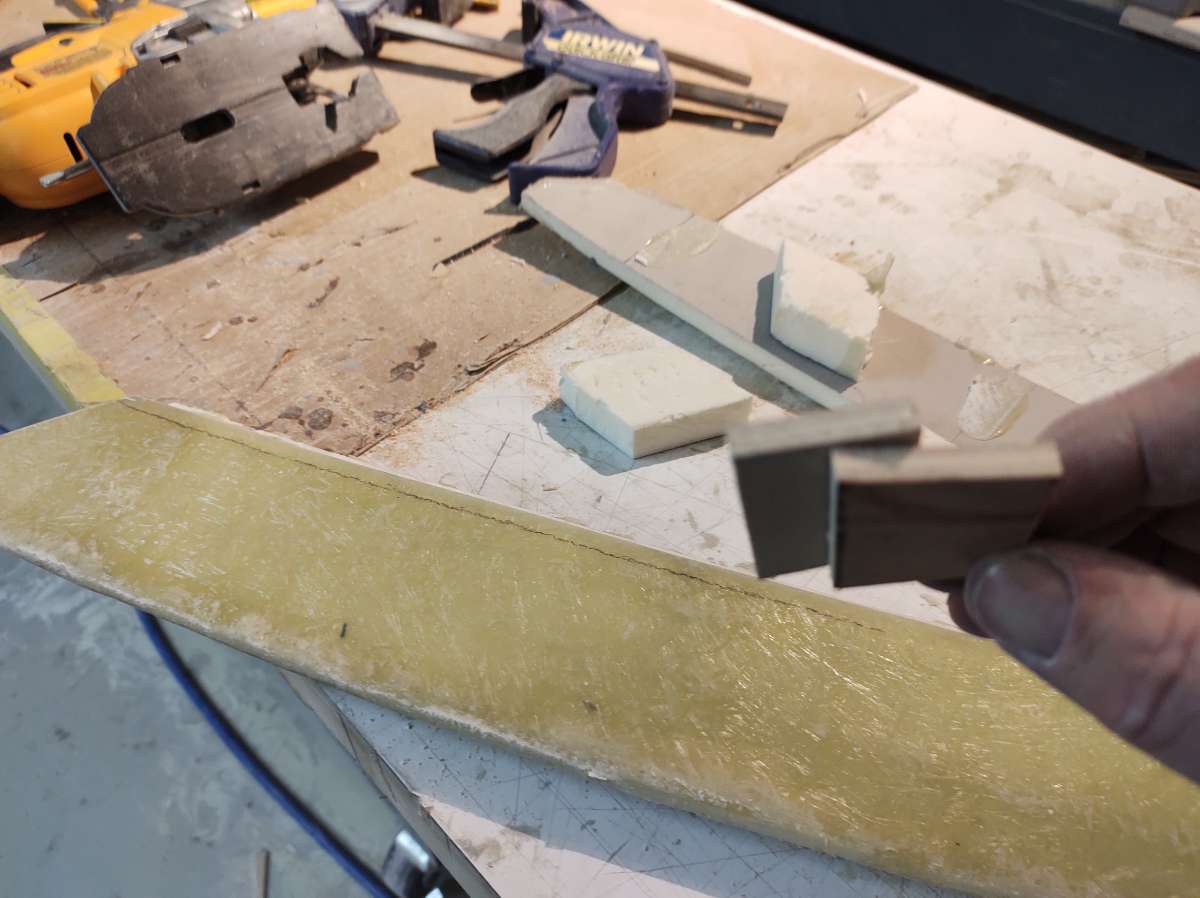
I decided to make the exhaust slot deeper , to give that area more strength and easier to chop the back off to make the opening . I made the mistake of putting filler on the foam edge without fiberglass first and the shape got away from me . so this will help me get it sorted out faster .
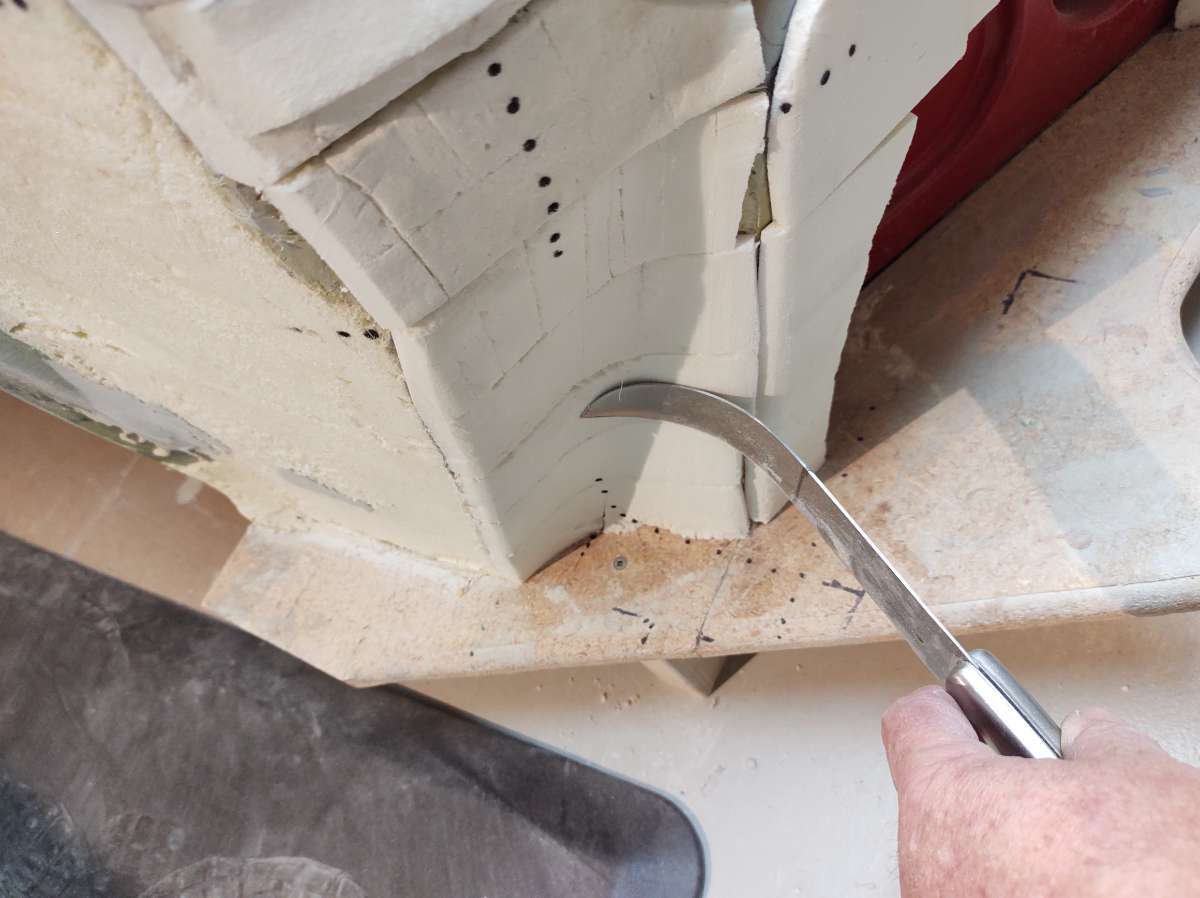
This is it cut out

The new part to go in , by myself it's very difficult to be on both sides to line things up and glue etc , so I had to cut the part in half .
The little foam posts were to hold the gap open to glue it in place using the laser to insure it was right
and checking with the template
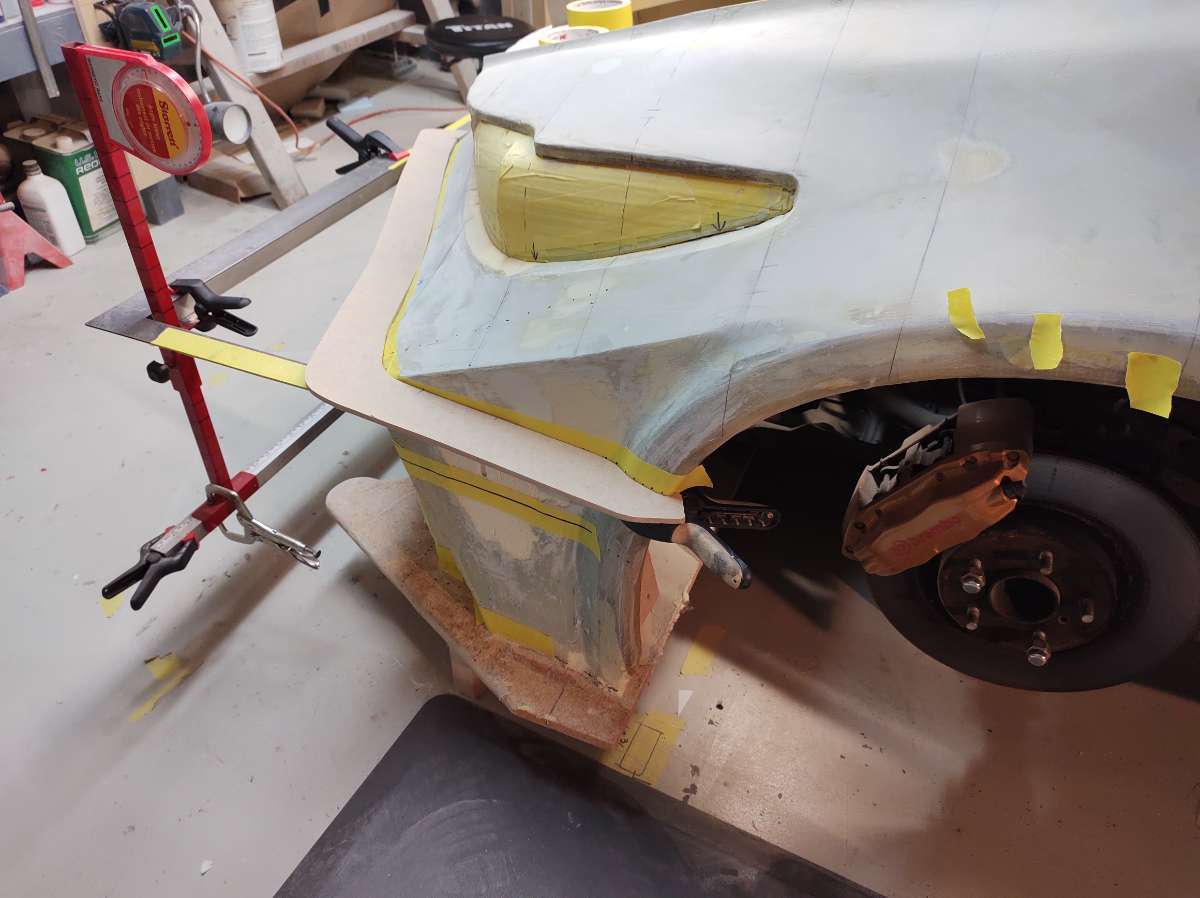
the first layer of glass , will flip it over to do the top today .
It will look better if you can't see the back edge past the exhaust tip .
Cheers for now , thanks for fallowing along .
Stay Tuned and Stay Safe
-
5
-
-
Got the pics of the Ranchero to Sync , so here they are .
Here you can see where the gap is in the box side and the wheel arch
and this is the fiberglass part that will conceal the gap , it will look decent .
-
3
-
-
Also did a favor for my neighbor , he is building a 1964 Ford Ranchero , small block Ford , manual trans , EFI , Modern suspension , it's going to be very sweet and super straight .
He asked me to make him a sheet of fiberglass to make some inner fender covers for inside the box , these will finish off the transition between the wheel tub and the box side .
I will post a couple of pic's of his car next time I tried to get them off my phone but it wouldn't load them on this site ?

Cheers for now .
Stay Tuned and Stay Safe !!!

-
3
-
-
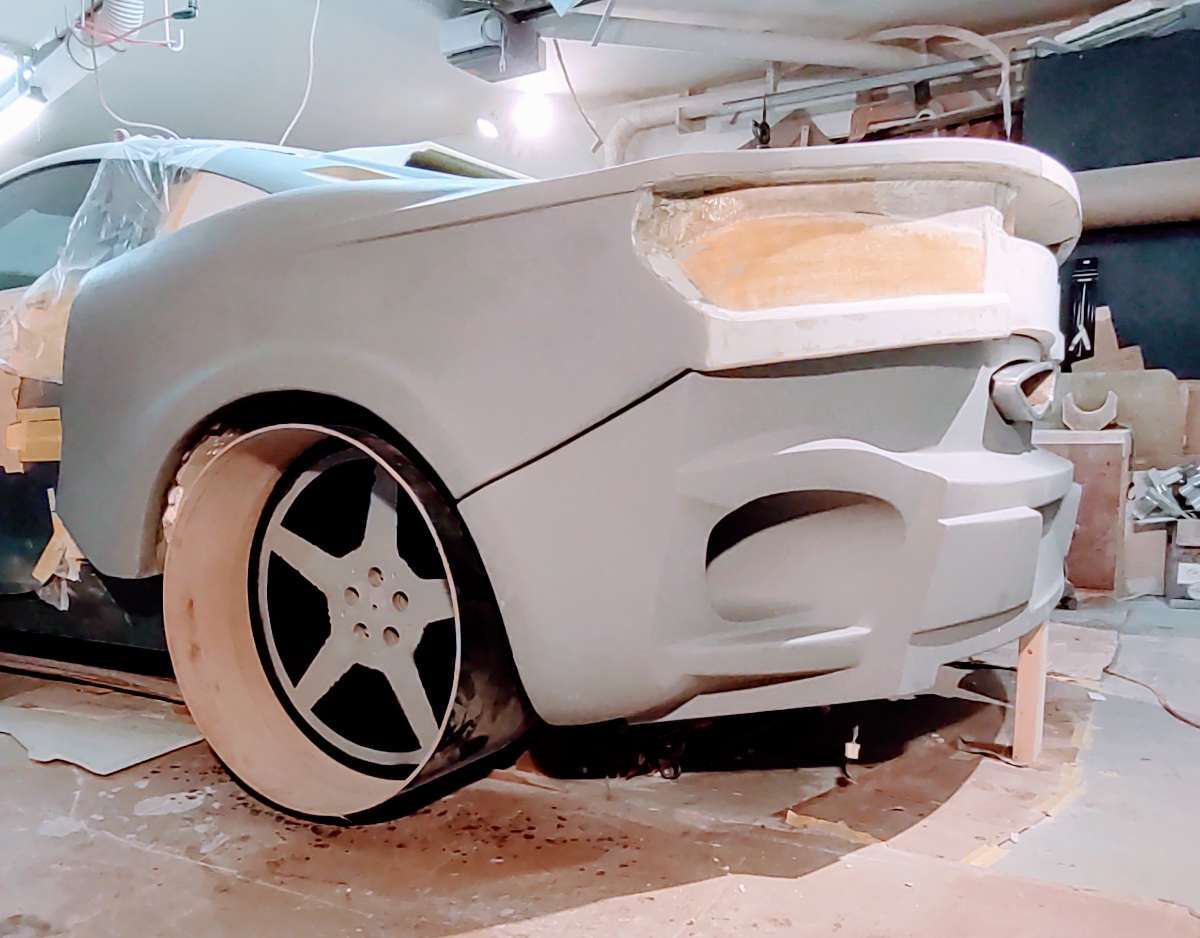
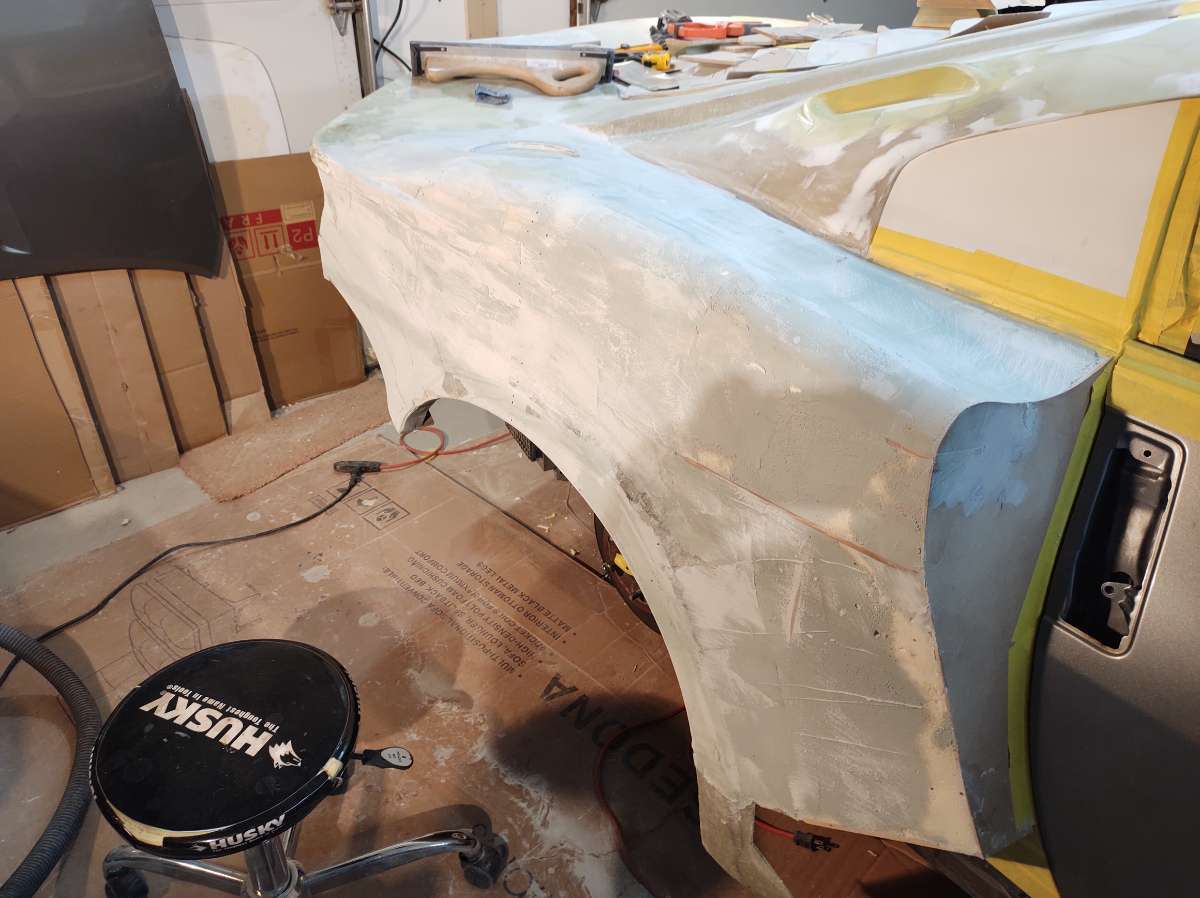
Hi everyone it's time for an update .
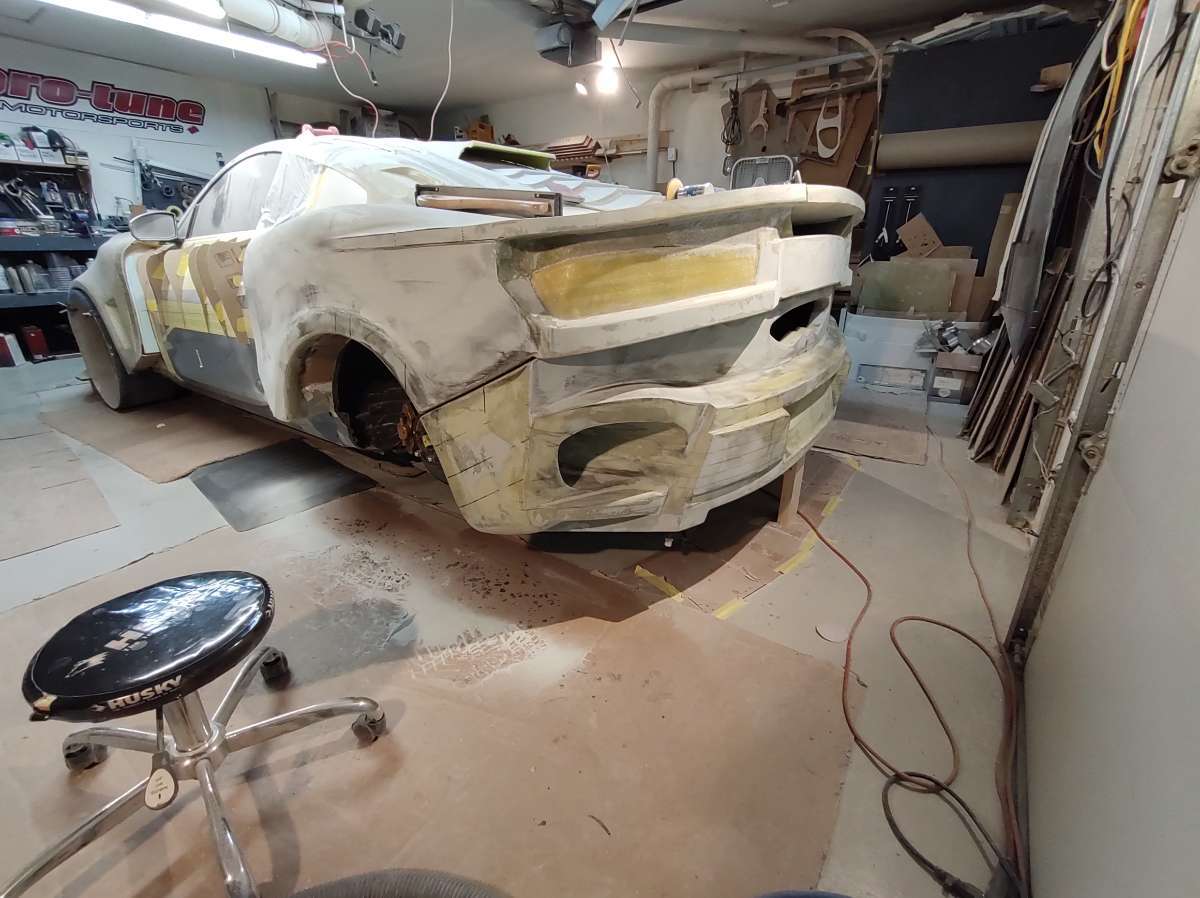
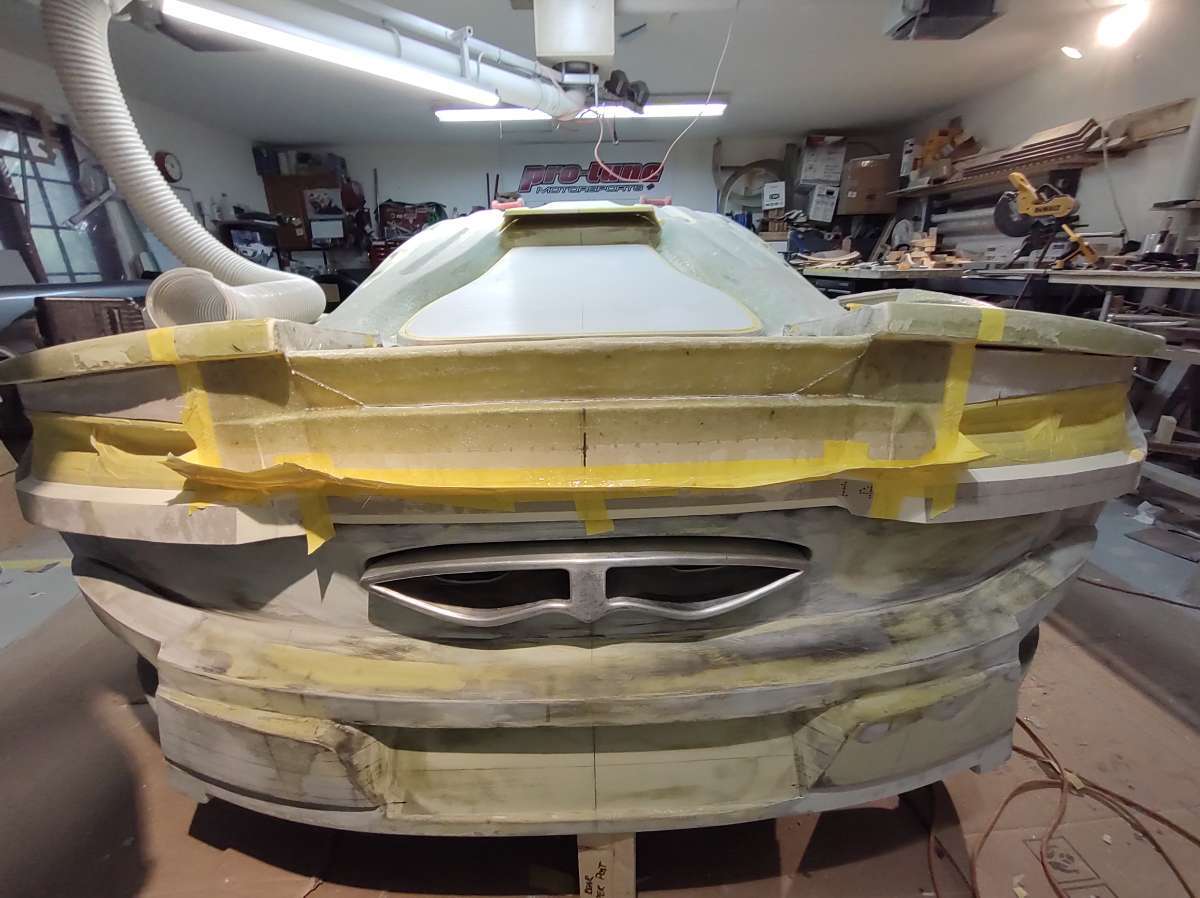
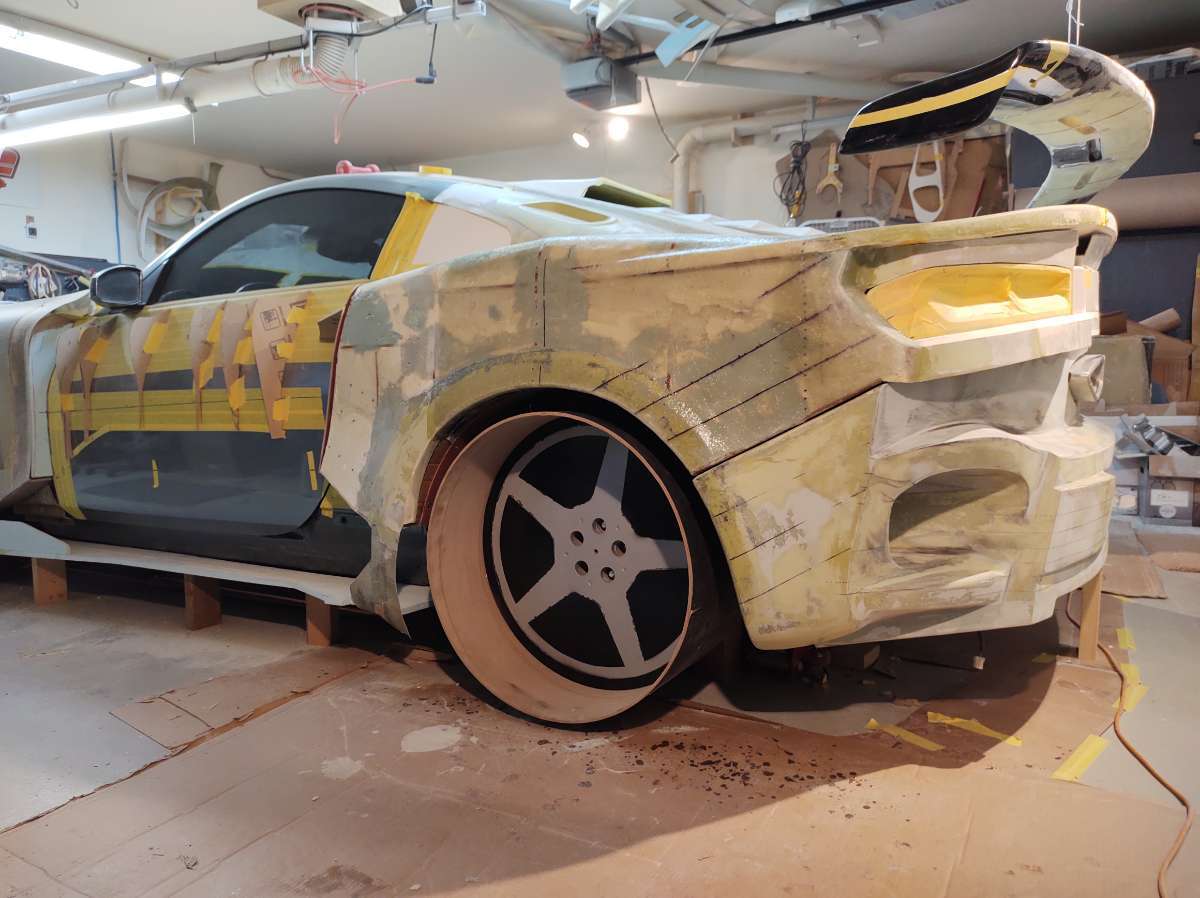
Been working on the beast as usual here's what I have been up too .
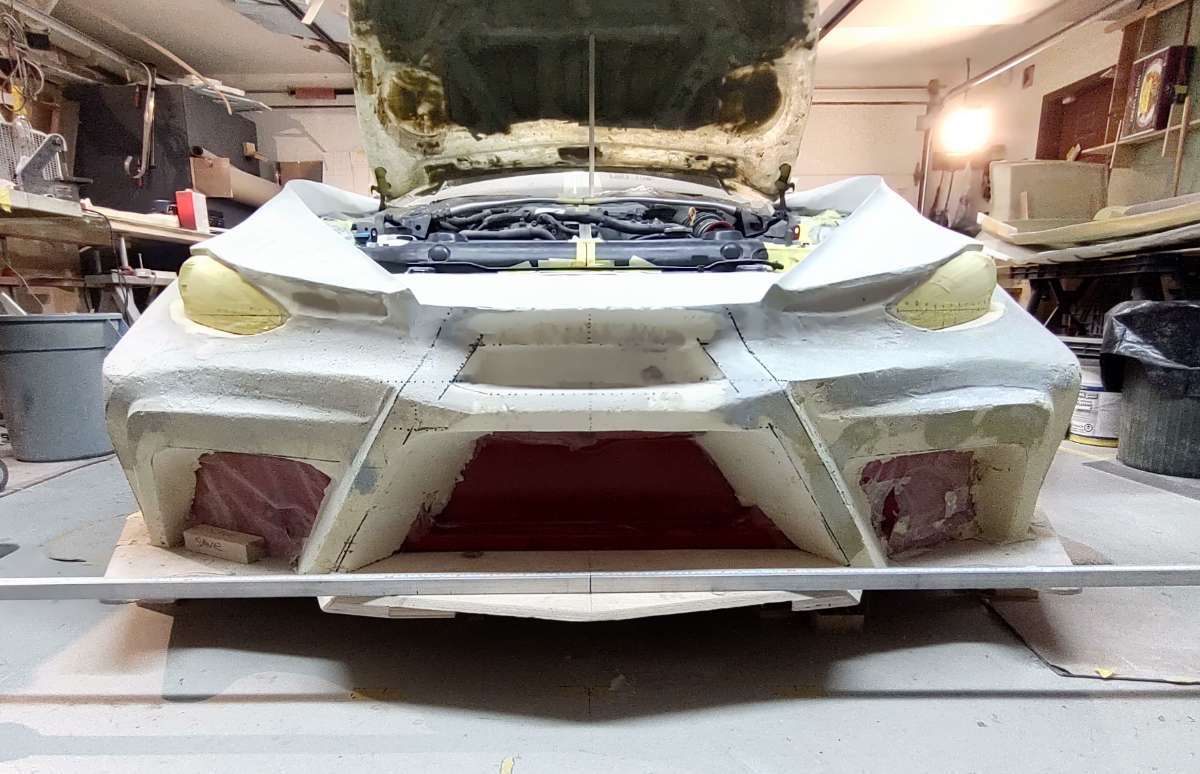
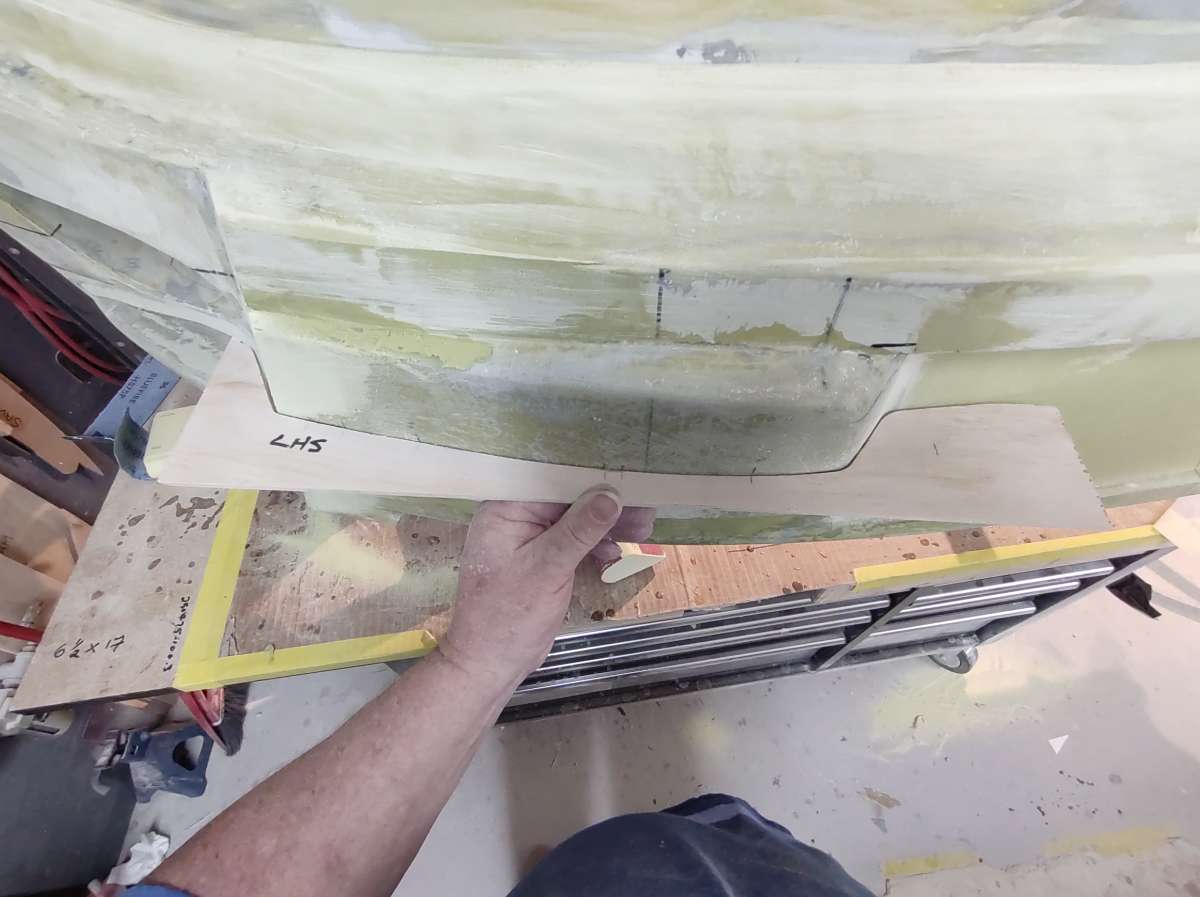
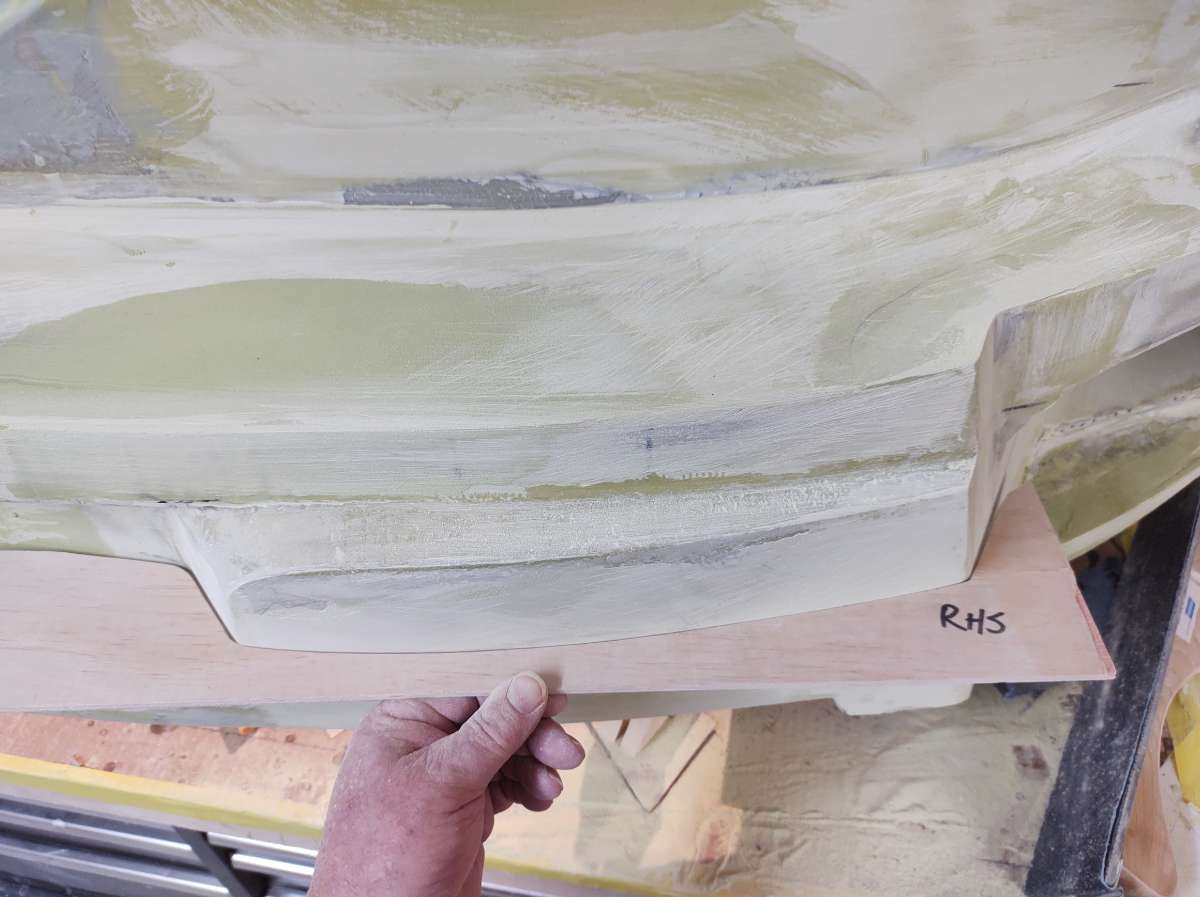
I added some extra to the bottom where the diffuser will eventually go
the inside of the other side
It was no fun at all to fiberglass inside the ducts
bumper cover starting to take shape
Getting ready for more glass
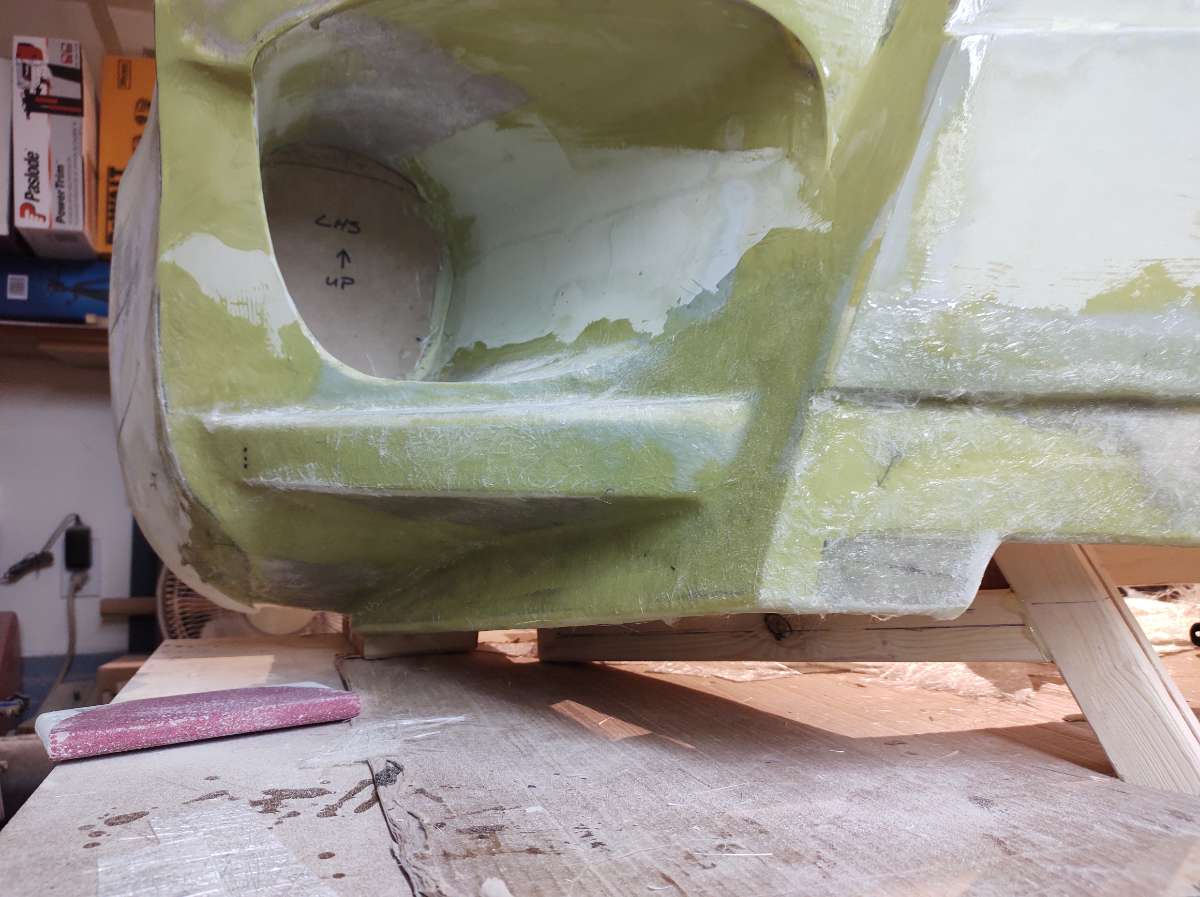
with this foam you have to glass over it before you apply any filler or when you try to sand it just tears it out in chunks .
Here you can see better the pieces i added to the bottom
upside down to apply filler and sand
here checking to make sure everything is staying symmetrical , it not easy , so many compound curves .
started filling in the fender inside lip with foam .
I modified my fender roller ( it didn't reach the edge by a long shot lol )
Using it to check and ensure that both sides are the same
More quality control , this is an unbelievable amount of work , I am going as fast as i can , it's just me and I have to have this finished by late spring .
I need to get it done but a also don't want a pile of crap after all the effort that's gone into it so far .
-
2
-
-
6 hours ago, Sim said:
Happy New Year : )
Wow, good bit of snow there.
So, stupid (maybe not so stupid) question, presumably you use all these parts to make molds and then make GRP/FRP parts from the molds?
Hi Sim
I don't know what GRP/FRP stands for , but yes I make the parts out of foam , wood , plastic etc then body work them to a finished state then take a mold from that part and then make a part from that mold .
The parts out of the molds will be trimmed , etc then bolted onto the Zed , was hoping to have molds good enough not to have to bodywork and paint them , we will see as time is running out for me at the shop I am in.
And today is another snow day !!!!! that I can't get into the shop .
Thanks for your interest
-
2
-
Re-body My Zed
in Member Build Projects
Posted · Edited by Falcata
Hi everyone sorry for the delay , everything is ok , just have been super busy helping another car buddy .
I have done a couple of renderings thought you might like to see them.
There not perfect , just learning how to do them .......... as usual .
Once the doors are finished and the hood , I will do them again . it's great to see roughly what it will look like shinny !!!
Stay tuned there will be some updates soon.
Cheers