


synolimit
-
Posts
111 -
Joined
-
Last visited
Content Type
Profiles
Forums
Events
Gallery
Store
Posts posted by synolimit
-
-
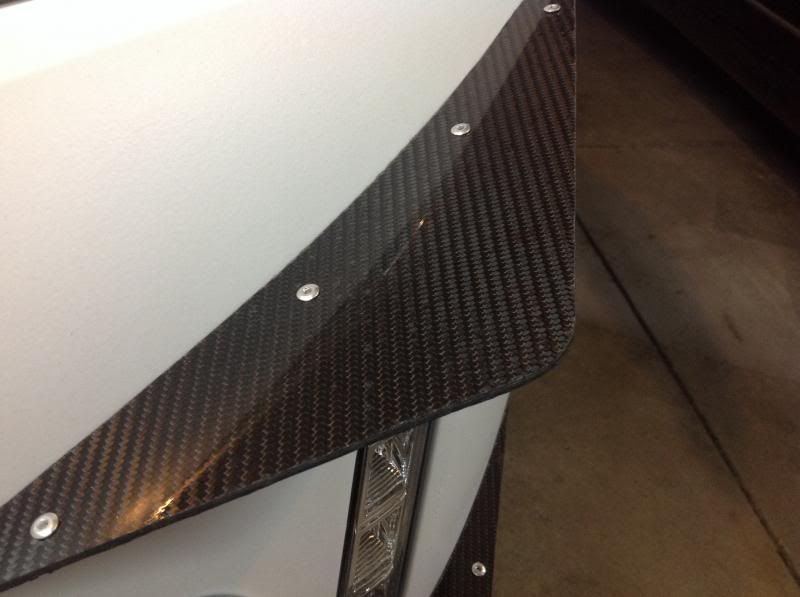
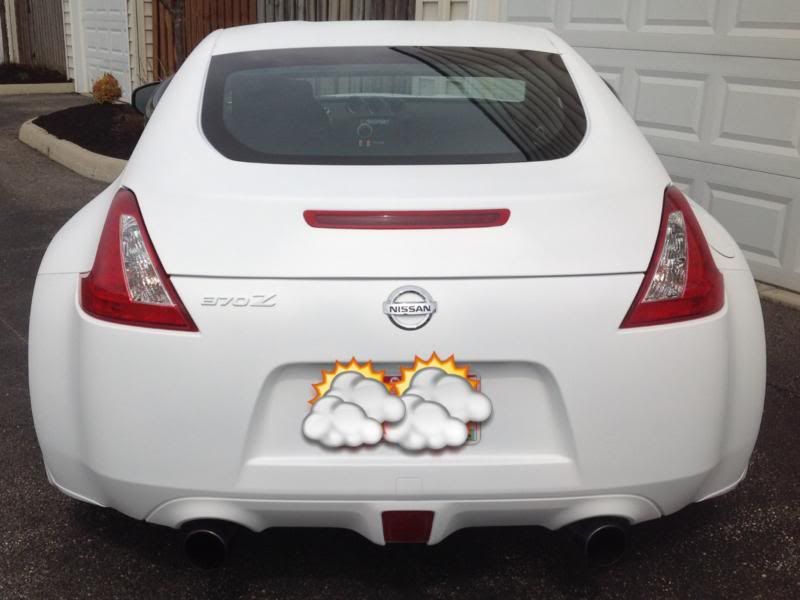
Nice work but too much effort or cost for the gains. But if its a DIY it's another brainer along with cams, equal length short or long tube headers and decats with tune exhaust system.
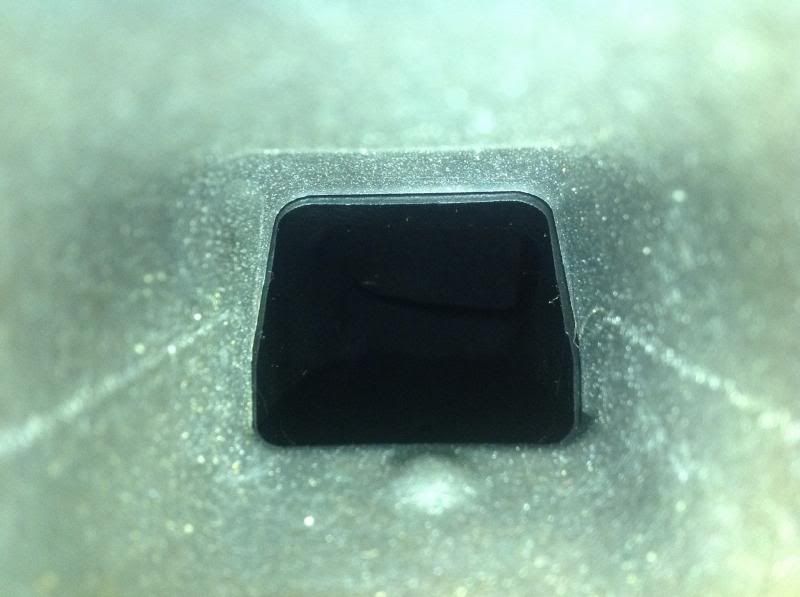
How do you mean? I bought spares and have already sold my OEM parts and sold for slightly more so I made a little bit of money. Then the porting was $199 for the Tb's, $90 for the lower mani and $260 for the upper mani. The Z1 upper mani is $295 and the motordyne mani is $540. So I've spent less then all of them. I'm sure I'll get the same gains out if the upper mani as Z1 and for only $289 on the other two I think its very much worth it. Where else you going to get power out of a NA Z for only $289? Even if its only 5hp, that's a great price to pay.
-
 3
3
-
-
Great results... Nice solid every day na power gain there!!
Haven't gone yet. That was only the beginning.
-
Just went for a test drive. Surprised it went great. I thought the TB's would need the idle screw adjusted but it drove 100%. Good to know when you need to drive to the tuners.
-
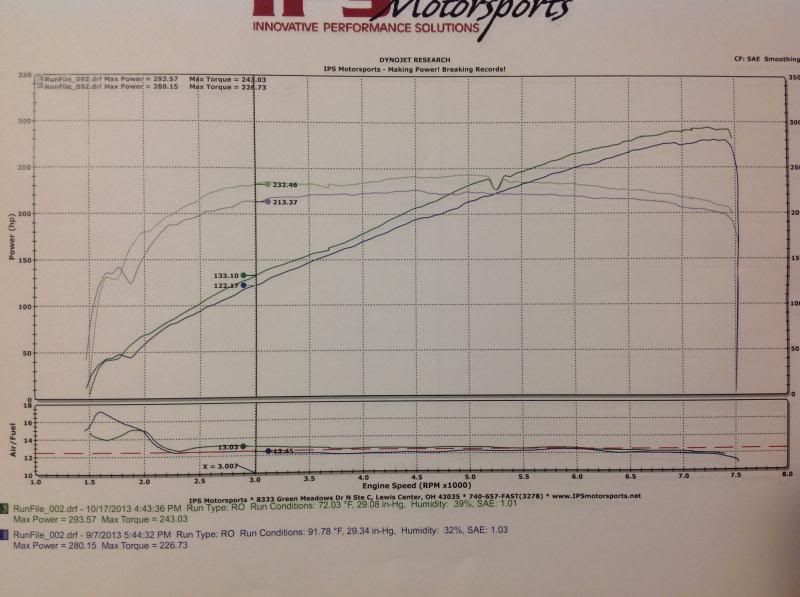
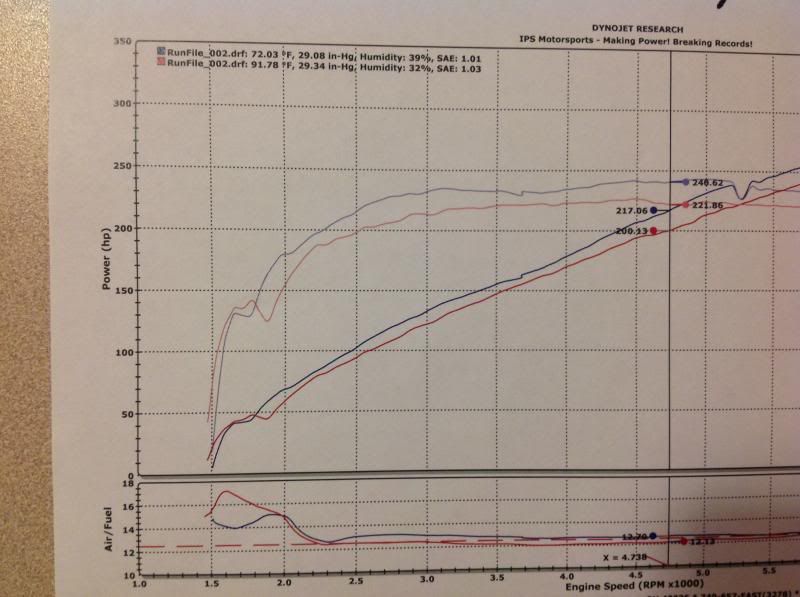
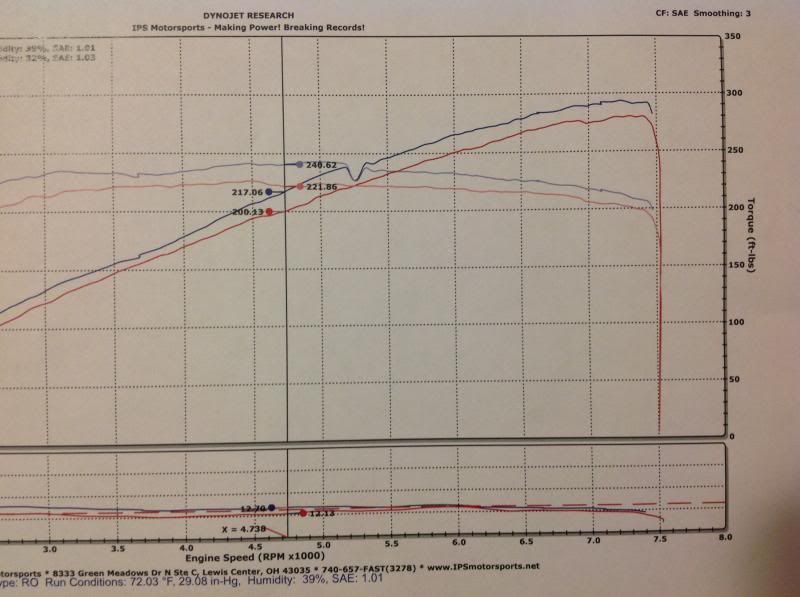
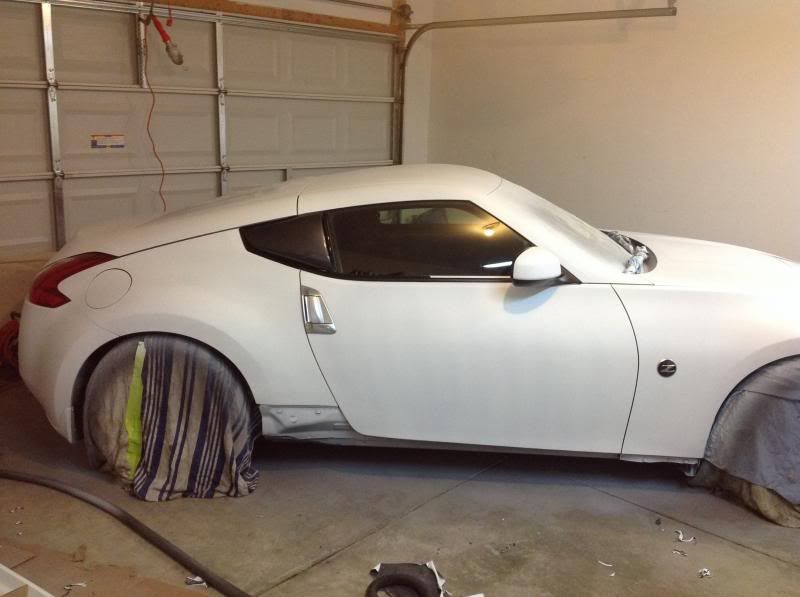
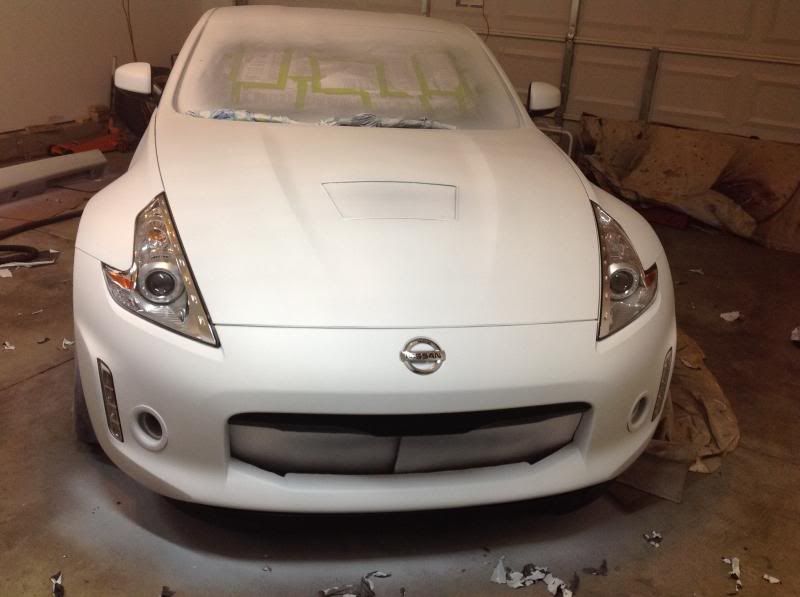
Well here's the before...tuning is tomorrow!
This was long tube headers added and smooth post MAF tubes with no tune.
Peak power was 13hp and 17tq but mid range gained anywhere from 11-17hp and 18-19tq. 293hp 243tq.
-
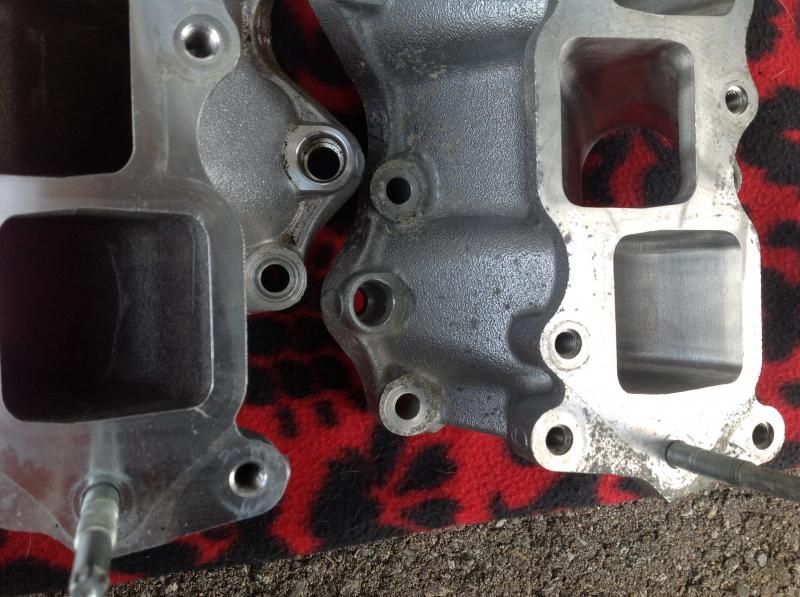
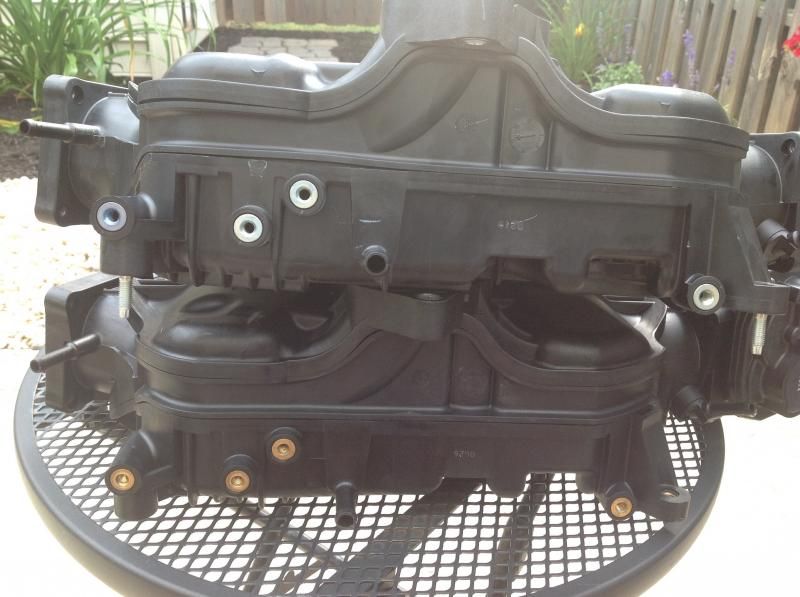
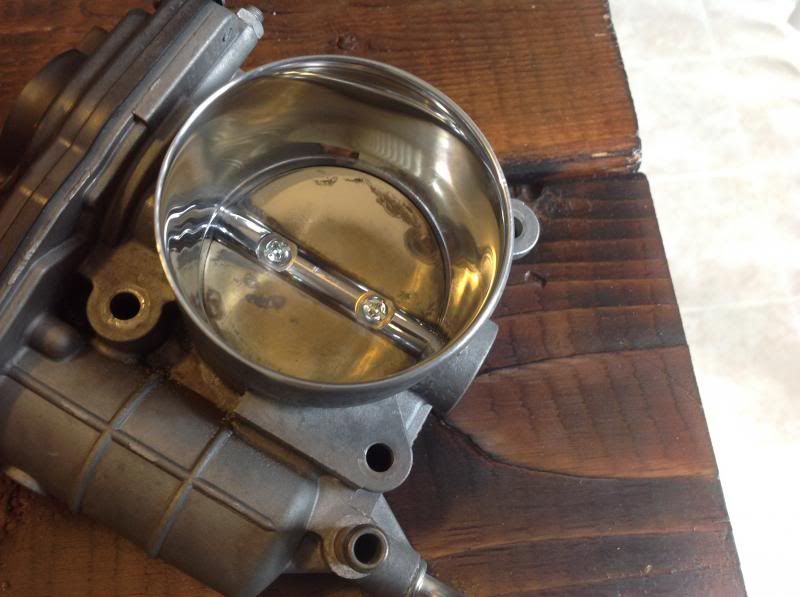
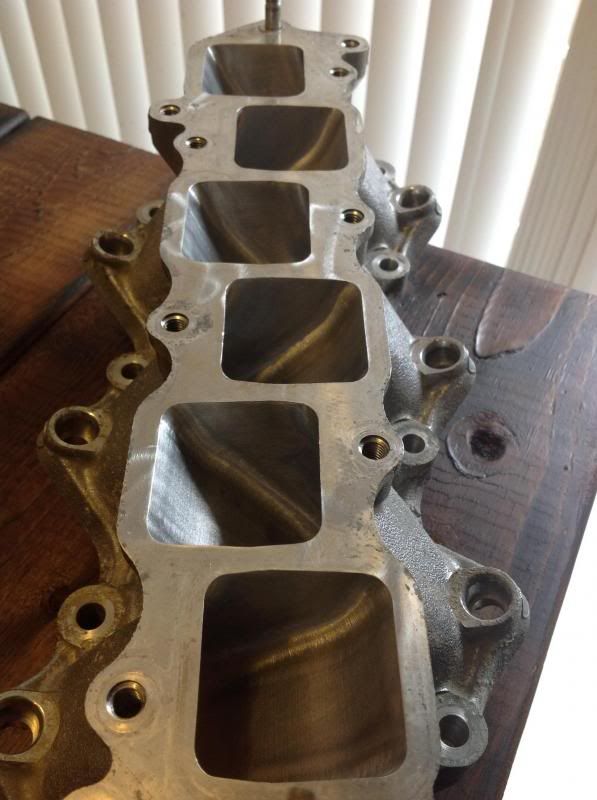
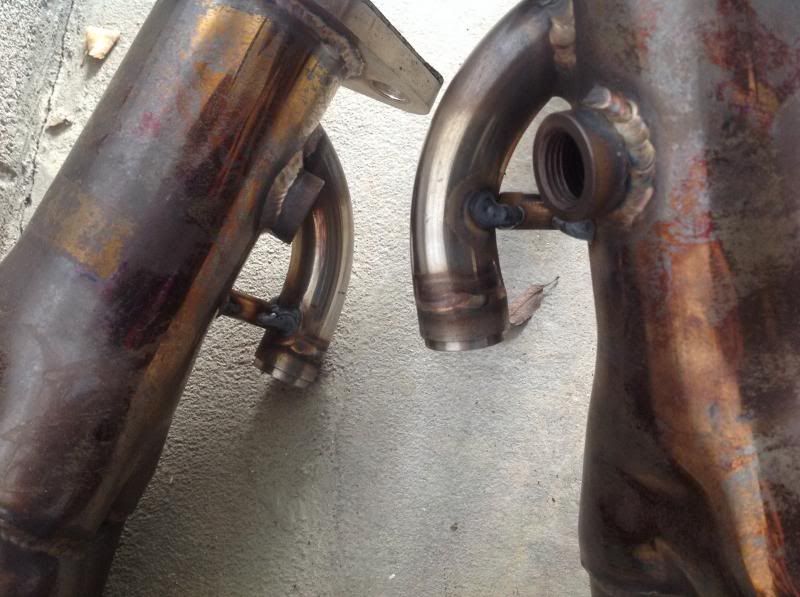
Ok I did the swap last night. Just wanted to show more pics and info regarding the before and after of all the parts side by side.
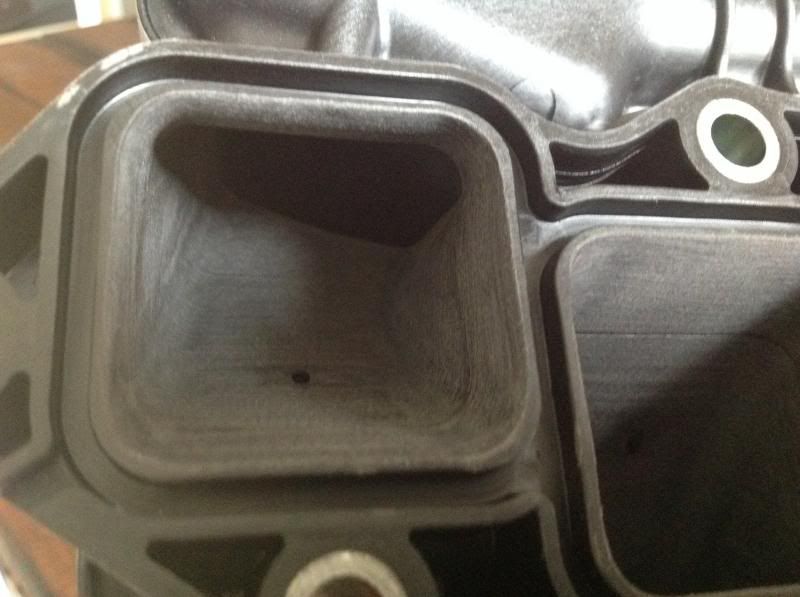
First up the weight of the ported lower vs unported, 5.80lbs vs 6.04lbs. So clearly some weight loss of material.
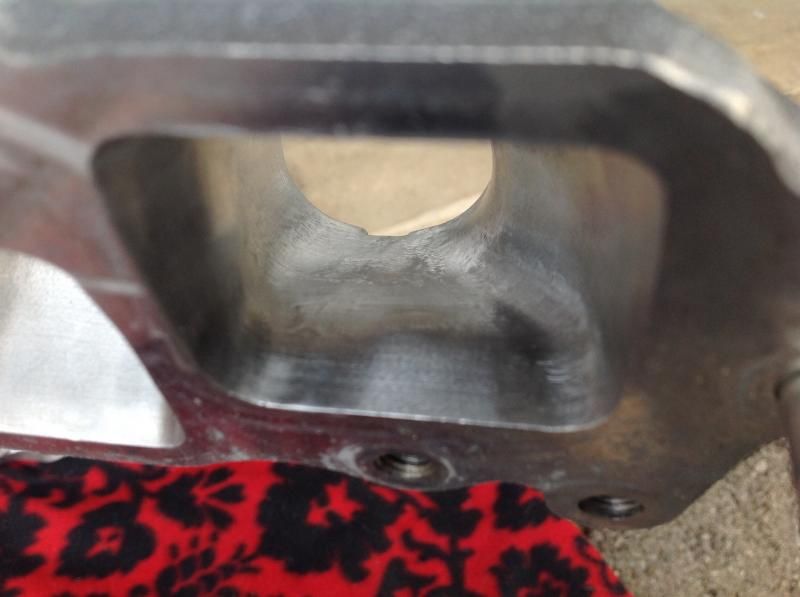
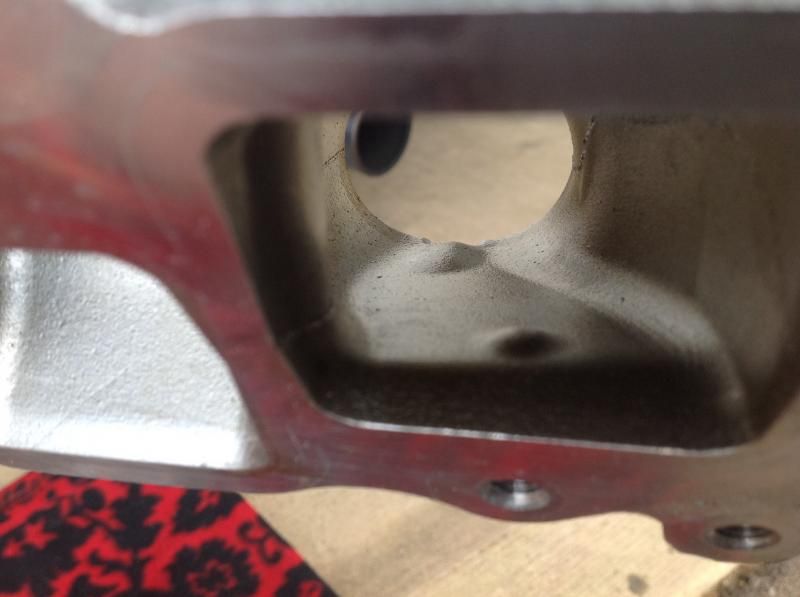
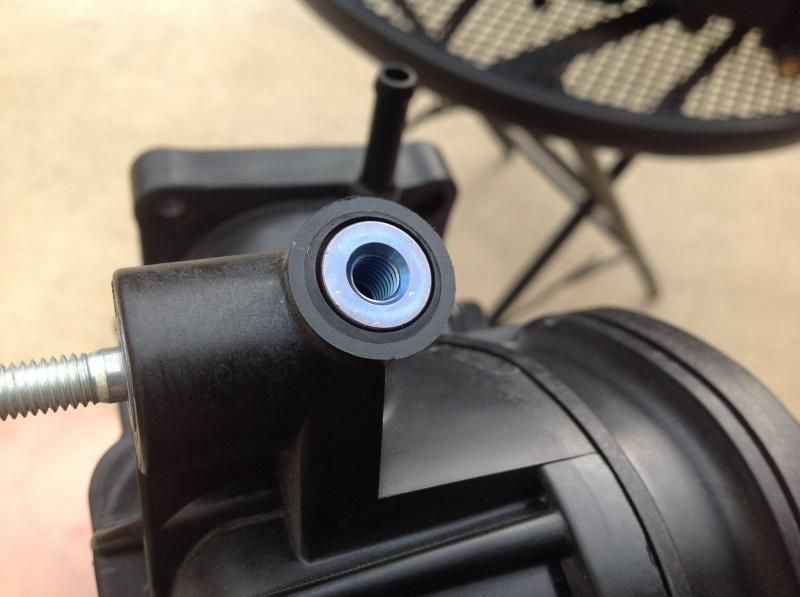
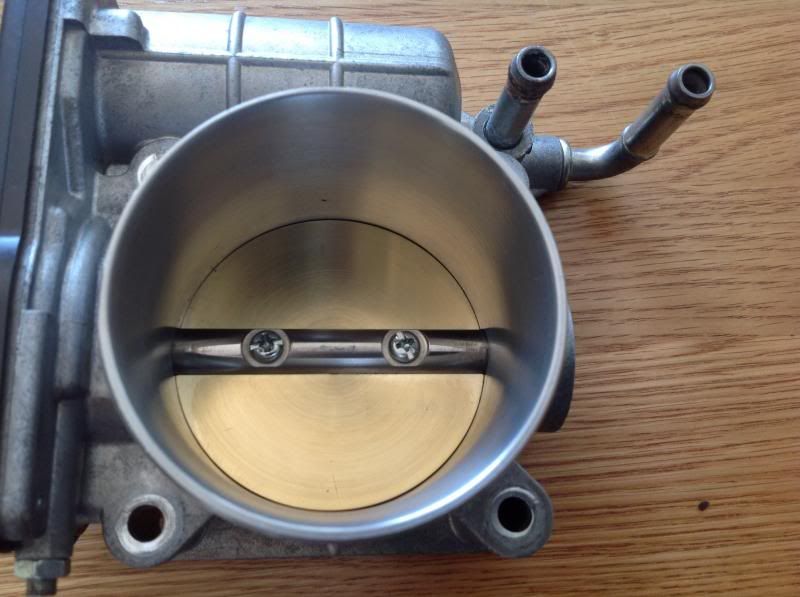
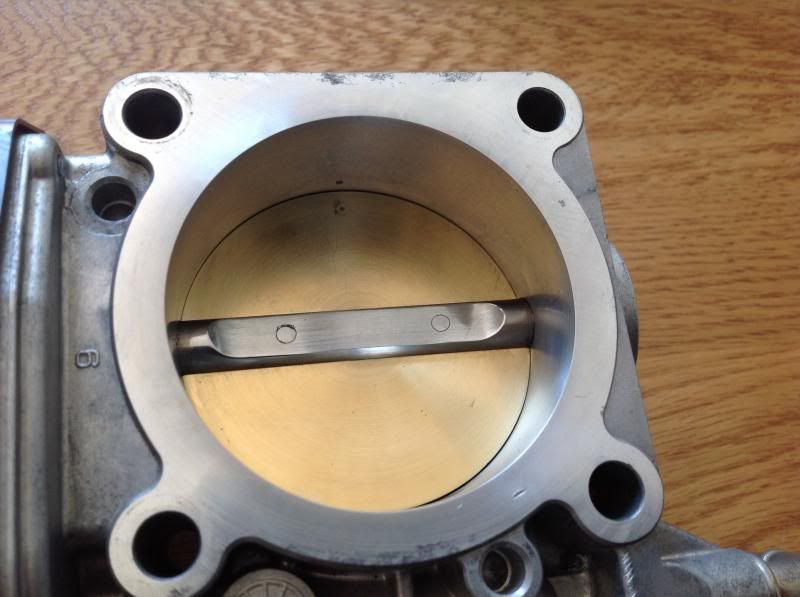
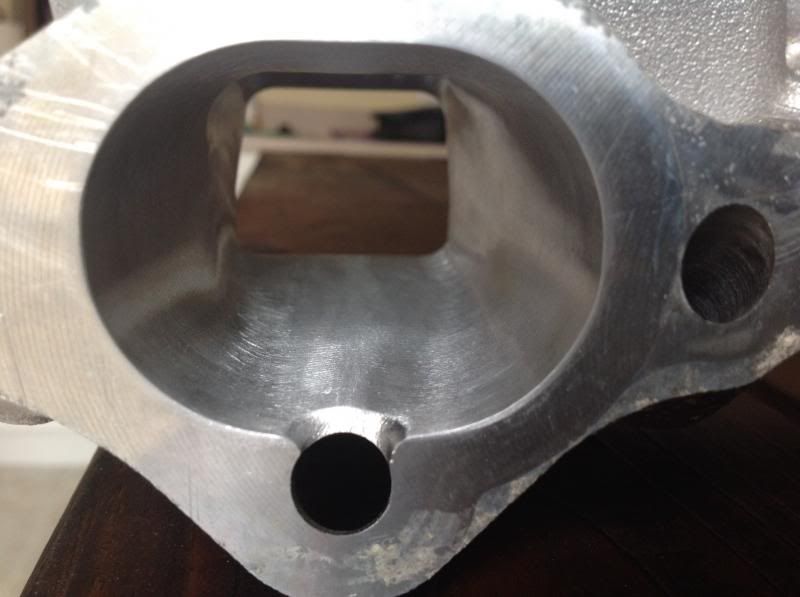
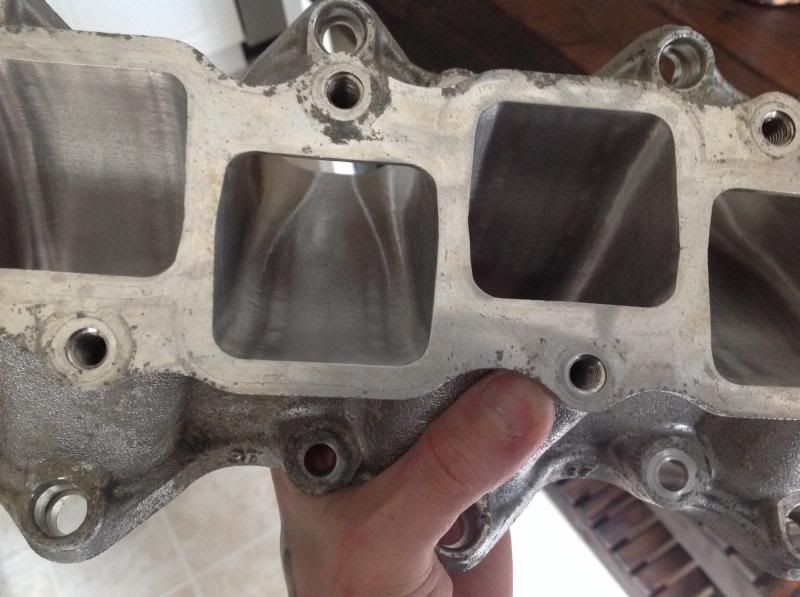
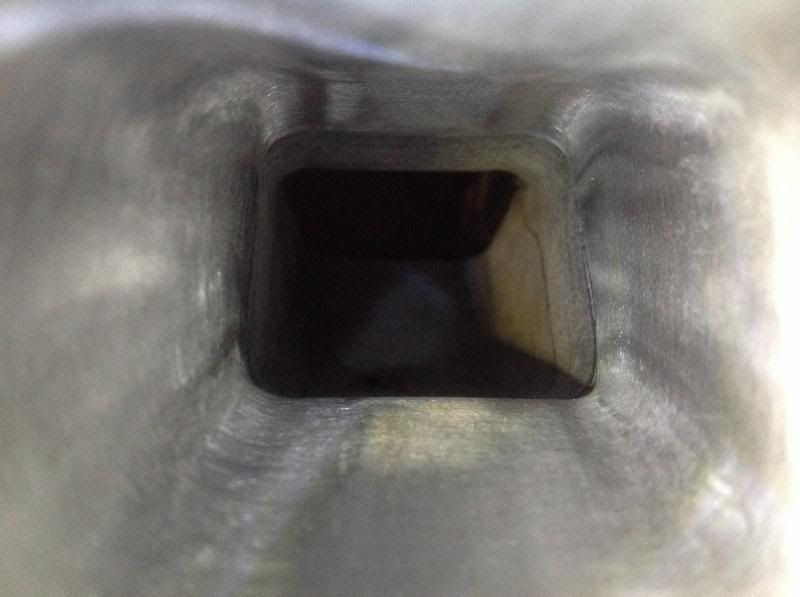
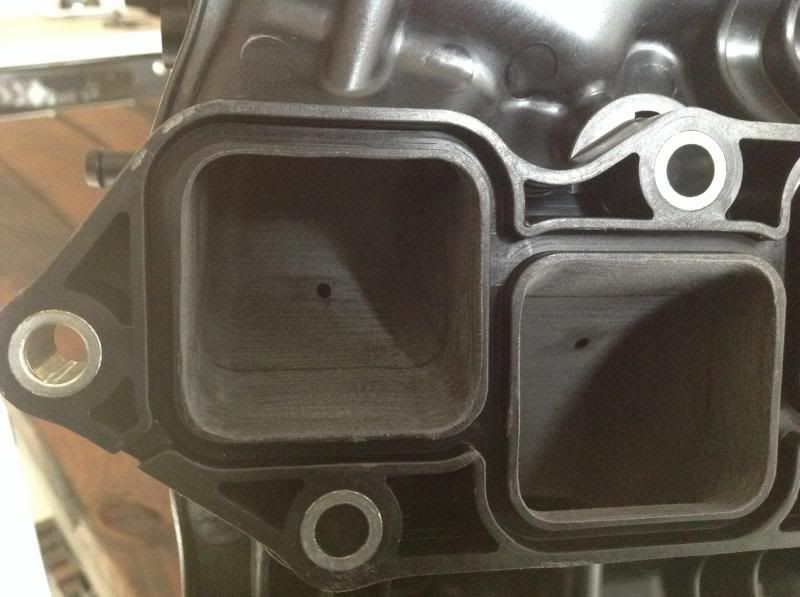
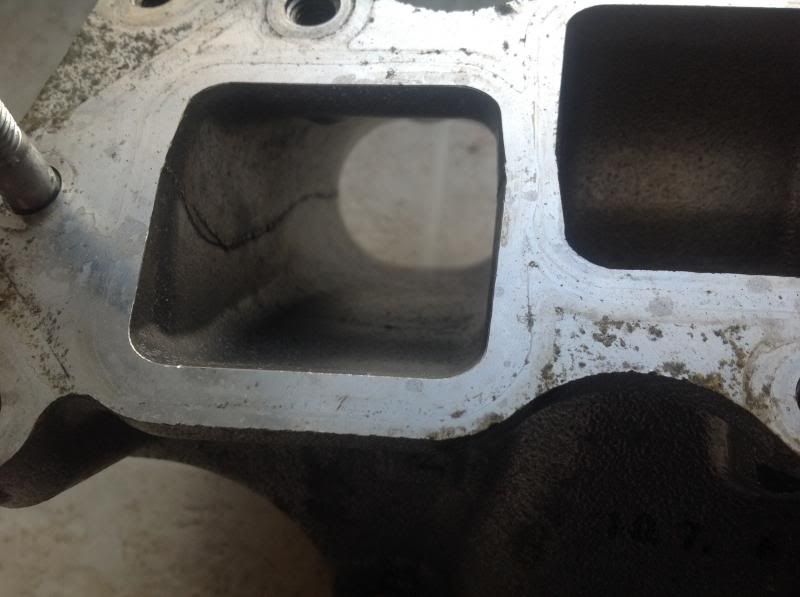
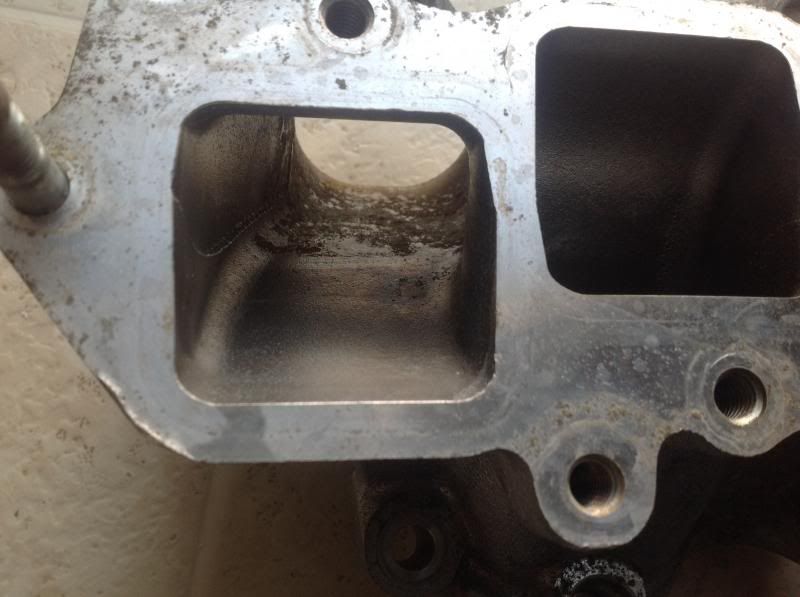
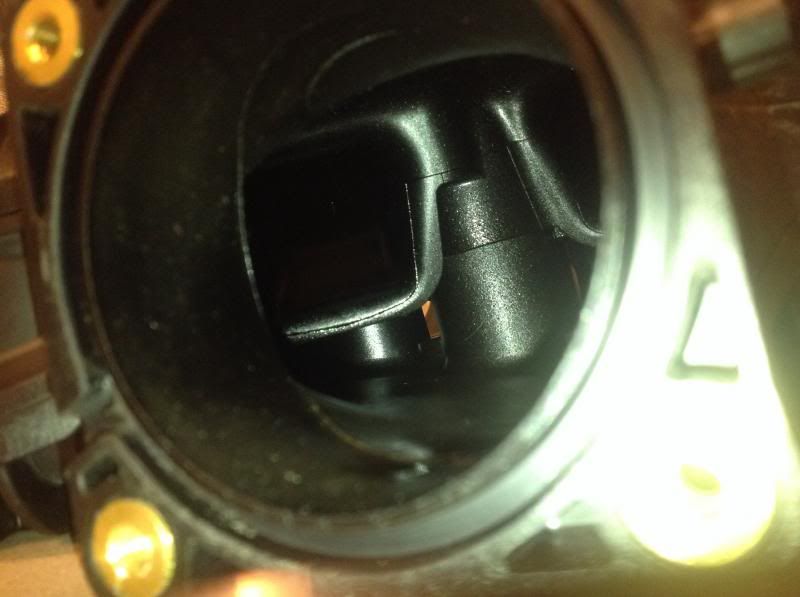
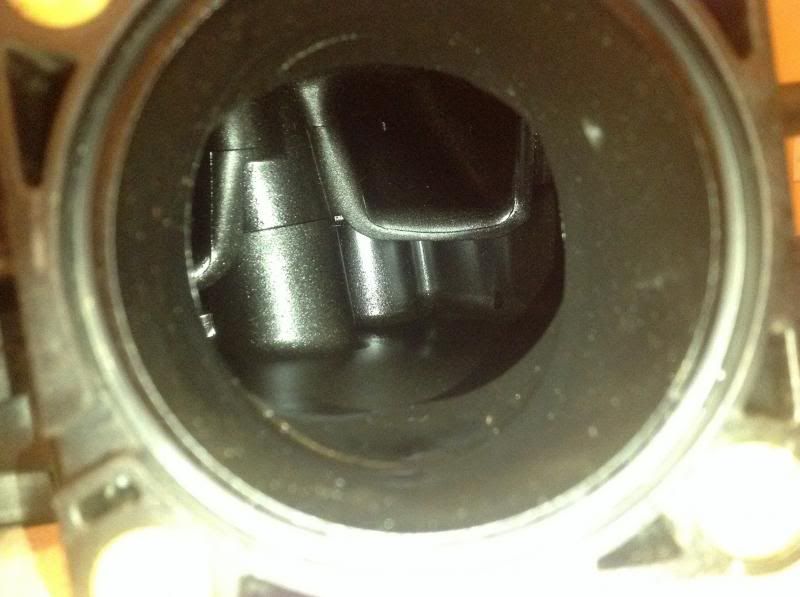
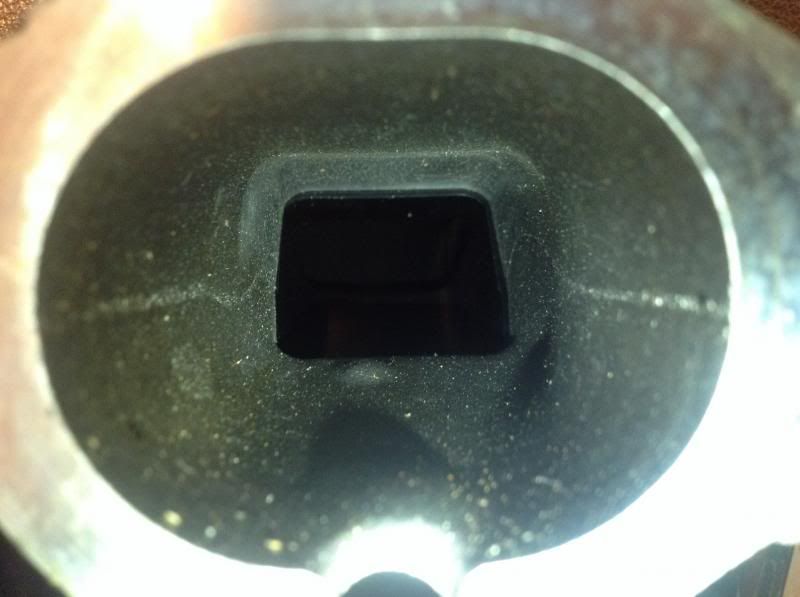
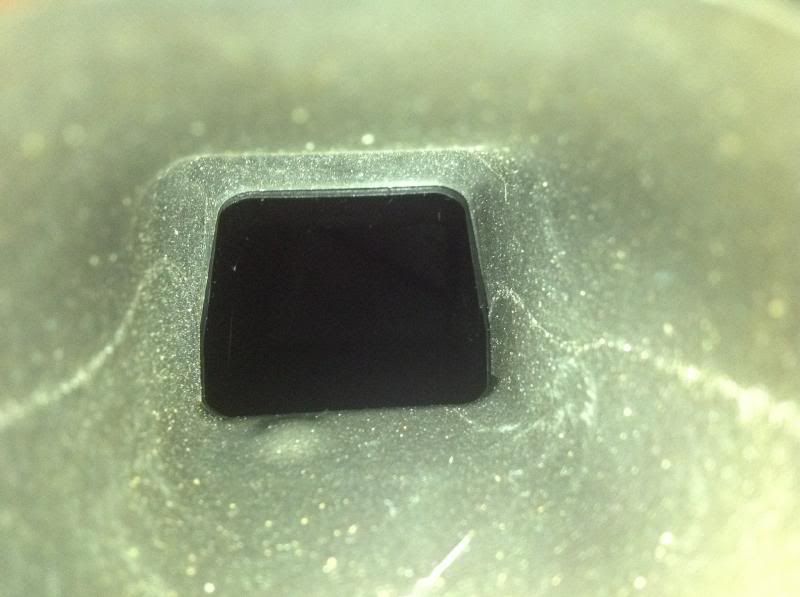
Next, the openings at the bottom of the runners running in both directions, 1.53" vs 1.43" is where the bump is that the injector is slid into. Clearly with the bump gone its opened up quite a bit!! The other way it not as much opened at 1.99" vs 1.98".
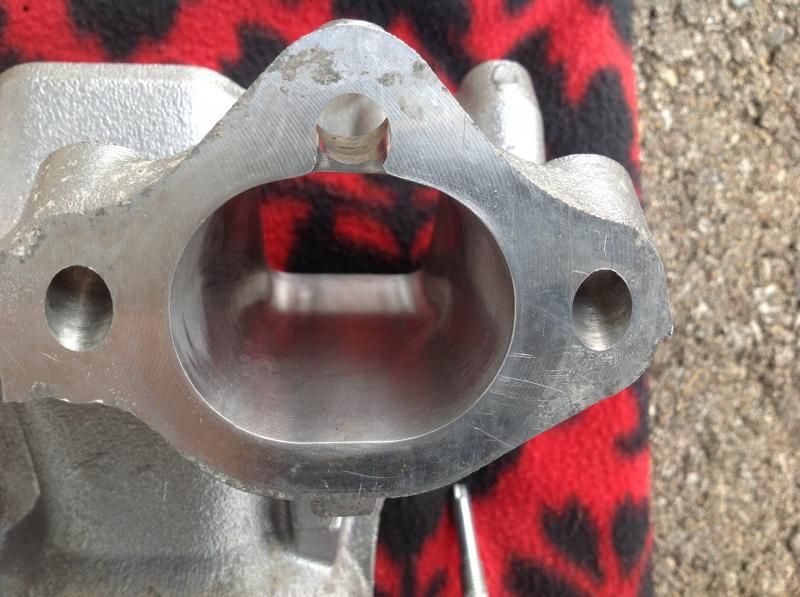
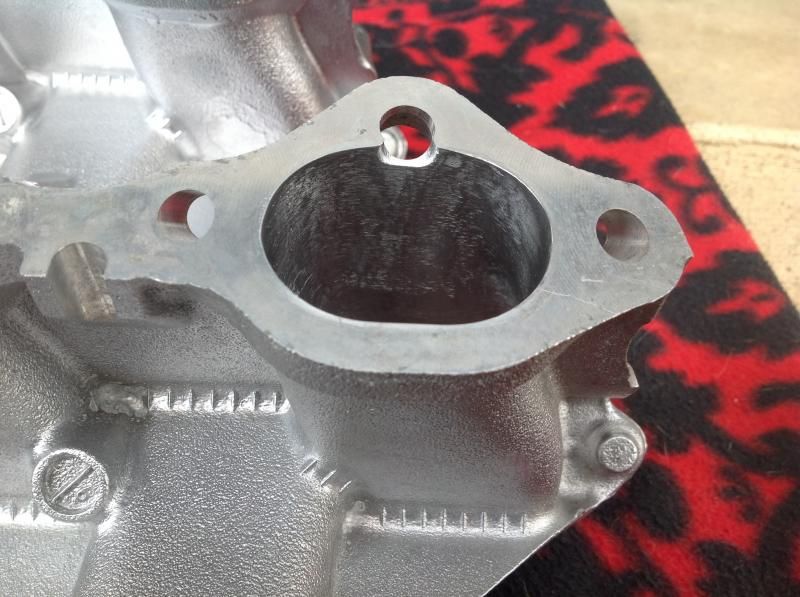
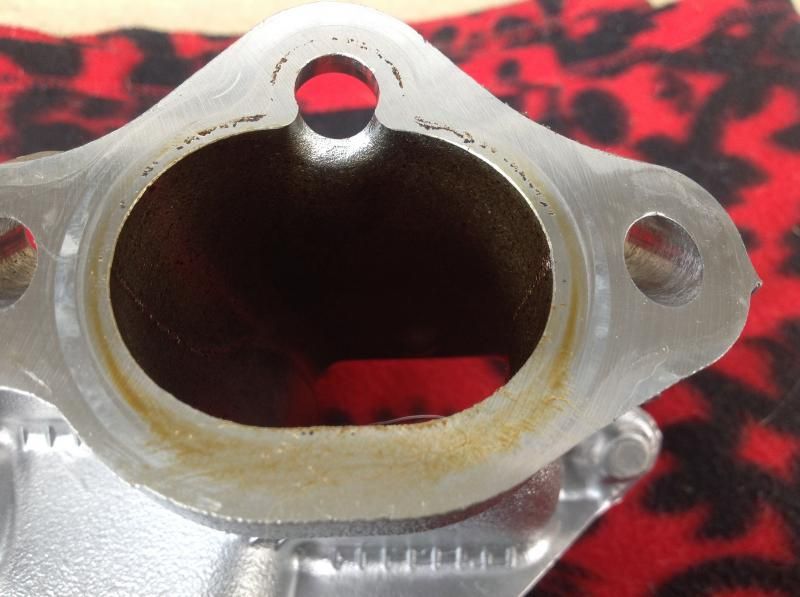
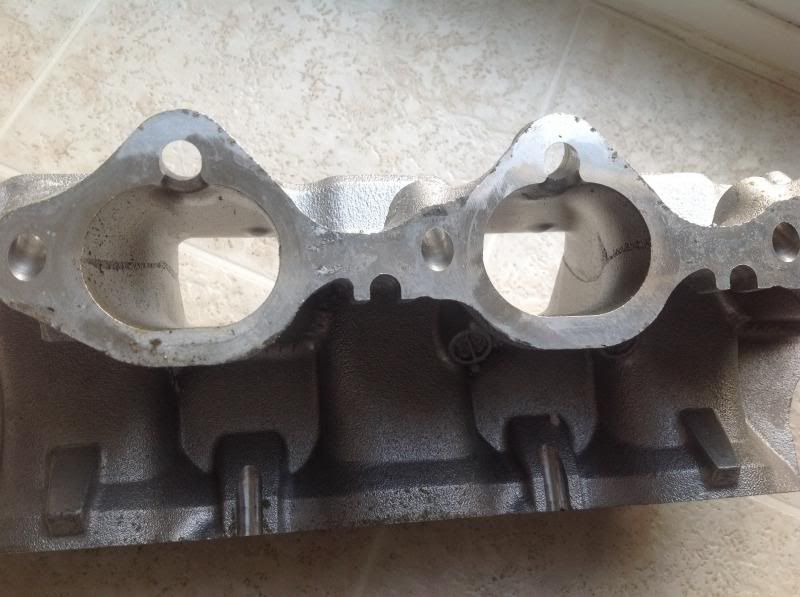
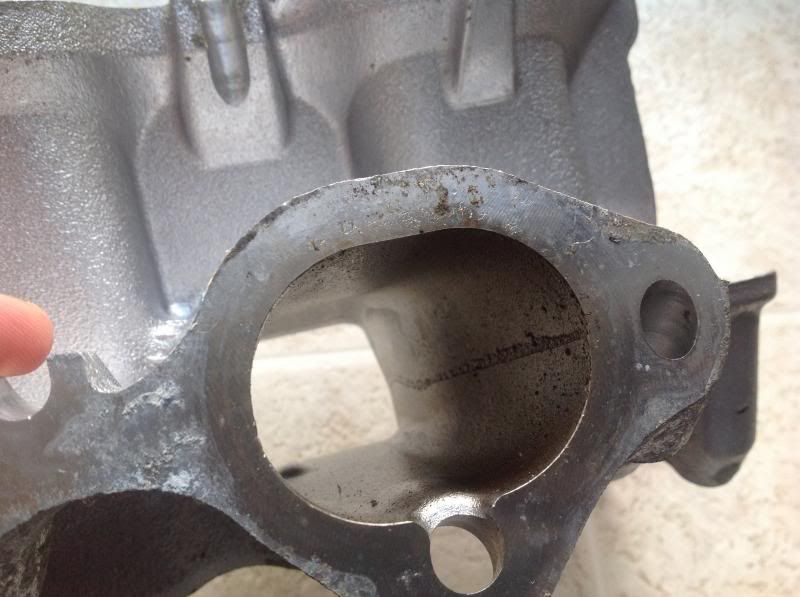
Next, the openings at the top of the lower mani are 1.70" vs 1.70" and 1.53" vs 1.52". The reason the upper part didn't open that much (only 0.01") is because every part on the intake system starts smaller at the TB then gets bigger for the next item. This is because nissan wants the parts to never have to "hit a lip" with air flow. It's better for flow to go through a small space and open into a larger one, than flowing through a bigger opening then hit a lip of metal of the lower mani and cause a bunch of turbulence. So the lower mani's upper part wasn't touched much because the upper mani is what got ported to be port matched to the lower. And looking at the pics with upper mani's gasket system we couldn't port more of it or we'd of ported into the gasket space destroying the upper mani.
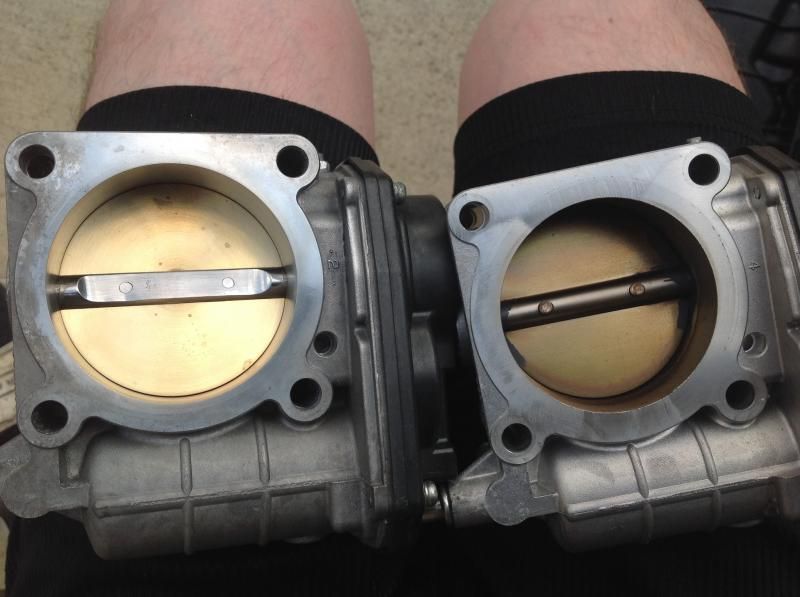
Next, 1.86lbs vs 1.92lbs of each TB.
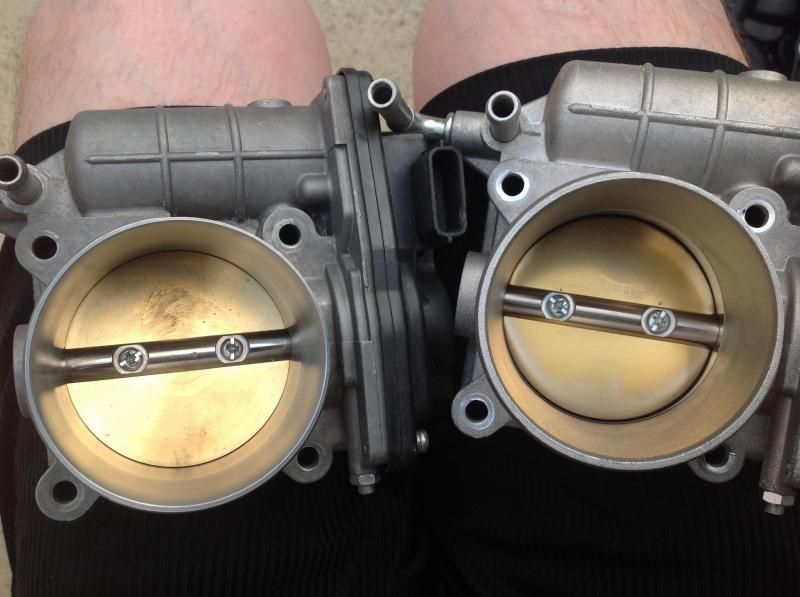
Next, upper mani's weight, 7.90lbs vs 7.16lbs. Now why is the ported mani heavier than the unported? Well the ported one is off a g37. They for some reason give it very long cylinders where the bolts go through adding mass and needing longer bolts. They also use brass vs what looks like titanium on my 13 mani!! All my silver looking threaded parts are rainbow colored like when titanium heats up.

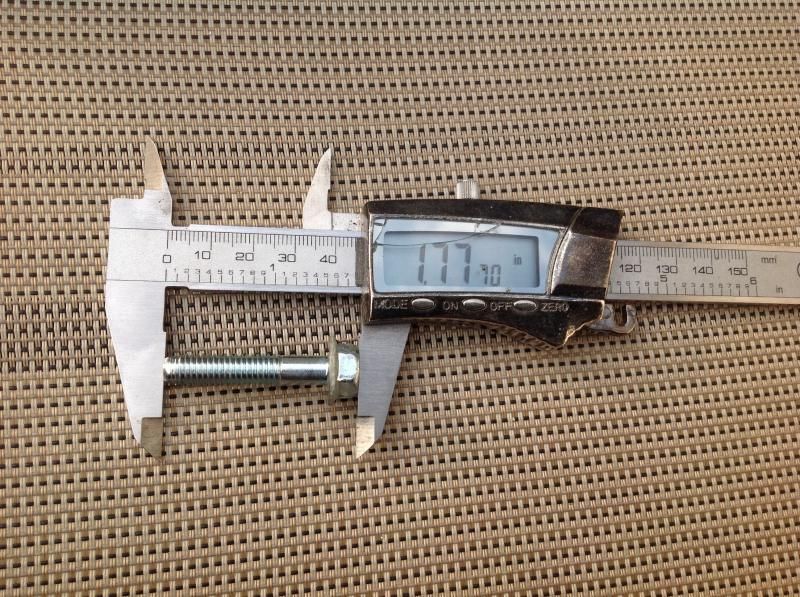
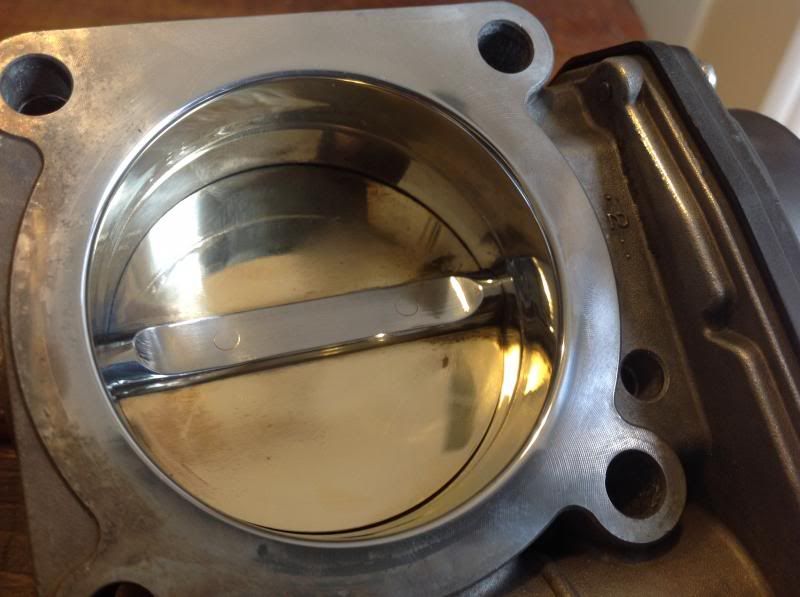
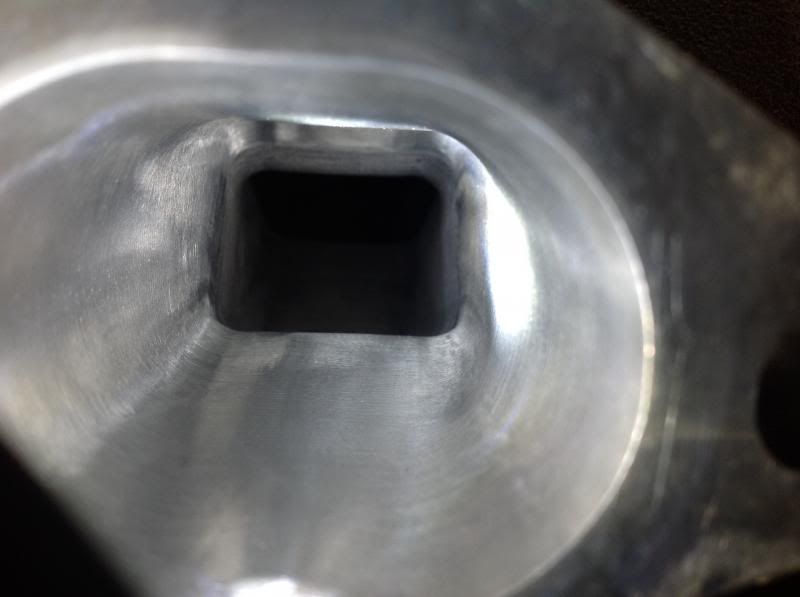
Next, the upper mani runners going in both directions, 1.85" vs 1.82" and 1.56" vs 1.50". Now you'll ask yourself these numbers don't match the numbers above for where it bolts to the lower mani's openings. That's because I didn't measure the exact opening of each item. I stuck my calipers down inside so they laid flat on the parts surface and measured wherever the tips made contact. This just insured a proper measure of each item. The calipers tips are like a 0.5" long so its inside more but i looked and each part is flow matched 100%. You can also see some horrible lips on the unported mani that needed to go away.
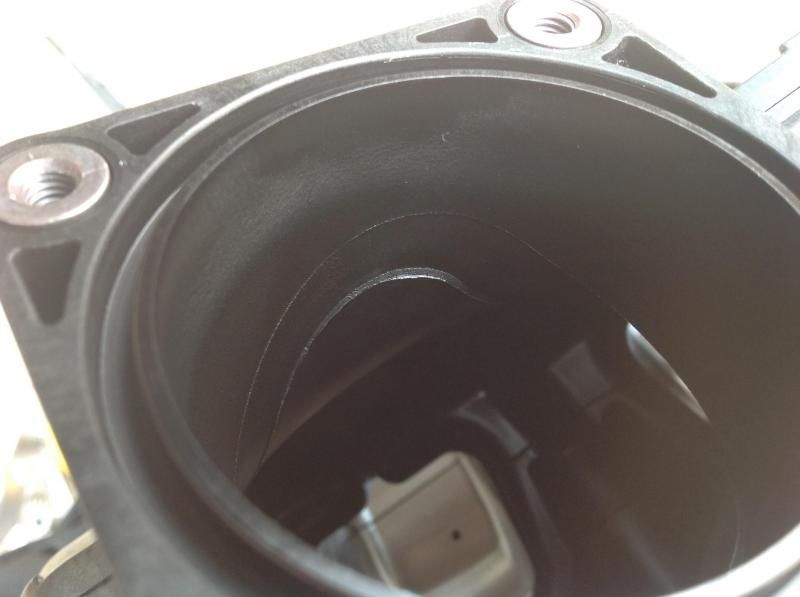
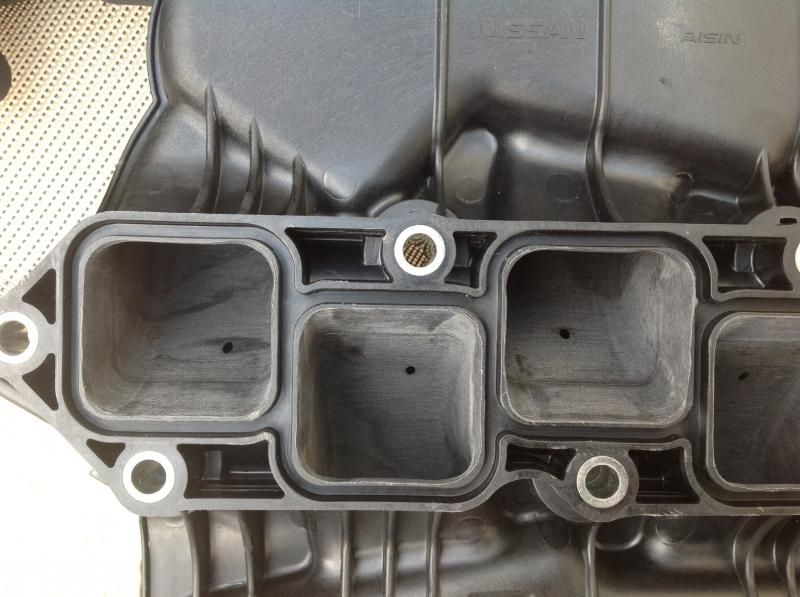
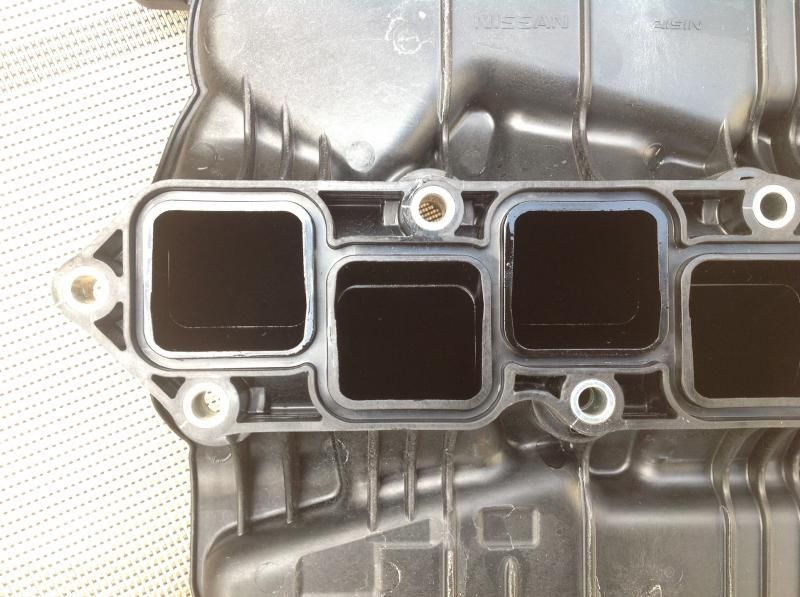
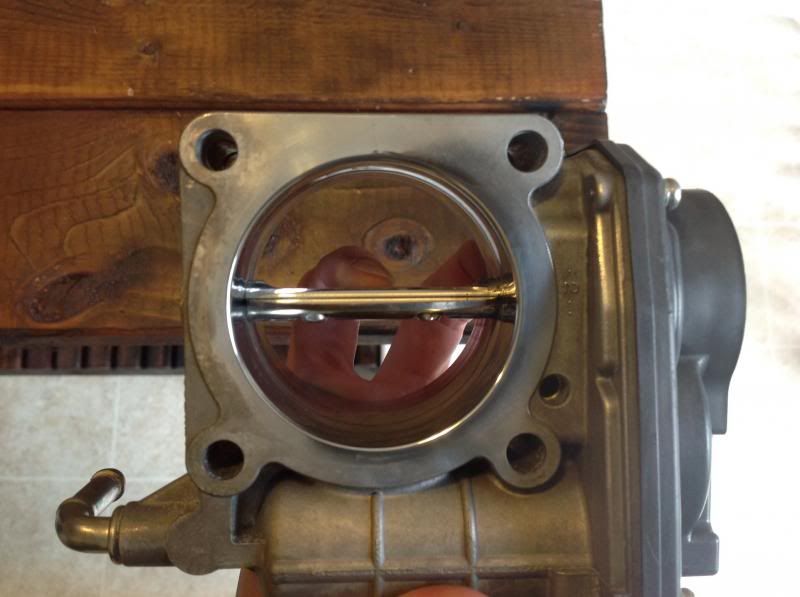
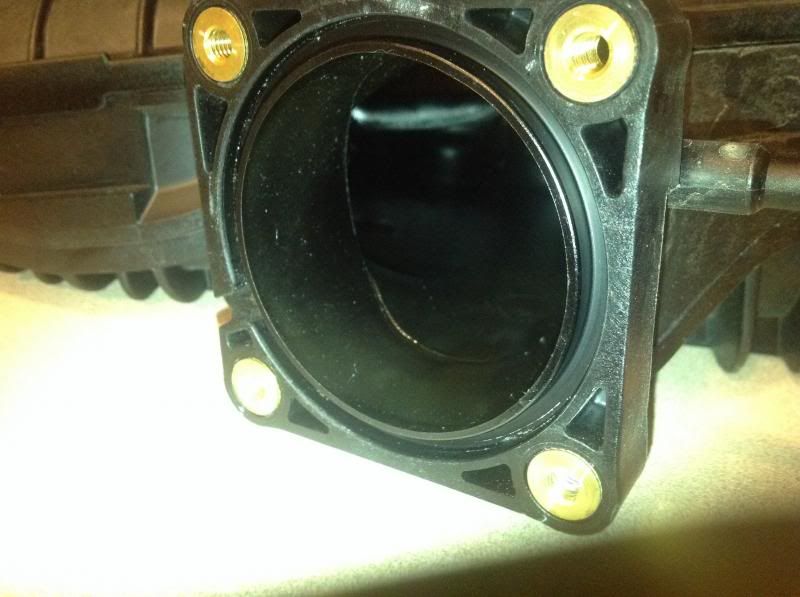
Last, the opening of the TB hole on the mani. 2.47" vs 2.46". Again, because of flow its the TB that got all the porting and not the item it sits on. The TB is 100% port matched now to the upper mani.
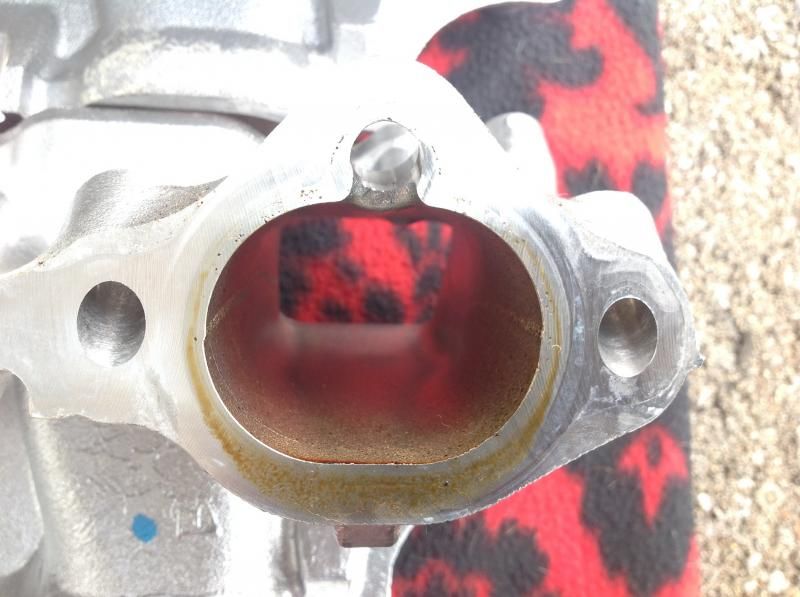
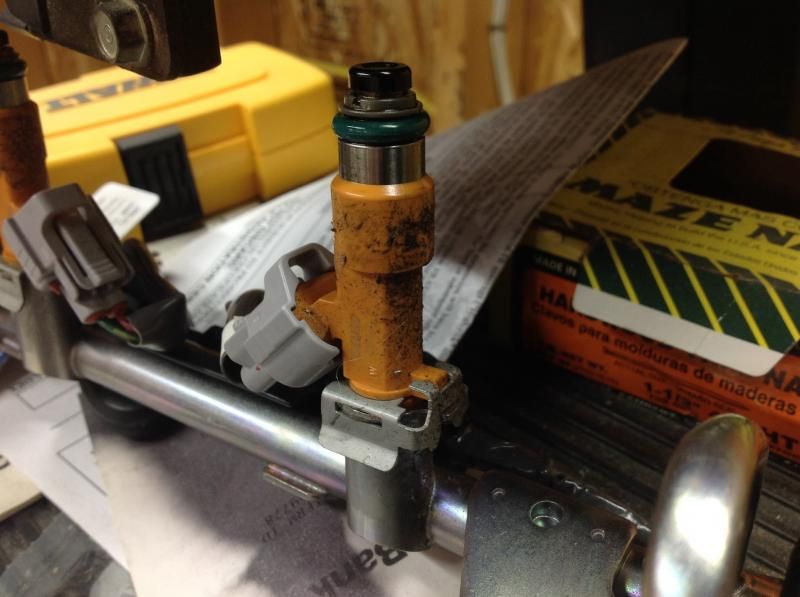
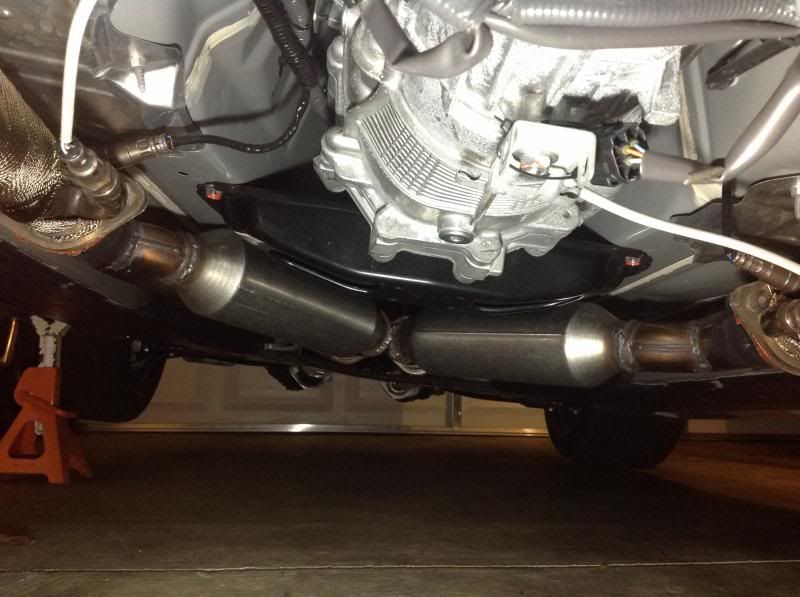
On a side note. One thing I hate is the oil in the system! I'm not even boosted and oil comes out of the gaskets of the lower mani to head and injector o-rings. Just nasty stuff. I need to have my catch can running to atmos.
-
2
-
-
Tune on Saturday I hope.
-
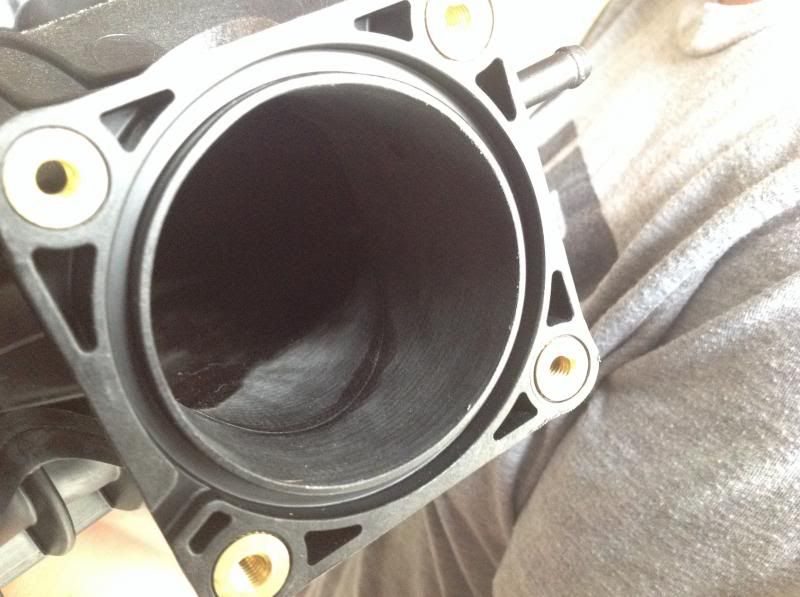
Ok TB's are in.
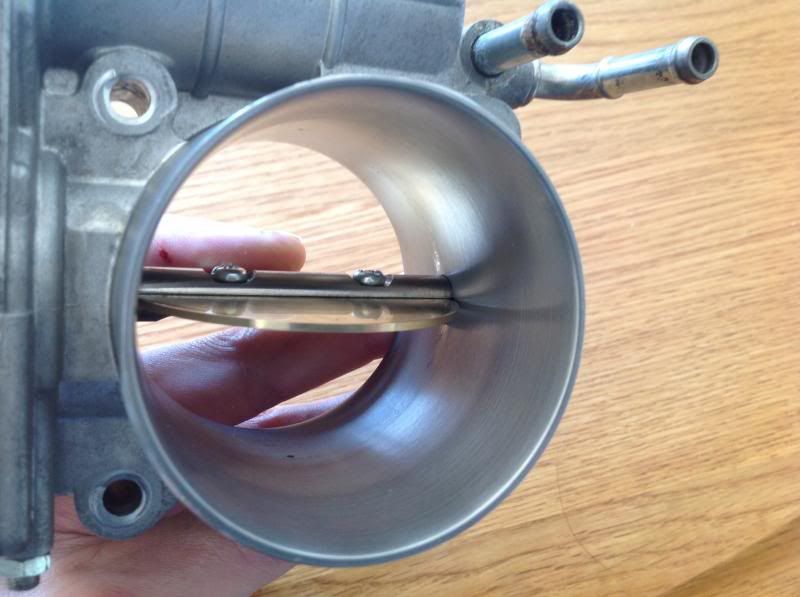
So front lips gone to 2.64" and tapers down into the center but now there's no more lip. The middle went to 2.51" as far as my calipers can get in from the front. 2.49" now on the back lip which now looks port matched to the manifold!!!! I might have a little sanding to do on the mani, won't know till I bolt them up. And as far as I can get in on the back side closest to the butterfly, it's now 2.48"!
So before 2.6 to 2.5 but then 2.5 down to 2.35 at the butterfly, then back up to only 2.39 at the mani.
Now 2.64 to 2.51 but only down to 2.48 at the butterfly, then to 2.49 at the mani.
I wish the new butterfly was knife edged though.

-
1
-
-
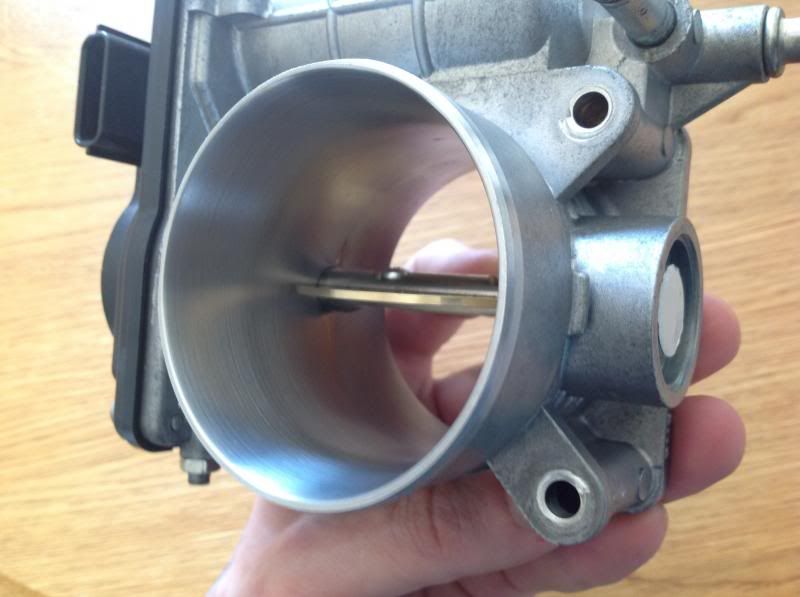
Not happy with the TB's. Getting them sent out to be done for real this time. Full CNC port with new butterfly plate. I thought I was getting some porting but he just polished it and profiled the butterfly shaft. OEM is 2.6" tapering down to 2.35" at the plate then back up to 2.39". The manifold is 2.5" so the new CNC TB will be 2.5" through and through. Dyno to come shortly.
-
1
-
-
Couldn't cut and paste and to lazy to rewrite it haha. I know shipping to you all won't be cost effective but I'm sure you guys can find a porter in the UK. Just a big FYI for you guys incase you need more power for NA Z. Dynoing will happen soon with tuning. Parts are done and ready for pick up.
Prelim pics
-
1
-
-
-
-
Brilliant write up, very intensive

Hope this doesn't affect you're warranty

Awesome

Lol warranty. My friends refer to me like the Stig..."some say no one touches his car but he." If anything goes wrong I'll build something to fix it haha.
-
that pic right there is awesome, looks totally mad max! love the cooling ducts aswell thats a great idea. cant believe i just came on for a quick look thismorning and now ive sat for about 45 mins reading your build
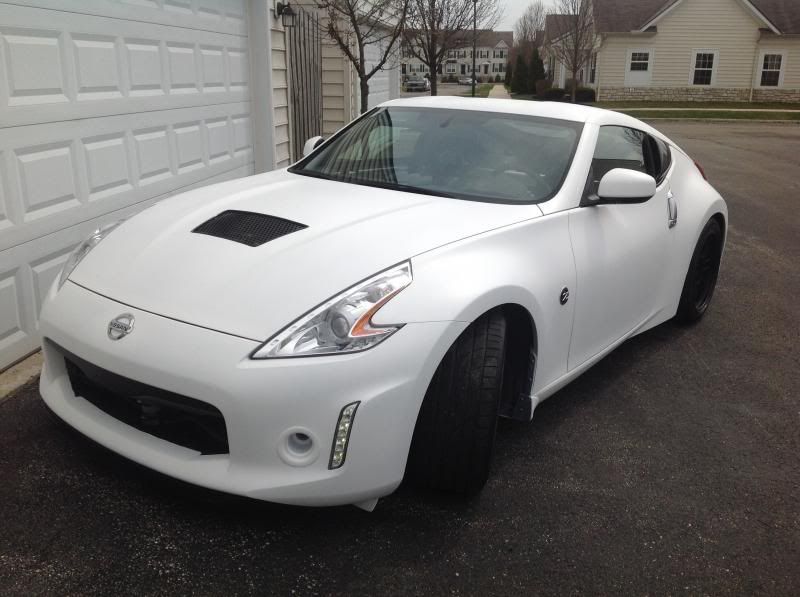
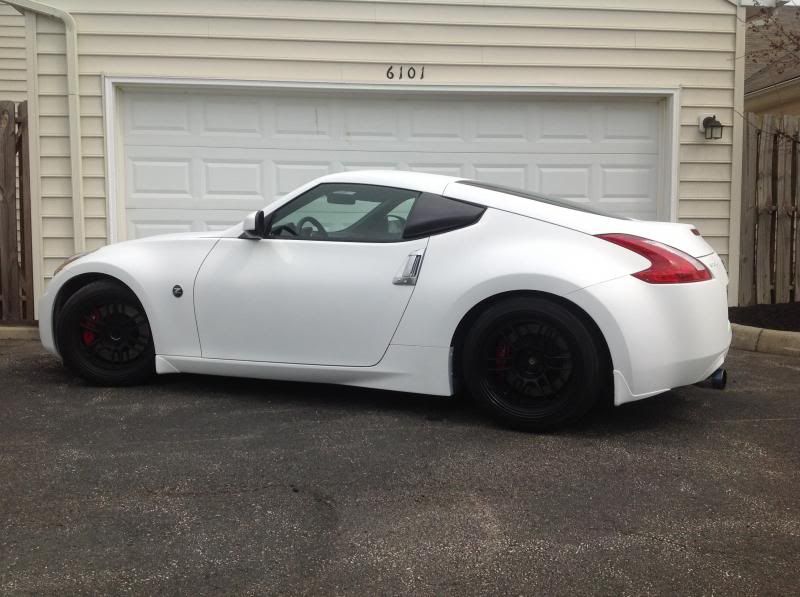
Yeah it looks kinda cool not being perfect and mint.
If you have time I'll post the USA build with thread links to all my DIY.
http://www.the370z.com/members-370z-gallery/72829-2013-sport-build.html
-
1
-
-
I try not to haha. I'm not a great finisher though, a little rough around the edges because I rush but I do try.
Lol yeah a little. I look back now though after doing the quarter panel and it's no big deal anymore to cut.
-
nice build. i prefer the wheels in silver though. and you have alot of abreviations like CBE and AOS that i havnt got a clue what they are
. either way though good for you for making things yourself and for having big balls for cutting the hood etc 
Lol cat back exhaust and air oil separator. Thanks.
-
1
-
-
Thats a bingo
-
Here we go.
-
-
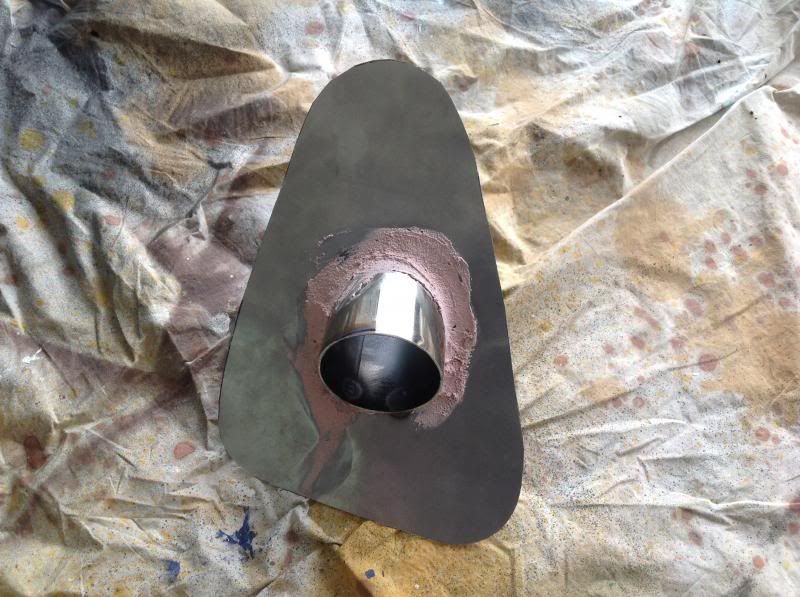
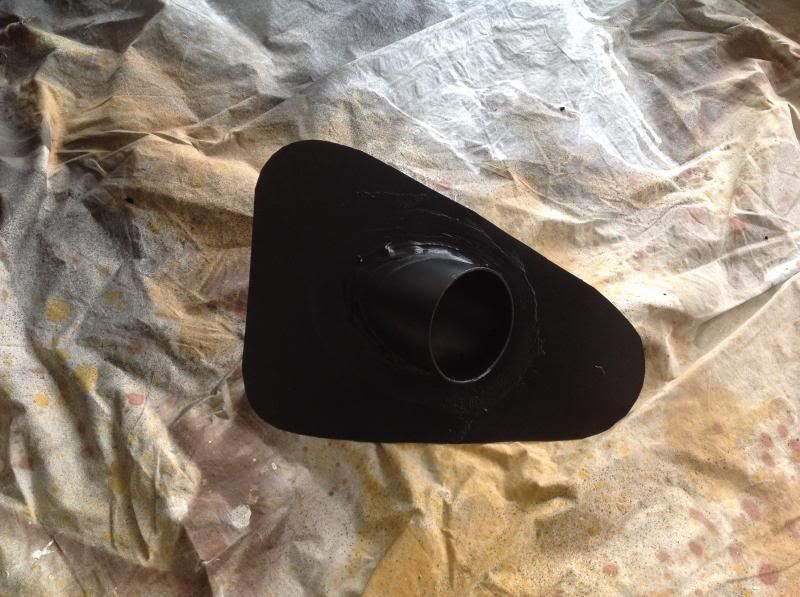
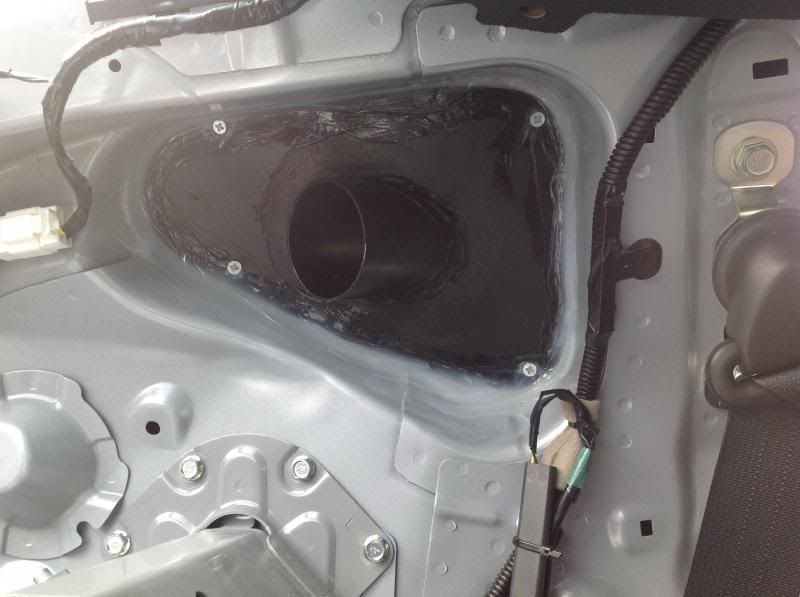
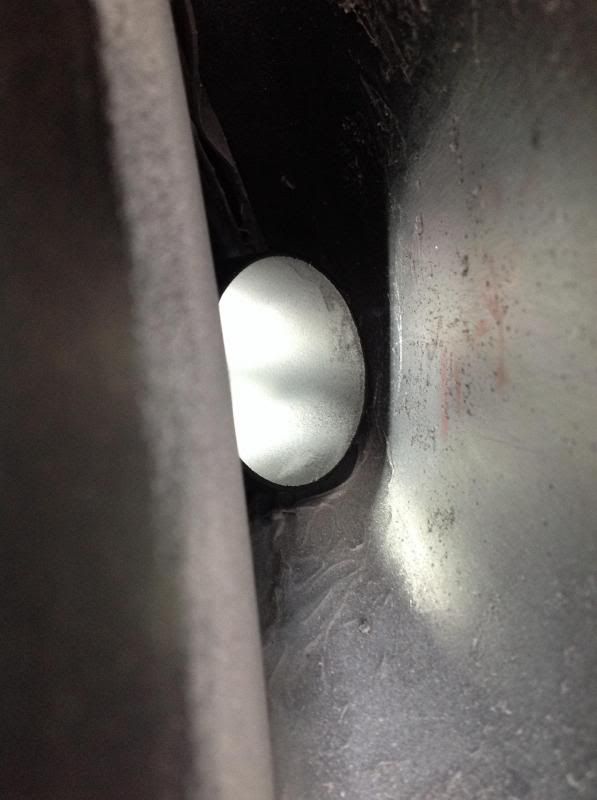
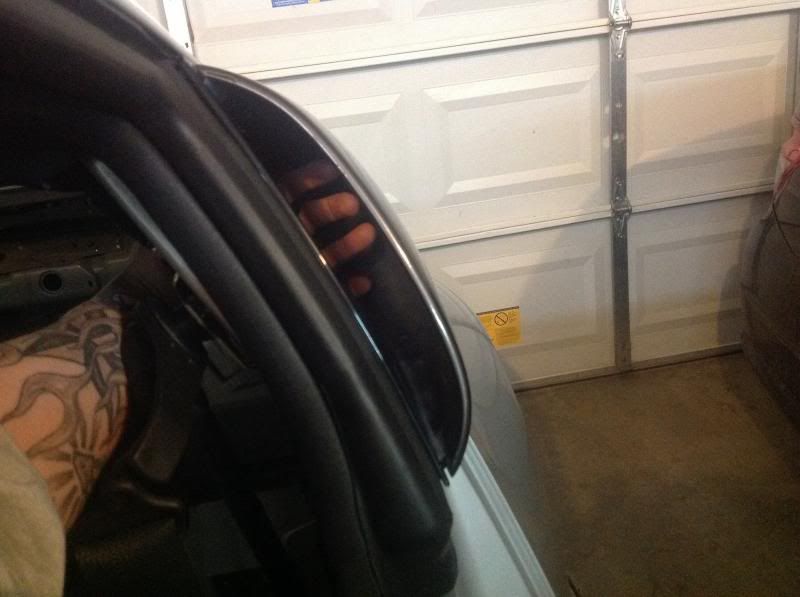
Finished the vents
 .
. I got 22g steel and cutout the hole and to fit the windows shape. I had some 2.5" SS pipe laying around that I then tac welded to the steel. Then I bondo'd filled the gaps for an air/water tight seal then plasti dipped everything because that is also water proof. Then I siliconed in front and behind the steel for a water tight finish and used self tapping screws to secure it to the body.
The air flow in is very great because the 2.5" pipe is at the back of the vent. It acts like a big parachute and funnels all the air into the pipe. The rear brakes should remain pretty cool :tup:
-
Progress...ran out, needed to order 2 more gallons

Done.
-
1
-
-
More rear weight loss. But not happy. Ratio was 57/43 already. But with the SPL mid links I can raise or lower 3" which I believe is needed for corner balance.
-
Quarter work, no fun.
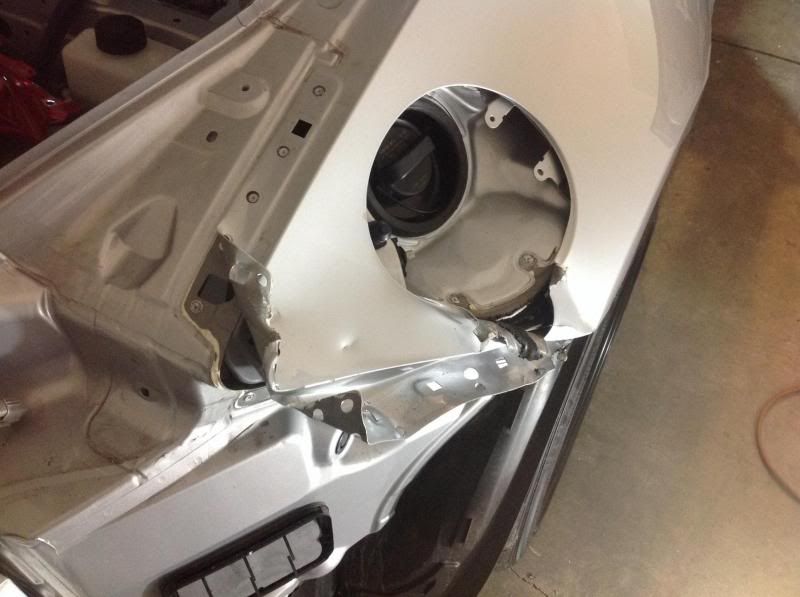
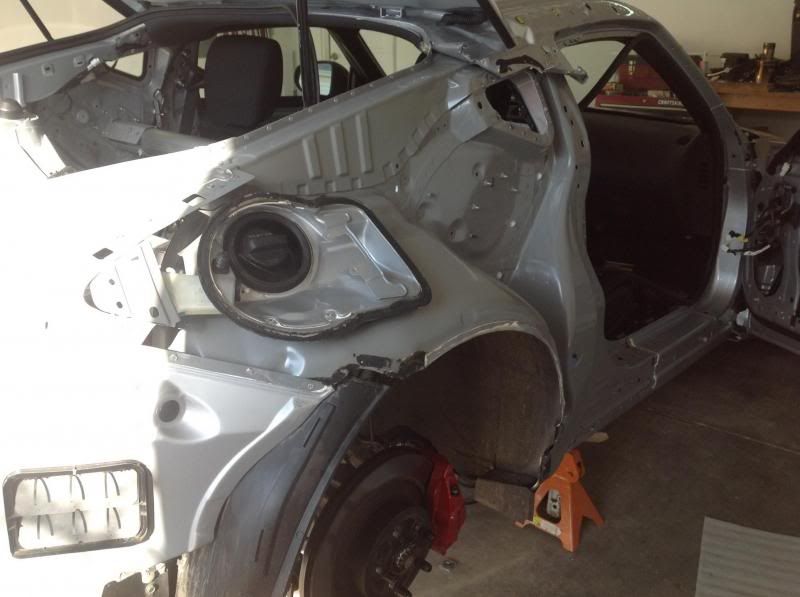
Sand, primer, paint. Almost done. Took a week for the quarter to show up. Just got it last night.
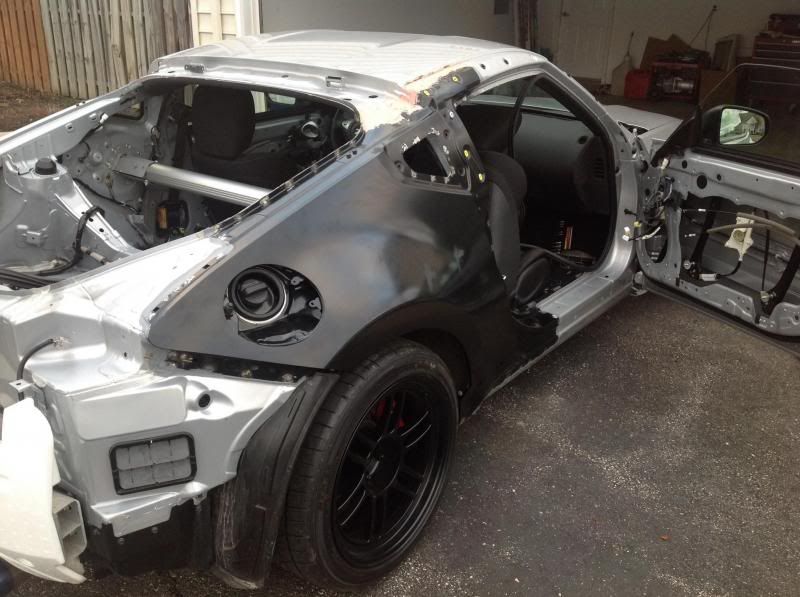
Done. Ready for paint. Getting the fender lip rolled at a fender rolling party since the new one needs to be tucked under the inner fender. Now it's sealed and bed liner sprayed for protection.

-
More air's
-
First exhaust sounds.
Hope your speakers are better than my ipad because its way deeper and better in person. Hook it up to a tv.
Cold start
Hot start and rev to 3k, 4k, 5k.
Don't judge. My 110v free mig sucks azz! Doesn't penetrate then over penetrates and blows holes so they get thick at times.
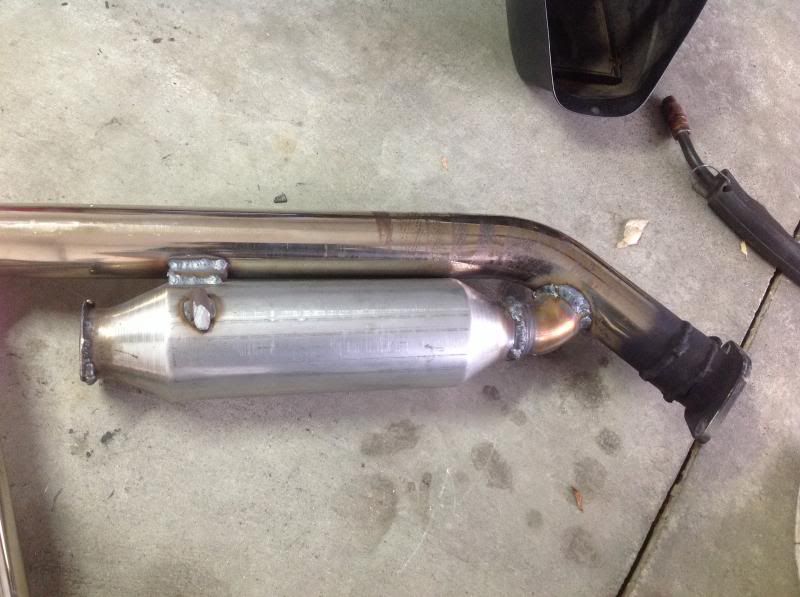
The header looked great. Better than I could have made. Metal looks thick and strong, tigs are all good with penetration, but I don't know what makes welds fail. With all the CNT TS failing I reenforced the j tube.


Port and polish TB's, manifold and lower manifold.
in Performance
Posted
I sold my OEM for $100 each TB, lower was $225 and upper was $225. I exchange for $95 each TB, and $215 for both manifolds. So I'm making a whopping $10 each item. So in the end all you're paying for is shipping, handling and porting.