


AlexZ
-
Posts
656 -
Joined
-
Last visited
Content Type
Profiles
Forums
Events
Gallery
Store
Posts posted by AlexZ
-
-
Thats true Huskey, I keep seeing them Citroen C3 DS cars flying around and I'm thinking what if I could make them vertical l.e.d lamps fit my reflector holes some how lol..
I'm thinking reduce the size a little and flick them round.

Alex
-
Hi all, couple of months ago I pc'd some of the car (see my progress thread for further info) and I found some perforation coming through on the underside of the bonnet were seal covers. We have recently become a Nissan authorised repair centre at work. I though this is the perfect oppertunaty to have the perforation sorted and know where my car is and whats happening. The bonnets are aluminium but the paint isnt broken yet so you cant see the oxidisation and it's clear its coming from under the paint. I spoke to the local Nissan dealer who informend me theres a 12 year perforation warranty on our vehicles. He then went on to tell me the service body needs to have it's "Body & Paint" stamps filled in for the warranty to be valid (rear of service book). Sure enough I bought the vehicle second hand and the stamps arn't filled in. You need to have the Paint & Body inspection every 3, 6 and 9 years by Nissan.
They've taken all the relevent information to process the claim to the Nissan warranty department but havent promised anything due to the stamps. I put my thought forward that even if the paint & body stamp had been carried out the dealer would'nt have pulled the bonnet seal back to check unless it was a common problem.
I'll keep you all informed when I hear back from them but all I can do now is wait. I would advise anyone who hasnt had the Paint & Body inspection carried out and there vehicle is less than 3 years old to do so if they want there body warranty. For all others with older vehicles I would check under your bonnet seal that runs along the front because I've looked at two Z's one 54 plate and the other 04 and there both showing perforation issues lol.
Alex
-
Haha thanks guys, I havent moved the seats for a while before the light came on. It was strange lol... I know moving the seats causes problems on some cars. I'm for ever sorting next doors Clio out for her because she has a child seat in the back.
Alex
-
you can reset it yourself. There is a how to in the guides section. Its very easy just by using the key in the ignition.
If the problem does re occur it may be a loose connection under the seat. Re seat the connectors. If still no joy it could be a trapped loom in the back of the seat which is getting damaged. Repair with a bit of soldering, should cost around £40
Ahh good new mate if it can be rest via the ignition. With my mate working next door to my work I didn't even look.
With reference to the soldering I have seen this done a couple of time on French cars..
I'll wait and see what happens. The only think I dont understand is why it doesnt record the a fault code. If it was the seat buckles it should record the pretensioners faulty etc.
Thanks for the info.
Alex
-
looks good mate but imo i would go for bigger leds. the drl leds on audi etc are always much larger and look better i think. the tiny leds always look homemade.
this is just my opinion obviously hope it doesnt come across as harsh
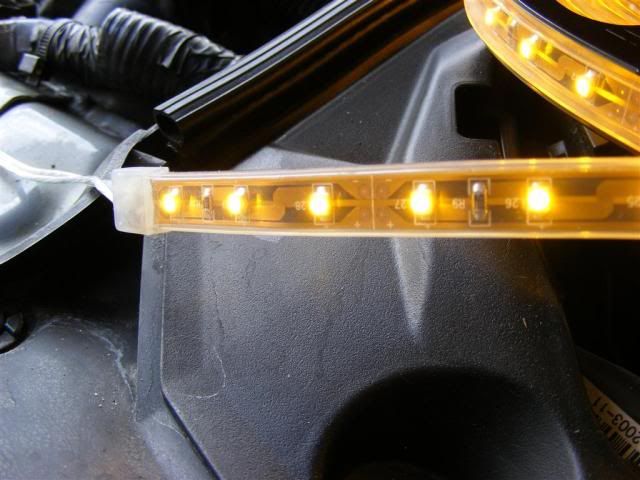
That is spot on mate, I agree with you the only problem is the amount of space and making them look stock on the little reflectors. My plan is to find the right l.e.d set up were it looks like a nice positive line but with tiny gap's between the l.e.d's so it doesn't look like a chav light lol...
I'm looking at these now...
http://www.ultraleds.co.uk/water-proof- ... -1361.html
Alex
-
Evening people....with the weather been fine yesterday me and my lady tooks a drive down the coast. On the way home the air bag warning light came on. This is the second time in the 11 months I've owned the vehicle. I took it to my local specialist today and he reset the warning light for me. He said "again theres no fault codes in the ecu but the light just re-set" thankfully he's a good friend and doesnt charge me. Has this happen to anyone else who has a good contact to take there vehicle to?

Alex
-
Ok I spoke to my mate today and he's passed me these little puppies to have a play and look at. Now there orange and I want super brite white but I can plan a attach lol..
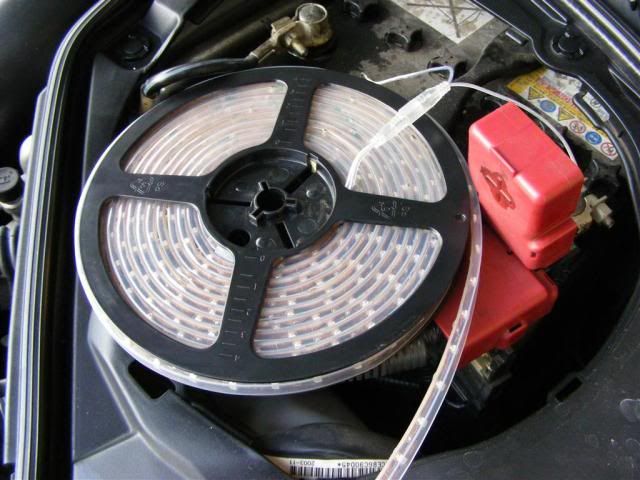
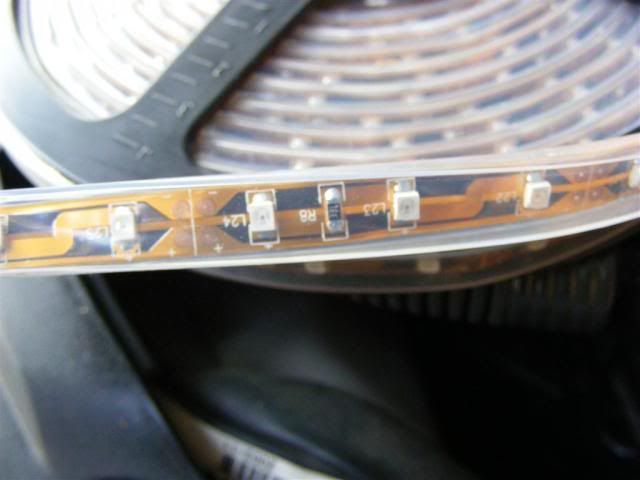

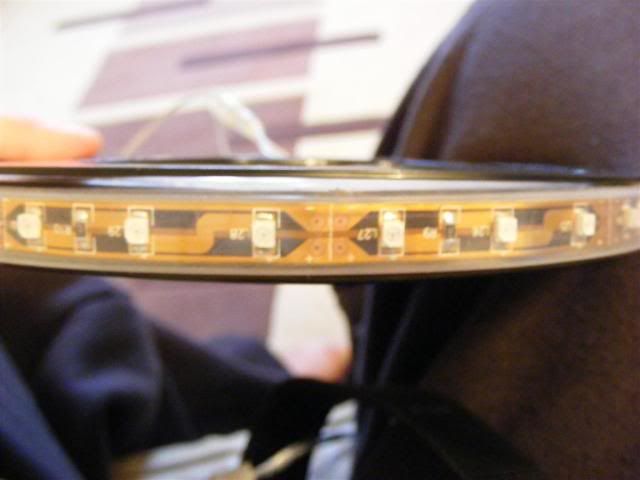
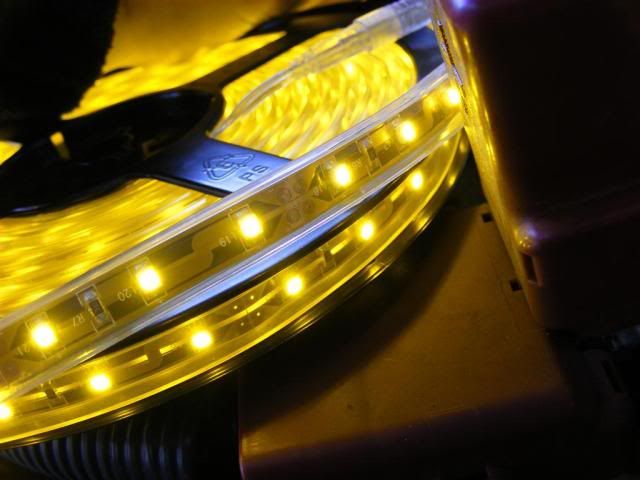
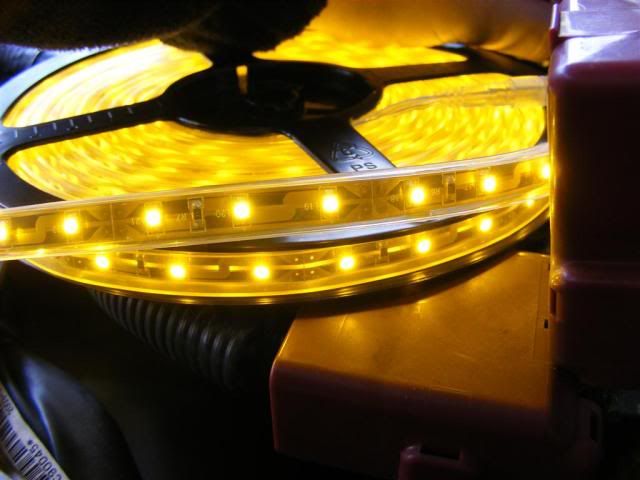
I'd really like the l.e.d's closer together so I'm keeping my eyes peeled.
The l.e.d's above come with a 15 year constant run warranty and are waterproof.

Alex
-
Haha to be honest me and Hamster went over to Nurburgring last month and we only saw one 350 (what a mess) and two 370's. All that way and we were special lol...We got looked at loads although we do have the same car, same colour, same wheels, same interior etc etc lol.
Alex
-
Can you powercoat repair filler or would the wheel need to be bare metal repaired then fresh alloy welded in and shaped?
Alex
-
I think Nissan have built a car for us to perfect...lol...
I now have some L.e.d's to play with watch this space later for some images man.
Alex
-
Hi Matt, if you can't see it through the ash tray I have wrote a little strip process in my progress thread although there arnt any images lol. Remember adjust the cable with the handbrake off lol.
Alex
-
We find when we repair them at work the manufacture doesnt give a paint code for the wheels. We repair the wheel then get the colour chips from the paint scheme and spend 10mins finding the nearest colour. You will find the repaired alloys won't be the perfect match but very close.
I wouldnt worry mate just get it done lol...

Alex
-
no worries mate

-
Best to let off the cable, adjust up the drums and then readjust the cable.
A quick tighten up of the cable will not cause any harm but to get the best from your handbrake the drums should be adjusted first.

Alex.
Evening Alex, thanks for the quick reply...I didn't have time to get the wheels off etc today so I just whipped the three screw out the centre console and used a 10mm ratchet spanner to tighten the cable. She feels a lot better but time will tell I guess.
Regards Alex
Buy yourself a deep 10mm socket for next time and adjust through the ashtray aperture.

Haha I have have 1/4, 3/8 and 1/2 inch ratchets all with 10mm deep sockets, but I didnt know were the nut was...Mint tip mate, were theres a will theres a way lol.
-
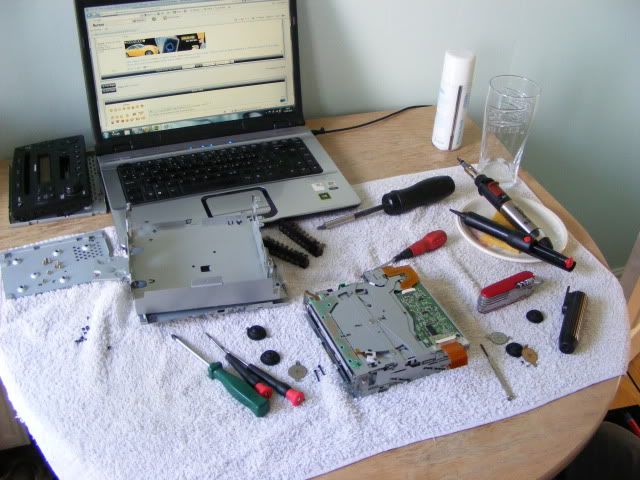
Ok this afternoon I set about fixing the Bose left speak problems that started a little while ago. Firstly I have to say what a top thread to help you through the process if you ever plan to attempt this yourself...
viewtopic.php?f=35&t=21318&start=0
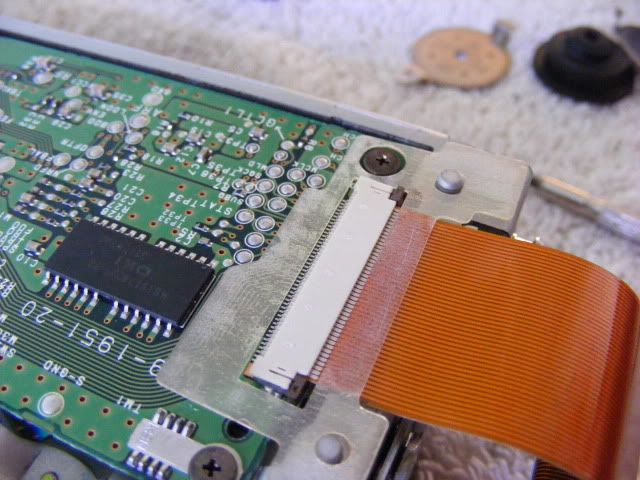
I've attached a couple of closer images to help you guys see whats needed from the ribbon postion.
Firstly this is what to expect..

Closer image
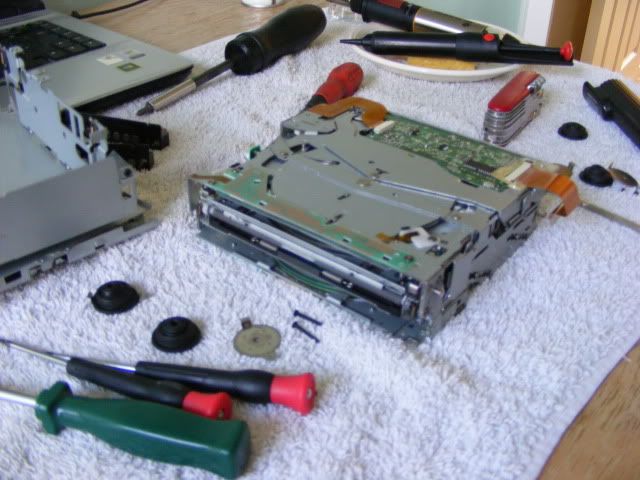
Be careful of the two little black pins...From what I can see they keep the cd stack together..They will fall out if turned upside down lol. I've marked them in red...
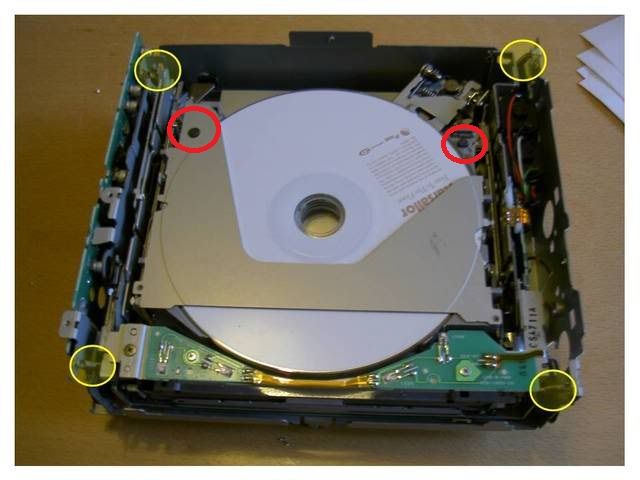
Finally, when the ribbon was in the retainer from stock you couldnt see any silver, Ive pulled it back and clamped it down on fresh cable.
I also adjusted the handbrake cable. This isnt the full manual way to adjust the movement but if times tight this is the quickest way.
Find your handbrake lol....
Remove the gear knob..(unscrew anti clockwise)
Lift the gear stick surround up and unclip the ribbon to the three circle dial (air location, air postion and air blow power).
You will see some black screws, undo the two lowest ones and remove the metal "L" brackets.
Remove the ashtray by pulling it up and out.
Remove the screw below the ashtray
Slide both seats forward and tilt them towards the front screen.
Remove both the screws on the rear of the centre console behind the seats (one each side)
The centre console will now lift enough to get a 10mm spanner on the handbrake cable nut and tighten until your happy with the feel of the handbrake.
Alexz
-
i was surprised to see they had released the grease without the rubber splitting, didnt realise they were cack enough to do that.
mine were in bits when i took them off

IIRC you work in a parts department at Jaguar???? I was susprise to see a ball joint with no steel retaining ring on it to keep the grease in lol..I bet all the ball joints you supply have steel rings on them....Stupid jap people.
-
Best to let off the cable, adjust up the drums and then readjust the cable.
A quick tighten up of the cable will not cause any harm but to get the best from your handbrake the drums should be adjusted first.
Alex.
Evening Alex, thanks for the quick reply...I didn't have time to get the wheels off etc today so I just whipped the three screw out the centre console and used a 10mm ratchet spanner to tighten the cable. She feels a lot better but time will tell I guess.
Regards Alex
-
Hi people, does anyone know if you can adjust the handbrake tension via the handbrake cable at the handbrake itself rather than as the manual talks you through. Most jap cars I've fixed or serviced etc you can adjust a tension nut on the handbrake cable itself and achive equal tension to each rear disk/drum..
Alexz
-
good stop gap measure
the newer versions are twice the size as they have beefed up the joint and the seal so best to upgrade eventually, they are only a few quid
Evening mate, I didnt realise they were so cheap...I thought they would be about £15-£30 each, plus fitting.
The above info is a quick and easy guide if you have the gear at home..Not to sure why Nissan have made them bigger, the only design floor I can see is theres no metal ring to retain the rubber boot tight like all other ball joints I've seen hense my tie lol
.sorry thats what i meant by a few quid

its the only repair on my car thats been done i would class as inexpensive
Ahhh fiar play mate, touch wood mines been good for the time Ive had it lol...new pads cost me £26 and I've used them round Nurburgring with no issues at all and I've replaced a cam cover gasket at £7 lol...
To be honest the fix is more for people who just want to fix the issuse rather then spend cash or wait for a couple of day for delivery. The drop links arnt damaged just need relubing. I'll change mine when the rubber splits I think.
Alexz
-
Lovely work on the car, nice job with the exhaust pipes. I've been doing mine today, looks like you had a job there as they were pretty black before. Out of interest what did you use to get them like that? Mighty impressed.
Morning Will, I started by using brake cleaner to remove any of the loose dirt. I then found the finest wet and dry paper in my shed iirc it was 2500 from work lol. I lightly used the paper to removed what was left then Autosol the he'll out of them lol. Once all the black had gone I Just polish them when the car is cleaned.
-
the bumper is a different shape so i dont know how practical its going to be to mod them in, by the time you've managed it you may aswell have changed the bumper.
the ones in the vid shown use the cheaper imported chrome side reflectors rather than the official nissan white ones
Ahh ok mate good point made about the shape. I intend on covering the reflectors anyway so it doesnt really matter on the colour...
I need my mate to hook me up with some samples asap...
Alex
-
Hi mate, to find out if it is your partner I guess the easiest thing to do is use the car yourself for a week or so. If the battery is fine blame her if not then get a battery load test from you local motor factor or Kwit Fit etc..
Alex
-
good stop gap measure
the newer versions are twice the size as they have beefed up the joint and the seal so best to upgrade eventually, they are only a few quid
Evening mate, I didnt realise they were so cheap...I thought they would be about £15-£30 each, plus fitting.
The above info is a quick and easy guide if you have the gear at home..Not to sure why Nissan have made them bigger, the only design floor I can see is theres no metal ring to retain the rubber boot tight like all other ball joints I've seen hense my tie lol
. -
Evening guys, I've been a little busy of late and the Z hasn't really been getting the attension it deserves. Last Novemeber when I bought the car the rear rear drop links were a little noisey and I found on the forum this was common. I removed them both and used chain lube to free them off and lube them up. In May the drivers side started making a little noise again so I relubed it with silicon spary.
In the last week the passenger side has started to squeak again. I removed both of the this afternoon and I think I have a little mod for anyone doing it first time. Just check out the images bearing in mind the link is already removed (see earliey in thread for info) and this should last the year at least if not longer I hope going of the last lube up.
Remove the link
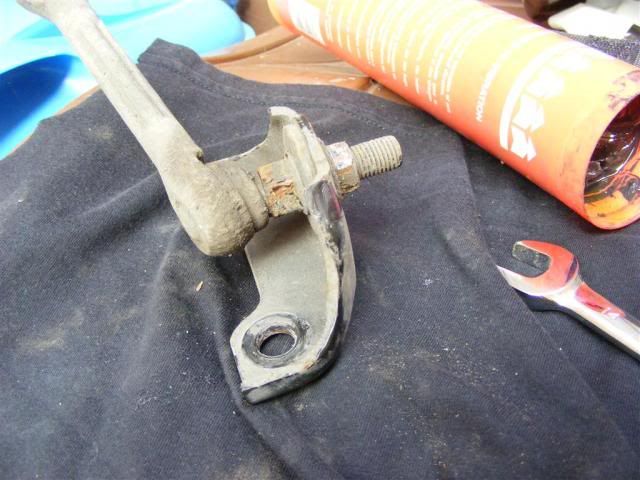
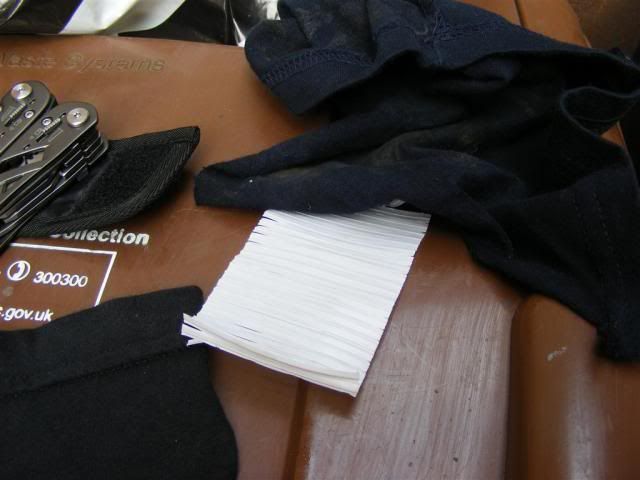
Choose the starting end and clean it up.
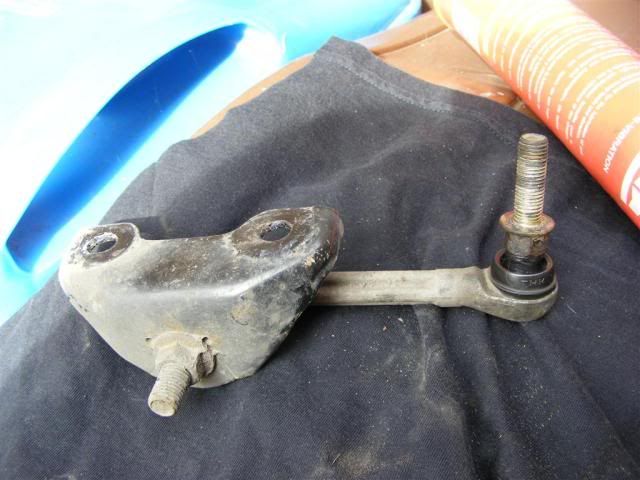
Lift the seal and put freash grease in, be careful not to split the seal.
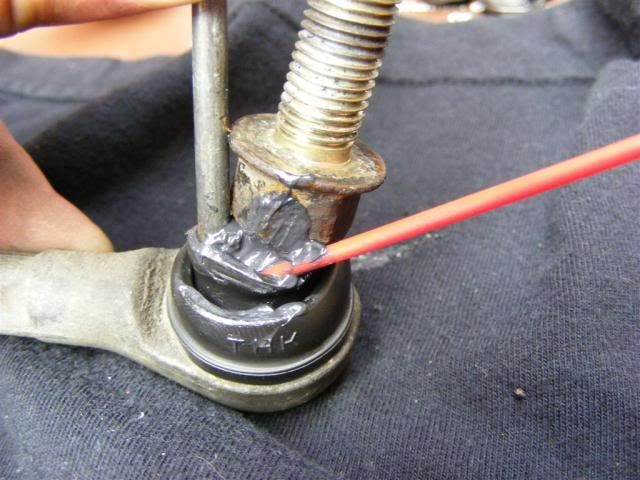
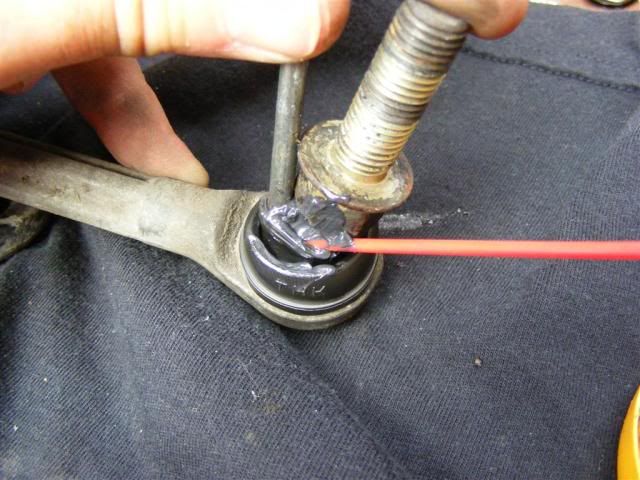
Get your freezer bag tie (mint invention for this lol) and carefully wrap it round the top of the seal to stop any grease coming out.
Without
With
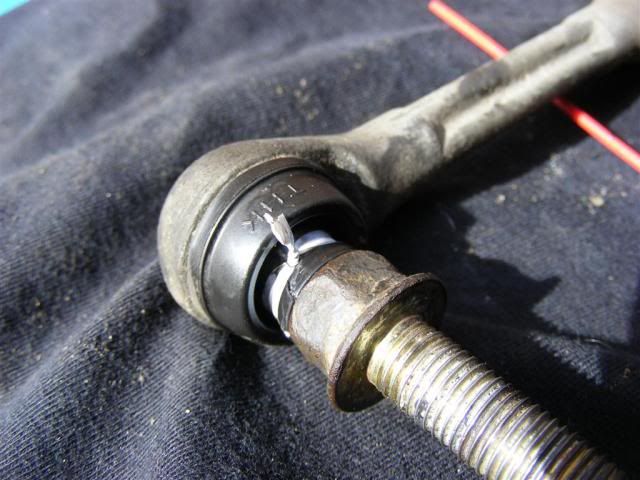
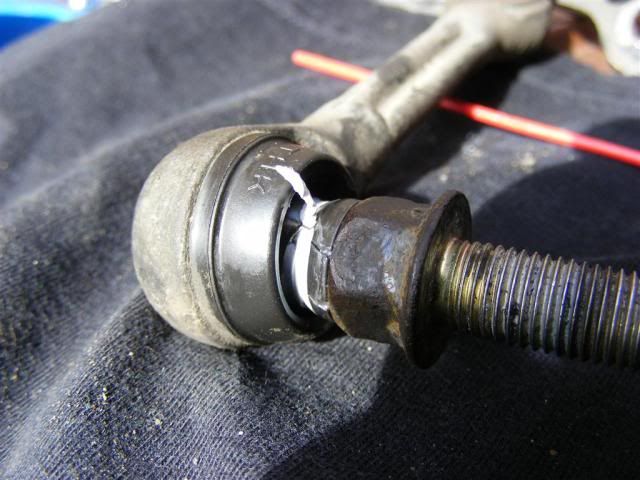
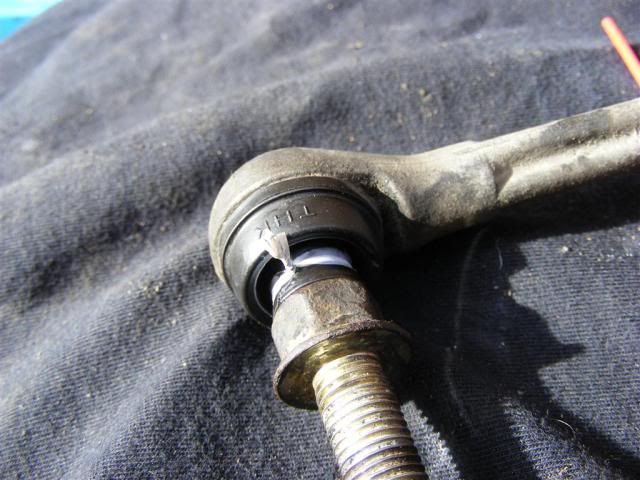
The tie should stop the weather getting in and the grease getting out through movement.
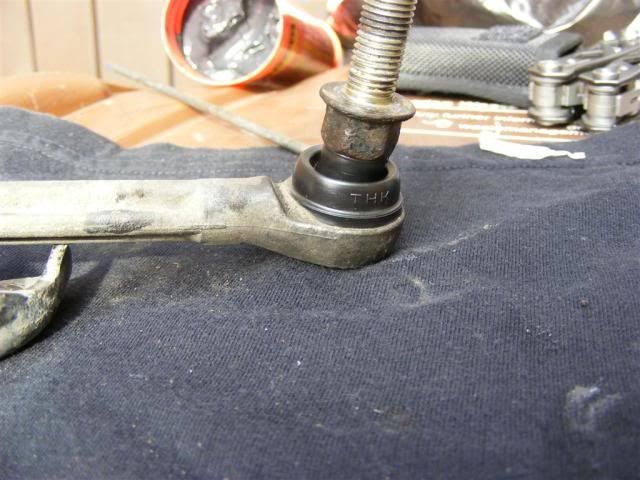
When the link is done she should look like this and job done...
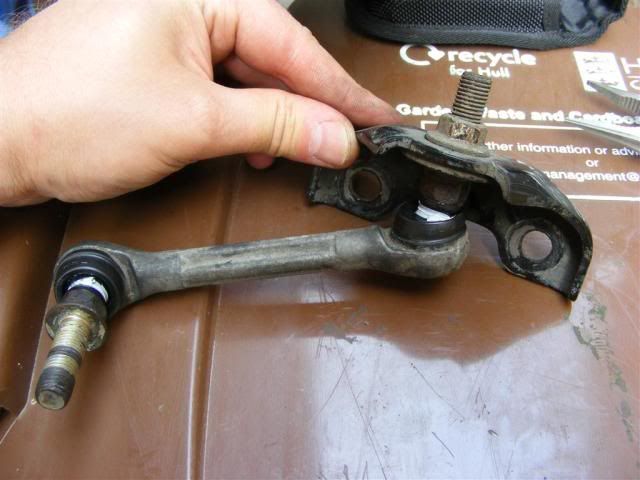
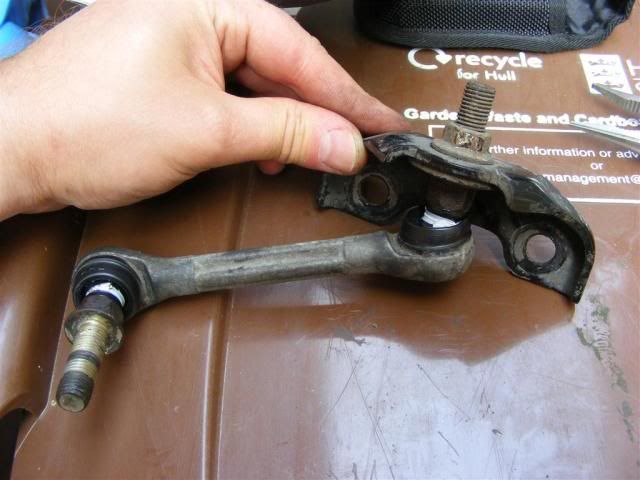
Hope this helps people with the issue now..
Alexz
Front Bumper L.E.D lights
in 350Z General
Posted
Emm sweet, you got an image of them in the dark...might be the cheaper option.