


Polo
-
Posts
116 -
Joined
-
Last visited
Content Type
Profiles
Forums
Events
Gallery
Store
Posts posted by Polo
-
-
Could a mod please change the name of the thread to "Team Falken UK 650hp V35 Skyline (G35) "
bit of an update, not got alot done this week, lost a bit of motivasion tbh!!
Parts arived over the week
1000cc bosch injectors and pig tails
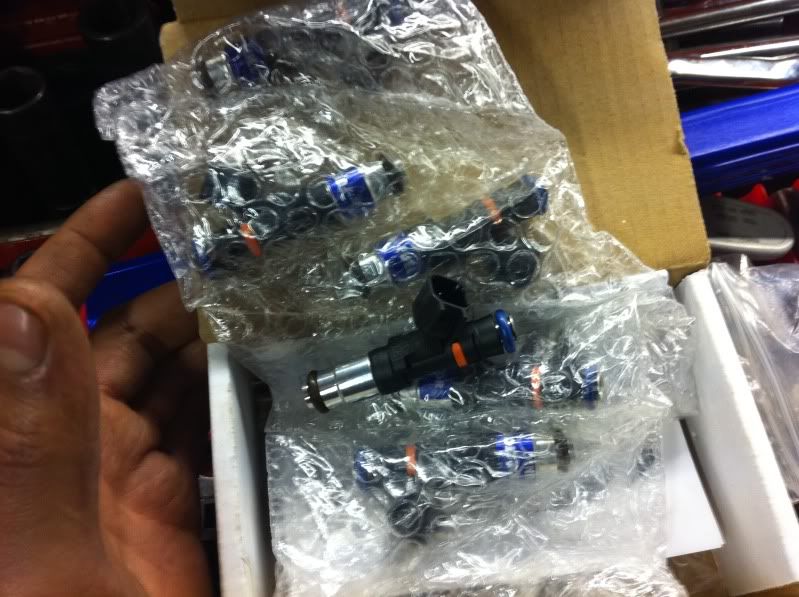
Mocal 24 row engine oil cooler with -12 fittings
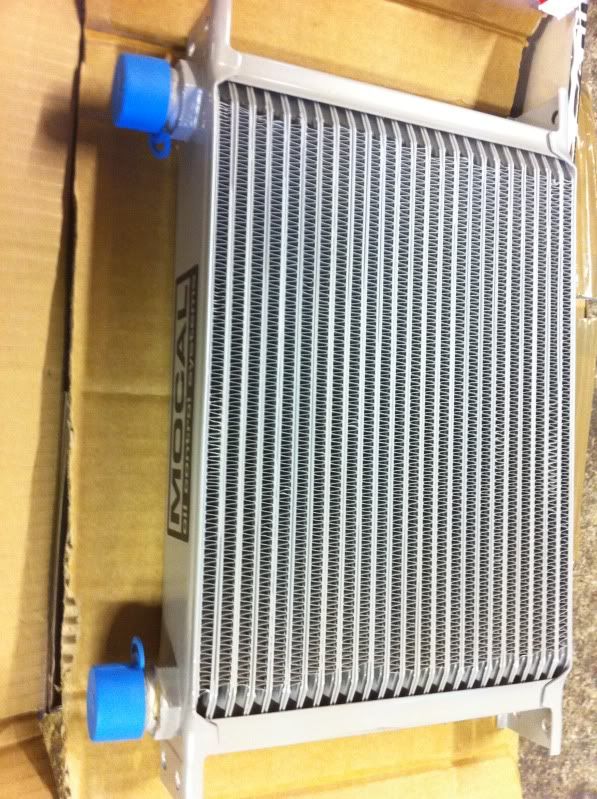
Mocal sandwich plate with -12 fittings
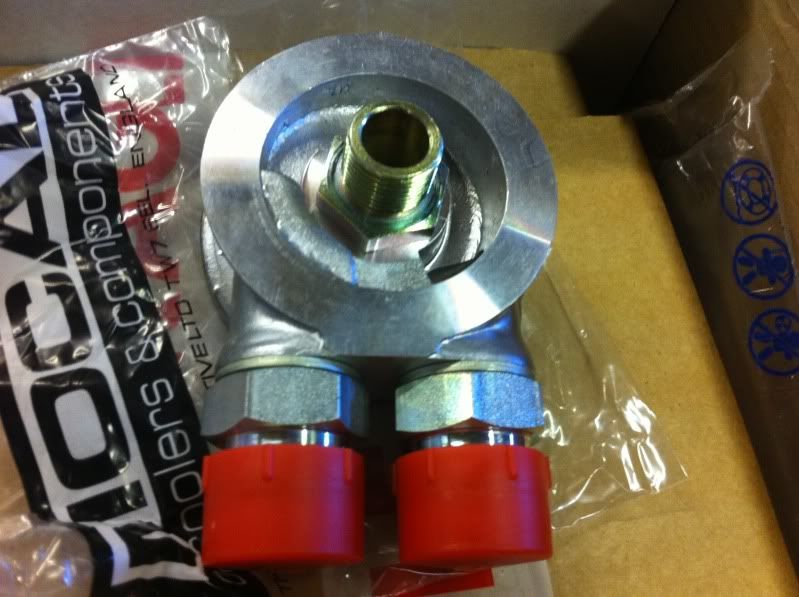
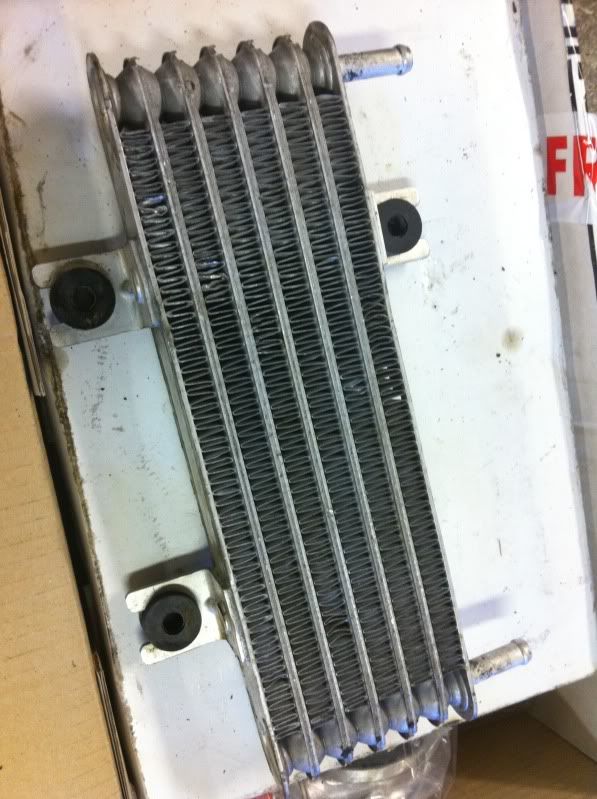
13 row cooler for gearbox cooling system, iv also got a remote filter and big Mocal oil pump for the system.
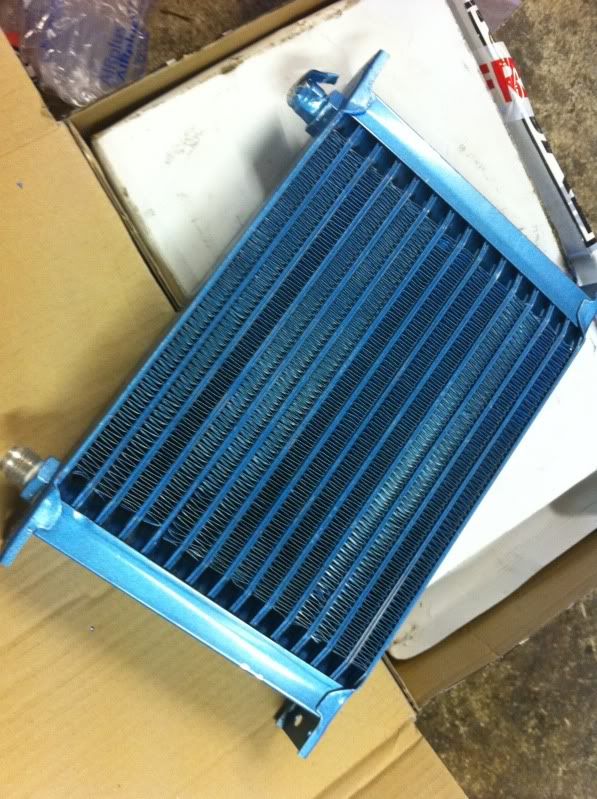
low mile s14 diff cooler to be used to cool power steering fluid
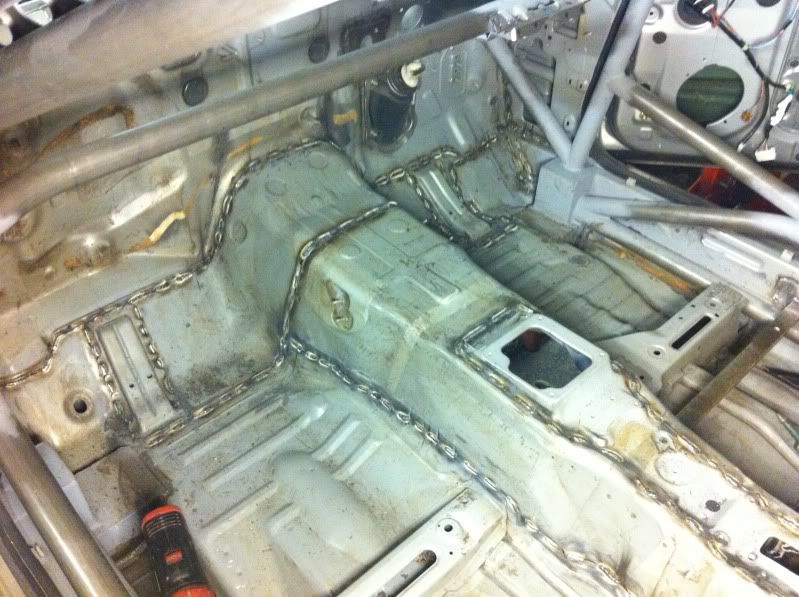
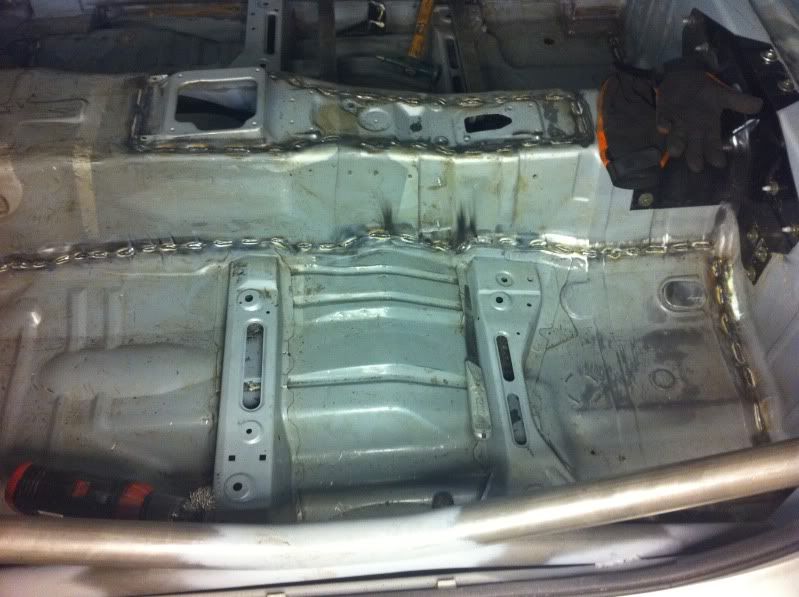
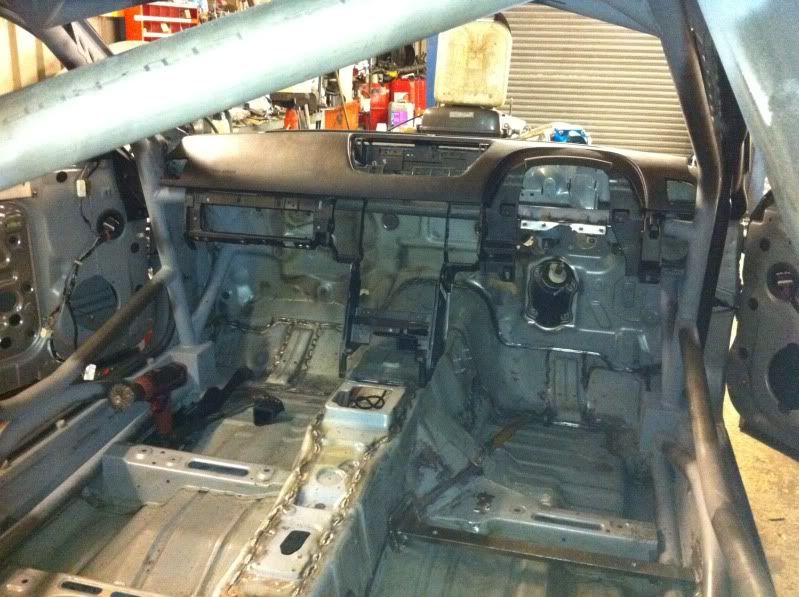
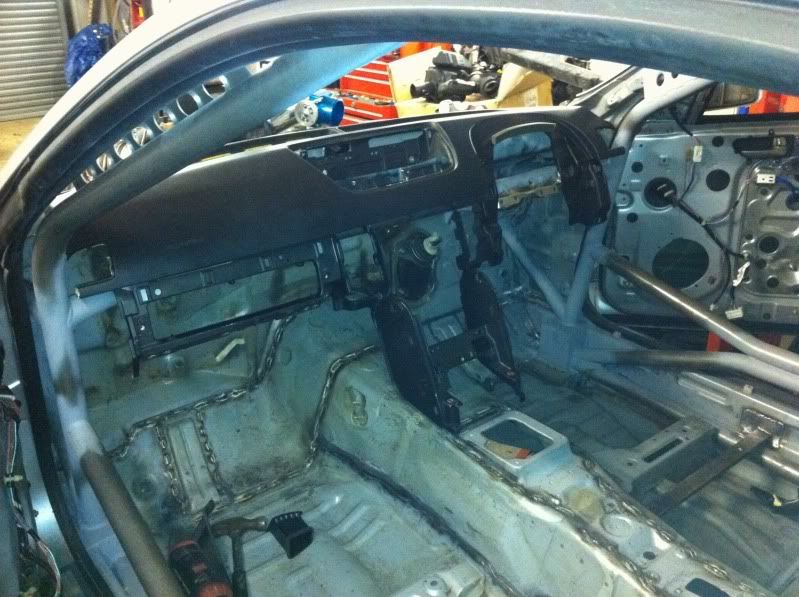
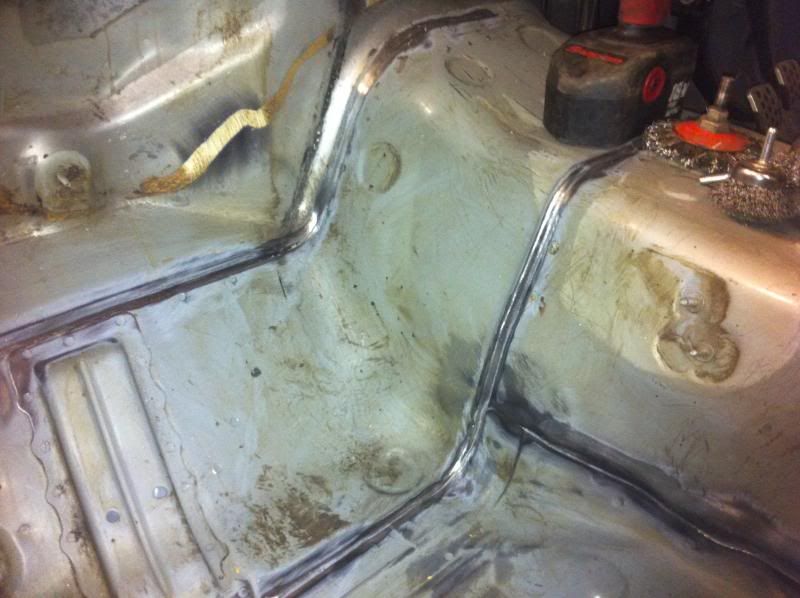
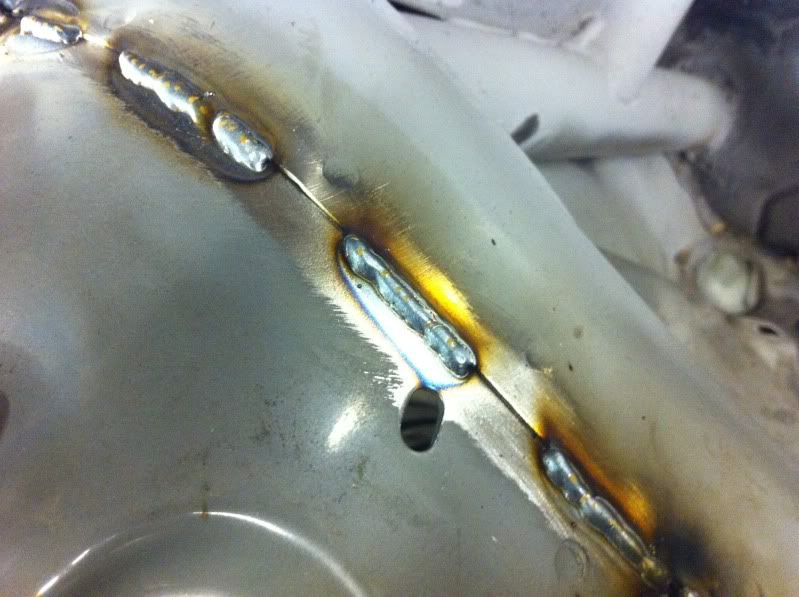
And iv got on with some of the seam welding, the welding its self takes hardly any time, its the cleaning the paint and sealer that takes ageees!!


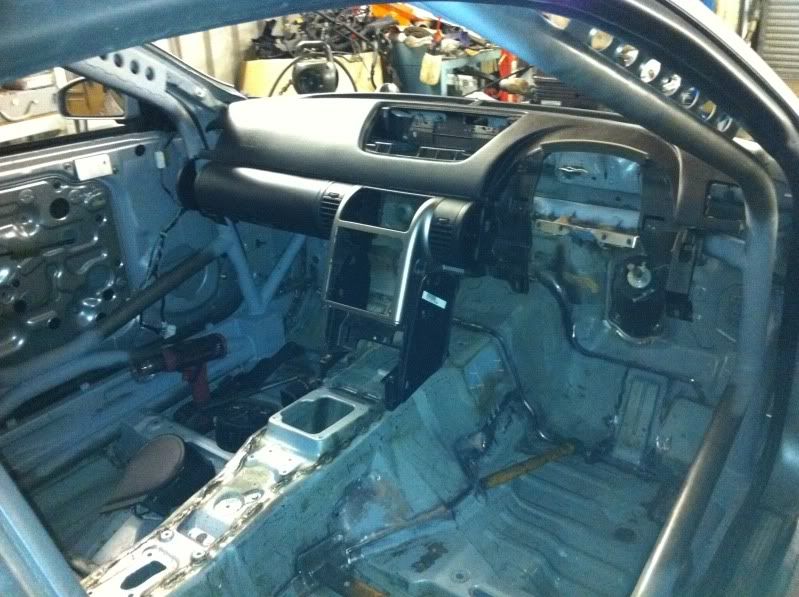
Also had time between jobs in the day to trim the dash and see how it fits around the dash
-
Could a mod please change the name of the thread to "Team Falken UK 650hp V35 Skyline (G35) "
bit of an update, not got alot done this week, lost a bit of motivasion tbh!!
Parts arived over the week
1000cc bosch injectors and pig tails
Mocal 24 row engine oil cooler with -12 fittings
Mocal sandwich plate with -12 fittings
13 row cooler for gearbox cooling system, iv also got a remote filter and big Mocal oil pump for the system.
low mile s14 diff cooler to be used to cool power steering fluid
And iv got on with some of the seam welding, the welding its self takes hardly any time, its the cleaning the paint and sealer that takes ageees!!
Also had time between jobs in the day to trim the dash and see how it fits around the dash
-
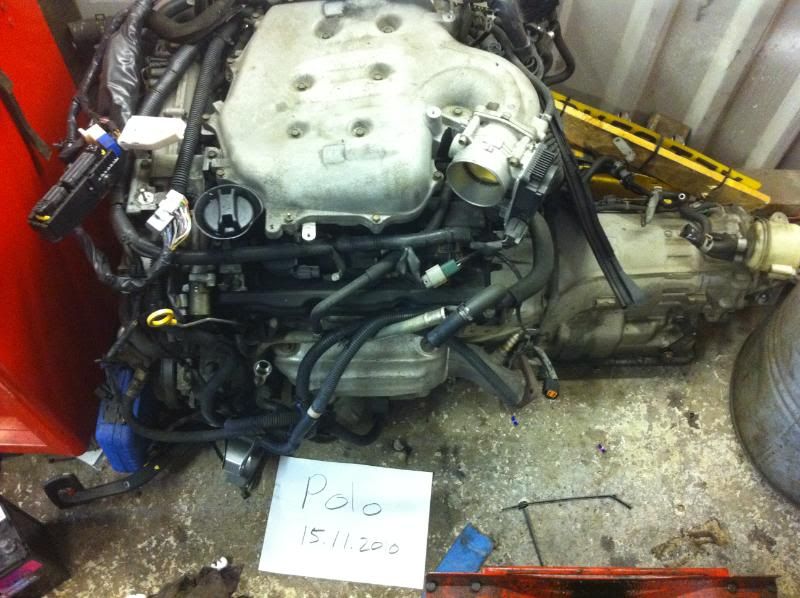
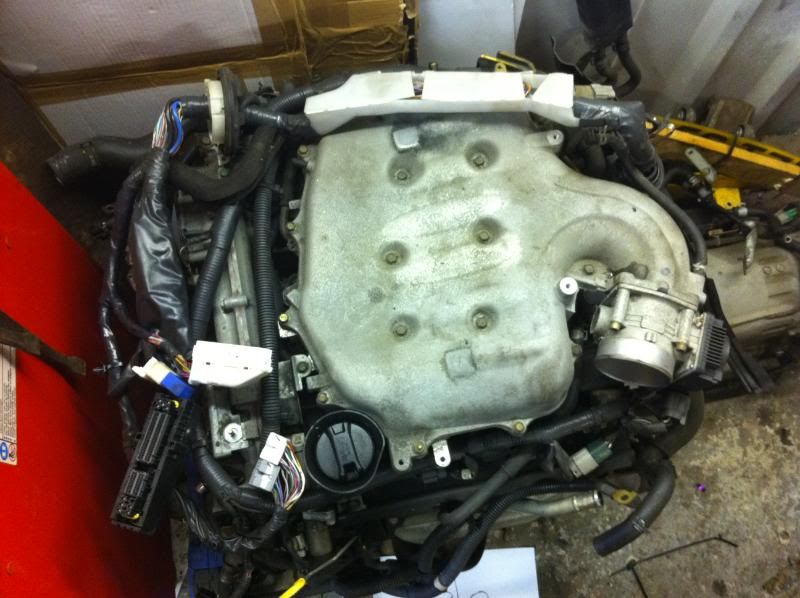
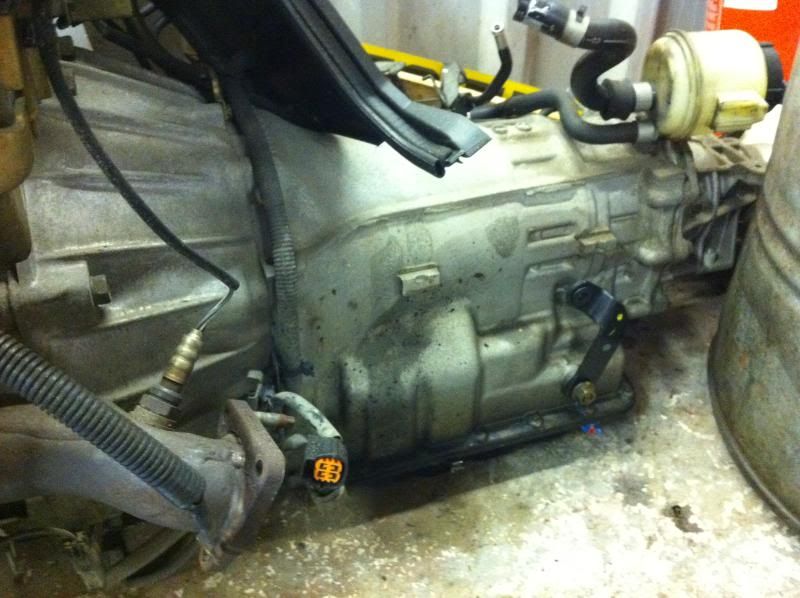
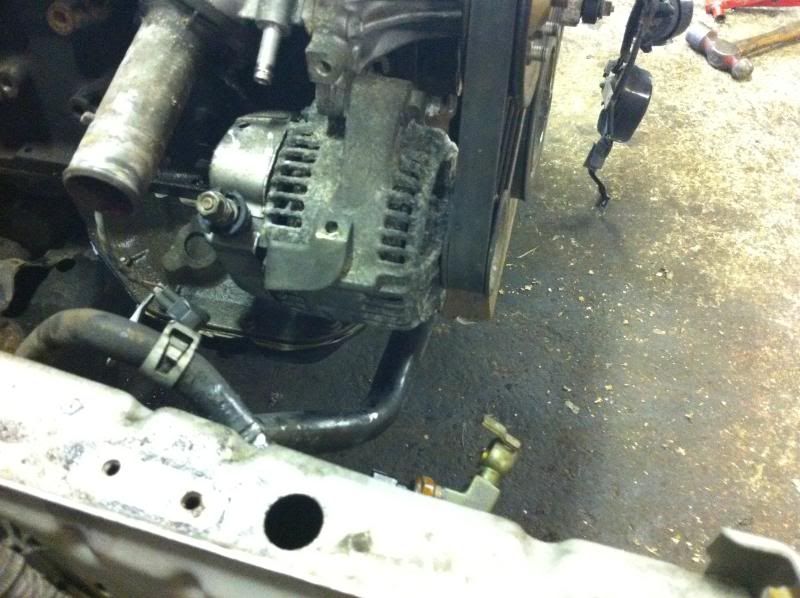
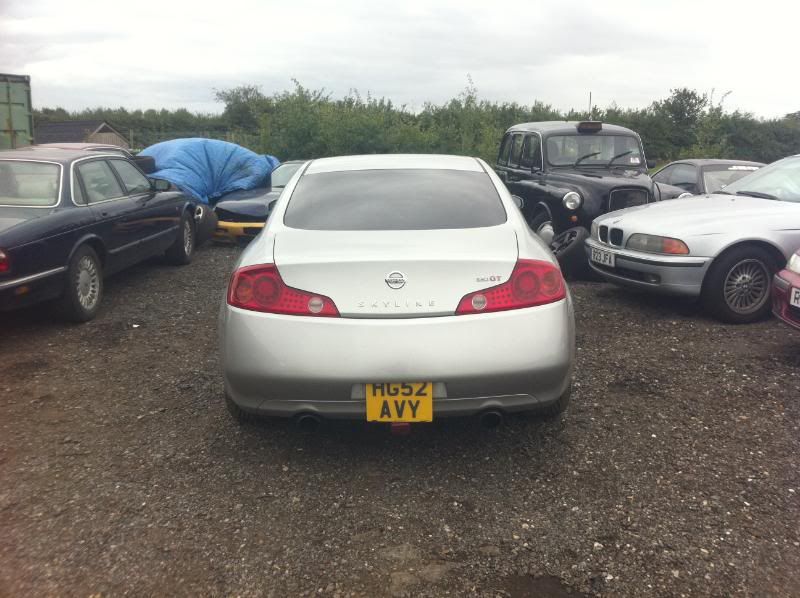
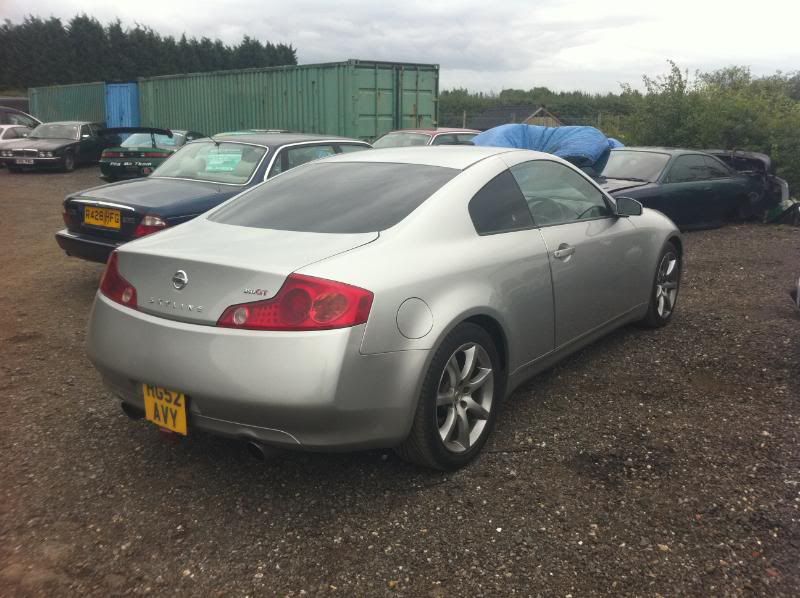
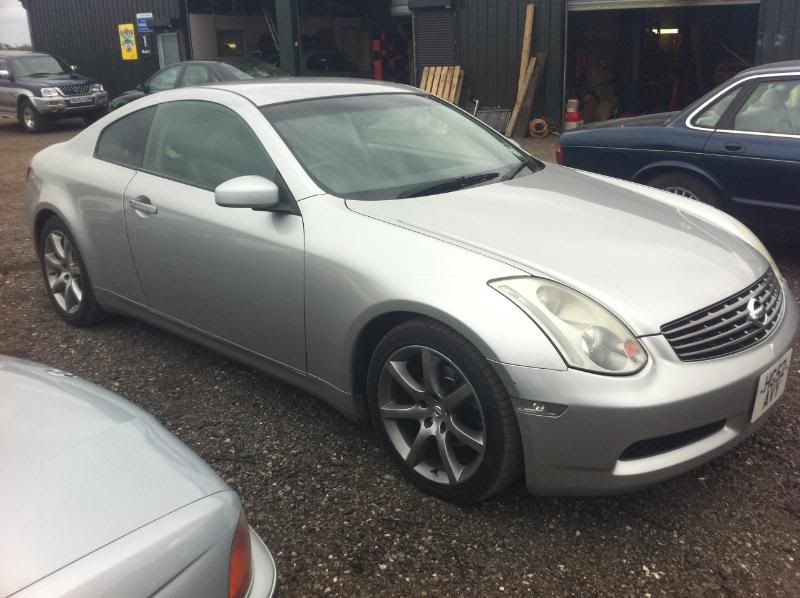
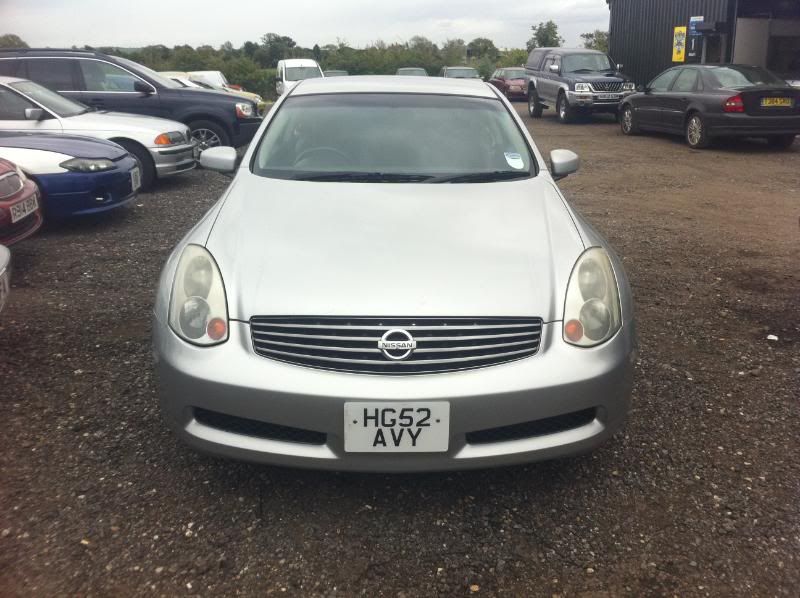
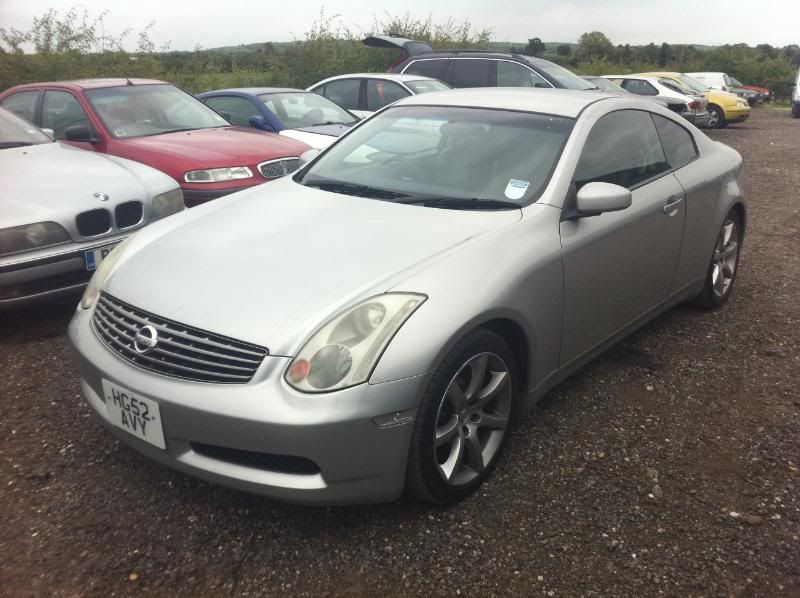
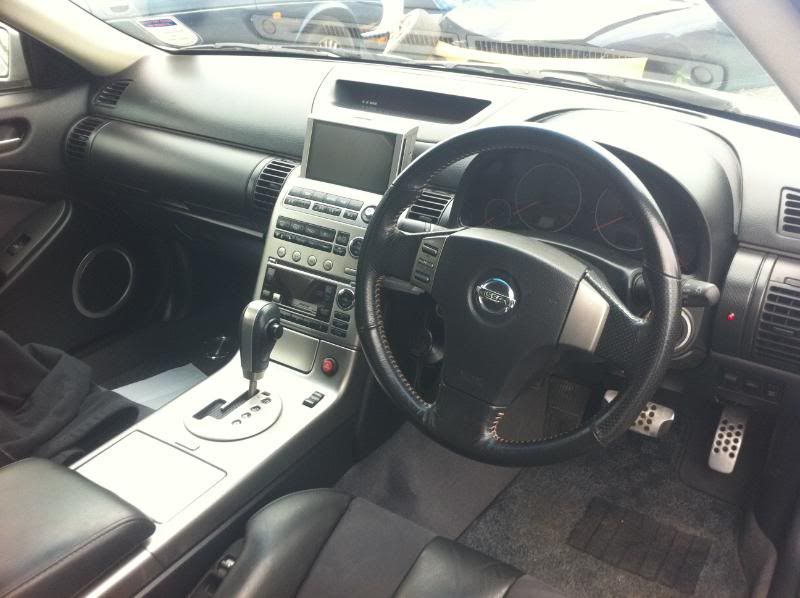
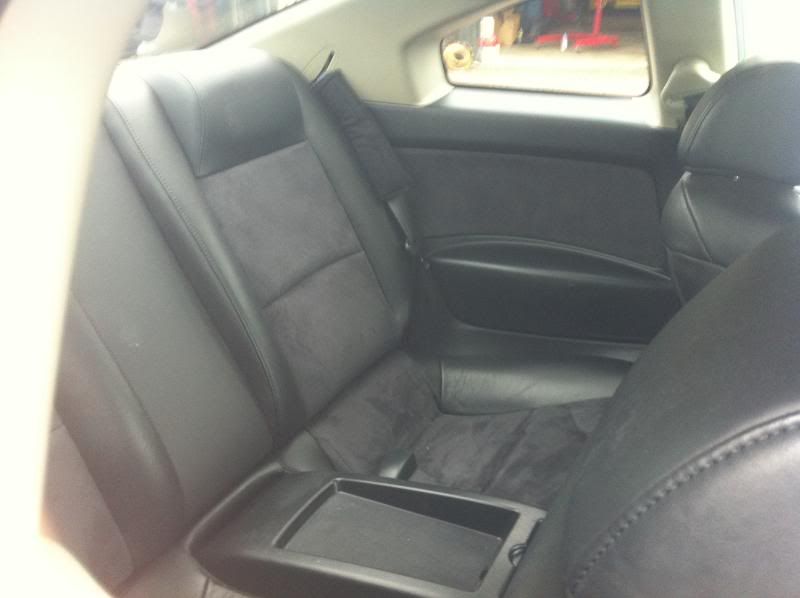
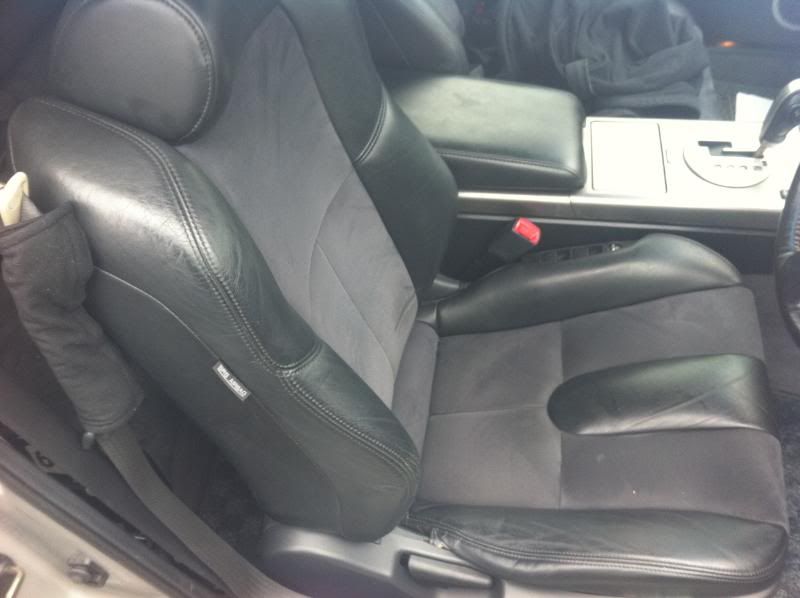
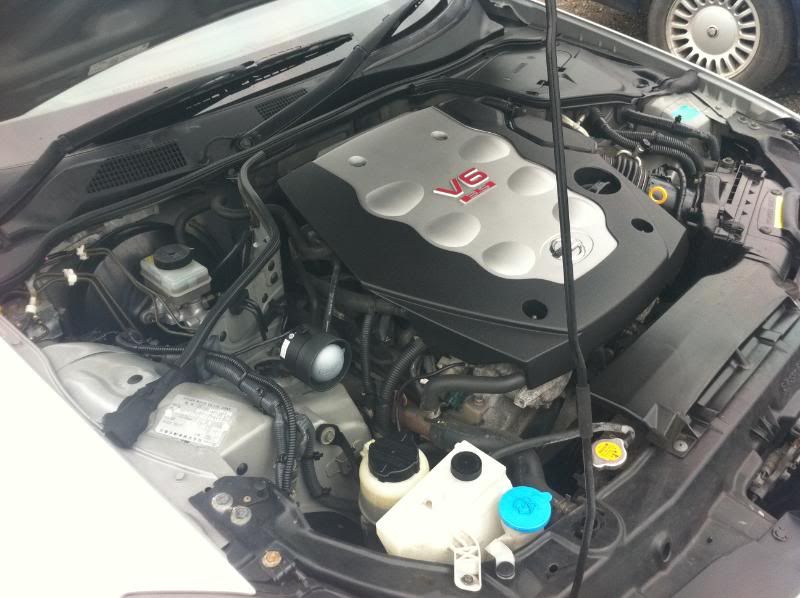
Right ok, hopefully this will work now iv read the rules

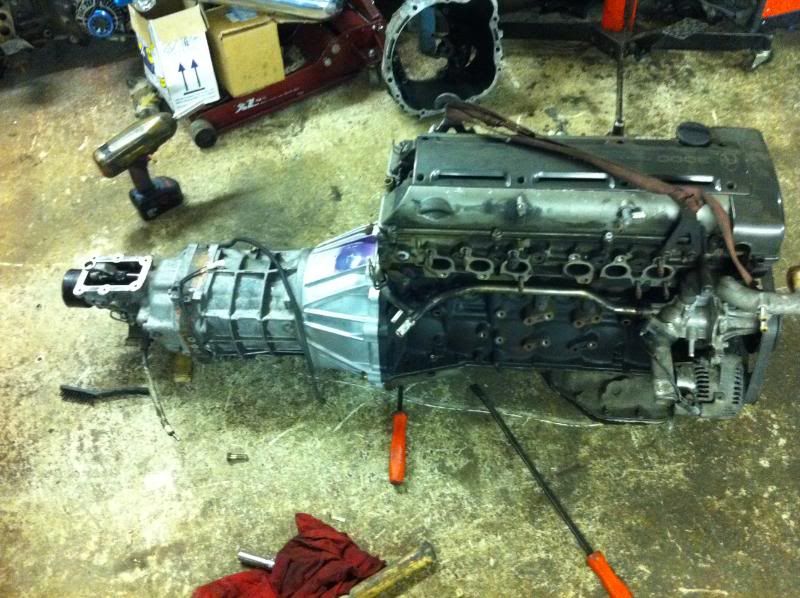
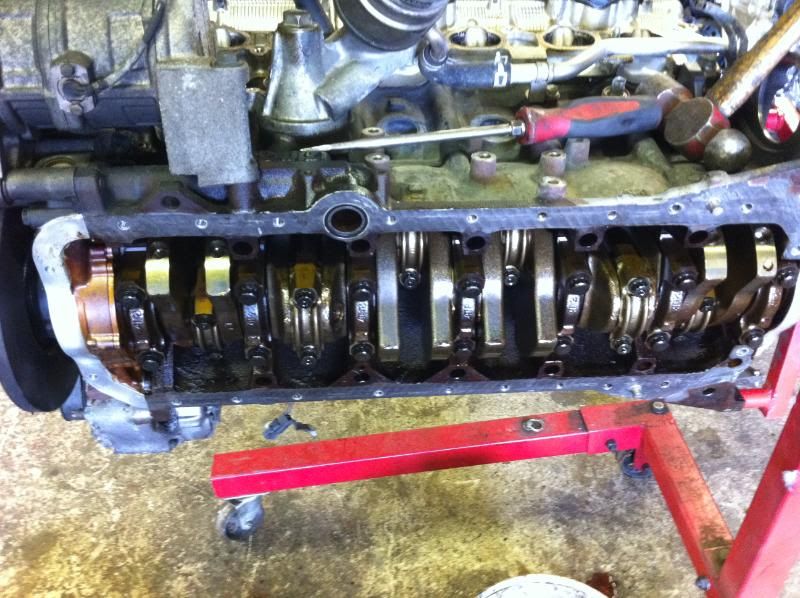
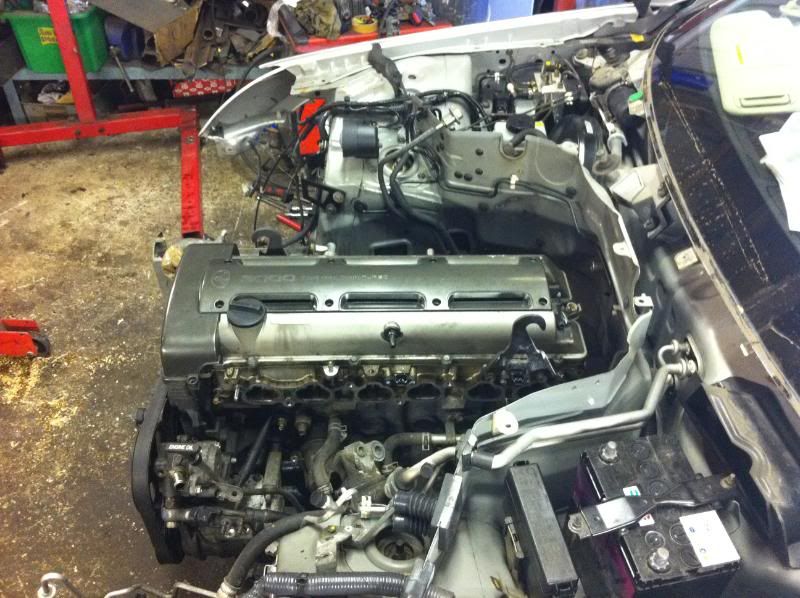
Here i have a vq35 from a 2003 v35 skyline, its coverd 60k miles, i have docs to prove this. I want around £1750 for the engine.
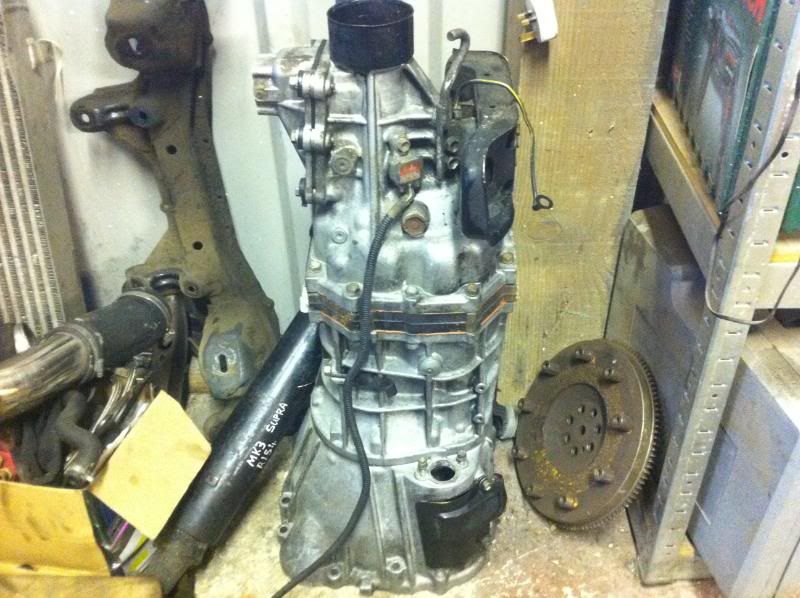
Gearbox from the same car with torque converter £450.
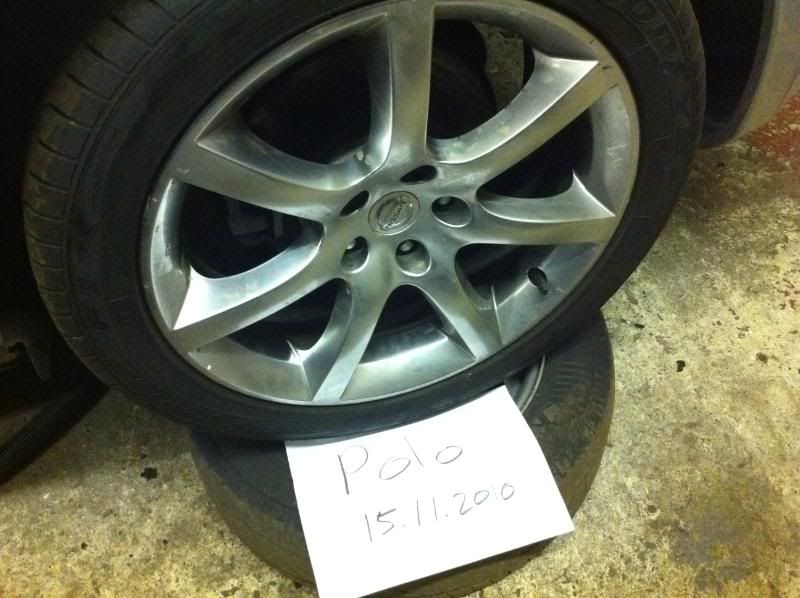
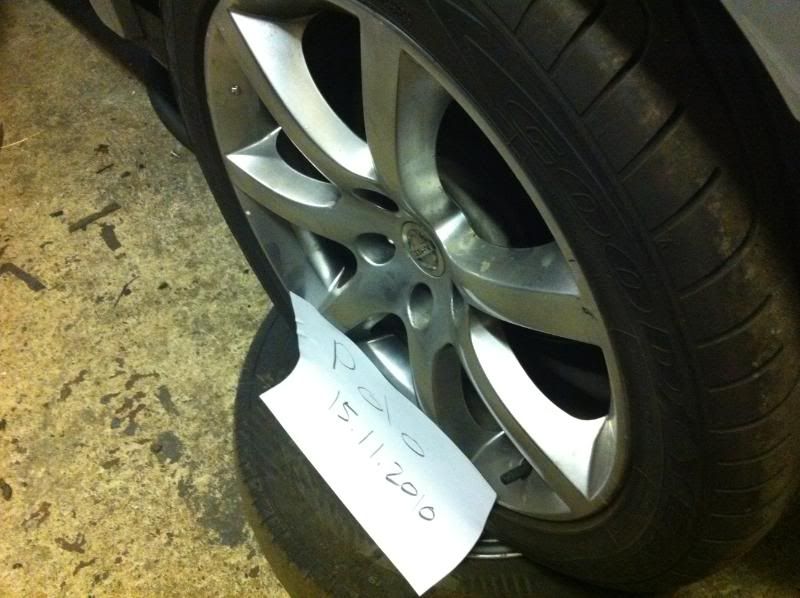
I have the wheels from the same car also, all tyres good, rears are goodyear f1s, i want around £300.
Please let me know if my prices are relistic or not.
Pics
-
I never knew the amount of work needed to get a car drift spec!
I happen to work with one of the headsheds of the BDC who runs a 460bhp 2JZ twin turbo powered white Lexus is200, that's a pretty special machine, now I have some understanding of what's entailed! Crazyness!

TBH there are only a few hand fulls of competition drift cars built to such an extent in the UK, most started as modded road cars turned drift, my old one was but ended up a 500hp 2ltr out right track beast! Was just never built from scratch like this.
I know the car, Matt ownes it, TDI used to map it, now a guy called Dave maps it, hes in the army??
-
Excellent stuff, took me weeks to get all the sound deadening out of mine

When are you hoping to be ready to drift?
Cool, you building a track Z then? Sorry im new to the site.
Plan to be out testing end of feb but you know how it goes, season done start till end of april, so i have some head time, but i really want to get testing done and go to the 1st round ready to rock and knowing its sorted!!
-
Thanks guys!!
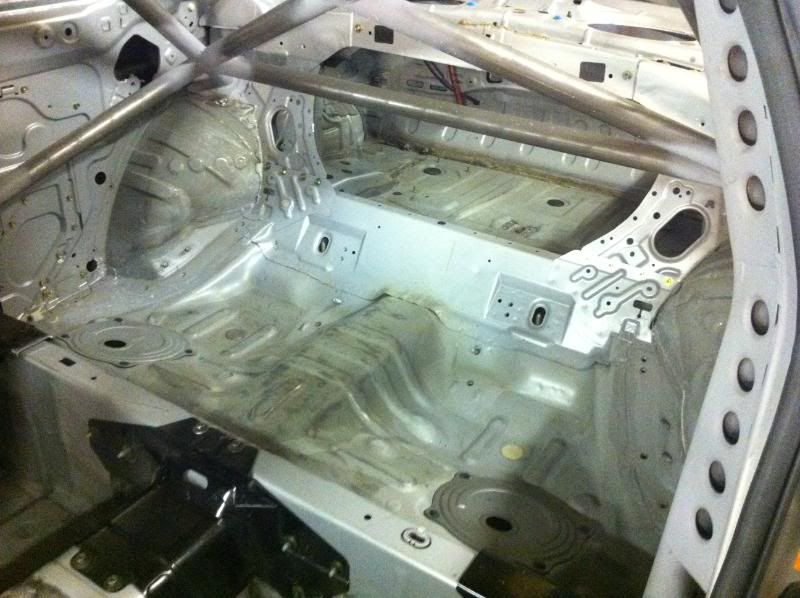
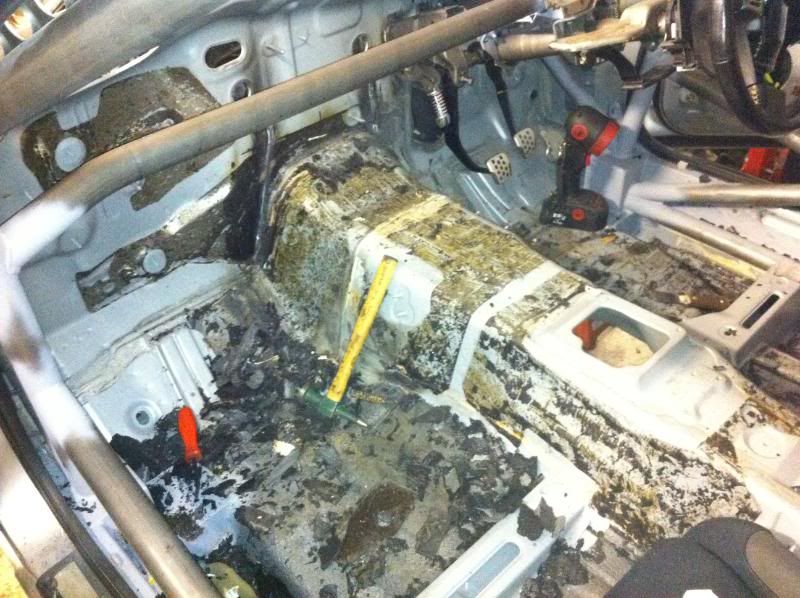
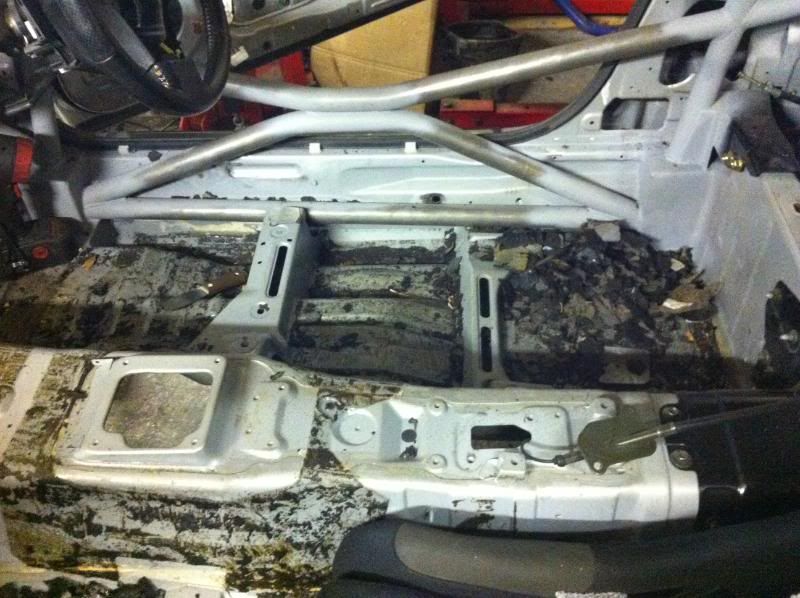
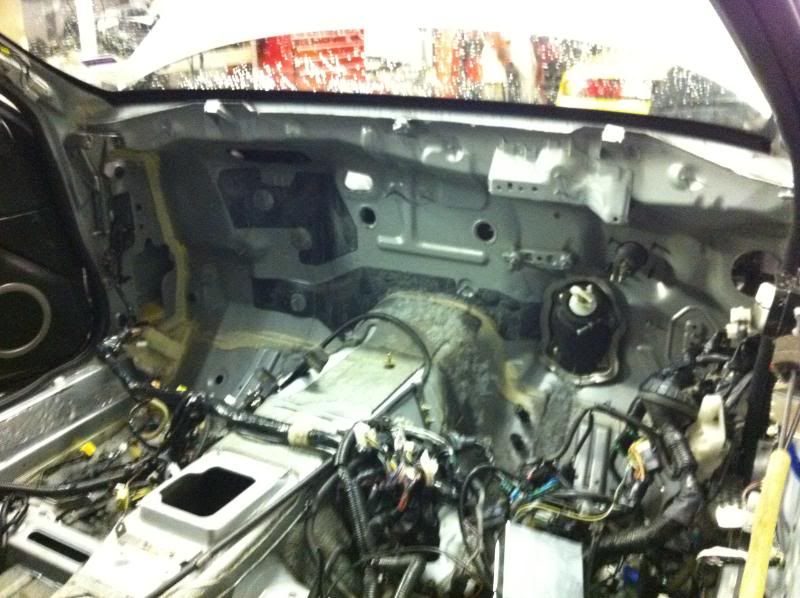
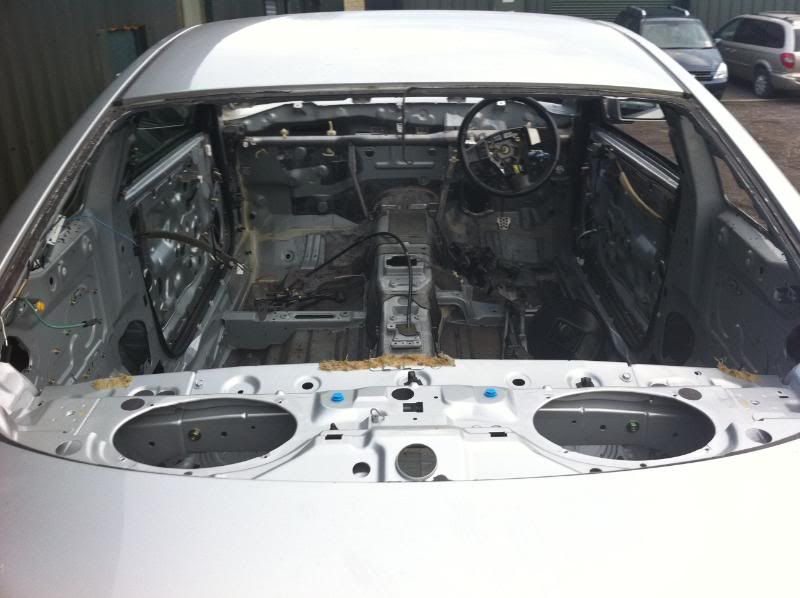
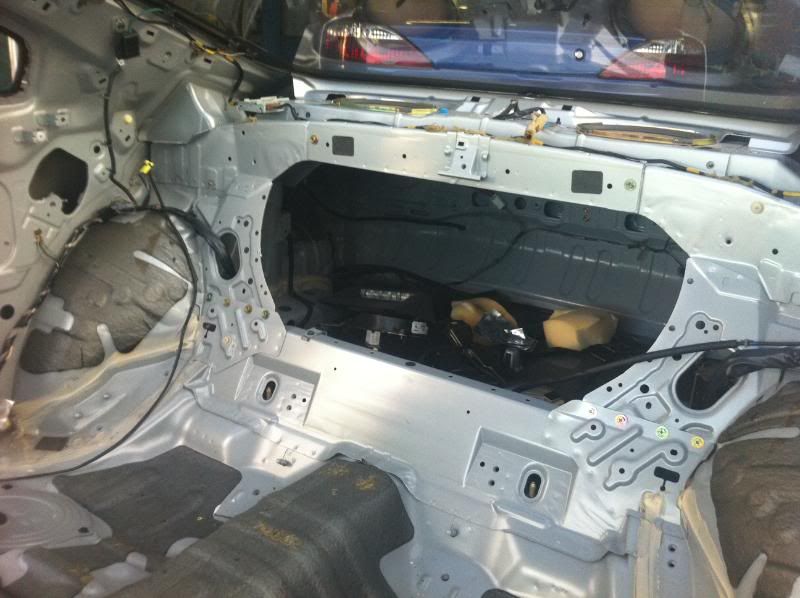
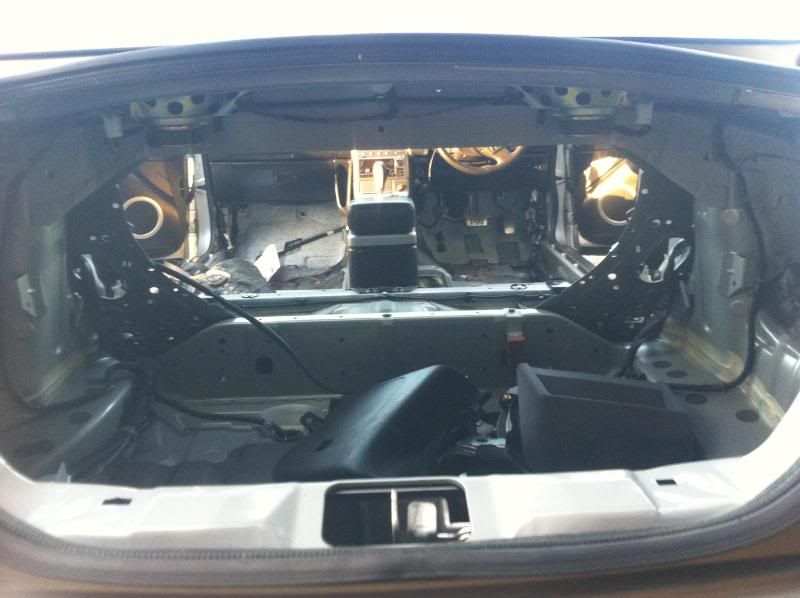
Bit of an update!!! Sound proofing is finaly out and most the prep for seam welding done!!!! you think an s14 is bad!! try one of these!! Iv spent 4-5 nights, my bro and my girlfriend a day each and a mate 2 hole days!!!!

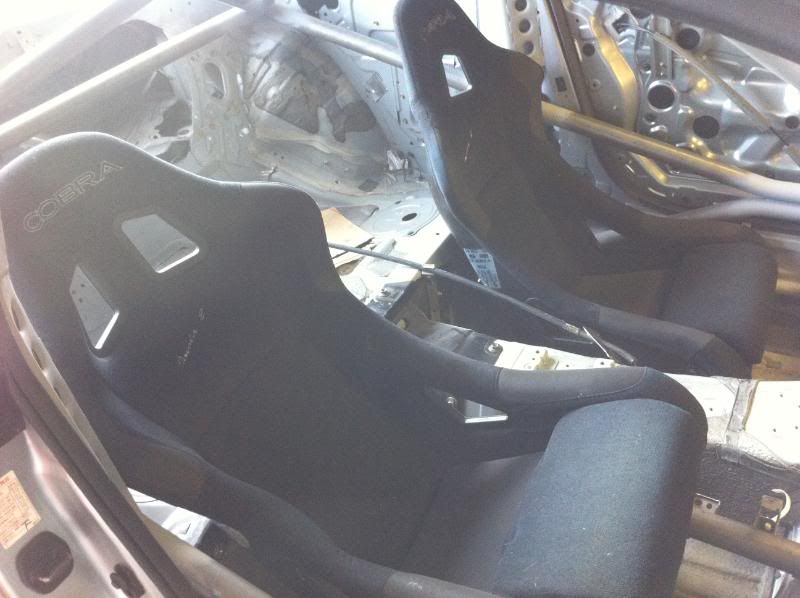
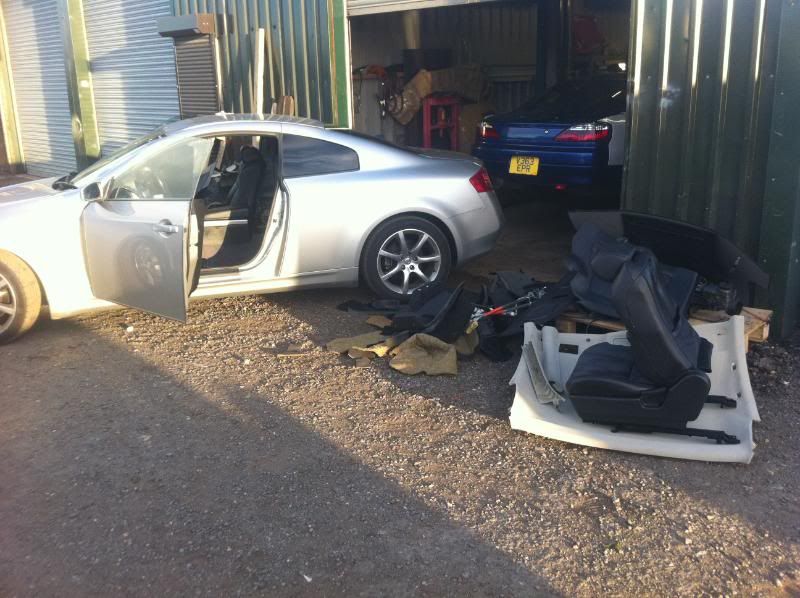
Got some good second hand Cobra seats and some new rails,
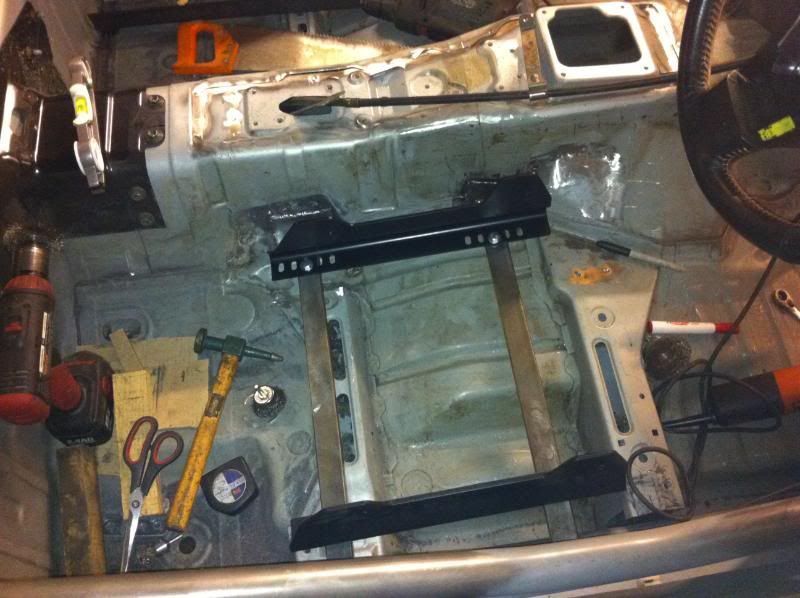
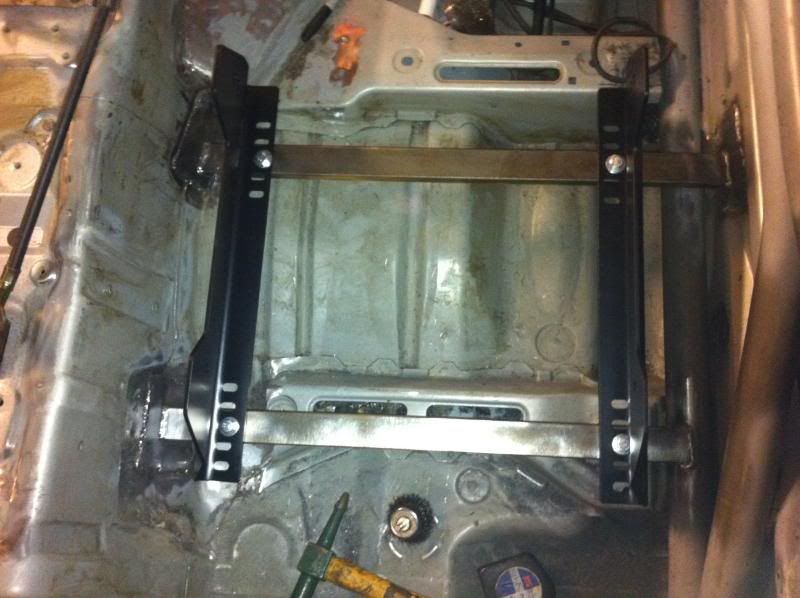
and made some cross rails to hold the seat in, still need to do the other side, but that does not need to be in any particular posision,
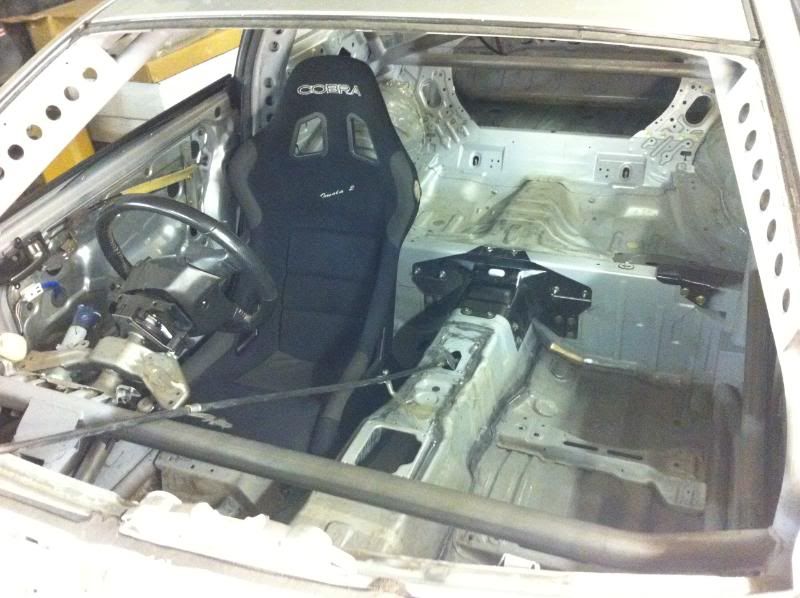
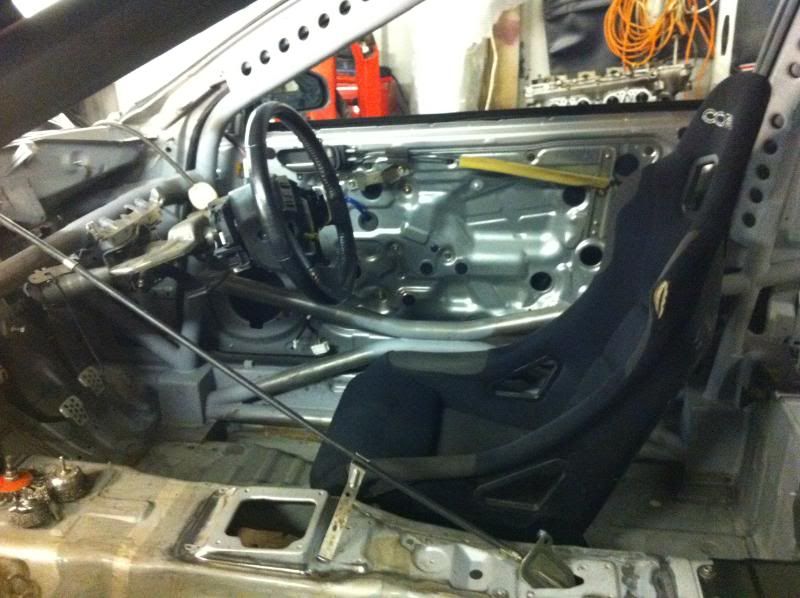
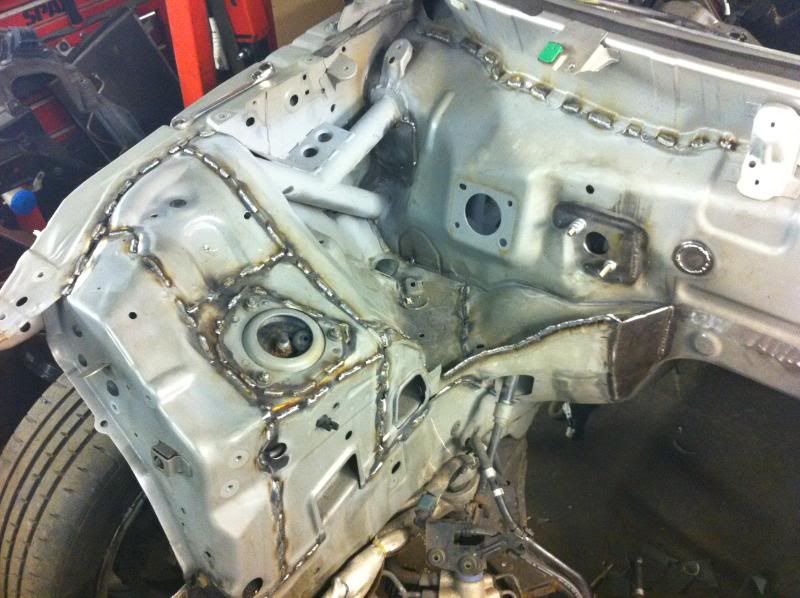
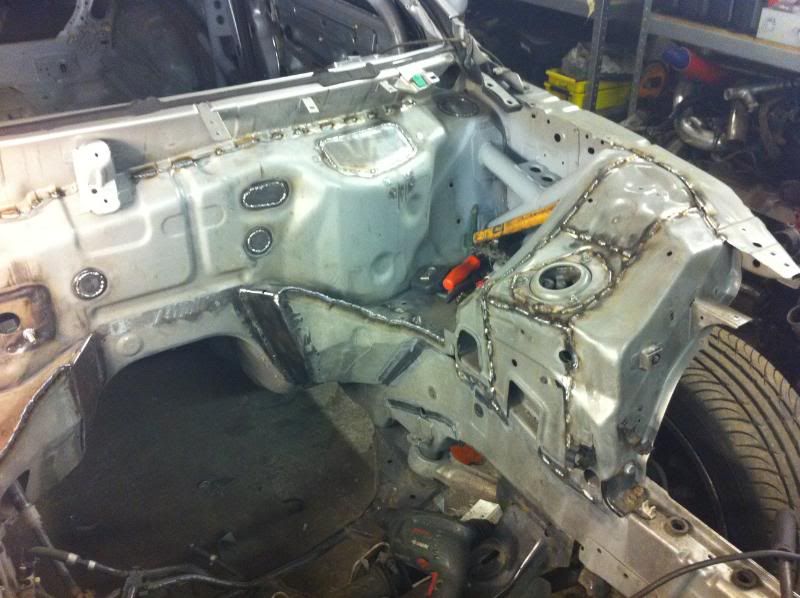
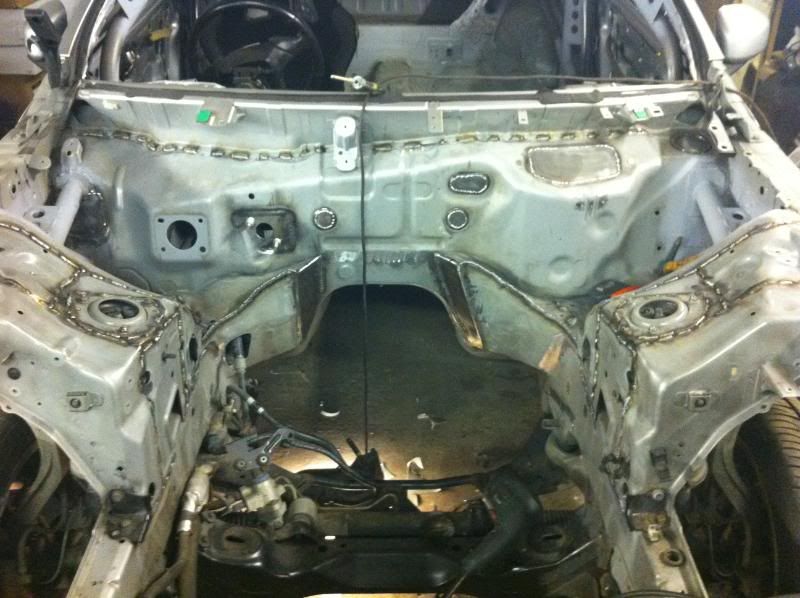
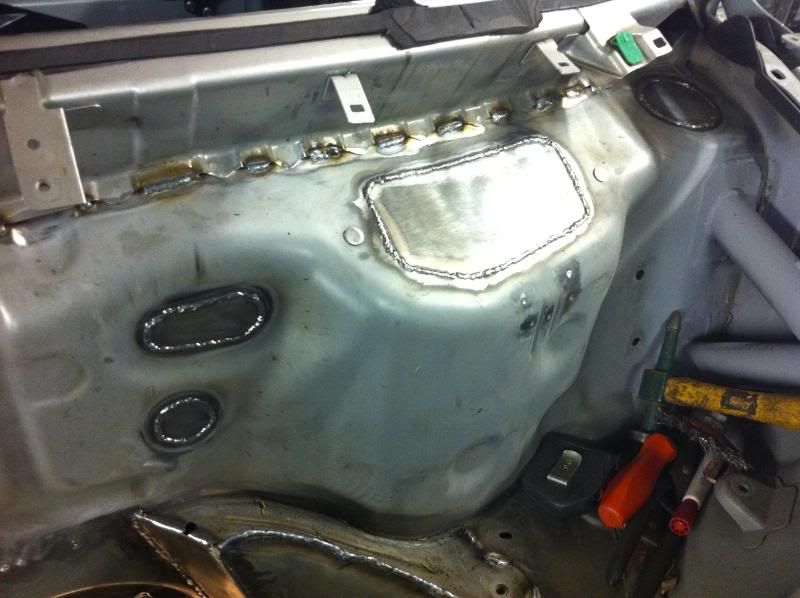
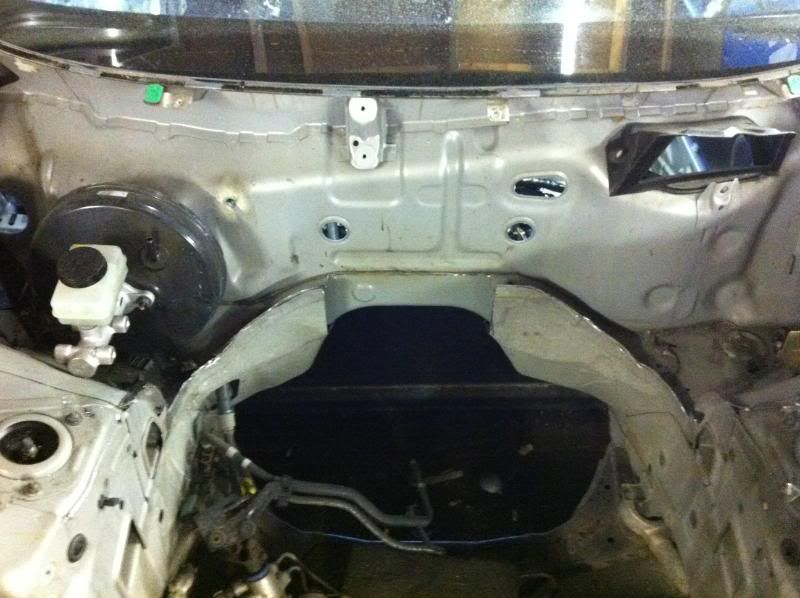
Then got on with some of the seam welding and sealing some of the un-needed holes in the bulk head,
-
Thanks every one
 il be updating soon but not got alot to show TBH, spent the last few weeks just removing the sound proofing and prepping for seam welding!! What a job!! All going well the shell will be seam welded and preped ready for paint over the weekend.
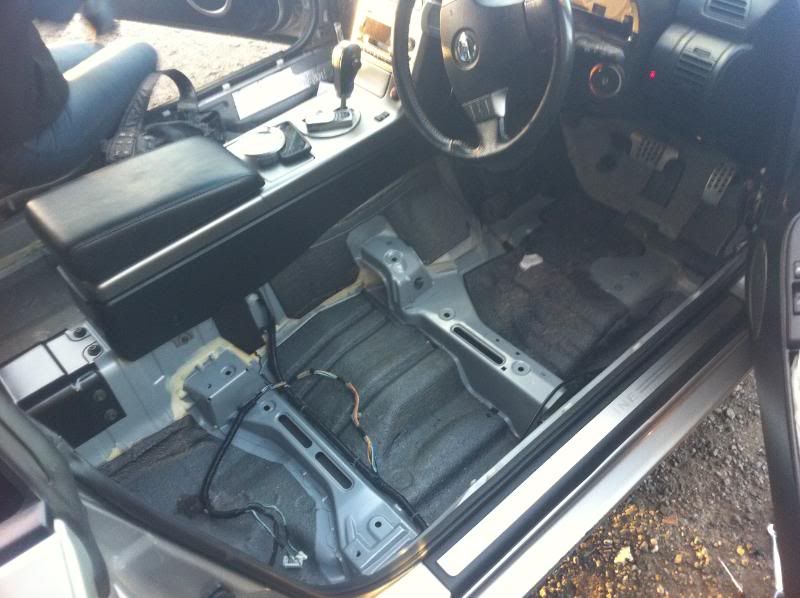
 Great log of what's going on with the car. What I couldn't get my breath over was the removal of the dashboard area.... all those screws and plastic bits and bobs, how the hell do you manage all of the bits and pieces.
I've always had a screw or two left over, or missing.... it's a nightmare to manage. I wouldn't dare invision the pile of screws and bolts you have after removing the interior etc!! Although I guess a lot of the interior won't be going back in, but still!!
LOL, no not alot is going back in, only the dash skin and thats about it. Its not too hard to strip, just use a power tool like a power screw driver.
-
This is the latest update, today, the others have mainly been over the last week since it came back from having the cage fitted.
Not really alot to update,
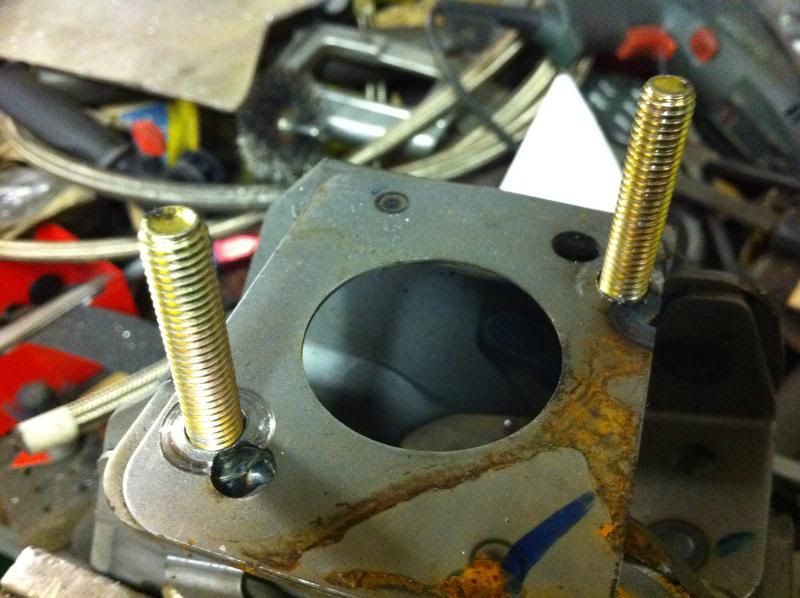
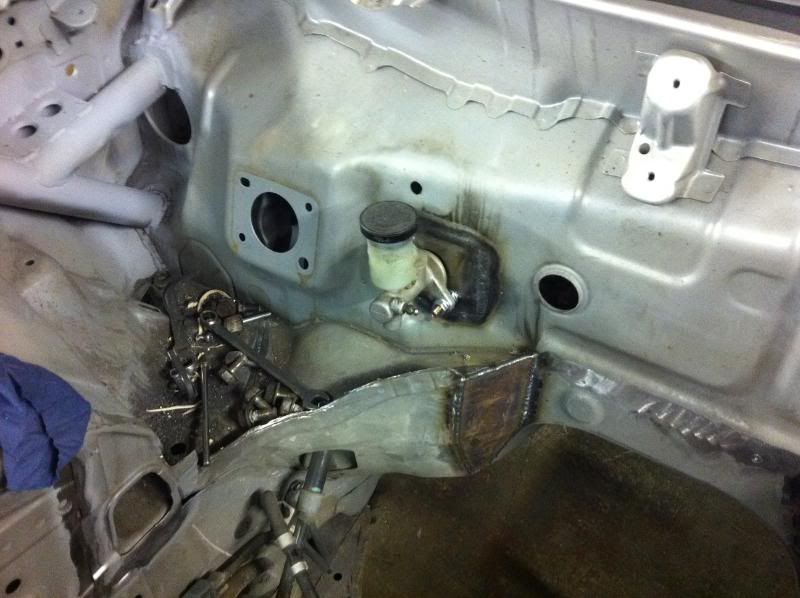
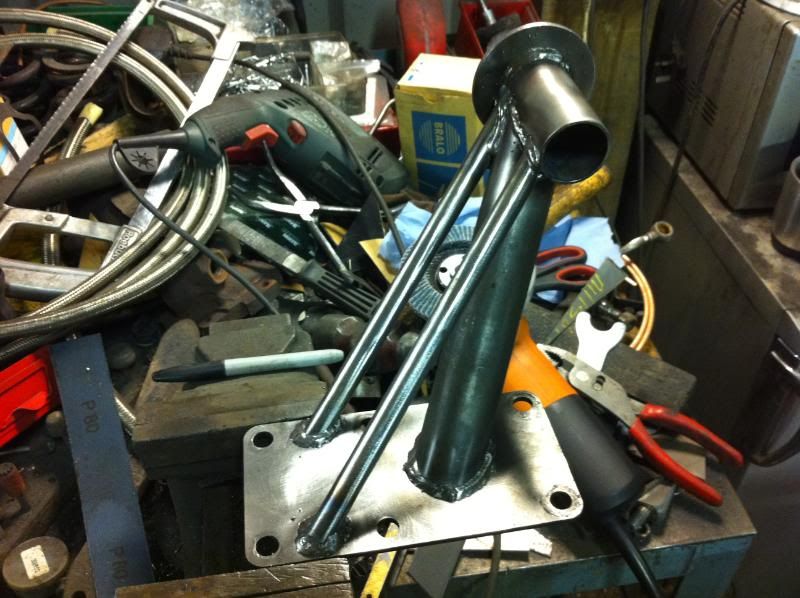
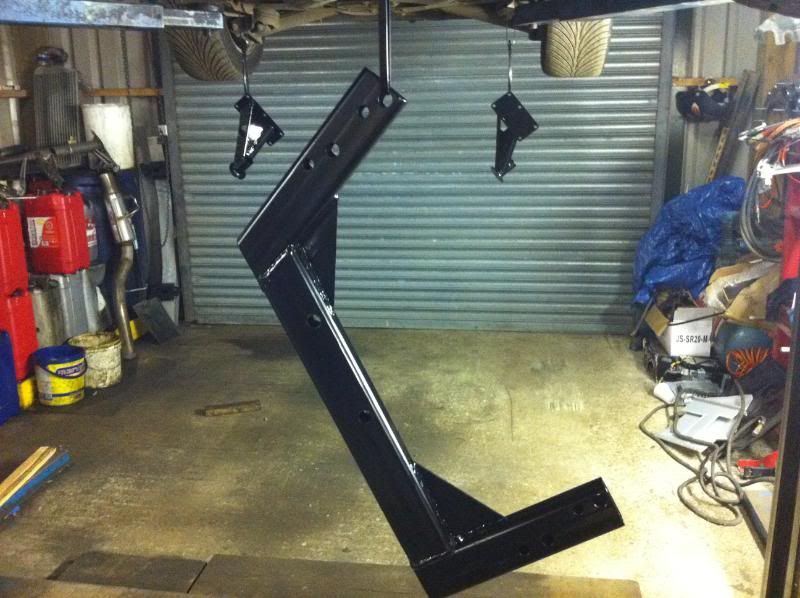
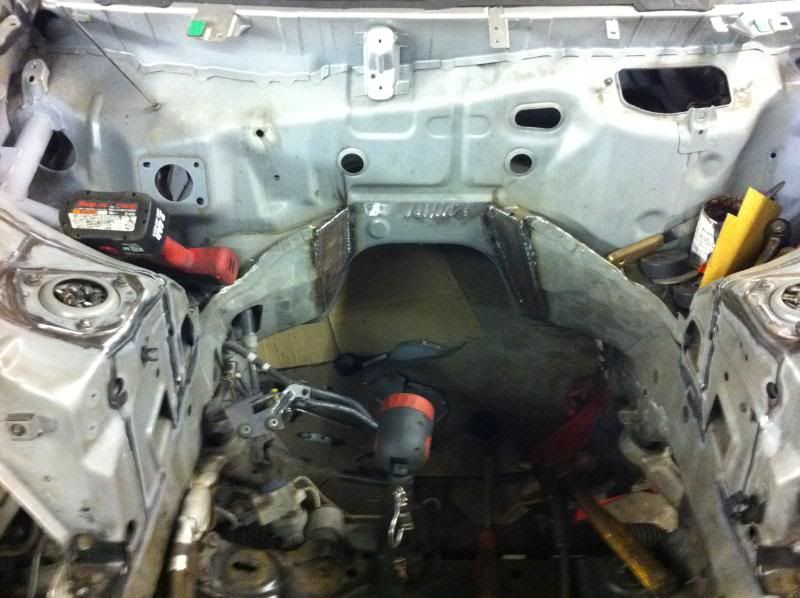
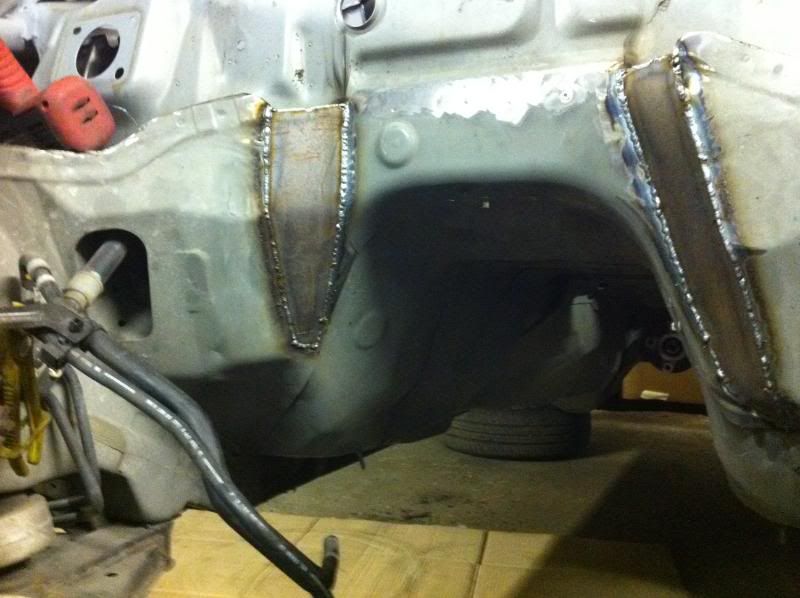
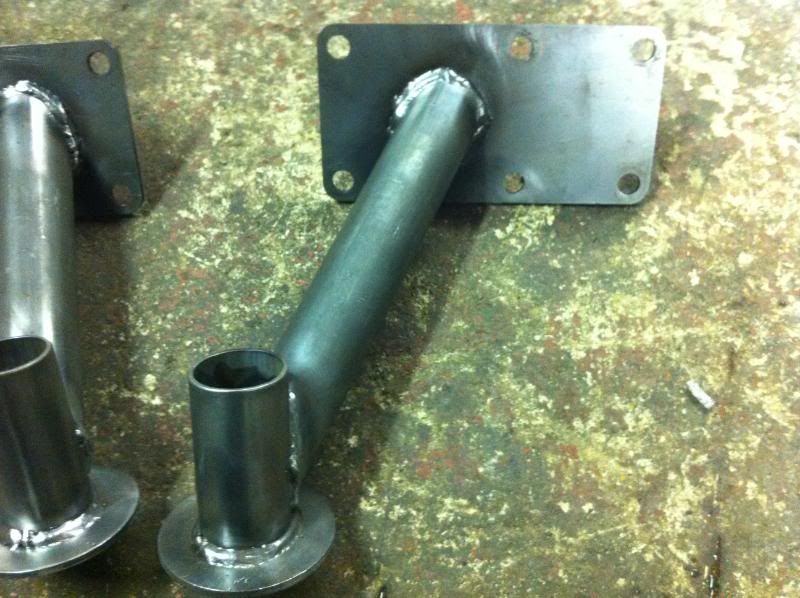
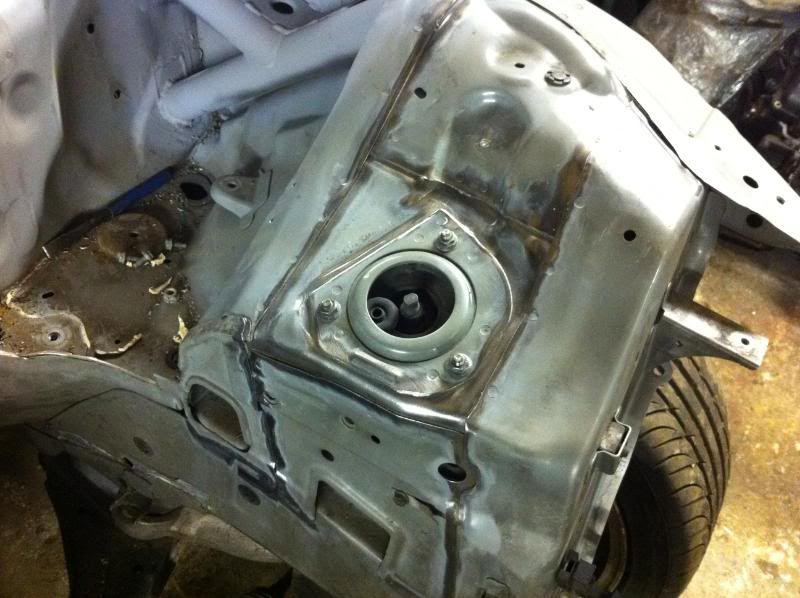
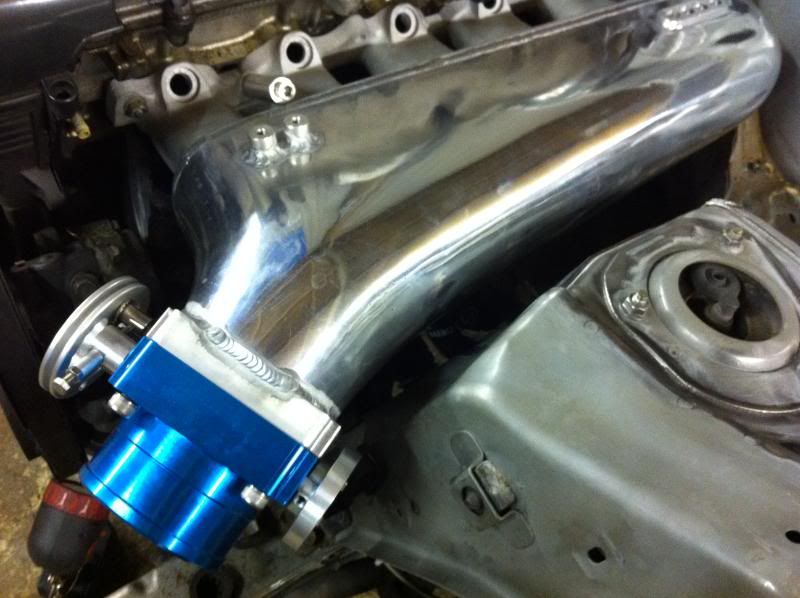
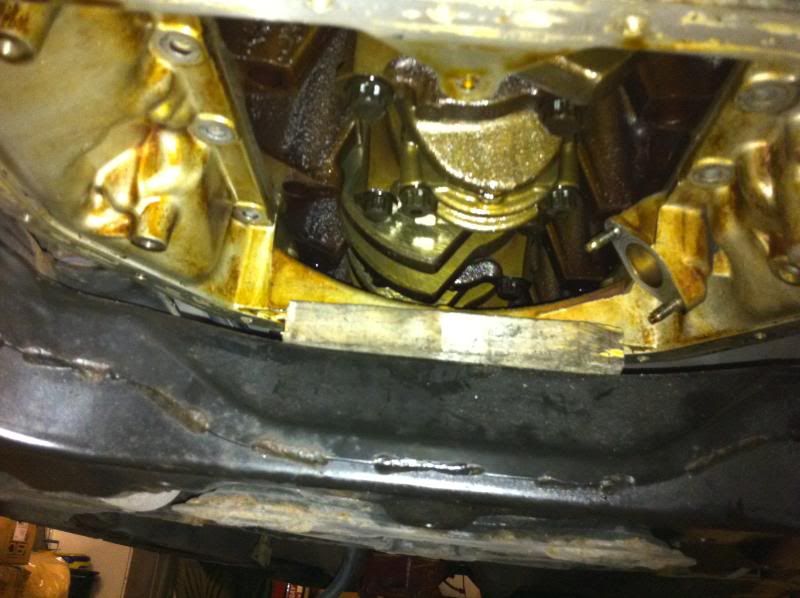
Seing as its and auto shell and its going to be manual, a little work is needed in this area. I managed to get a manual brake and clutch pedal from some one on another forum, but there was no where to really mount it like on s-bodies, also, i could not find a slave for a 350gt or z so im using an s14 one, so.................
Holes line up but itl put the cylinder on the ****,
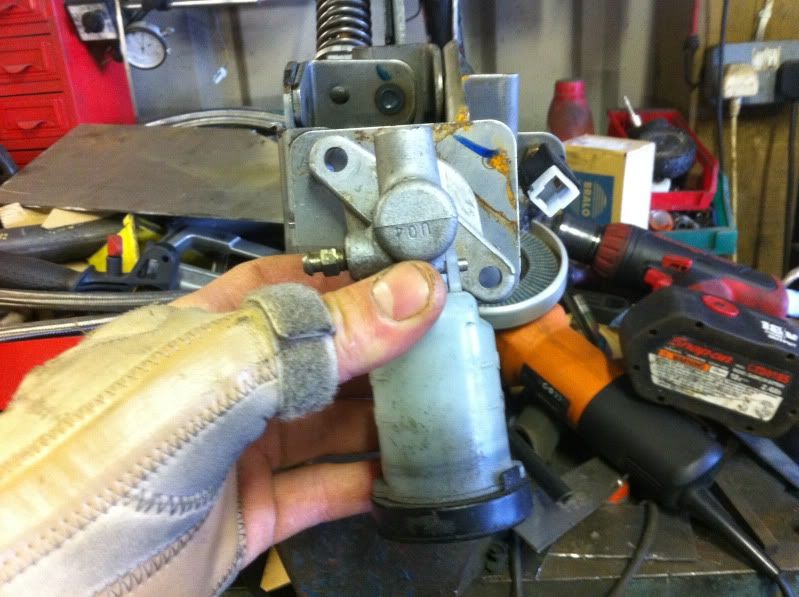
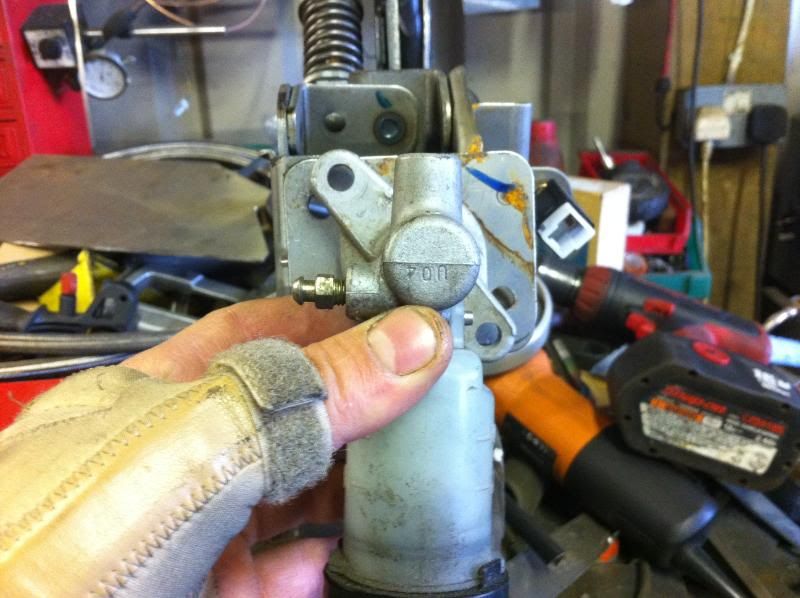
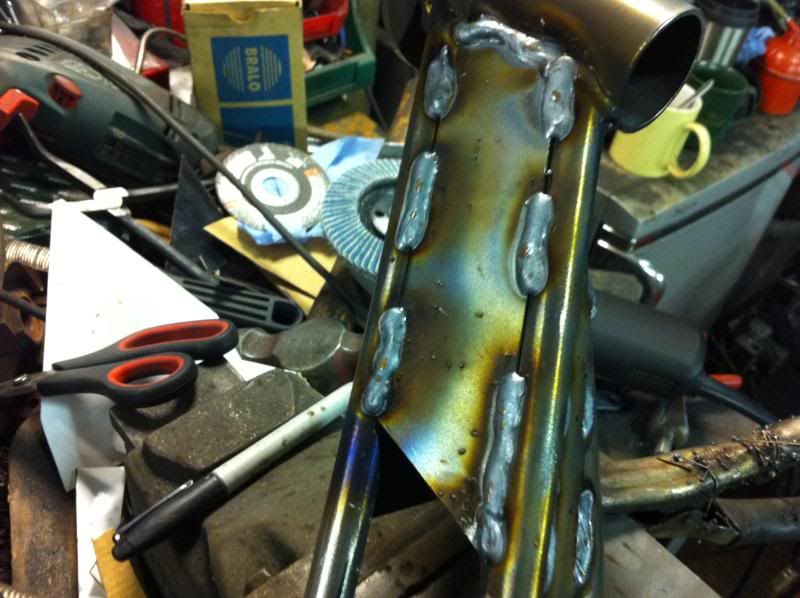
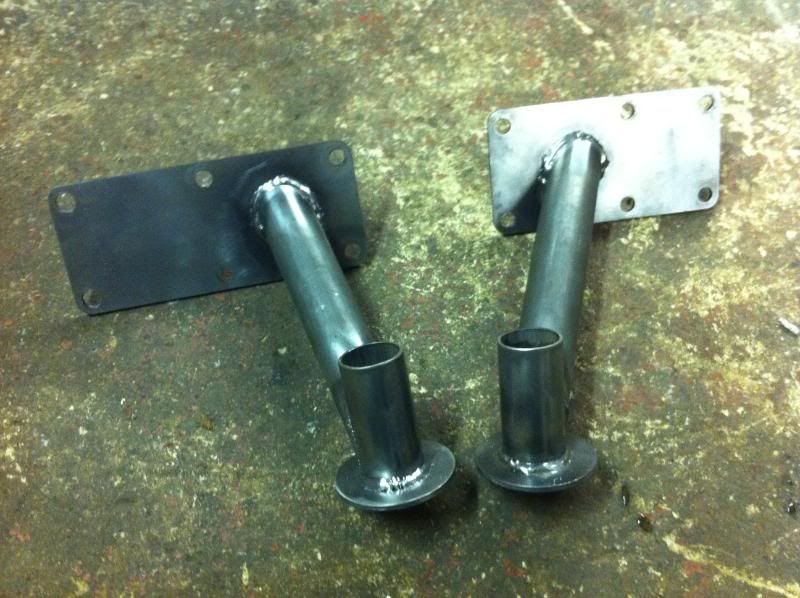
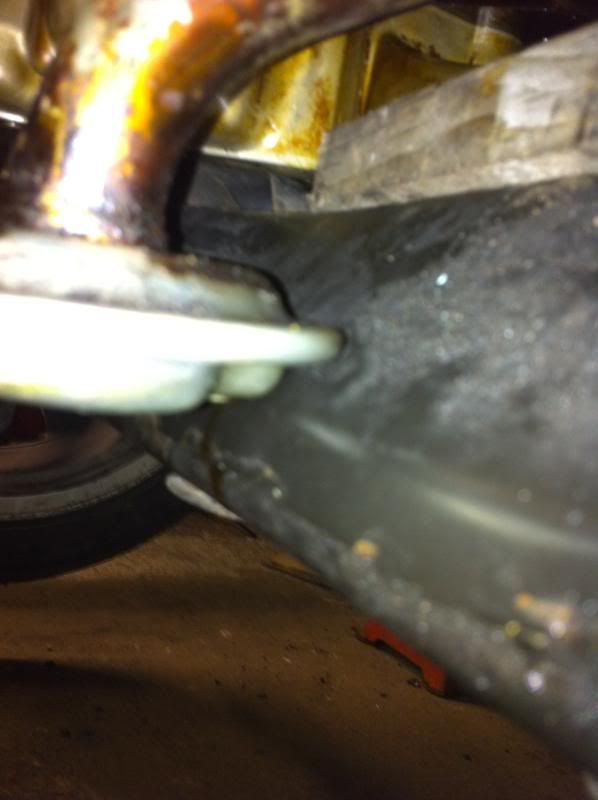
Welded in a spreader plate as the bulk head is soo flexable
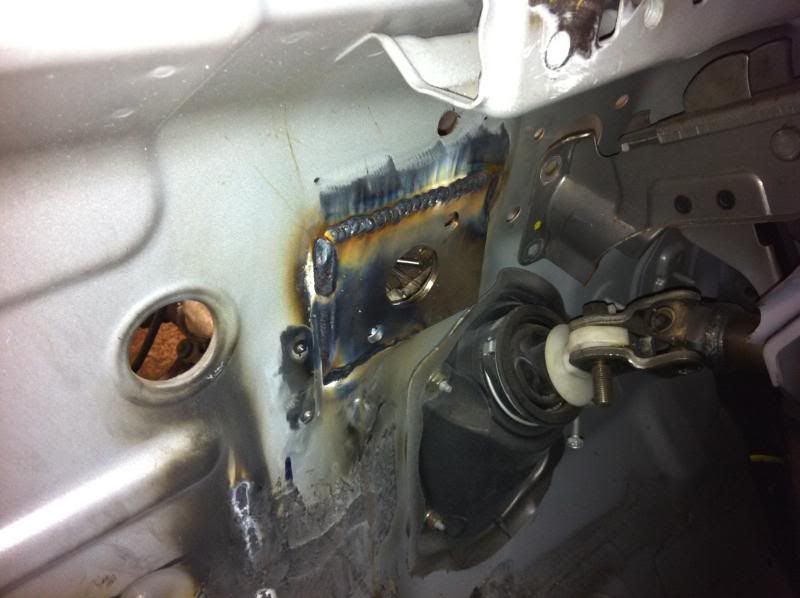
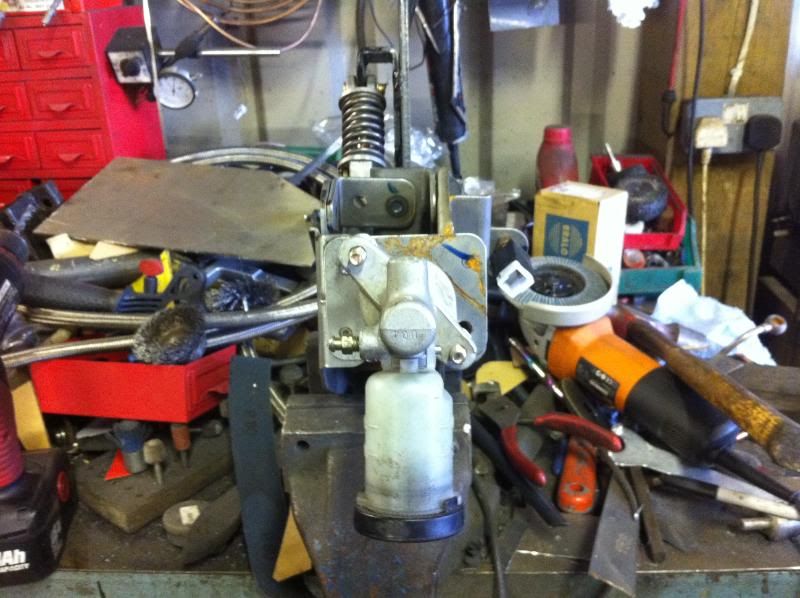
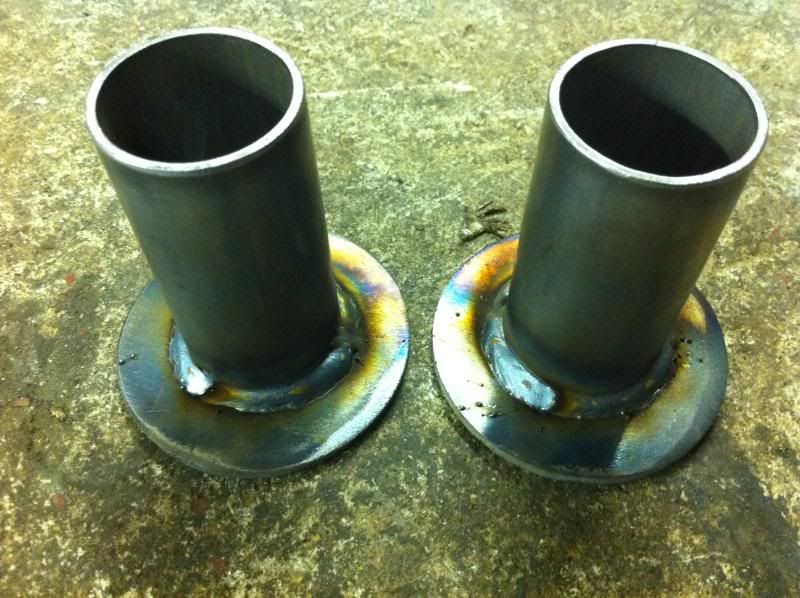
welded in some studs to make fitting easier
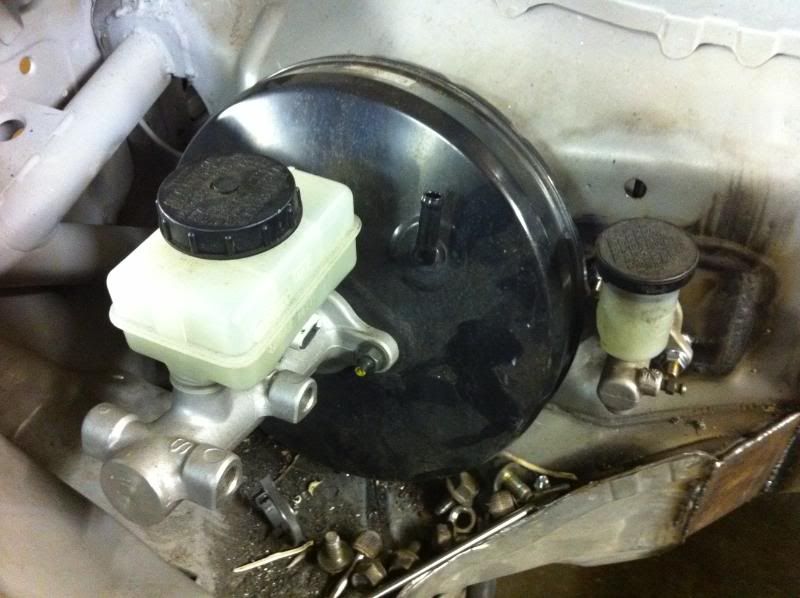
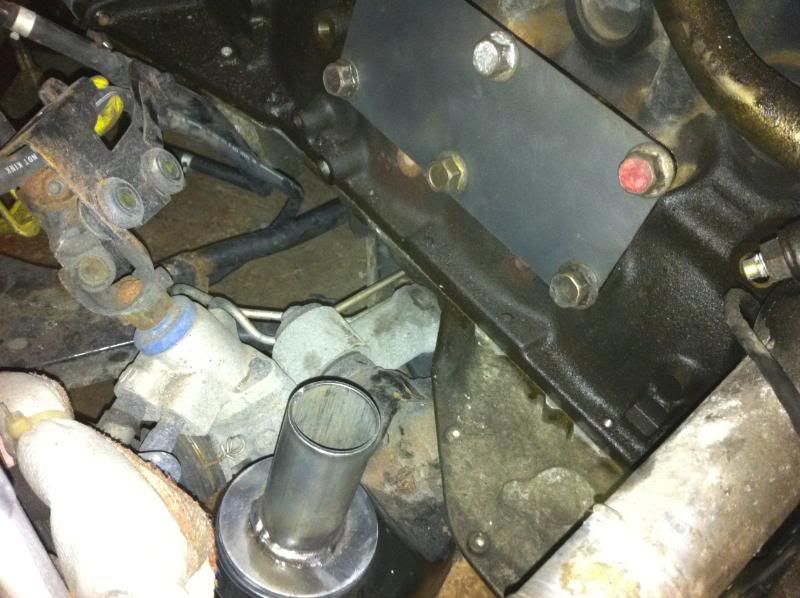
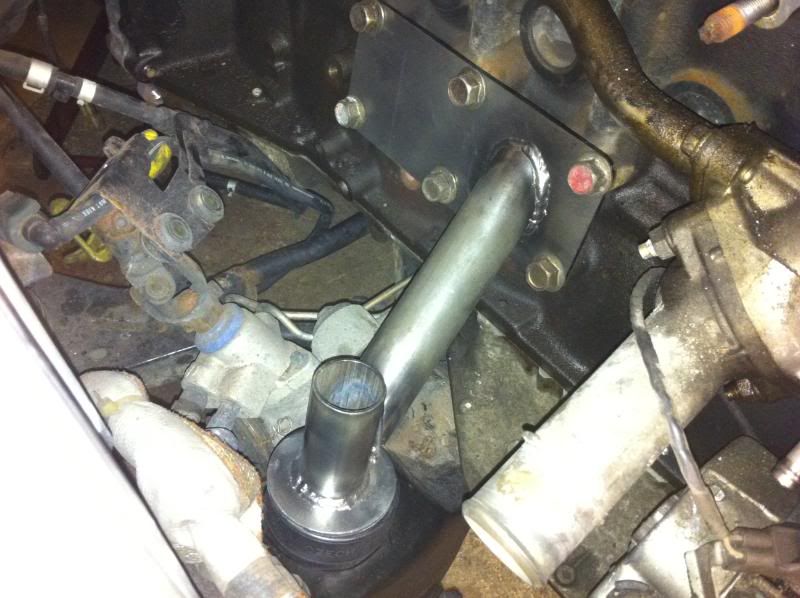
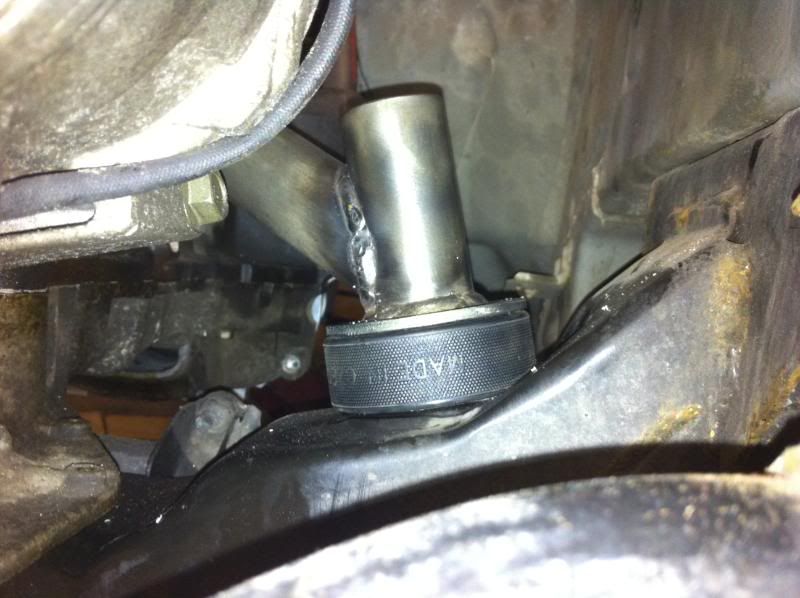
In the car
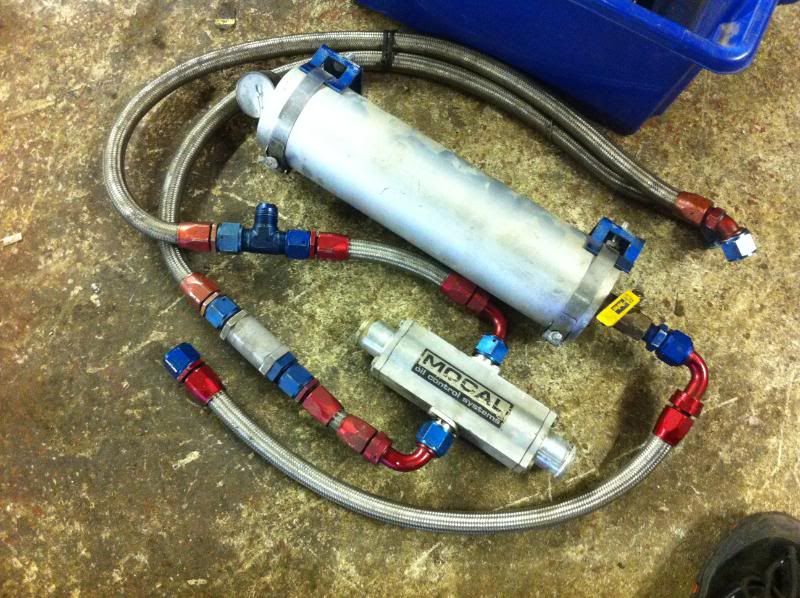
Managed to pic up this accusump and a load of -12 fittings for pennies,
i done the sums and new this lot is very close to £1k!!!!
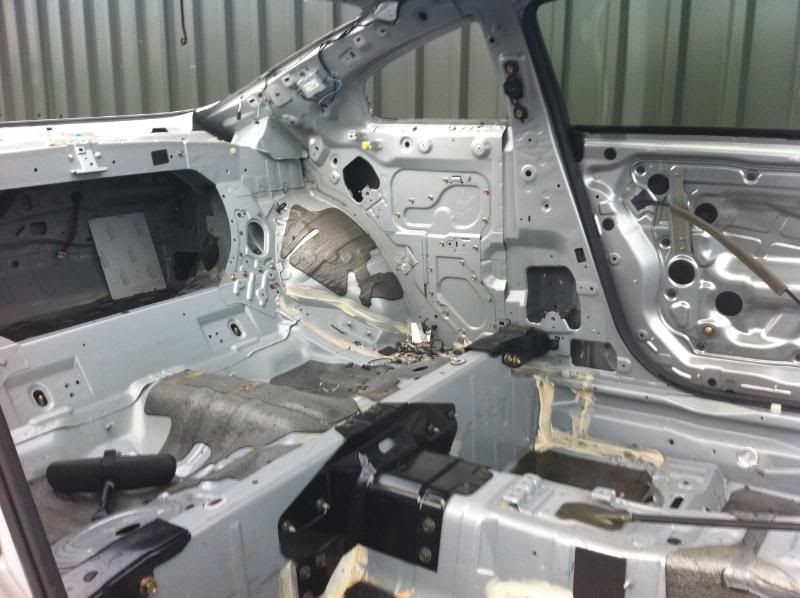
then got on with getting the shite proofing out!!!
-
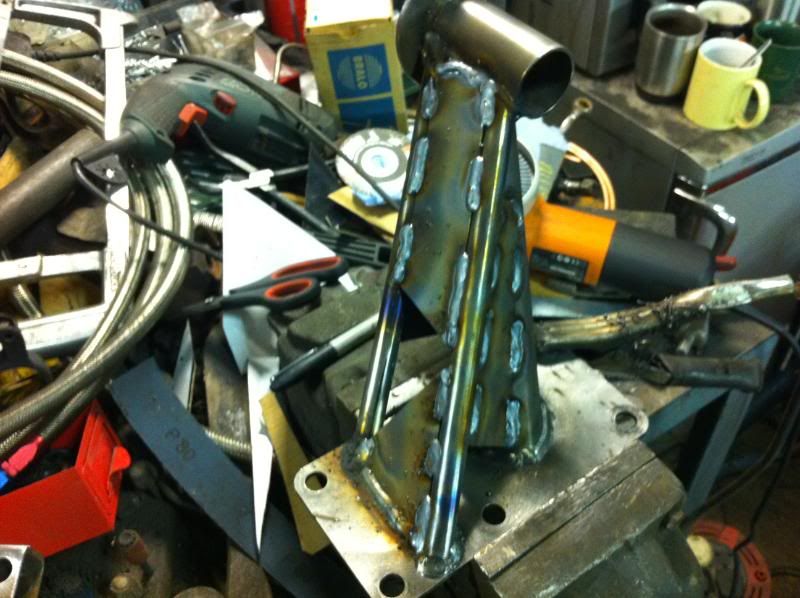
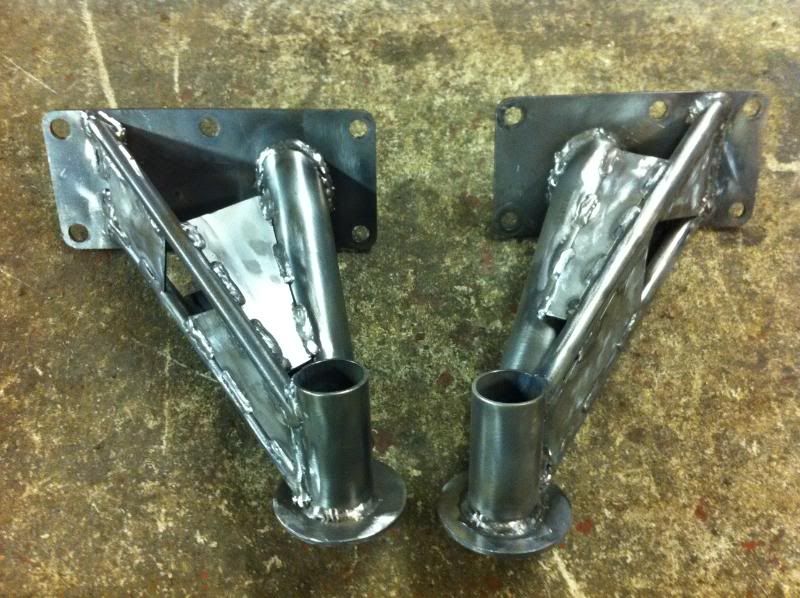
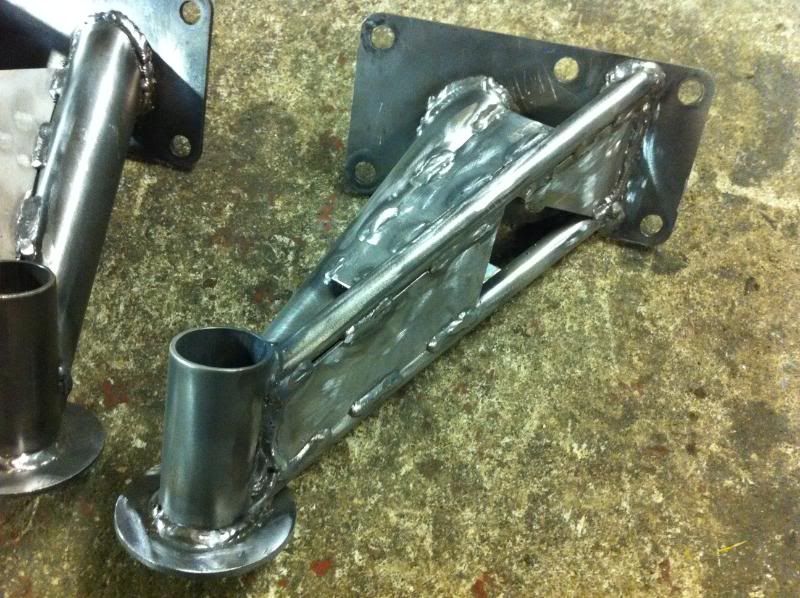
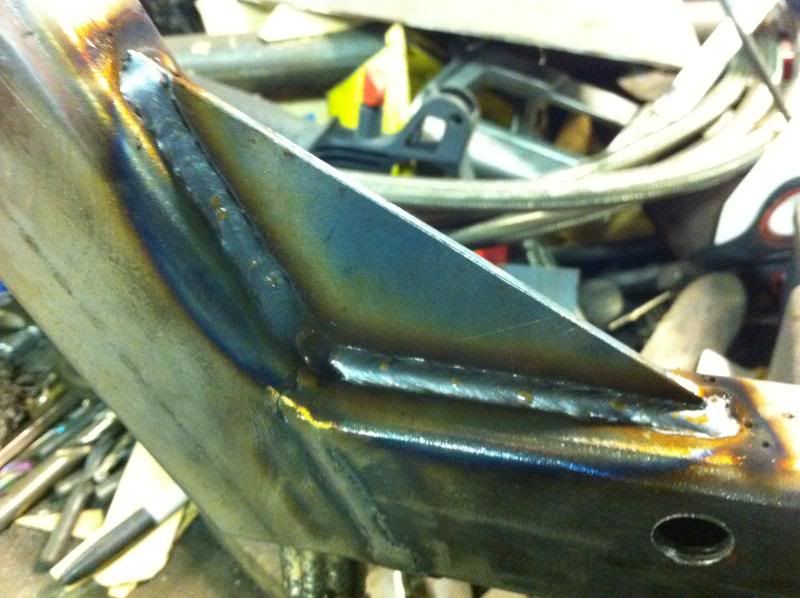
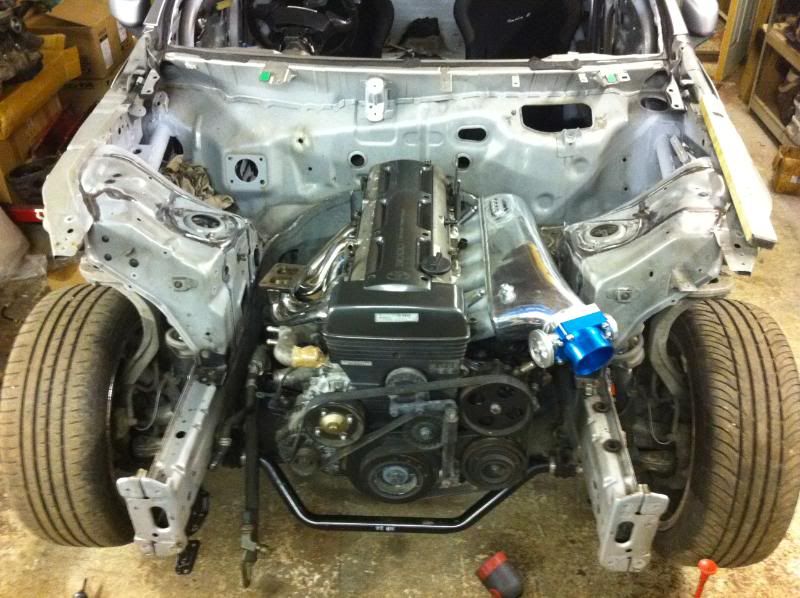
Little update,
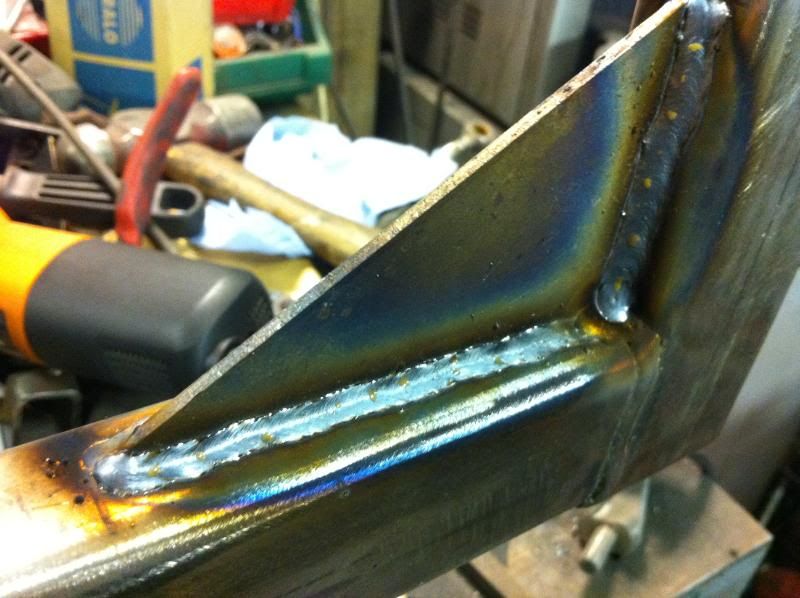
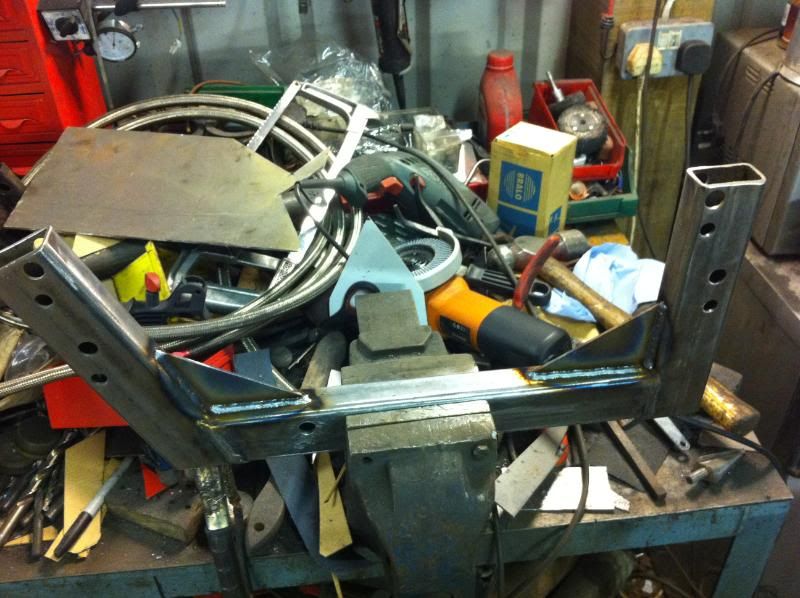
Finished the engine and gearbox mounts
-
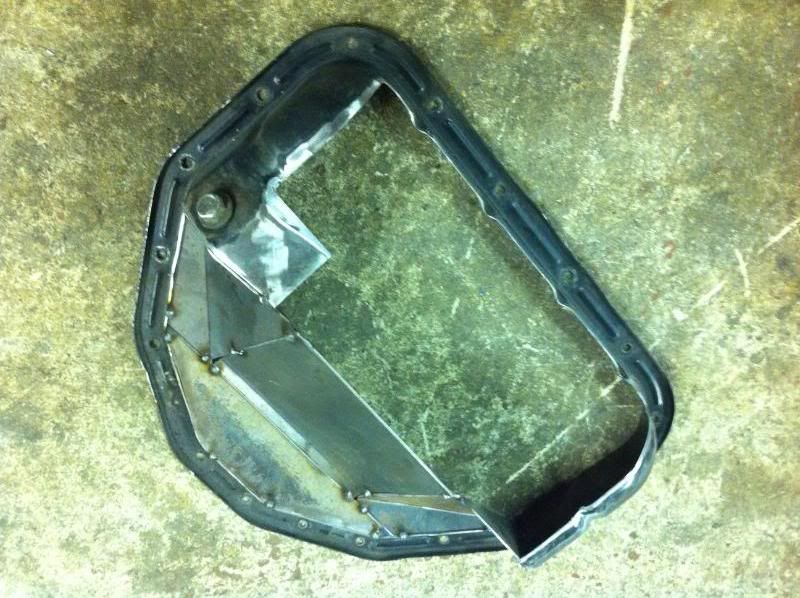
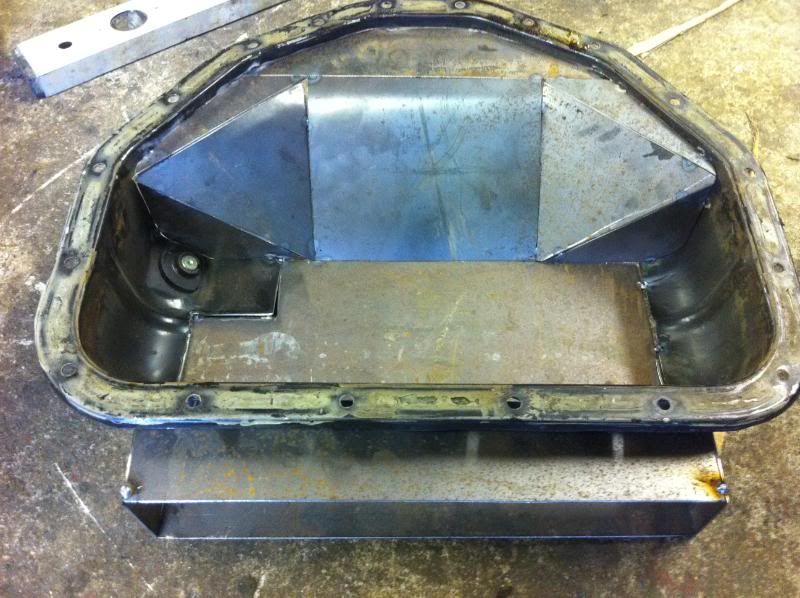
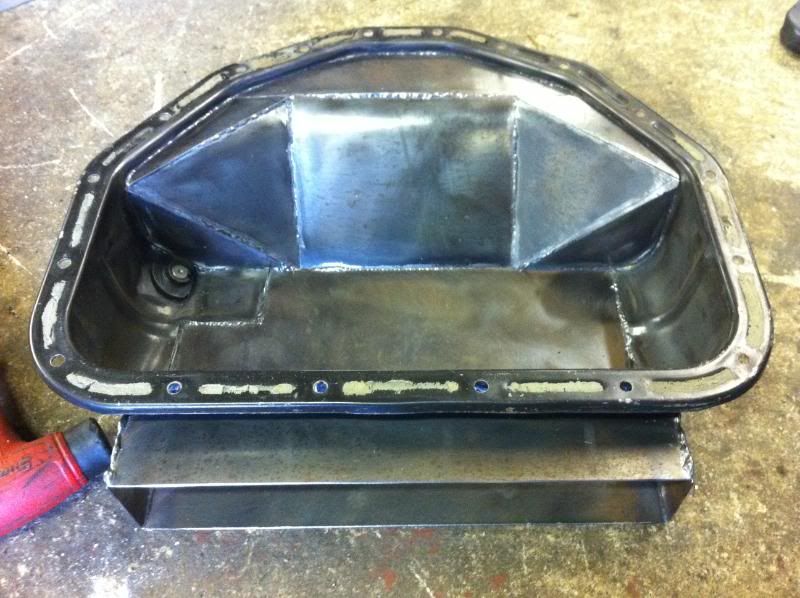
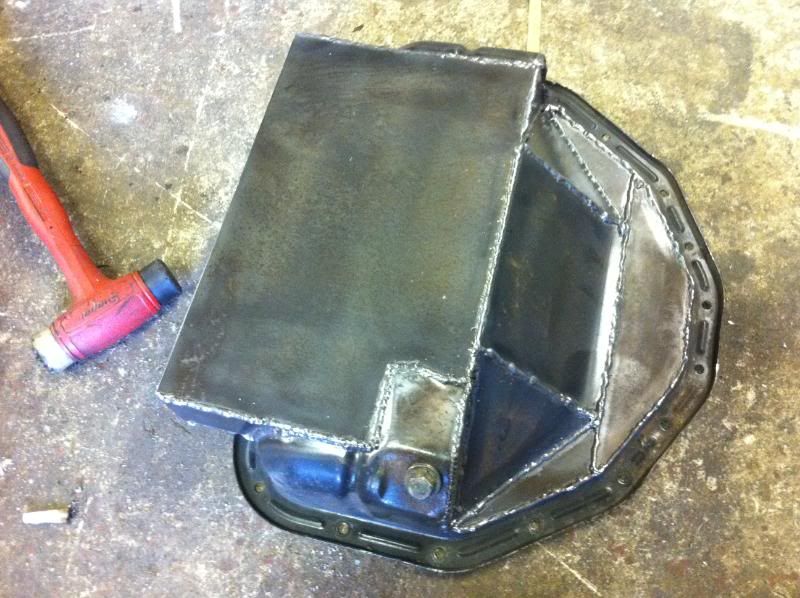
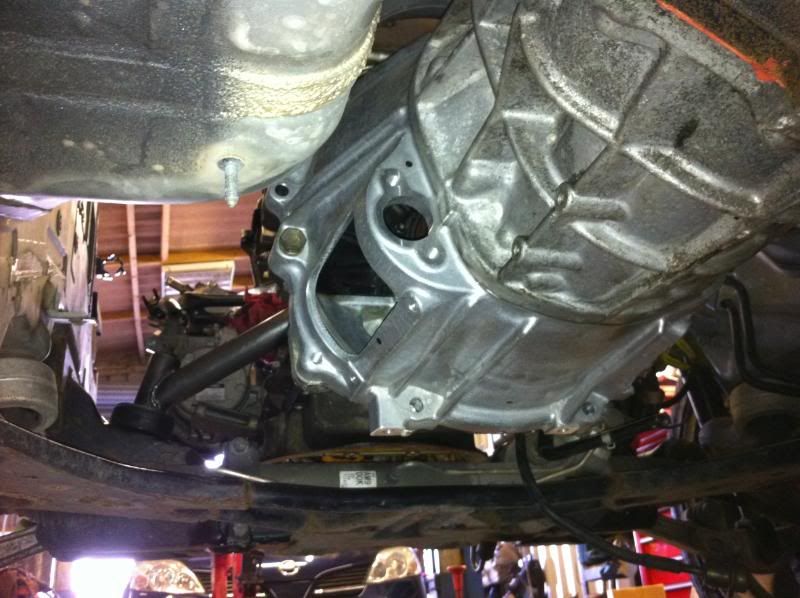
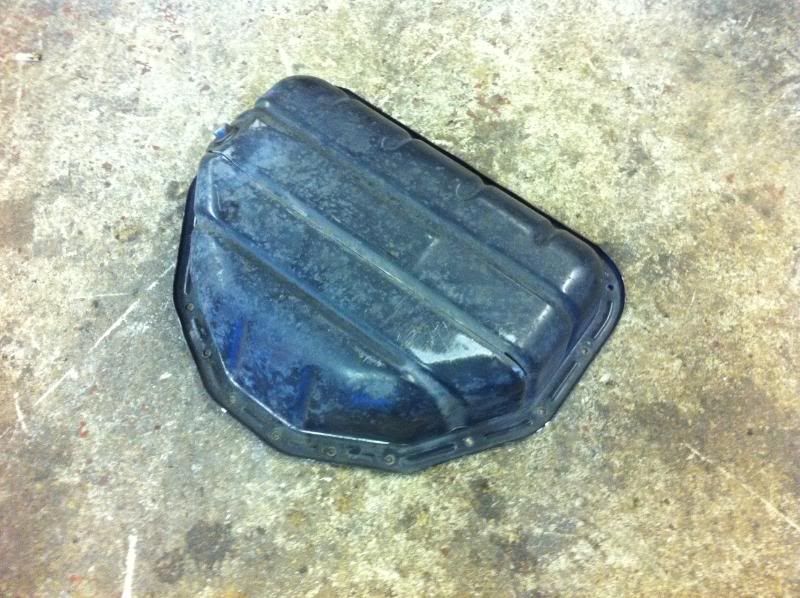
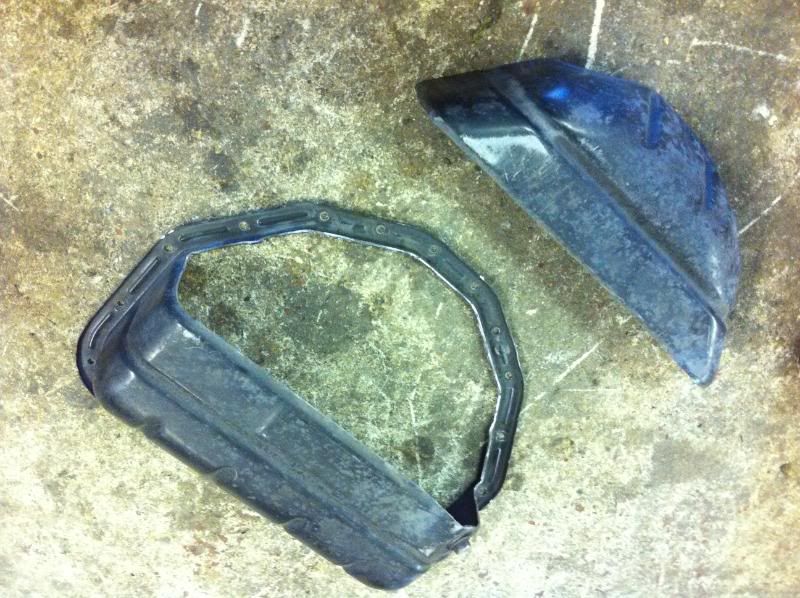
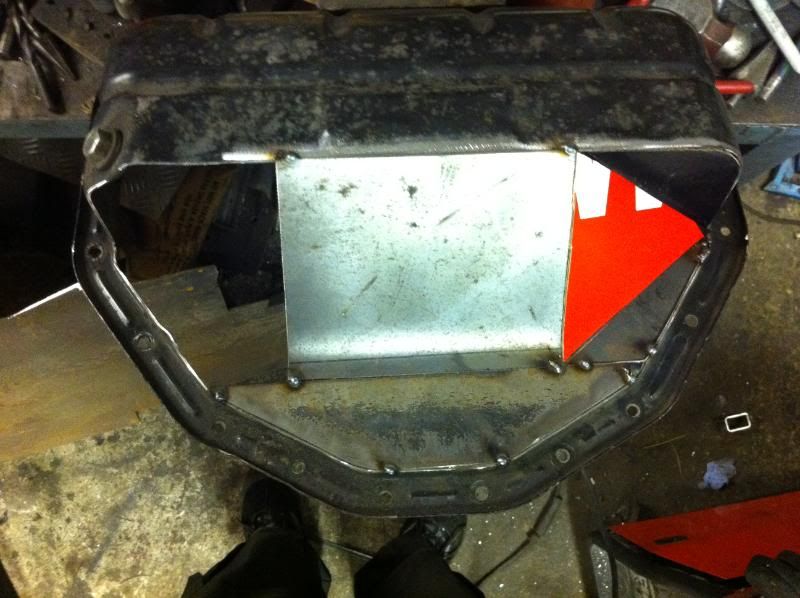
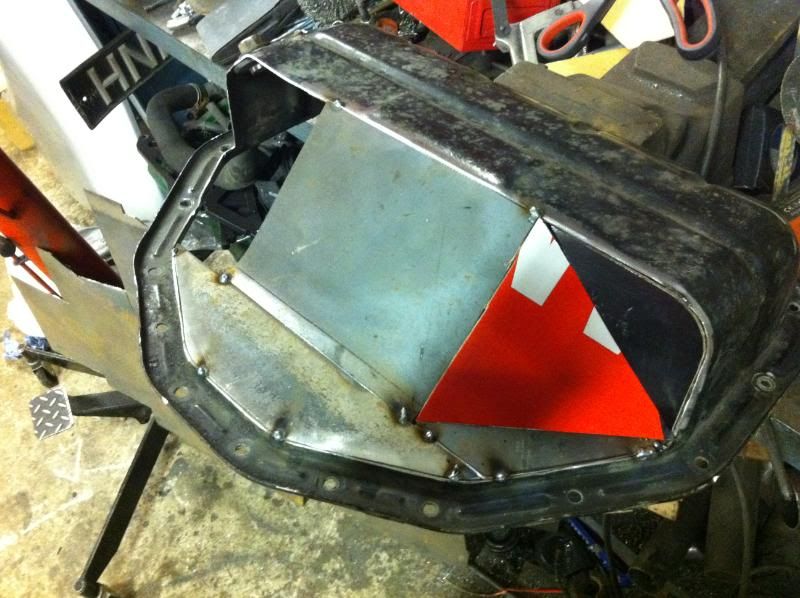
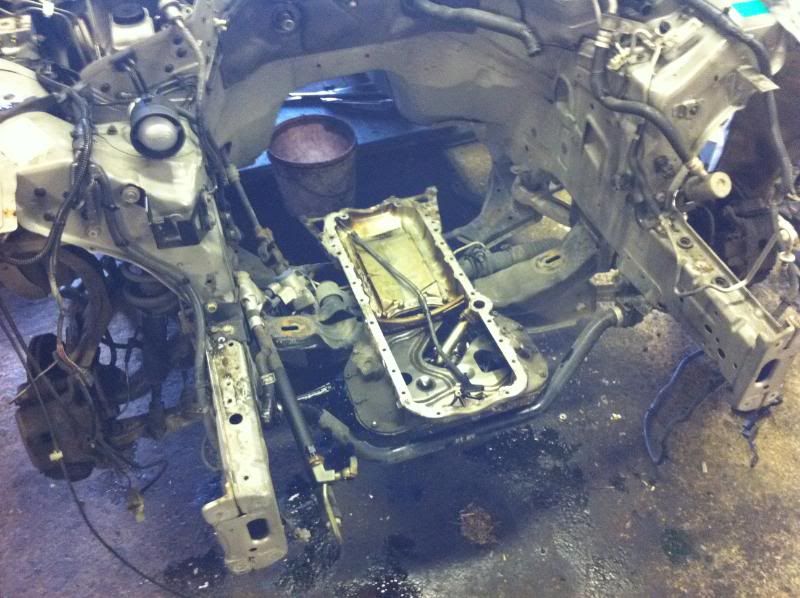
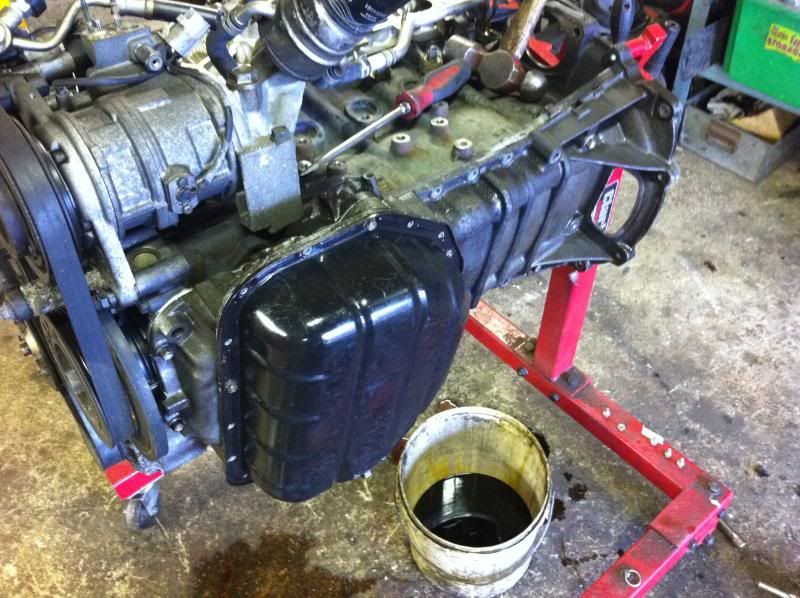
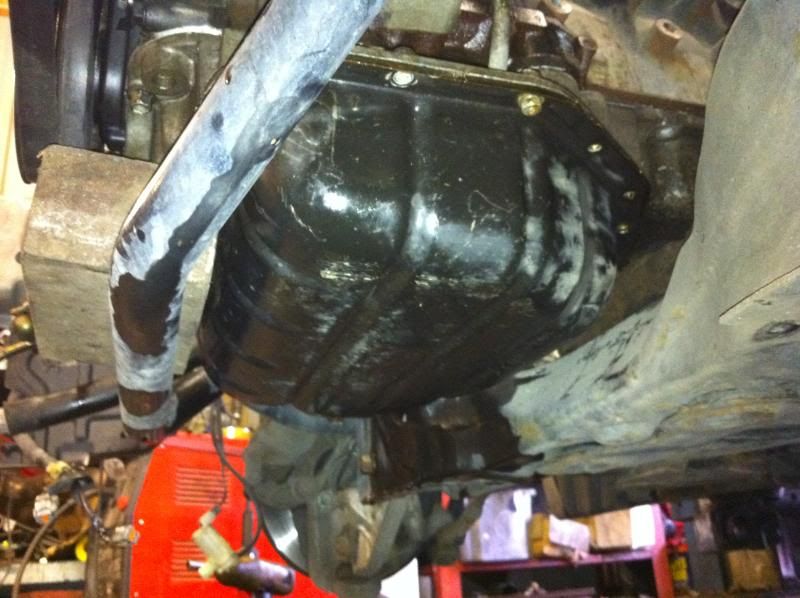
Been at it again today, got the sump prety much finished! Left on of the sides open until iv made the new pick up, to make it easier. Also need to do a leak test on it once the welding is finished.
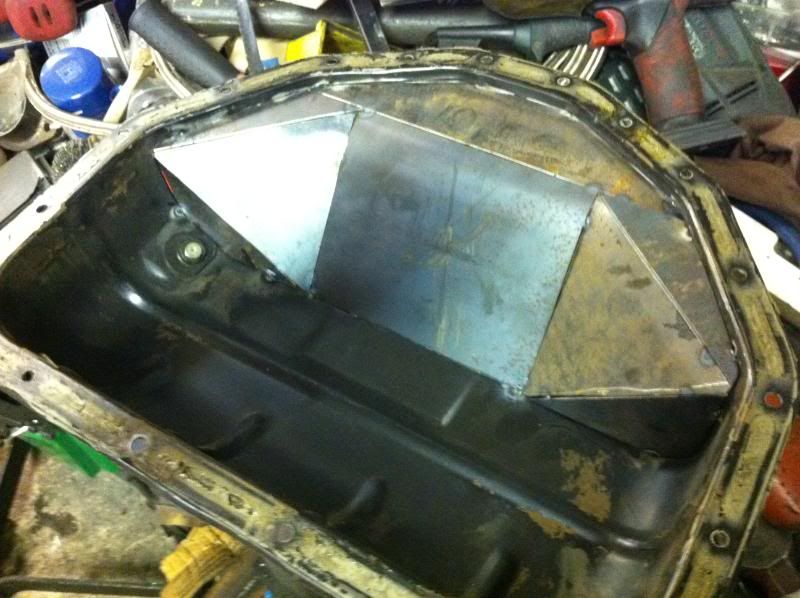
Phase two, make it hold 5ltrs again,
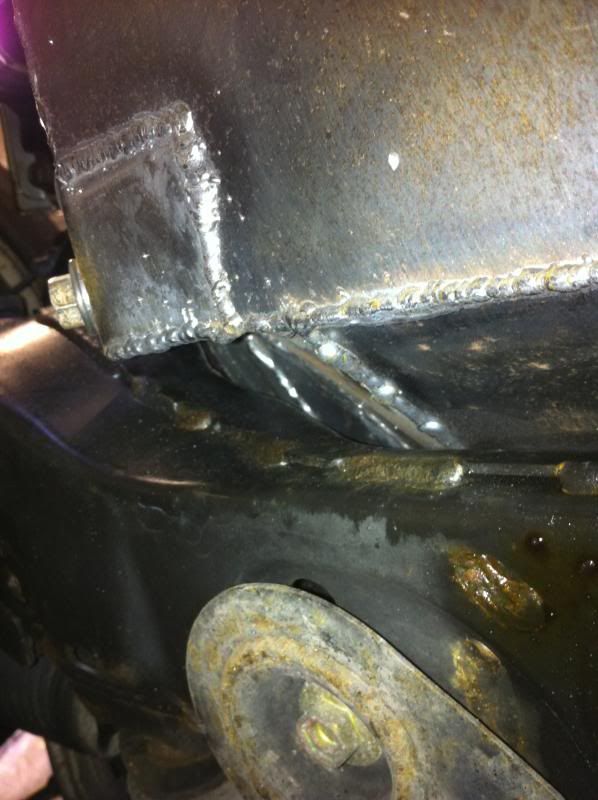
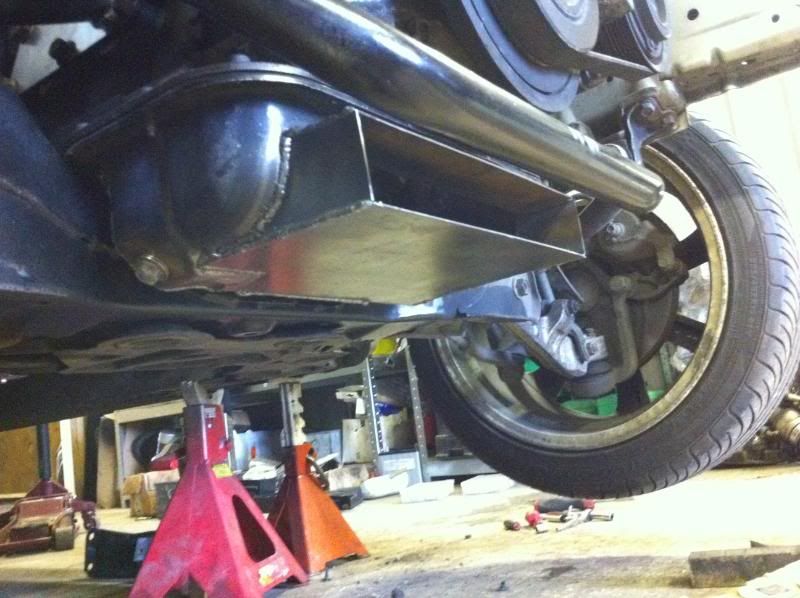
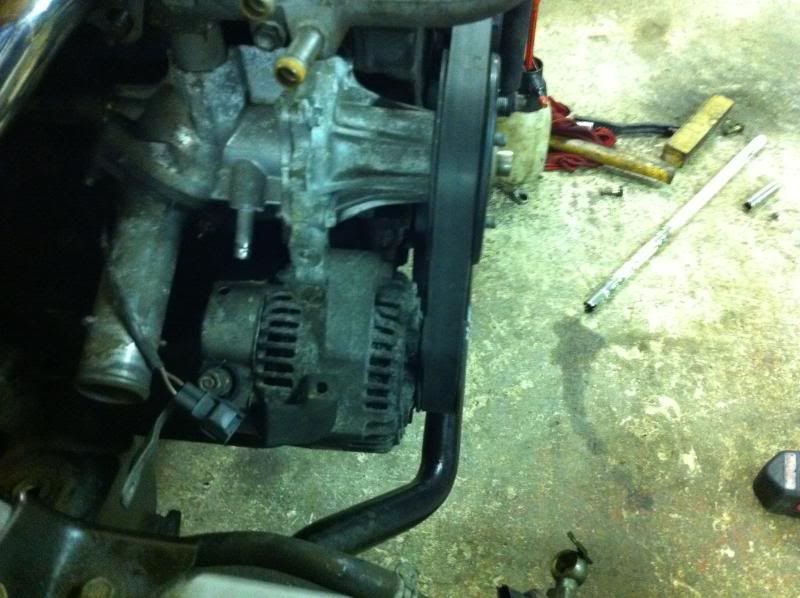
So i got the engine back out to sort the trany tunnel, slight bodding needed to clear the bellhousing.
Thats as far as i got! My angle grinder died so need a new one of them befor i continue, next it to trianglate the engine and gear box mounts. Then get the rest of the sound proofing out and start the seam welding.
-
etc etc

Gearbox mount
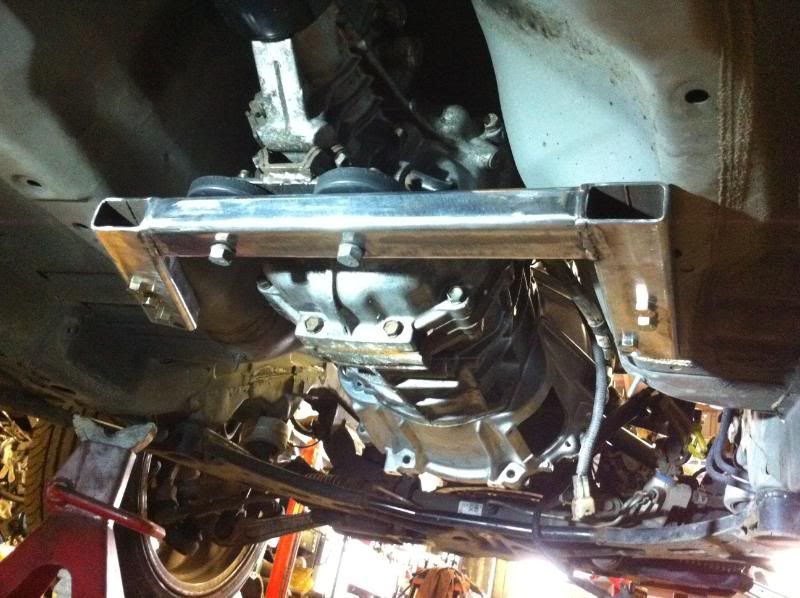
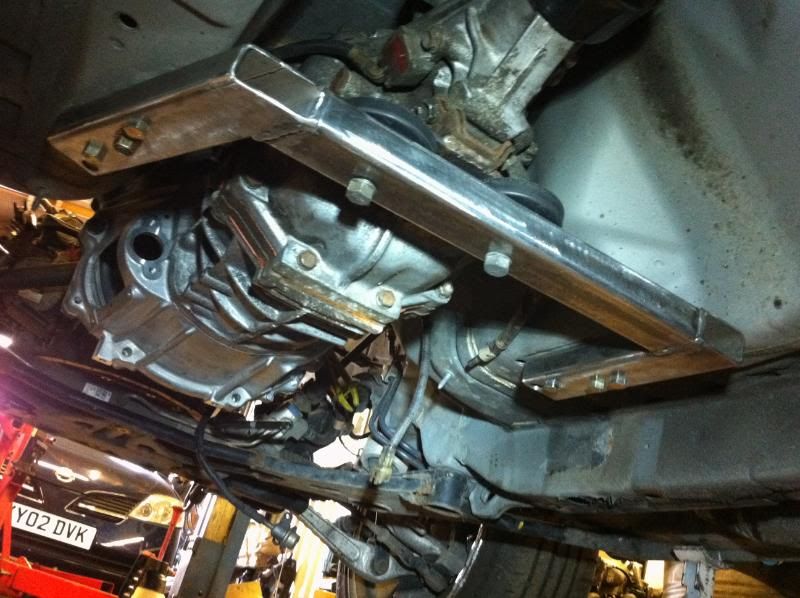
Neither the engine or gearbox mounts are finished yet, just fitted for now until iv made the sump, then once i take the motor back out to do the rest of the shell prep il finish the bracing on the mounts.
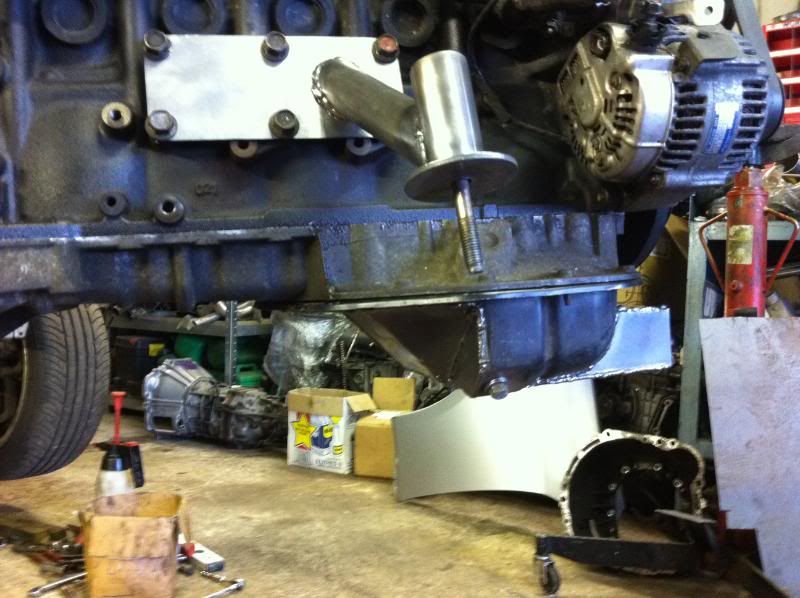
Started to make the sump, mesured it takes 5ltrs, so once im done i want it to hold as close to that as poss again.
-
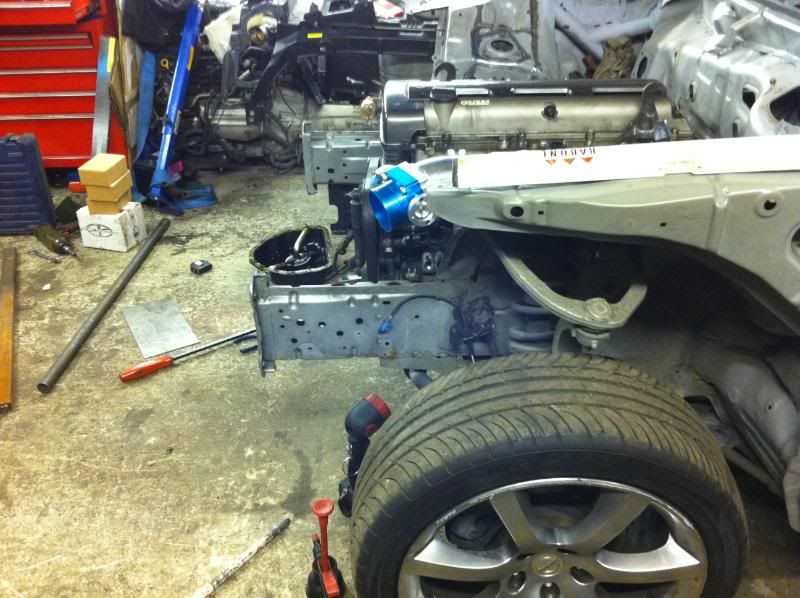
Ok, time for an update, cast is off my arm now and feels loads better so its full steam ahead!!!
So got the car int he back of the workshop jacked up and sat level.
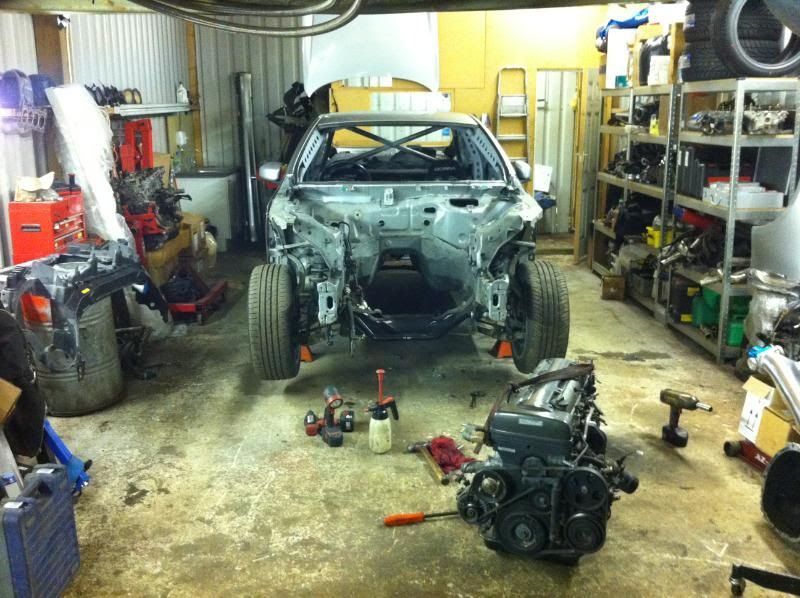
Front wings off ready for seam welding
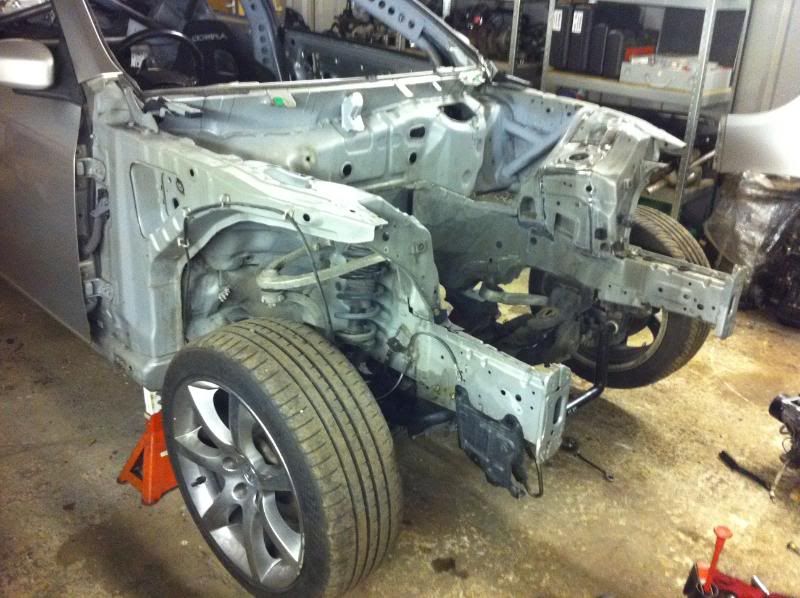
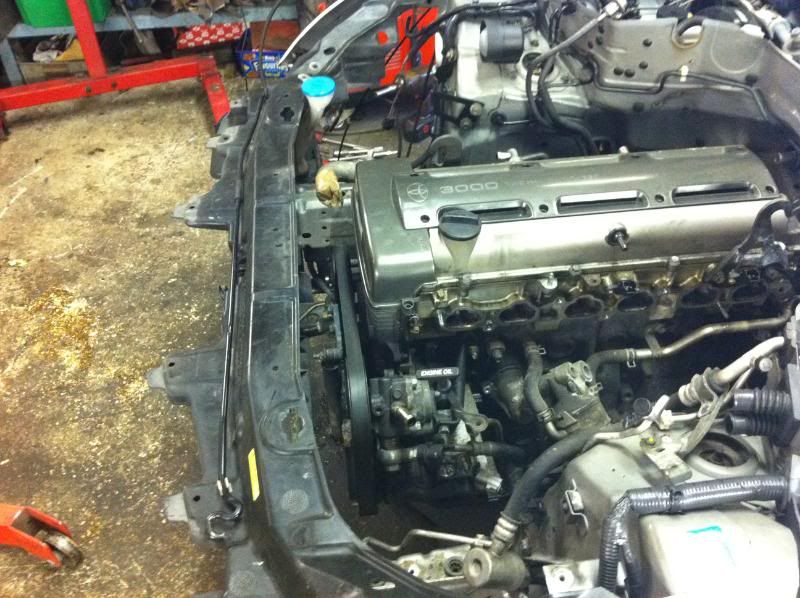
Next was to get the right bellhousing on the box, get the box mounted to the motor and get the motor in the final posision! This took a good few maybe 4 hours to get right!!
Why it took so long was due to having to take in to account clearance on clutch master, steering colomn, sump, subframe, inlet and exhast manifolds.
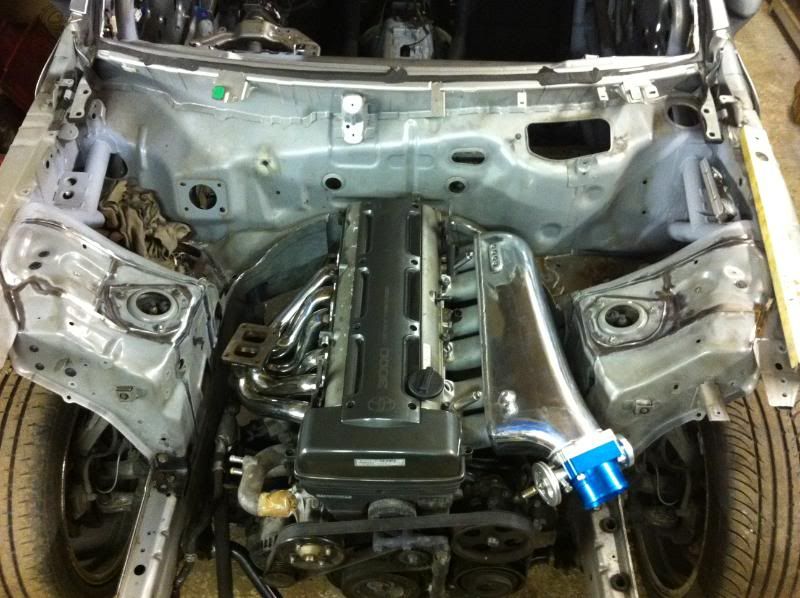

Managed to get it quite far back, front pulley is flush with the front of the front wheels and the ARB (note back on the 1st few pages this is where the vq35 sat too. And that 3 cylinders shorter)
The bigest prob was the sump, this is how its going to sit, so im having to prety much make a new sump and modifie the pick up.
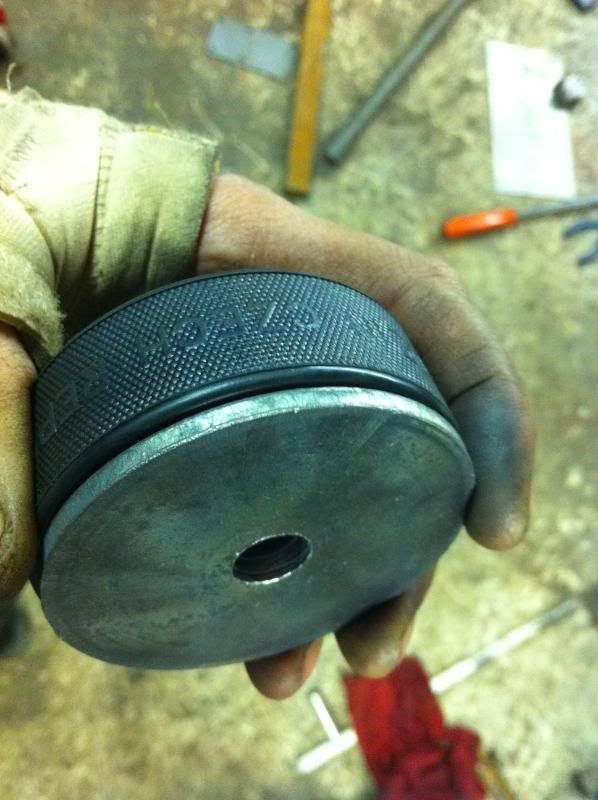
Got some steel bits from MrSteveo to make the mounts
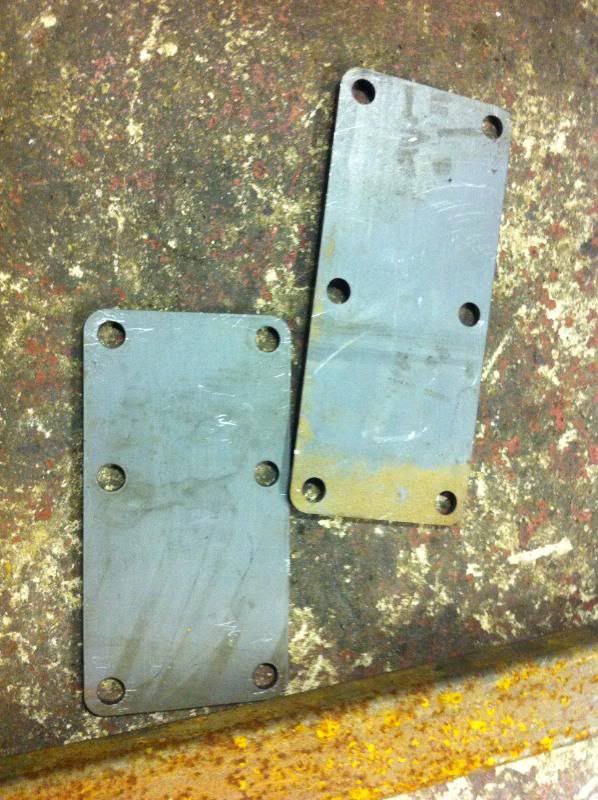
So drilled a hole in the hoky pucks and got some washers to suite
-
Sorry iv not updated this, iv been away and so has the car having the cage done. Not alot other than the cage, nothing interesting really, just stripping sound proofing!!!
Cars back from having cage fitted by Nickson Motorsport!


-
ok time for an update, not a very big one as iv been so busy with work etc.
Some parts hve been ariving, inlet manifold with 80mm throttle but damaged in the fecking post!!
New toyota bellhousing and some hockeypucks to make engine mounts from  oh and a manual pedal box.
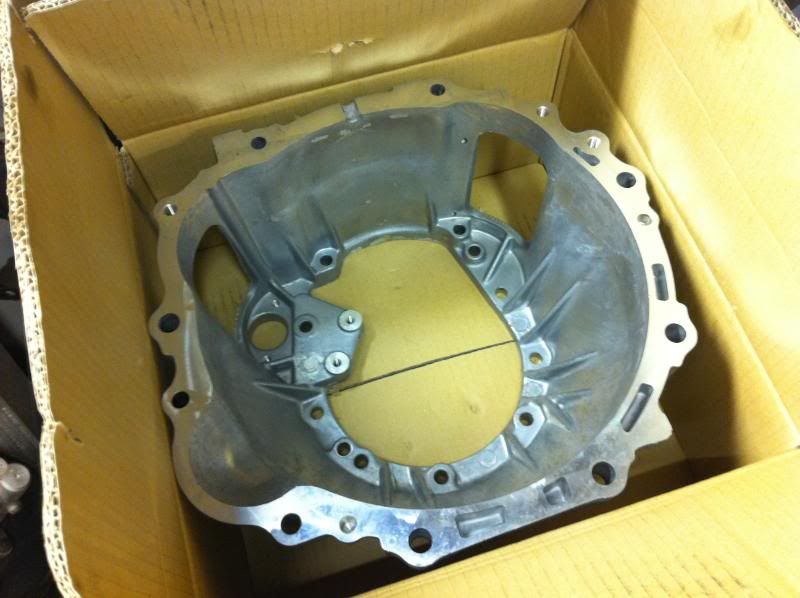
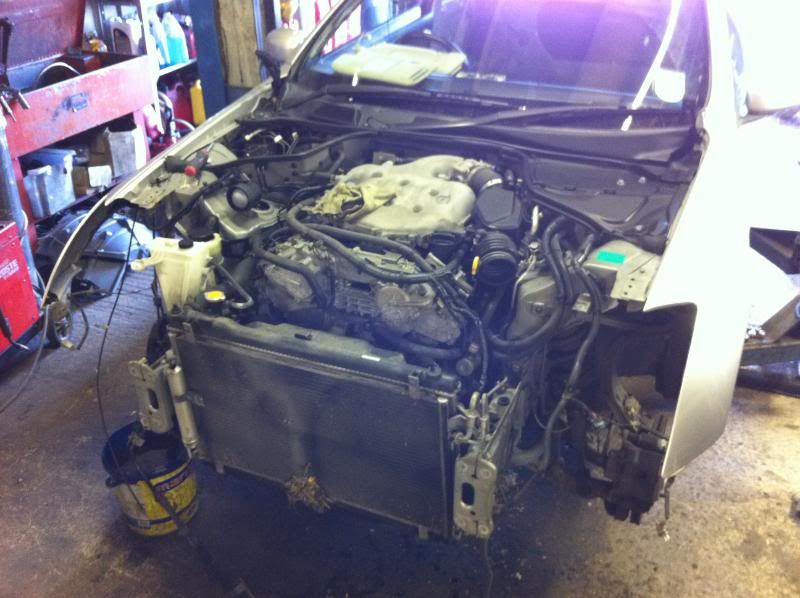
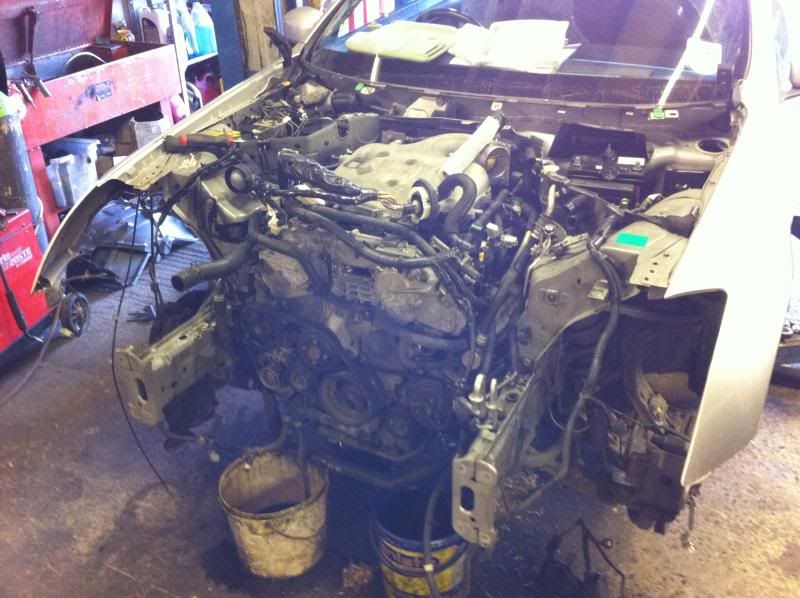
Back to the car, engine was sitting in but not happy with where its was and obv there is a hell of alot of junk that still needed stripping out
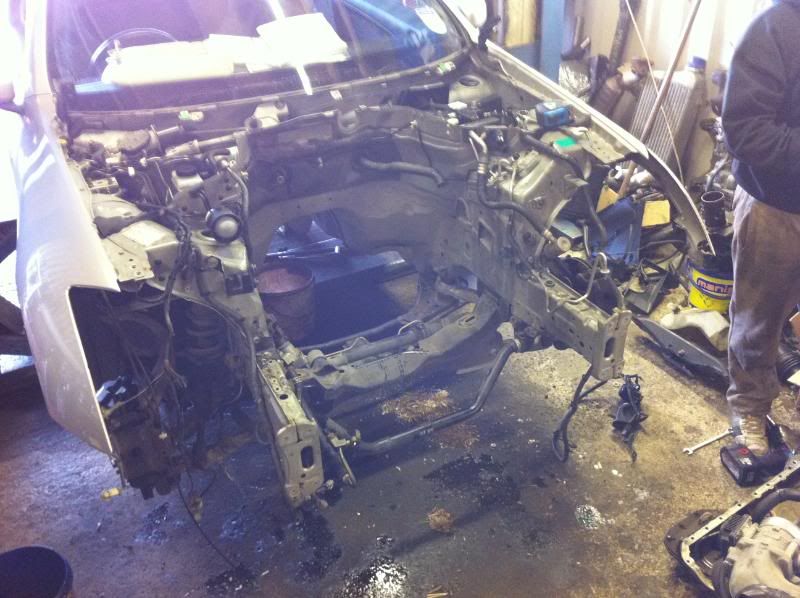
so out came tons of un-needed stuff
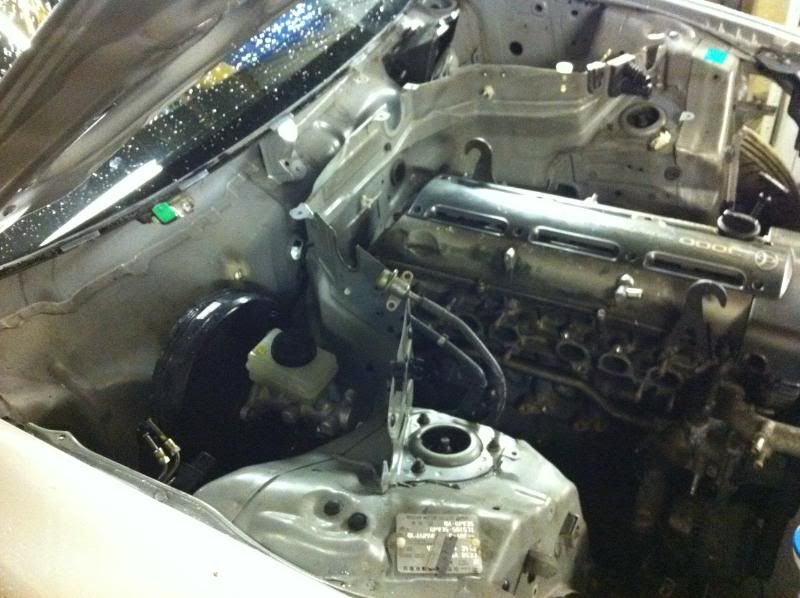
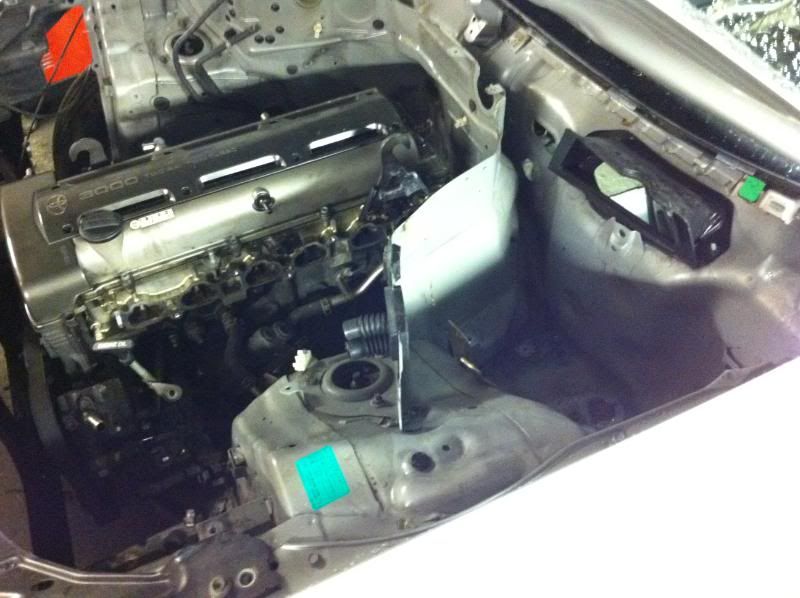
engine back out and more stripping and cutting to get the engine back in the car more
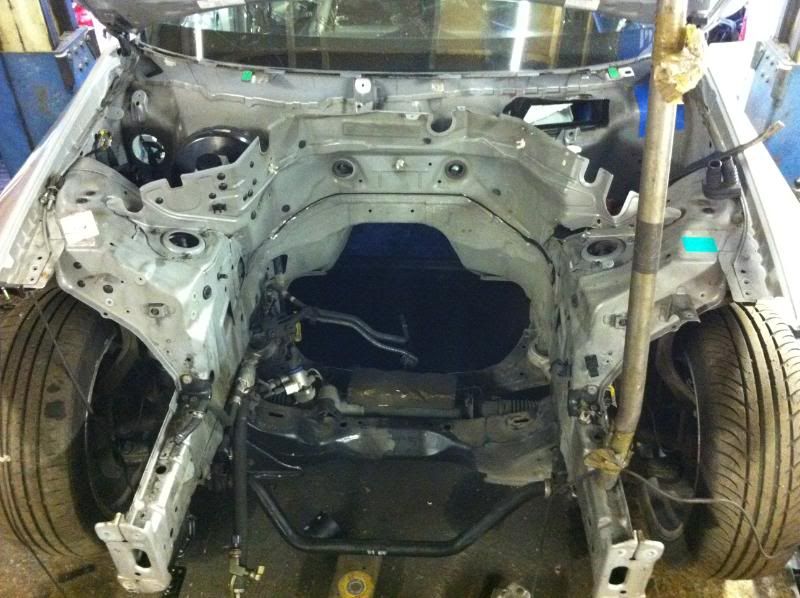
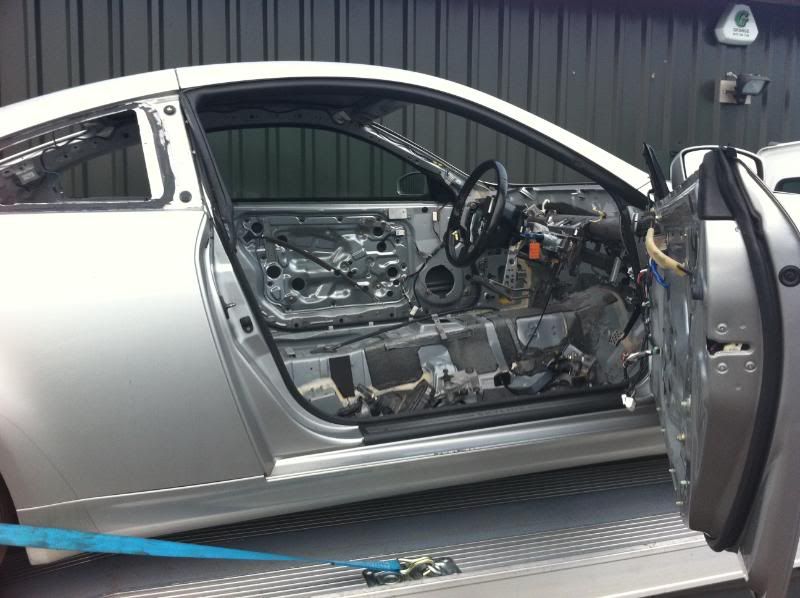
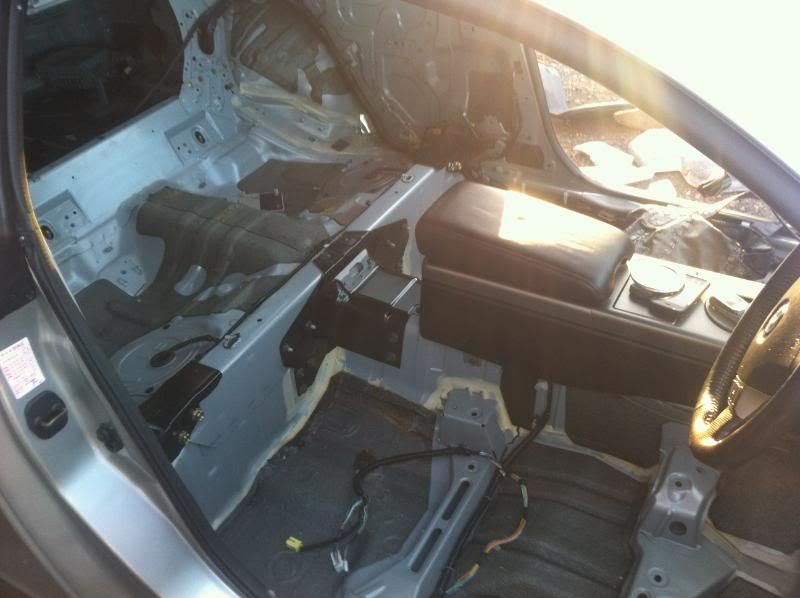
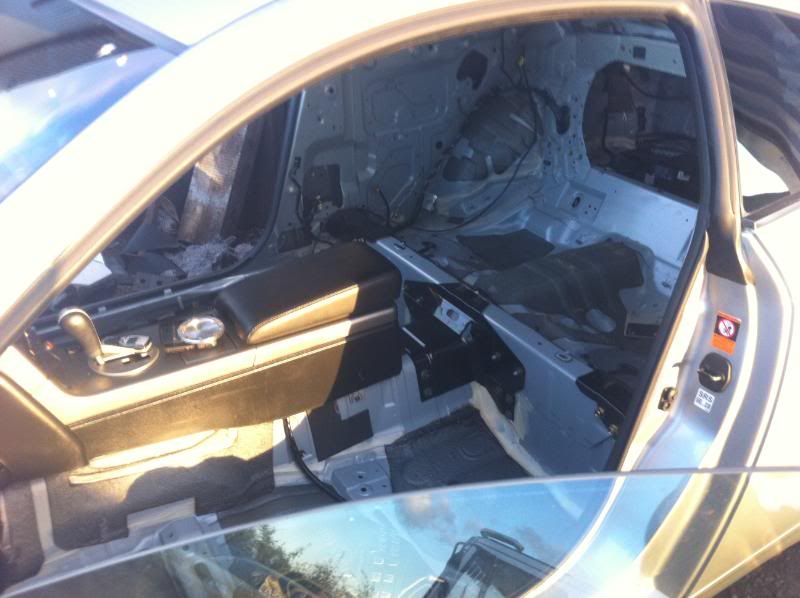
Then started the task of getting the dash, heater box and wire loom out, that lot weighs a ton!!

Then i had all the windows taken out ready for the cage

-
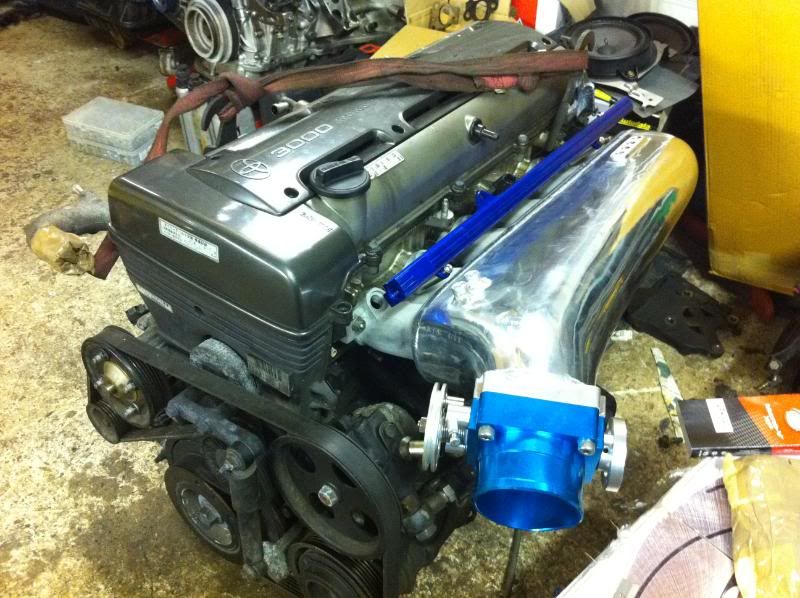
Time for updates, lots done, il let the pics do the talking as norm.
The 2j got stripped some more, ready for new shiney manifolds
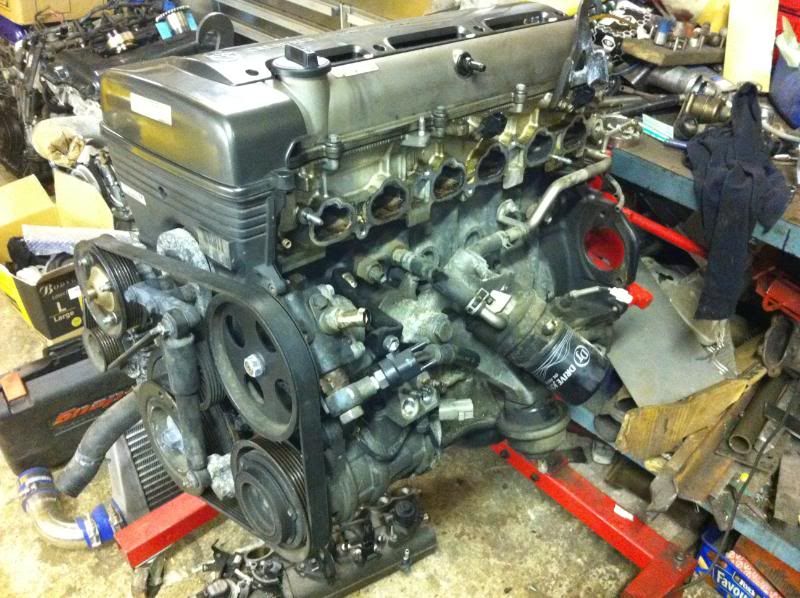
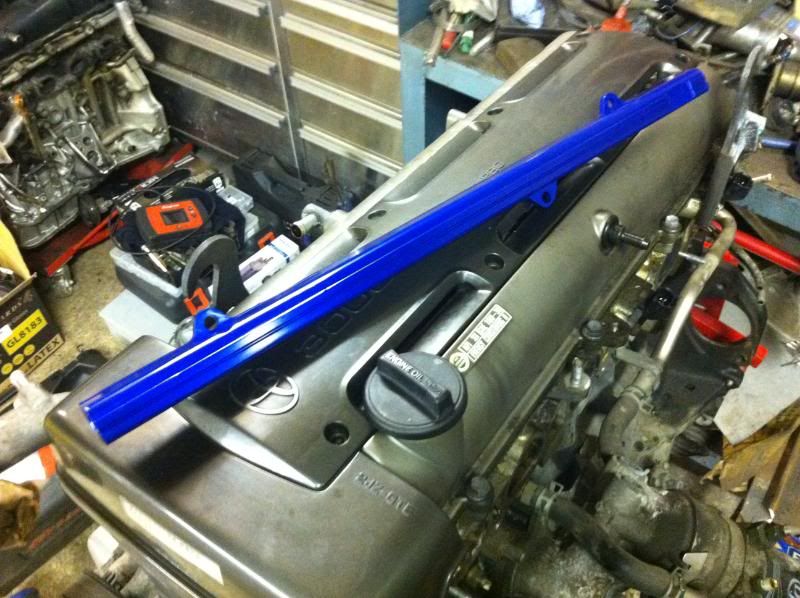
cheapy cheap ebay fuel rail, will be getting modified for two feeds and one return in the centre.
Stripped out the front end, this is fibre glass, its the slam panel, holds the rad, lights bumper, etc etc etc, nice and light also prety strong.
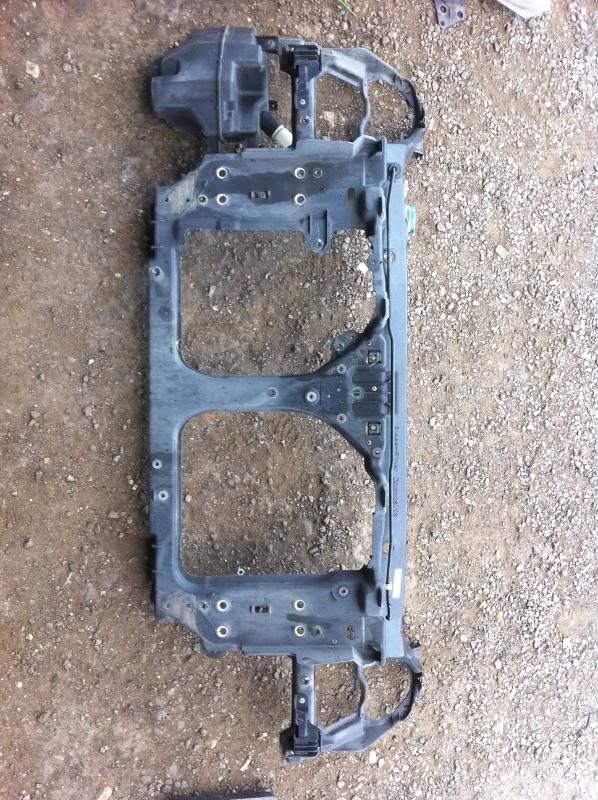
See how clean it is
2j front sump, seing whats the best option
Front sump defo the better option, so on it went
fuel rail, will be getting modified for two feeds and one return in the centre.
Stripped out the front end, this is fibre glass, its the slam panel, holds the rad, lights bumper, etc etc etc, nice and light also prety strong.
See how clean it is
2j front sump, seing whats the best option
Front sump defo the better option, so on it went
Then time for trial fit, its resting on wood ATM, im going to try get it back 2 inch and down 1.
http://i55.photobucket.com/albums/g158/P0l0200sxy/05 time for trial fit, its resting on wood ATM, im going to try get it back 2 inch and down 1.
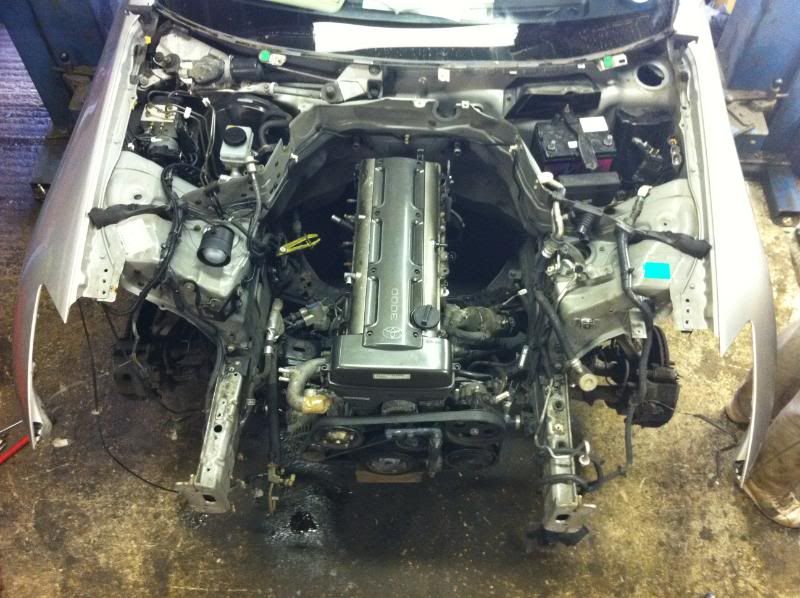
as is its about 4 inch forword of where the vq sat
-
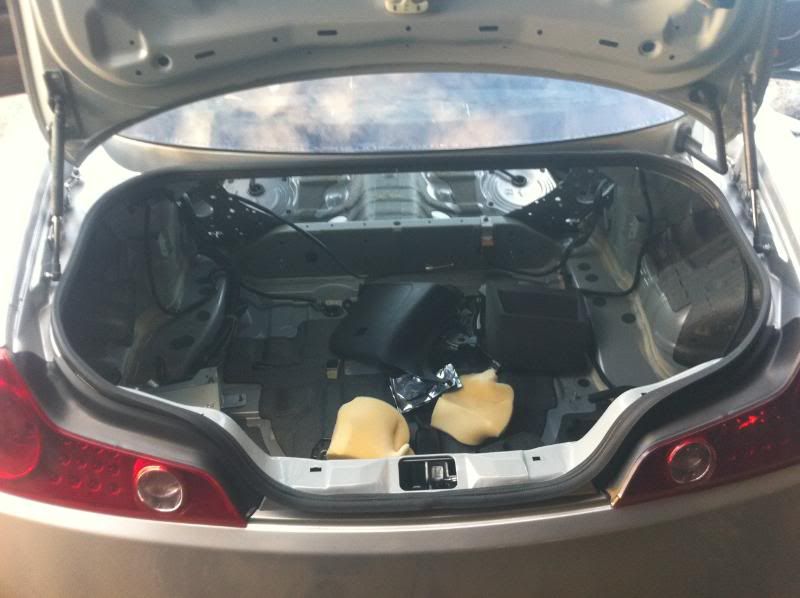
Been busy stripping and shopping today
spent most my budget already :wack:As usual, a hell of alot of crap came out weighing a ton!!!!!
-
Ok, collected the car last night and headed to Garage-D to collect the front sump needed for the conversion and the prop.
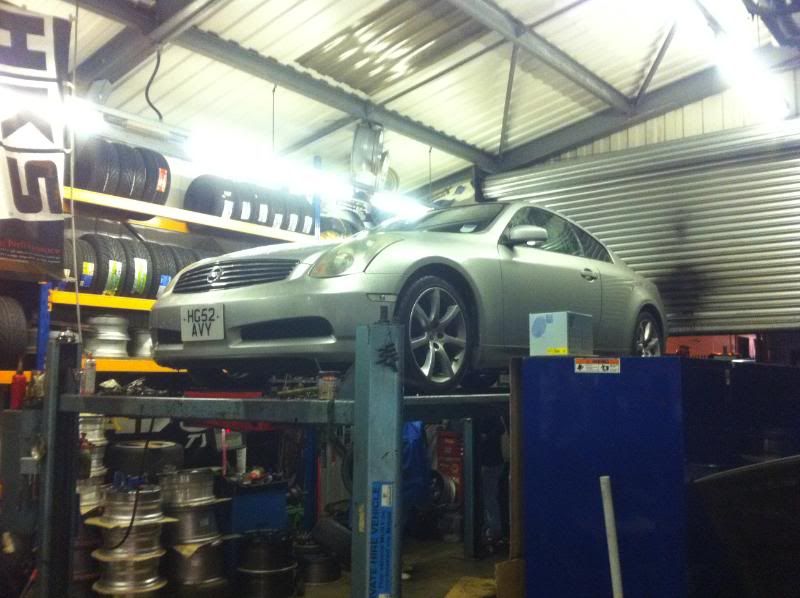
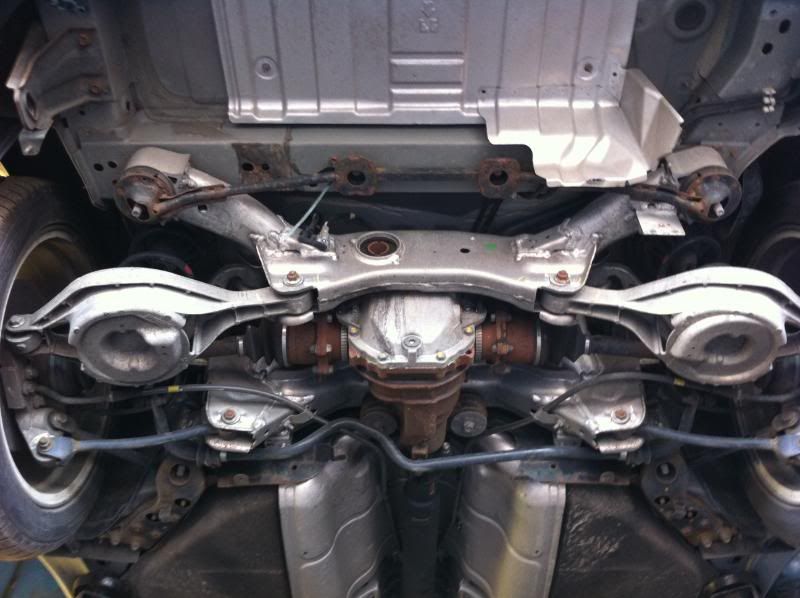
While there we chucked it on the ramp to inspect the chassis, see what could be done etc.
We mesured the wheel base and its 12" longer than an s14!!! Thogh the car may not be longer the G35 has hardly any over hang. Its also 2" wider.
Other things i noticed wer its got a saloon type boo where the window stays down unlike a Z. Also on the way back i found its got DVD player and TV lol. And its got twin front lower arms like the modern BMW's, Jags Audi etc, i thoght they had one solid lower arm.
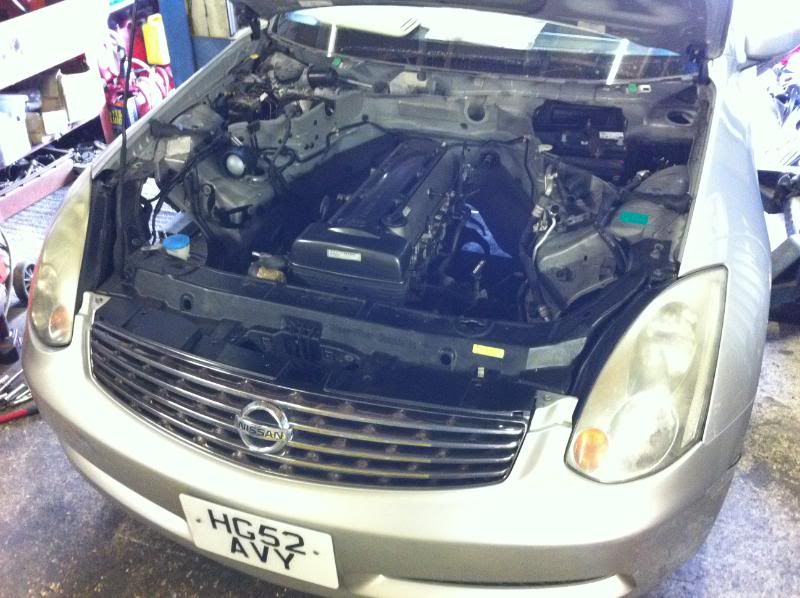
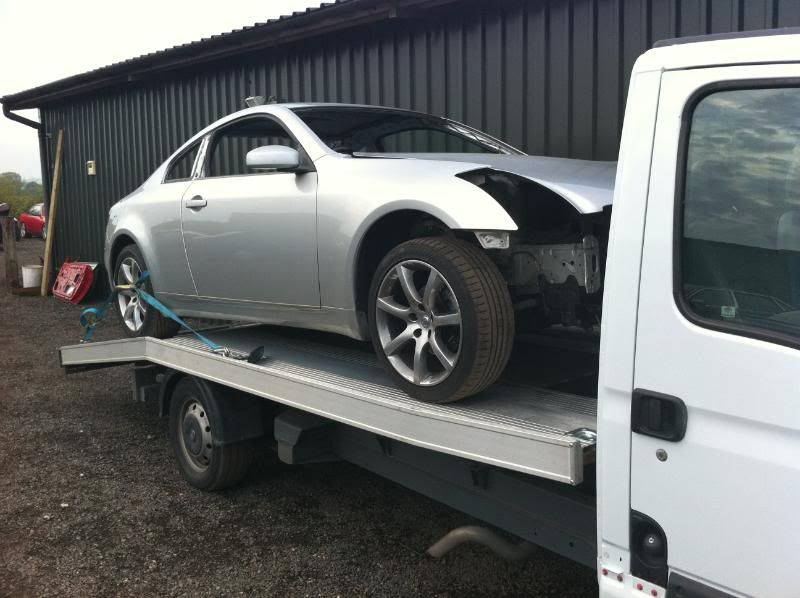
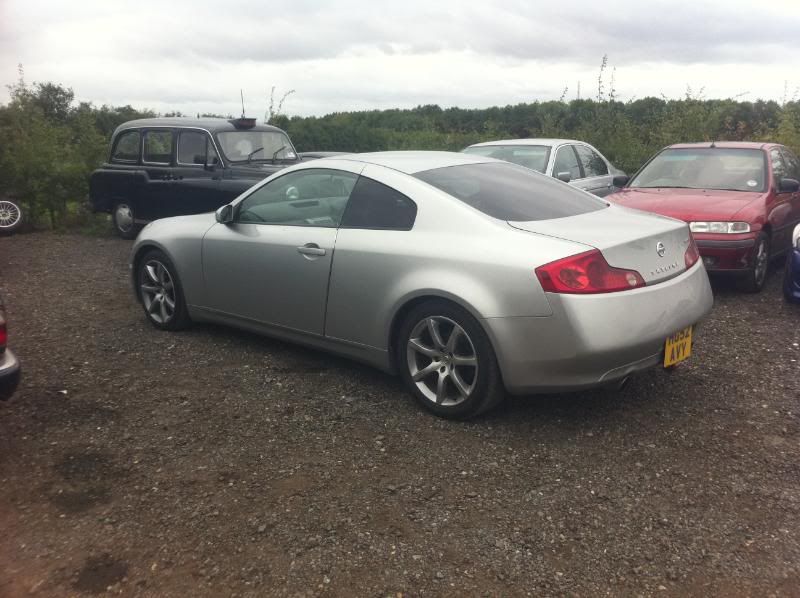
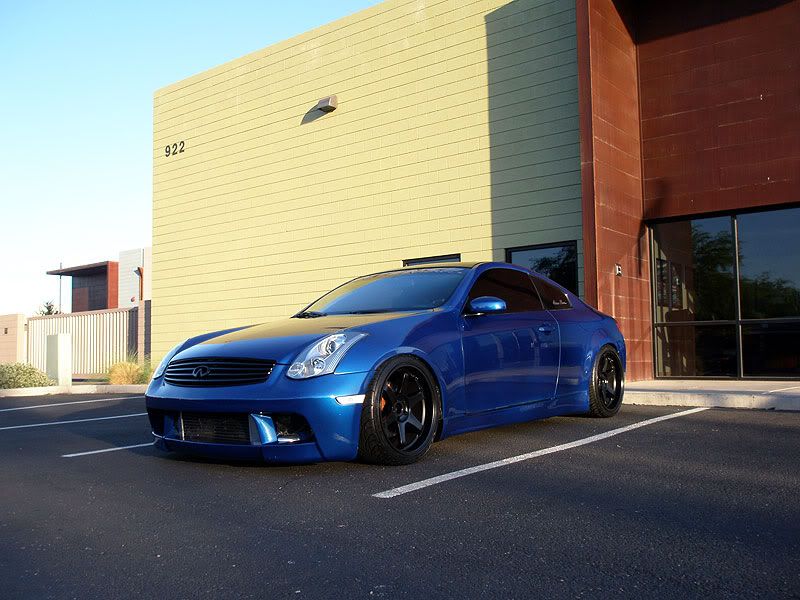
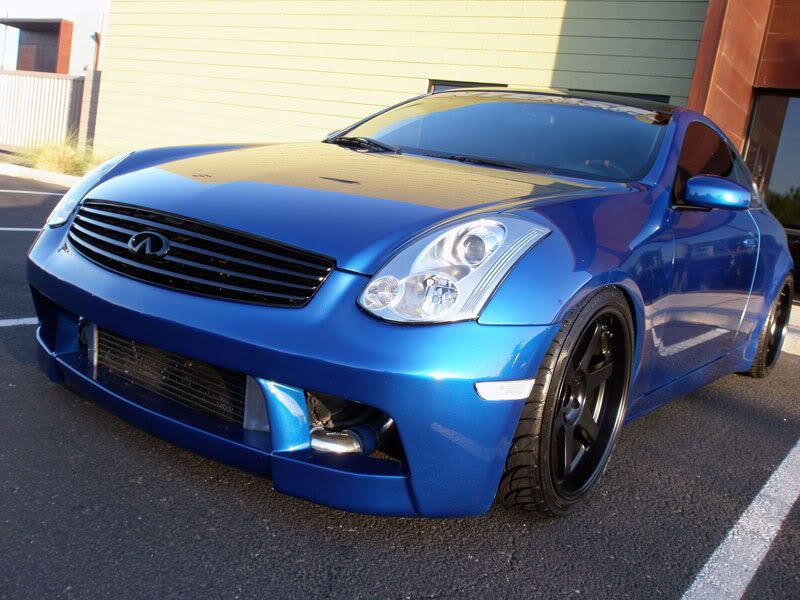
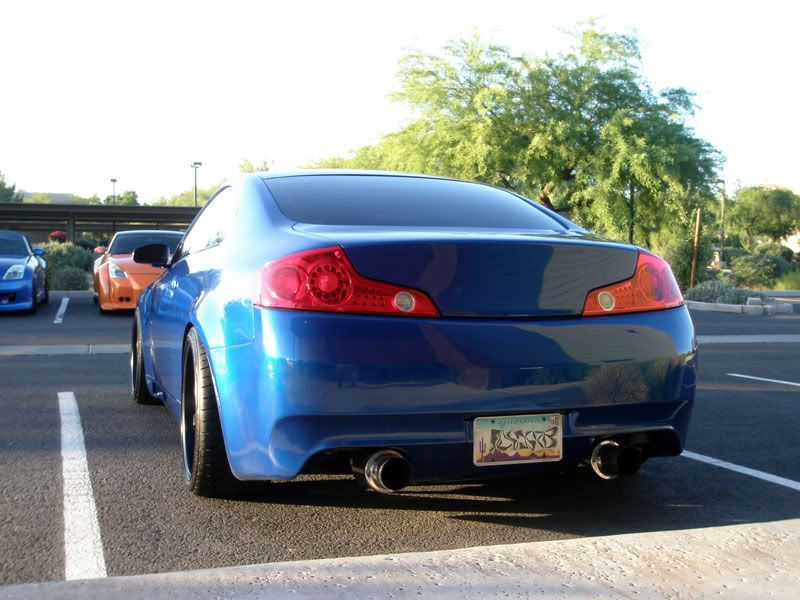
Back at HQ this morn, the last pics youl see of it looking like a normal car and the 1st!
This also arived, masive thanks to Christy (Carpo)
So i got the turbos off tonight, what a job that is, you think getting an sr turbo off is a job, think again lol
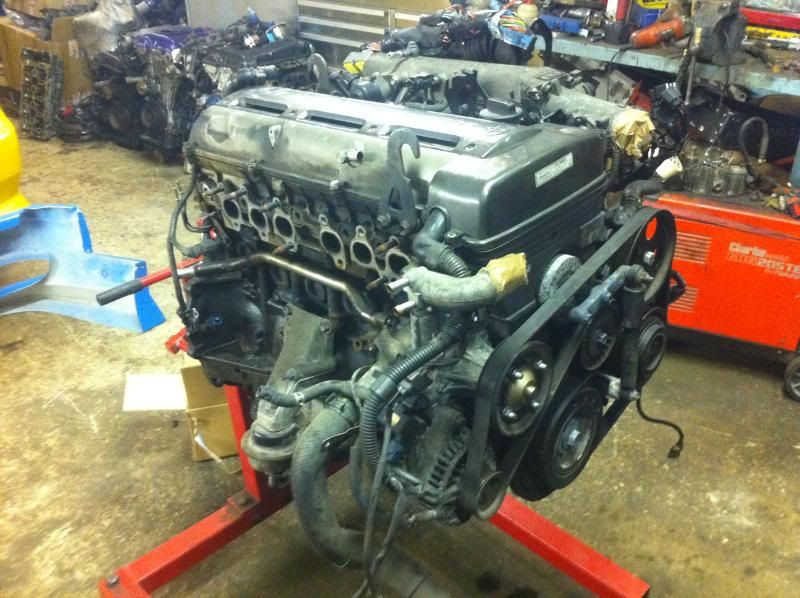
this little lot has got to weigh 30kg at least!!!
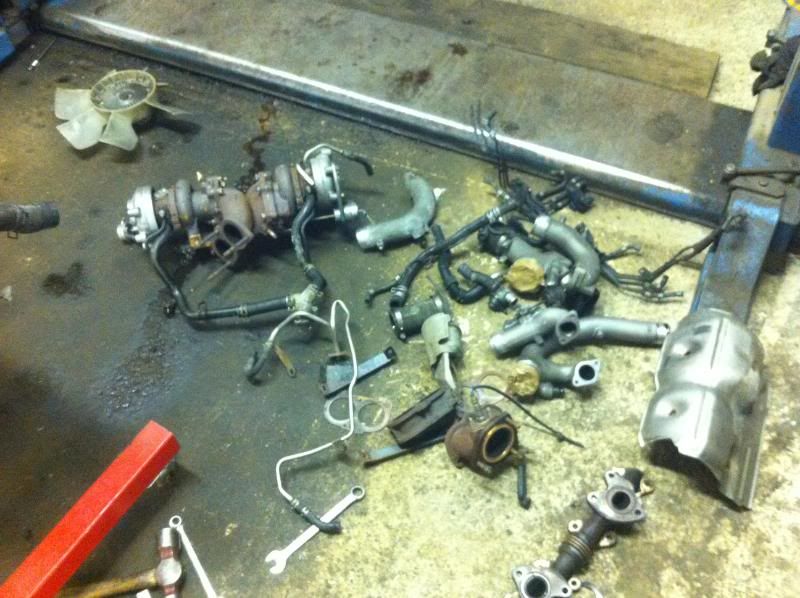
So, im using the car this week and think il strip it sat, so if any one knows any one wanting any parts, please put them this way.
-
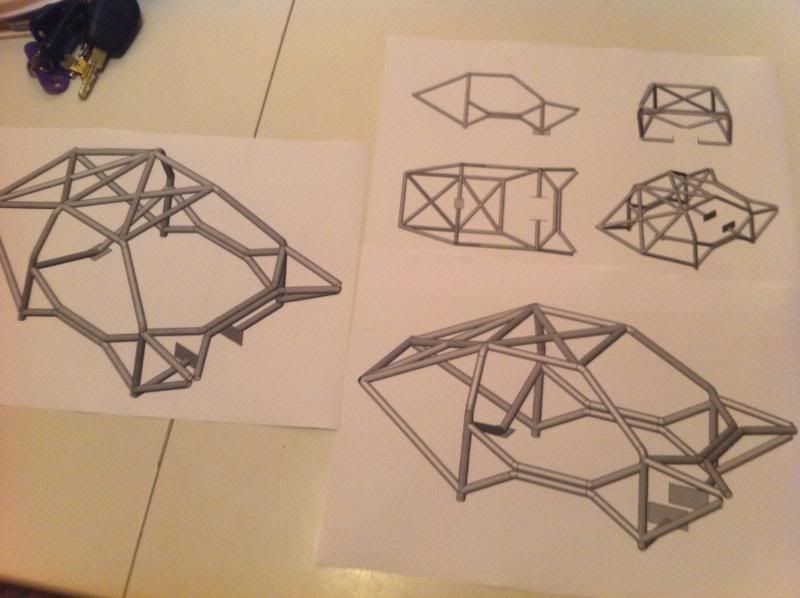
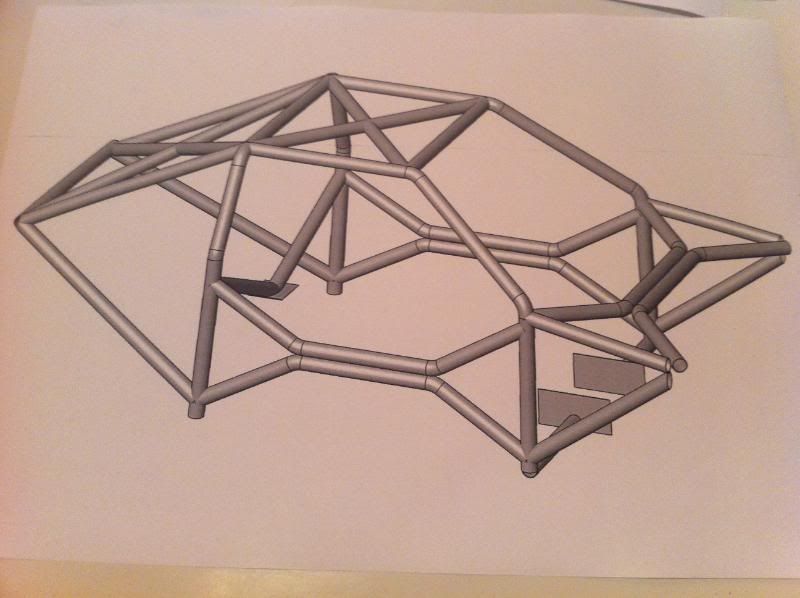
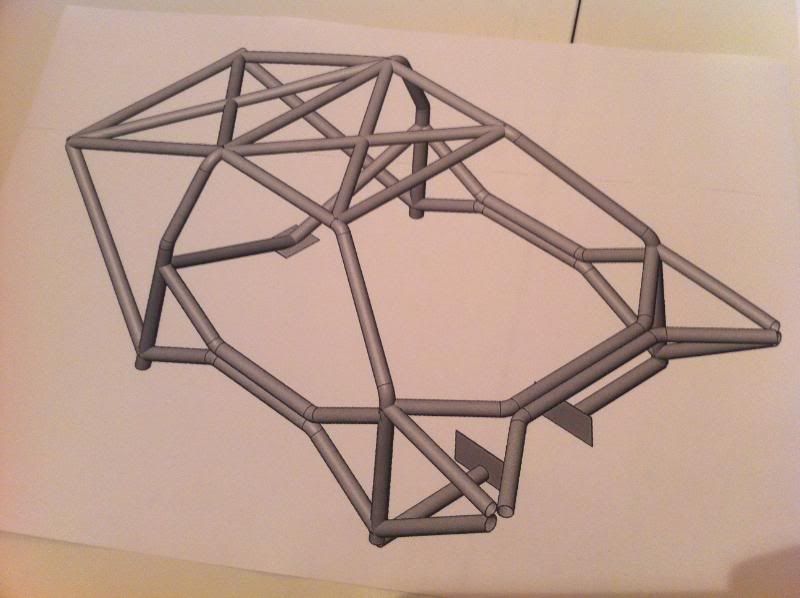
Got my mate to draw up my rollcage design tonight as i tryed it with pen and paper, it just wasnt working out lol :wack:
This is obv not to scale, its to purley show the design so i can pass it to the guy making the cage. Obv there will be gusets down the A and B post, along with tying it in any where that is close tot he body. The bar accross the floor will have a removable brace attached to the two spreader plates that will go under the gear box. Im not 100% sure i can run the front tubes exactly like this until i have the dash out and inspect the bulk head and turrets, it will also be a smaller diamiter tube and the main hoop a larger diamiter. Il most likely be adding in a few more tubes at the back to tie in to the rear subframe. Also the rear turrets will be getting extra plates as il be converting the rear suspension to coil spring over damper.
-
Ok, just going to copy from other forums and paste. this started about two months ago, if that!
Ok, hello

I wasnt going to start this thread yet but im soooo excited about the hole project i cant keep my mouth shut
S14 has gone to its new home
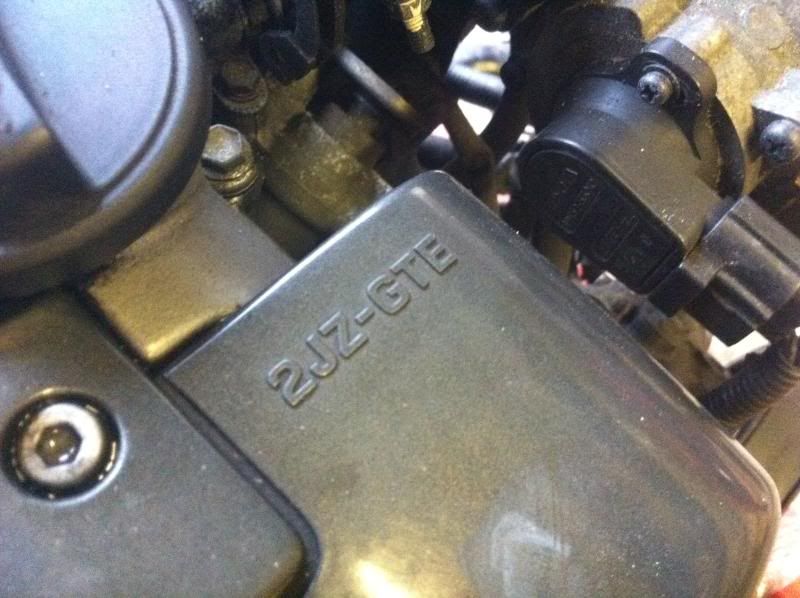
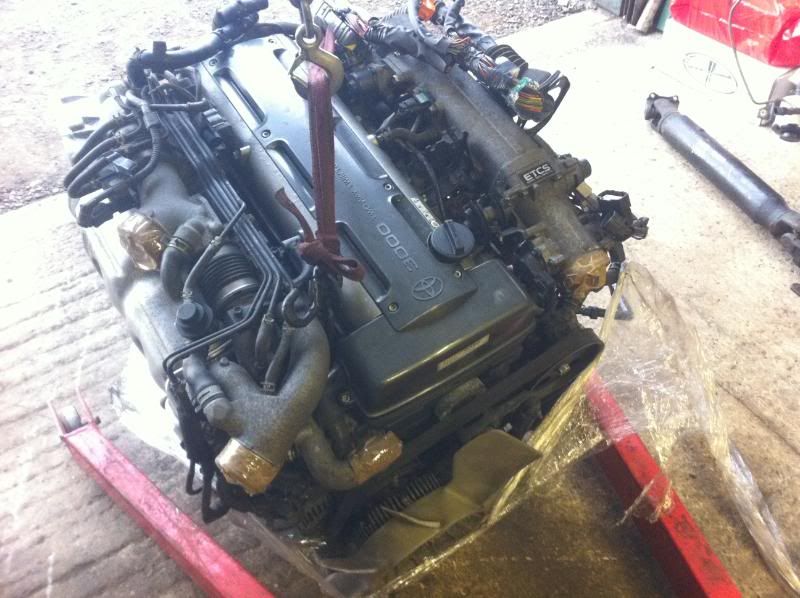
 , here is its replacement, considering iv never even looked at the chassis befor, just thoght "I want that one" and i know diddley squat about 2jz's iv got my work cut out!!!! Im not even sure if the engine will fit in the hole yet :wack: Thogh there is an rb26 left hooker knocking about that gives me some reasurance that things will kinda fit.
So i pic this up early next week
ugly ****er aint it :wack:Nsi1qhkBMfS4TJRbw~~_12.JPG)
MmUjknMBMfS4YnKlw~~_12.JPG)
Epracing have this Dmax kit on order
So, plan is get the car on the ramp early next week and asses the chassise, steering and suspension, to see what iv let my self in for and see what can be done.
Then strip it down to a rolling shell, selling most of it :wack:, trial fit the 2jz then off to have a cage fitted.
Then its just a bit vauge from then on
Im set on a 2jz at 600hp and have one lined up but there is another engine potential also 600hp but 3.8ltr v6 twin turbo
 Just got to work out if i can relisticly do that as it would with out doubt be one of the coolest modern drift cars!!
Watch this space, im sure its going to get interesting
-
Hi folks,
After brembo brakes, all 4 calipers, idealy 2 fronts and 4 rears. I see the 4 re-painted ones in the for sale section, i was hoping to get a set a bit cheaper that i can refurb my self, so condition is not a problem.
Also would be willing to buy disc if there good.

-

Whats so funny? lol
-
Hi chaps,
Wondering if there is a list of suspension differances between the two cars? Or has any one got good photos of 350z suspension? front and rear.
Paul
Suspension components are the same.
Have I not already confirmed this to you previously.?
Alex.
Lol, yes, i have been told this but surely there are some differances like braces? considering the g35 is longer. Also, i always thogh z33 had a single front lower arm but i checked my G last night and it has a twin front lower arm set up.
Cheers
Paul
-
Hi,
Im after a z33 manual brake pedal, clutch pedal and master cylinder.
Thanks you
-
Hi chaps,
Wondering if there is a list of suspension differances between the two cars? Or has any one got good photos of 350z suspension? front and rear.
Paul
Team Falken UK 650hp V35 Skyline (G35)
in Other Cars
Posted
Ahh cool, not like other forums then!!! Cheers