


jonny mac
-
Posts
38 -
Joined
-
Last visited
Content Type
Profiles
Forums
Events
Gallery
Store
Posts posted by jonny mac
-
-
-
-
hi folks, please let me know if anyone has a cd009 for sale
 I'm in Scotland so if one comes up I can collect rather than have it posted from down south
I don't mind either way
needs to be a mint box with no whines or grinding or notchy gears etc
please drop me a pm if you have one for sale and i'll be happy to deal if the price is right!
-
hi folks, please let me know if anyone has a cd009 for sale
I'm in Scotland so if one comes up I can collect rather than have it posted from down south
I don't mind either way
needs to be a mint box with no whines or grinding or notchy gears etc
please drop me a pm if you have one for sale and i'll be happy to deal if the price is right!
-
hi, specifically looking for a cd009 gearbox, the 2006 last revised model gearbox from a 350z
testing my luck before i go off and hunt one of the mkiv supra 6 speed getrag boxes, the 350z cd009 boxes are supposed to be just as strong and can take 800-1000hp no problem
oem part no: 32010-CD009
i'd like the box to be in as best condition as possible please, no crunching, no whines etc as it's going to be used with a high performance engine
any out there?
i tried to buy brand new from main dealer in japan but they said it's unavailable plus the shipping costs on a 60kg box wouldn't be cheap
contact me on here, or via pm

thanks.
p.s. before anyone says it, i've already asked zmanalex
-
 1
1
-
-
monday 30th nov 2015
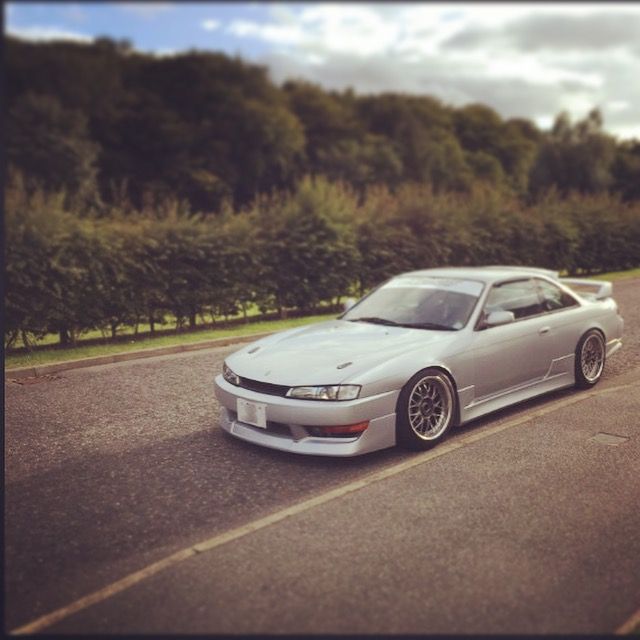
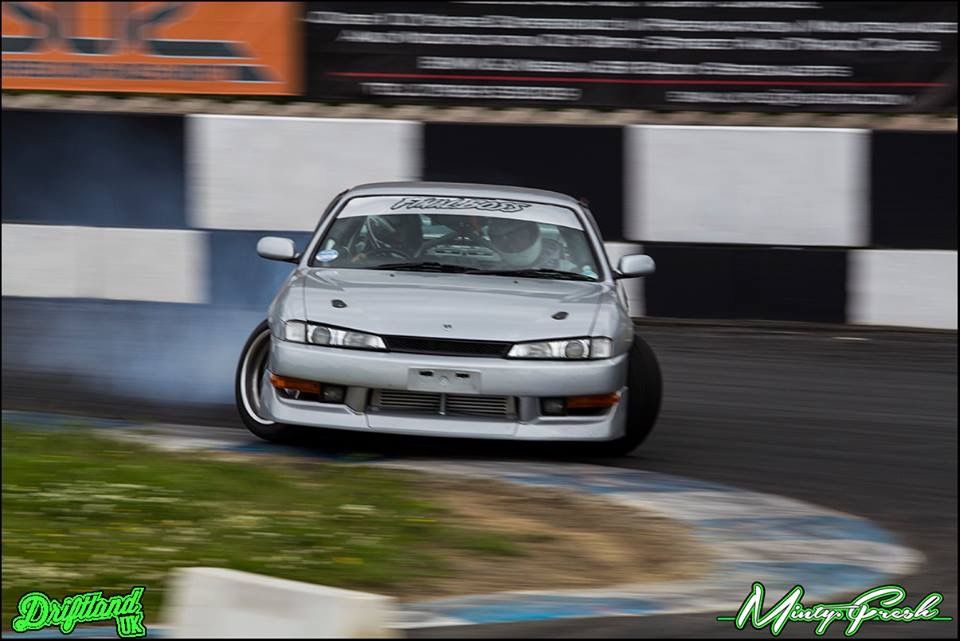
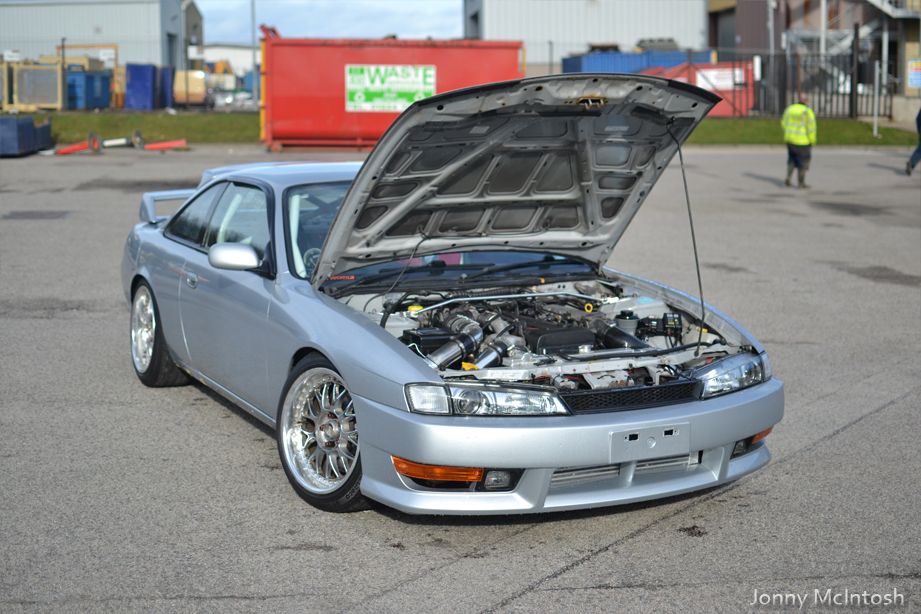
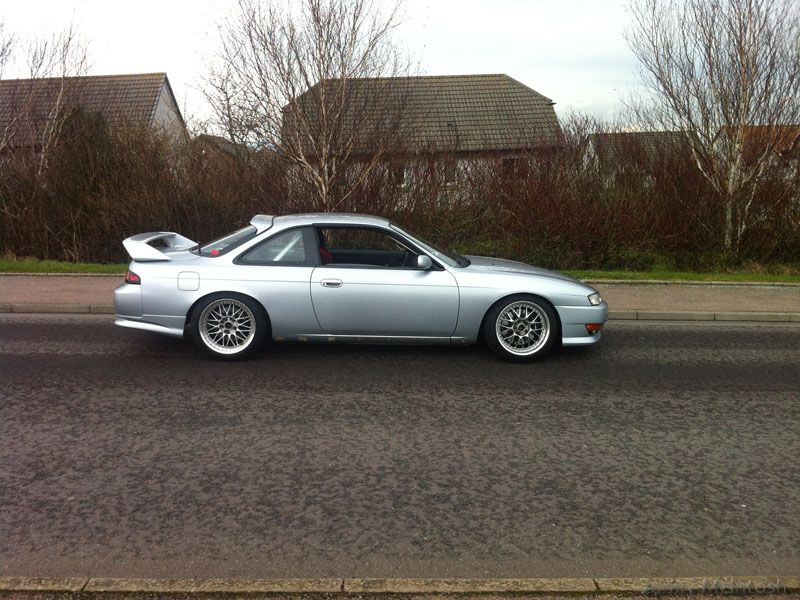
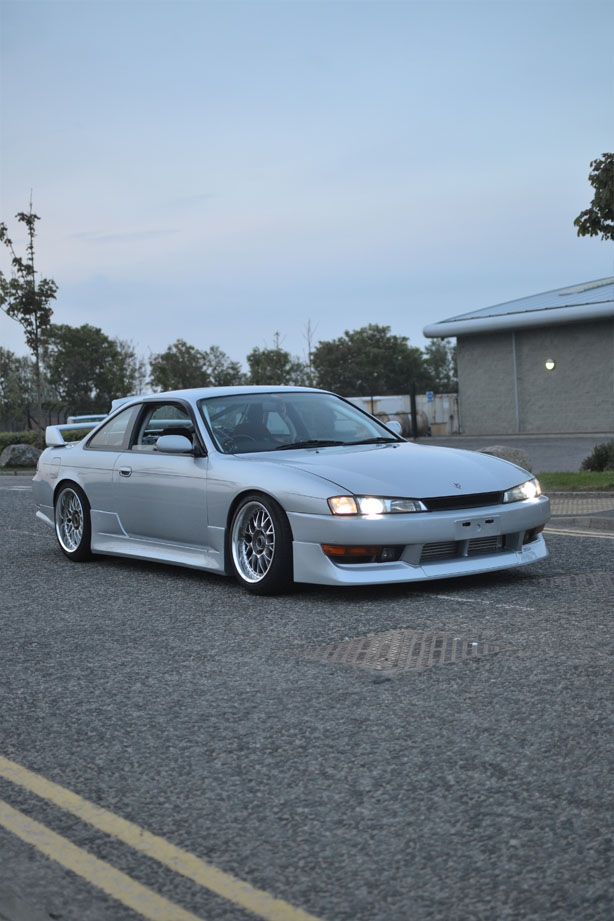
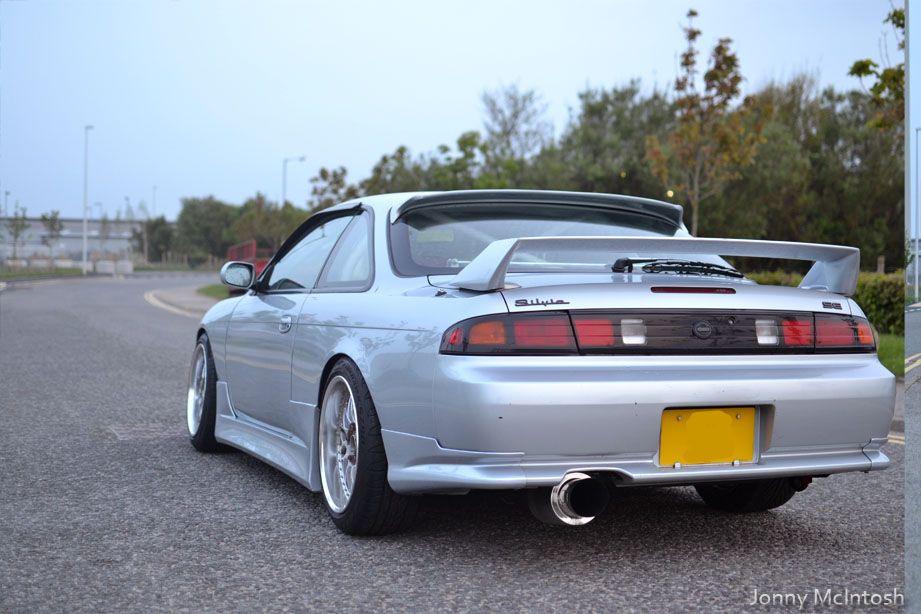
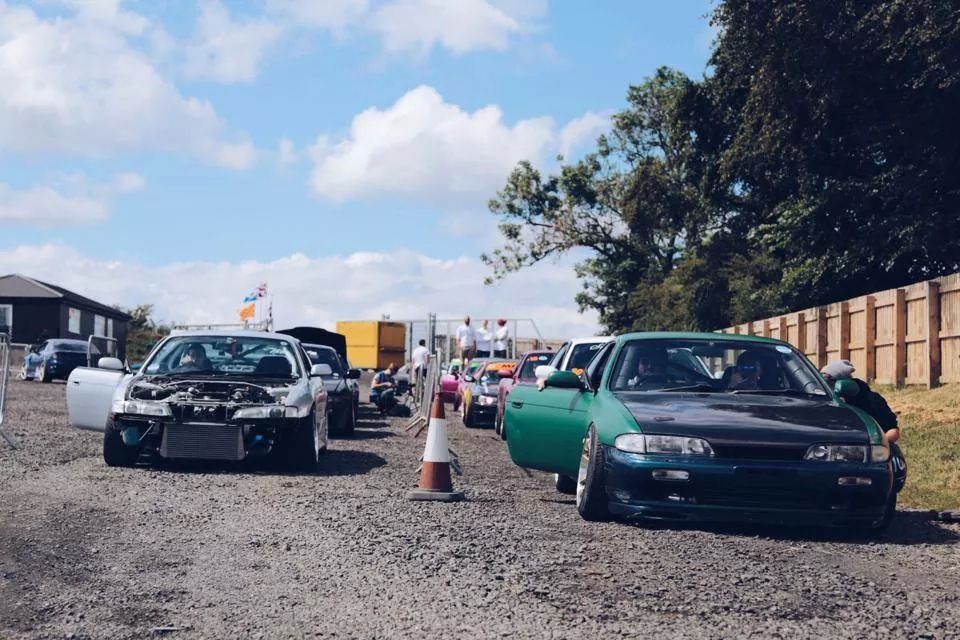
banzai japanese car magazine shoot day!I arrived nice and early to get everything setup and the car cleaned again
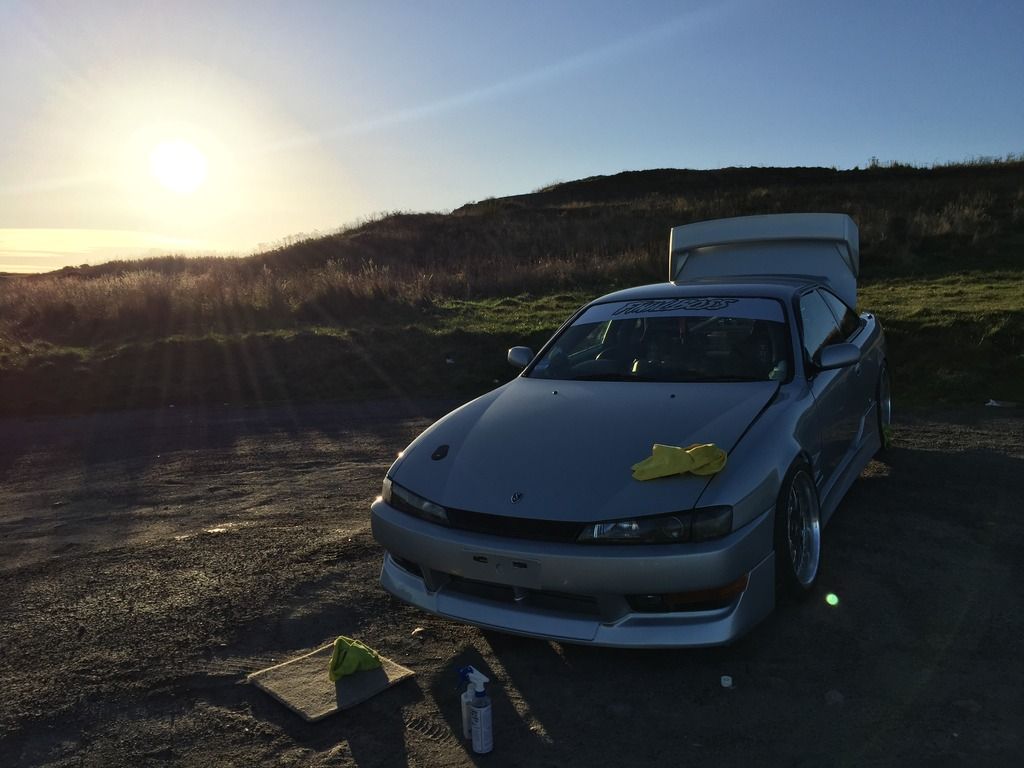
photographs were taken by Steve McCann, nice fella and will be doing my wedding next year too which is cool
I will post his pics when i get permission, from what i've seen already they look next level!
no date when it will be featured in the mag as it's just up to the editors whenever they fancy using it so i'll just be keeping an eye out for it
all i can say is i'm over the moon
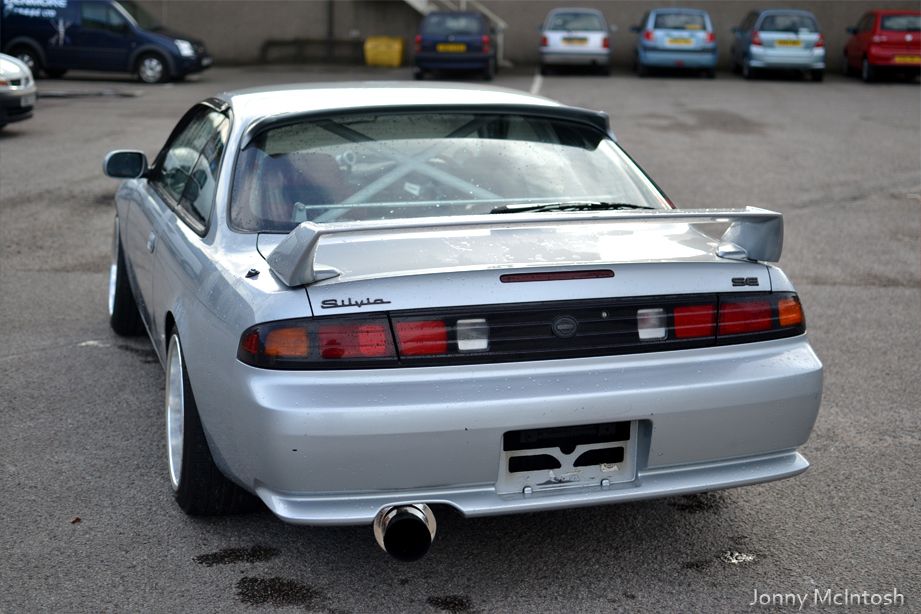
number plate ain't real....

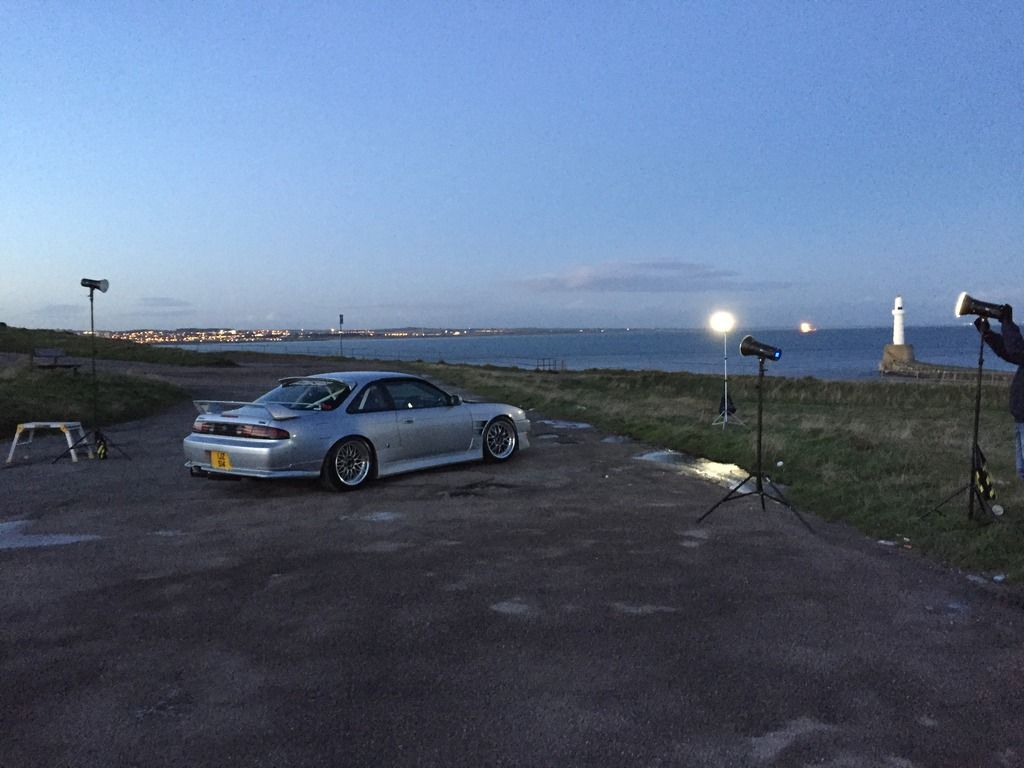
shots continued into the evening/sunset
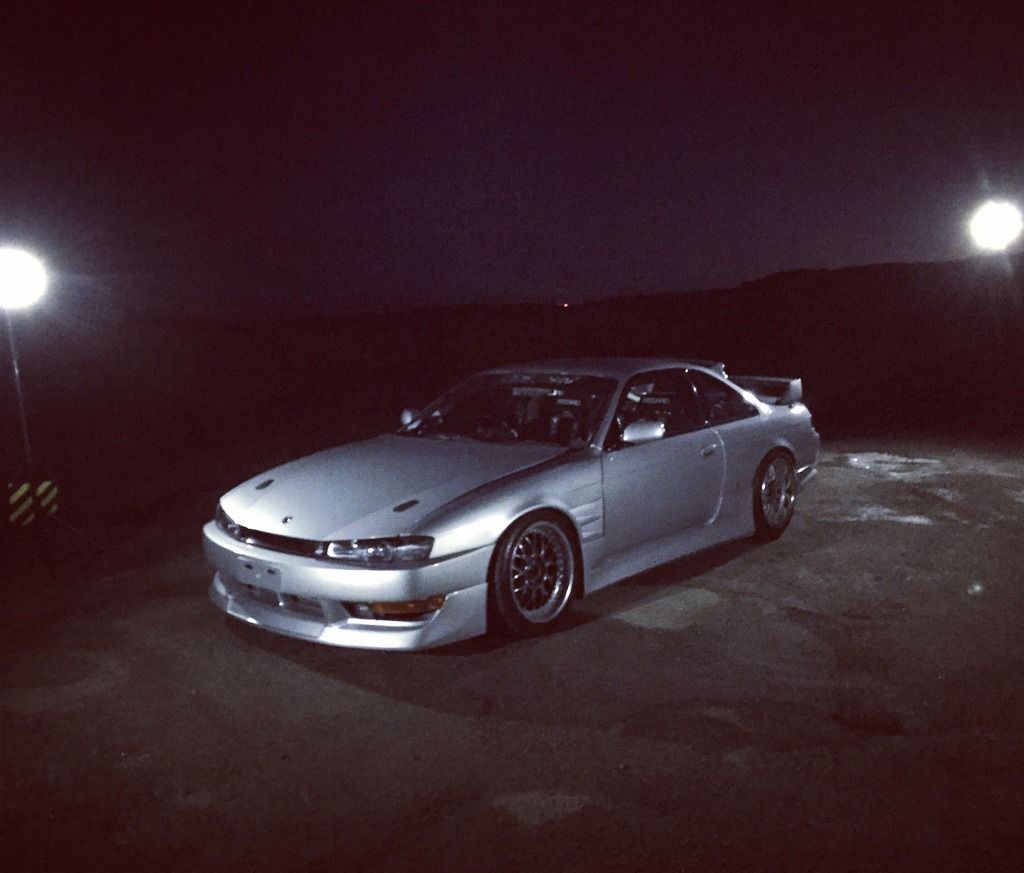
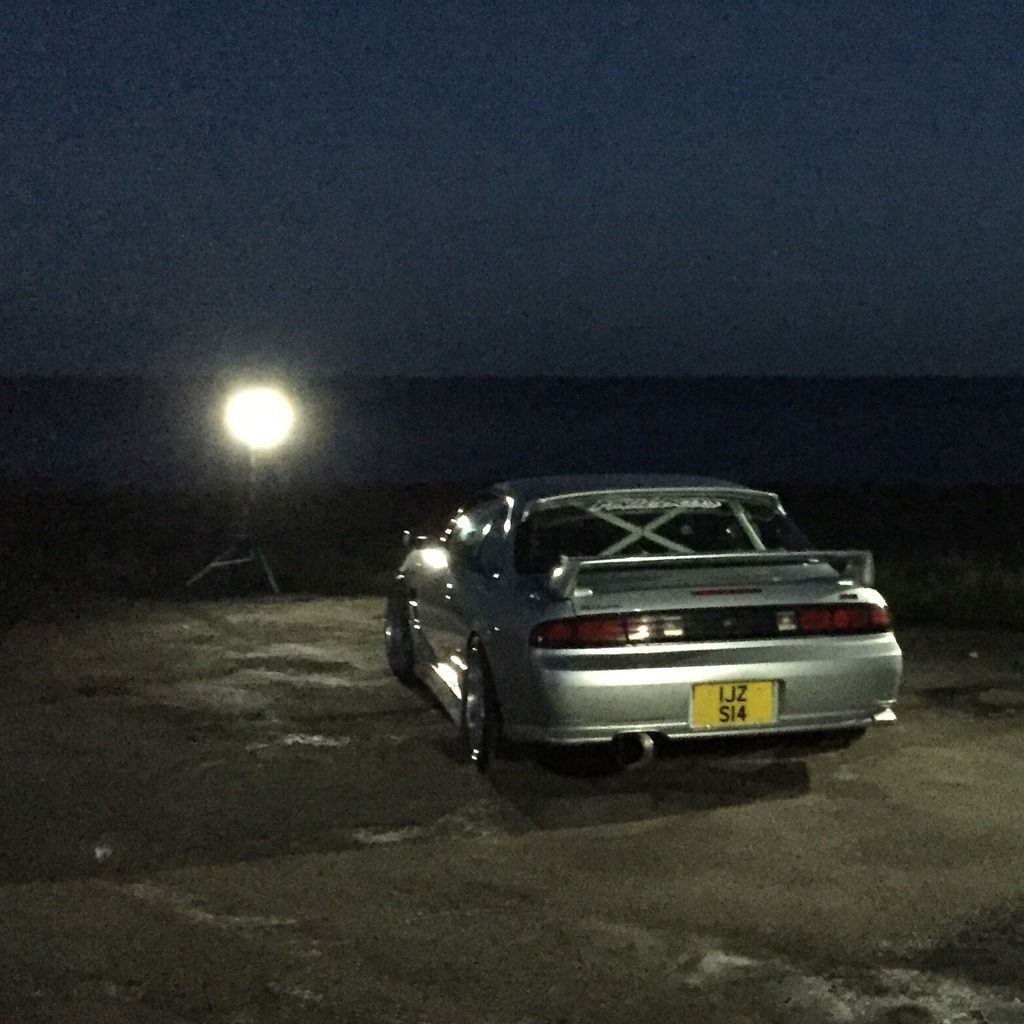
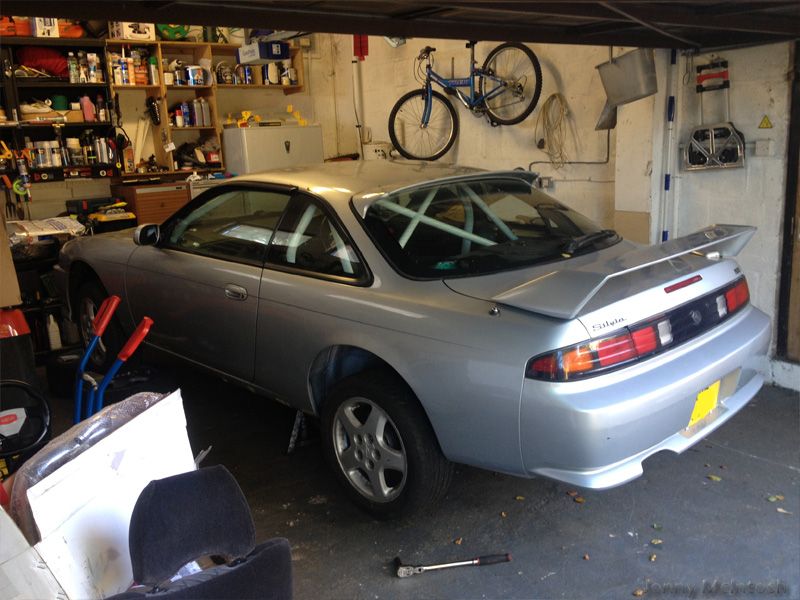
anyway, for now, the car is stored in the garage all nice and warm for winter coming
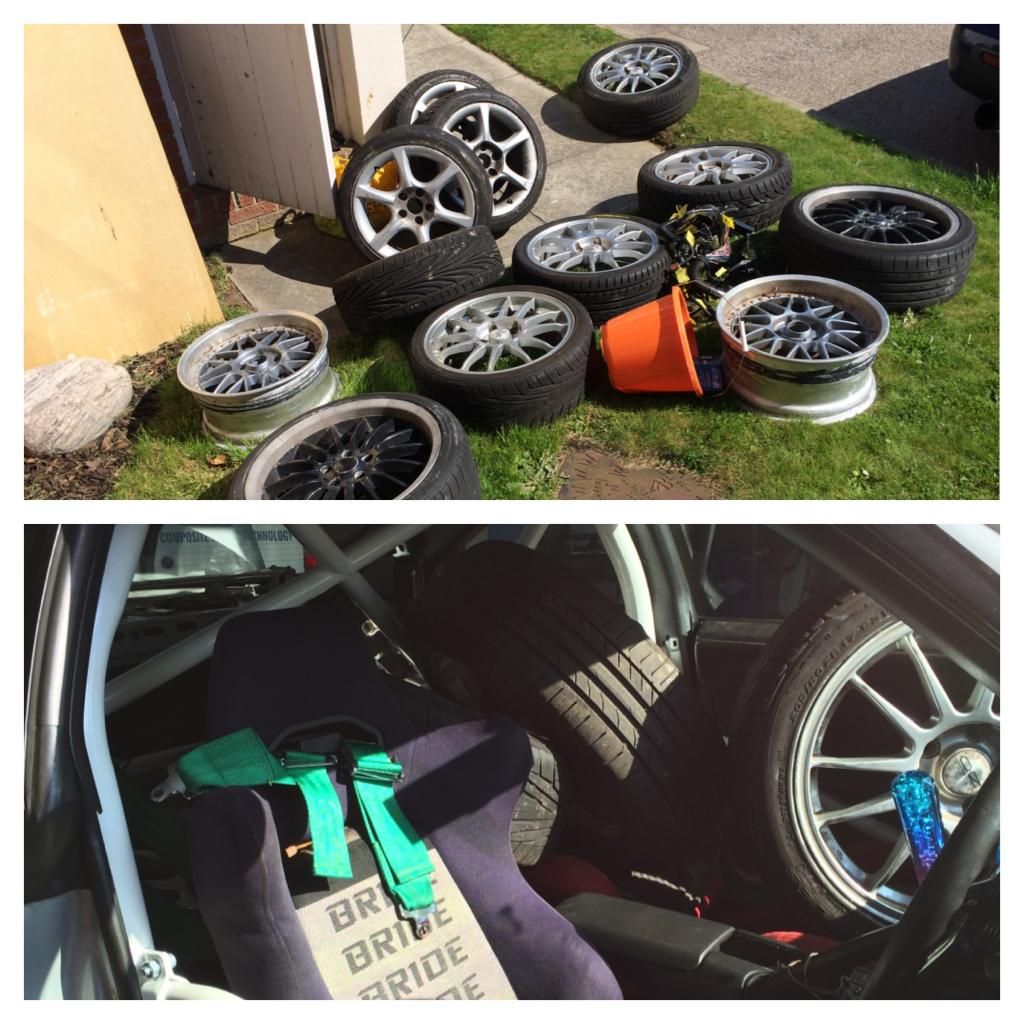
possibly sold my rear wheels too which will give me some money to get my other work wheels chrome coated and cleaned up so the car will finally have a matching set
-
2
-
-
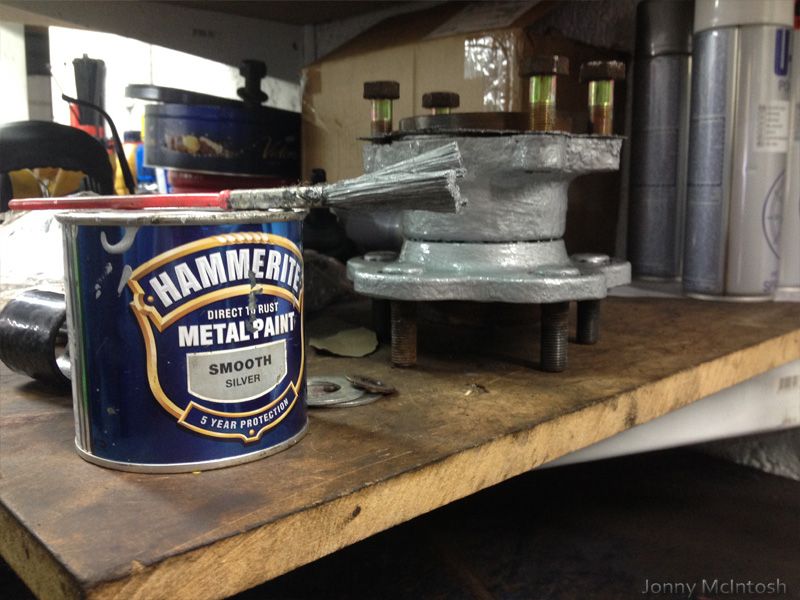
got myself a 4.1 ratio diff and had it welded
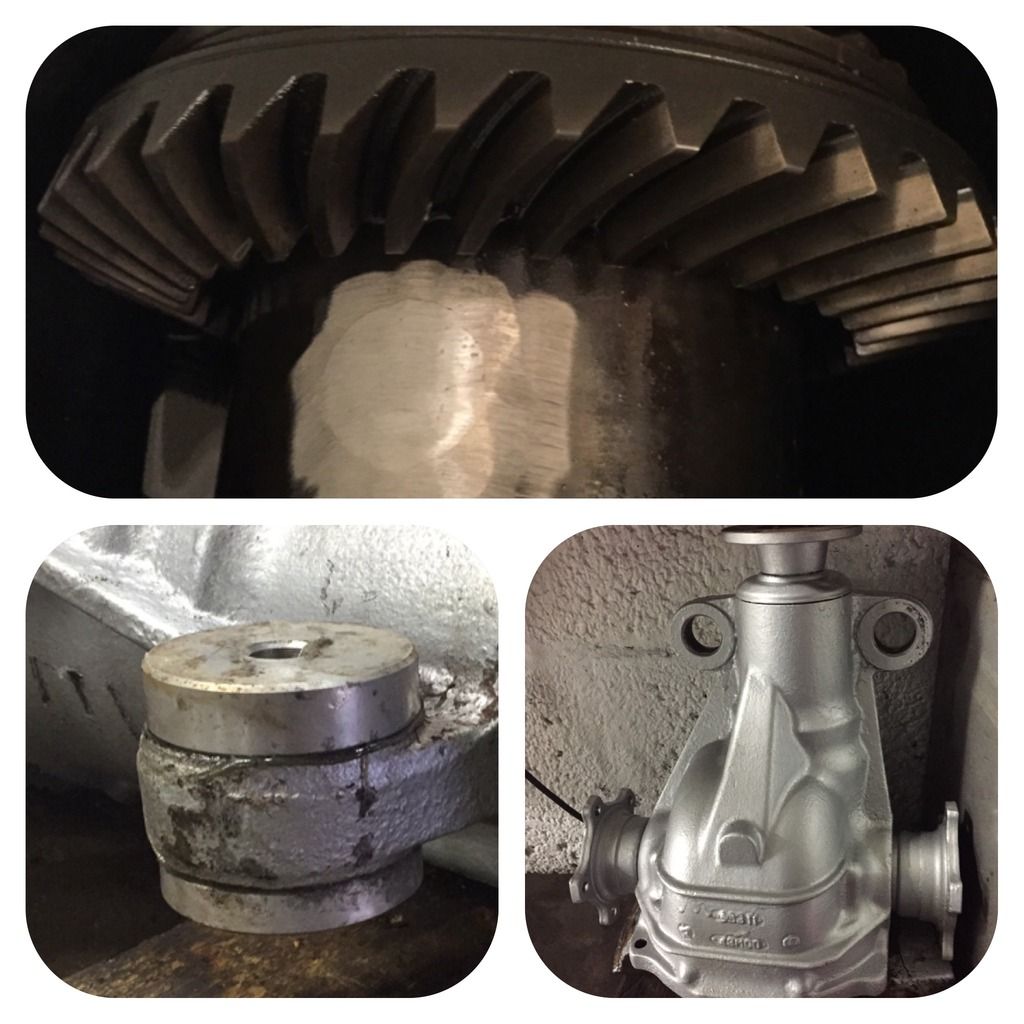
then painted the casing silver, also put in new oil and sealed on the backplate
also put in some driftworks solid front diff bushes
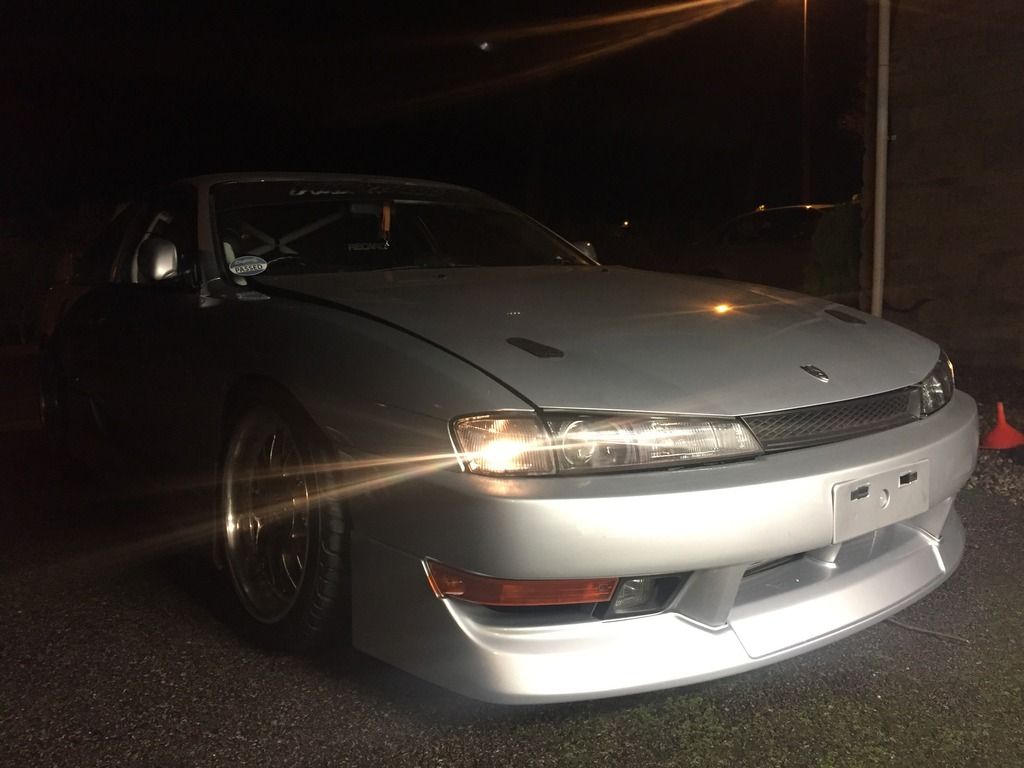
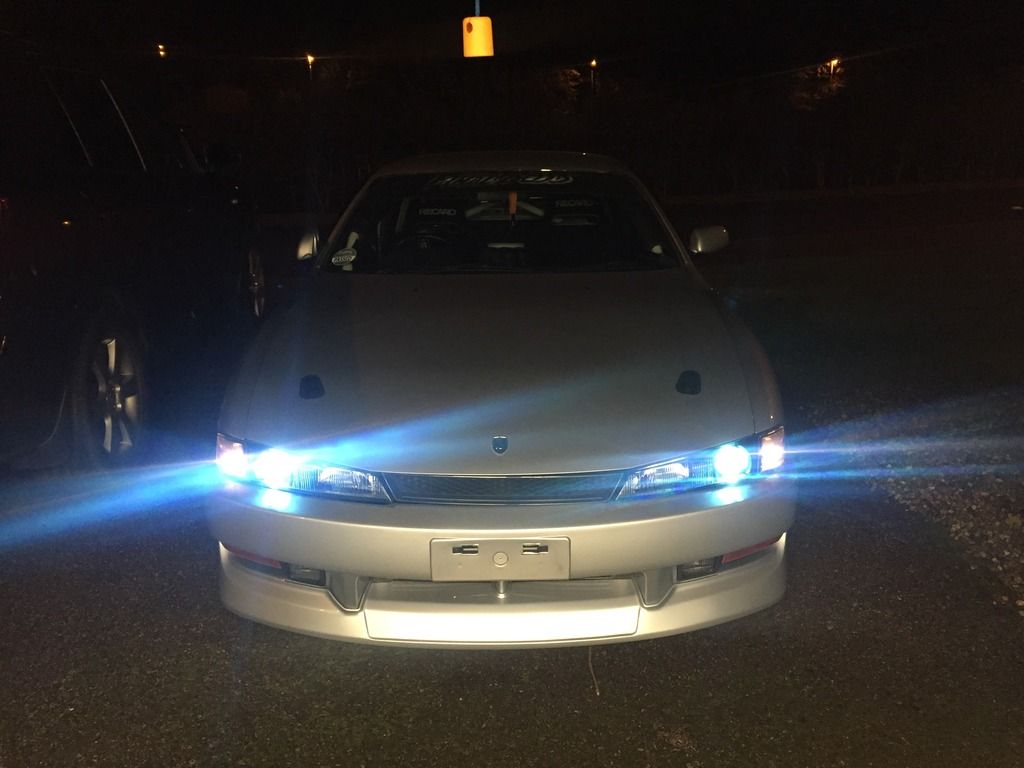
the next thing i'd wanted to do was black out my headlights like i had done on my first s14a 5 years ago
used a bosch heat gun and made them toasty hot to break the sealant, then pulled them apart which was quite tricky
took out the screws and removed the chrome insets and painted them
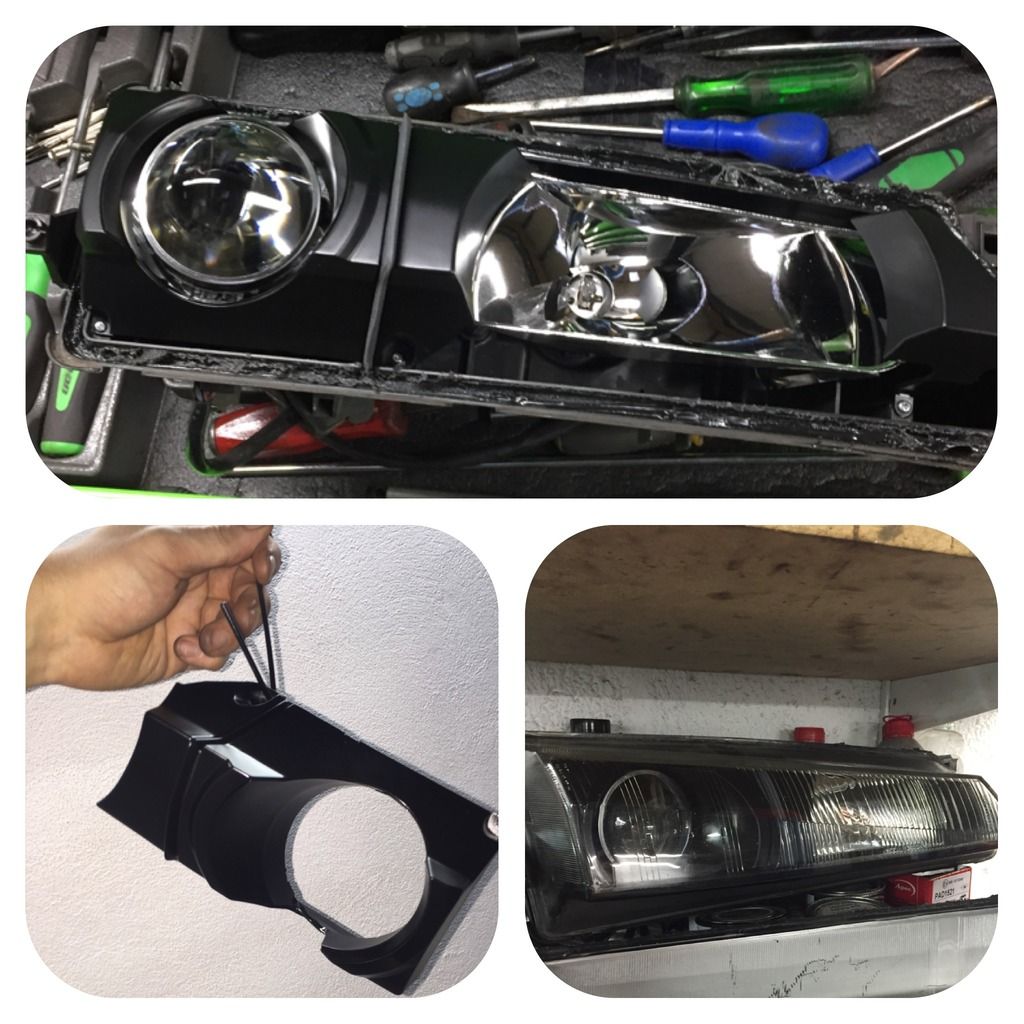
did the same to the sidelights, these are a bit harder as they are all plastic as opposed to the headlights, so more chance of bending them out of shape
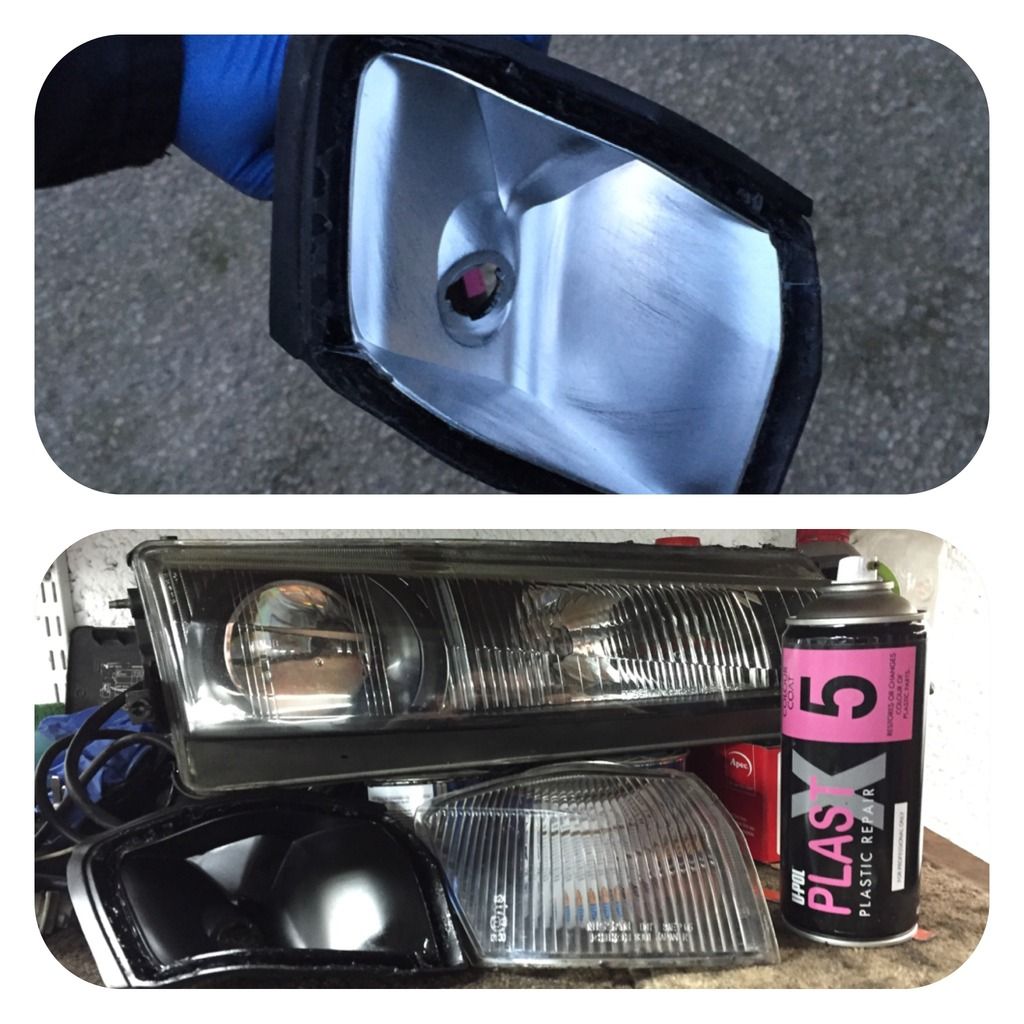
all i need to do is reheat them back up for refitting and i'll also be adding a bead of tiger seal around them before i push them back together
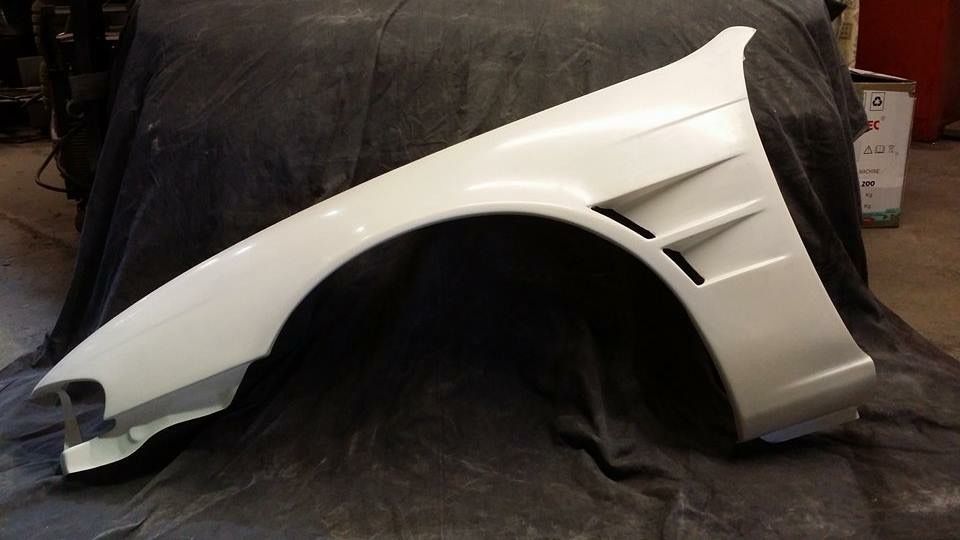
i've also ordered a pair of +25mm vented front wings from kinzuru kits
--------------------------
bought red lense tint spray and done the amber corners on the back lights
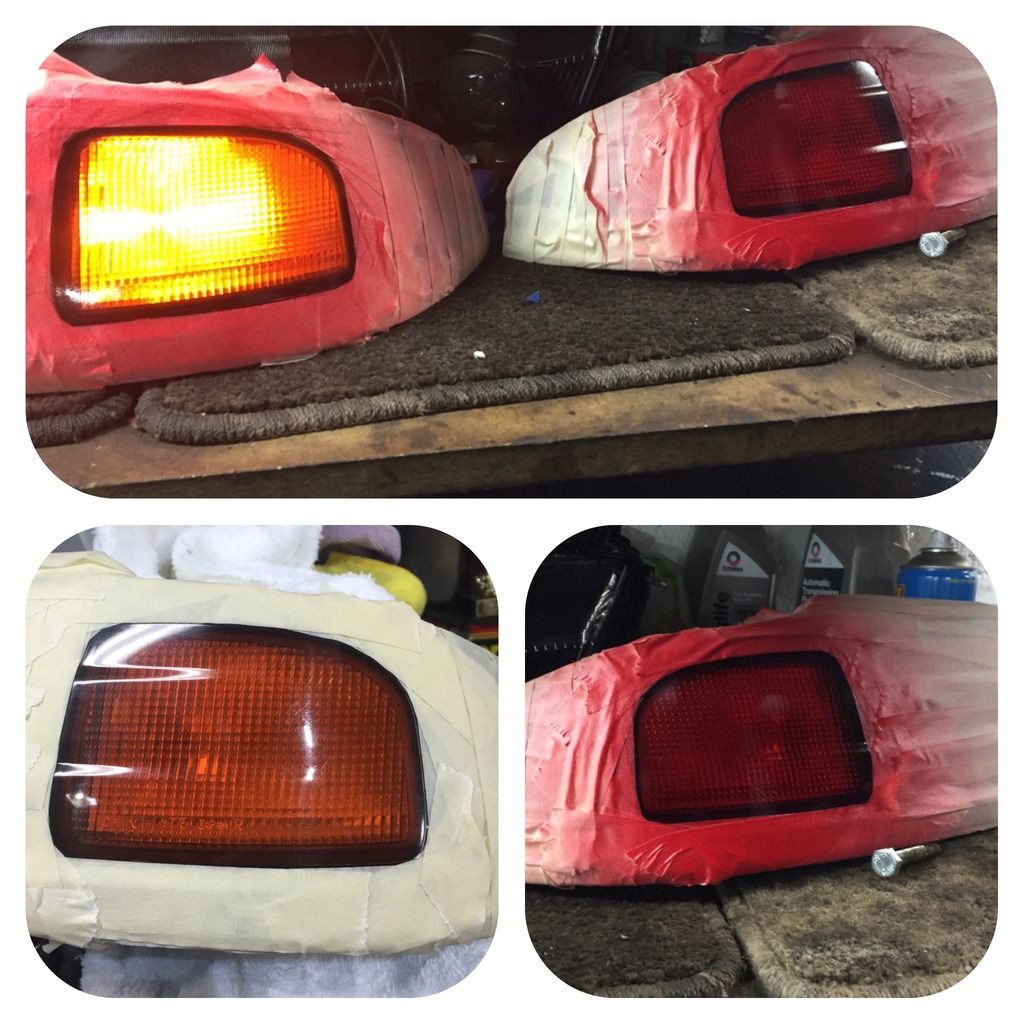
just need to add a light layer of black over them
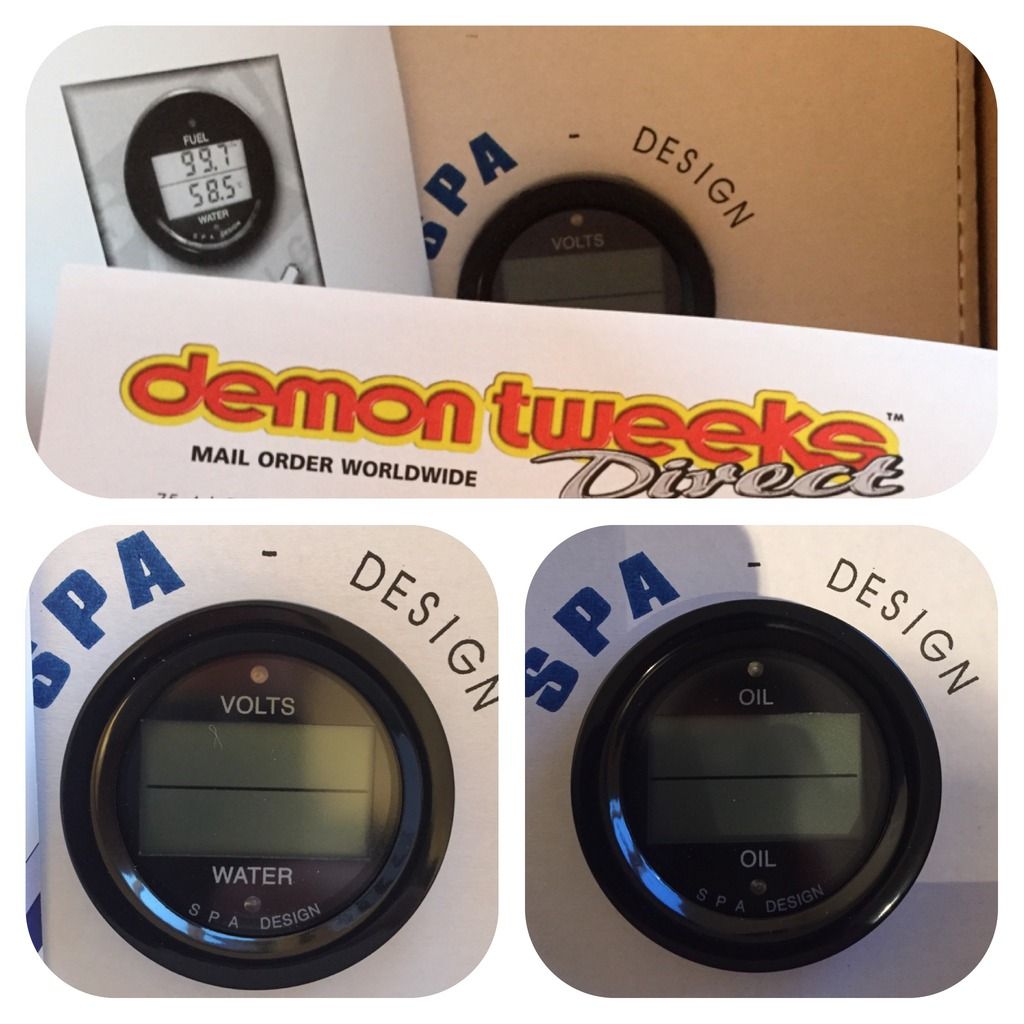
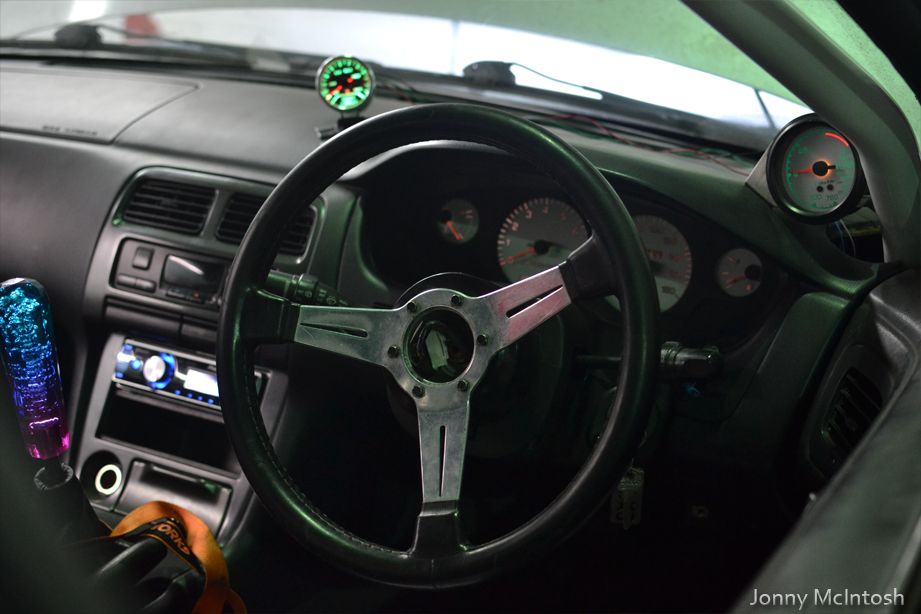
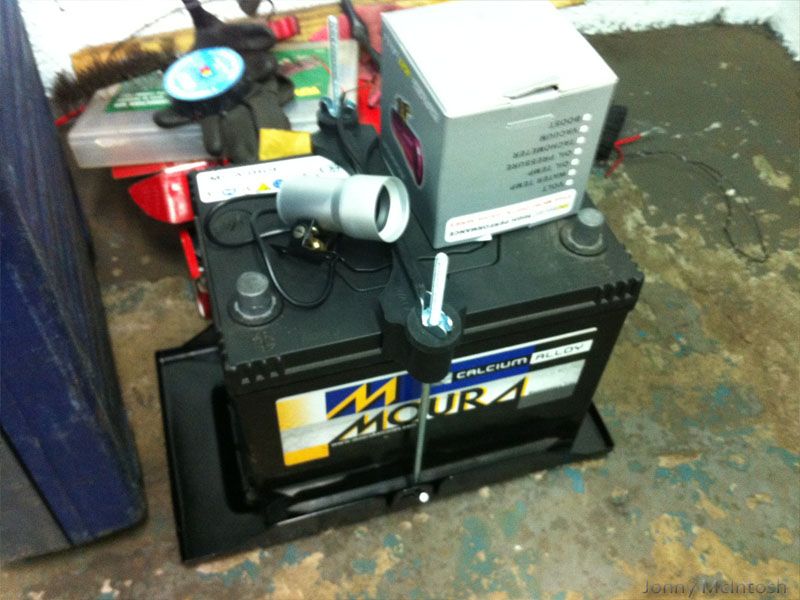
bought new gauges from demon tweeks, 2 SPA designs 52mm half and half gauges
one is water temp / battery voltage
other is oil pressure / temprature
all come with new sensors / loom
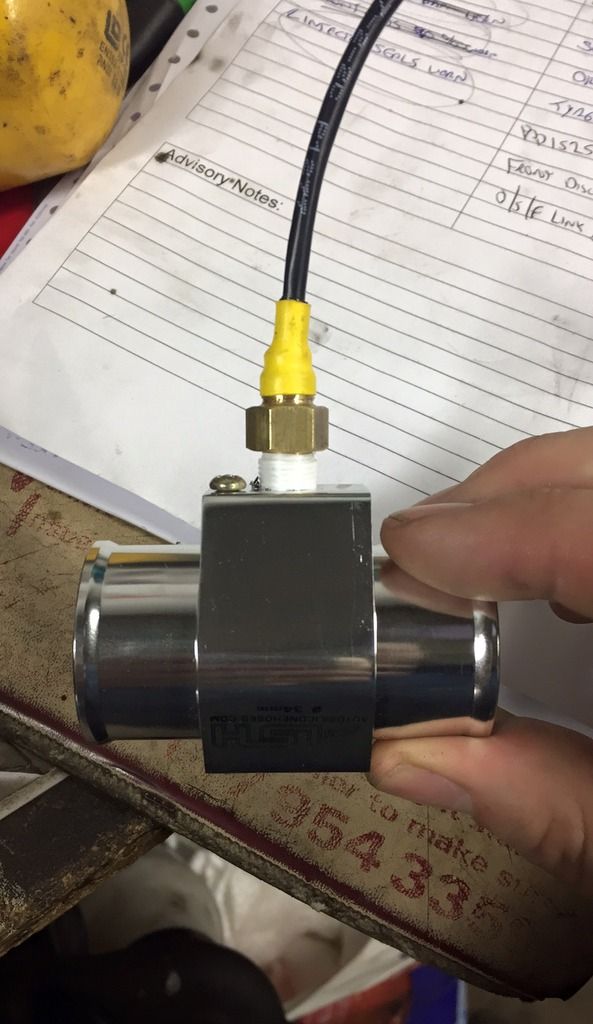
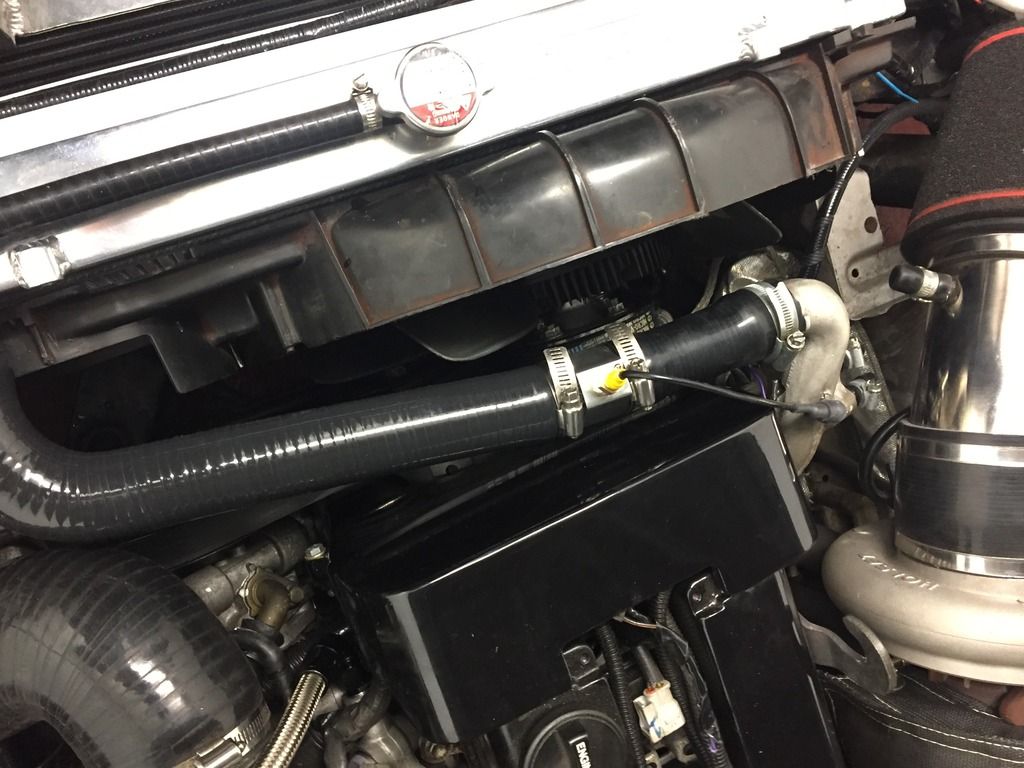
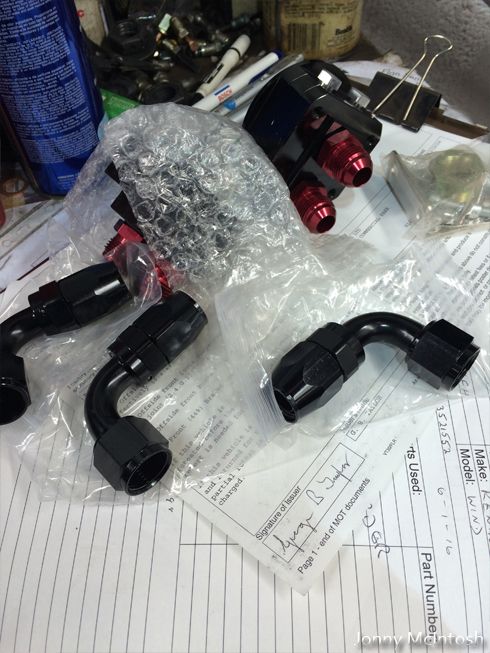
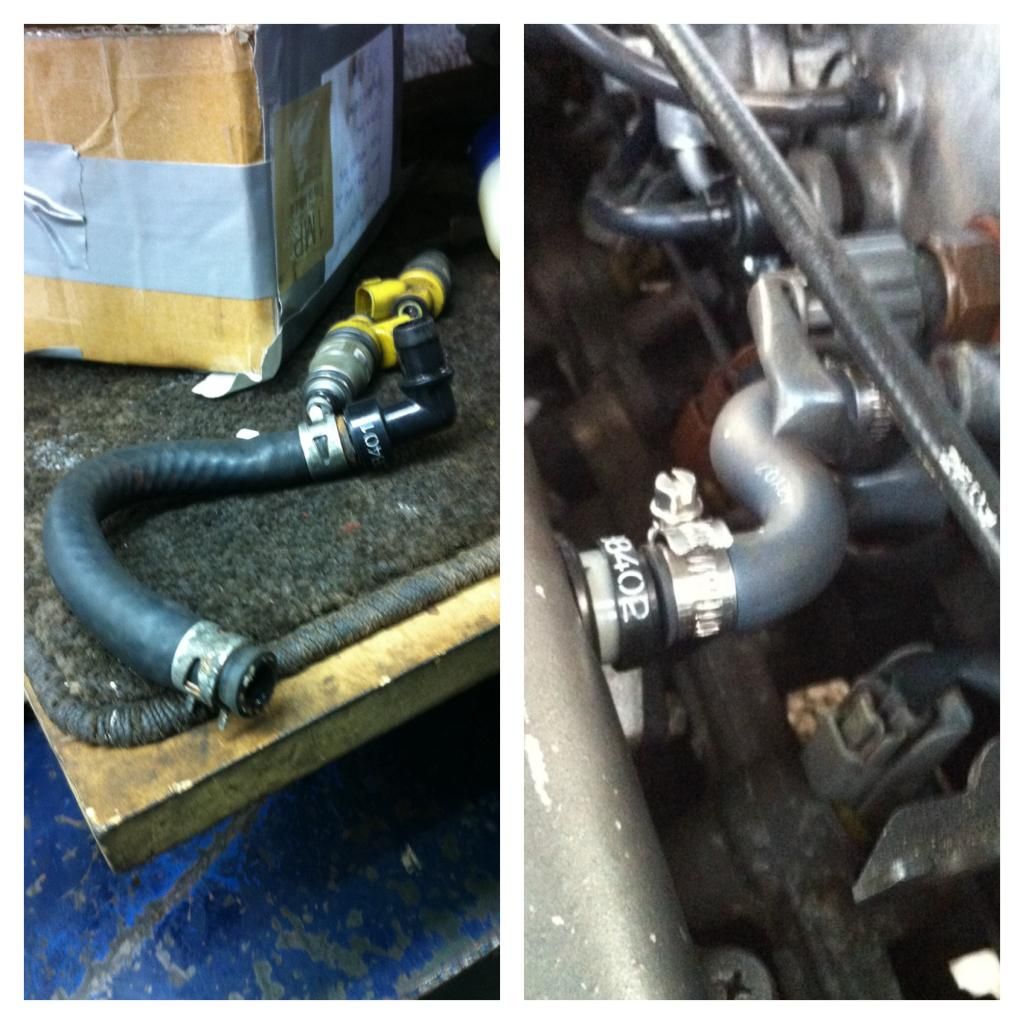
bought an inline rad hose fitting and put the new water temp sensor in there
changed the water neck on the engine and used the old oem 90 degree bend i had for my other head, (looking for one of these if anyone has one for sale)
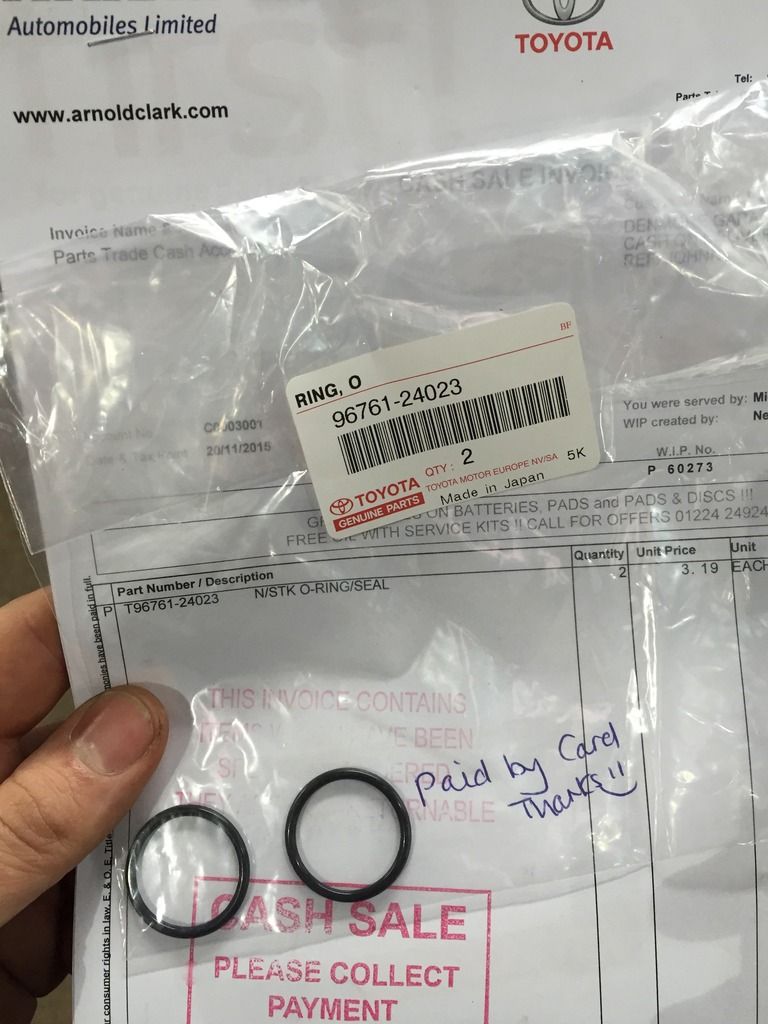
also renewed the O rings in the water pump return top pipe and put a new gasket in behind it against the head....£3.19 plus vat per washer :S
then a new supra 2jz top rad hose which had to be cut down to fit
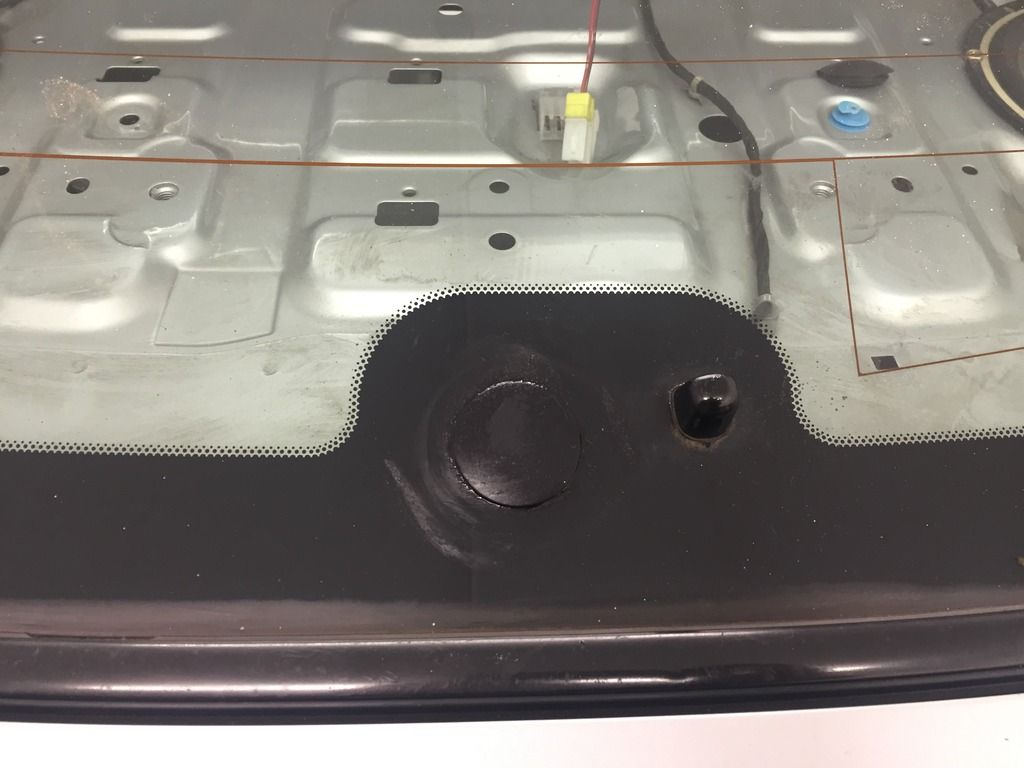
since the tiger seal was out for the headlights i thought now would be a good tinme to do the bung on my rear window
then the black front lights
unforutnately the car sat like this during the wait for my new front wings....
after alot of chasing and so on, turns out they were behind on production, i couldn't wait as i had to get wings on the car for a test fit / drop them off to paint / refit them back onto the car in time for a photographer
one quick call to EP racing, within 24 hours they were here
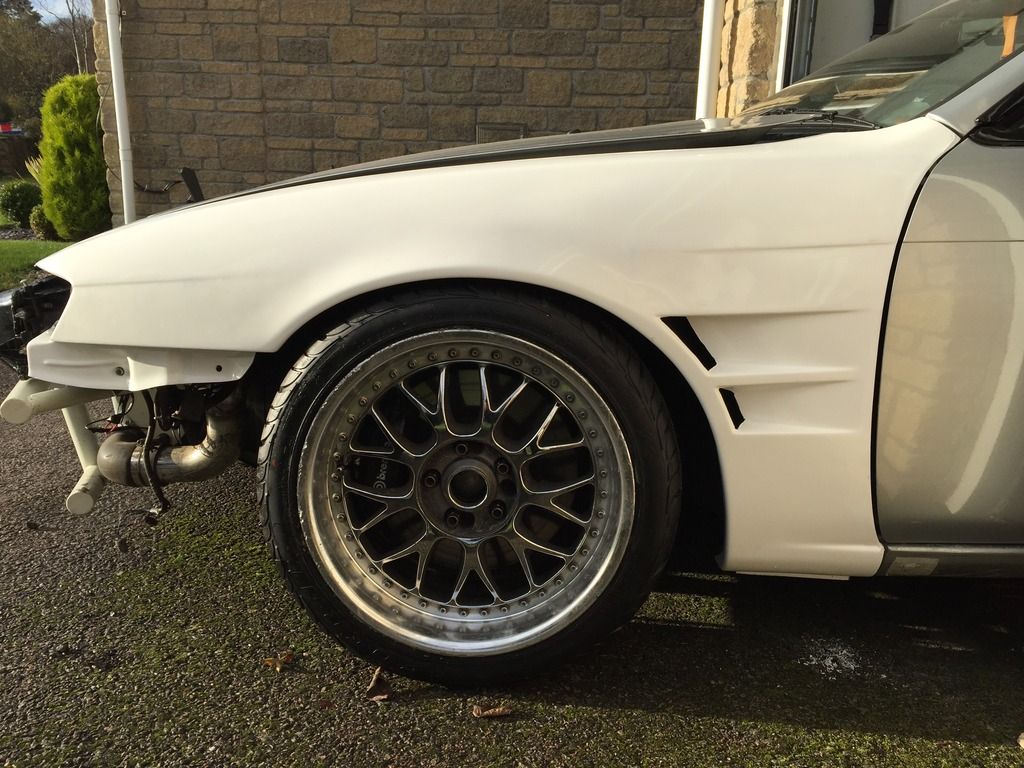
dropped them off at stevie's on friday night, went to collect them at 8am sunday looking like this.....
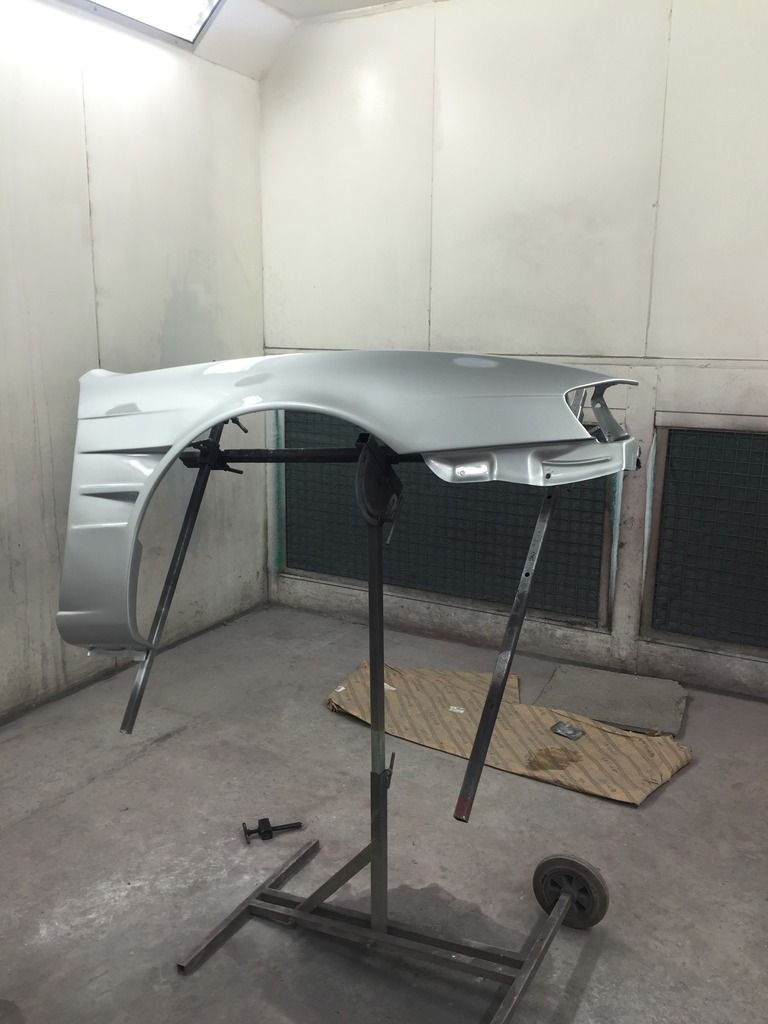
can't thank stevie b enough! match is perfect and paint is perfect as usual....so good of him to squeeze them in with such a short notice of time!
rushed home to get them on the car as i only had two hours spare on sunday to get things 100% for monday's photo session
------------------------------------
-
not yet, still haven't bought a welder unfortunately. money ran low and had other things to pay for

the engine I take out will be sold as it's a good one
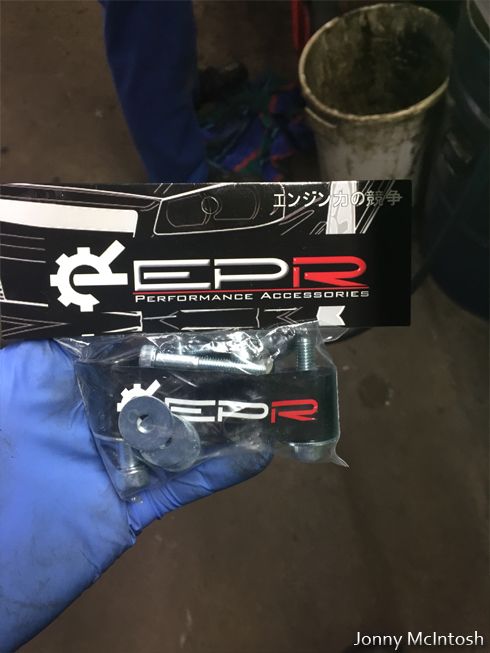
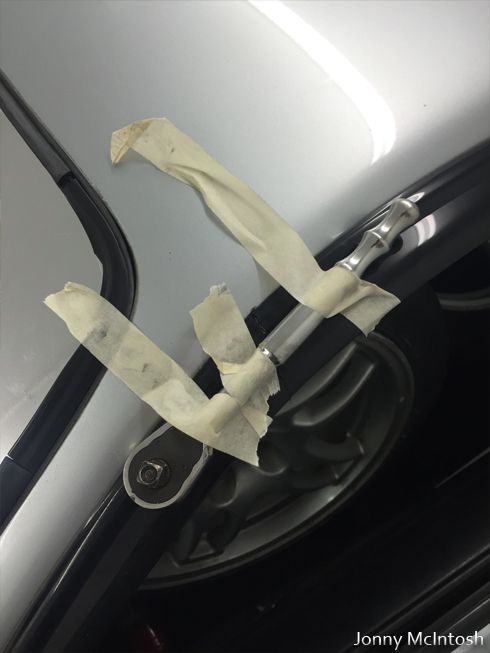
bought some ep racing bonnet spacers, seen them on a few comp cars and decided that funciton>form, not a huge fan of how they look but if they work then they are staying
next option is a vented dmax bonnet
repaired my wind deflector which snapped in half at finalboss on track, used tiger seal and found a perfect method of holding it still haha
not sure why or how but the broken off half was found by one of the staff there, many thanks to that dude! can't remember your name sorry
also got round to putting the original Q's badges back on, hopefully they will stay on and won't get slapped off by a tyre haha
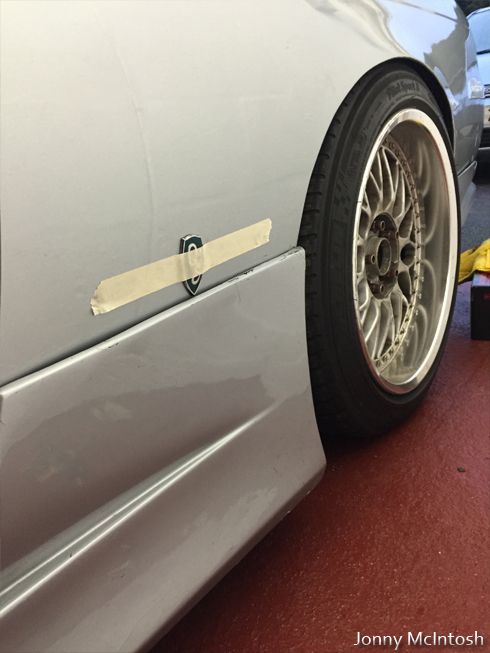
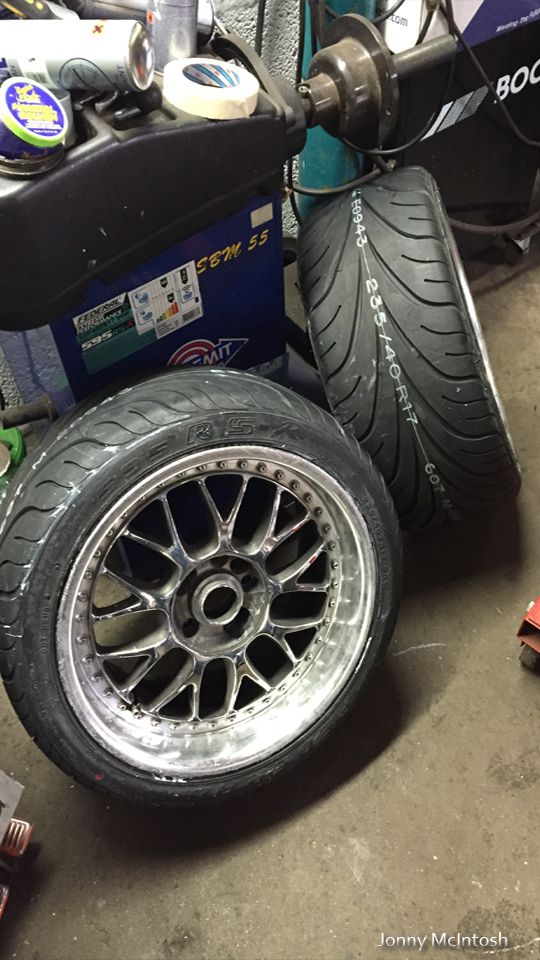
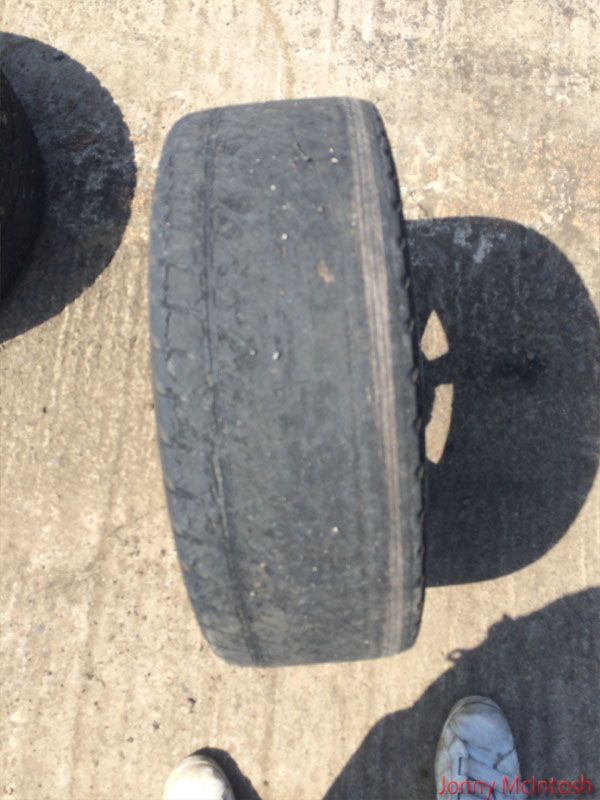
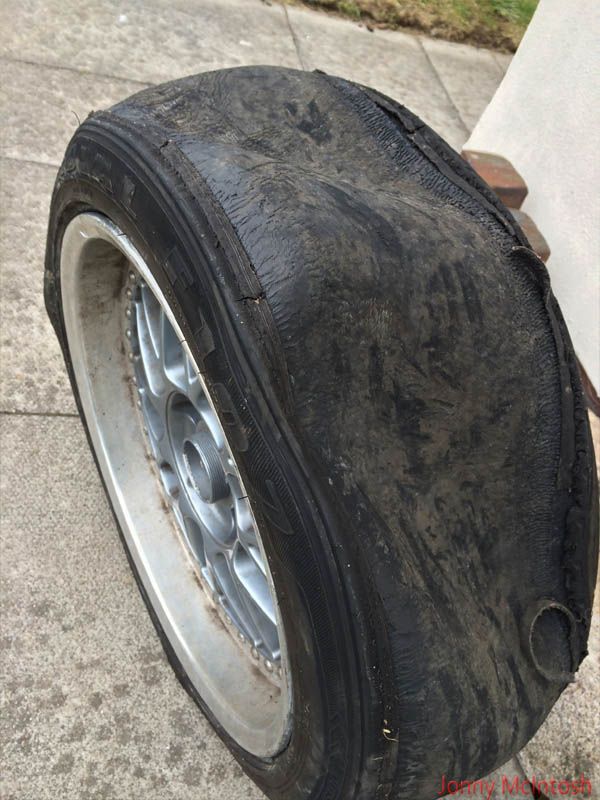
new 235/40/17 federal 595 rsr tyres bought from mytyres.com for the front
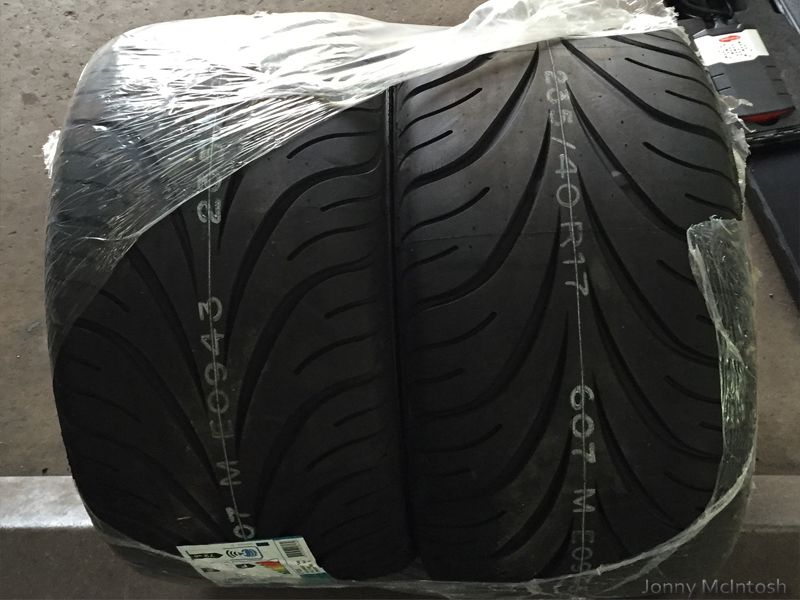
on and balanced
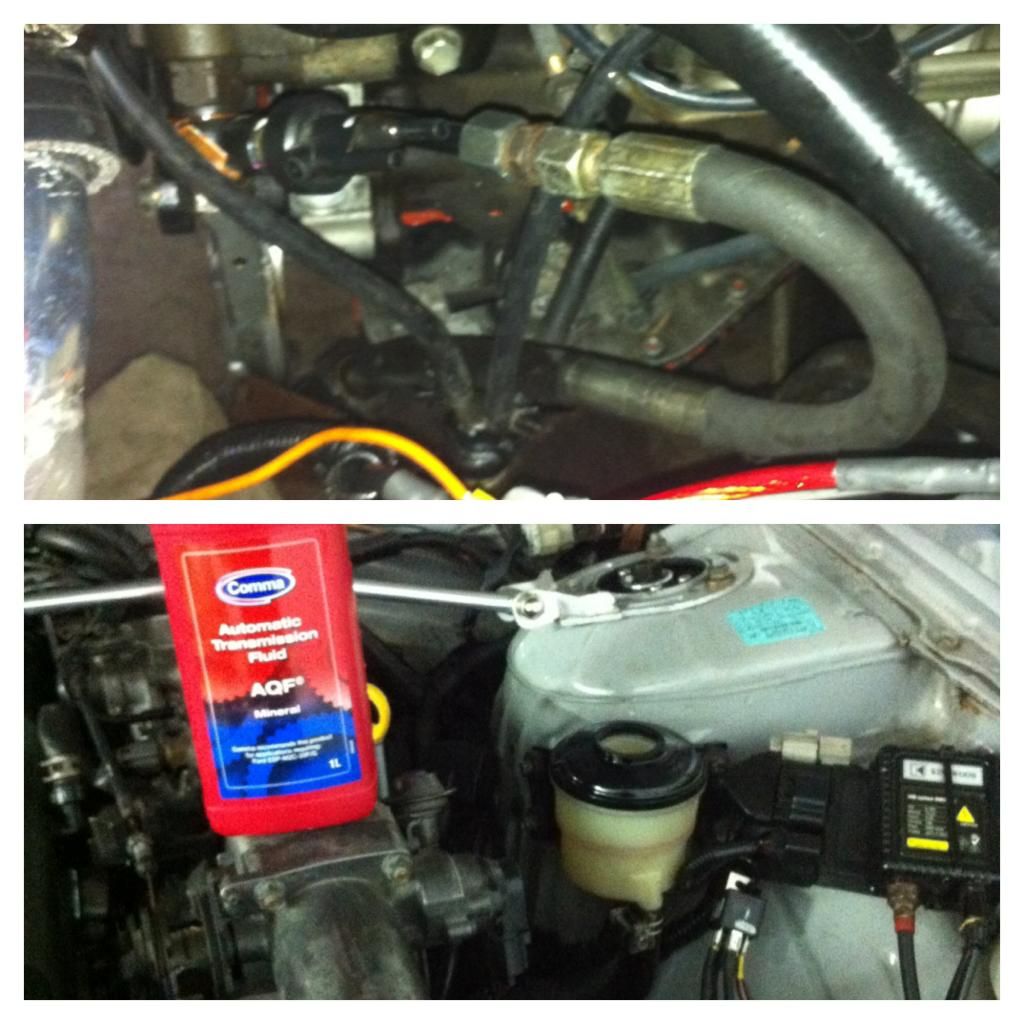
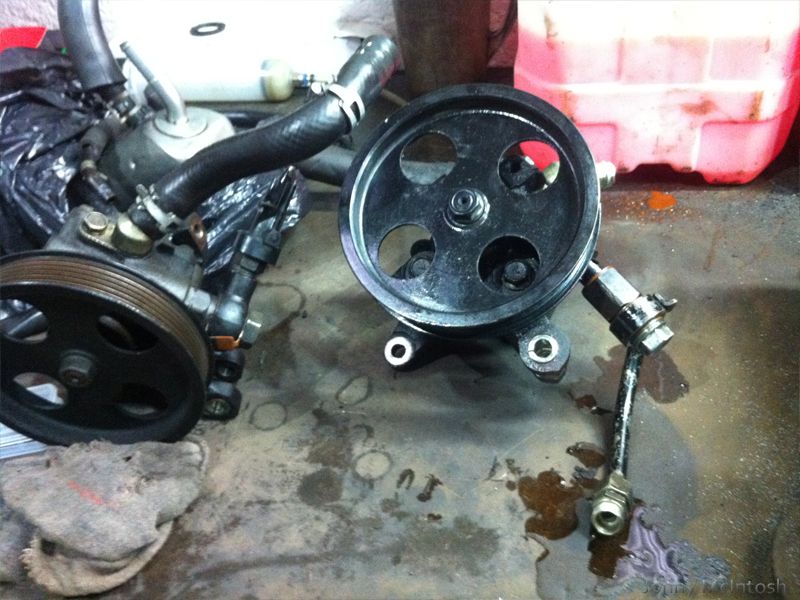
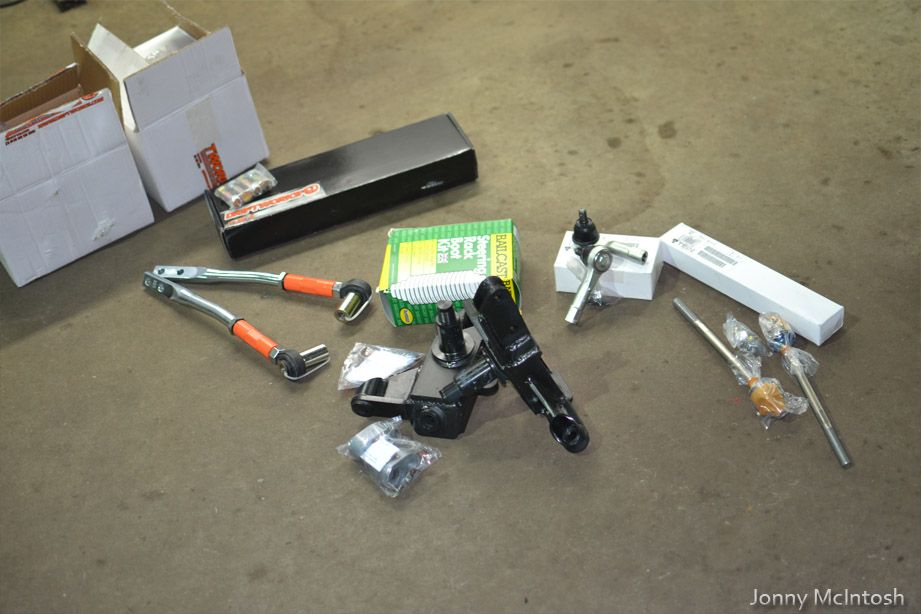
bought a 350z steering pump
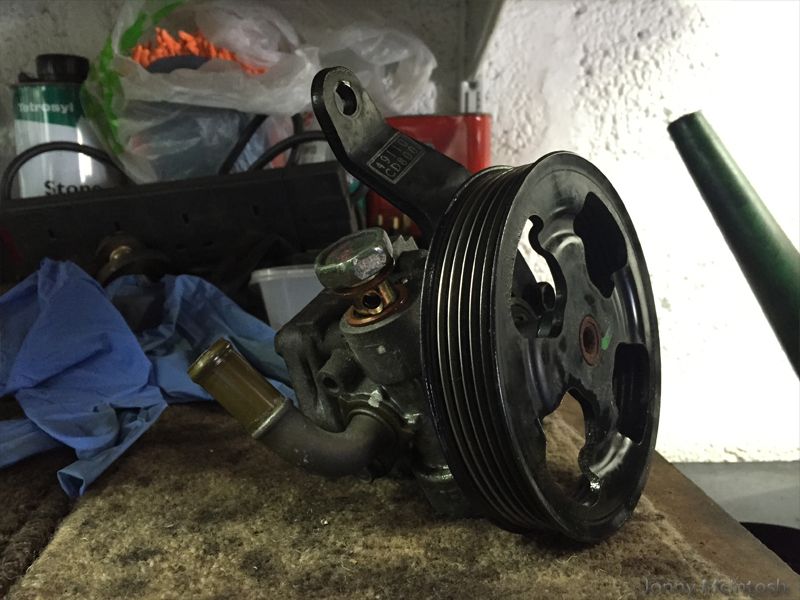
and some cnc made brackets from steven donnelly at diemax, great guy and very helpful! highly recommend him!
these retain the stock location of the power steering pump but using the 350z pump, so i didn't even have to change my aux belt
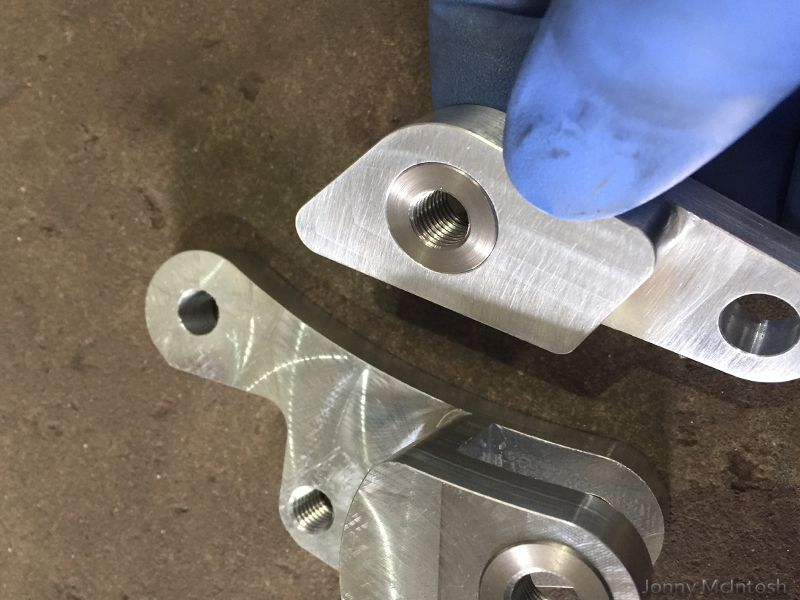
installed, i just had to change the position of my fuel pipe since the feed pipe is slightly different now and the fuel rail AN fitting i used was originally made around the old pump
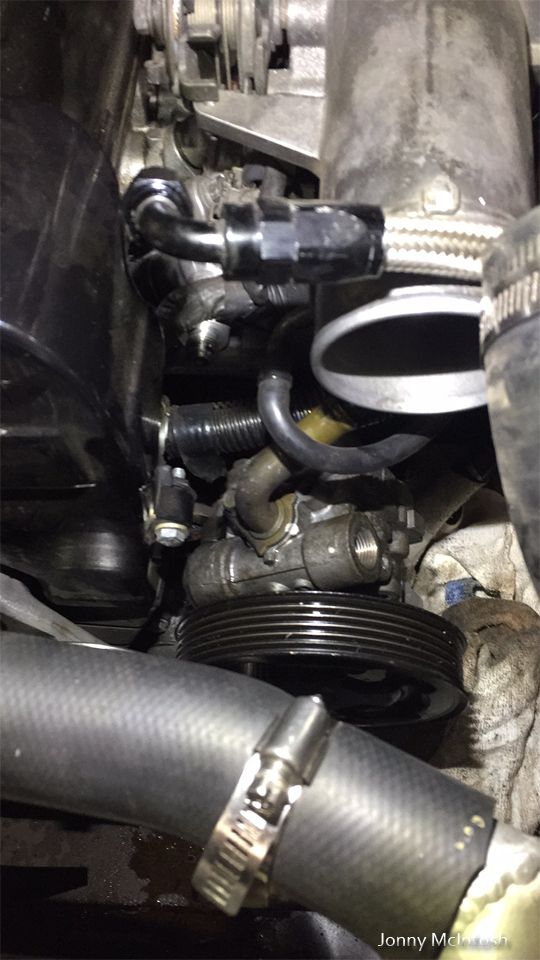
rolled her outside and started the car

filled with fresh new steering fluid as i'd drained the system
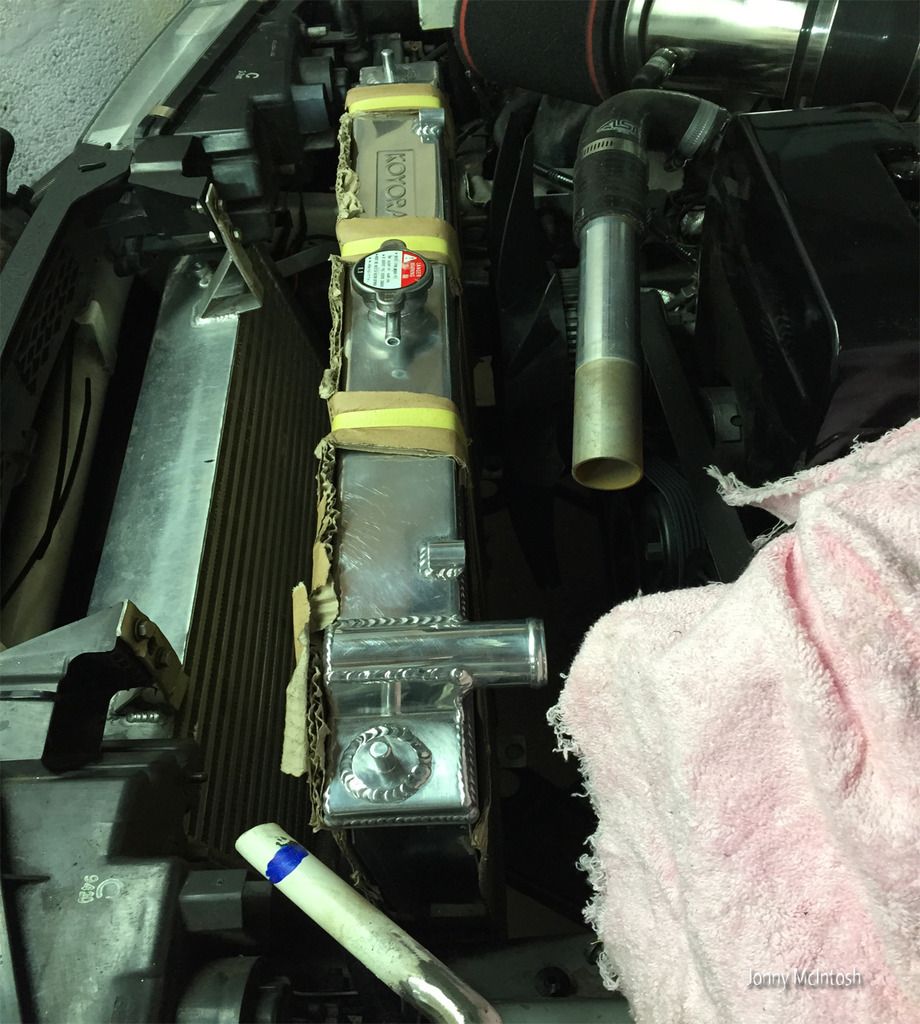
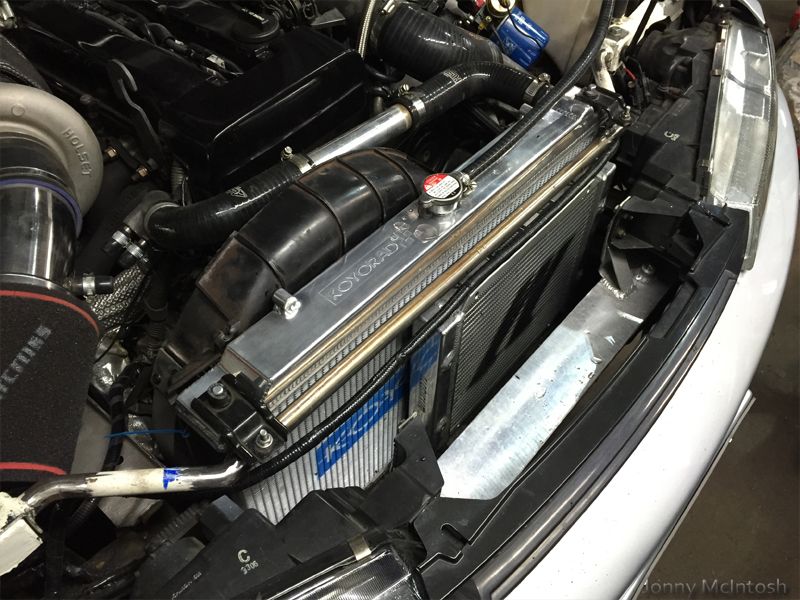
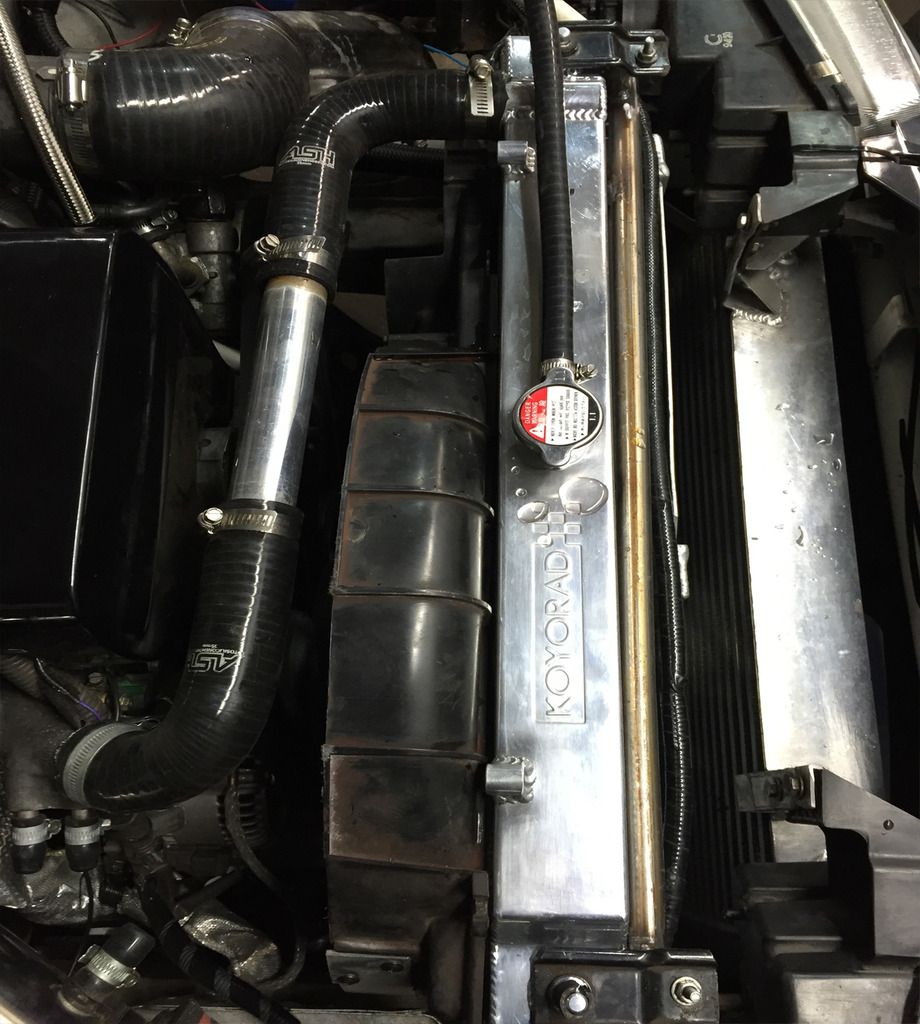
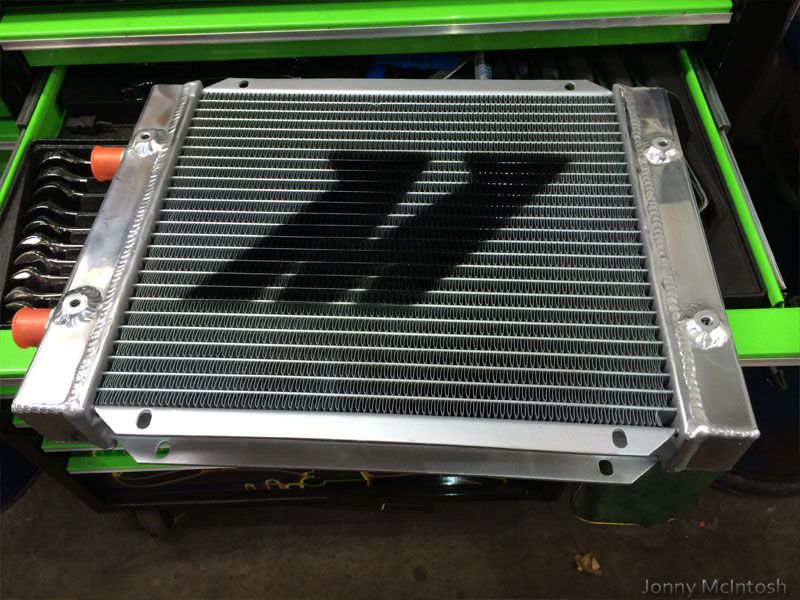
unfortunately my japspeed radiator had cracked along the bottom tank, it was spraying water onto the aux belt and causing it to squeak
that was the end to my weekend, i had arranged to go drifting on sunday too
so the saturday was a massive disapointment for me after doing all that work on the car with the roll bars, new tyres etc then this....koyo rad ordered through auto extreme, which also means i now have to make a new front pannel as it was made around the s13 japspeed rad which isn't as wide as the koyo one
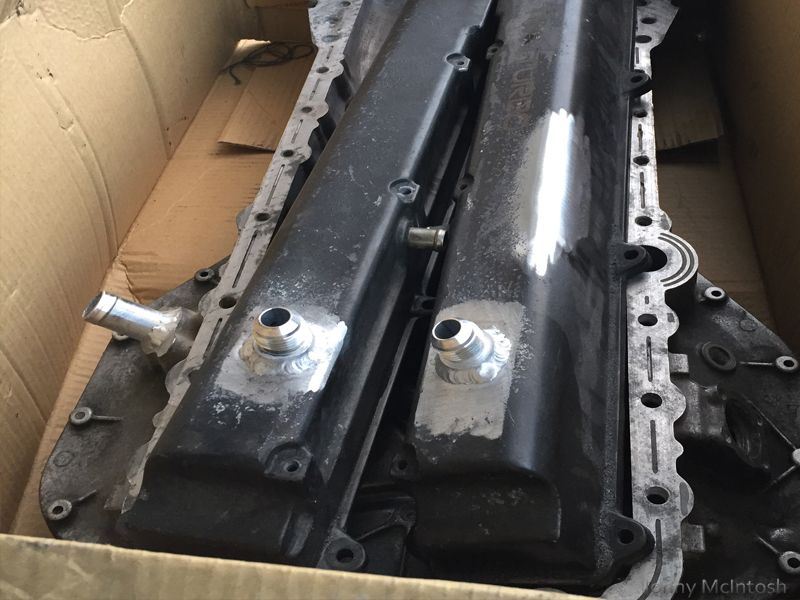
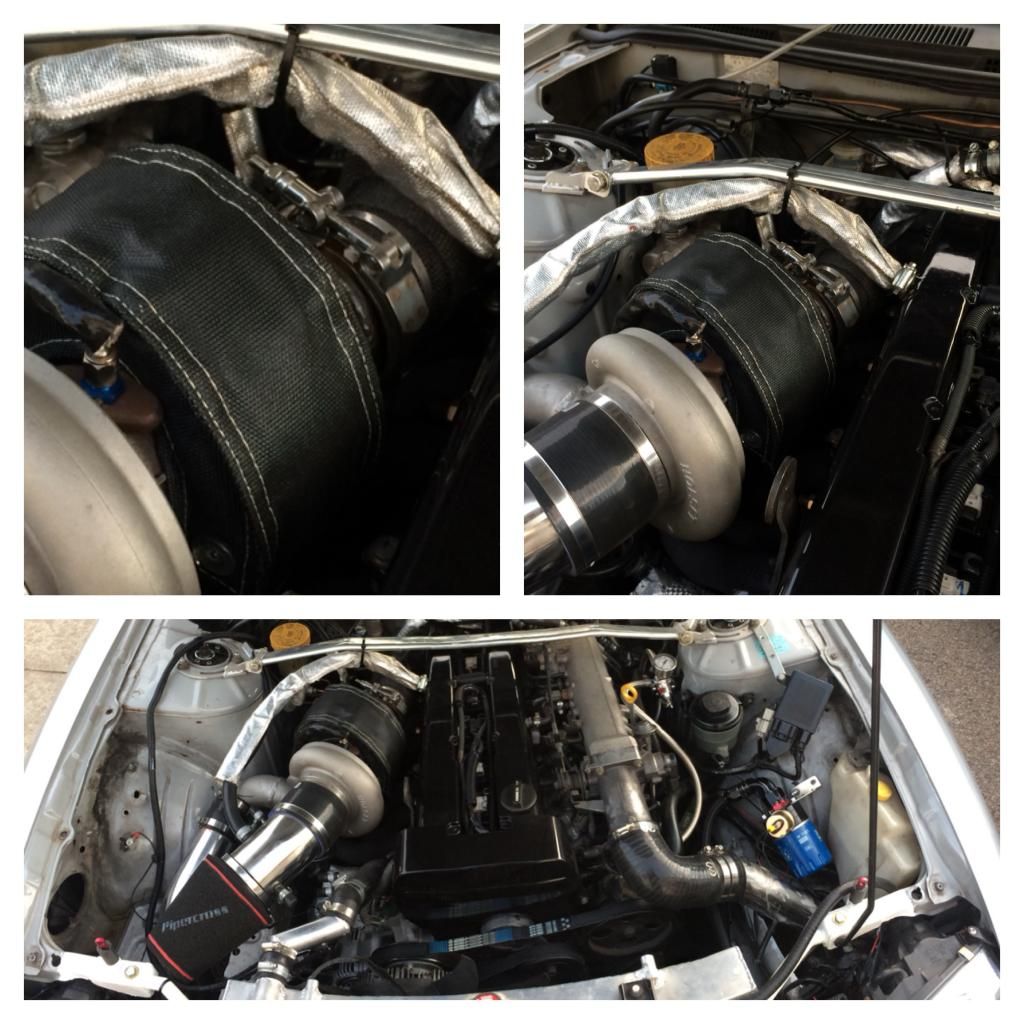
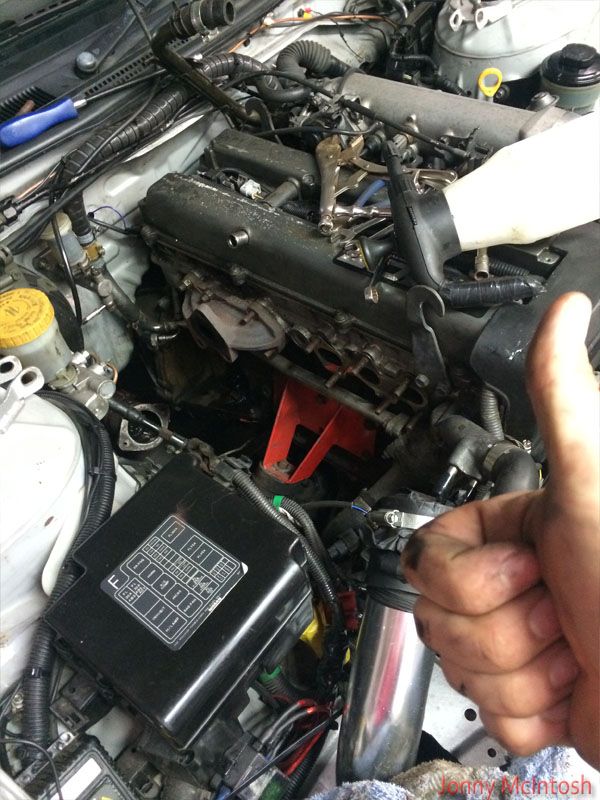
got my 1jz rocker covers back with 2xan10 breathers welded on, one hole blocked off by the turbo
also a 22mm pipe welded into the alloy sump for the drain
thanks to auto extreme, my koyo rad arrived
also ordered a koyo rad cap, unfortuantely doesn't come with a new cap!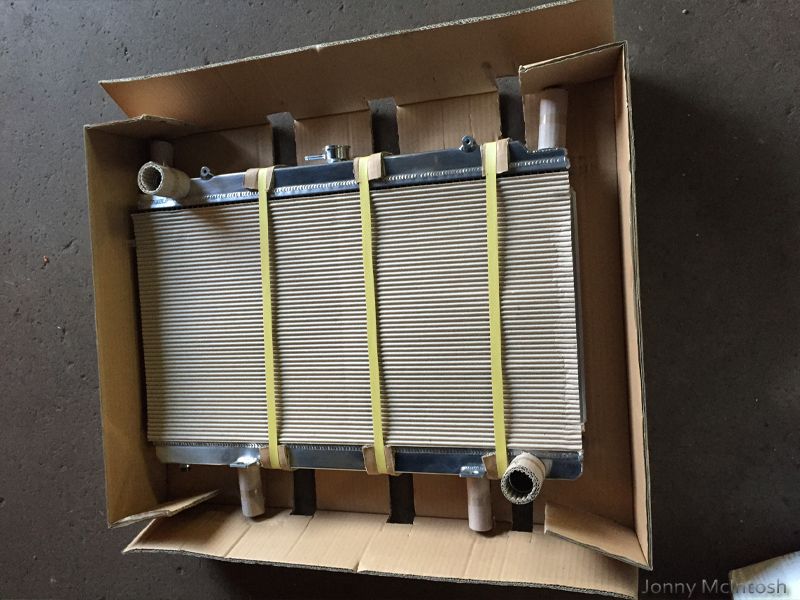
fitting was a bit of a nightmare due to the old japspeed rad being smaller, the new front rad pannel had to be redone
chopped off what was there, cut slits into the existing pipe and bent it further forward to gain more angle, then paul it welded back up

then cut out a small piece on each side and welded the gaps, this allowed the rad to come properly forward this time
welded shut the gaps then sprayed to prevent rust
getting there
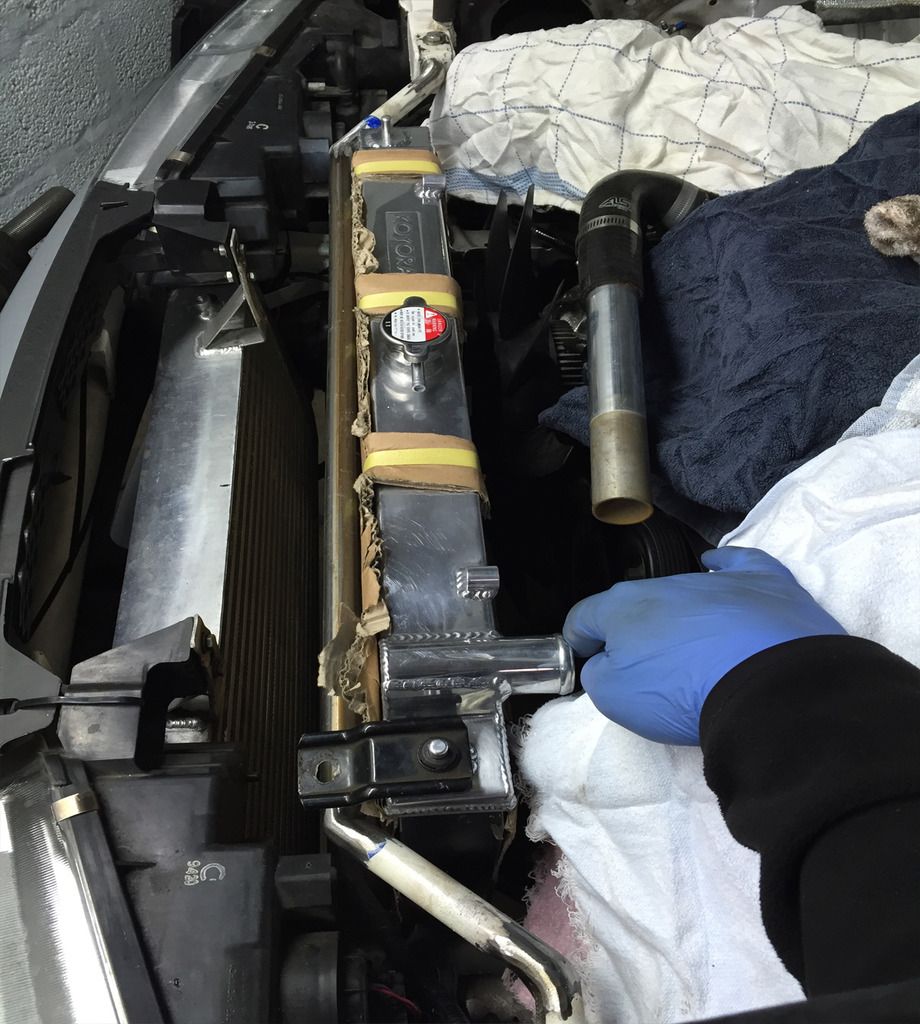
tacked rad mounts in place before fully welding
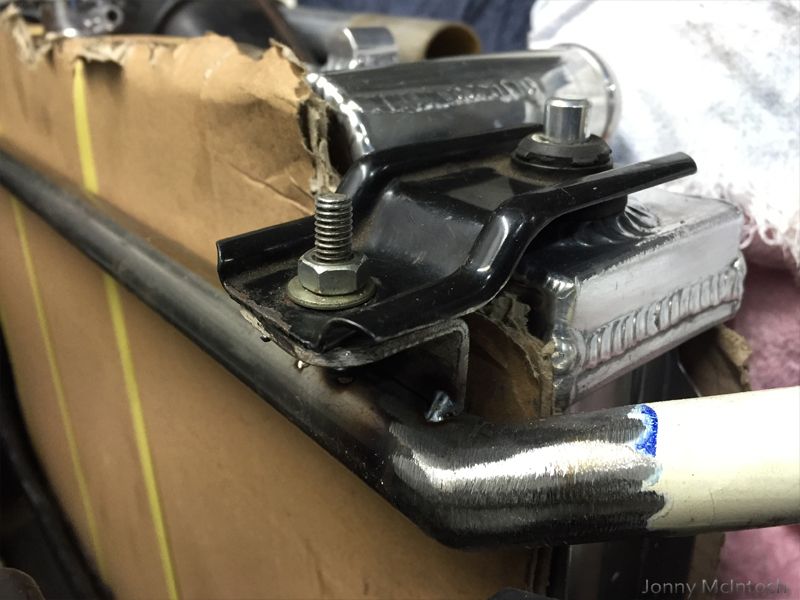
top hose done, i have ordered a mkiv supra radiator hose kit to see if that will work better and just have one silicone top pipe rather than a join
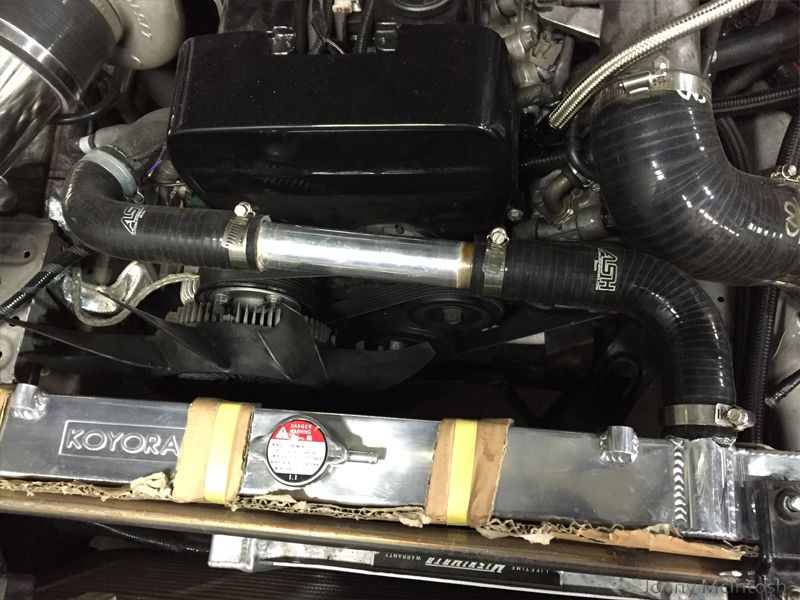
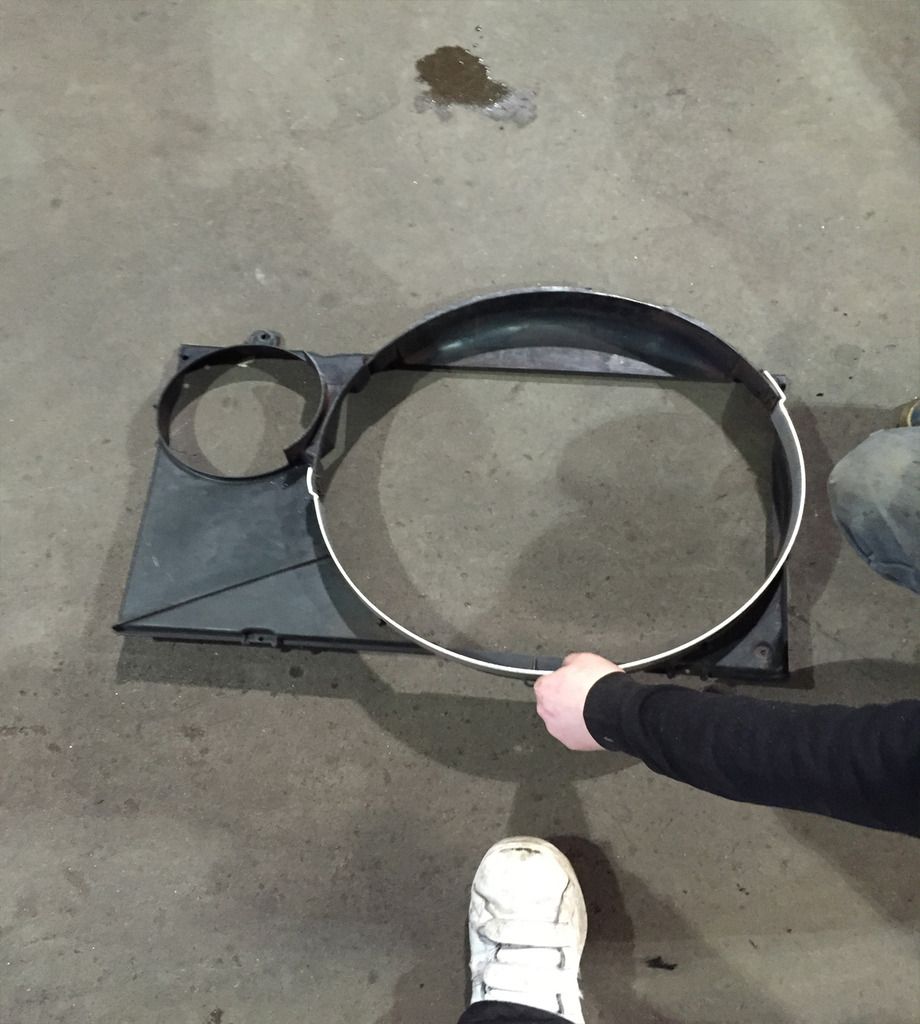
was missing the lower part of my mk3 supra fan shroud so paul shaped a piece of aluminium to fit
oil cooler mounts welded back on and it just needs painted now
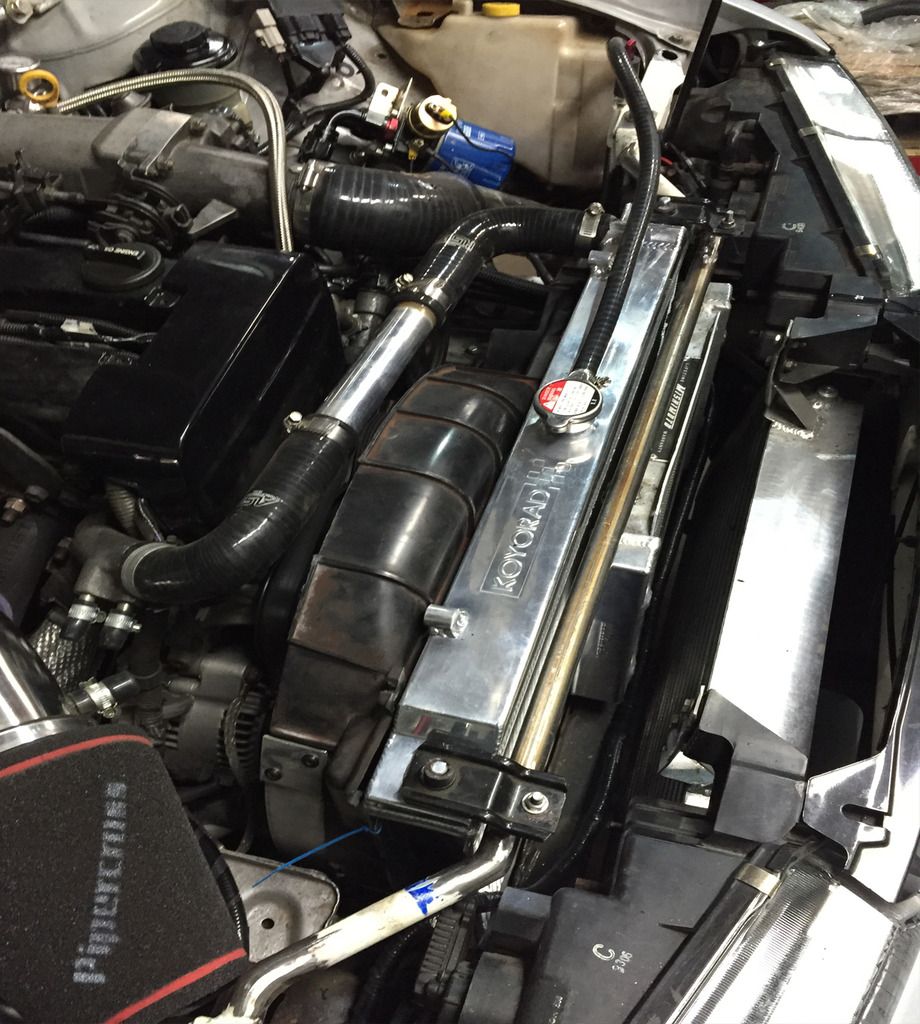
this time with a fan shroud
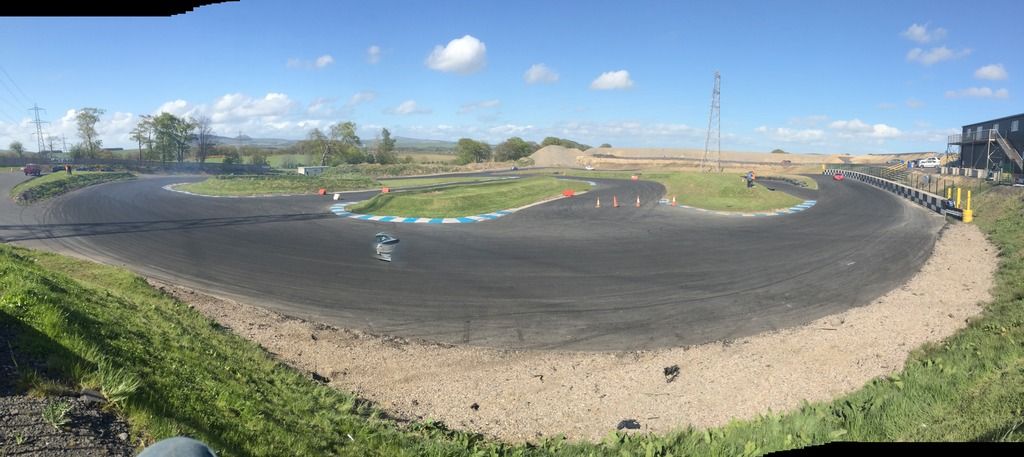
unfortunately i had to miss out on the november 1st skid day at driftland as i bought a car the weekend before
so all my spare money/drift fuel money was used on the car and transport tickets to england and fuel all the way back to scotland for my new daily
-
bought some more parts, can't wait to go drifting again
A31 Cefiro front anti roll bar, ultra racing 27mm
Super pro Front anti roll bar drop links and bushes
ultra racing front 27mm D poly bushes
super pro polybush rear anti roll bar D bushes
super pro rear drop links and poly bushes
also bought a stock rear anti roll bar (18mm) and then had it blasted and powdercoated along with all D bush brackets
conceptua tuning gave me an awesome deal on the roll bar parts and some other engine bits i've ordered for something else
unforutnately i got ripped off £80 just for powdercoating the roll bar, i'm not going back there again!
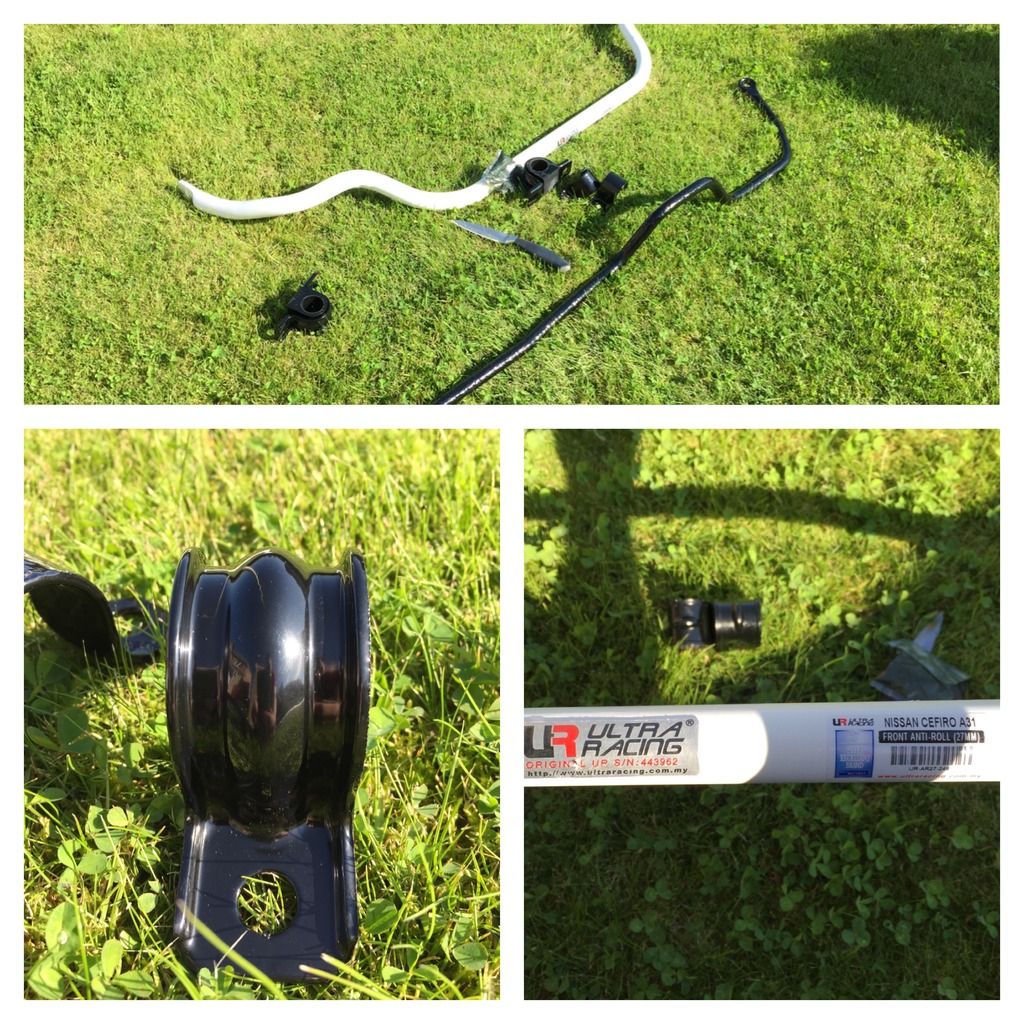
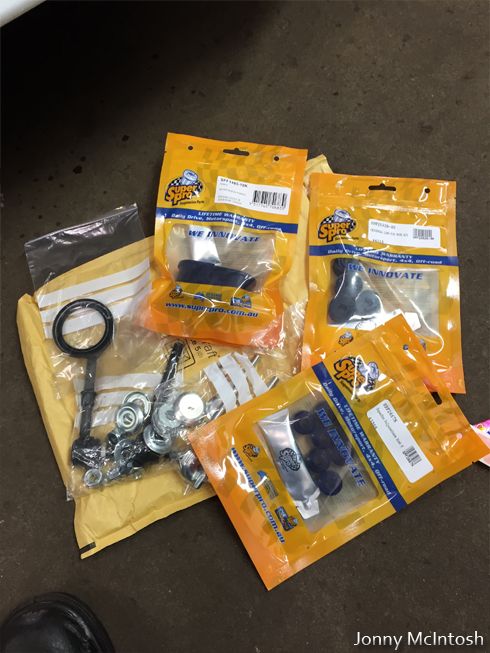
everything is absoltuely covered in grease and the superpro supplied grease, i'm very much against leaving things dry and prone too failure
plus it means next time you come to work on it, you just wipe the grease off and the threads/bushes are like brand new underneath, for example, my alignment last month!
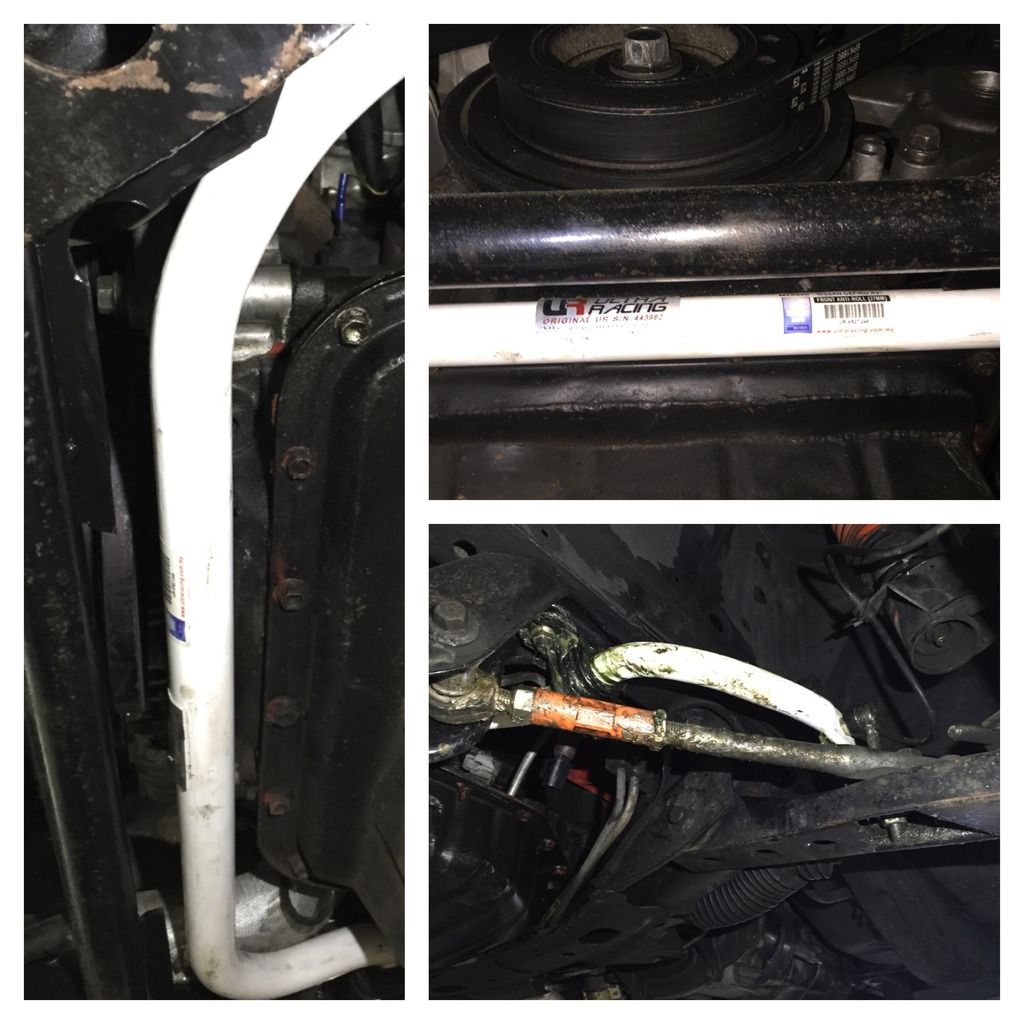
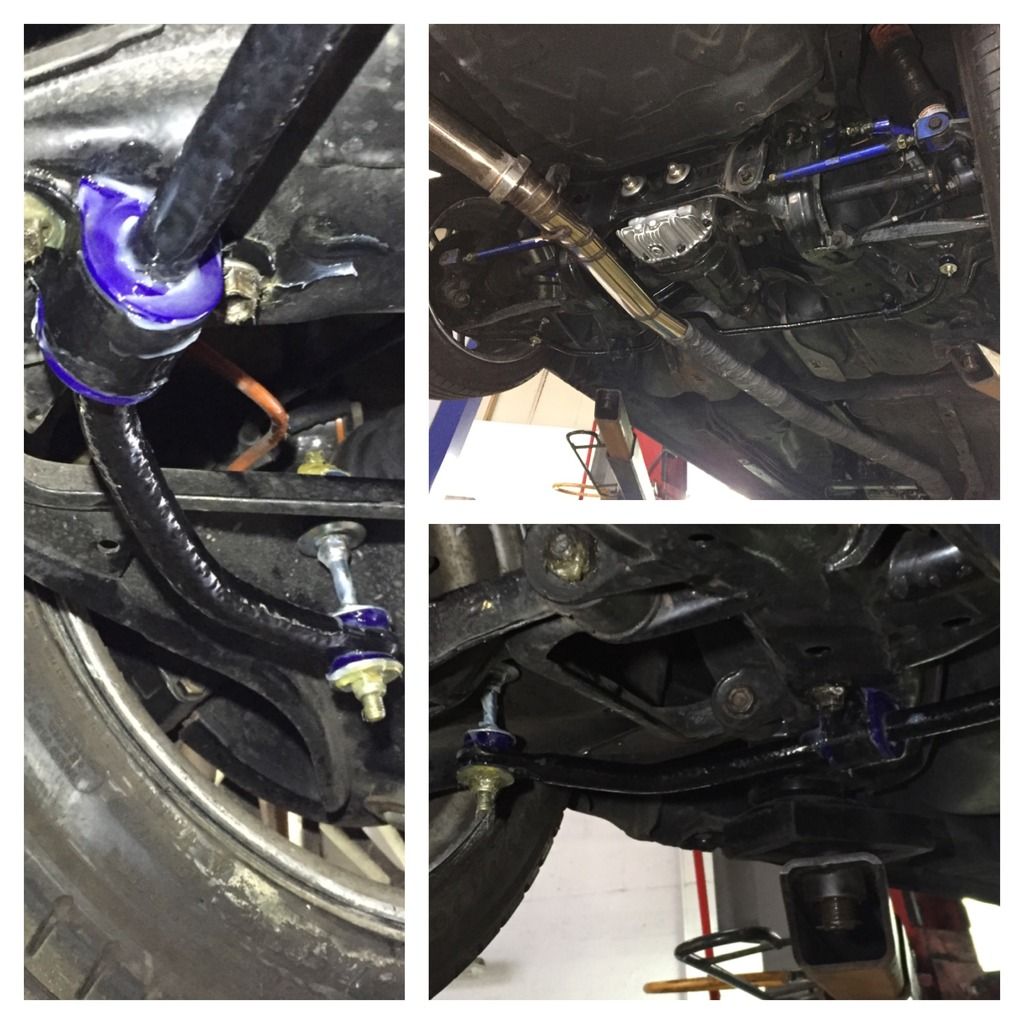
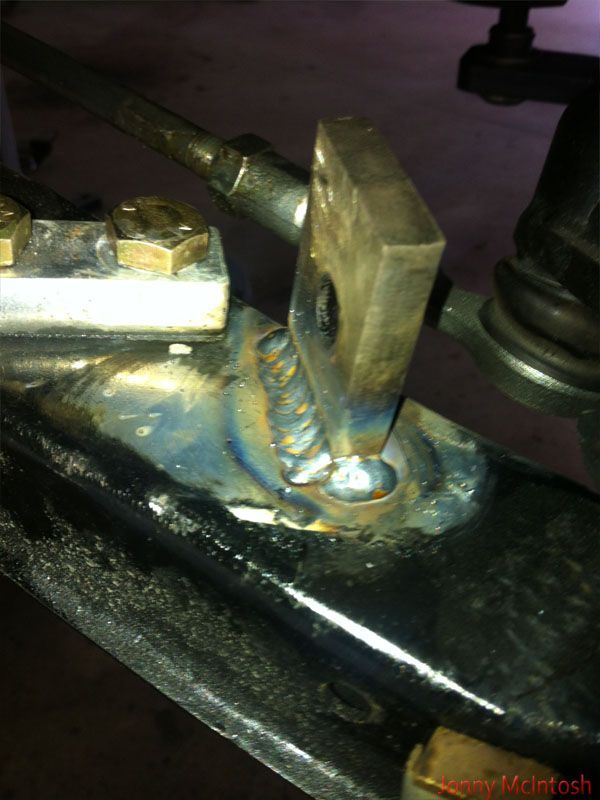
the a31 rb cefiro anti roll bar clears the 1jz front sump fully, i did have too trim down two brace brackets on the nismo style front bar however it still has the solid bar fitted so no difference there really
also had to reduce my steering lock, thankfully i'd thought about this when making the front end, the lock stops were easy, just undone the two 22mm nuts and unscrewed the lock stops forward so the wheels don't hit the new roll bar
it has been a great weekend, i took the car out for a run afterwards and it's quite different now, it certainly stays more level now
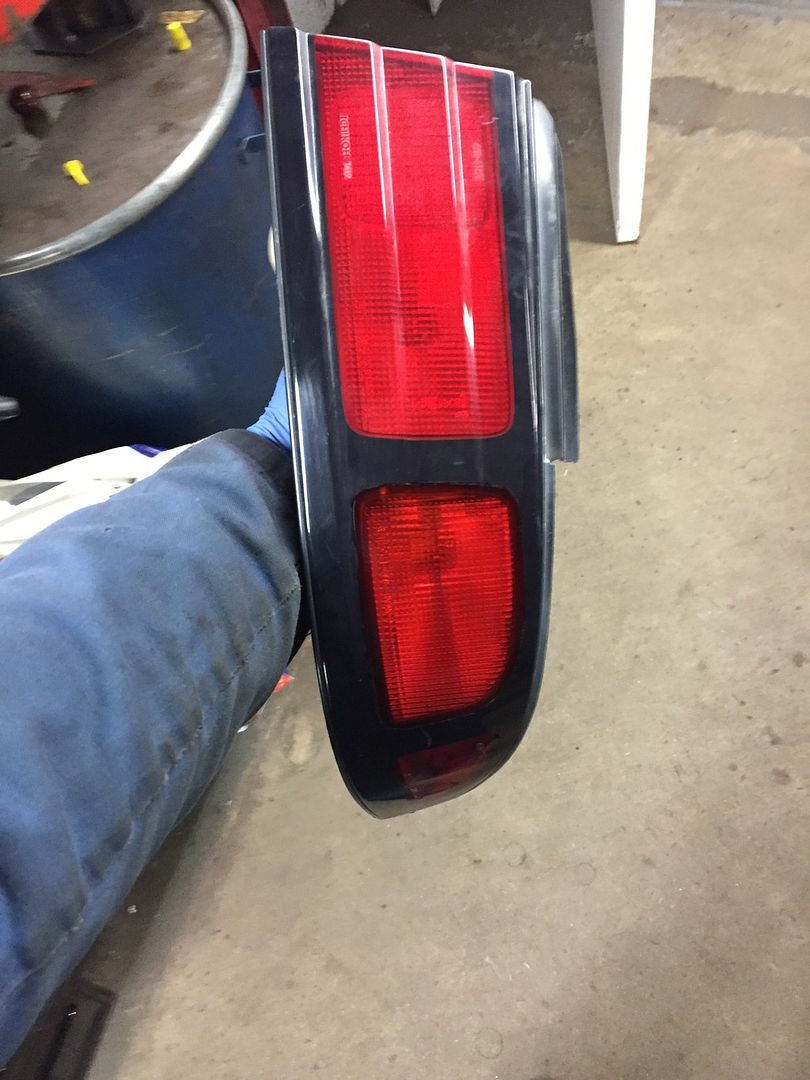
also this week a spare kouki rear bumper turned up which i have planned to get repainted as mine has a few marks
--------------------
so i'm starting a new project, a new engine, some fun basically to get going in my spare time.
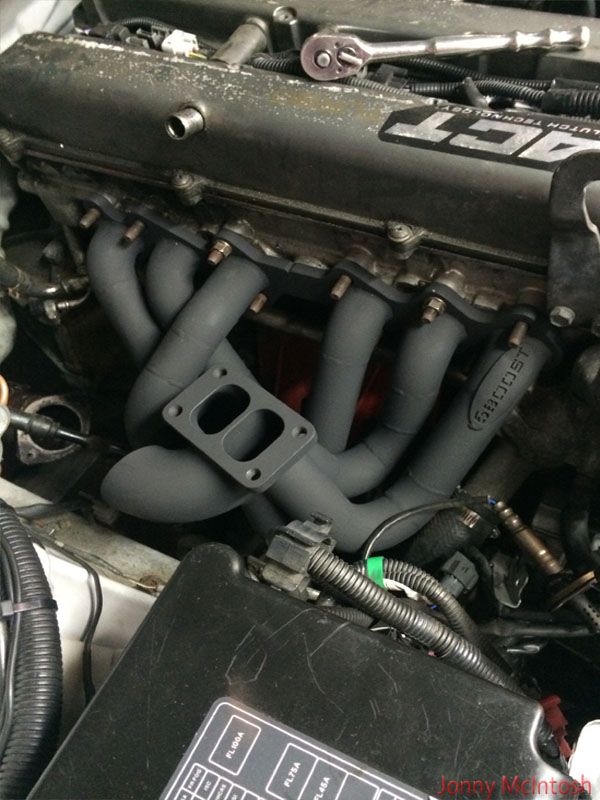
the plan is to have an engine with some better down low power, spools the turbo quciker and is 100% reliable and fresh
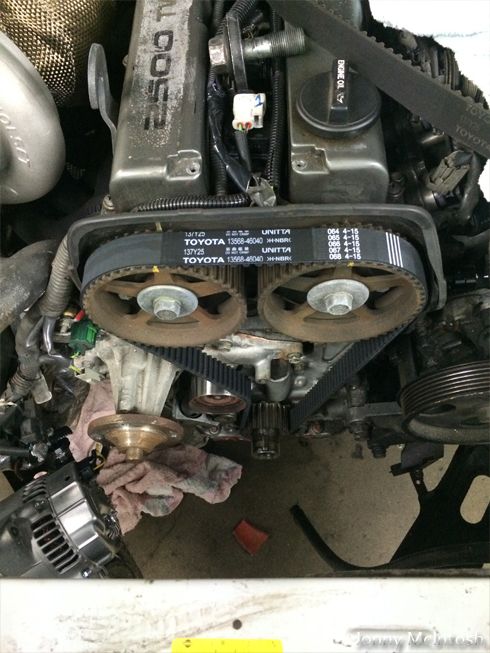
new piston rings, new head gasket, new cams, new gaskets everywhere etc
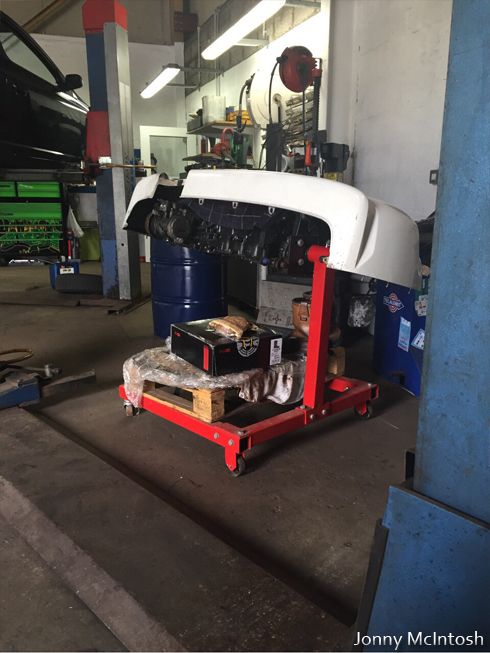
bought a new block, more info on this later
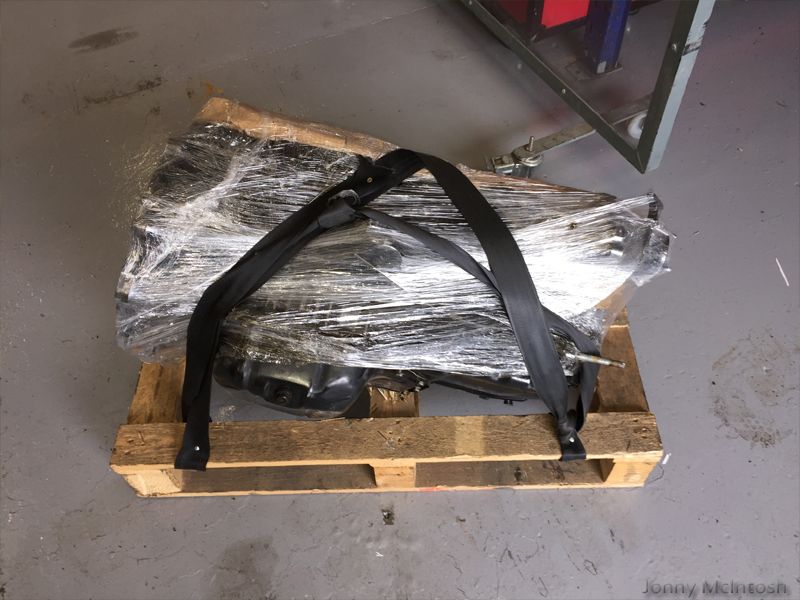
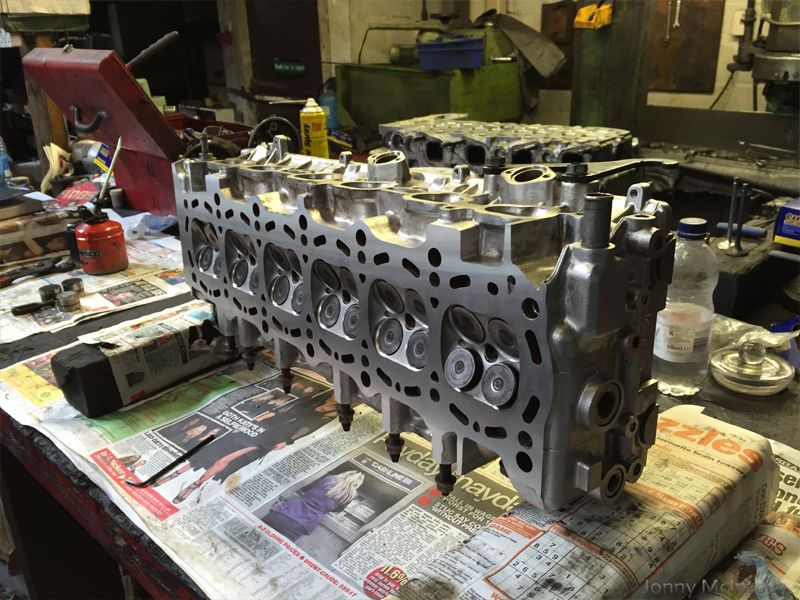
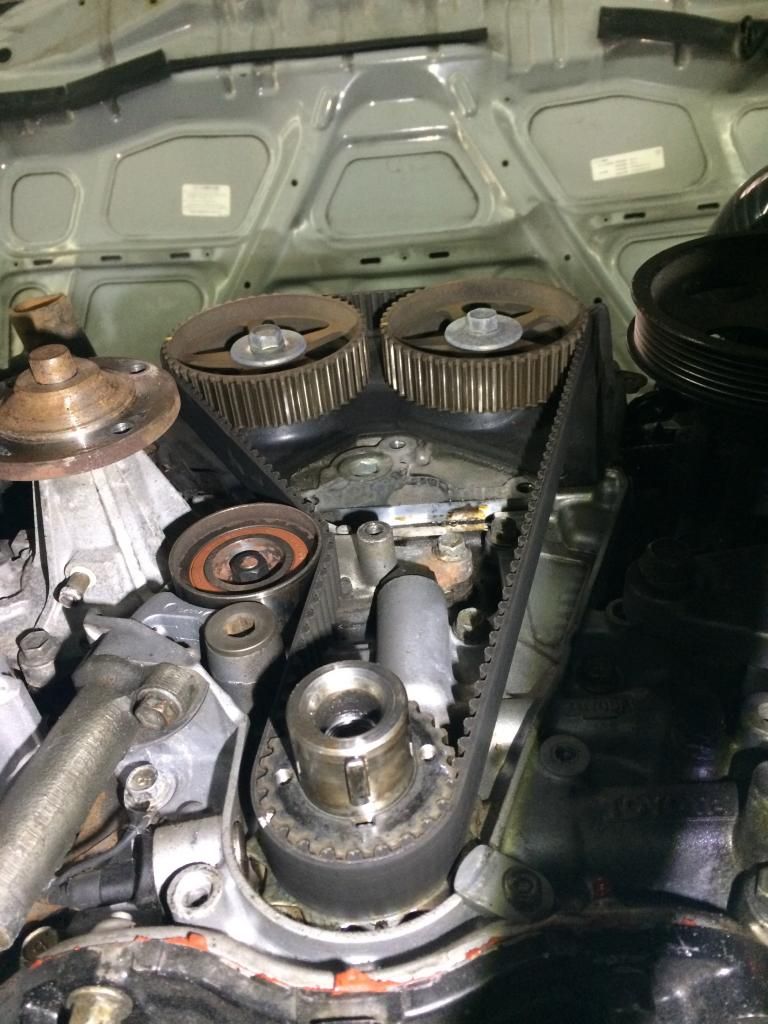
started stripping my spare 1jz head
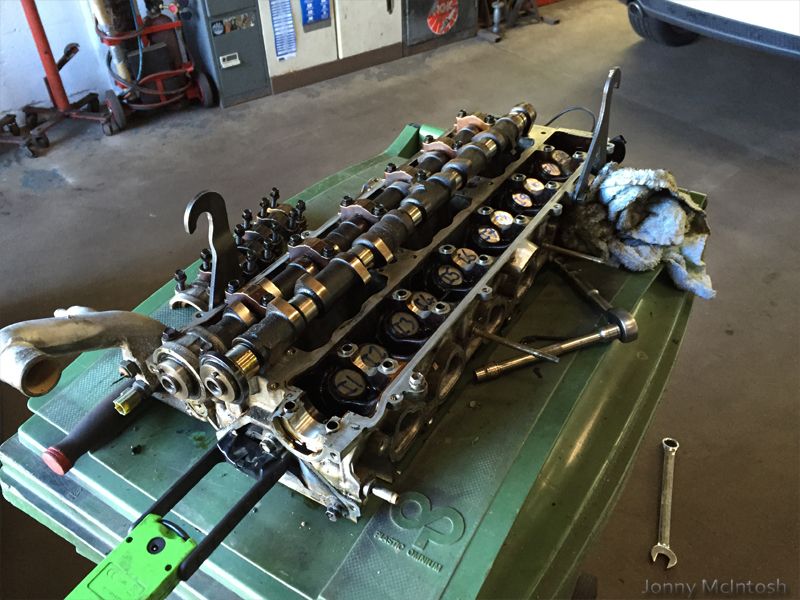
took it down to a local head shop
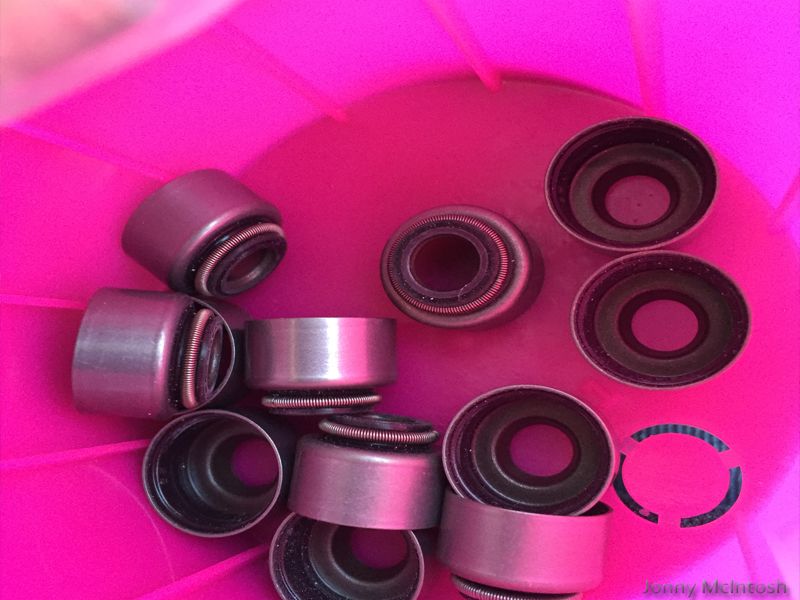
along with some new stem seals, (24 in total)
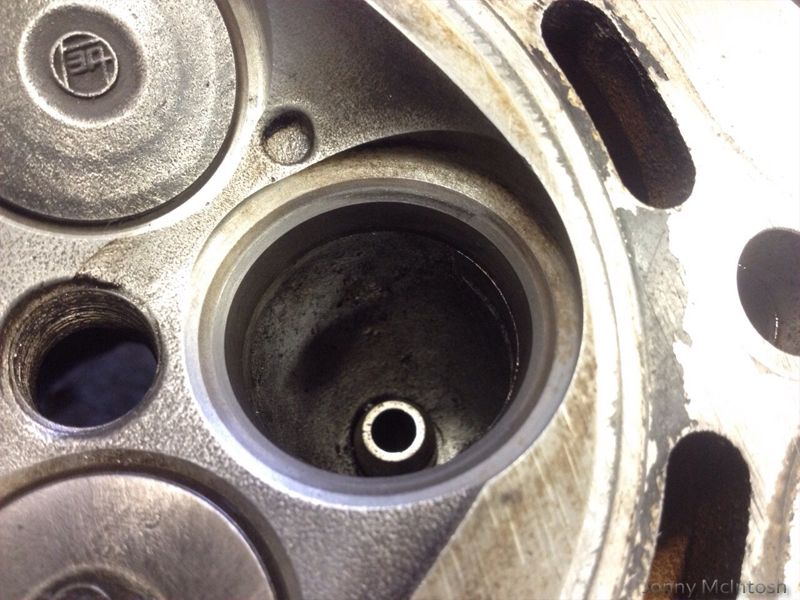
all valve guides are nice and tight, he said the only bad bit was one valve was showing sign of burning the seat, you can see it in this pic
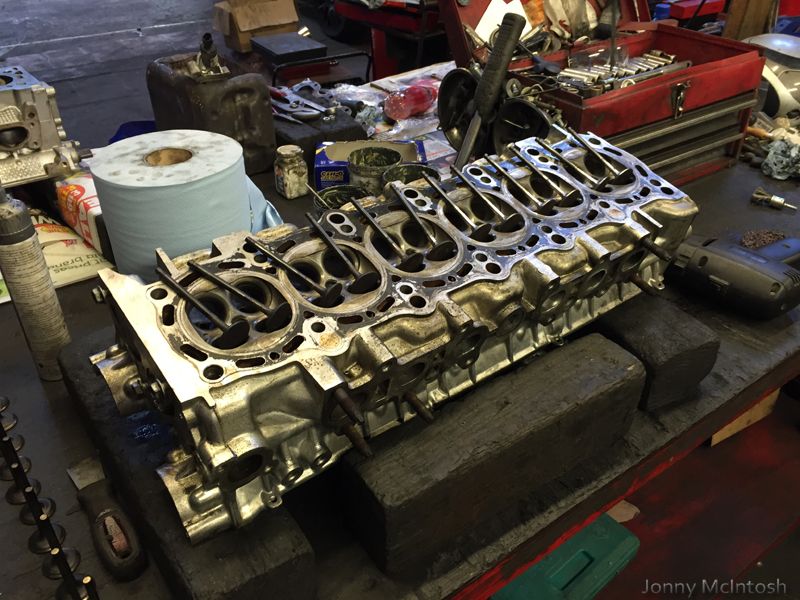
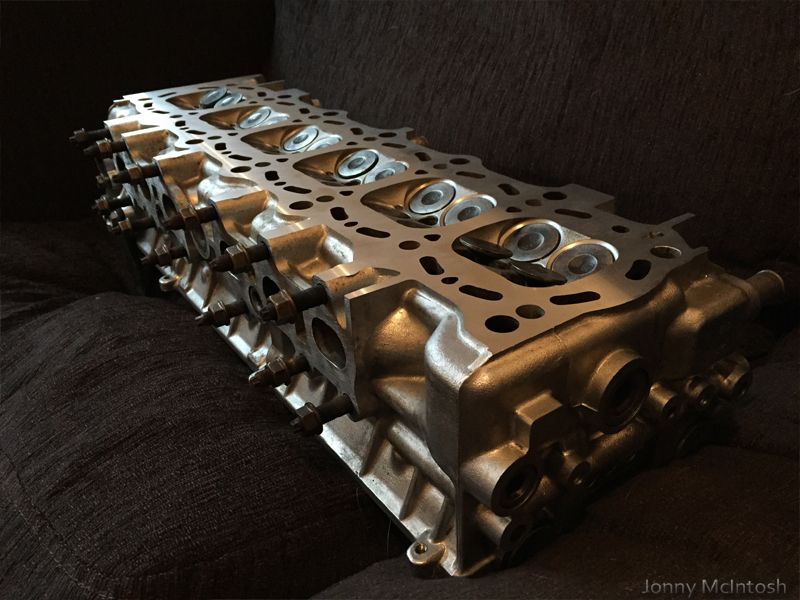
so 24 valves cleaned, polished, shimmed and reground later, and 24 new stem seals
the head had 7thou remvoed and resurfaced
P.S THERE IS NOTHING WRONG WITH MY CURRENT ENGINE! this is just a bit of a fun side project
-
also getting my bumper back
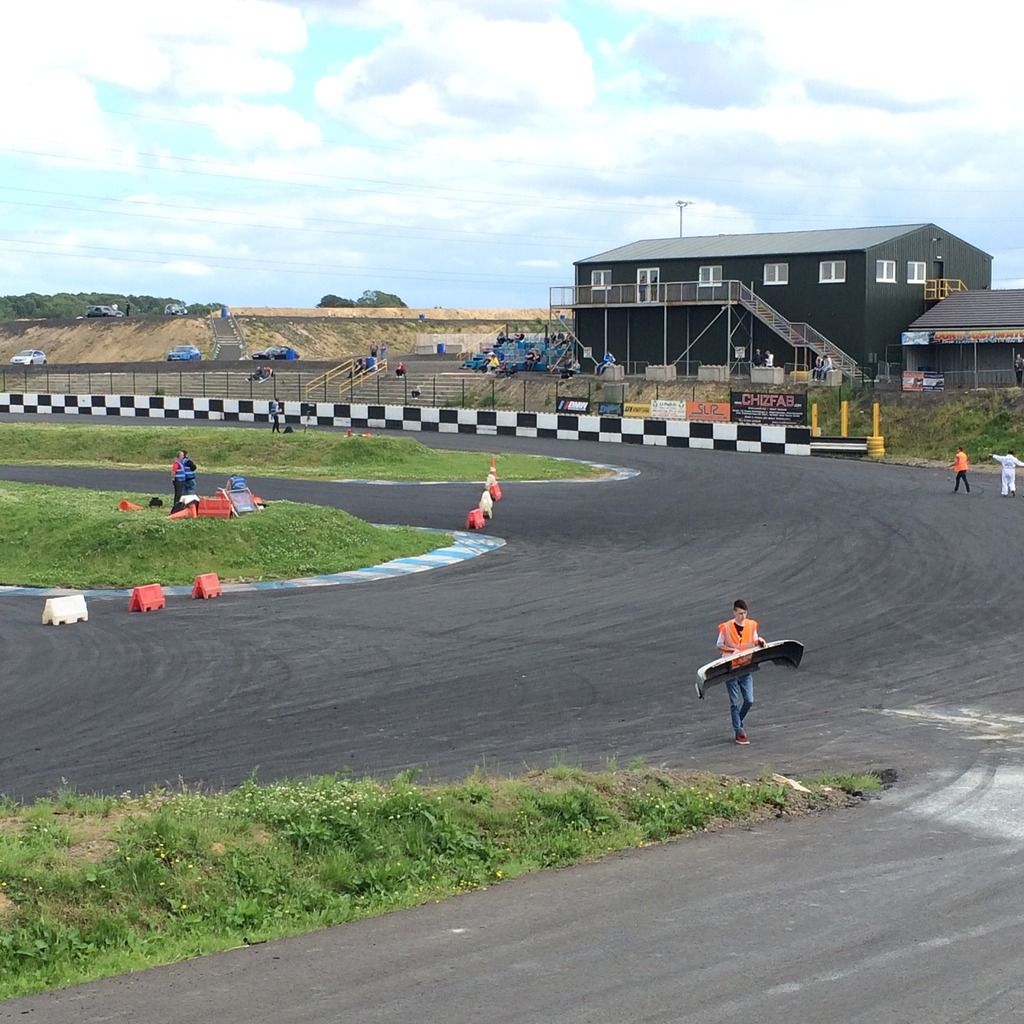
team tekno guys in the 86's were so good to watch, let alone drive with, that's me up front

- - - Updated - - -
my fav pic, so good!
gave my mate fraser a lift home on the sunday, thanks to him and jamie for taking wheels down, bad luck his wheel spacer sheered and gave up down there
since getting home, the car has sat in the garage, been busy with other stuff
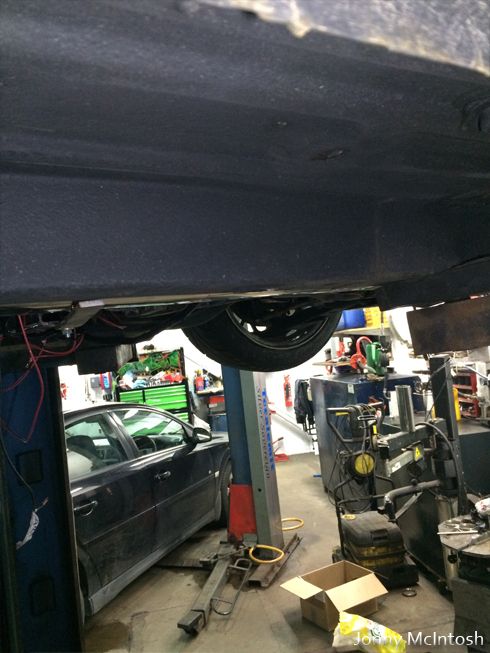
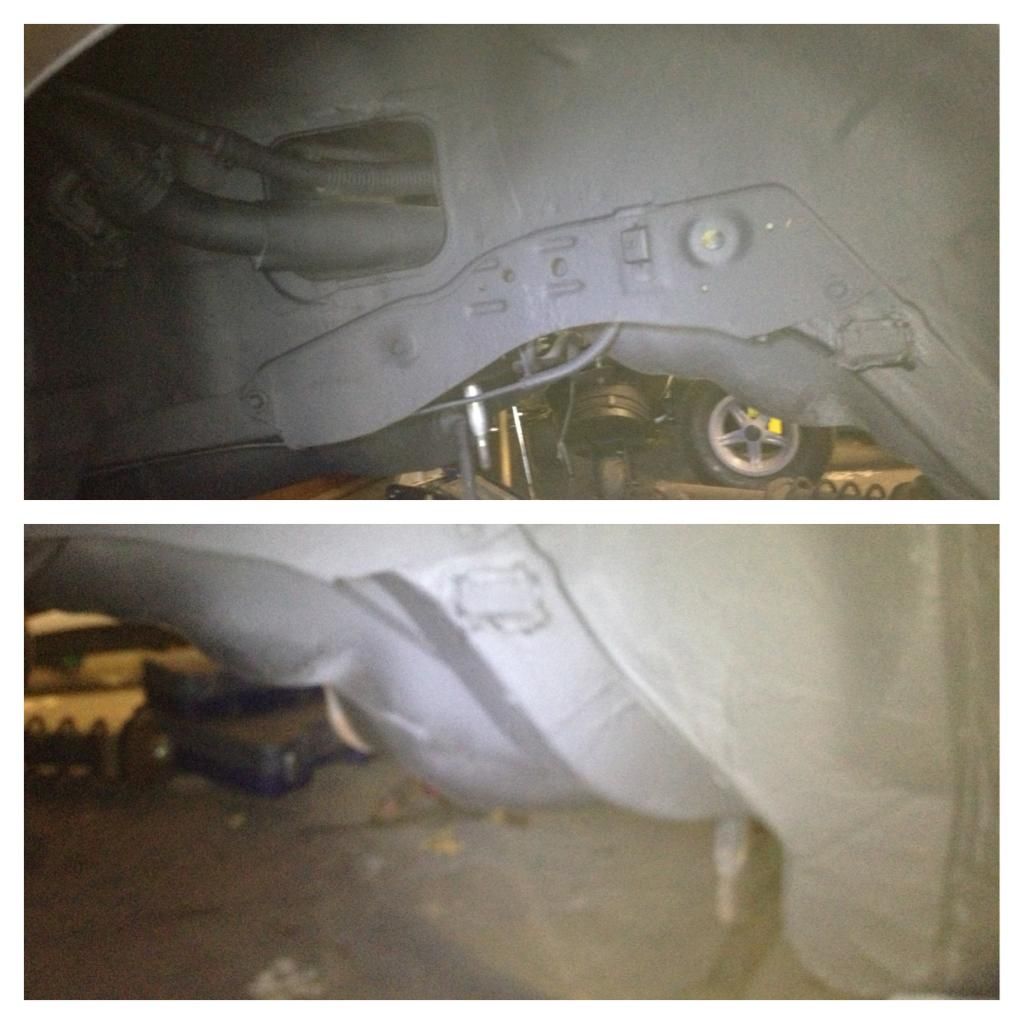
got the bottom of the rear 1/4 pulled out,
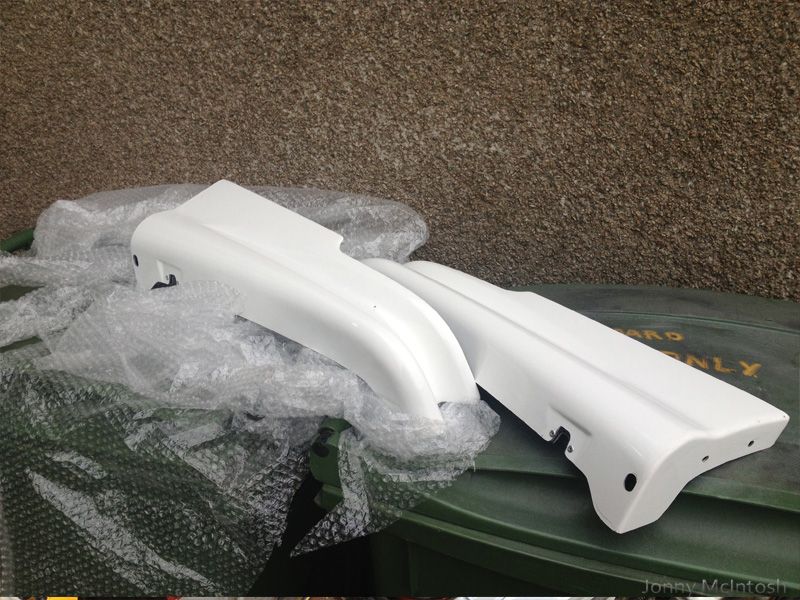
bought a new pair of spats and they are now off to get painted silver, i only needed one but couldn't buy them seperate
i'll get some of the footage i'd asked photographers to send me uploaded to youtube and on here soon
my changes for the next drift day, i want to put a set of anti roll bars on my car (never ran any), get the alignment done properly, soften the rear damping, run less tyre pressure on the back and run wider rear tyres
------------------------------------------------------------------
spats arrived
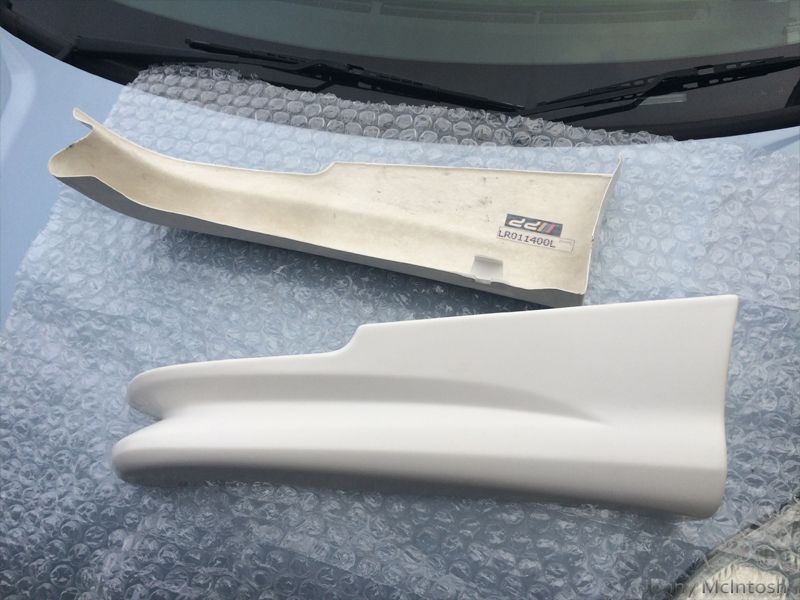
dropped them off at stevie's to get painted
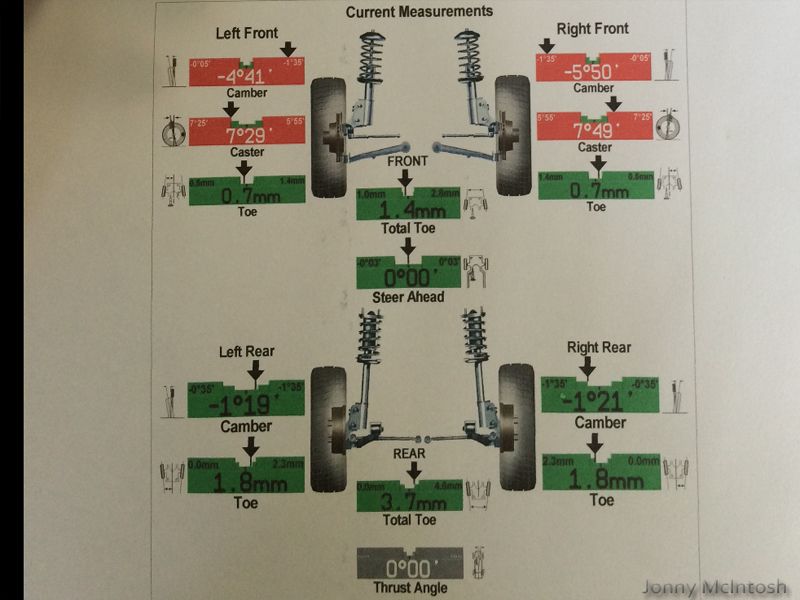
took the car for another alignment, this time at a different place
front caster wasn't too far off for having never been setup since i put the car together, annoyingly nobody could set it/had a machine that could that i knew of until now
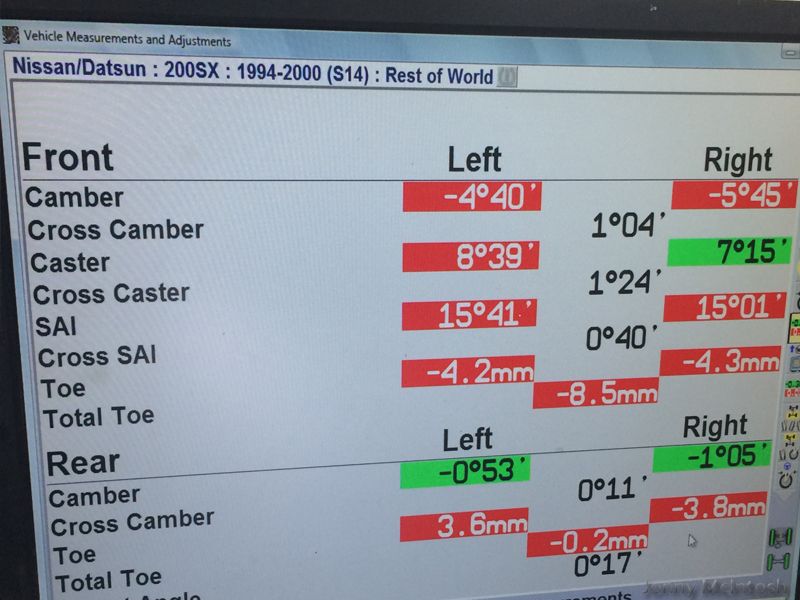
all better! just got too try level off my front camber as one side has more, i think it's because recently i had the front hub bolts slack and maybe didn't pull the hub out when tightening them again
-
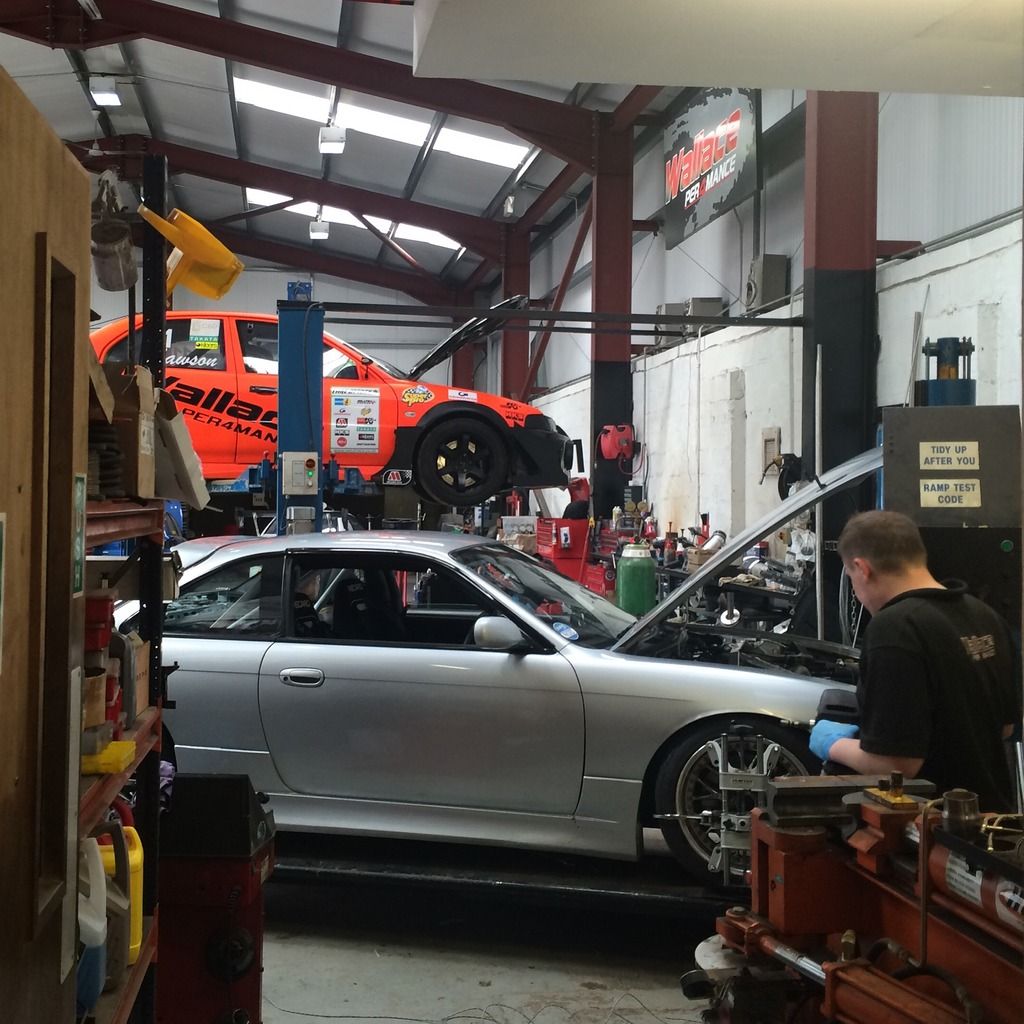
had the car into wallace performance for an alignment check, they still couldn't get the castor set as the machine won't pick it up on my car
needing to get it checked somehow soon as it's never been set right!

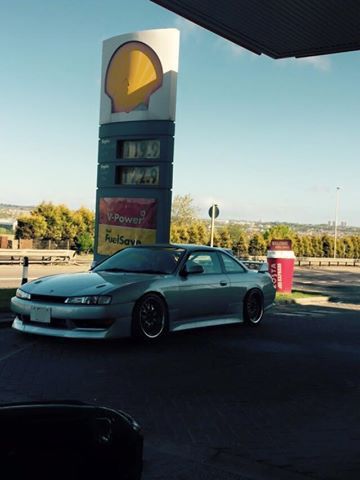
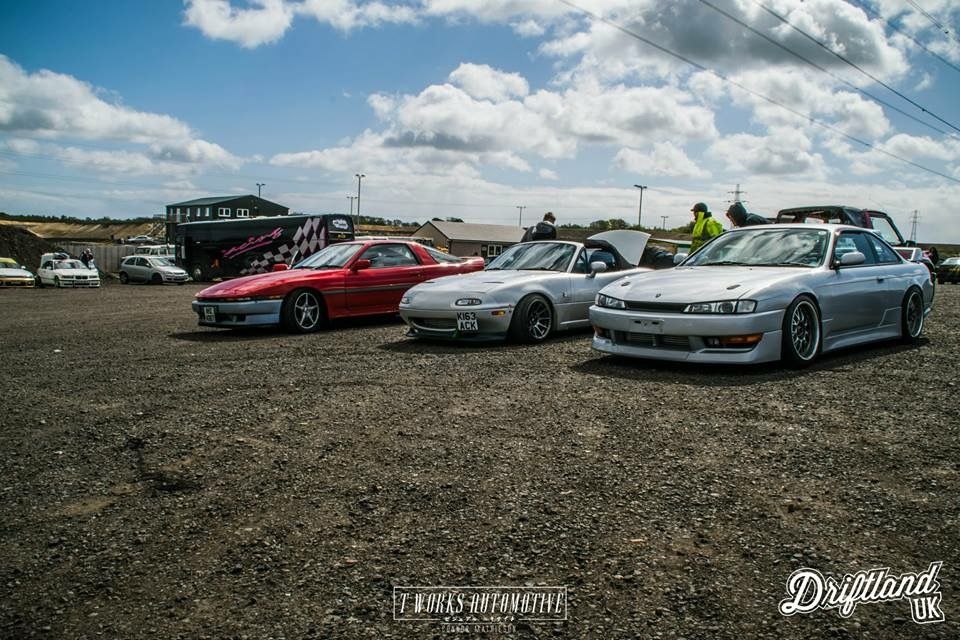
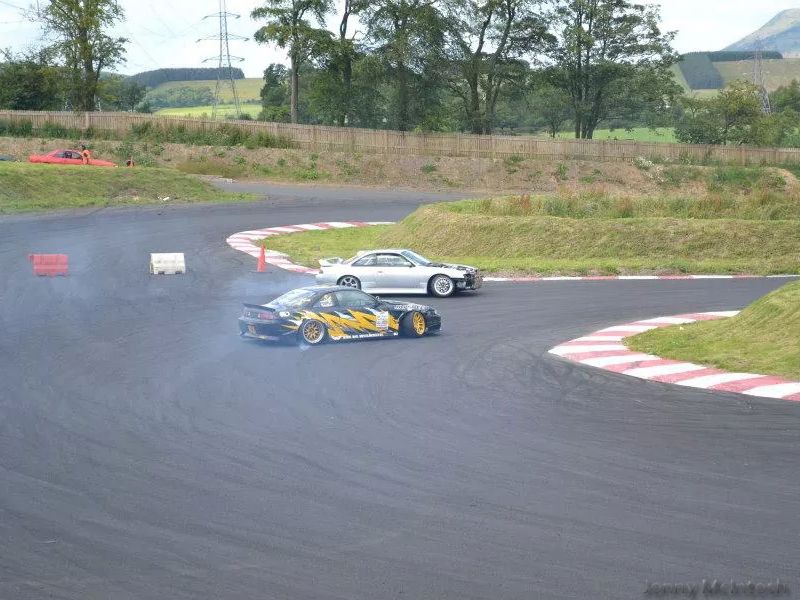
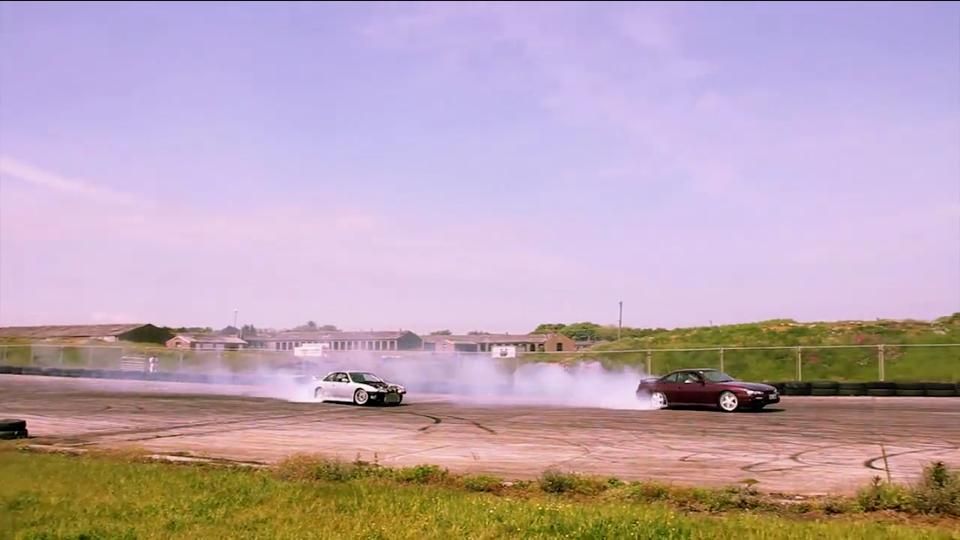
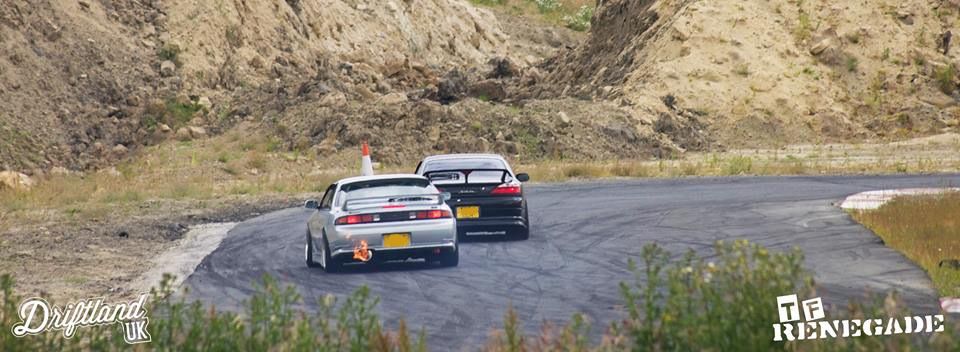
then loaded the car up and made the trip to driftland for the may weekender
only done the saturday and went home as i ran out of tyres/had stuff to do on the sunday
arrived there after a long drive with the garage hobo lot, unfortunately paul's mk3 supra done the bottom end in on the way down so his weekend was cut short
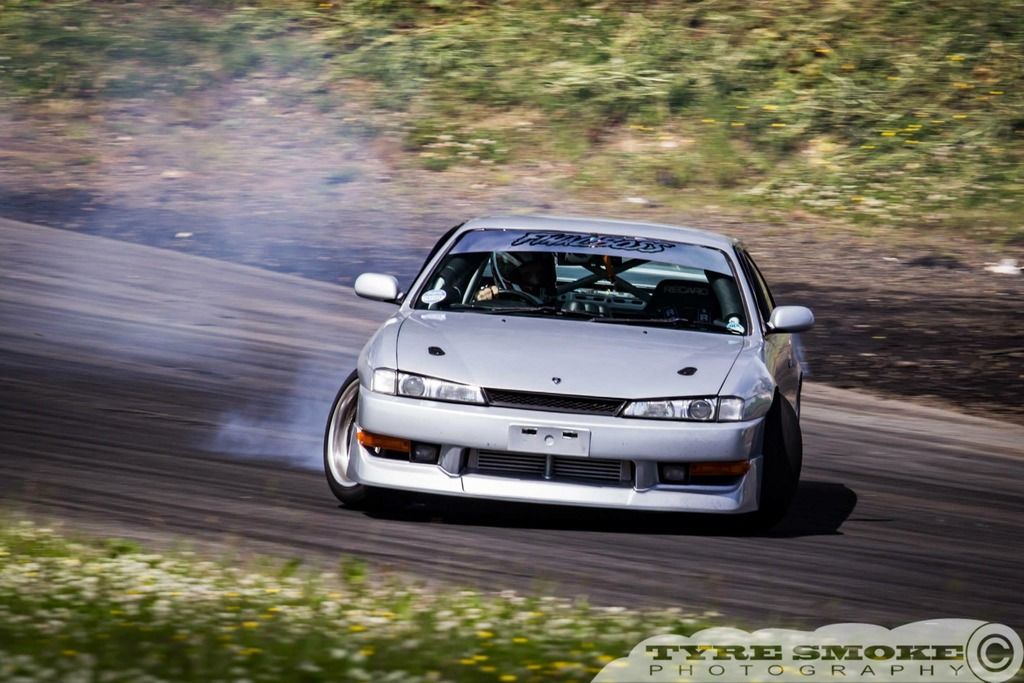
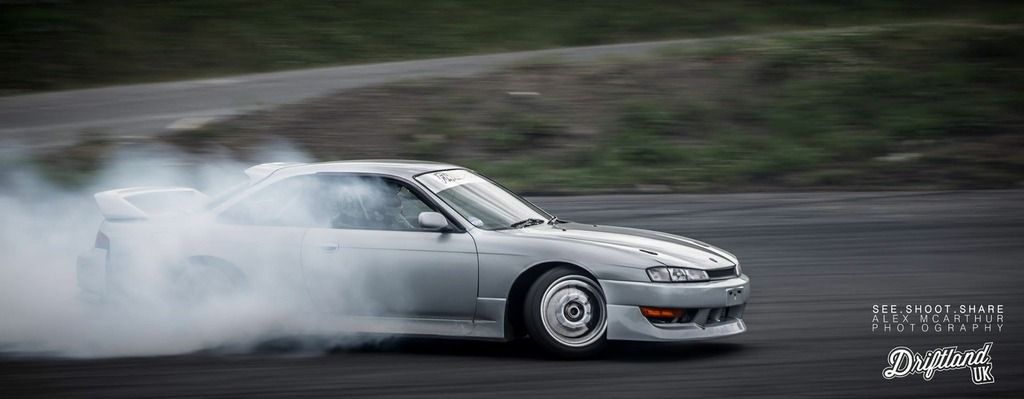
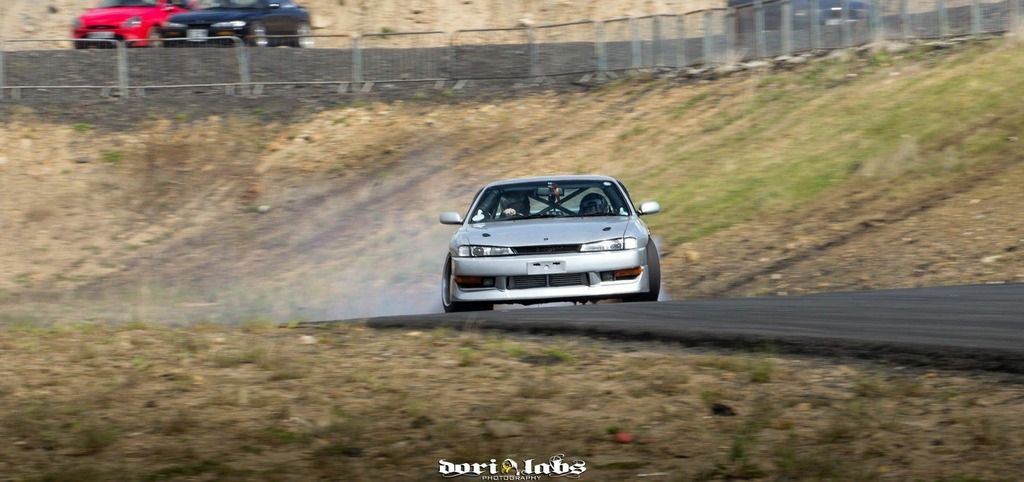
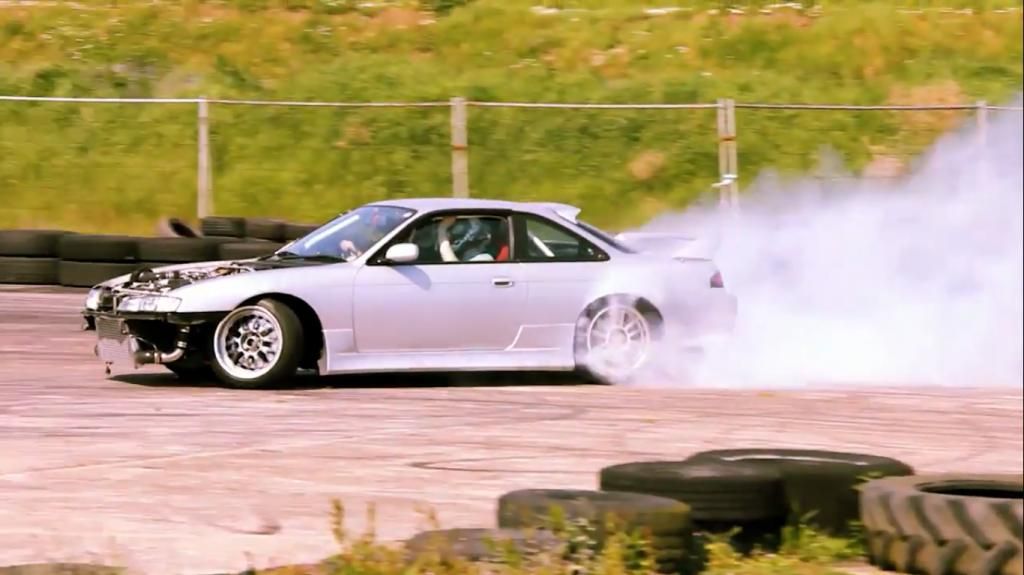
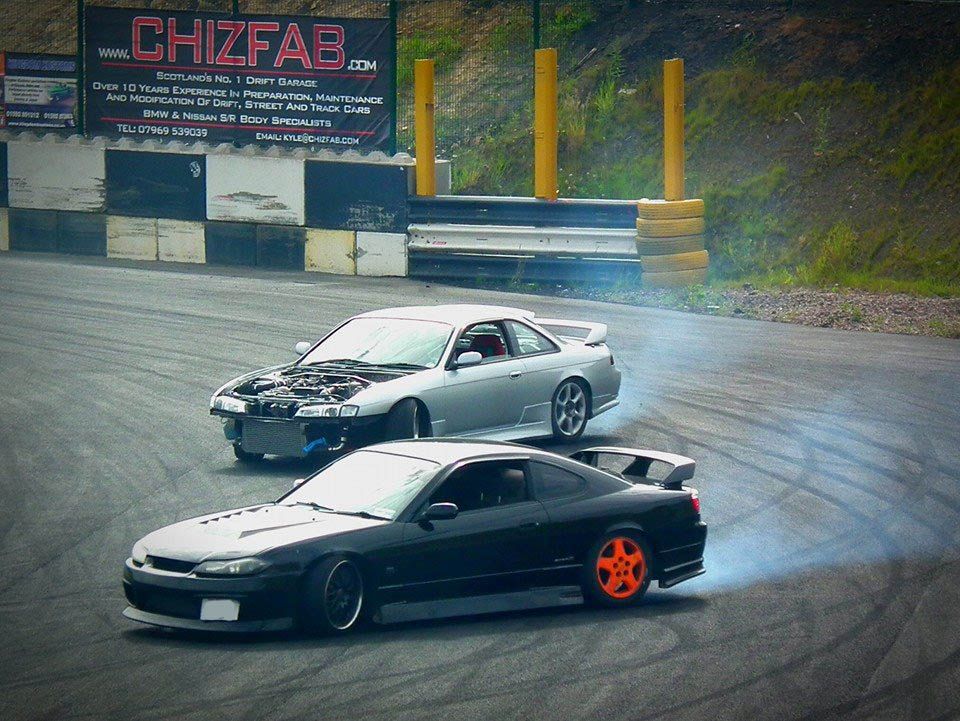
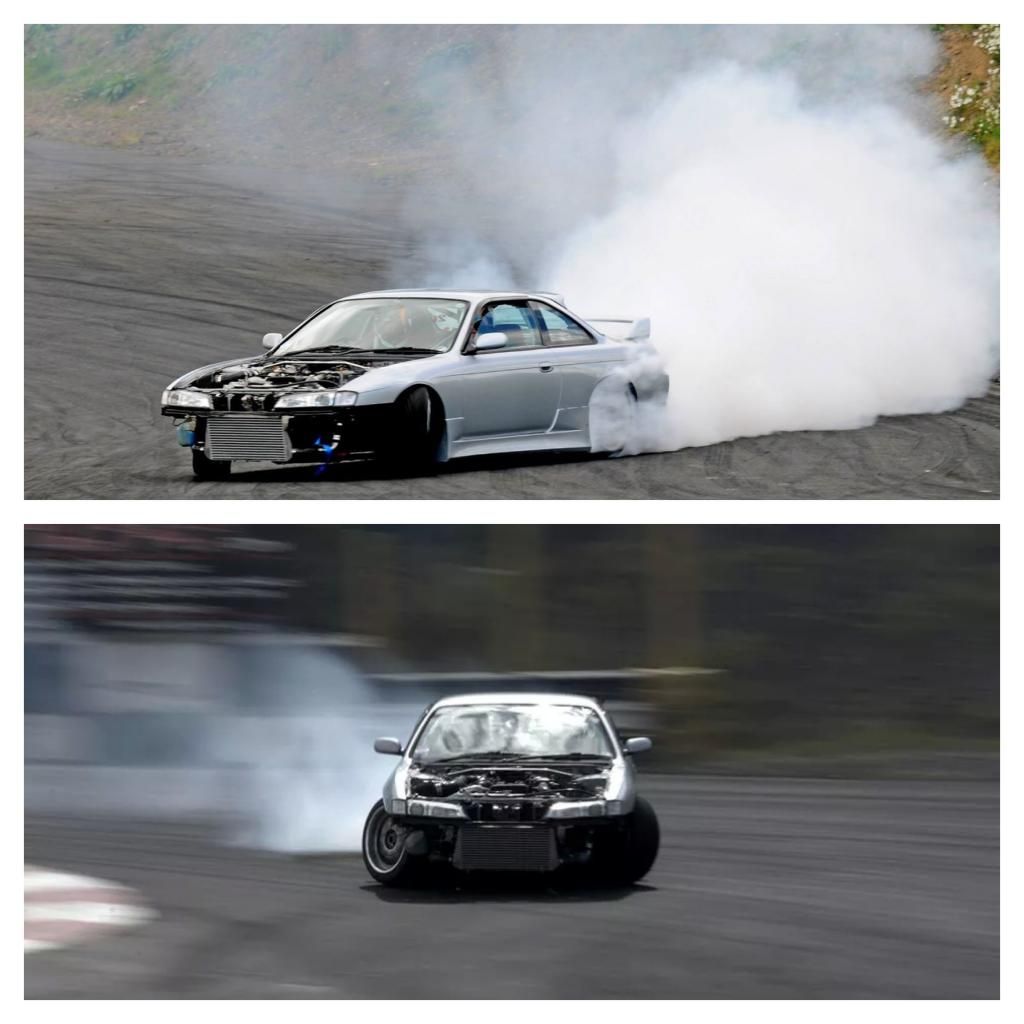
got my first few laps in....was VERY nervous and shi**ing myself haha, first time drifitng in 10 months (ignore the temp gauges, camera caught them funny)
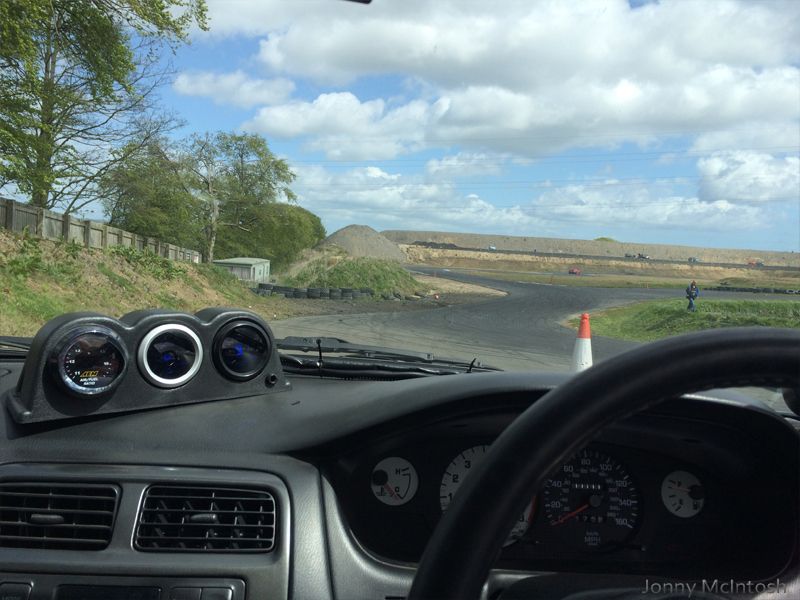
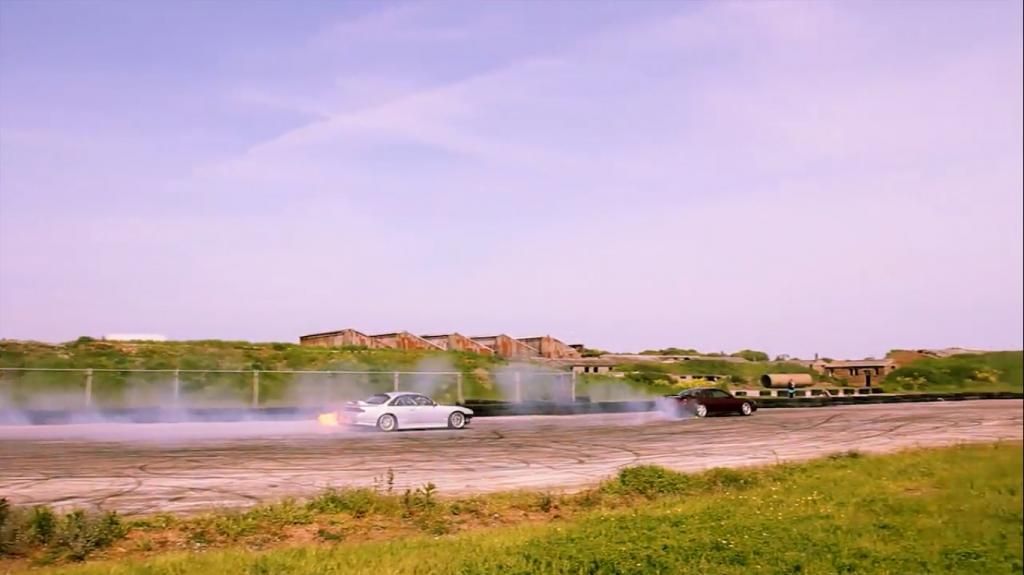
ran the full outside anti clockwise so loads of speed along the wall then a big throw into the corner
thanks to the photographers who took pics of me skidding, hit them up on facebook and give them a like!
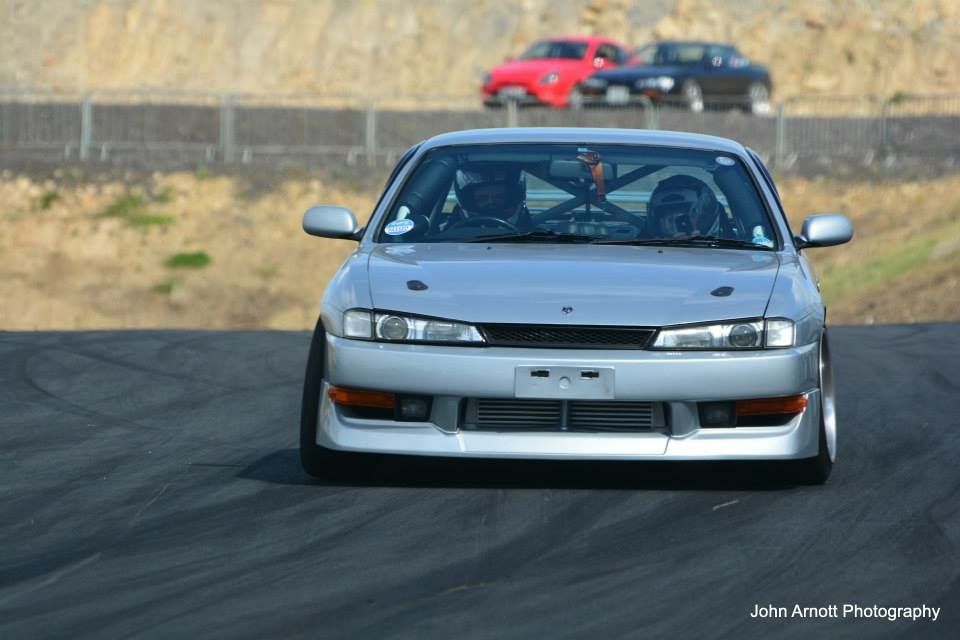
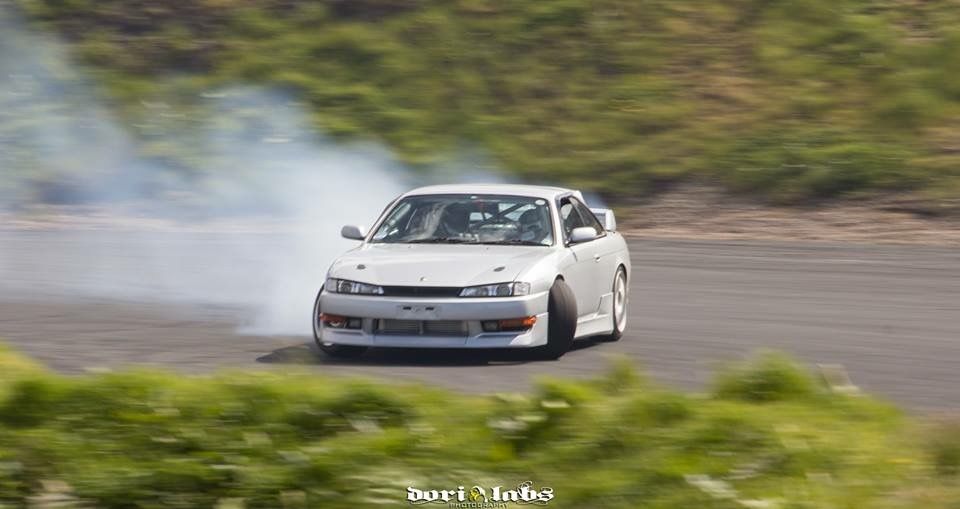


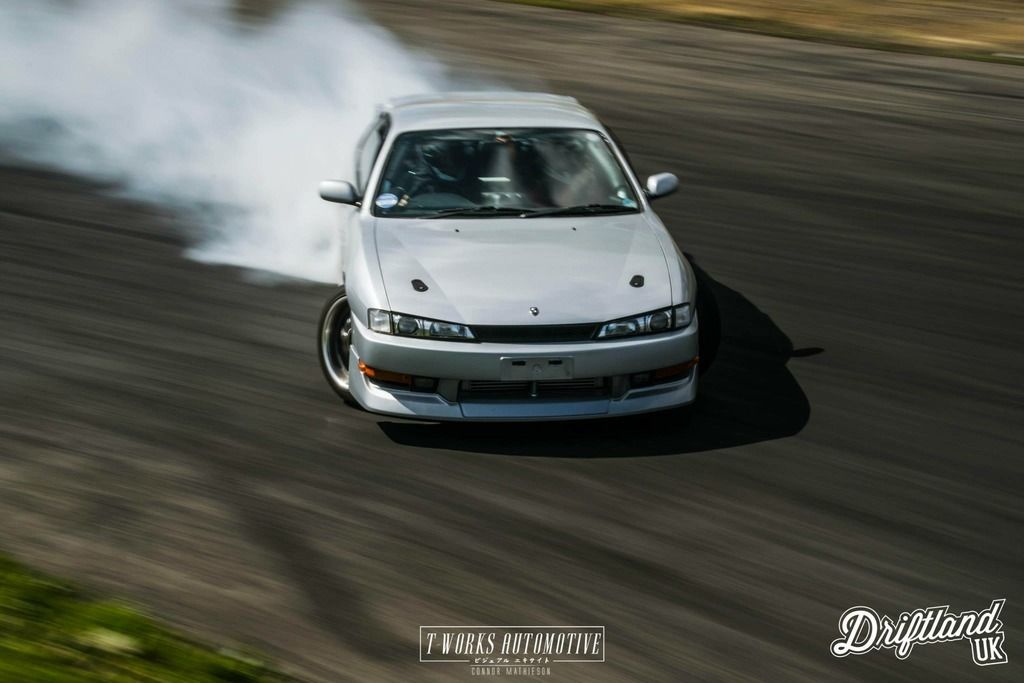
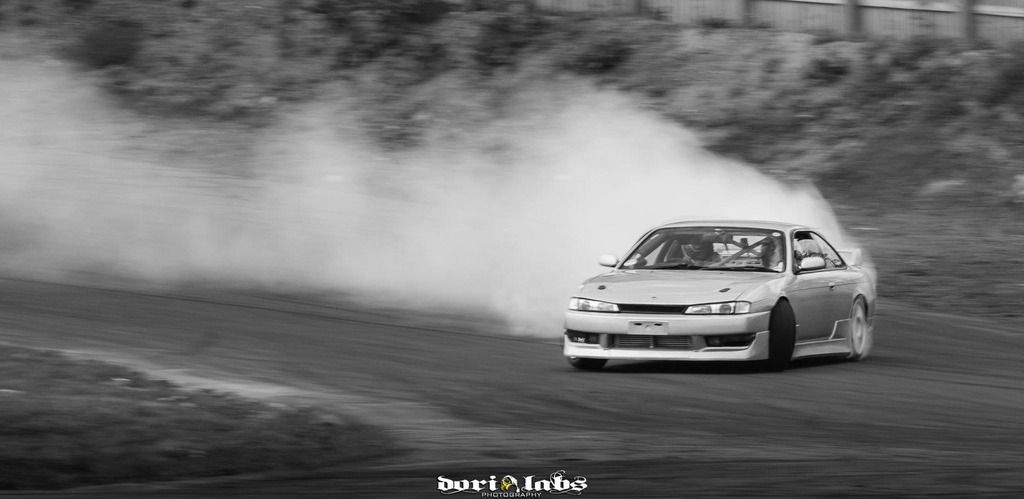
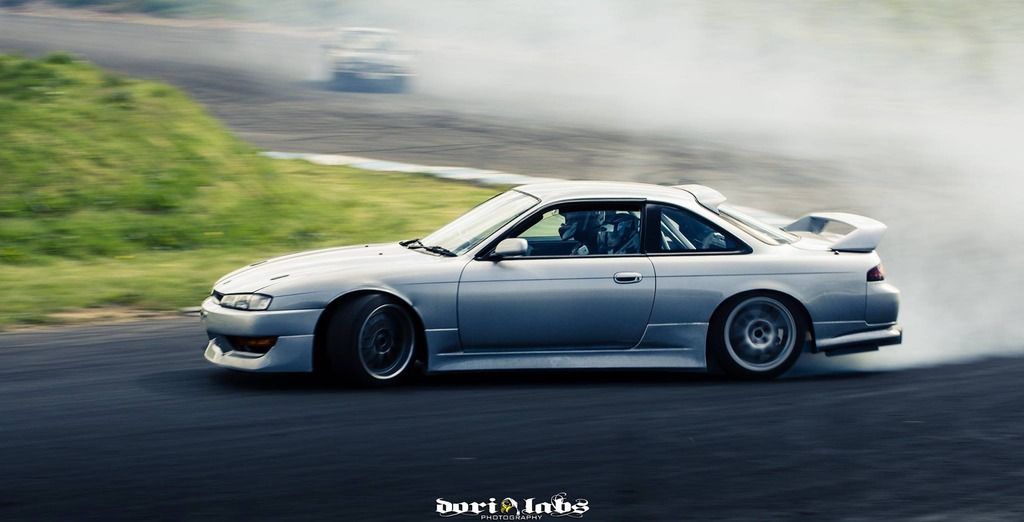
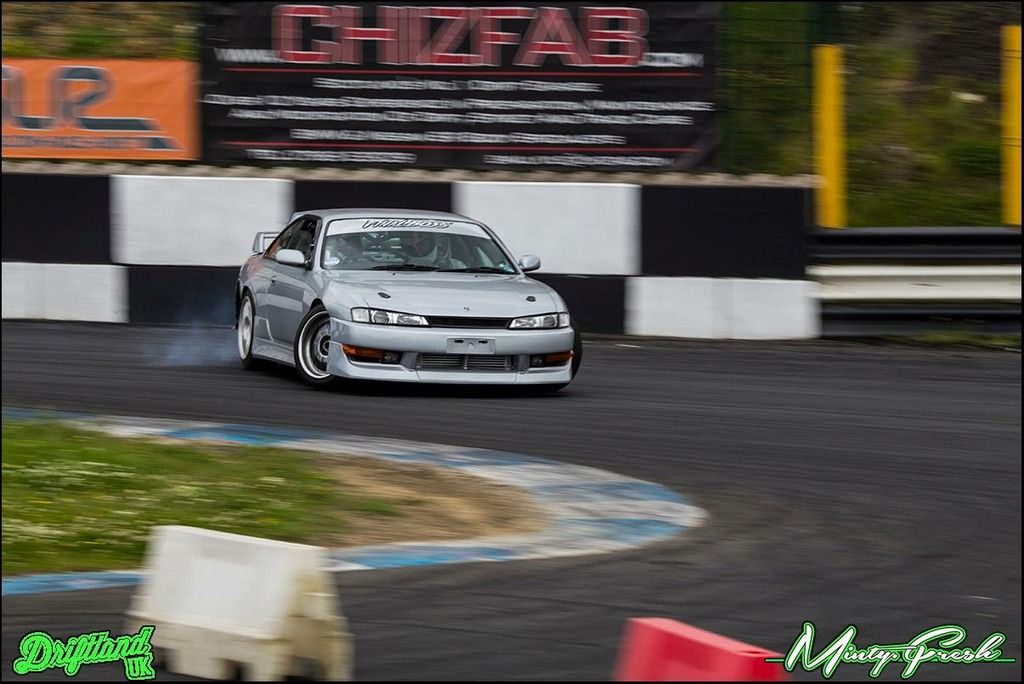
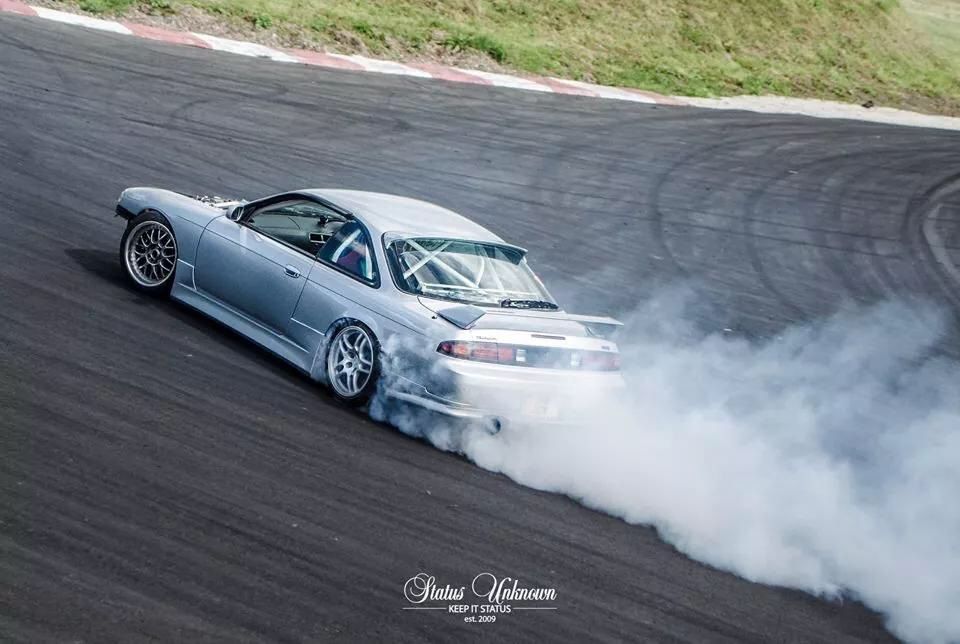
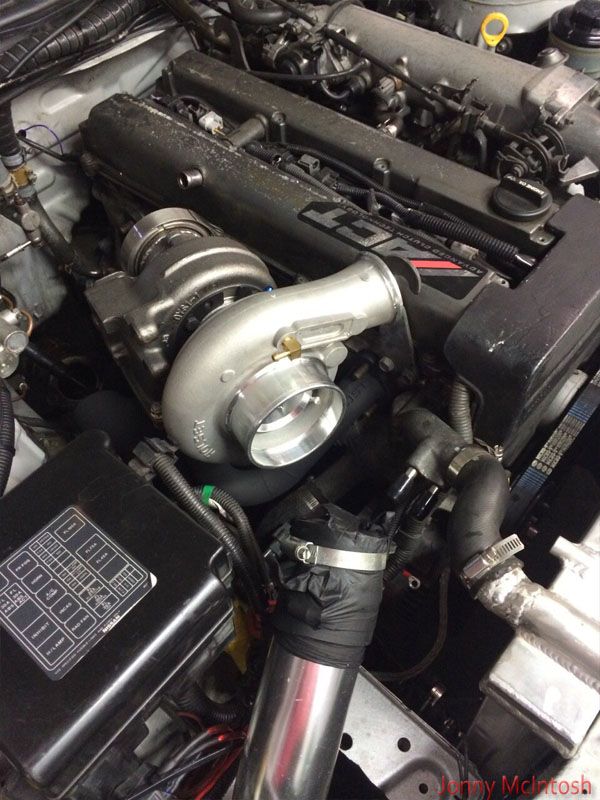
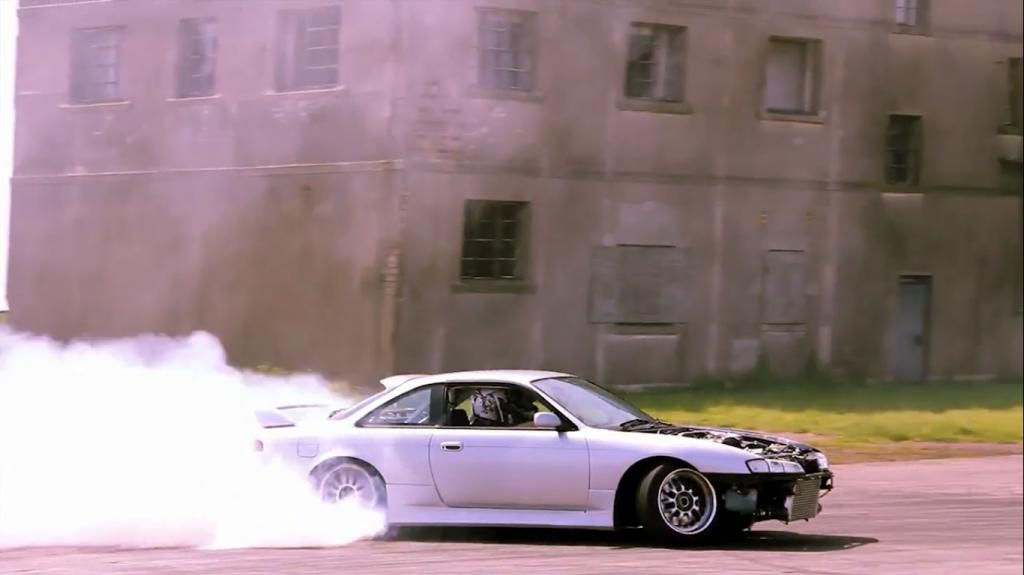
new turbo setup: awesome! i have had to re-learn how to drive the car on the track, it requires a solid commitment to keep it in boost while drifting since it's a big laggy as it'll immediately grip throwing you wherever it wants if you don't keep your foot planted
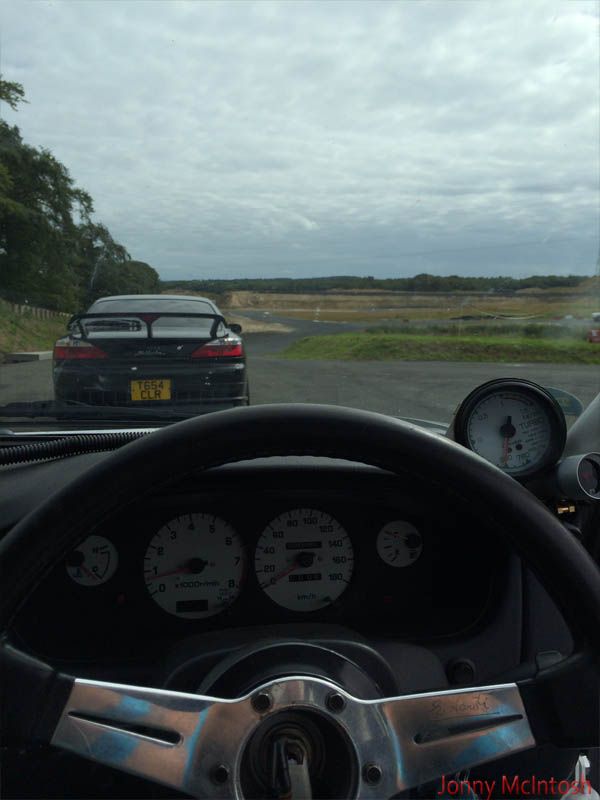
i'd bought a gopro hero 3 white edition, here's a small clip from one of my track sessions, took a young lad out from the pits who loved it! was his first time in a drift car
i still refuse to skid/manji along the wall after last year's spin haha. MORE SEAT TIME NEEDED!! i was slowly building my confidence by the end of the day,
I CAN'T WAIT TO GET MORE SEAT TIME AND PRACTICE IN!!
[url=https://www.youtube.com/watch?v=dtX3MBBpyfM
https://www.youtube....3MBBpyfM[/media[/url]] -
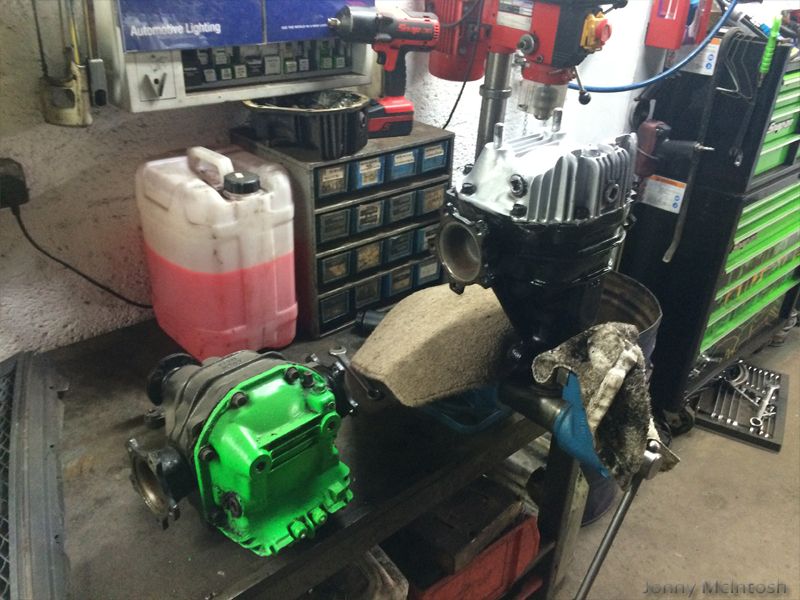
changed to another 4.3 diff
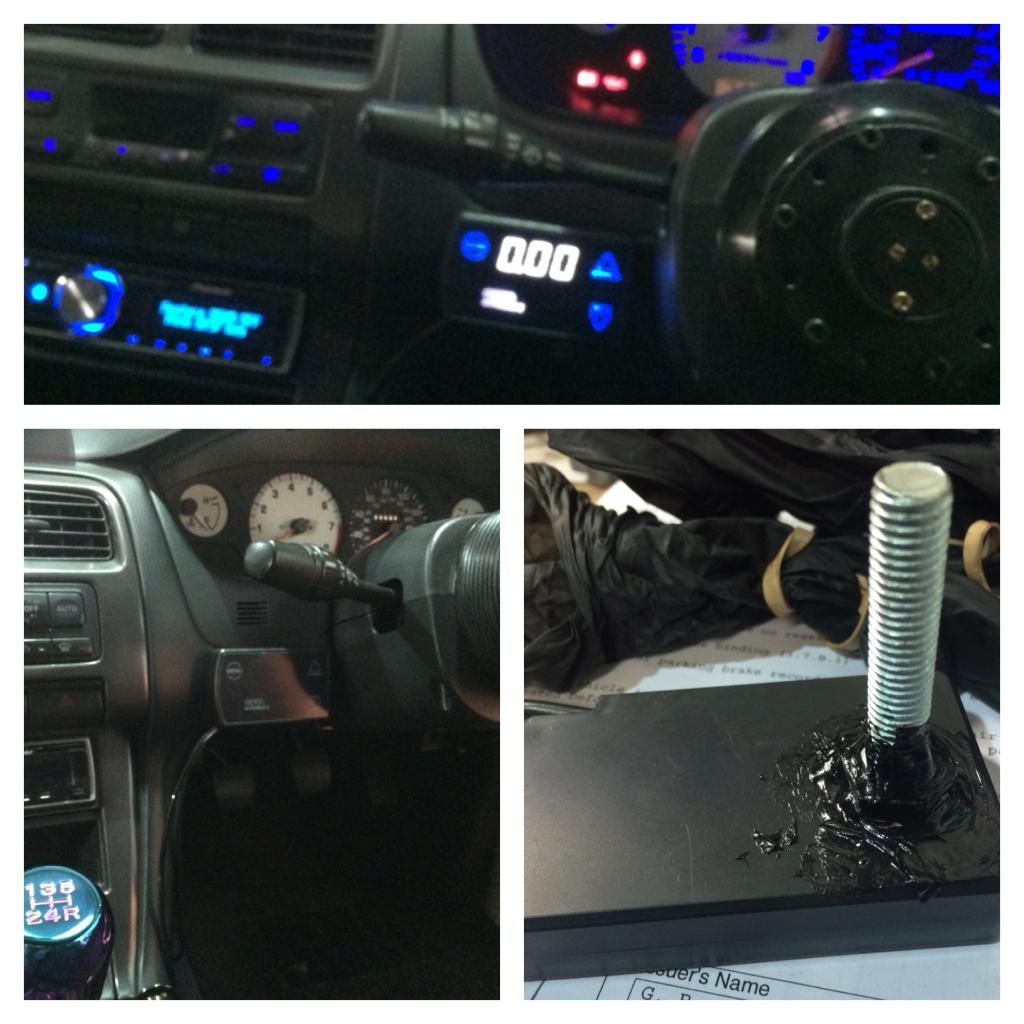
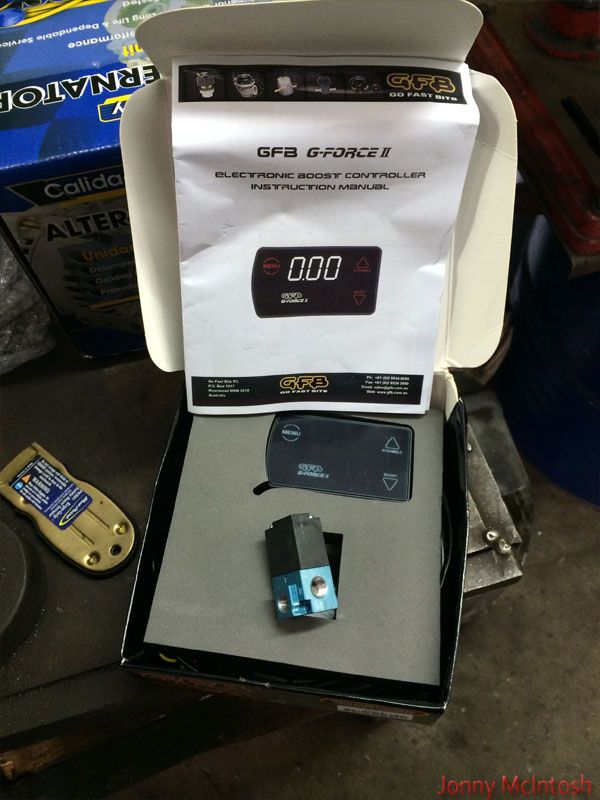
got sick of the gfb controller laying ontop of my dash just flying arond
tiger sealed a bolt onto the back as it doesn't come with a holder, you only get a piece of sticky back tape for mounting it which didn't work well on my dash
used an existing hole for the old fan switch and put it to good use
removed the 70mm greddy gauge and sold it to a mate,
replaced it with a smaller 60mm greddy gauge and a random ebay holder which broke as soon as i tried to push the gauge through
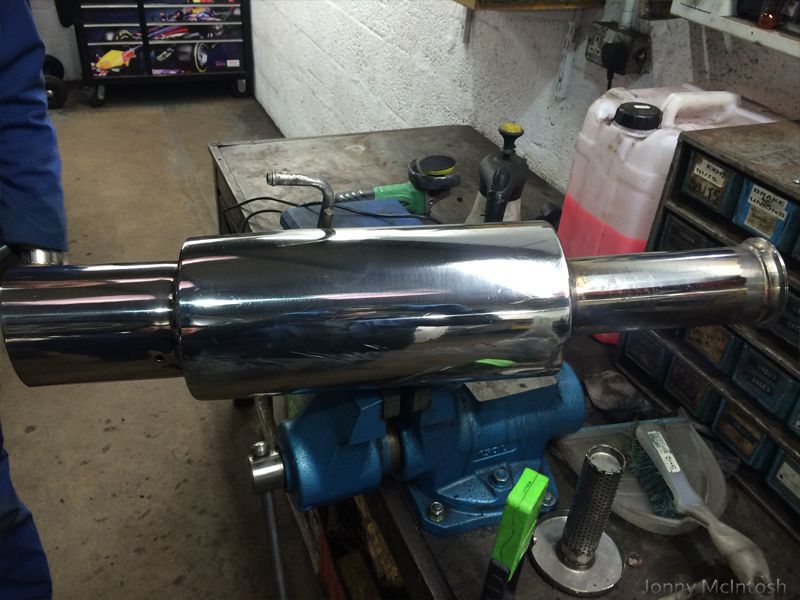
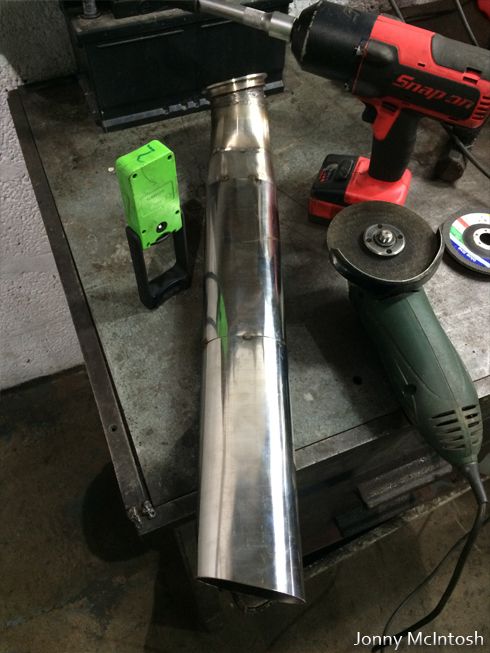
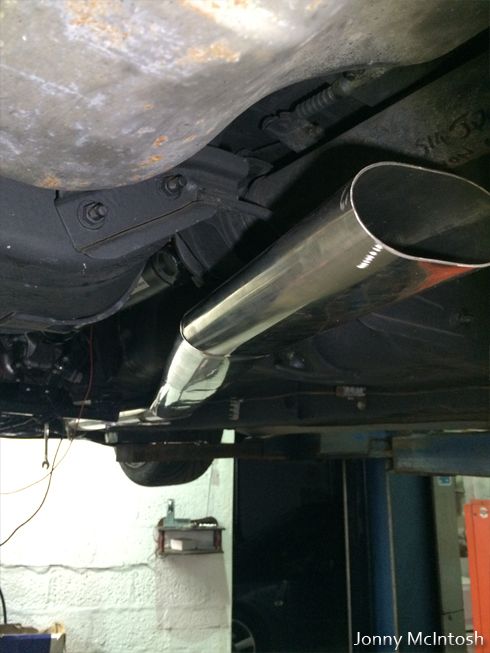
had some spare time at work waiting between jobs, took the backbox off and had some proper buffing pads on the grinder, finally got a good shine back
bought a new wide angle lens attachment on ebay for a tenner so tried it out
chopped up a silencer and made it fit my backbox

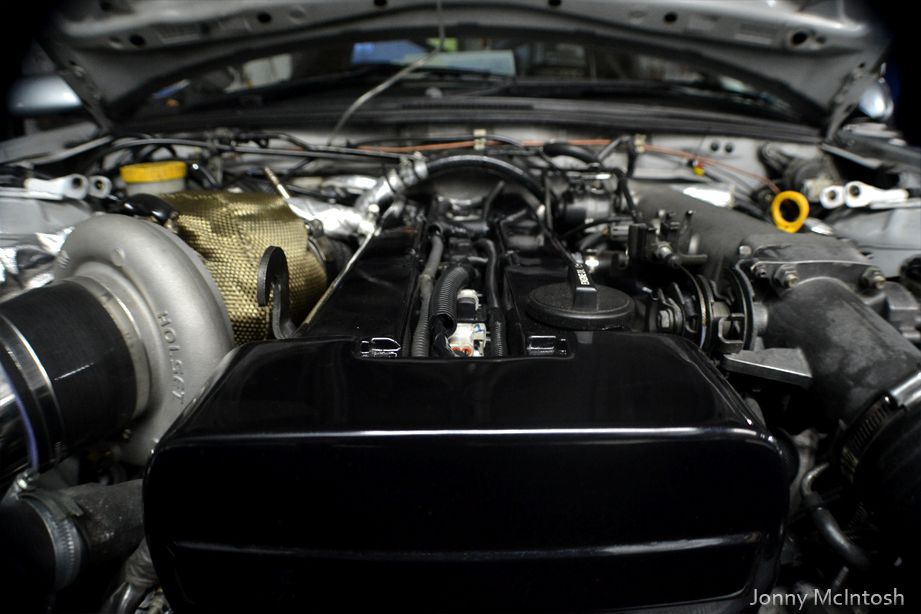
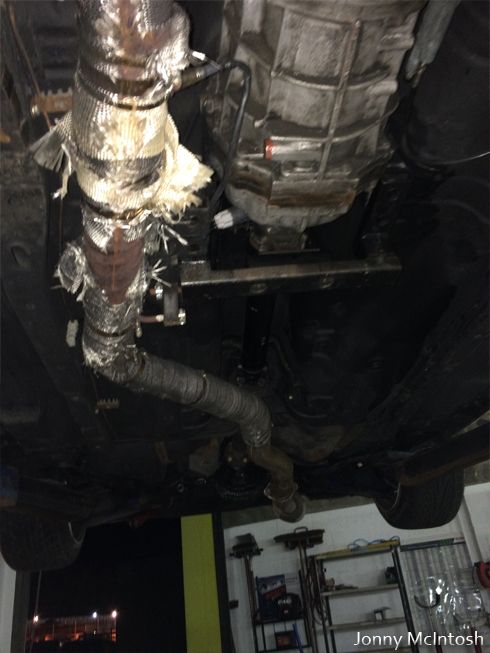
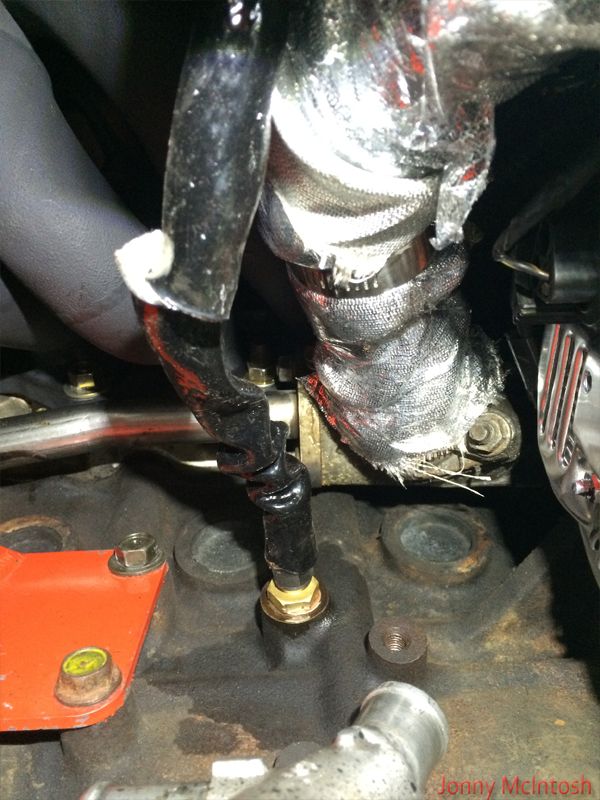
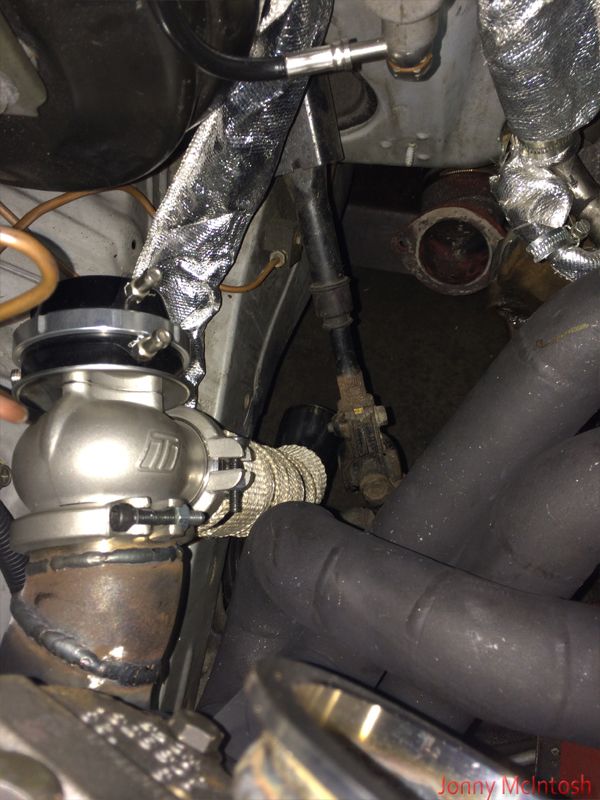
car is nearly ready to come home, all that's left is a fan shroud and i've got some 1200 degree capable silicone on the way for sealing the turbo vband better
also got a black turbo blanket on the way so i'll be selling that kevlar one i have on just now
new turbo jacket turned up
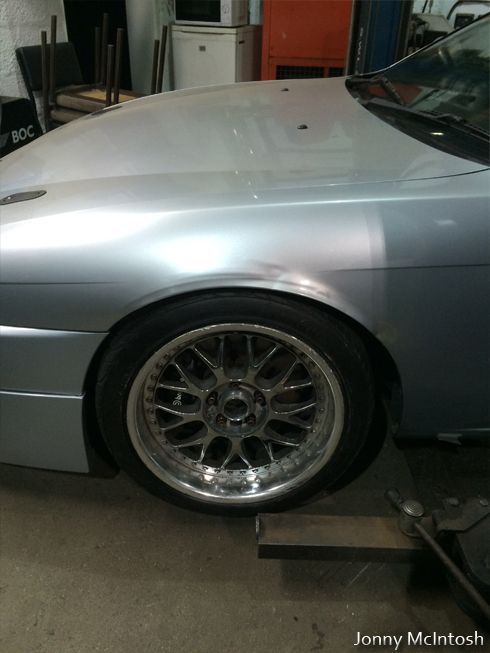
thanks to my mate alex, we rolled the front arches as the tyres were constantly catching, wasn't too worried how they would turn out as i want vented wings anyway, plus one wing is slightly bent from my headlight hitting the wall at finalboss last year
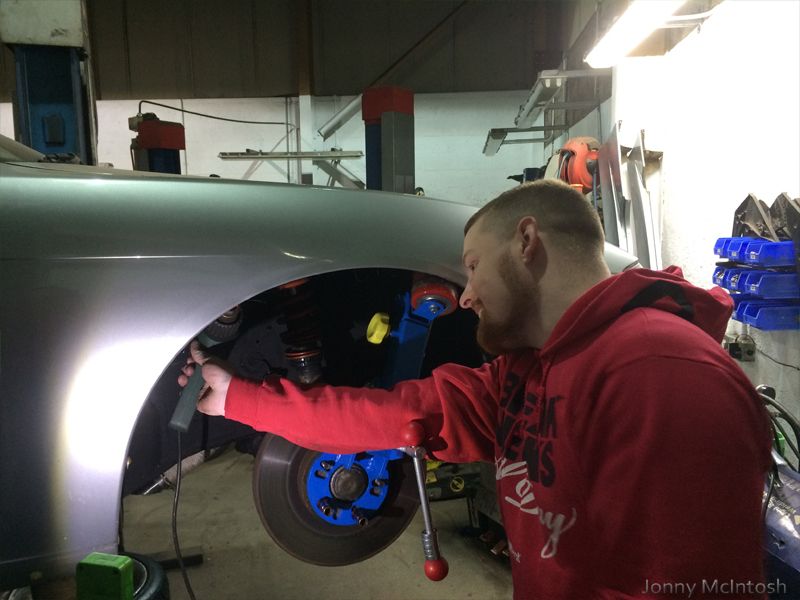
one side came out really good
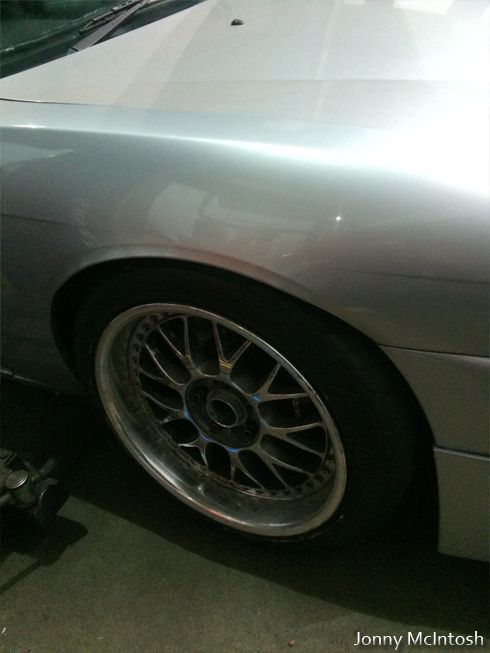
the passenger side, not so well, the arch liner retainer tab caught the inside of the arch and caused a crease so we gave up while we were ahead haha
it'll be sorted one day however i'm really keen on getting some vented +20mm front wings from srb power and a dmax bonnet so i'll see what 2015 brings
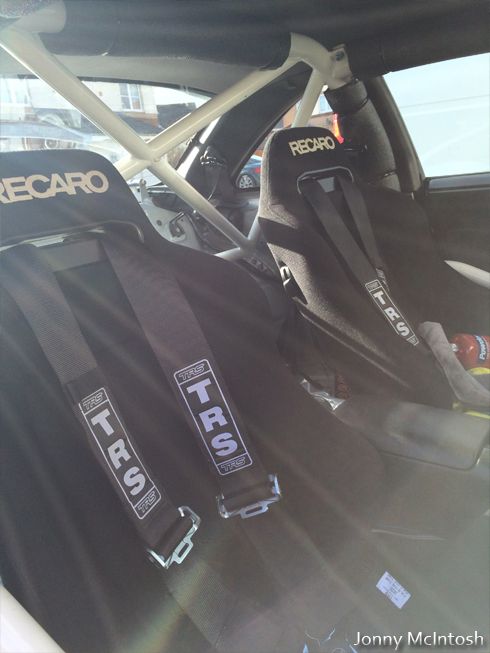
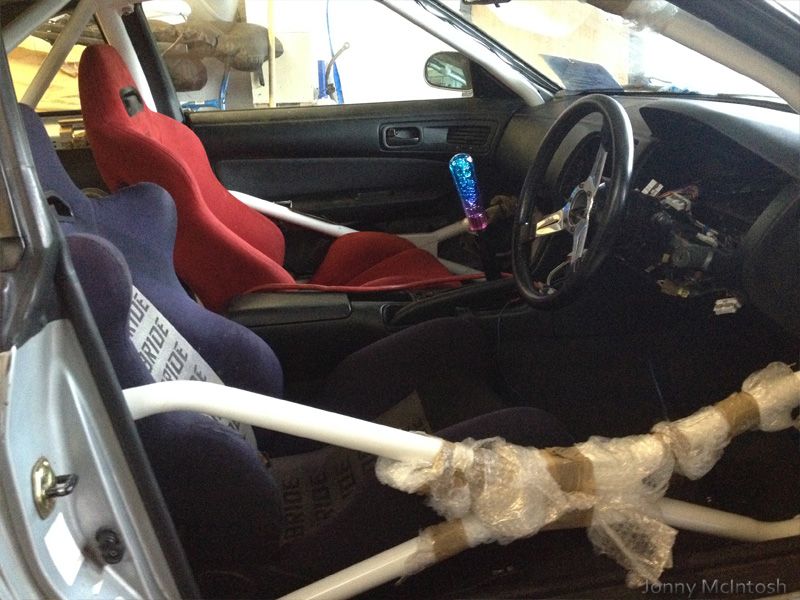
tonight i properly done the driver side harness, it's wrapped around the cage and properly adjusted for me now
with all that done i took her out for a run since the roads had sort of dried up
-
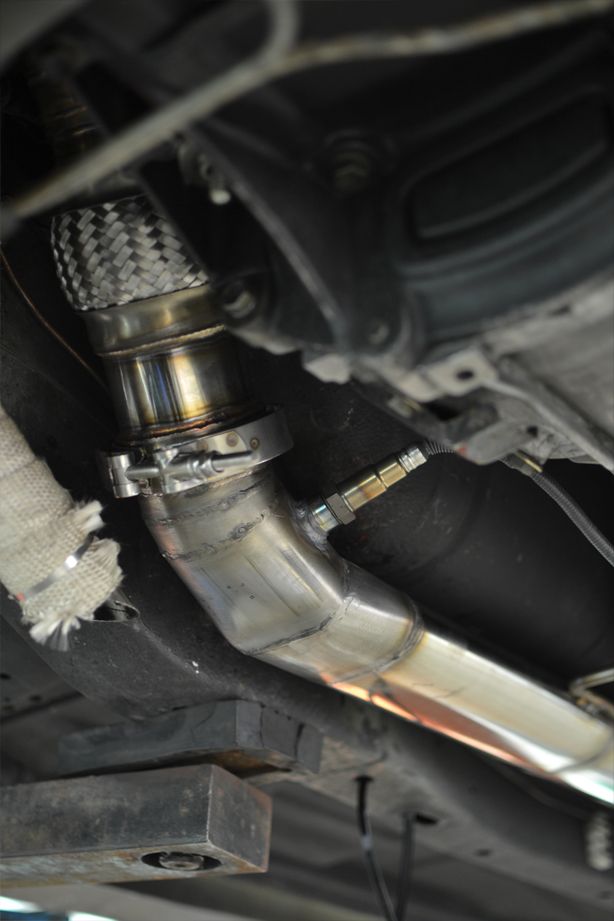
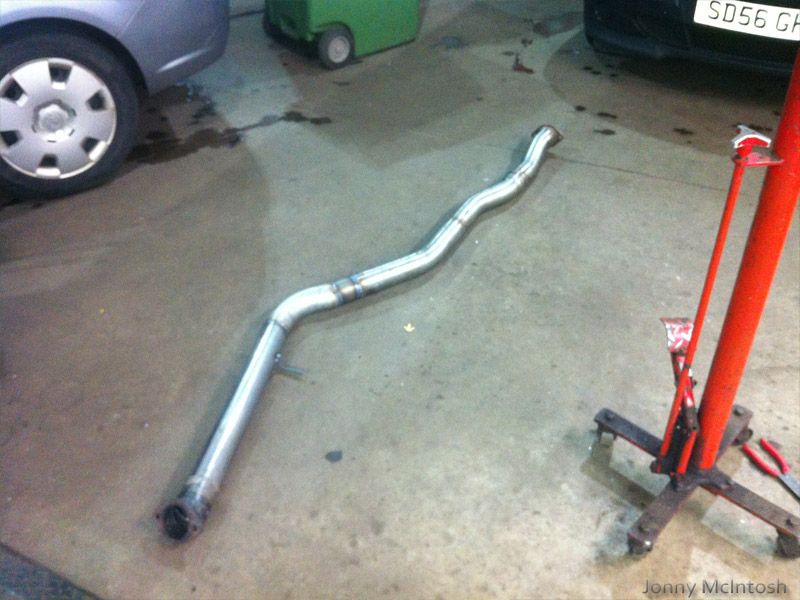
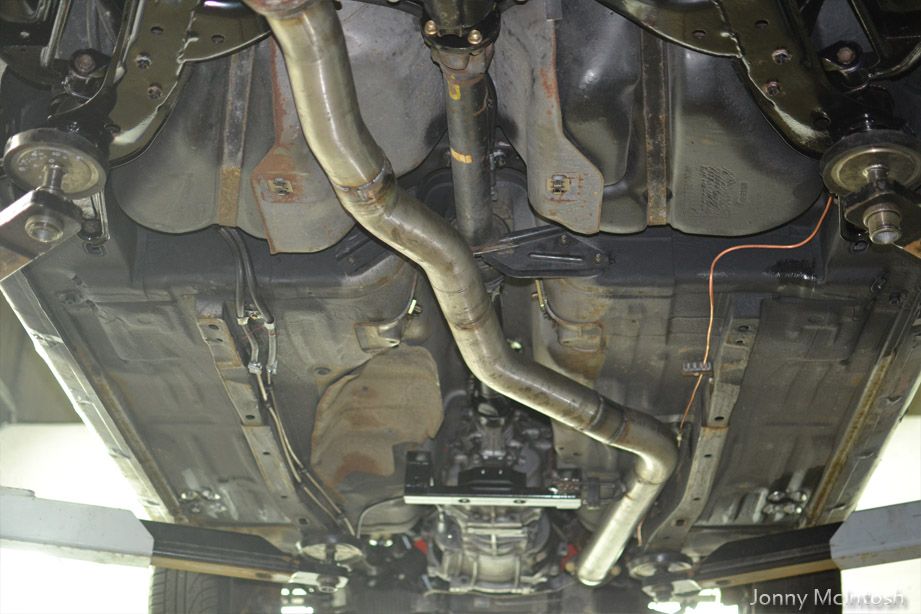
made up the last section to join the backbox on
also got the exhaust sitting at a slight angle which was exactly what i'd wanted
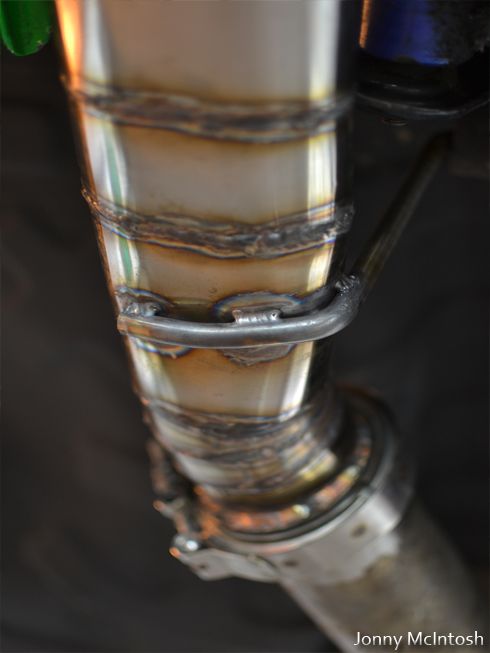
then every join was stainless tig welded
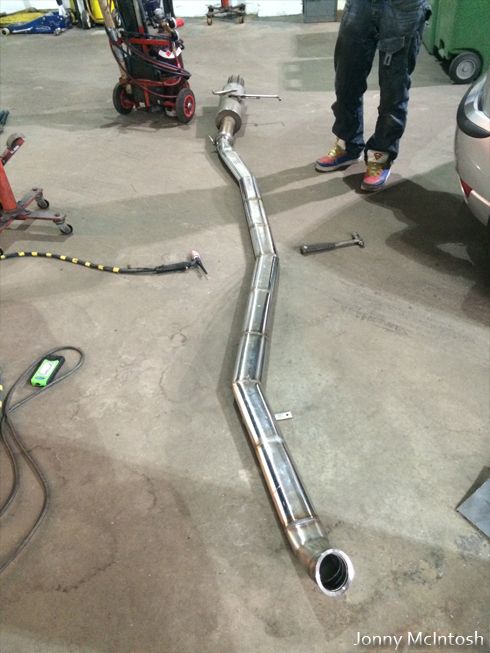
paul had to take the downpipe to his work to use a different tig plant which could pulse and go slightly lower amp's than his own one, this will hopefully stop the downpipe moving with good heat management
took my camera down to the workshop for some better pics,
anti roll bar will be off again, it was only on there to use as a guide for making the exhaust
the front is also support with tie wraps since the downpipe was off
wish i could weld properly, i'll be looking into my own tig plant soon and going to make an attempt at starting to learn, i know a fair bit now through picking up from what paul's told me so it should be good fun
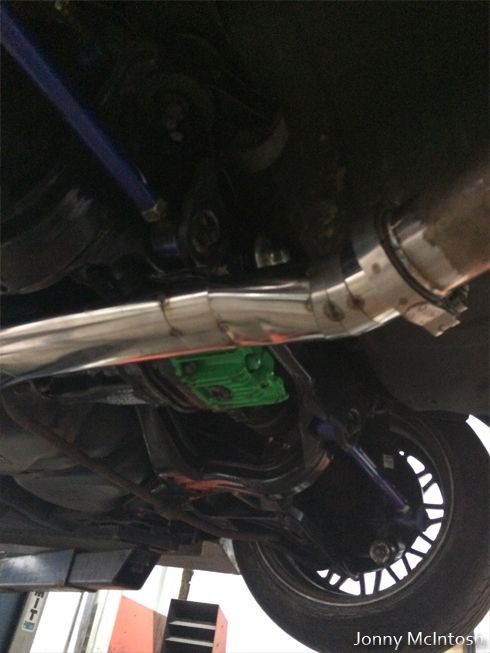
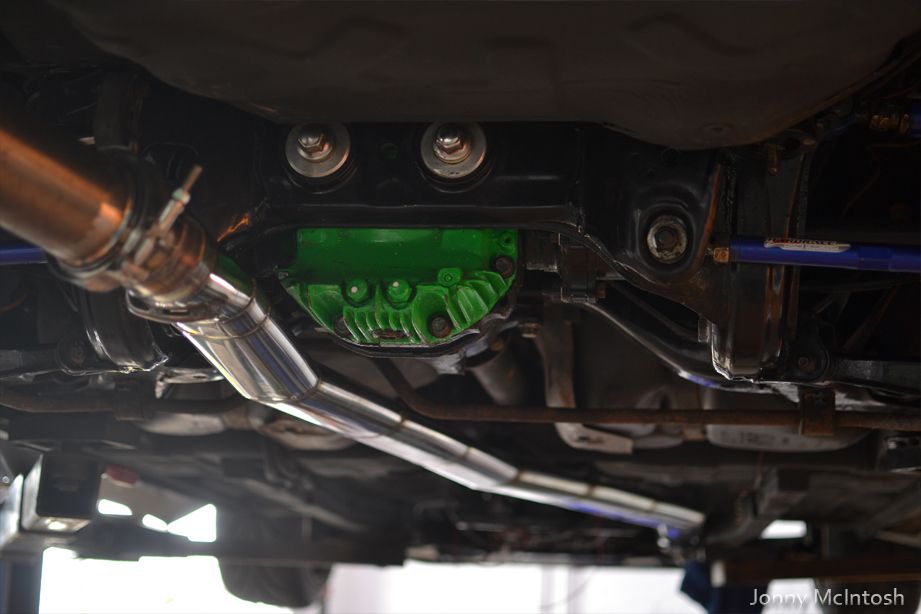
diff will be changed this week because i'm sick of the green backplate now haha!
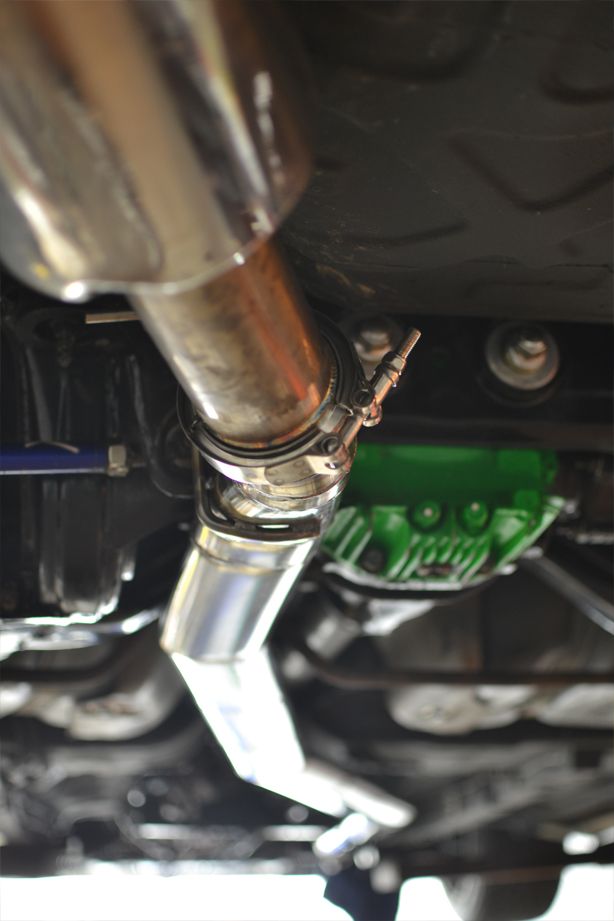
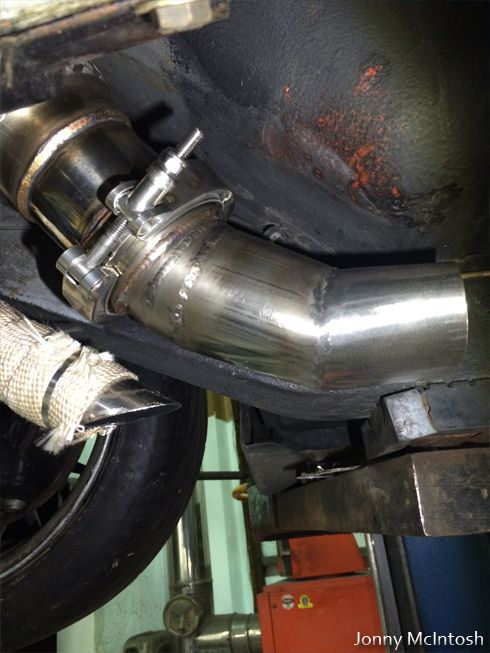
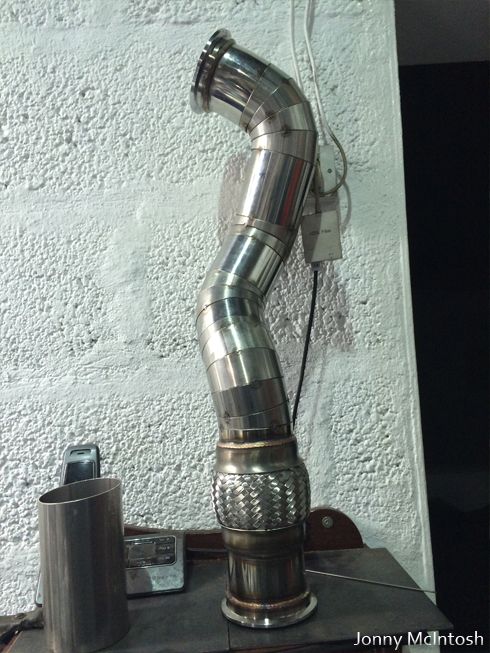
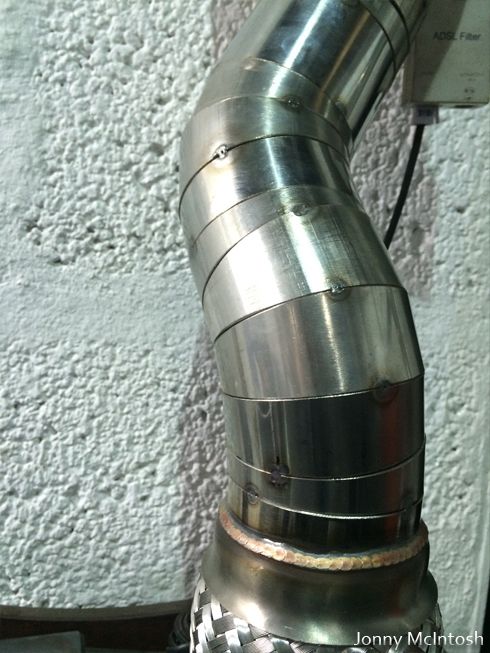
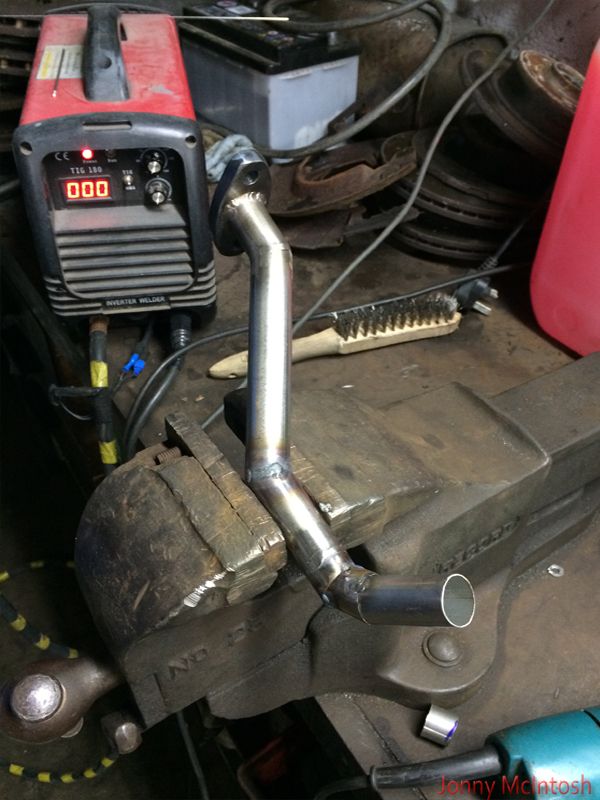
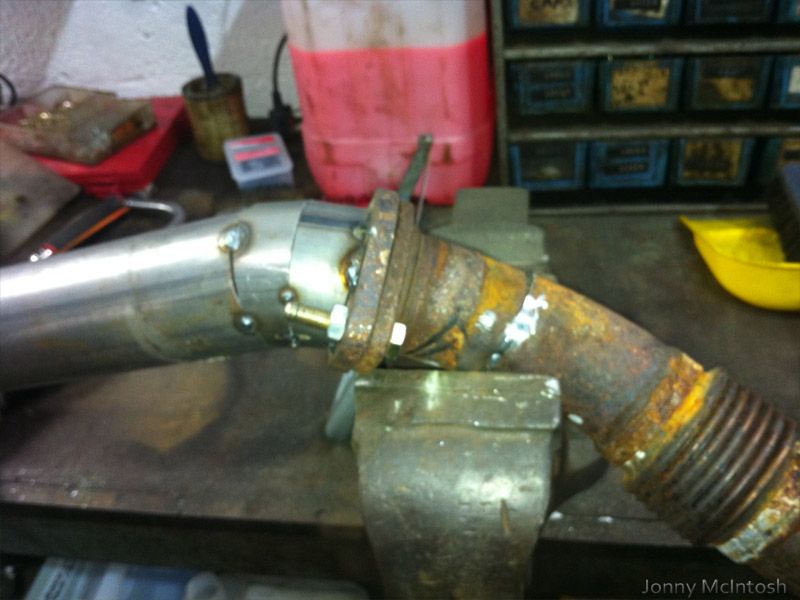
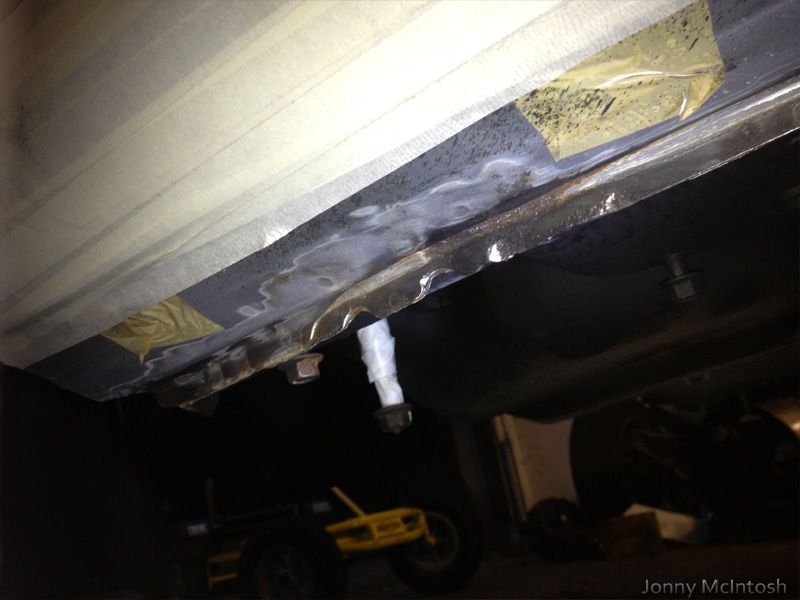
downpipe back from welding

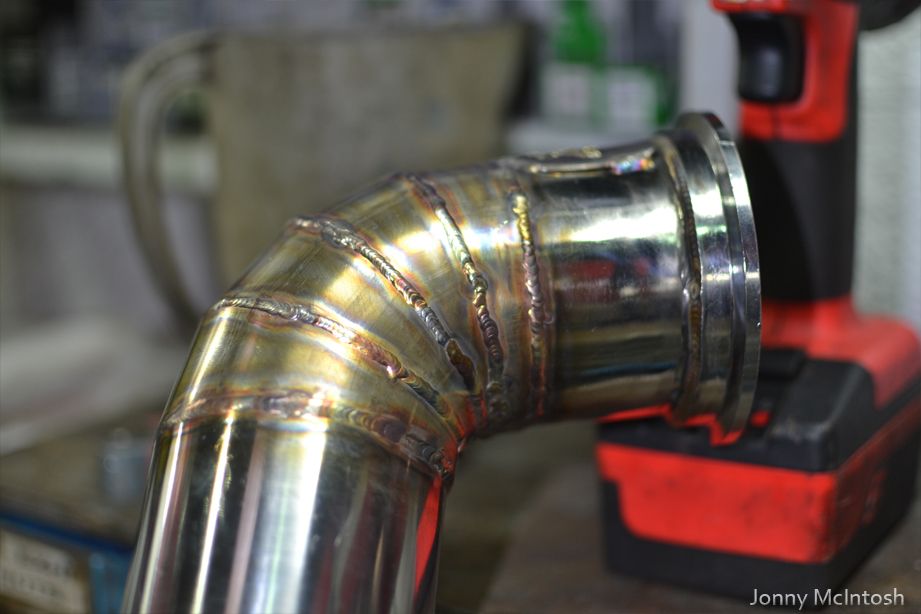
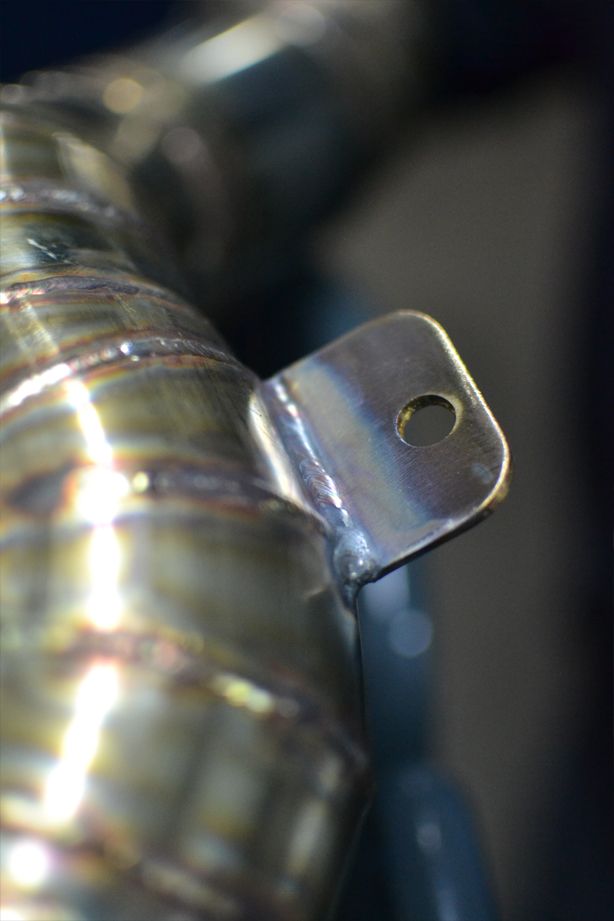
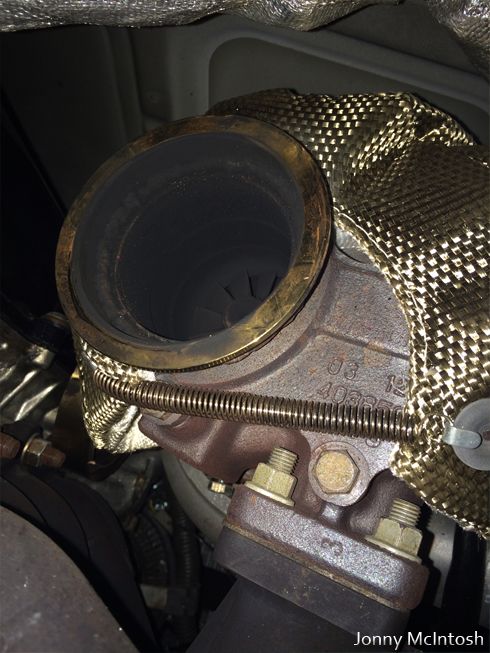
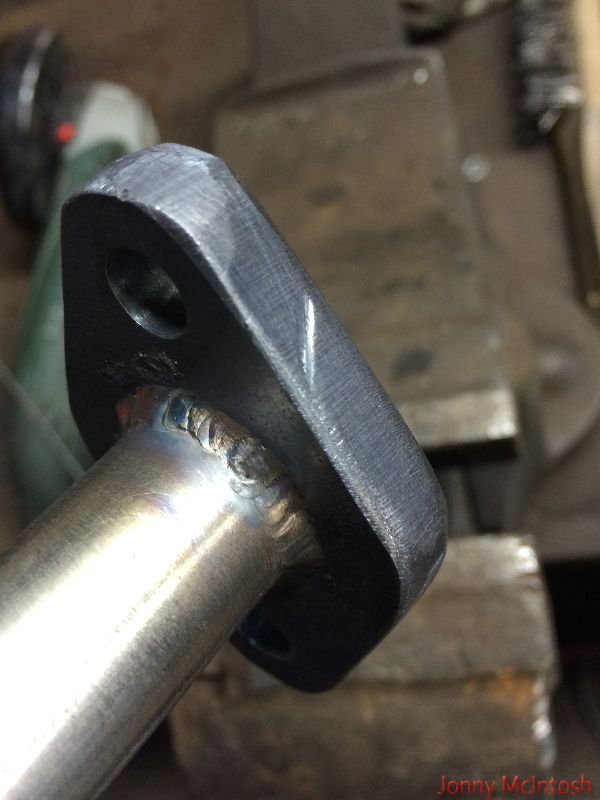
including the lambda sensor flange i'd made
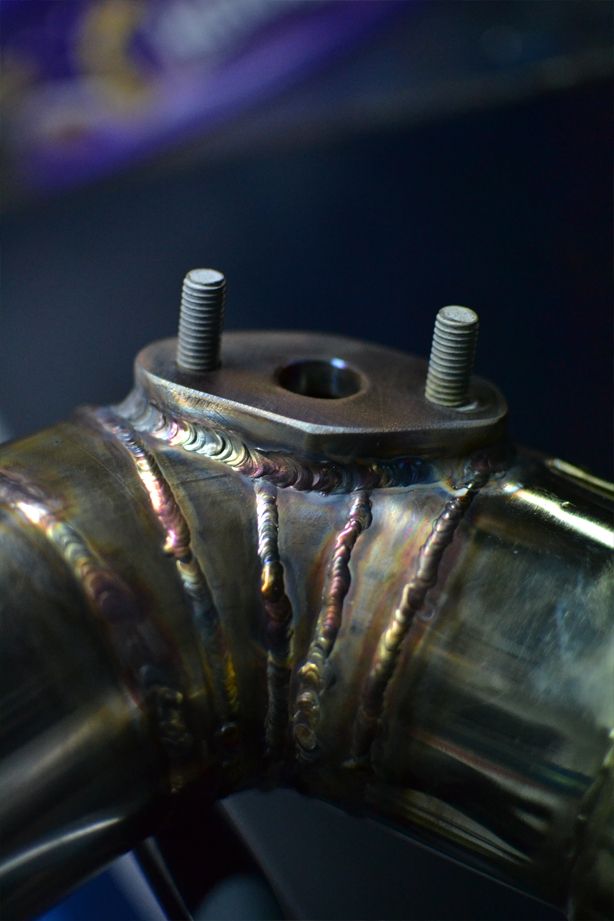
a tag was welded onto the downpipe and a bracket made up with an A brace to support the downpipe
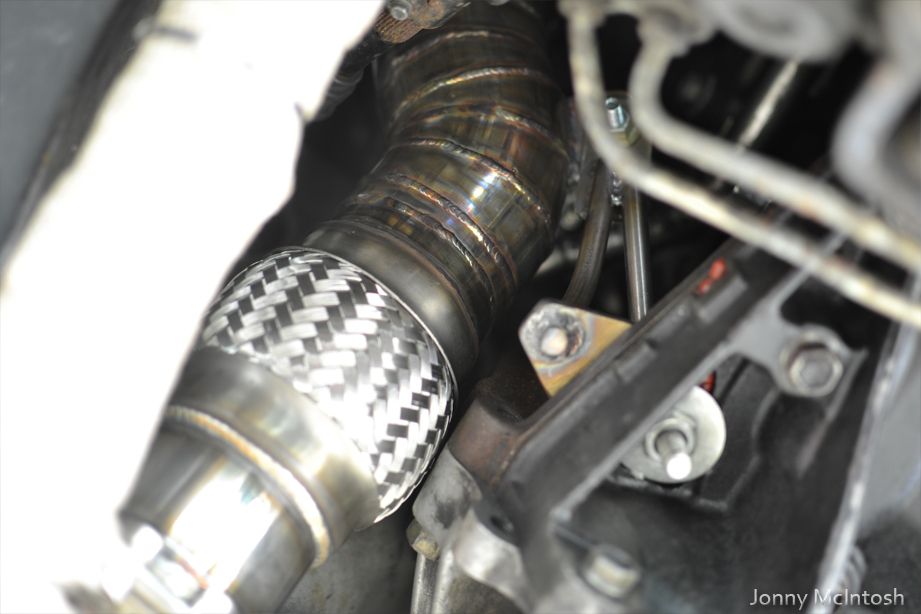
also the wideband bung was put in further down and a new hanger made for the center pipe off the gearbox mount box section
-
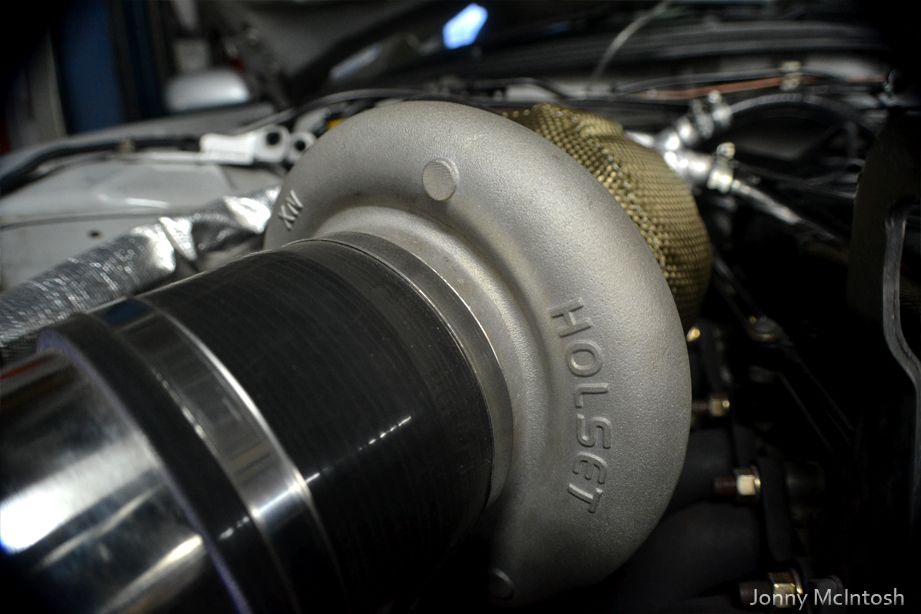
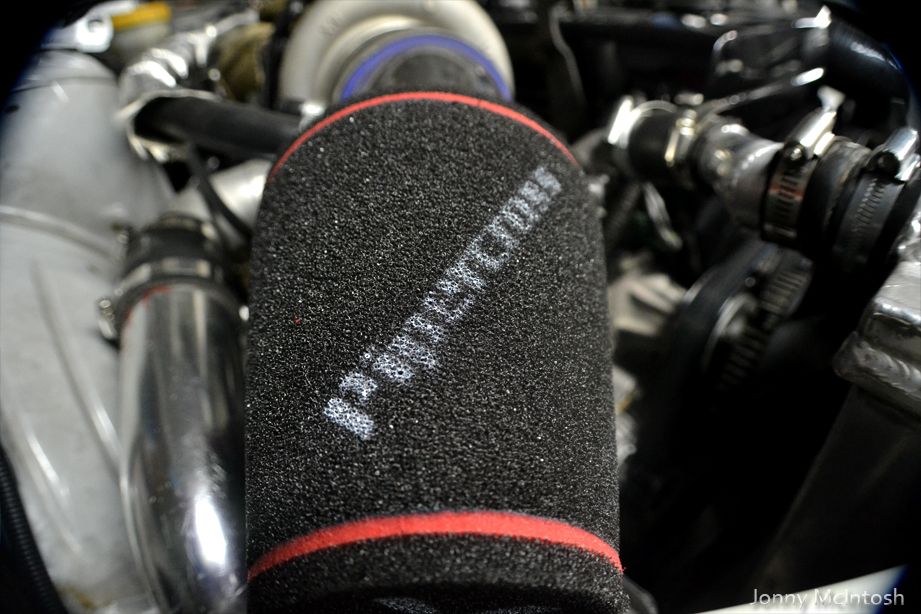
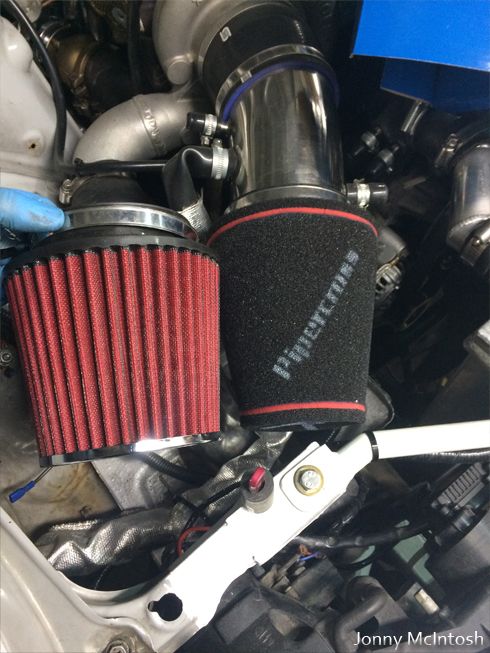
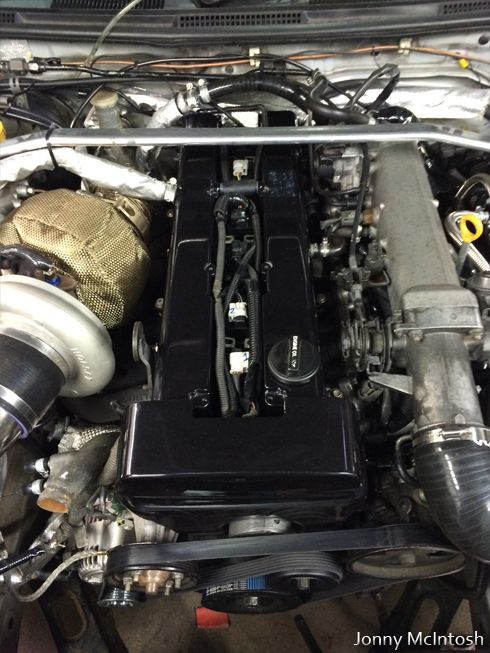
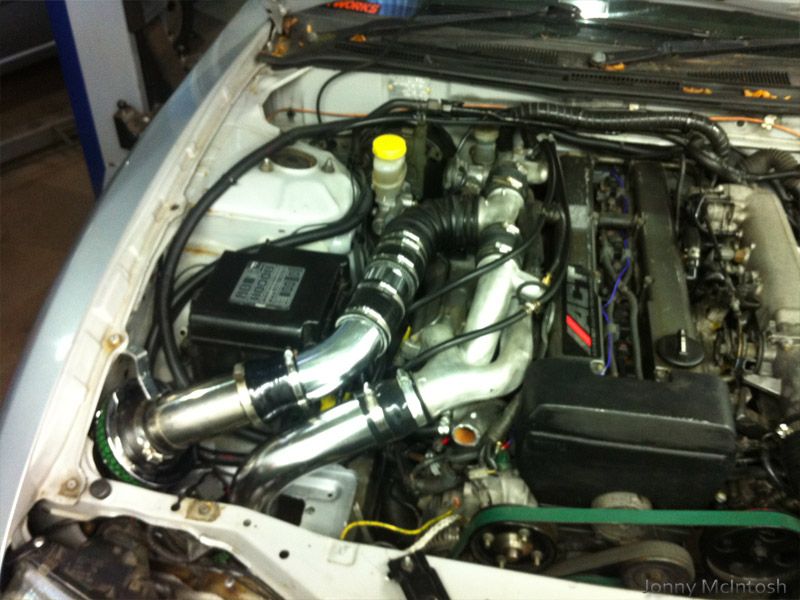
bought a new pipercross foam filter from demon tweeks, want to keep up the black theme in the engine bay
need a black turbo blanket now!
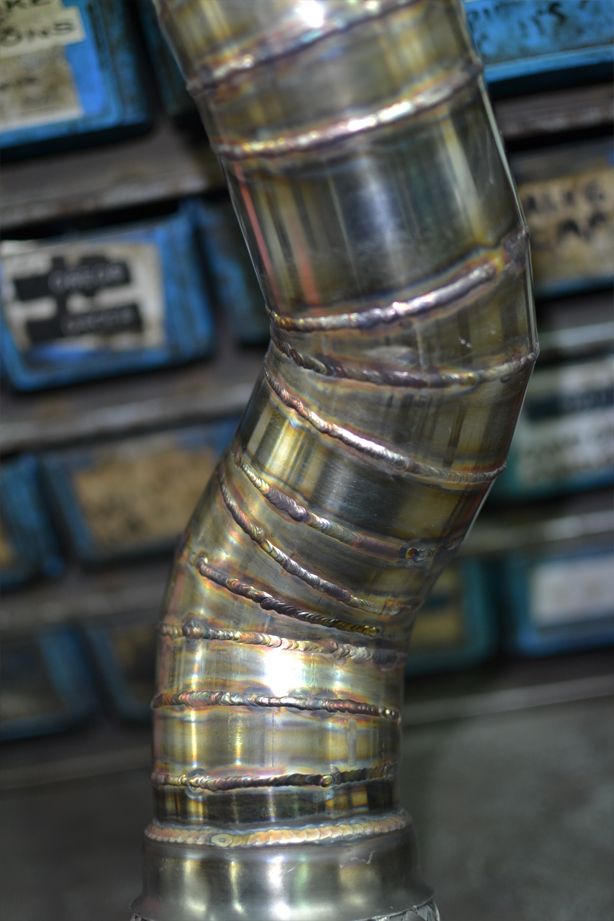
paul managed to get a spare evening to do some more welding on the exhaust,
it's so time consuming! another 5 hours spent on the car and it literarly looks like it took 10 minutes to do,
the begining of the 3" > oval piece was made after the downpipe
then slowly began to take shape of an exhaust
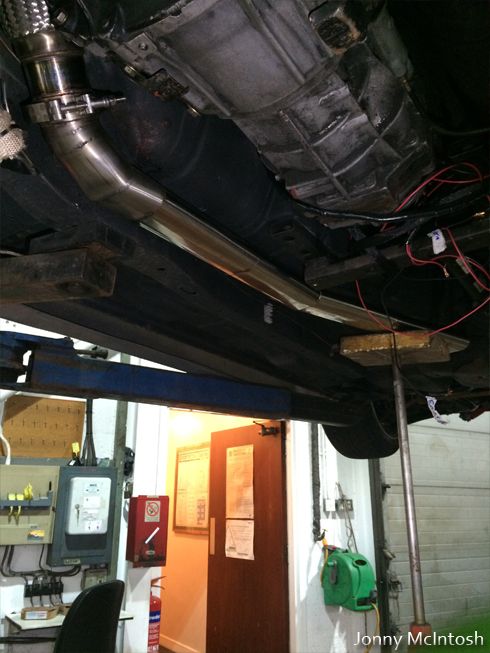
braced it off the gearbox mount to stop any pulling on the downpipe since it's not welded yet
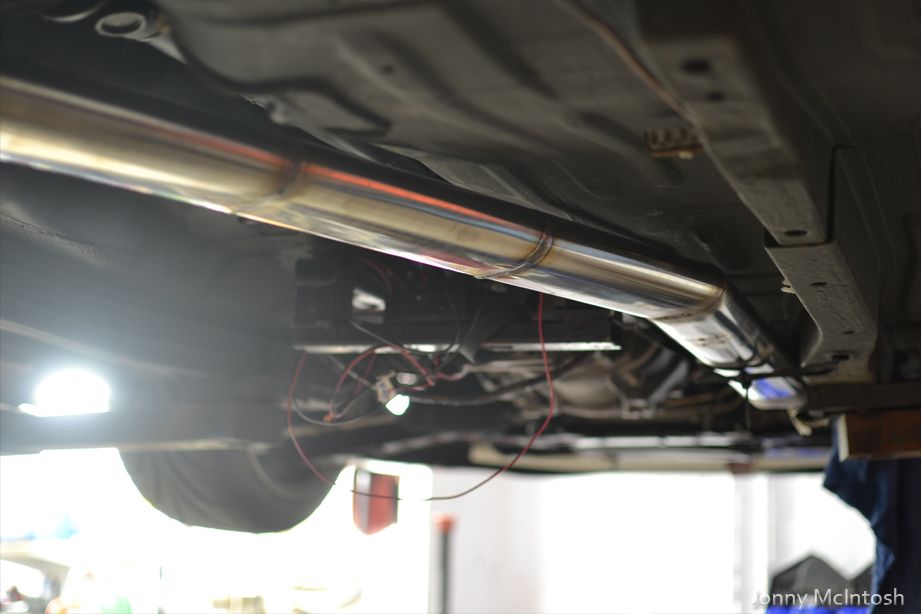
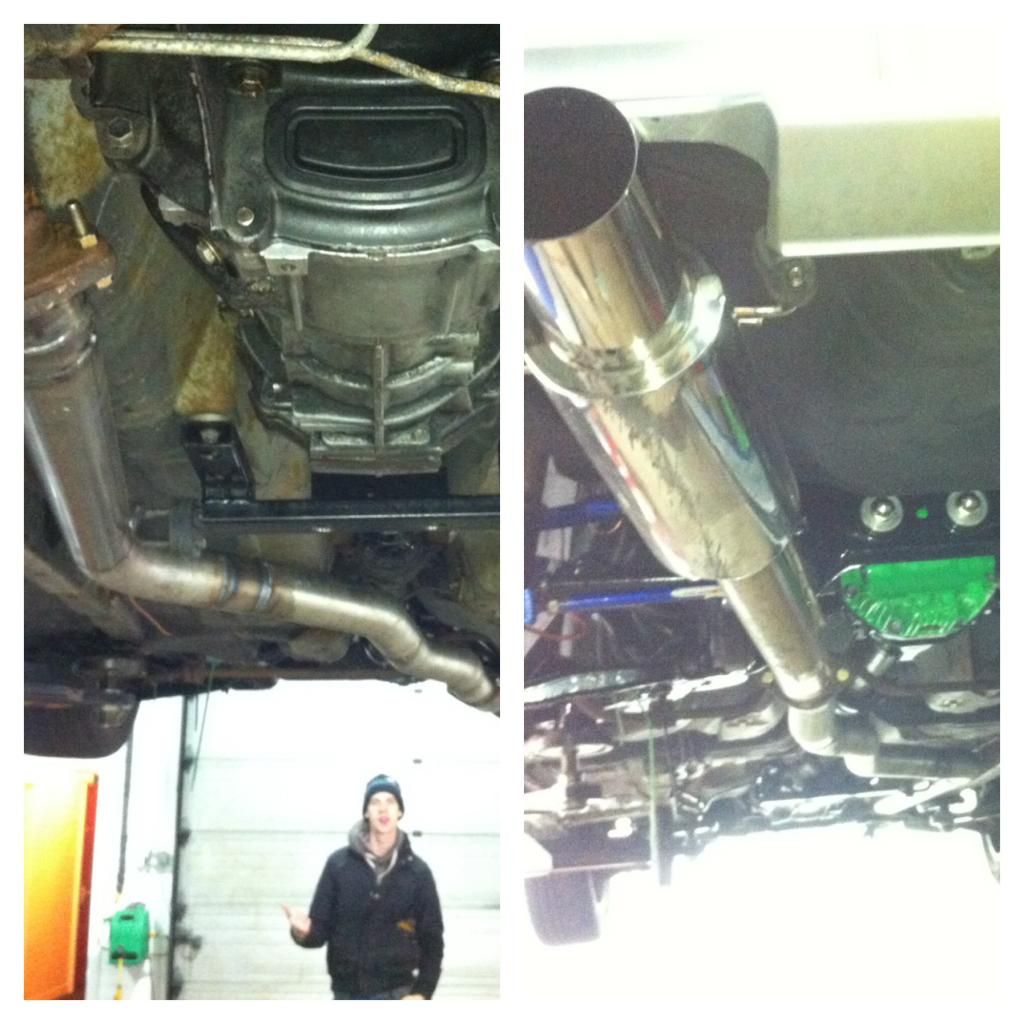
here's a view from the sill looking at the chassis leg....can barely see the exhaust
we have raised it up along the floor too so it actually sits higher than the backbox now
-
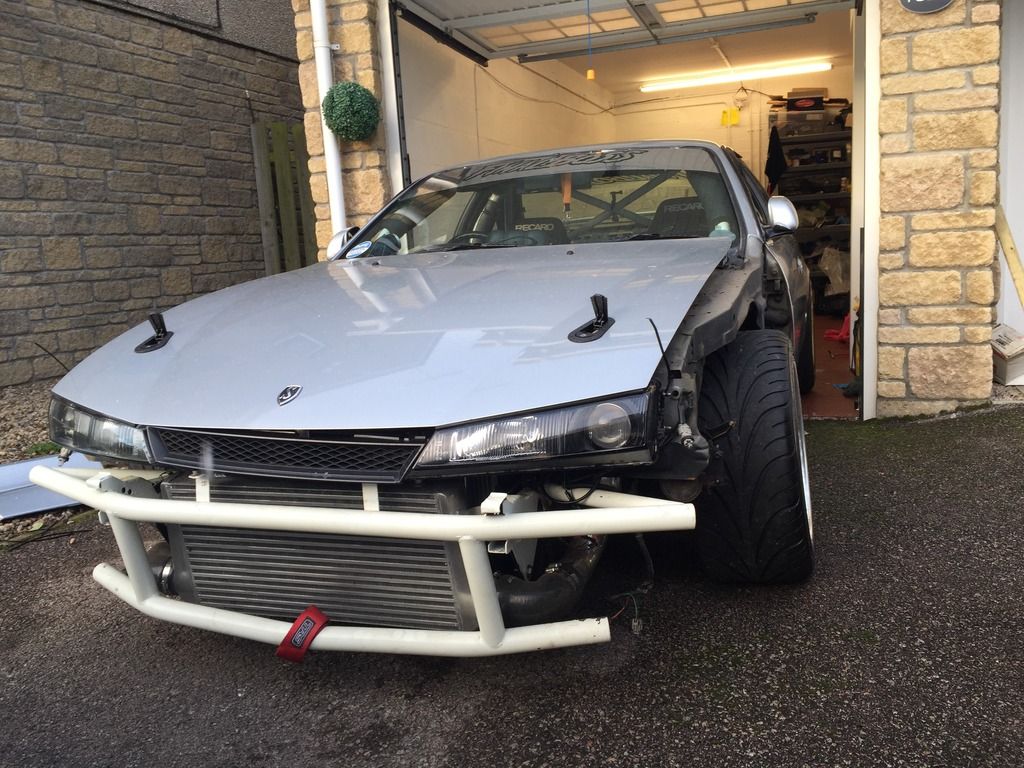
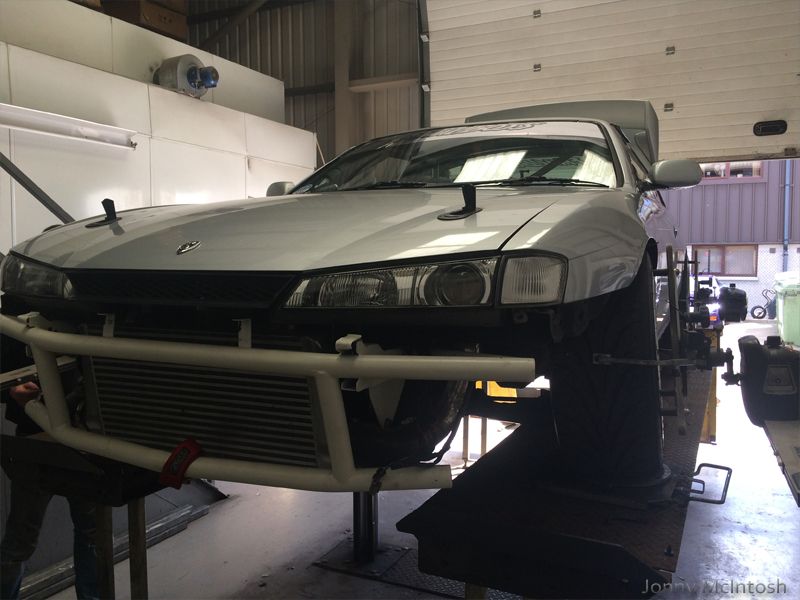
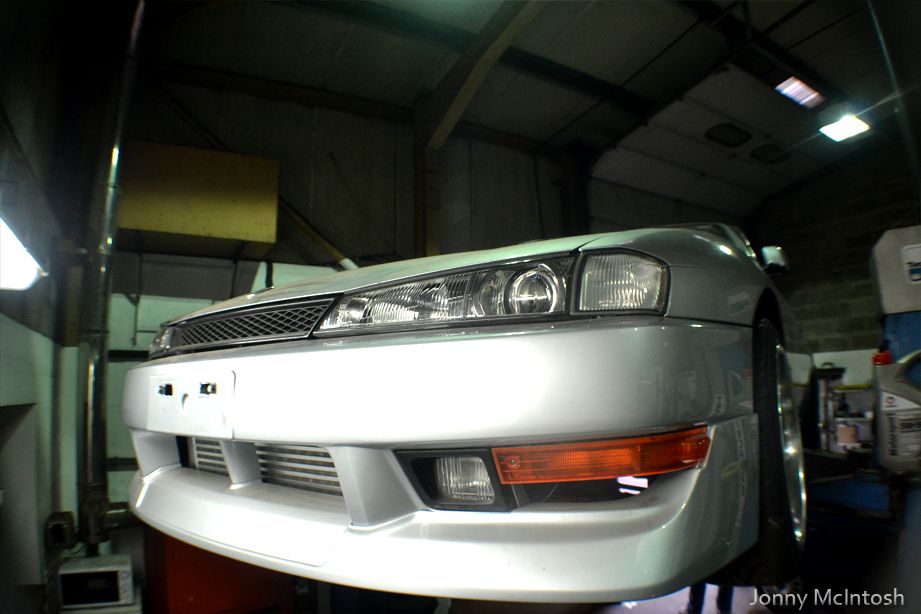
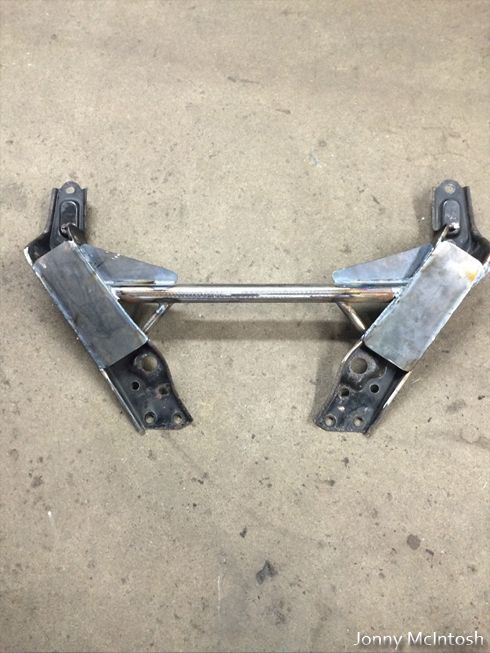
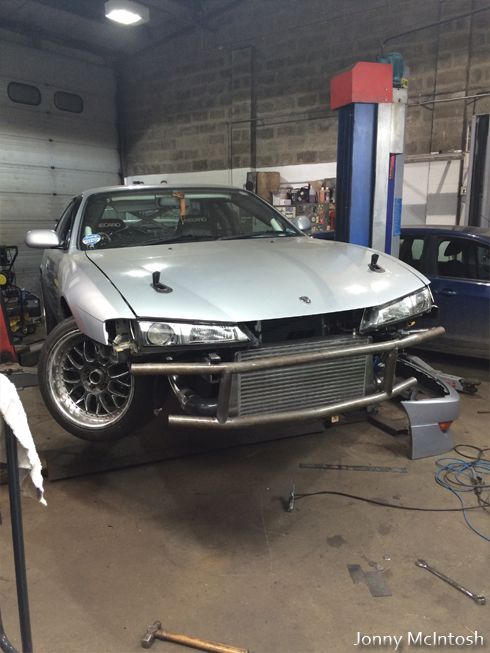
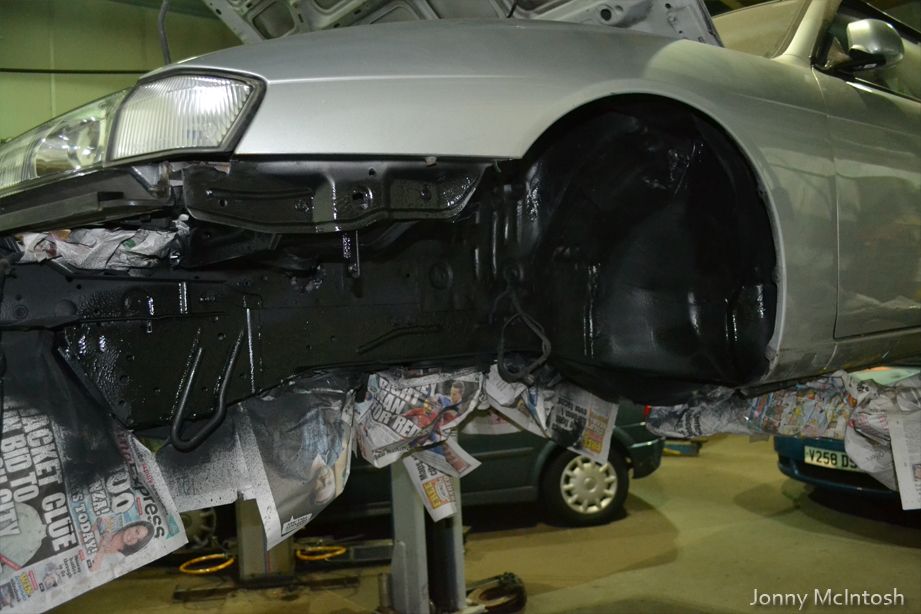
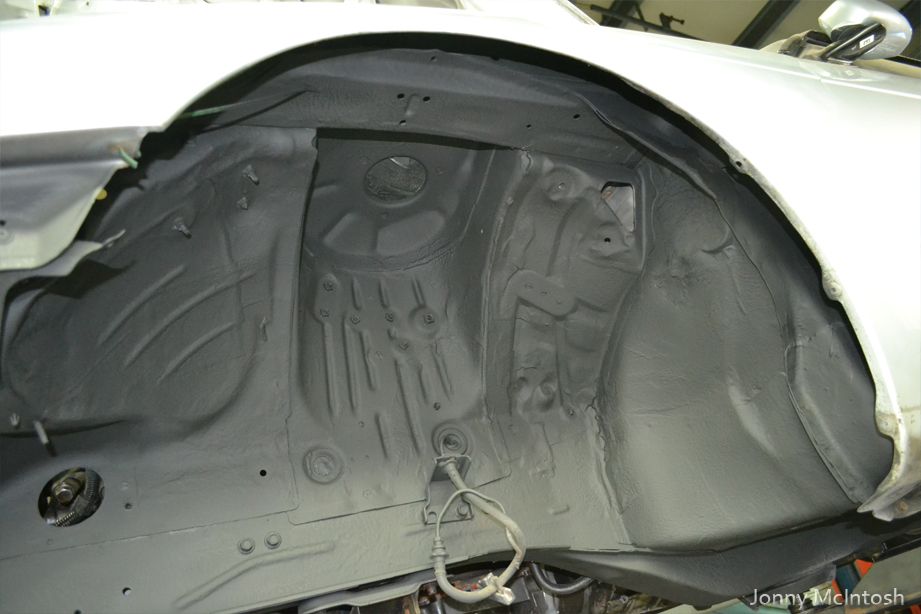
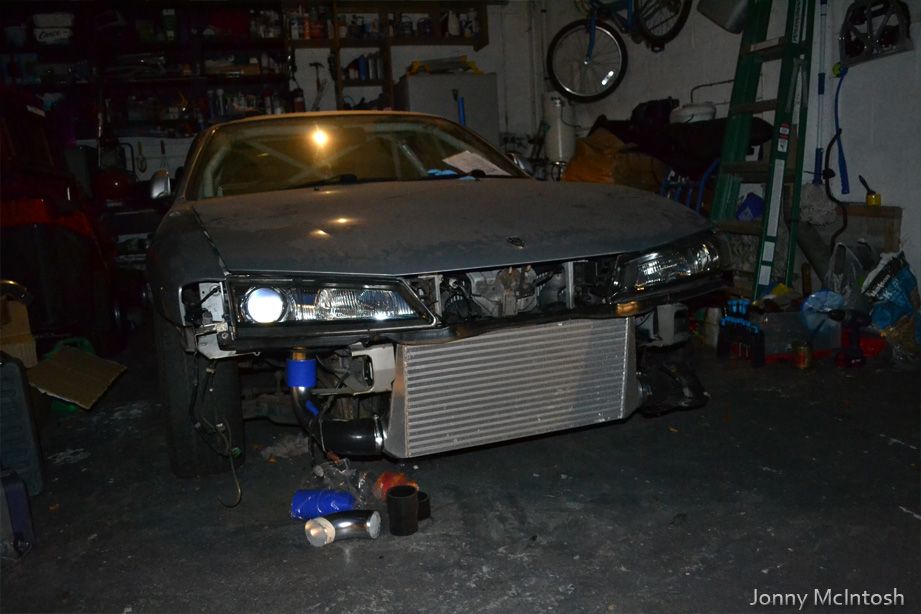
new slam pannel made up, supports rad, oil cooler, headlights etc
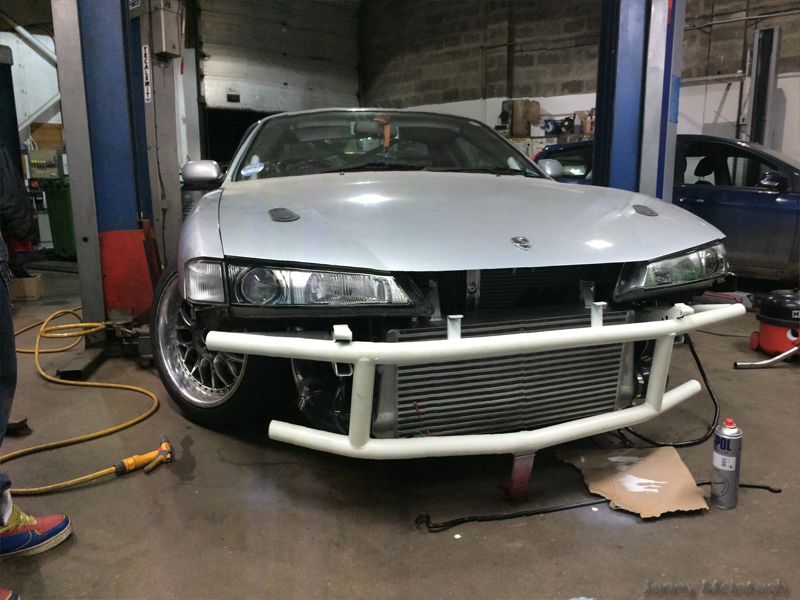
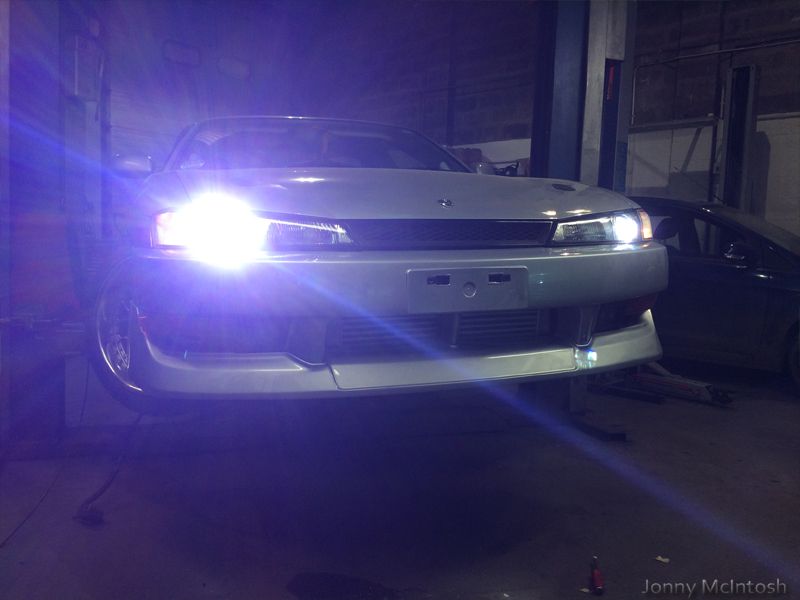
got the front end back together and put in a new set of 6k HID's i bought online weeks ago
i need to allign the lights again with the beam setter
car was then moved onto the spare ramp which is never used and i could begin the next job i've wanted to sort for a while
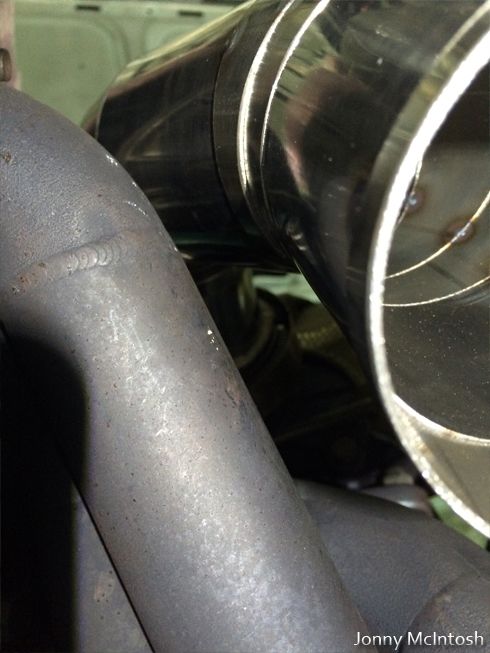
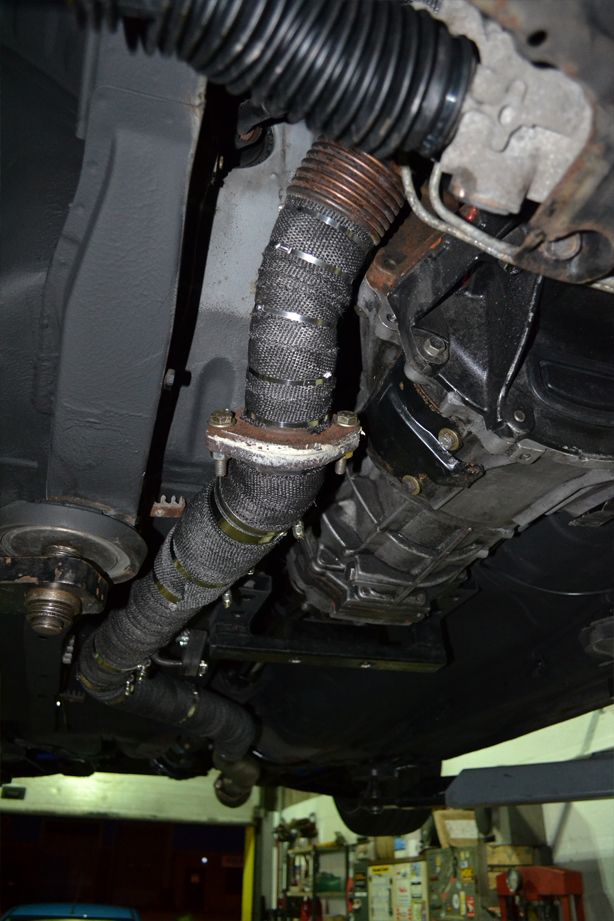
since going single turbo the exhaust has always pi**ed me off, keeps catching the speed bumps outside my house, without a flexi in the downpipe either i was worried i'd cause some damage above
it had buffed through one of the welded joins on the back too and was leaking out there
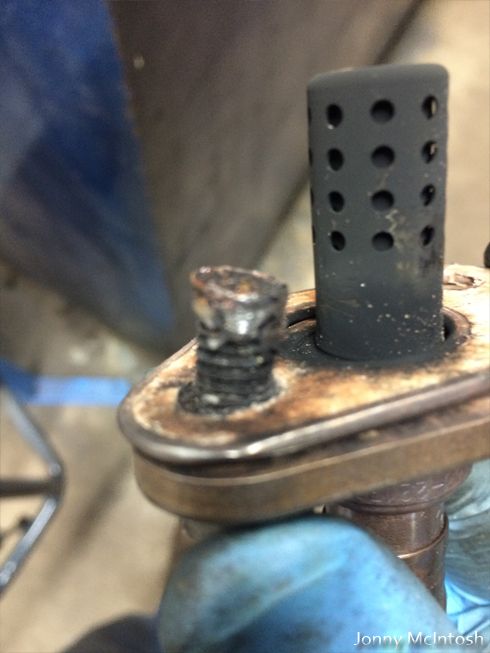
also when on the rolling road, i had to remove the wastegate to make an adjustment, done this by removing the lambda sensor from the downpipe and it came out the top
the lambda sensor stud which was a bolt welded onto the back of the flange had snapped the weld and was spinning!! tightened it with vice grips holding the thread and an open end spanner
overtime with the heat etc it must have worked it's self loose as when i tried to tighten it again the stud just fell out in my hands
so as per usual with my car, nothing's done in half measures....:S new exhaust time
the stud left me in a pickle, josh had welded the bolt to the lambda sensor flange, then the flange was welded ontop of the downpipe we made then the hole for the sensor drilled out
so i couldn't get a welding torch inside at the angle to tack a new bolt in place and my exhaust was badly leaking from there since only half the sensor was held on, throwing off my afr gauge which i couldn't risk
new exhaust time then!
took off the downpipe and exhaust, checked the manifold for any leaks incase it wasn't just the downpipe i was hearing, all is good!
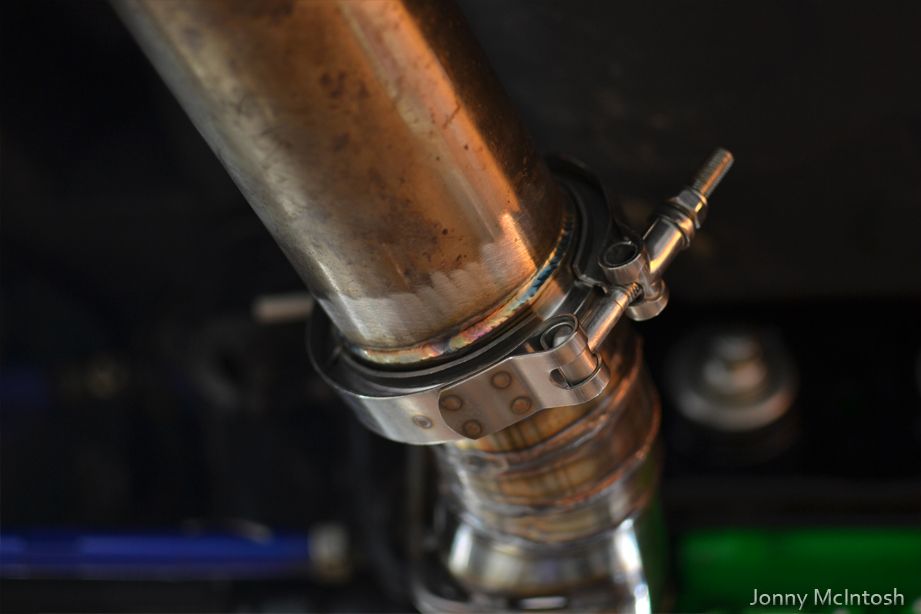
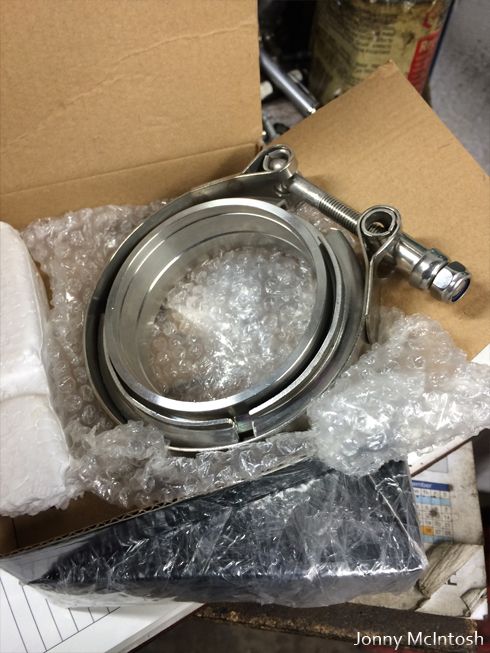
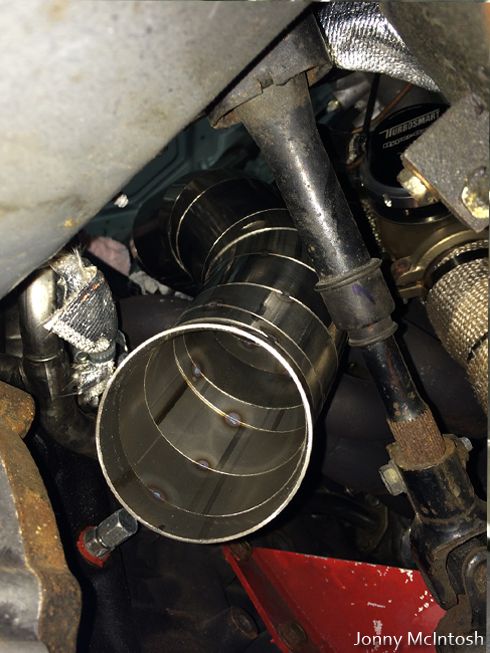
bought a few v bands for making a new system, no more gaskets to ever leak!
spare 3" flexi from previous box of spares
and took delivery of some 3" 1.5 meter lengths of pipe
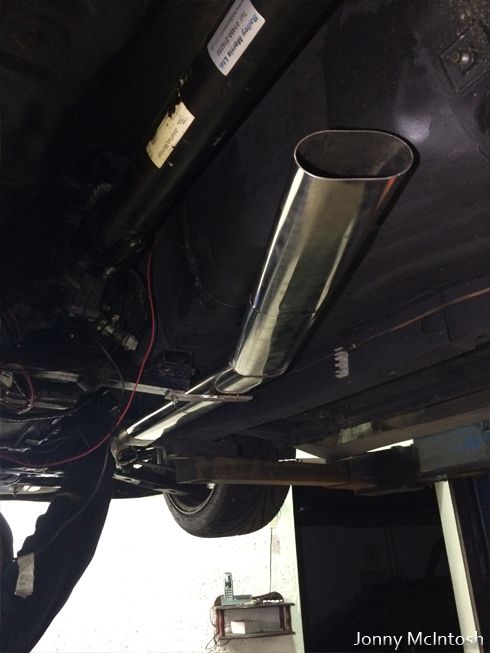
the apex exhaust backbox will possibly be going too as i'm potentially making a staggered shotgun backbox now....NO silencers
BLAST PIPES!my mate paul is chopping up some 3" pipe into loads of little angle pieces to make a 'lobster back' style downpipe, basically loads of pieces put together to form tight angles
the exhaust will be tig stainless welded and the plan now is to make it a full oval system along the floow for maximium ground clearance
the last thing i've done lately is get the reverse lights working
the reverse light switch on the gearbox had basically no loom left as someone cut it super short before i bought the box, managed to get two wires soldered onto what's left and joined them into the oem sr gearbox loom which was still hanging down the back of my dash from the fusebox
------------------------------------------------------
some more work was done last night
v band on apex backbox and on bottom of flexi for new downpipe
paul had managed to use the massive press at his work on some pieces of my pipe for the floor of the car, however when they squash normally the ends pinch and become almost pointed
so a solid bar in the vice and each pipe was hand beaten into a circle at the sides, took me ages haha

while i was doing that, paul started making the new downpipe
the last pipe had to be dented in with a hammer to clear the last cylinder's manifold branch, now, since we have more time/material etc it has correct clearance and much more room to allow for expansion etc (not that it'll be much)
and same again with the steering rack, rather than a mashed in pipe, this time it has max clearance
one 'finished' downpipe, needs welded up which paul's going to make a jig for to stop any flex/movement with heat
the other thing needing added is my lambda sensor stainless fitting which will be made up and a wideband bung which i have
-
How so? what fails in them? also I'm just up the road from you
.... well the other end of the a90 I mean -
after doing some research I've seen some mixed reviews, I would like to know, what is the strongest model of 350z gearbox released?
I read somewhere a cd09 from a 2005 model is? would that be correct?
will need to take around 5-600 hp
-
it was all good till the dash paint...sorry man I just don't like that, looks too bold, what about gunmetal grey or metallic black?
if you wanted to make the inside nicer, what about an r34 or nardi steering wheel? white dials? new head unit?
-
new fuel pipes made up and filters and stuff
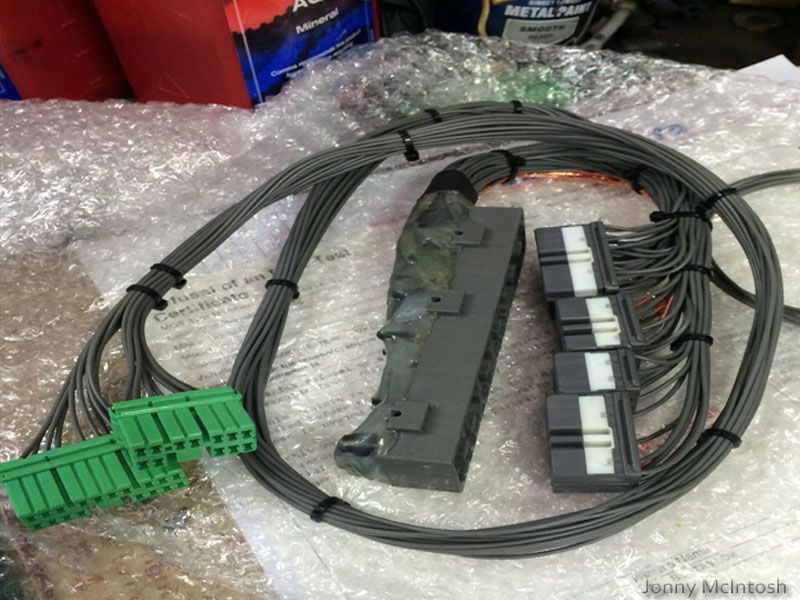
more loom stuff
whif bitz upgraded performance coils
prop seal
getting it all working
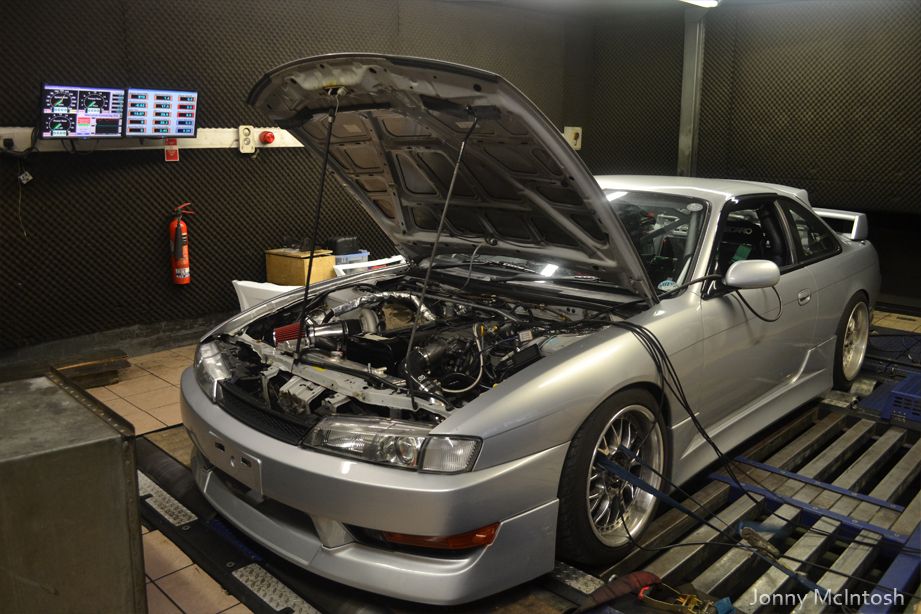
mapped by russ at performance HQ
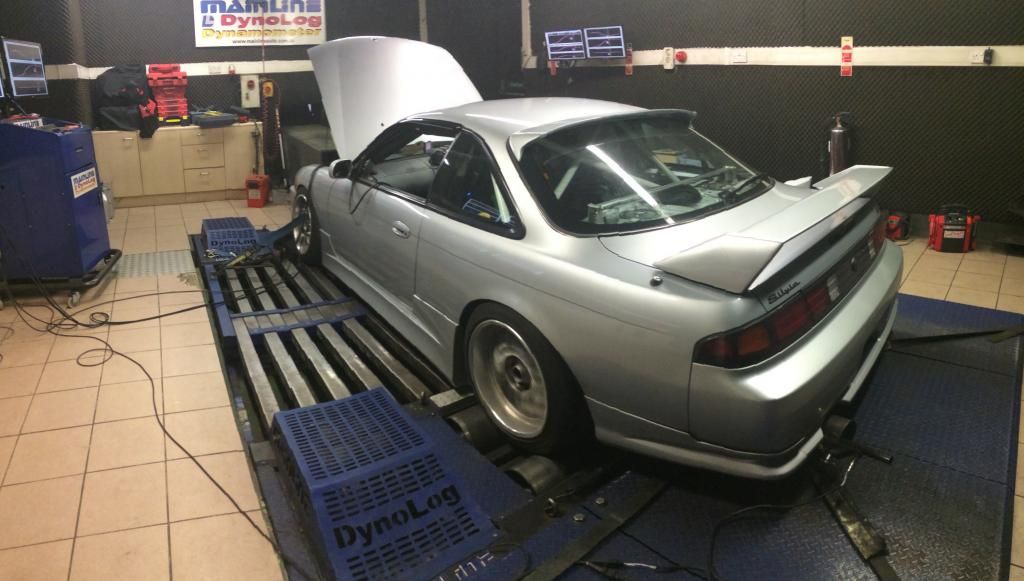
so far 406bhp at wheels
oil cooler stuff ready
new black metalic cam covers and new toyota gaskets
custom made front power brace by paul
chopped up front end and decided to brace it with a sufficent crash bar and also move radiator forward enough to run viscous fan
-
back out in half an hour though
began to focus on making more power and sorting ecu, car kept hitting fuel cut on factory limit
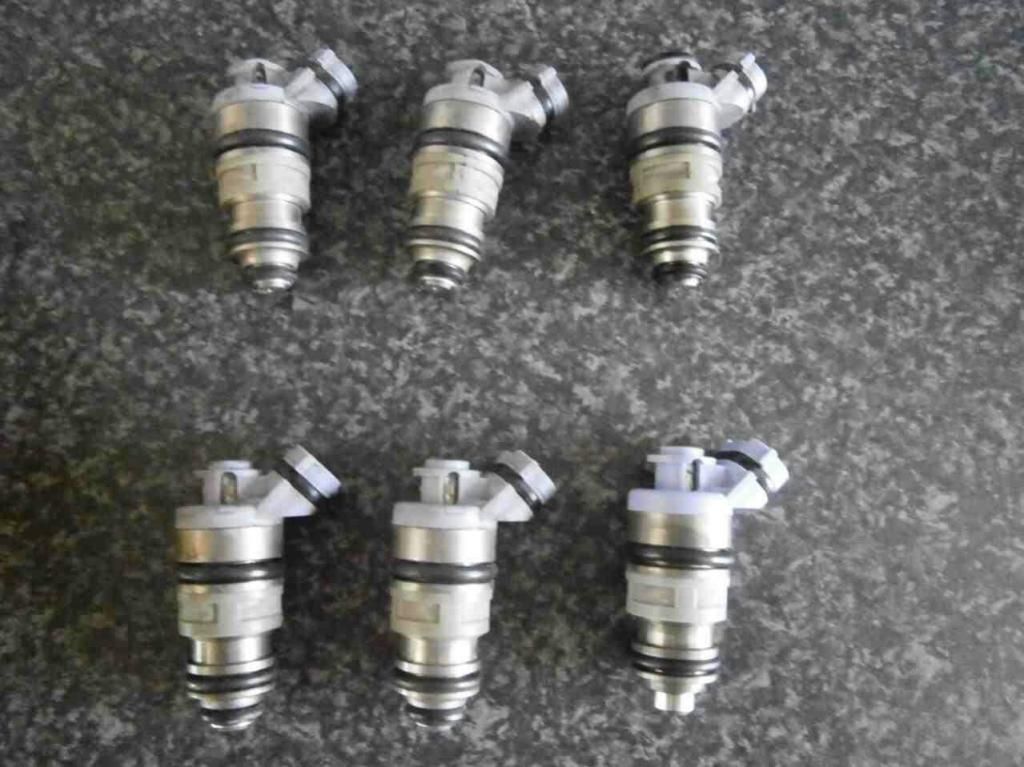
550cc uk supra injectors
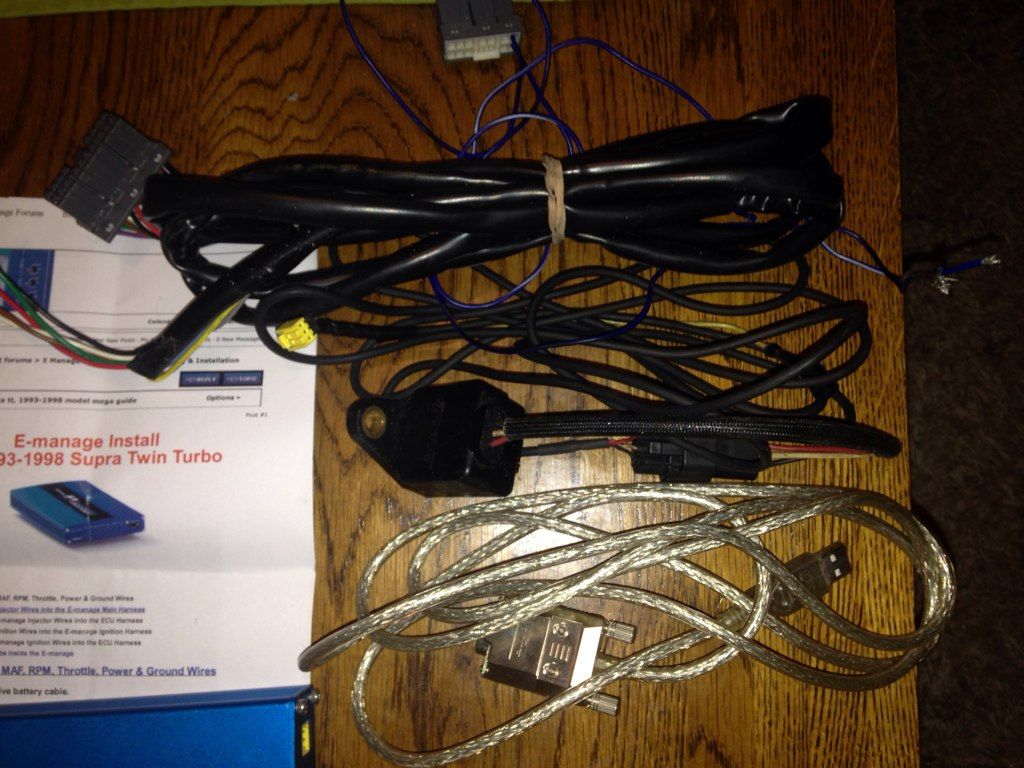
e manage blue, 3 bar map sensor too
6 boost turned up
custom made plug and play emange loom
twins off
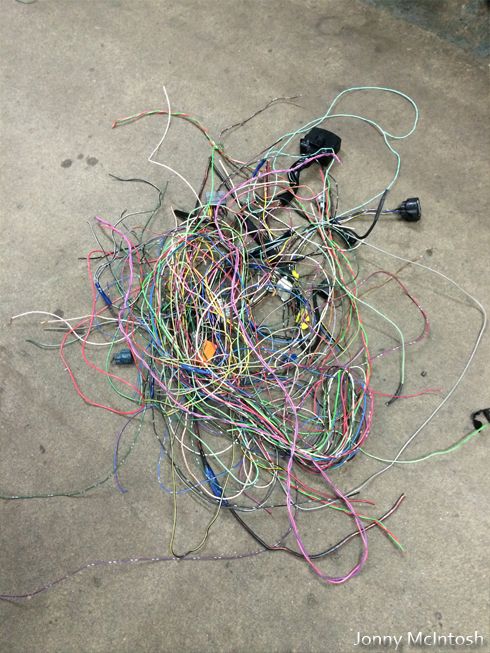
engine bay full loom removed
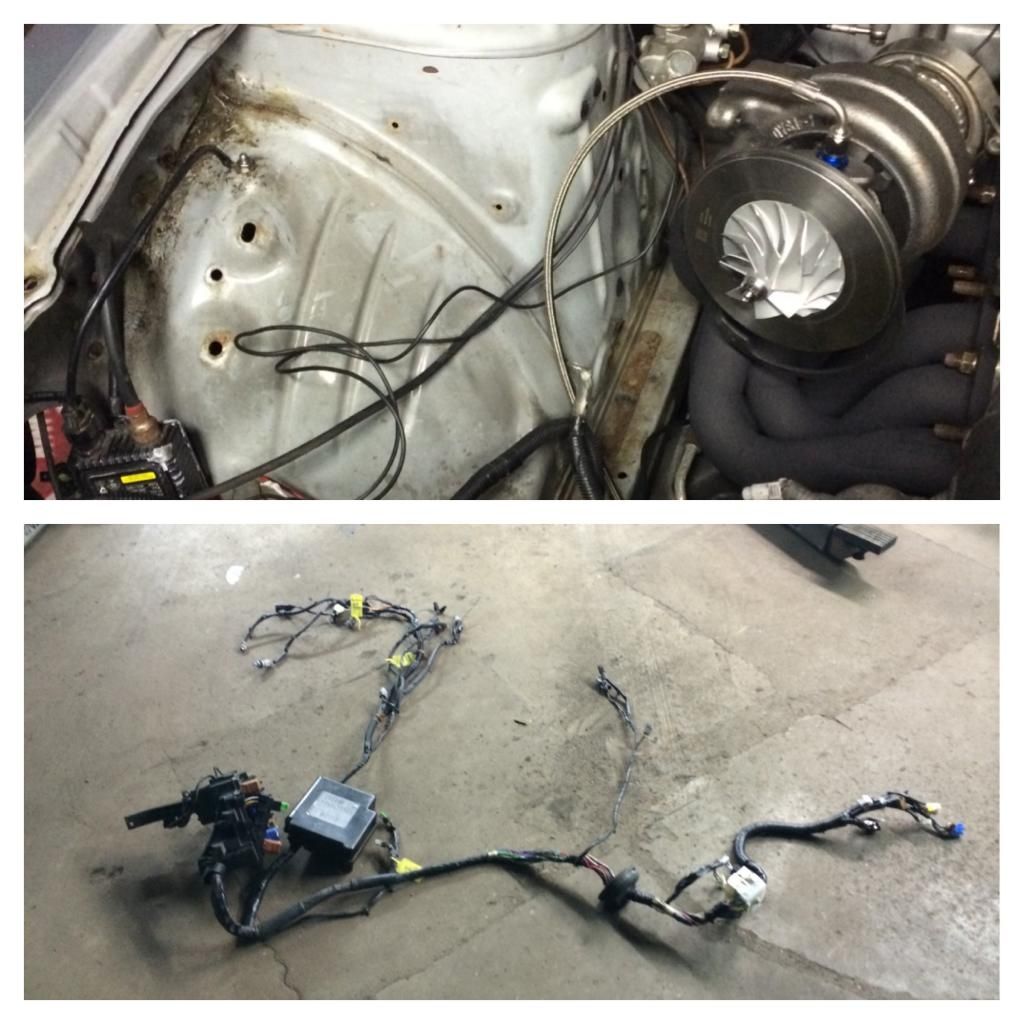
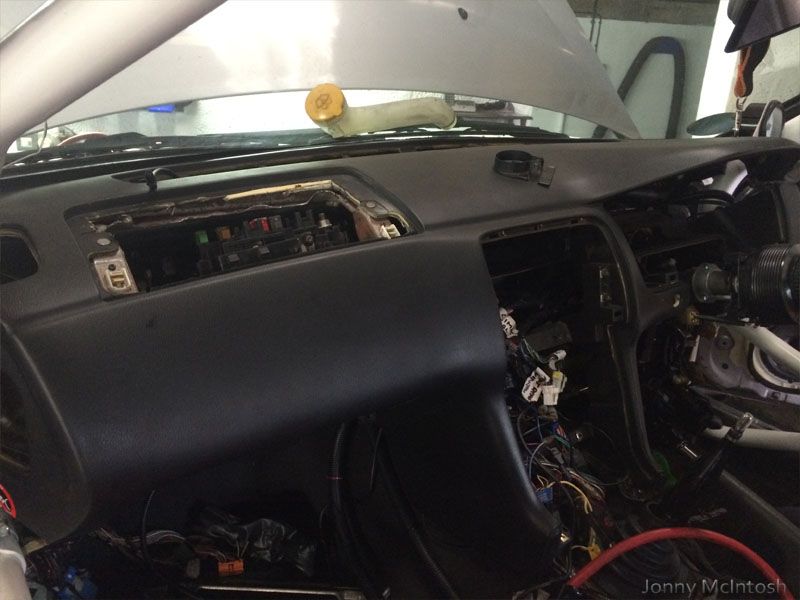
dash back out and loom tucked behind dash from engine bay, extended wires through for lights, alternator, starter and other sensors off the orignal fuse box

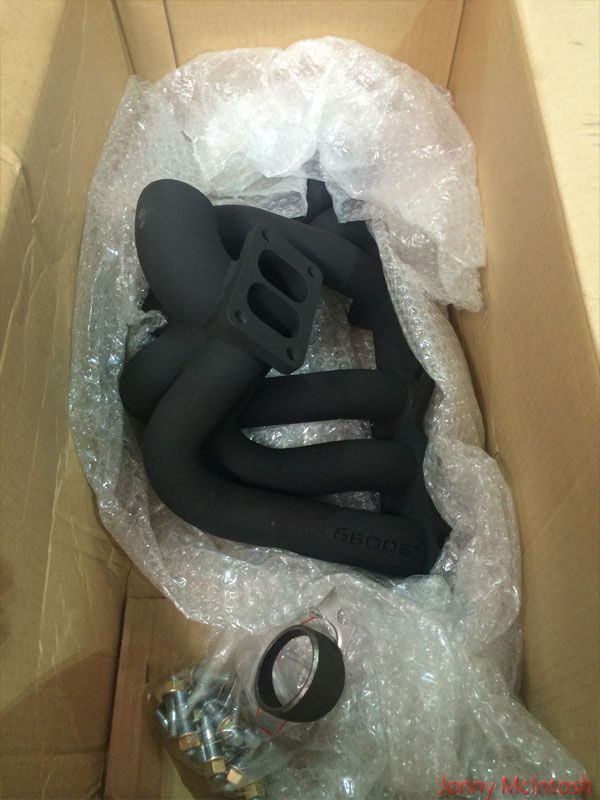
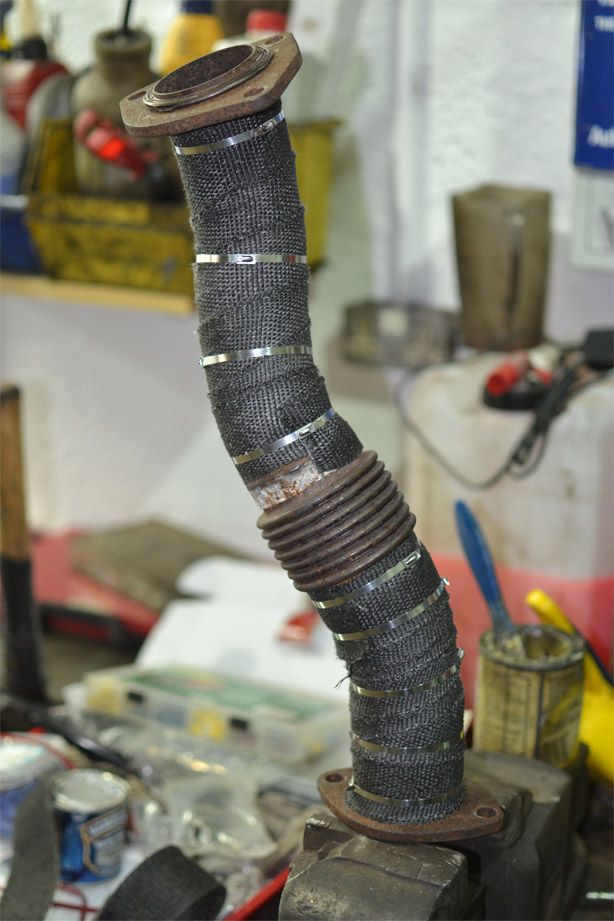
downpipe made, new coolant temp sensor for ecu in, rocker covers sanded for paint
everything heat protected, new oil feed for turbo etc
screamer made
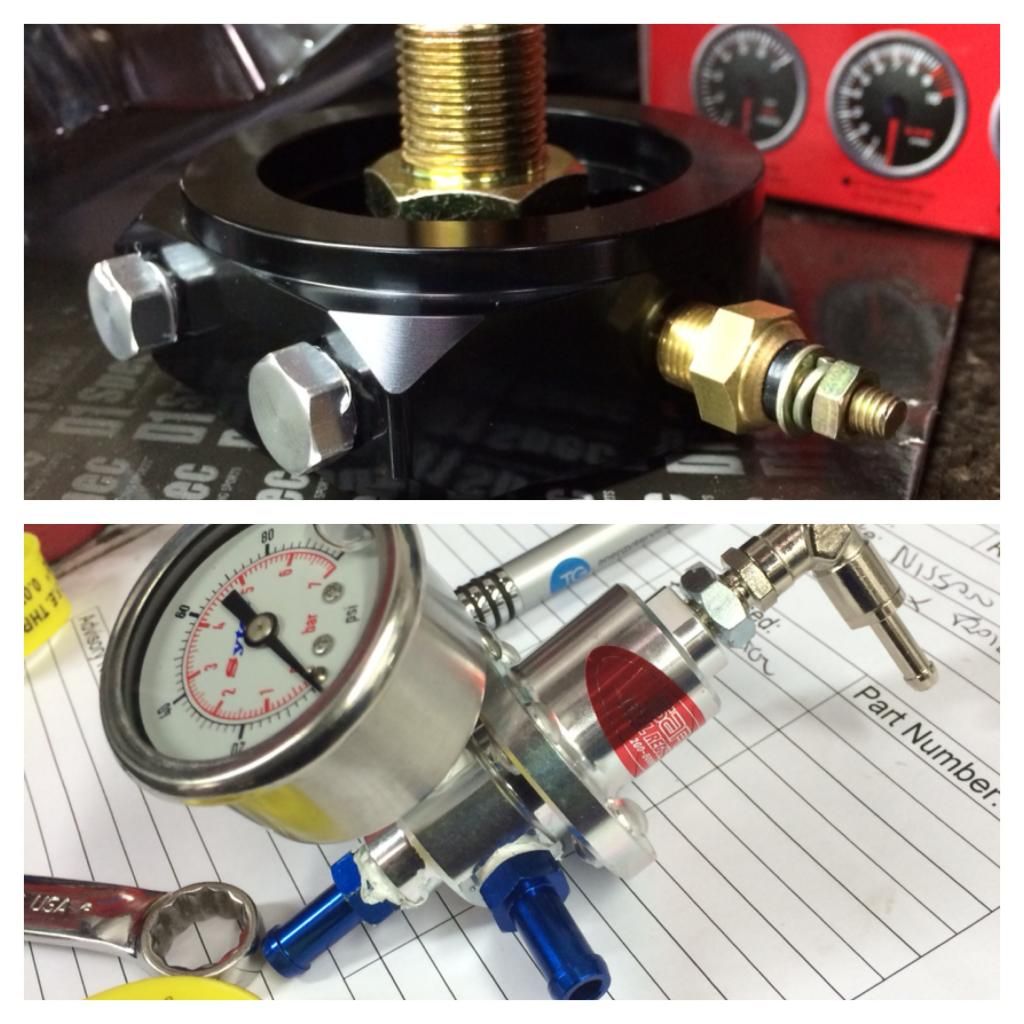
sard fpr bought and sandwich plate for temp sensor
ALOT of late nights got me here

mate paul welded up some parts for me
custom oil return
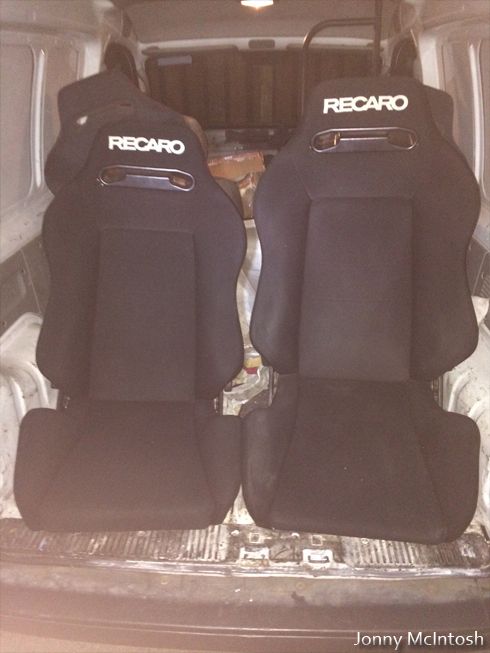
matching seats from some sort of limited edition evo
chopped all this extra rubbish out the engine loom while i was soldering in new resistor pack for new injectors
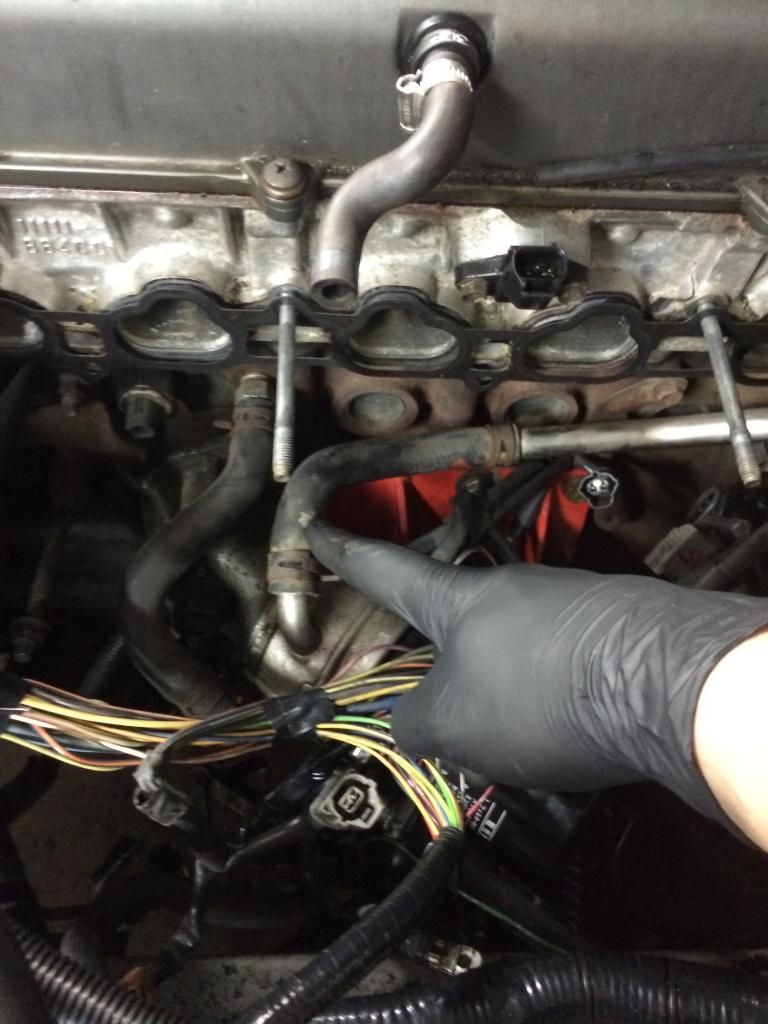
new toyota inlet mani gaskets and removed the water/oil heat exchanger pipework
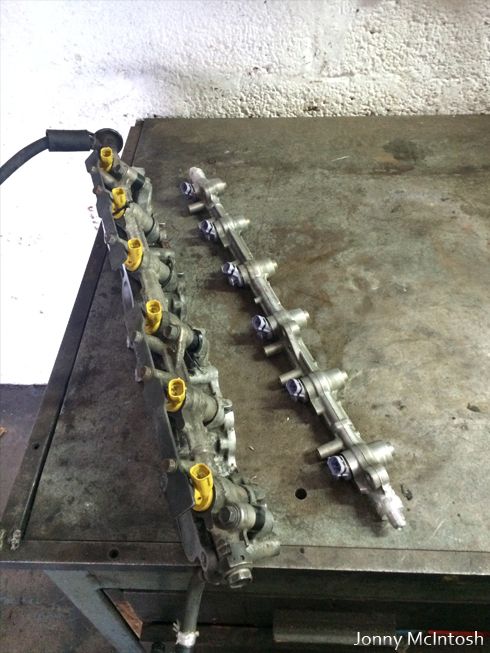
new custom fuel rail bored out to 10mm and AN6 fittings on each end, inejctors flow tested and cleaned too
-
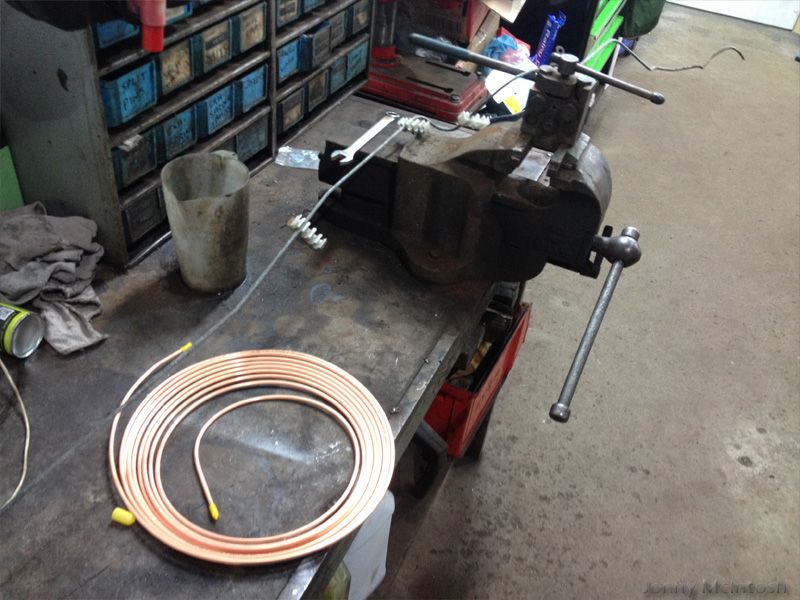
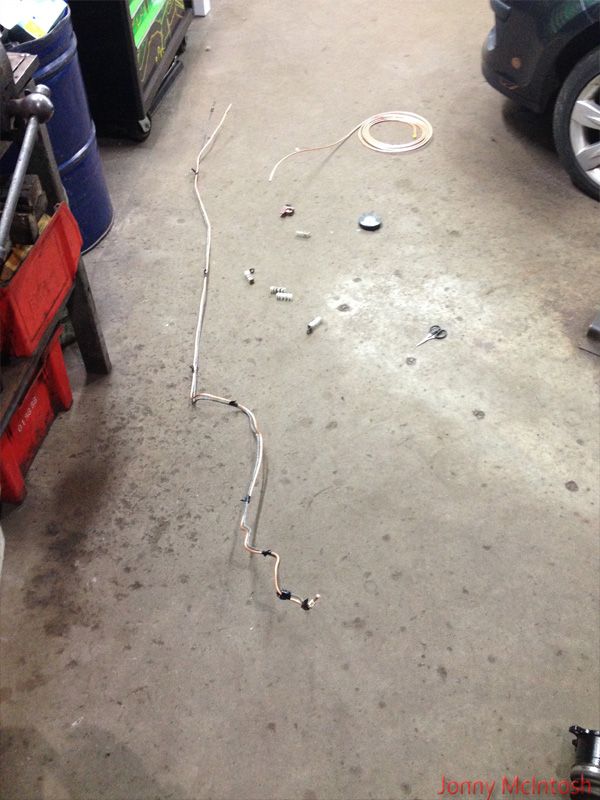
hydraulic shop next door made a new power steering line
back together for now
new power steering pump
outside for first time in ages
more stuff arriving
2jz pvc valve and hose upgrade
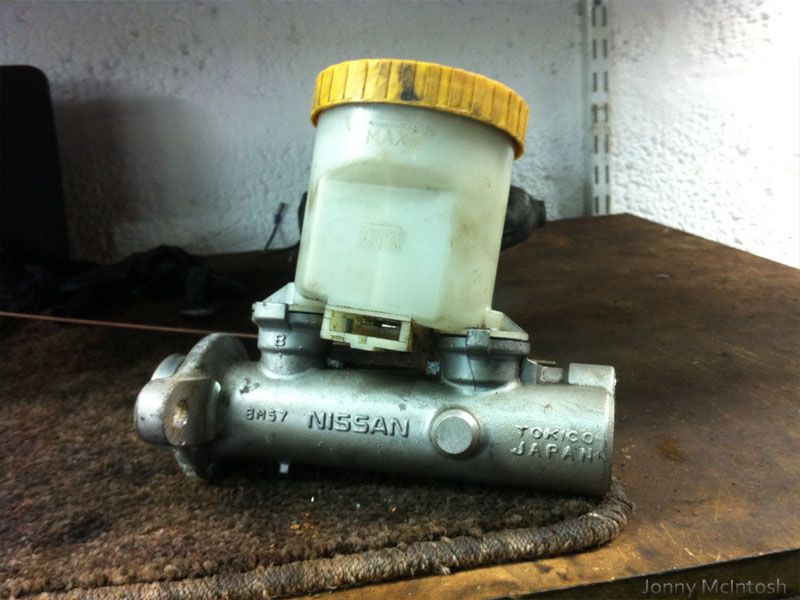
matched r33 skyline brake master cylinder
first drive...took it for alignment then home, was unreal!
adjustable lock stops made as steering was binding on full lock
oil cooler for future use
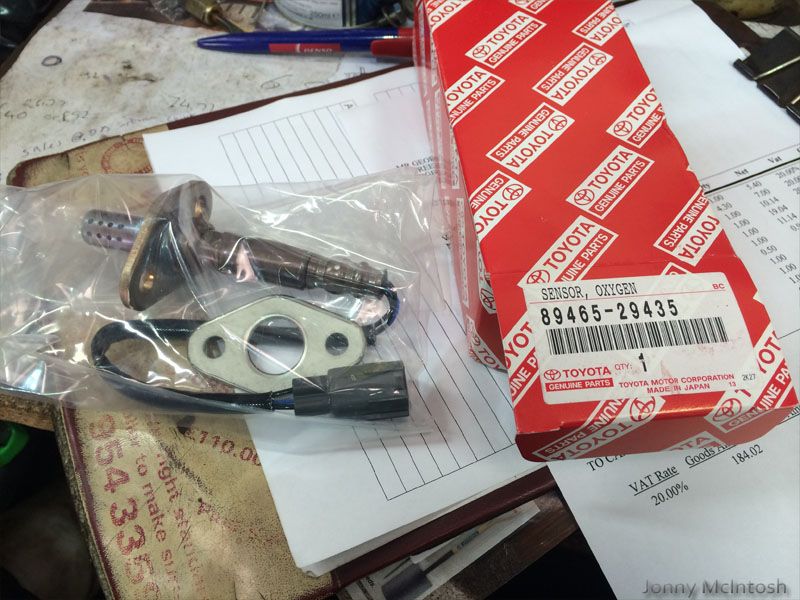
changed a few things, new toyota o2 sensor, went throuh 2 alternators, coil pack clips, another ecu all to get it running smoother
lip on
skid day
running warm so bonnet and bumper are off
then another skid day at driftland
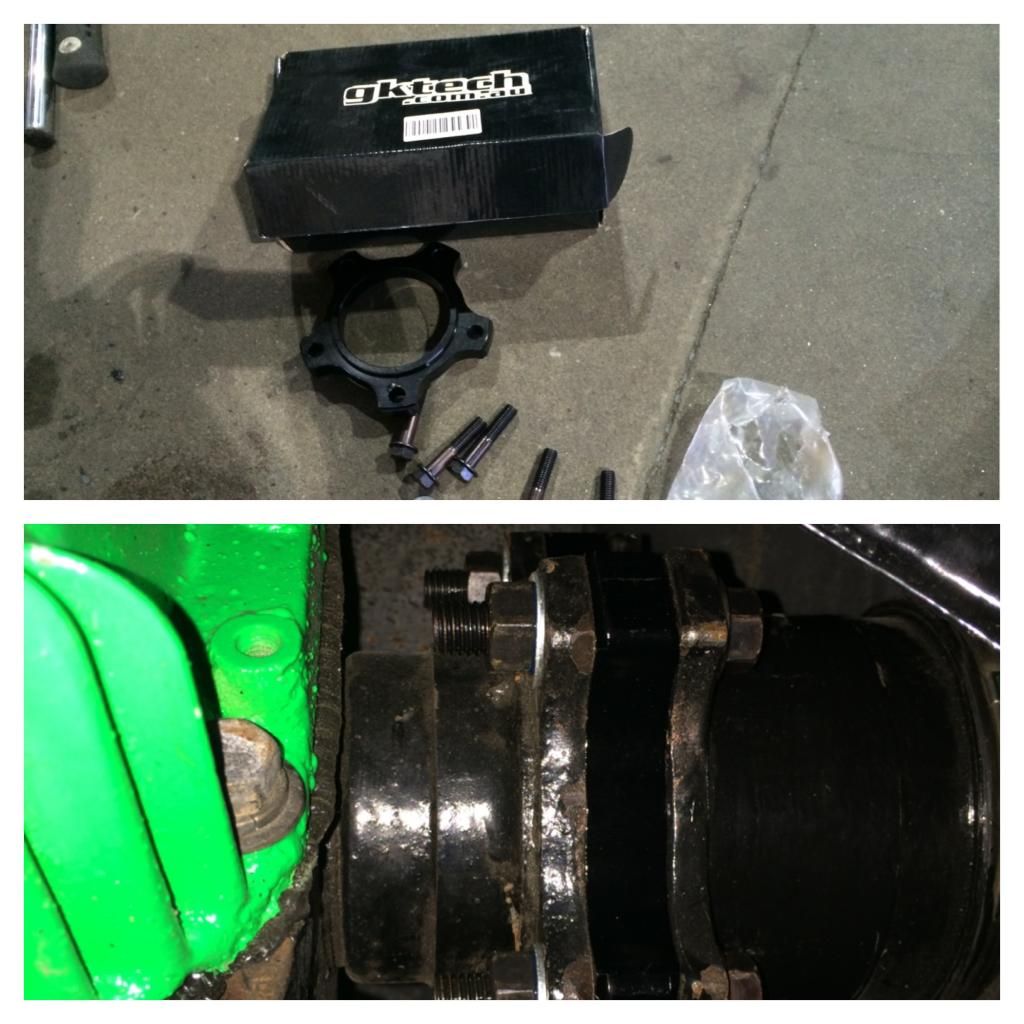
gk tech r33 shaft spacers to prevent cv failure
finalboss 2014
car was on form but again during drifting, serious heat from the engine bay
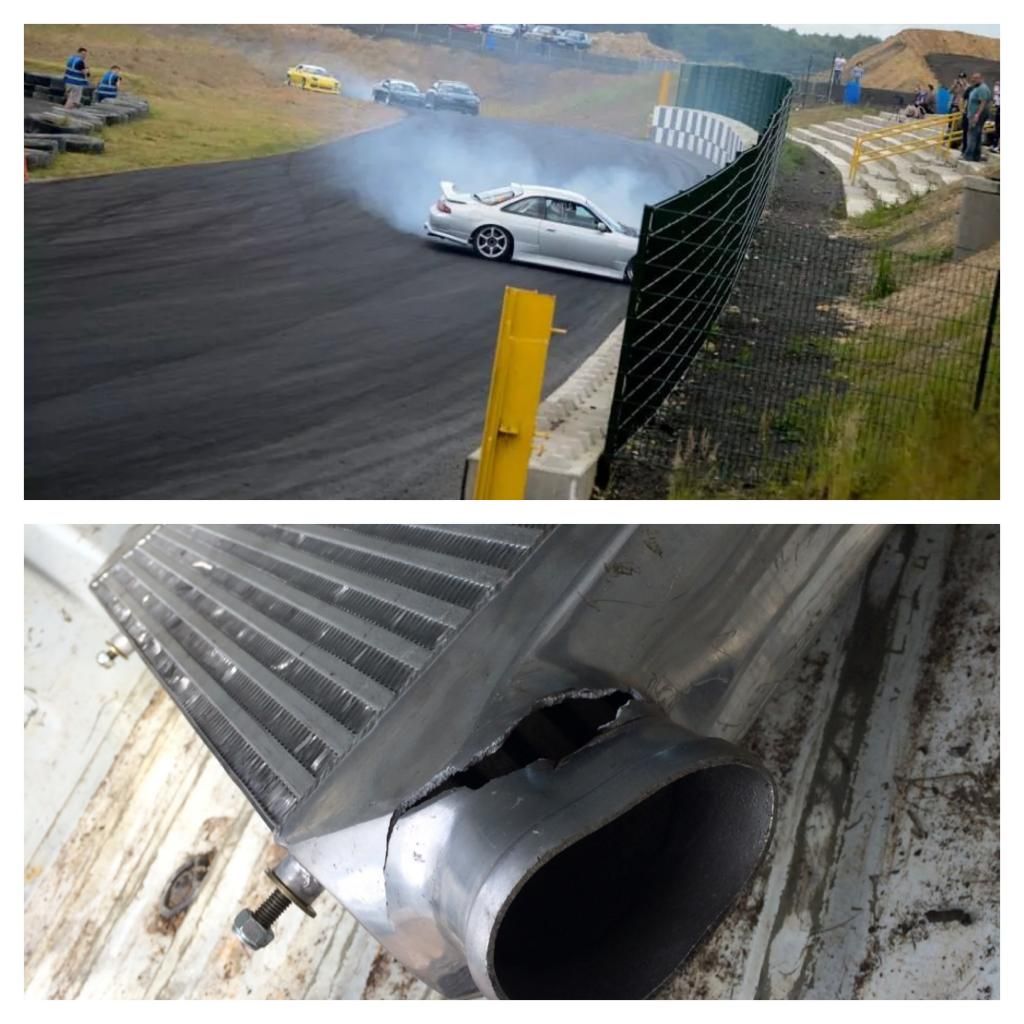
came over the hill along the wall in 3rd gear flat out and span, managed to save it and with the slowest touch of the wall i broke the intercooler and headlight brackets and headlight mounts....my own fault for going silly and not lifting the throttle trying to link the whole straight section
-
dash and carpet back in
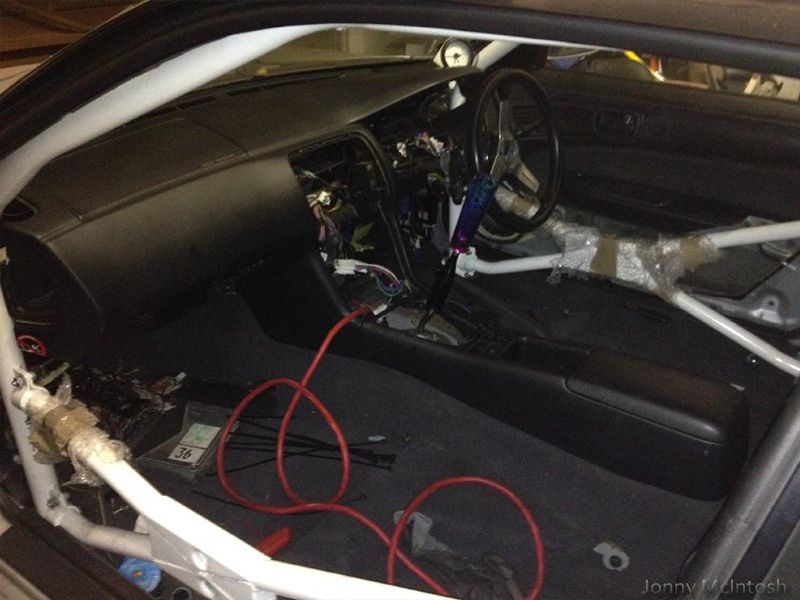
seats in
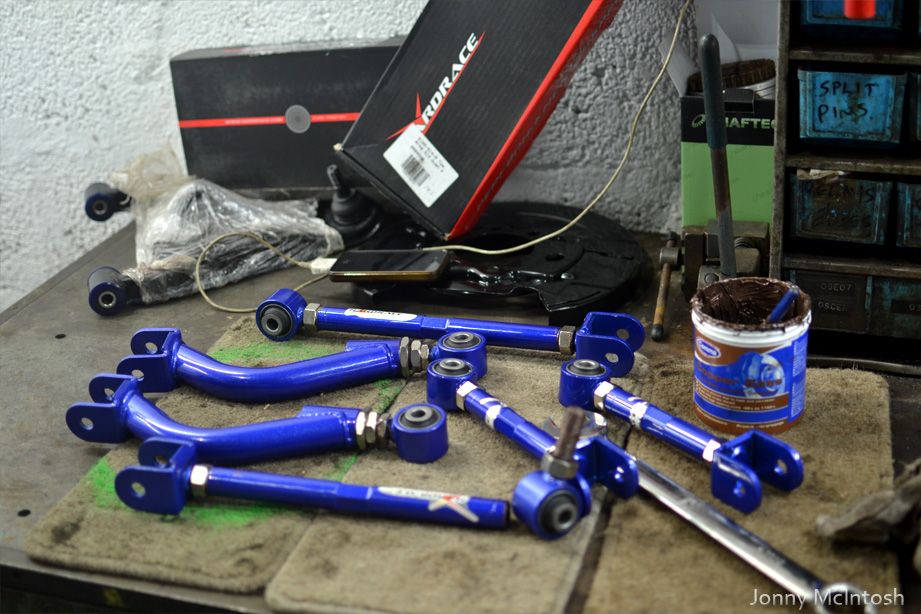
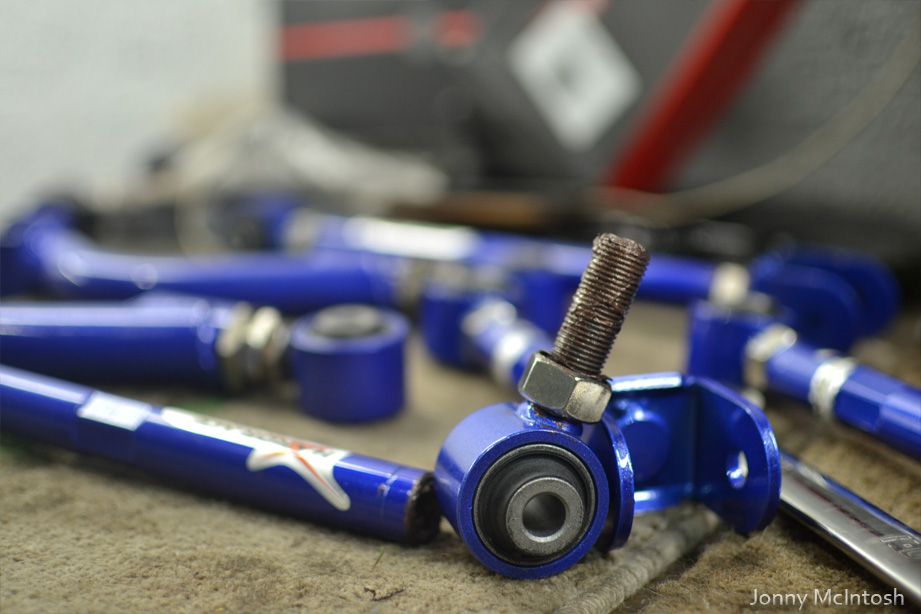
new front end parts, tie rods, rod ends, front tension rods, lower arm bushes and stuff
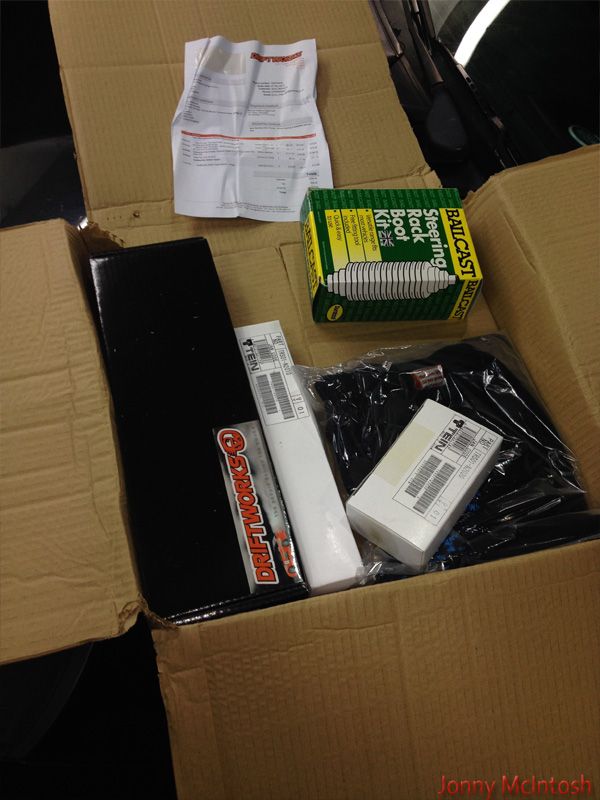
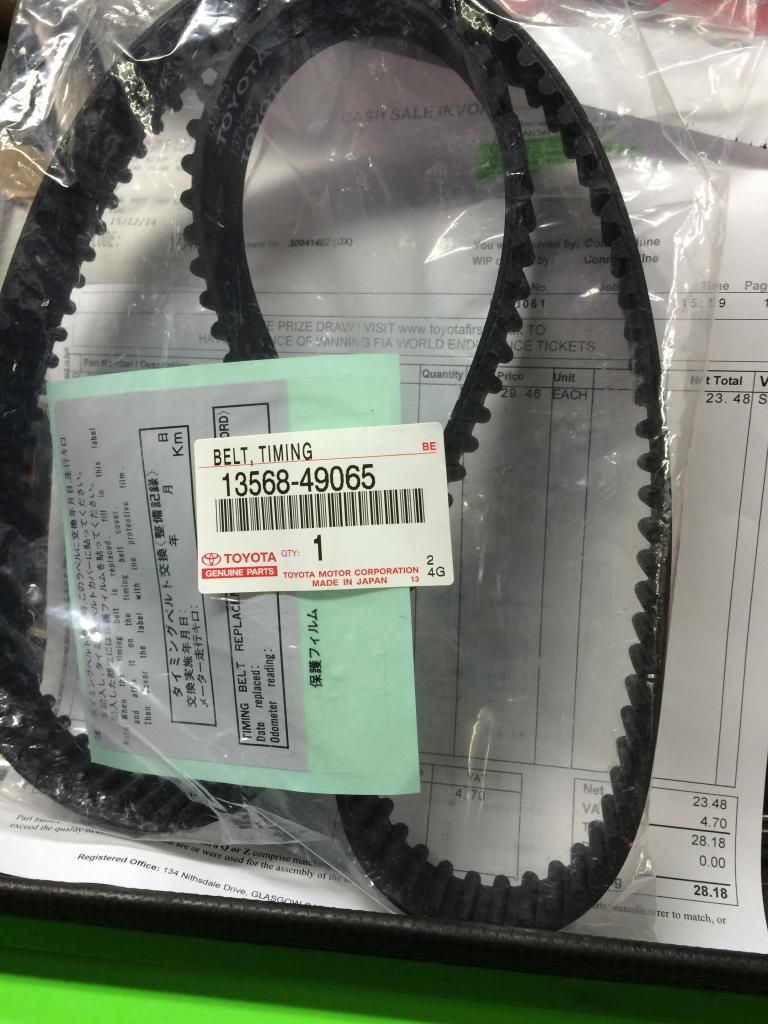
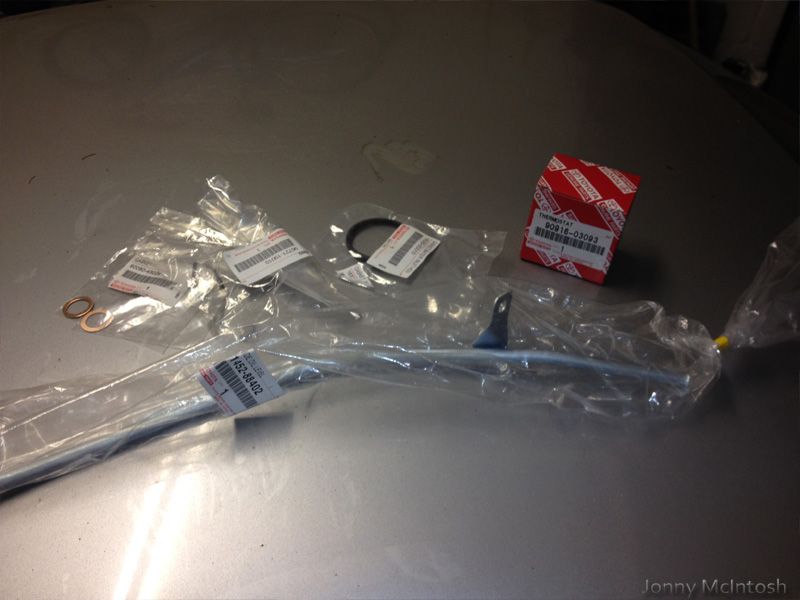
more toyota parts, thermostat, dip stick, various seals etc
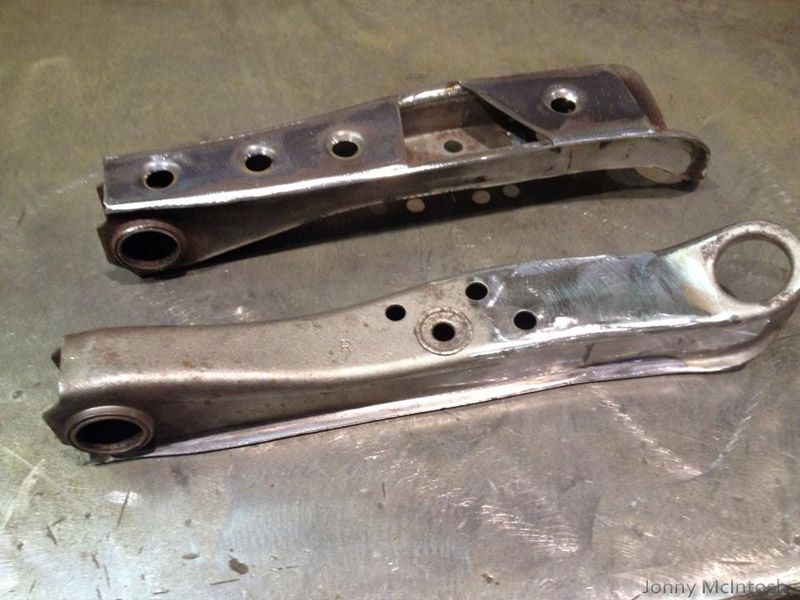
lower arms extended 20mm and braced
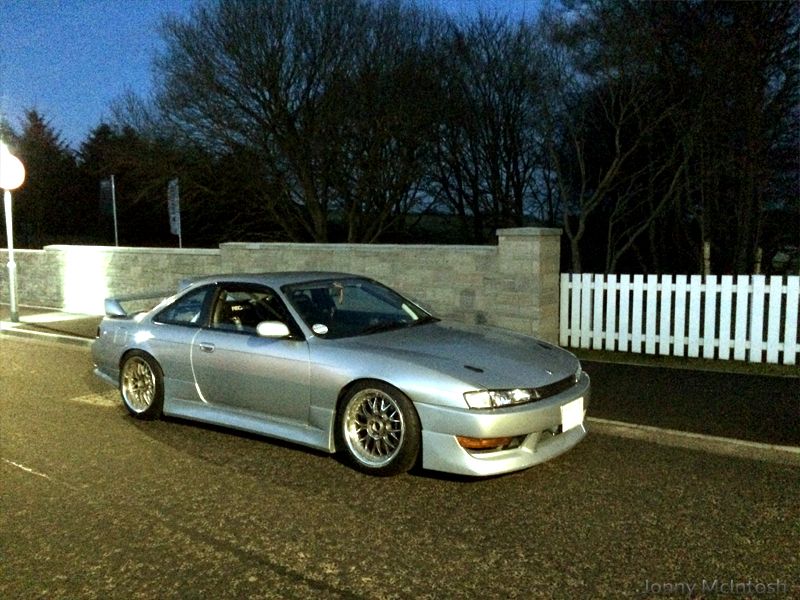
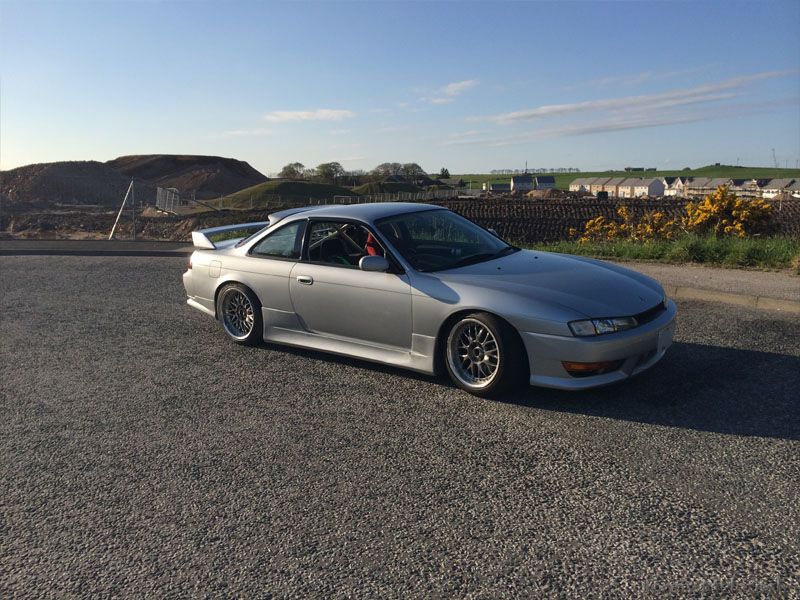
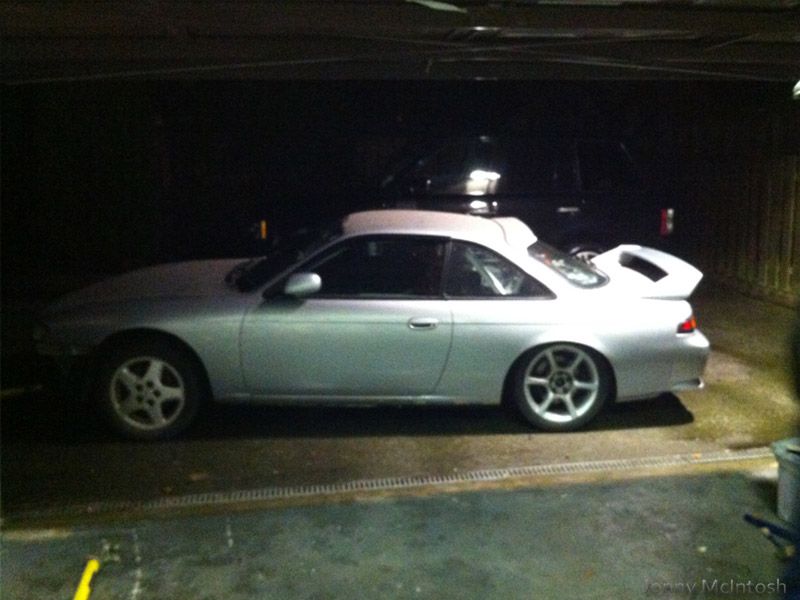
first time out the garage, yeah.....
exaust for twins made up of soarer jzz30 downpipe mixed in with some 3" stainless pipe
cross over pipe done
full exhaust wrapped
getting there
various pipes and stuff
old stuff
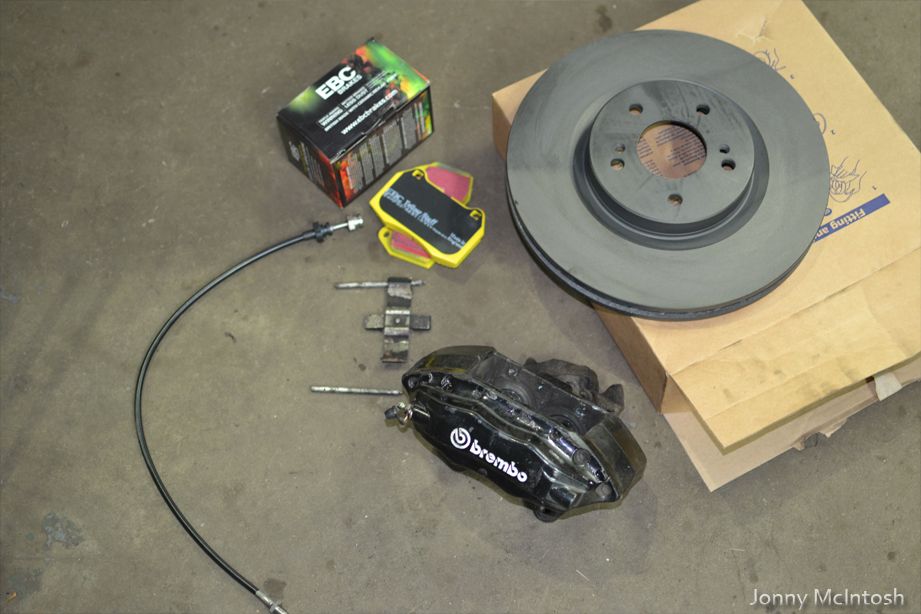
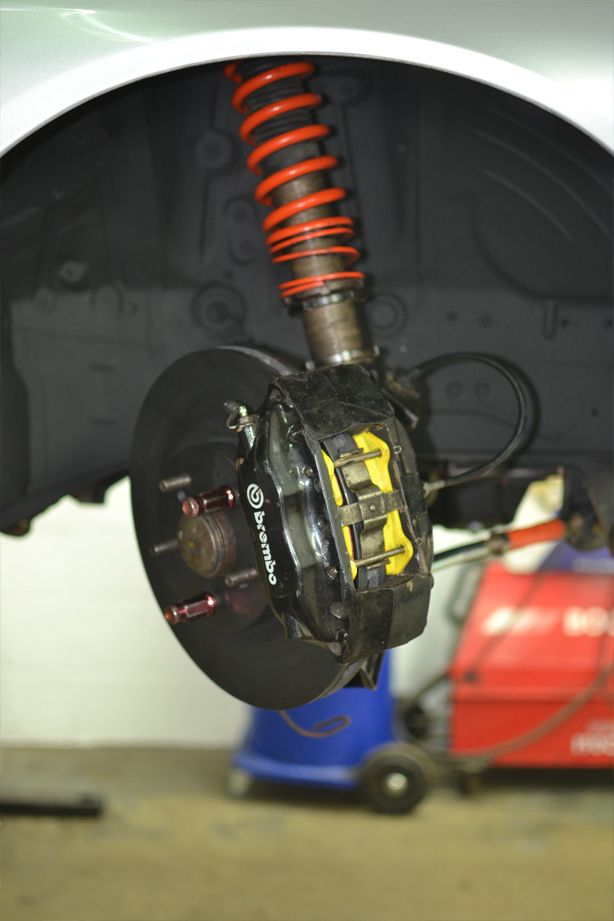
bought new r33 front brakes
soarer badge needs to go on somewhere
-
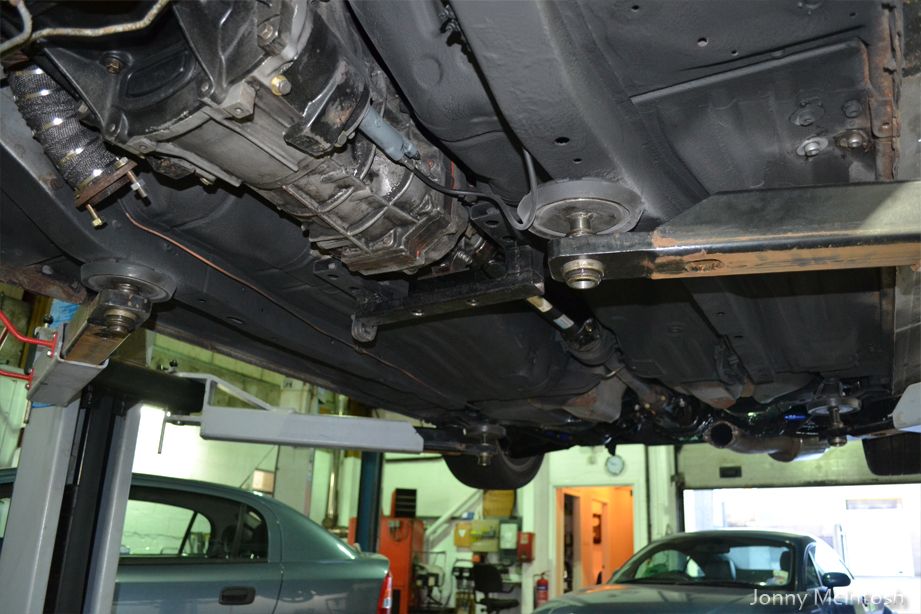
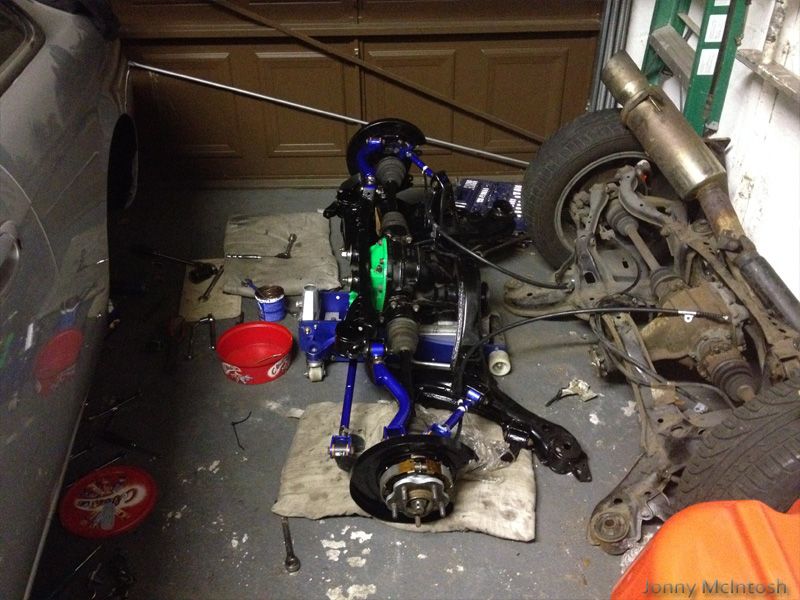
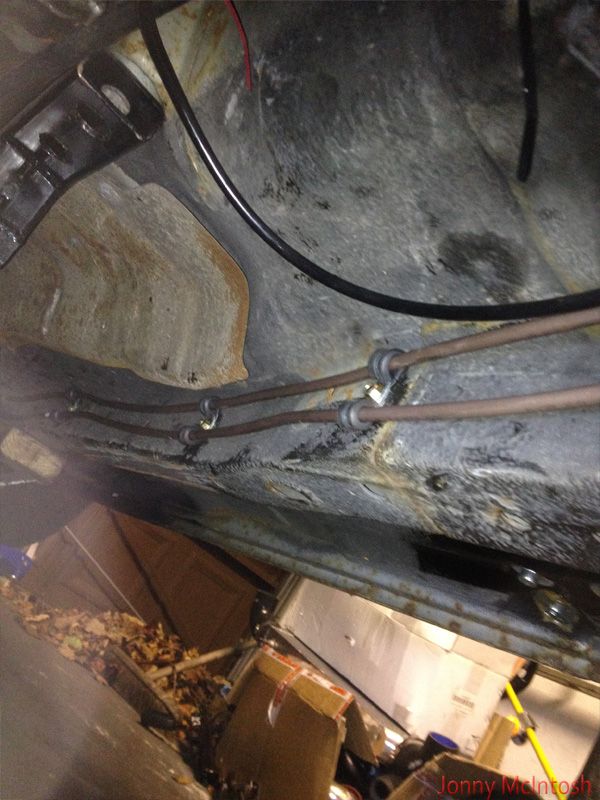
subframe and brake pipes done
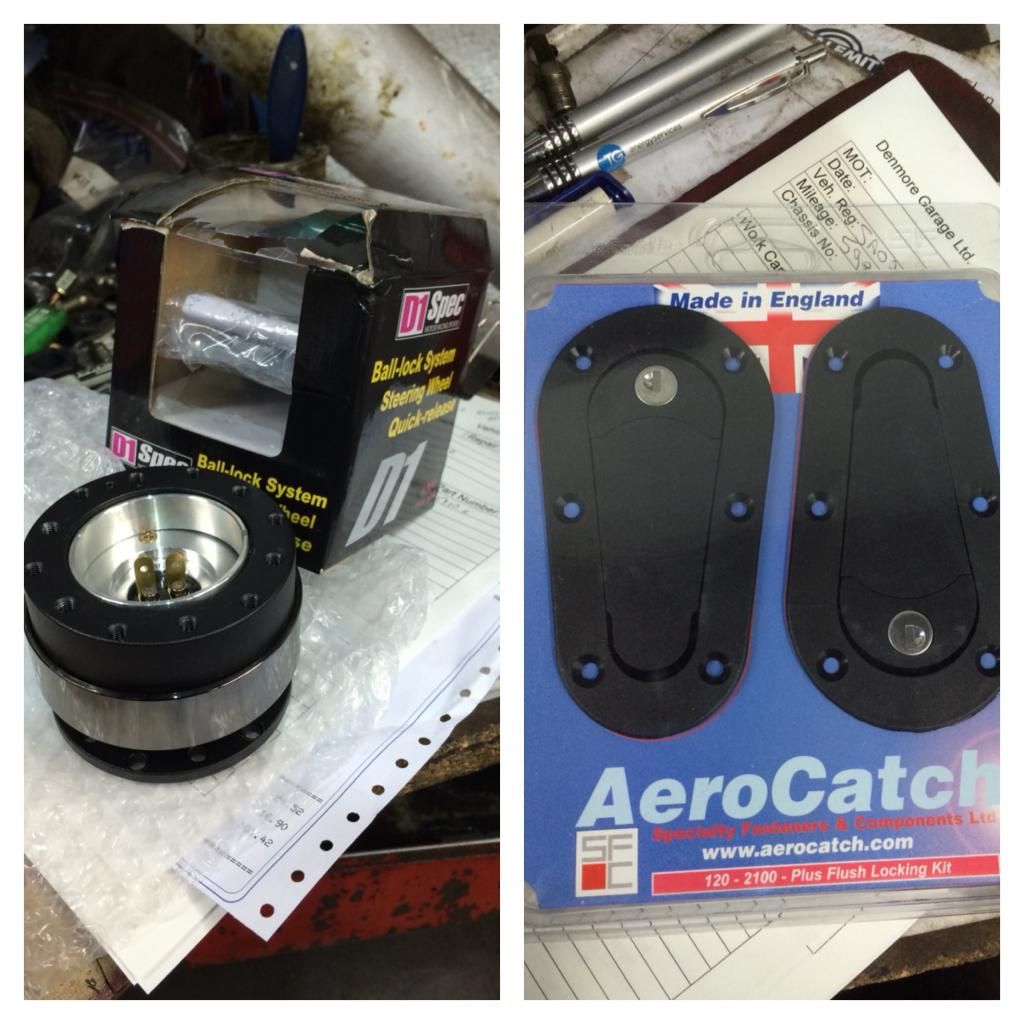
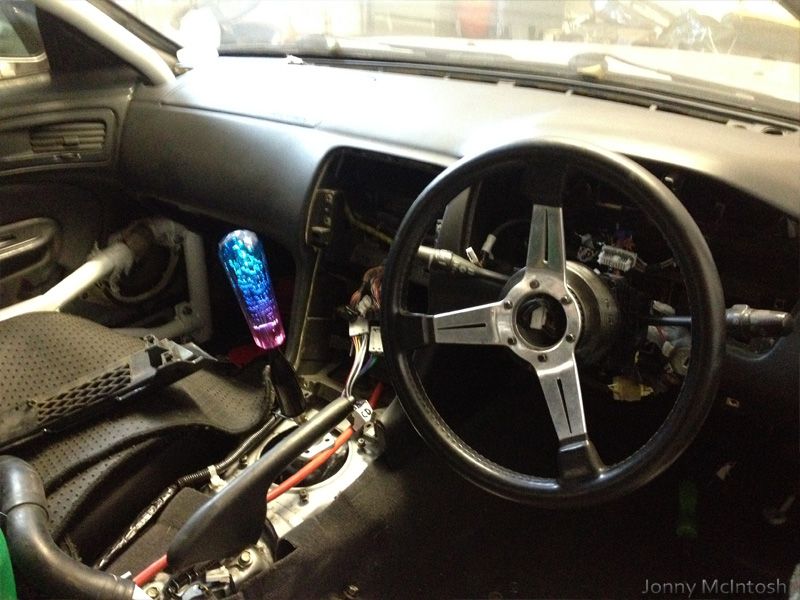
new wheel and hkb boss from driftworks, also funny auto bacs gear stick from japan
new box oil

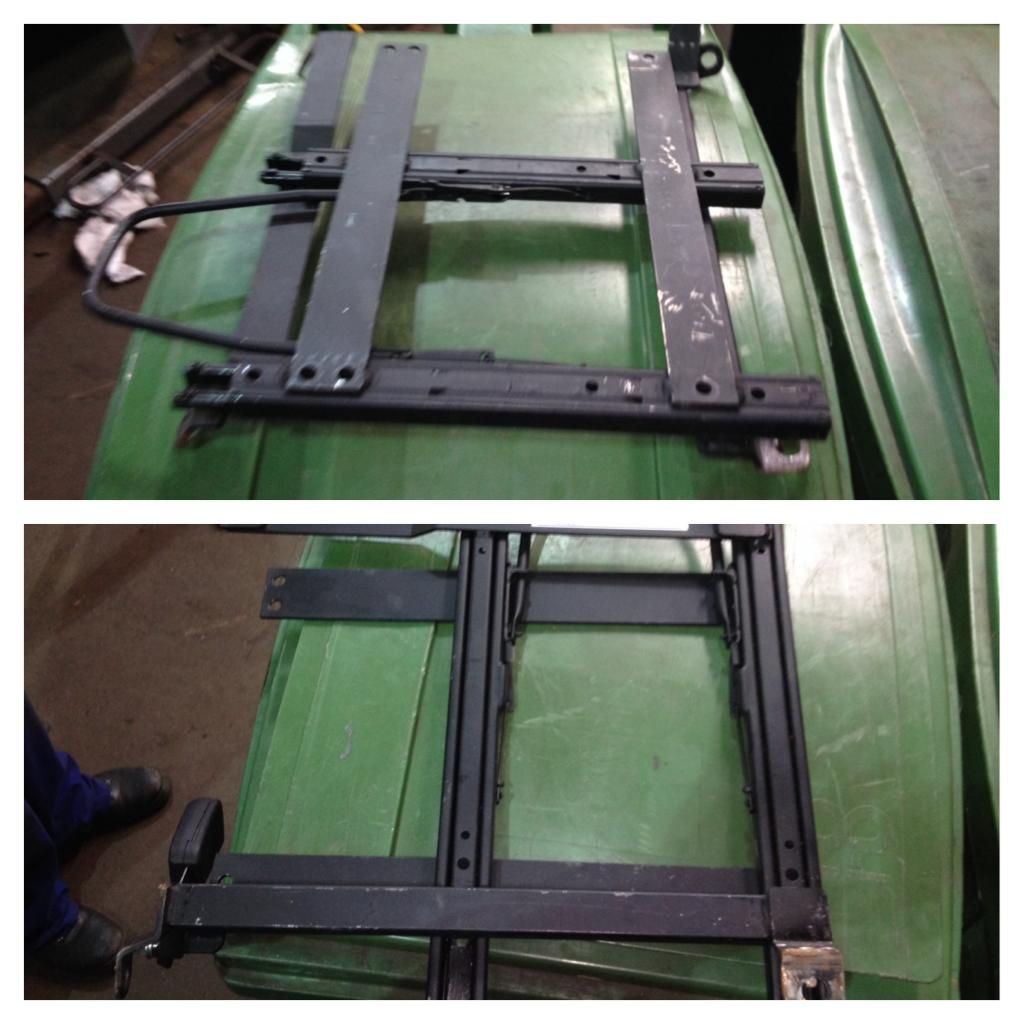
also some seat rails for recaro seats
getting there:
made up new fuel pipes and swapped the sides over since the 1j inlet mani is on the opposite side of the engine
mocked up some electric push fans and a fmic with pipework
-
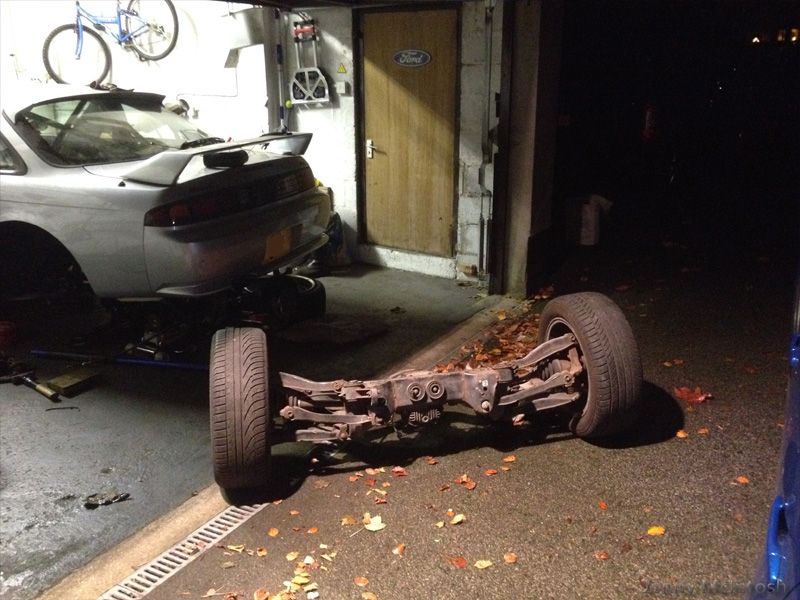
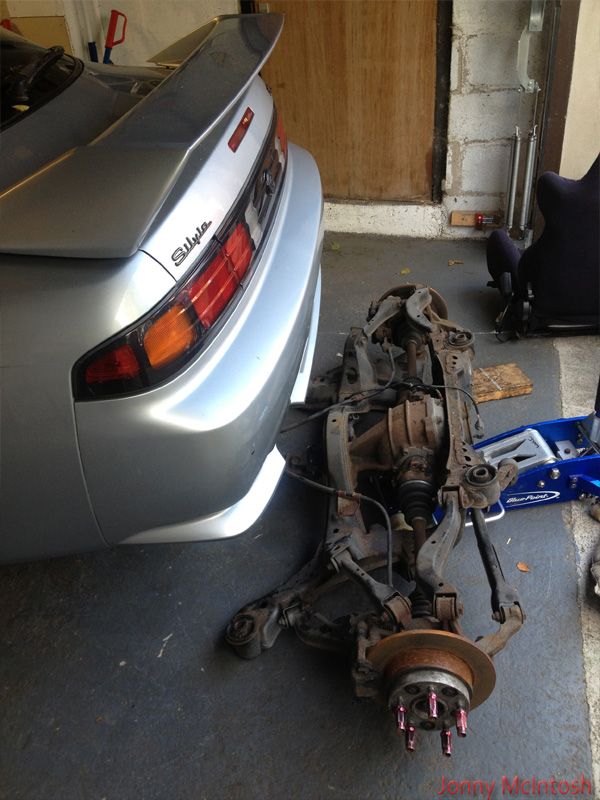
got it lifted up high enough
off it comes
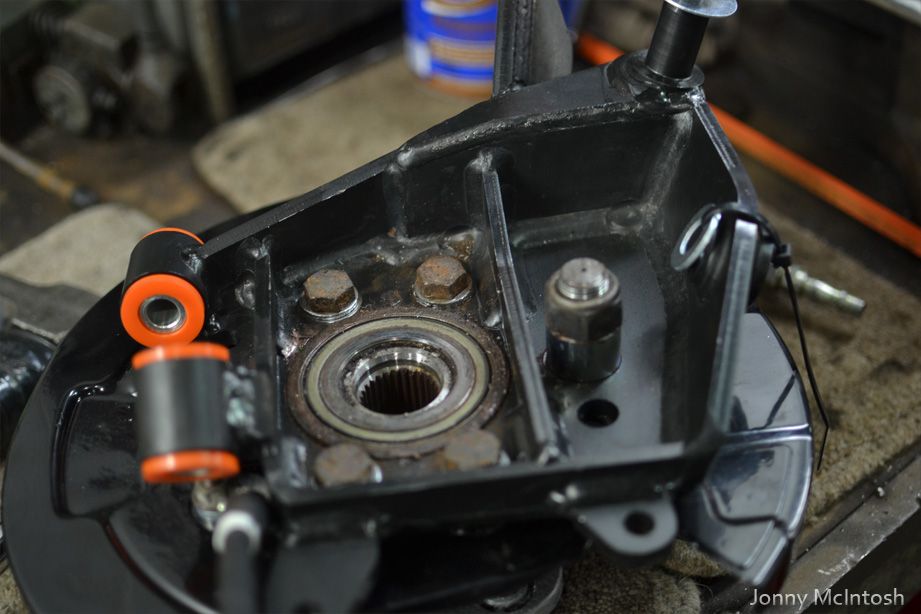
it's ridiculous how much the subframe locking collars have split the old bushes
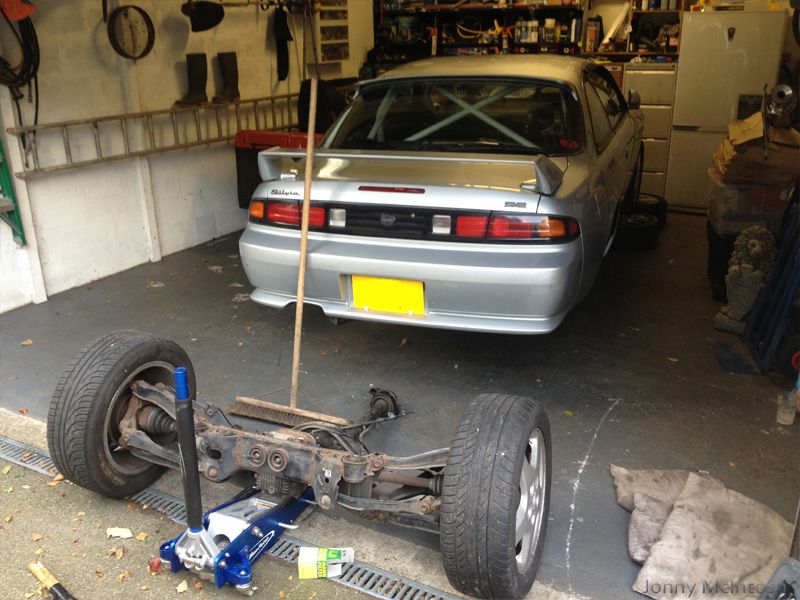
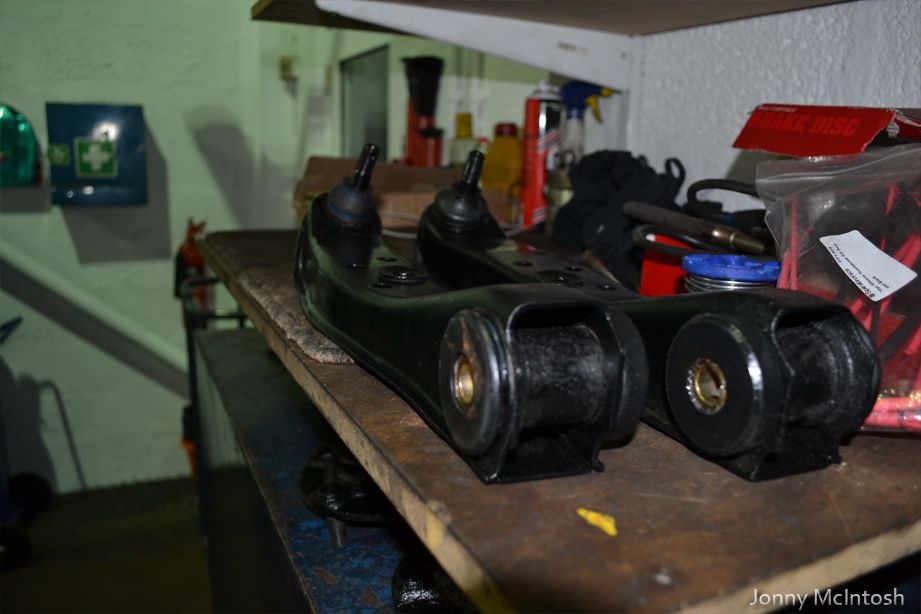
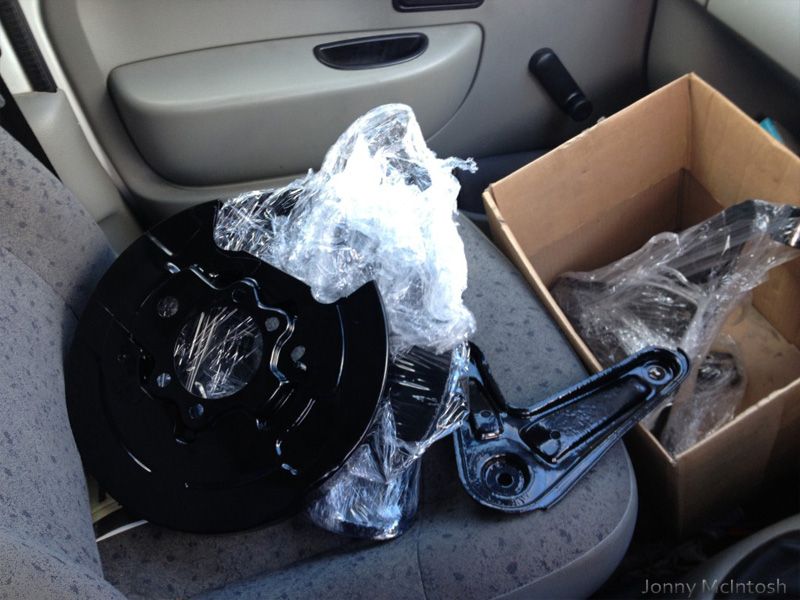
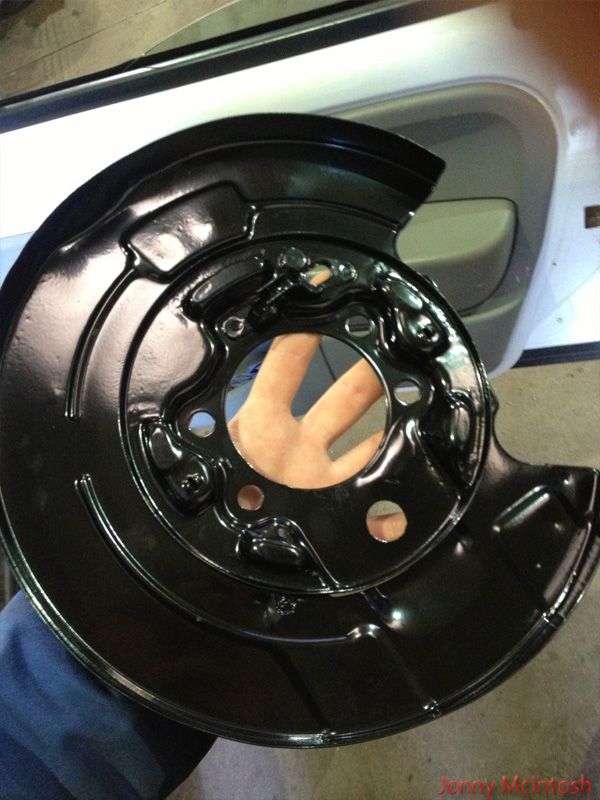
got my powdercoated stuff back
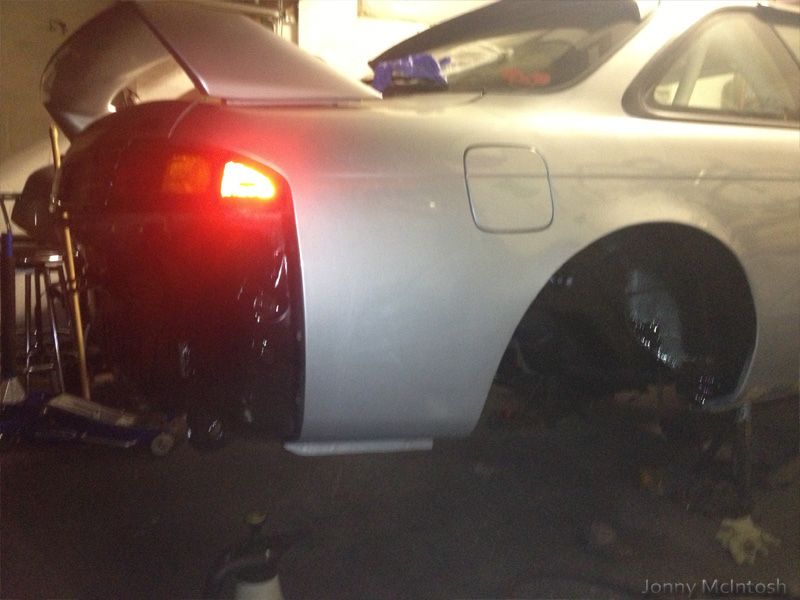
magic aero rear spats arrived
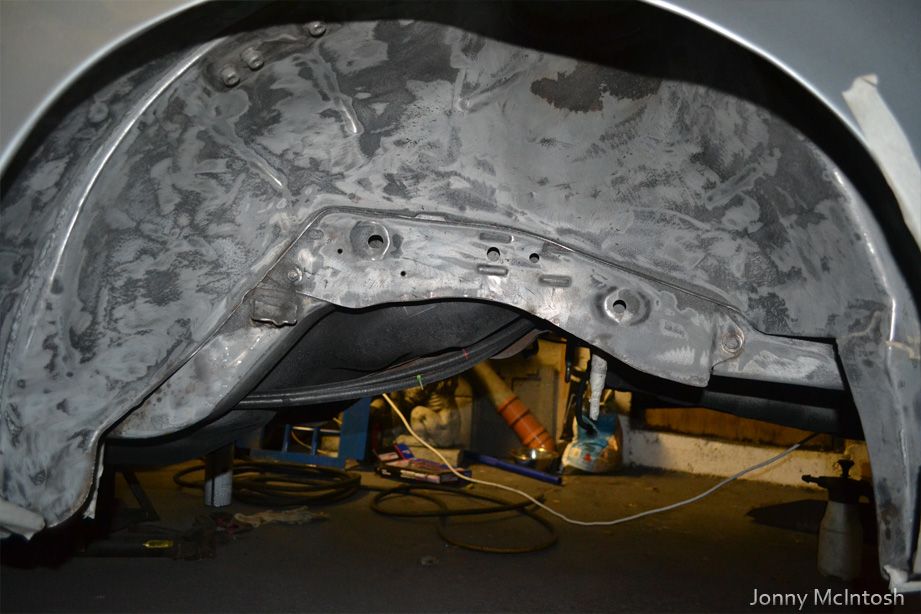
horrible job on my back with a grinder, cleaning up the rear end of the shell....
also can i just say....god i love imports
soo clean compared to UK cars!!!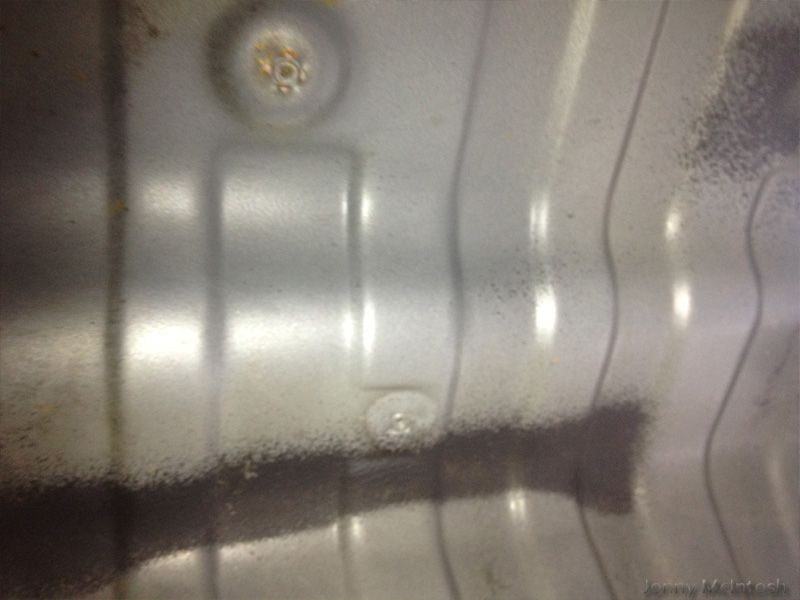
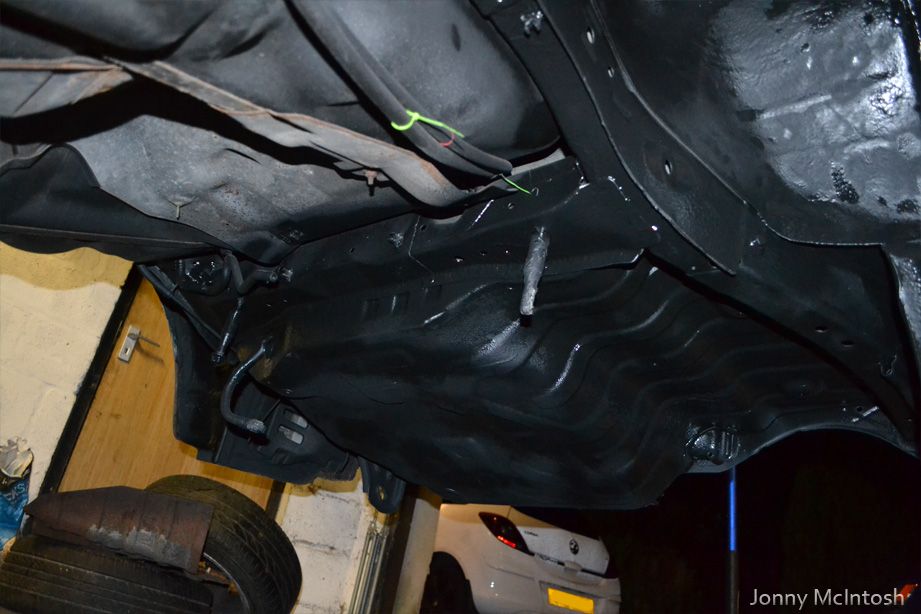
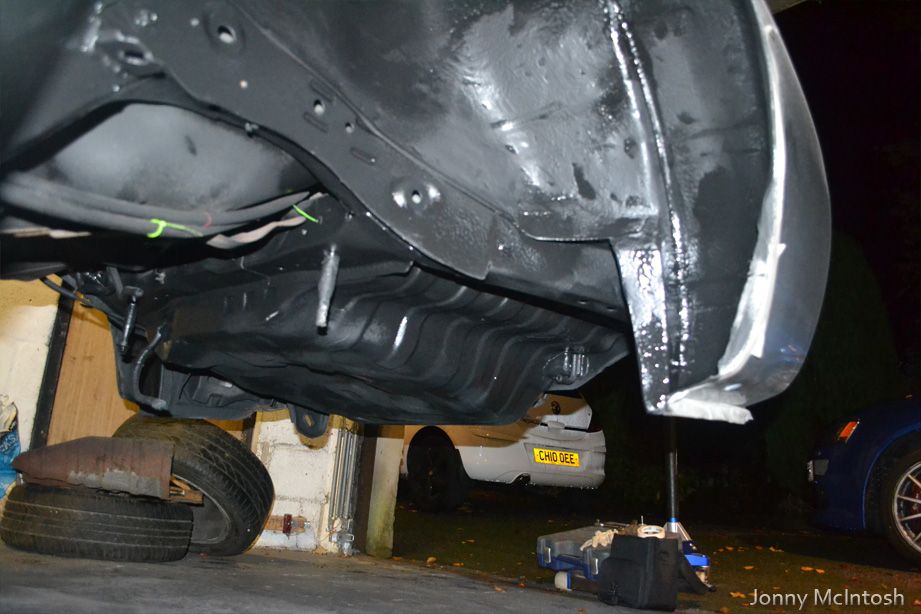
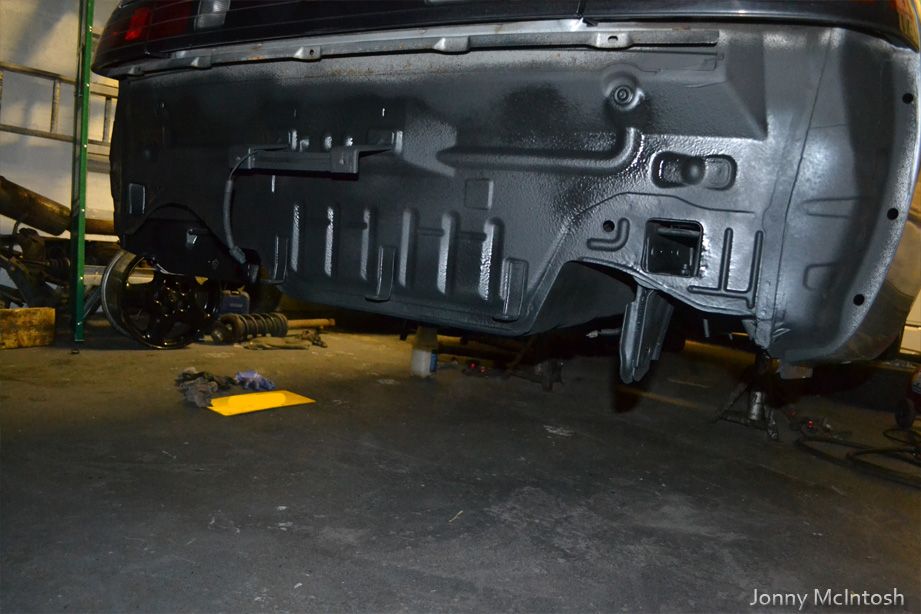
all stone chipped and cleaned up, fully protected now
a pic of the sills mid clean up before spraying stonechip on....making all the uk 200sx boys jealous

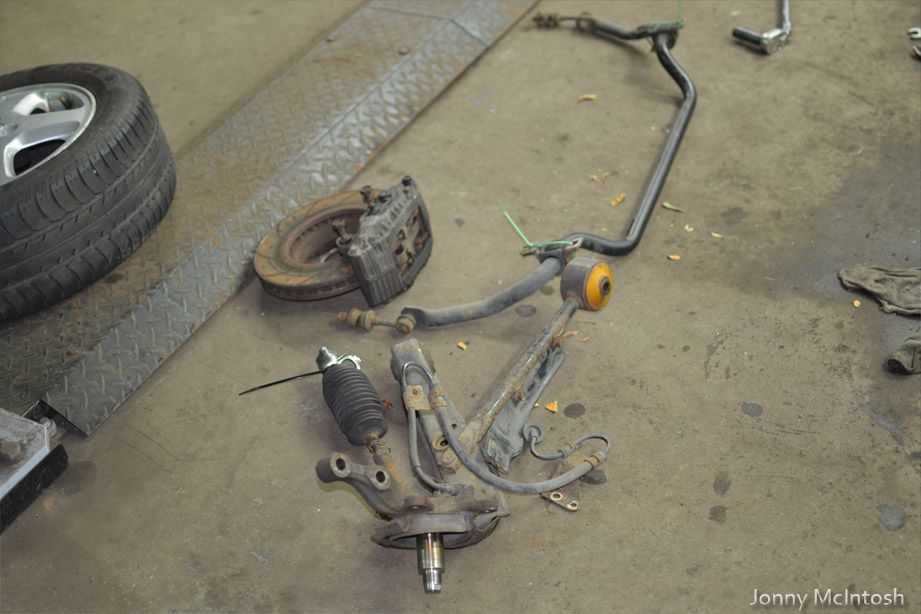
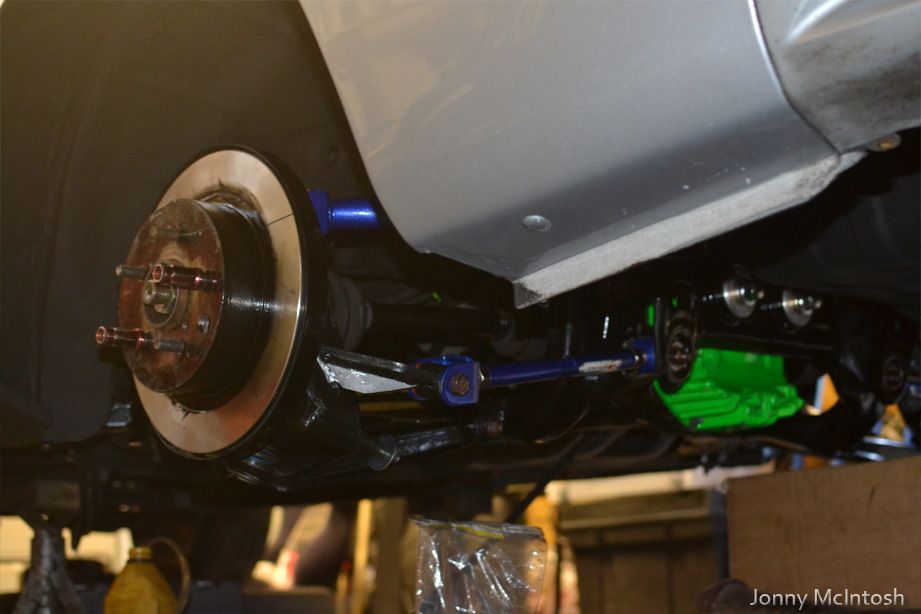
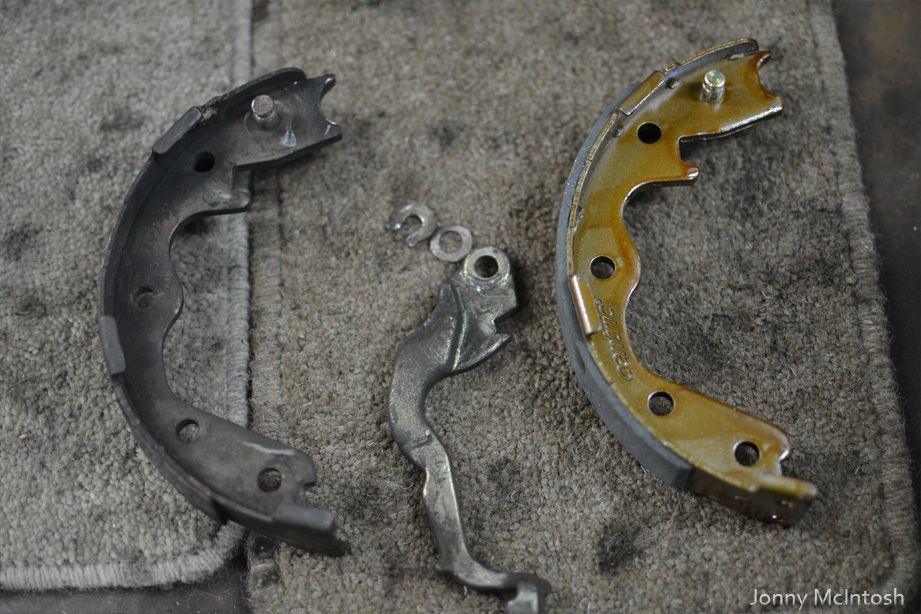
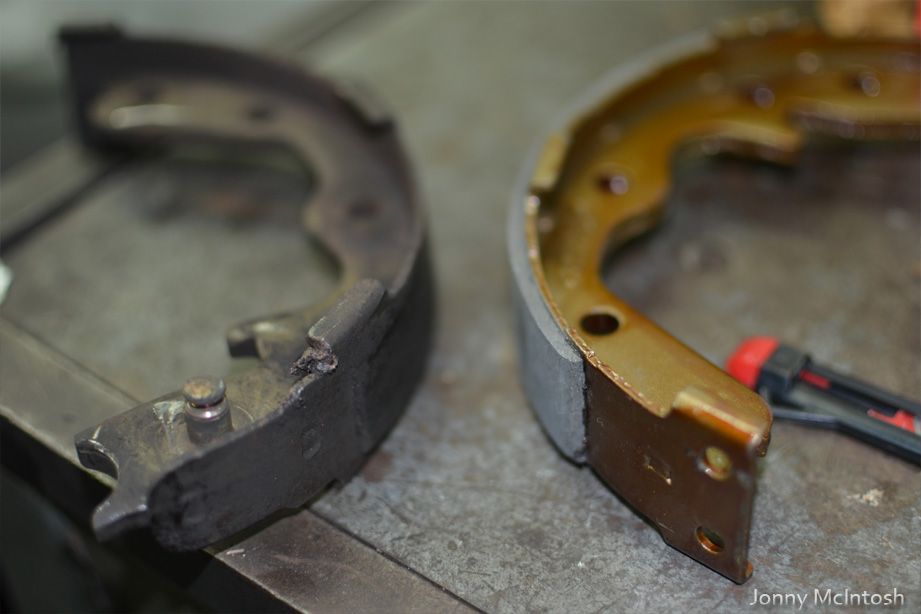
rear arm bushes
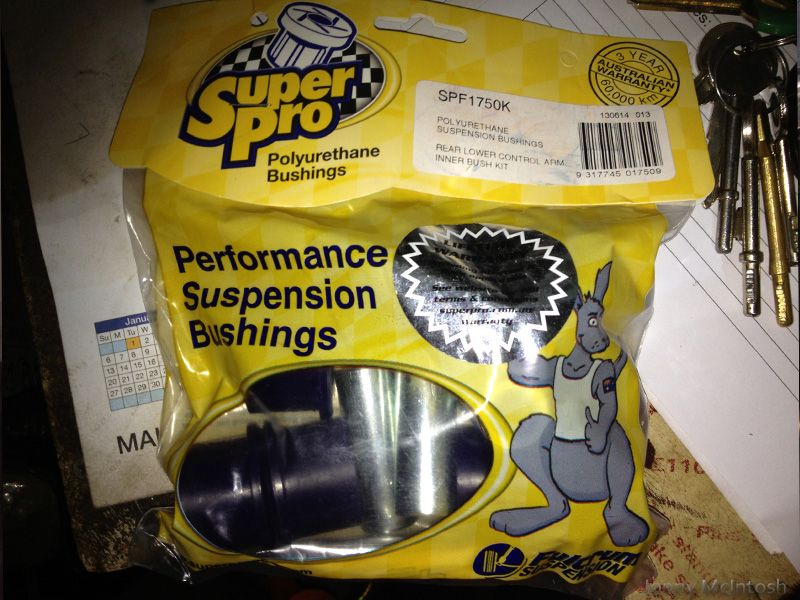
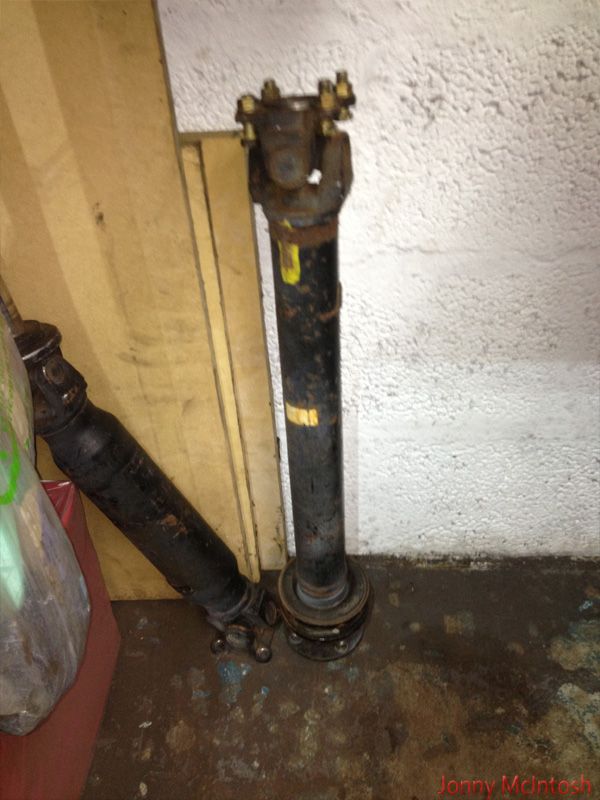
and a jdm turbo non abs rear prop to go with my new diff
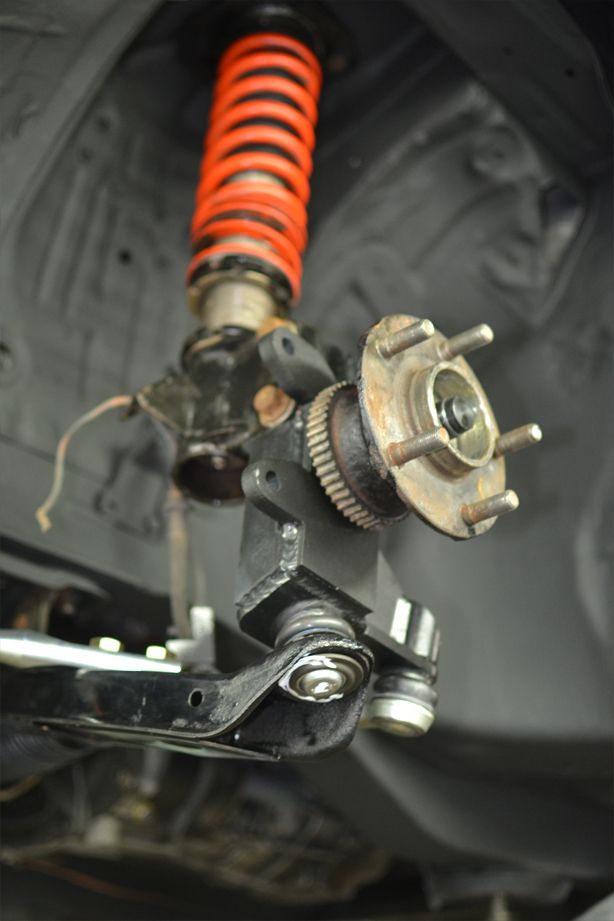
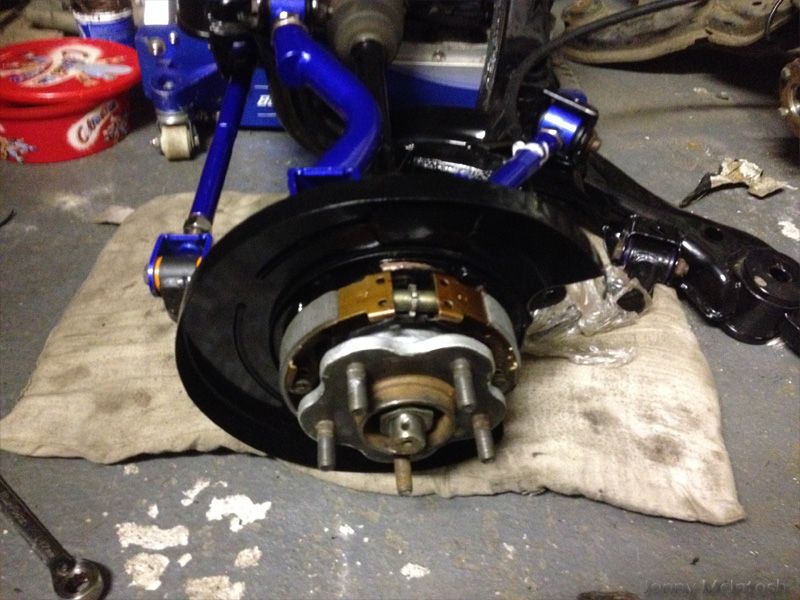
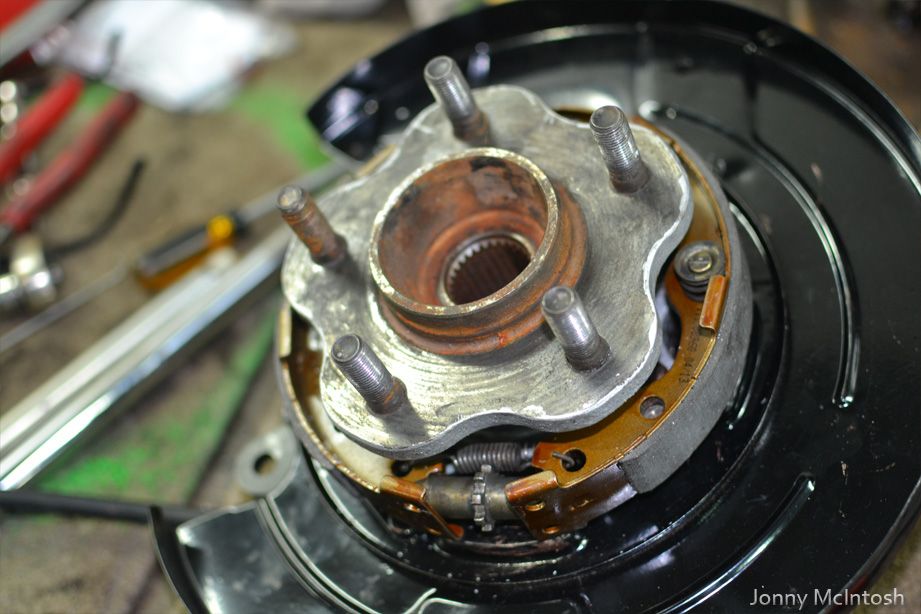
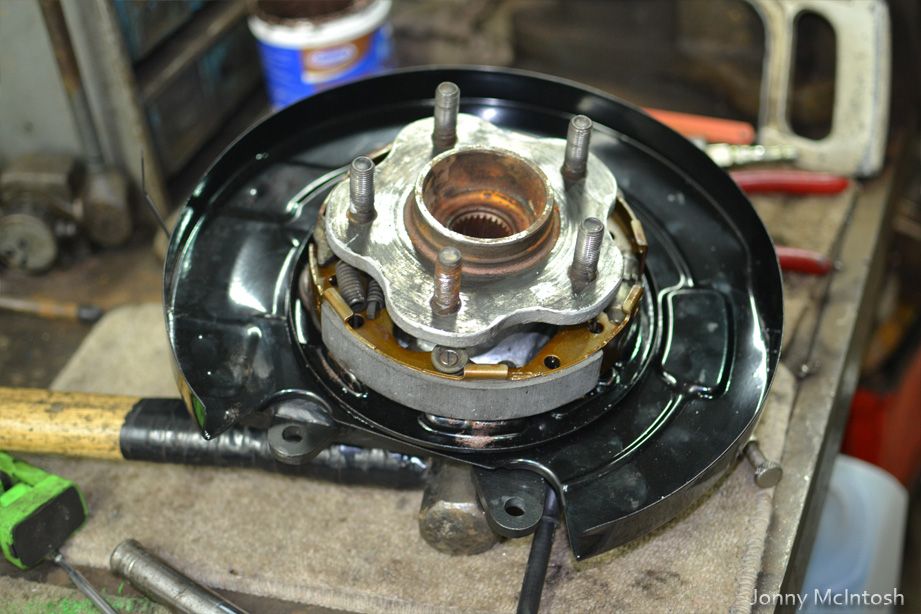
driftworks hubs
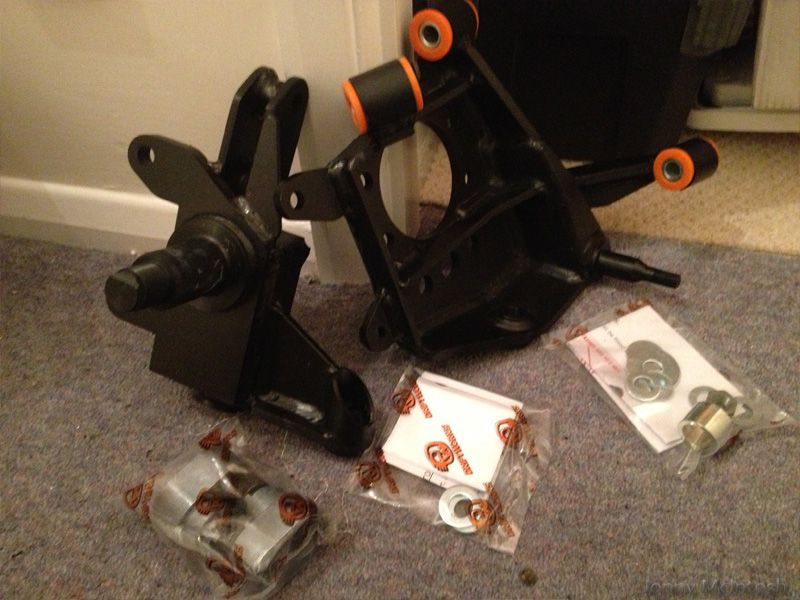
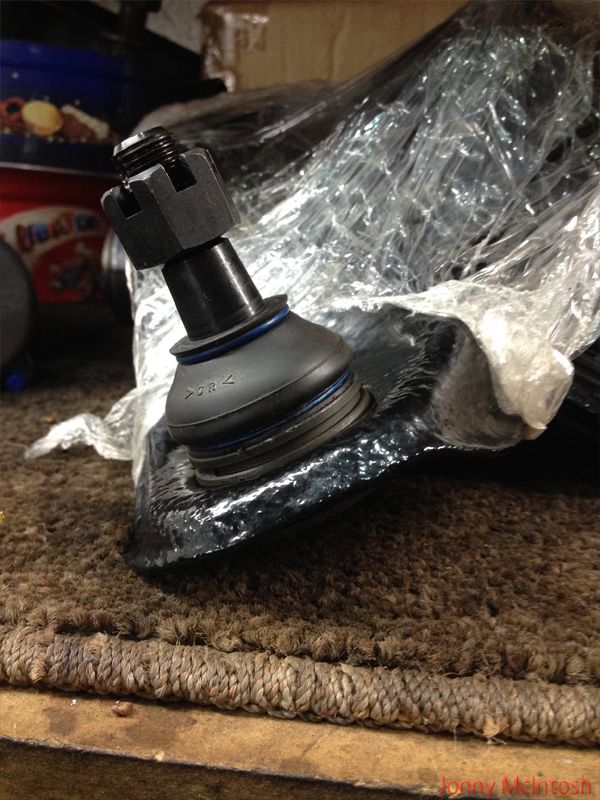
ball joints into the powedercoated arms
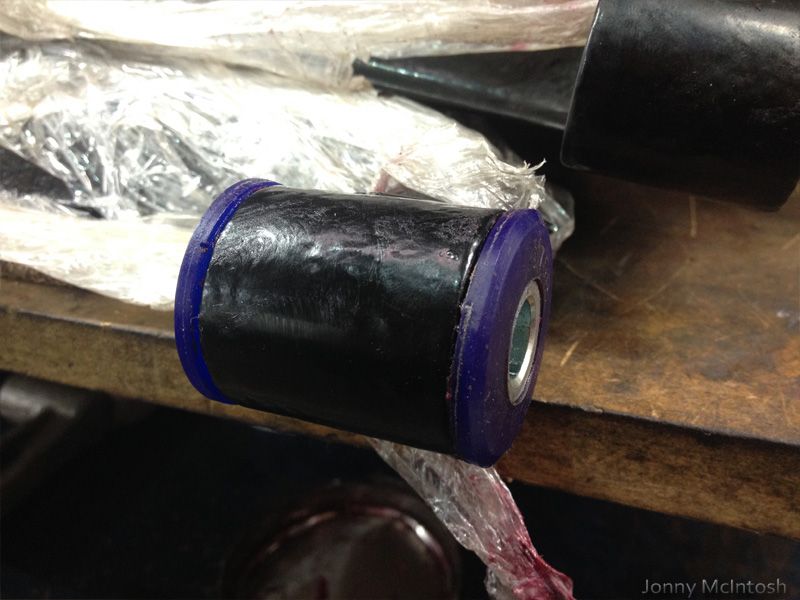
and bushes
i'm one for greasing everything, i hate siezed threads etc so stripped and prepped everything properly with this build
bearings tidied up

cd009
in Wanted
Posted
sent you a pm mate, I'm not far from you being in Aberdeen