

Spoons
-
Posts
119 -
Joined
-
Last visited
Content Type
Profiles
Forums
Events
Gallery
Store
Posts posted by Spoons
-
-
Well Im feeling generous seems it's Christmas!
Price reduction. £6200
If your after a 350Z that hasn't been messed about with and has been maintained and driven with mechanical sympathy and care. This is it! Christmas presents don't get much better.
-
On 03/12/2019 at 23:26, sk08rad said:
The best colour
 GLWTS
GLWTS
Thanks pal, I thought I replied to this the other day but doesn't look to have posted. Appreciate it though and just hope the fat guy on his sledge doesn't slow things down too much.
-
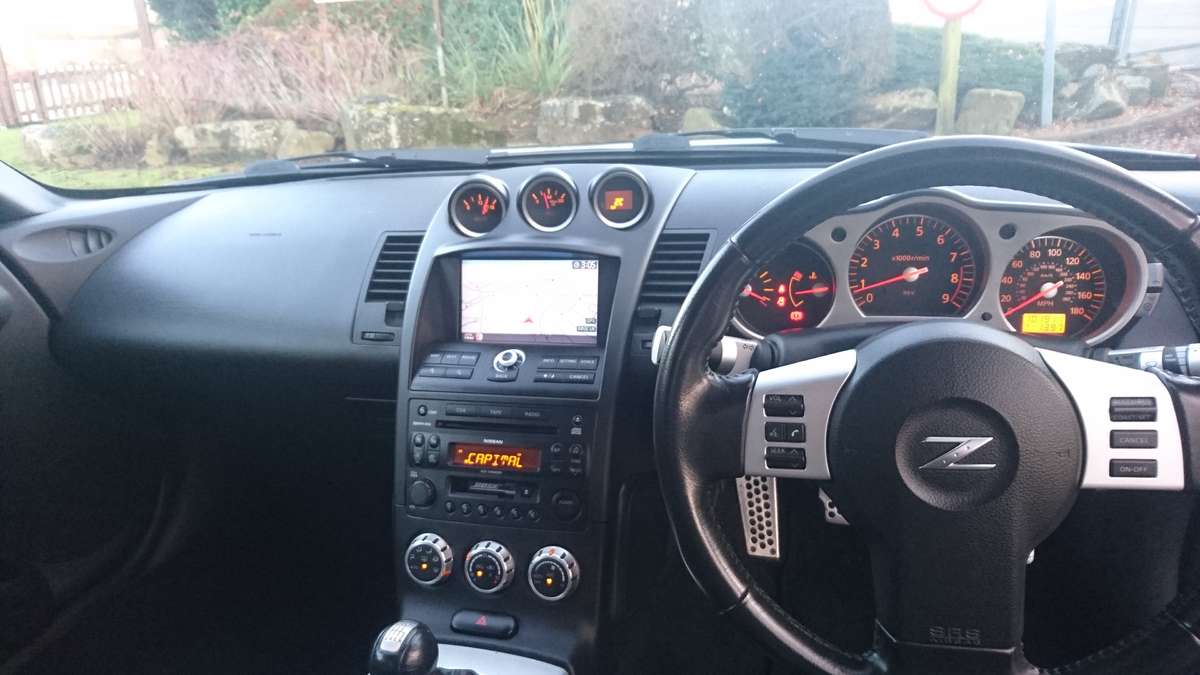
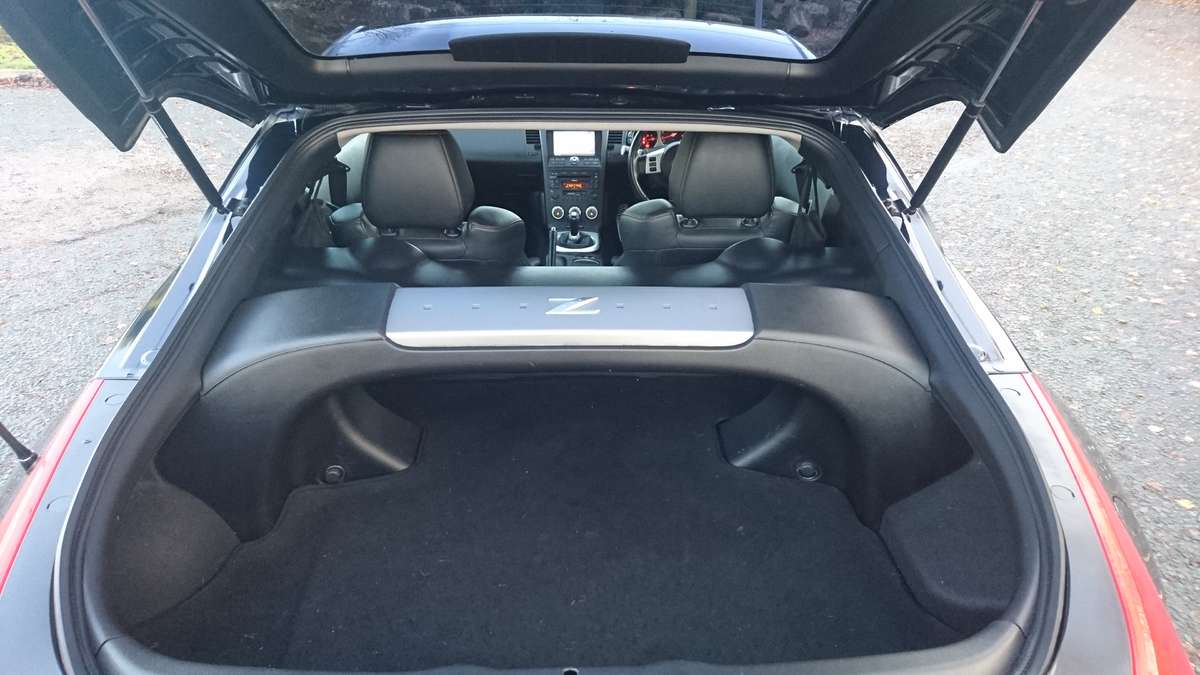
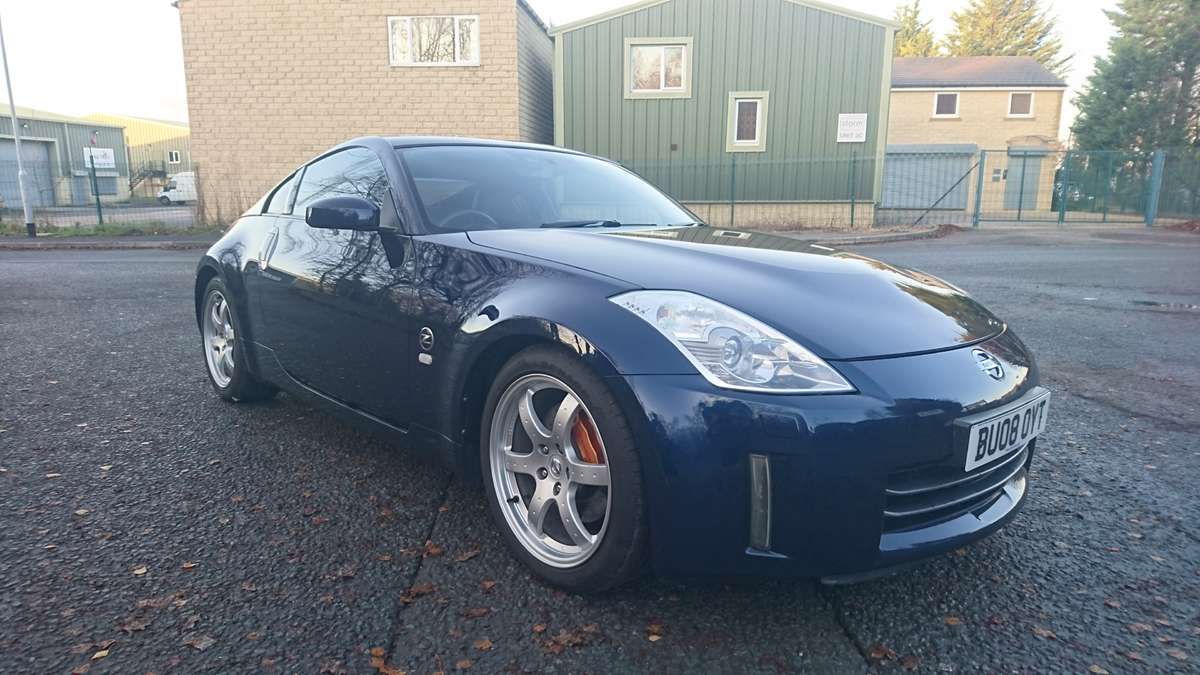
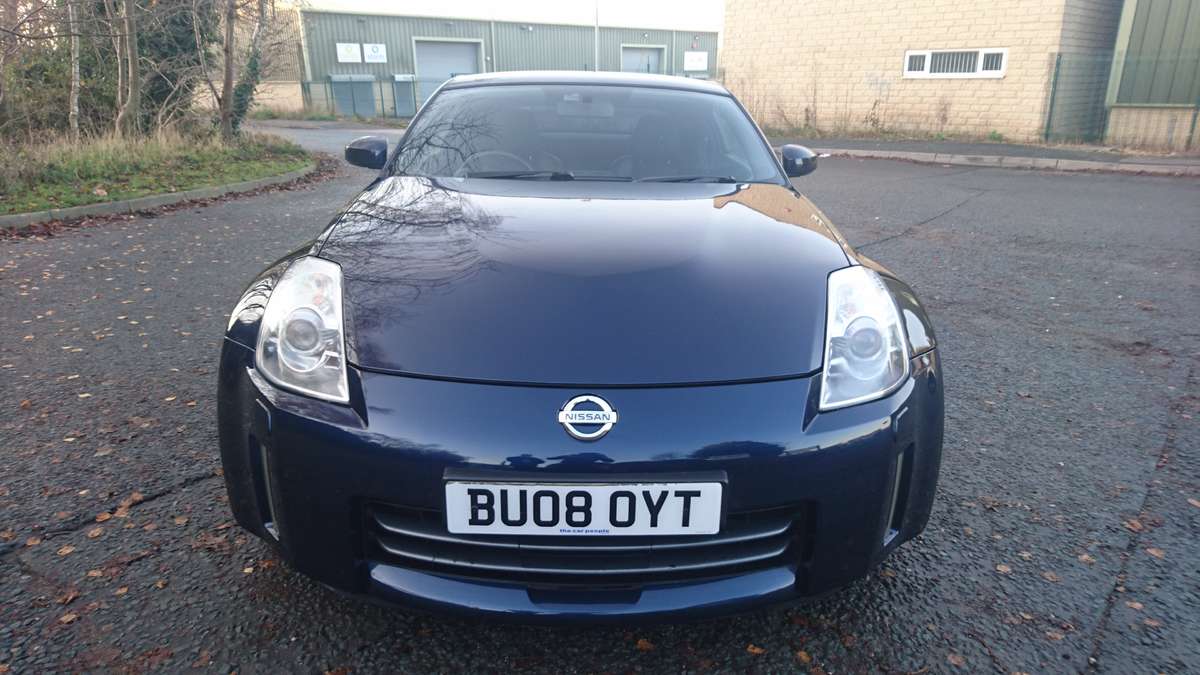
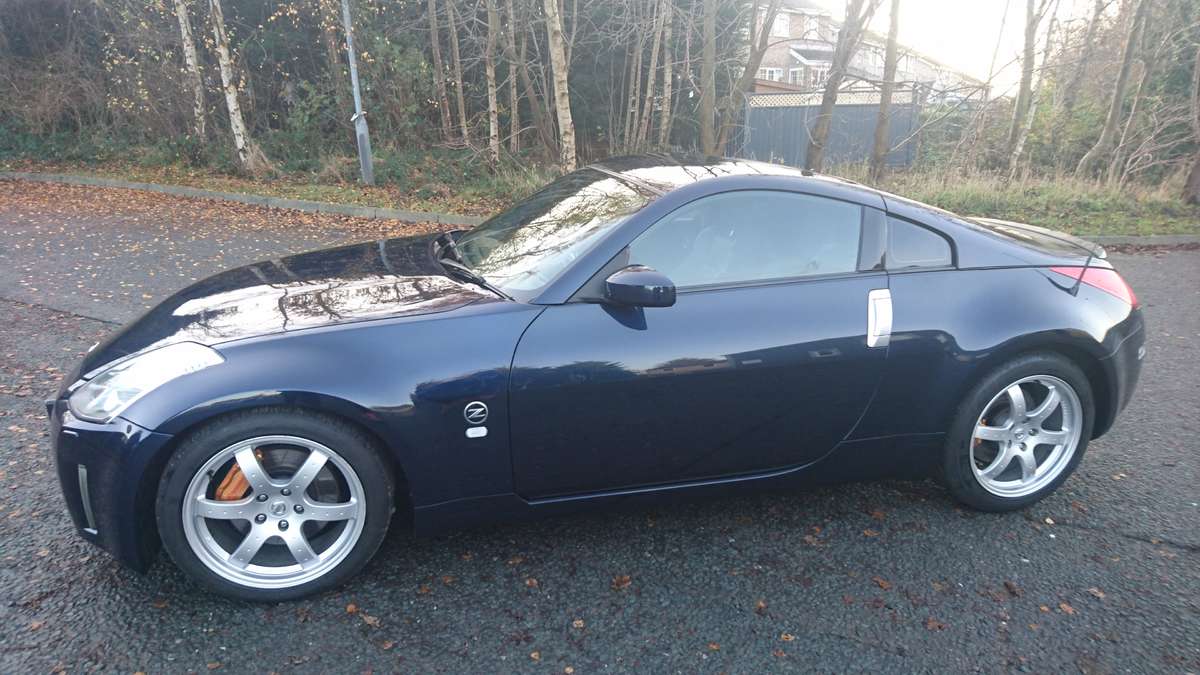
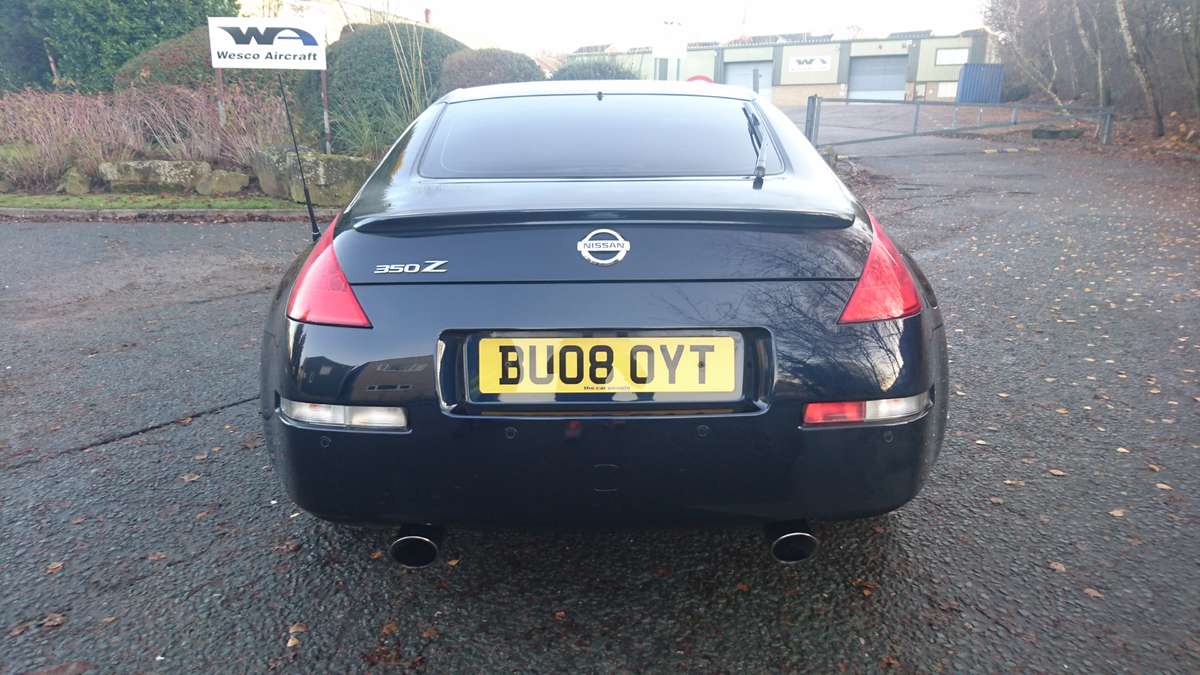
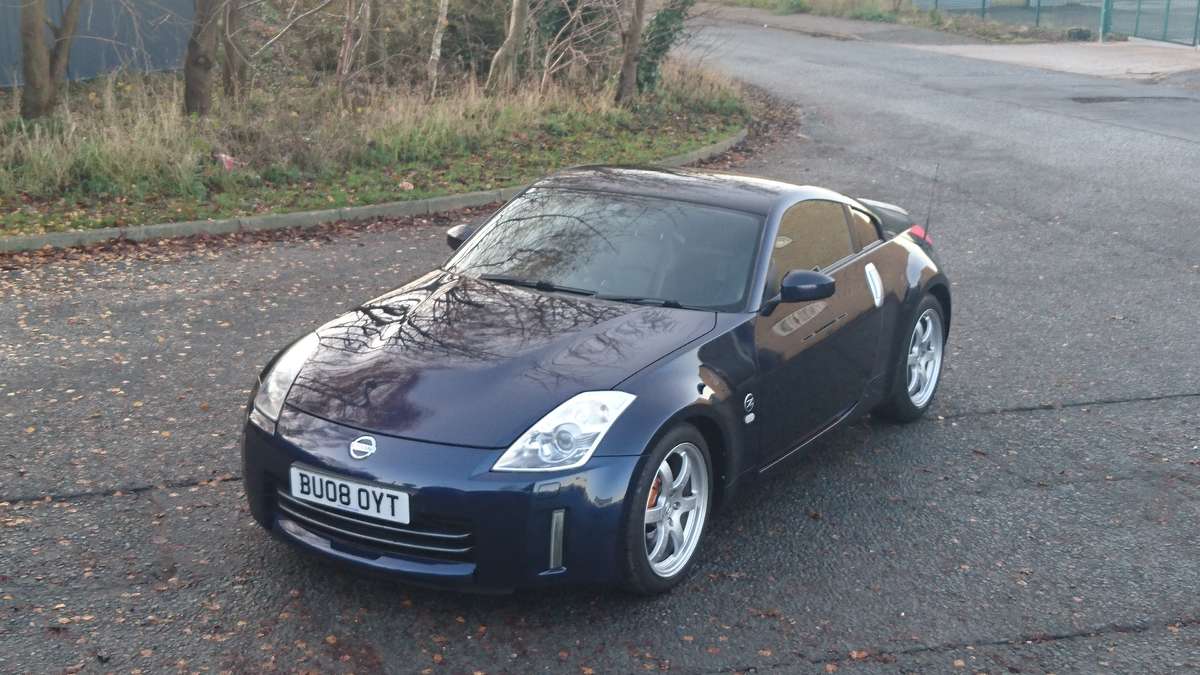
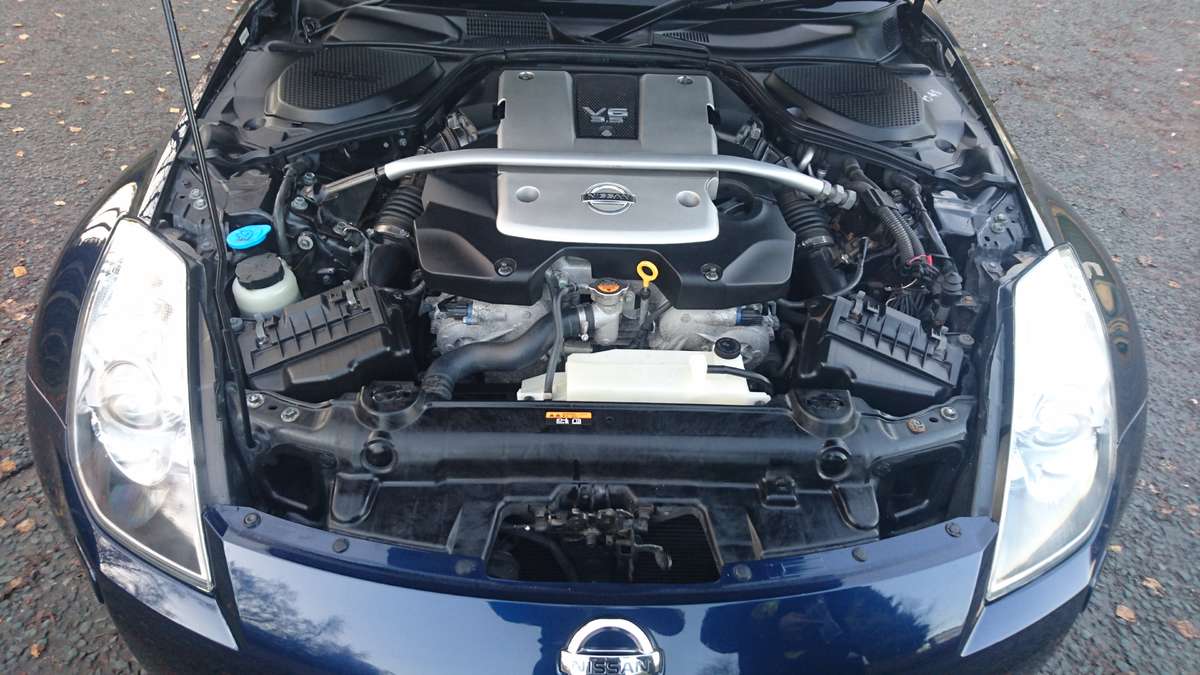
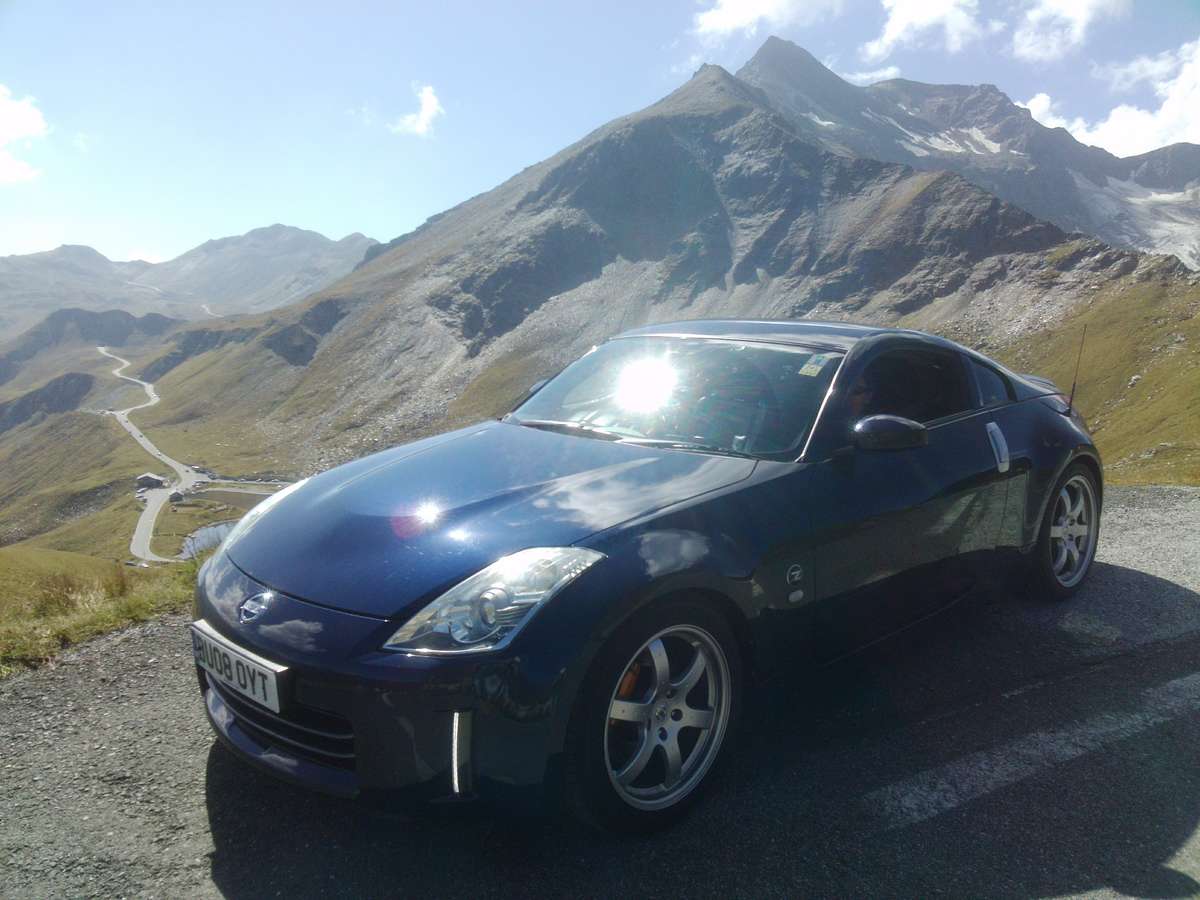
Nissan 350Z GT HR 313BHP
Midnight Blue
20083 former keepers
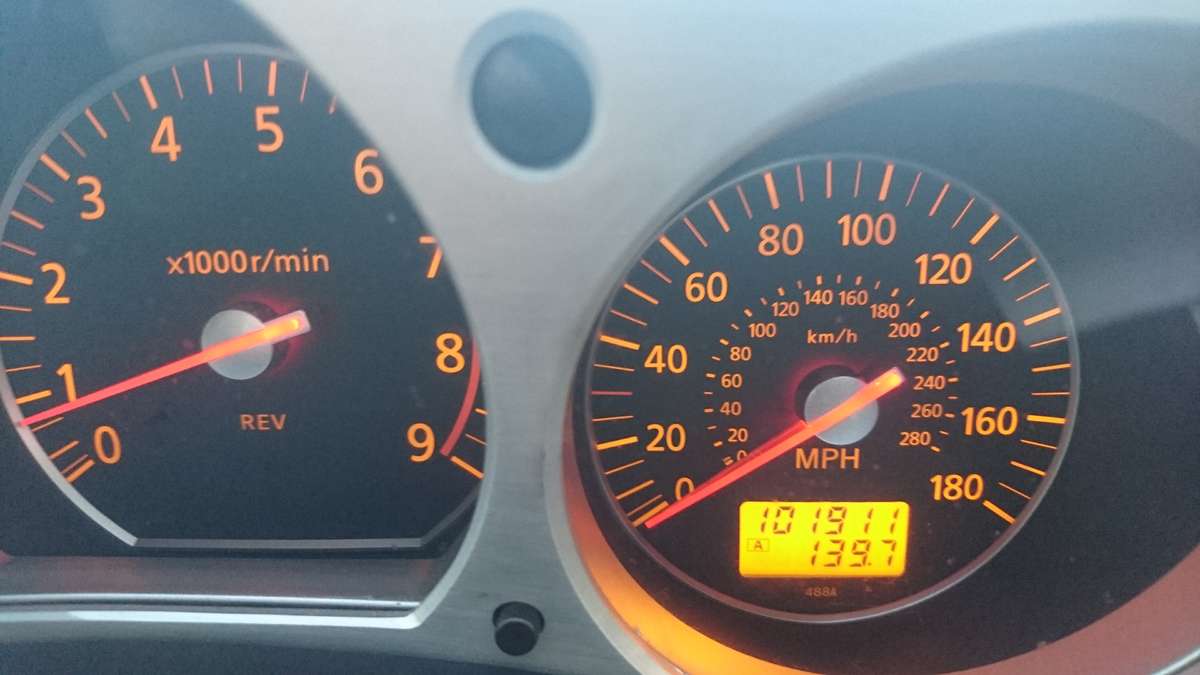
101883 miles (will rise slightly due to continued light use)
MOT expiry 15/10/20 (no advisories)
Full Service History by Nissan and myself (Engineer by trade)
Last serviced 12/09/19 at 101911
2 x rear wheel bearings 5/10/19
4 x new Dunlop Sport Max RT2 TyresSympathetic upgrades as follows
Hosetechnick stainless steel brake lines
Hosetechnick stainless steel clutch line
K&N air filters
Super Pro bushing on front lower compression (Banana arm)
M-TEC discs
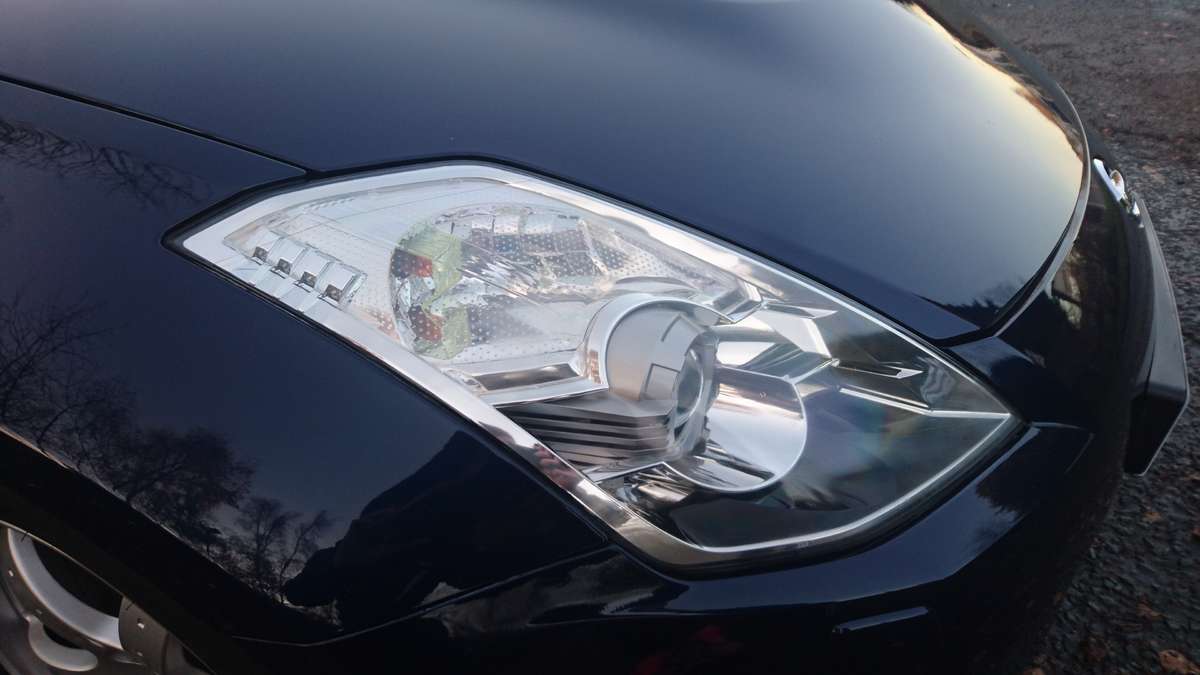
Front DRL’SWill come with an after market spoiler (unfit and Unpainted) and also front and rear wheel spacers.
Lots of history and receipts including Hunter Laser wheel alignment.
Always run on Shell V-power Nitro+ fuel without exception
I have owned this car for just shy of 4 years and have loved been part of the Z world! The car has been every bit what I had hoped and more, suffice to say it has done what any great car makes you do, and i have formed a huge attachment to it. That said I'm not asking daft money and you are still getting a hell of a lot of car for the money. It has been my daily drive for the time I have owned it, having done the daily commute (outside usual rush hour traffic, never sat over heating) and gone on some amazing drives too. It has never missed a beat and is without doubt one of the most dependable cars I have ever owned. That said a car is only as good as it is cared for and I always take exceptional care of my cars.
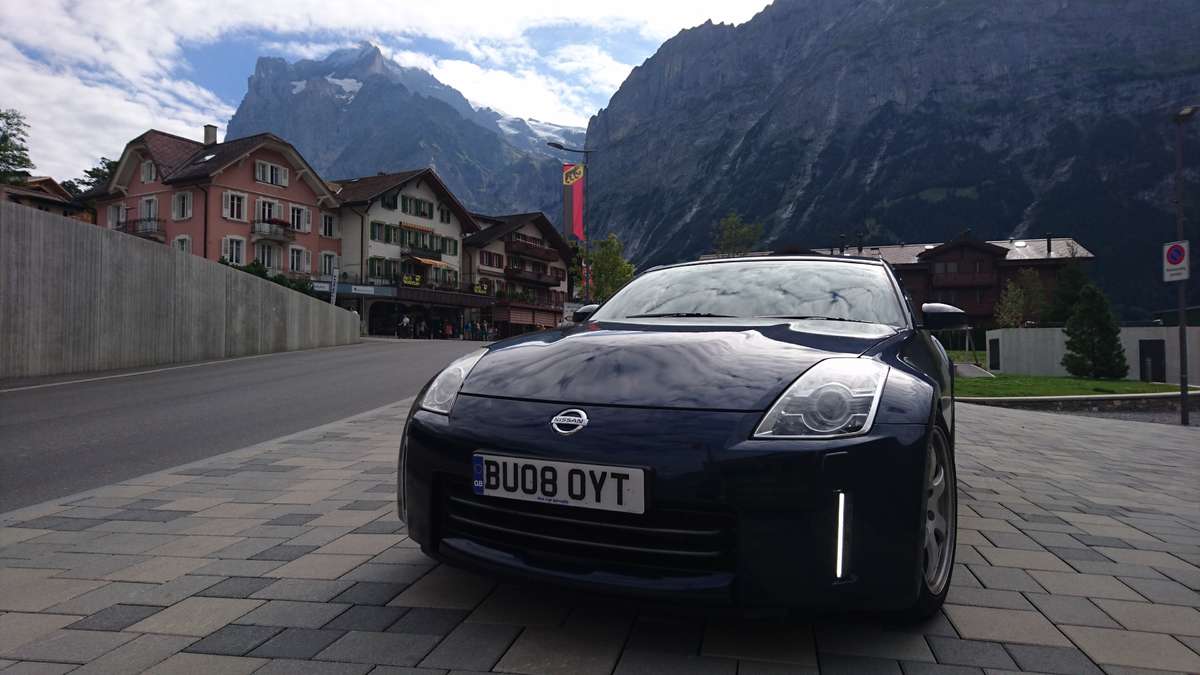
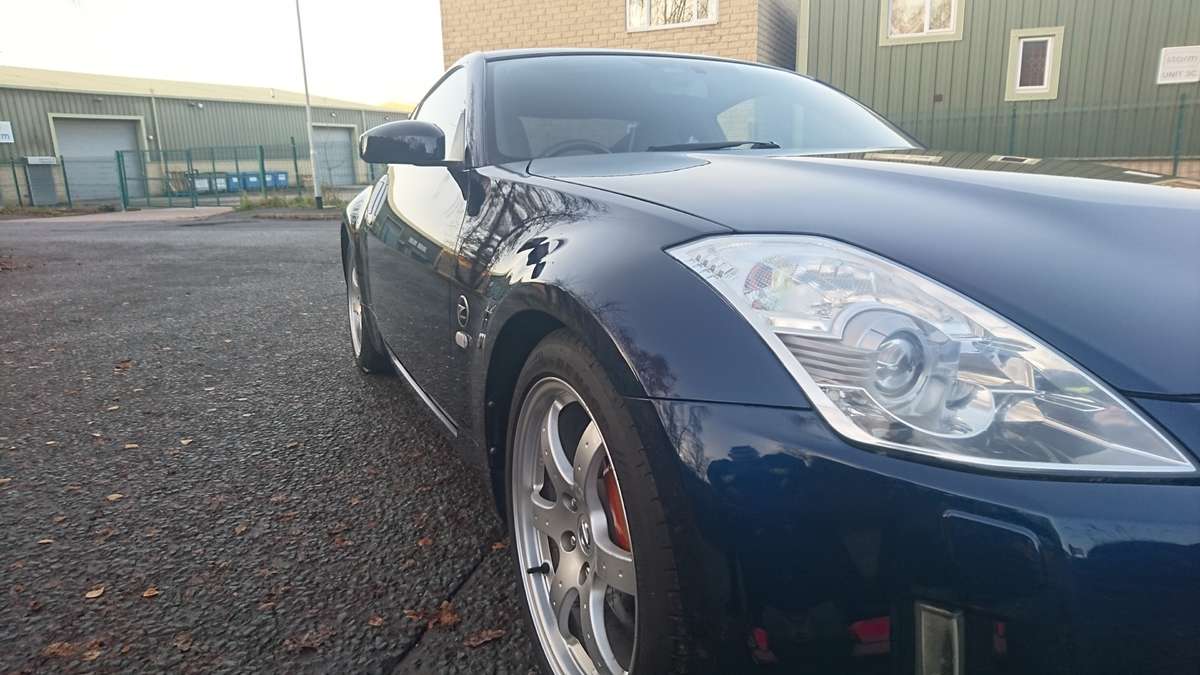
This car is a fantastic example of it's type and is still tight as a drum, other than the front bumper that has a few stone chips the body work and paint work are in great condition. No rust at all. It runs and drives faultless and always has.
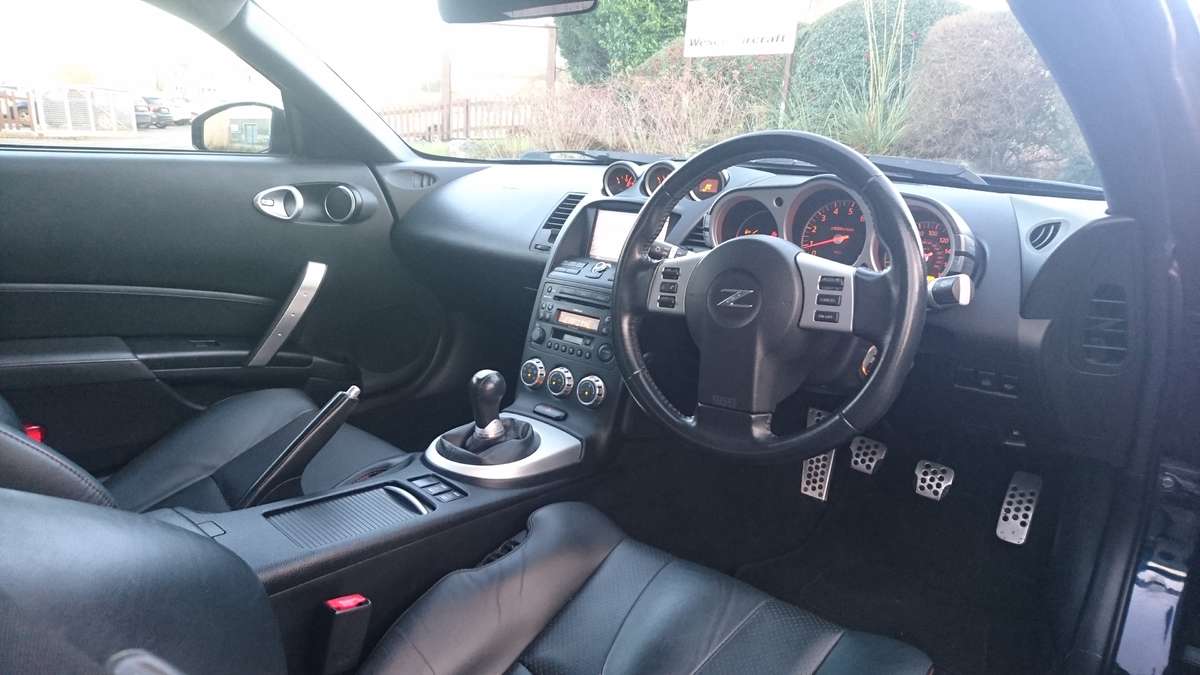
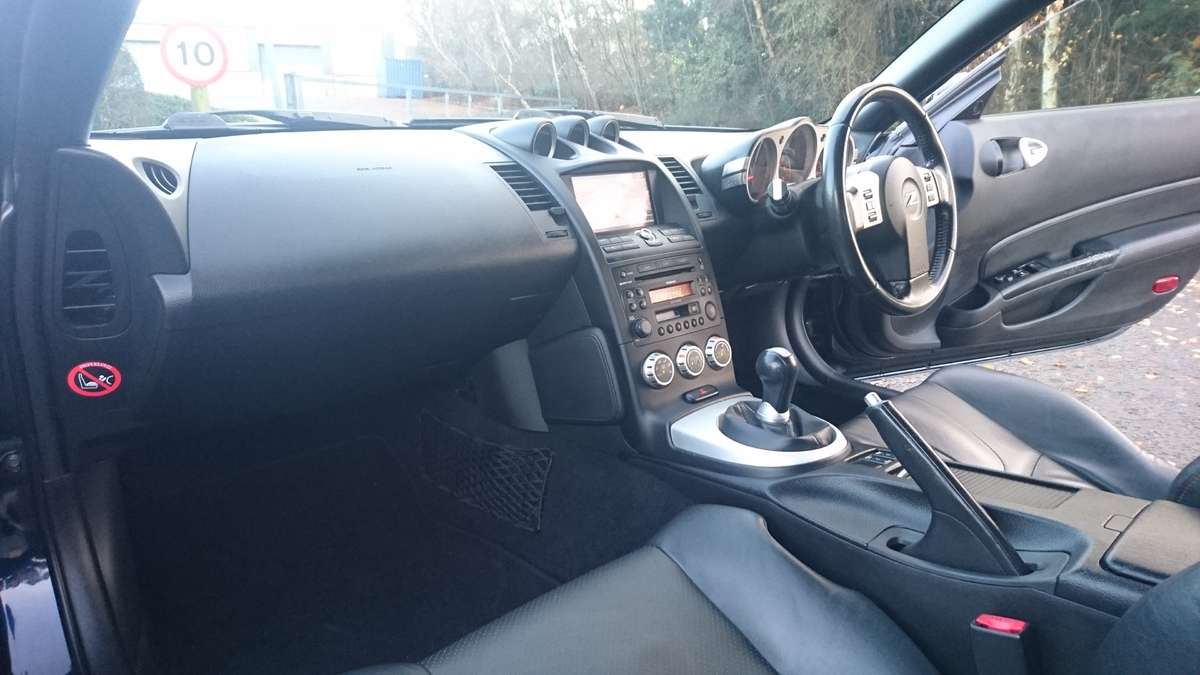
For those that don't know these cars already and those that can't do a quick google search for the GT pack, car comes with the following
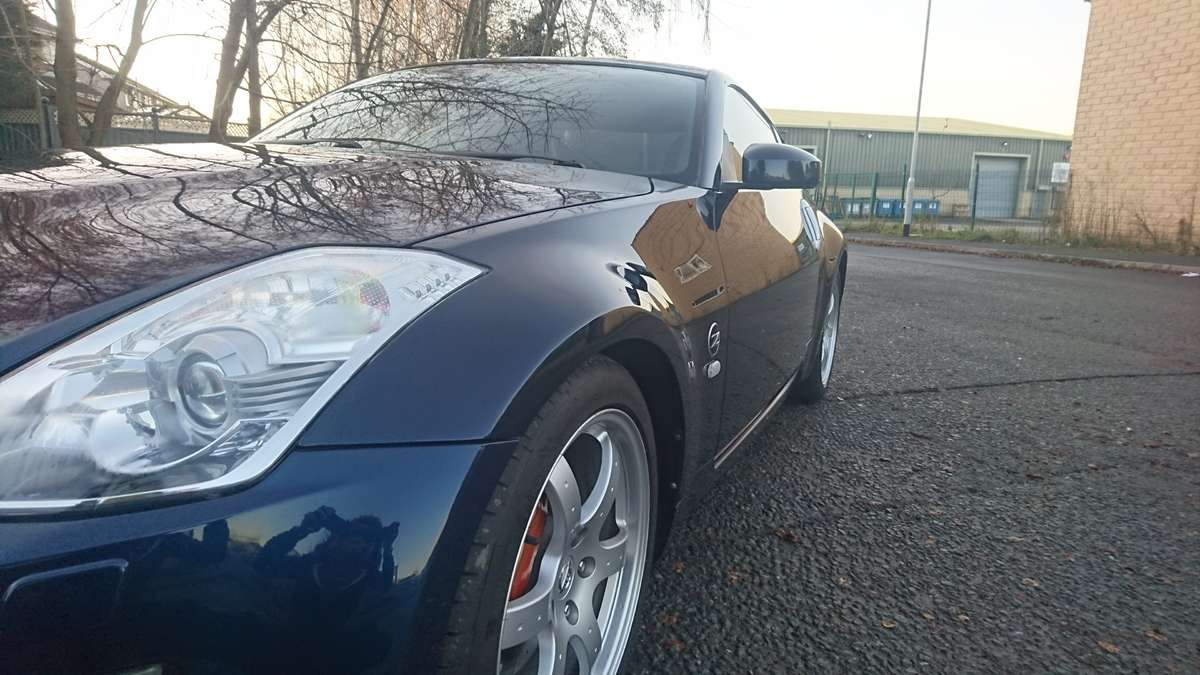
Rays Forged alloys
4 pot Brembo brakes
ABS and Traction control
Cruise control
Bluetooth connection (to certain phones)
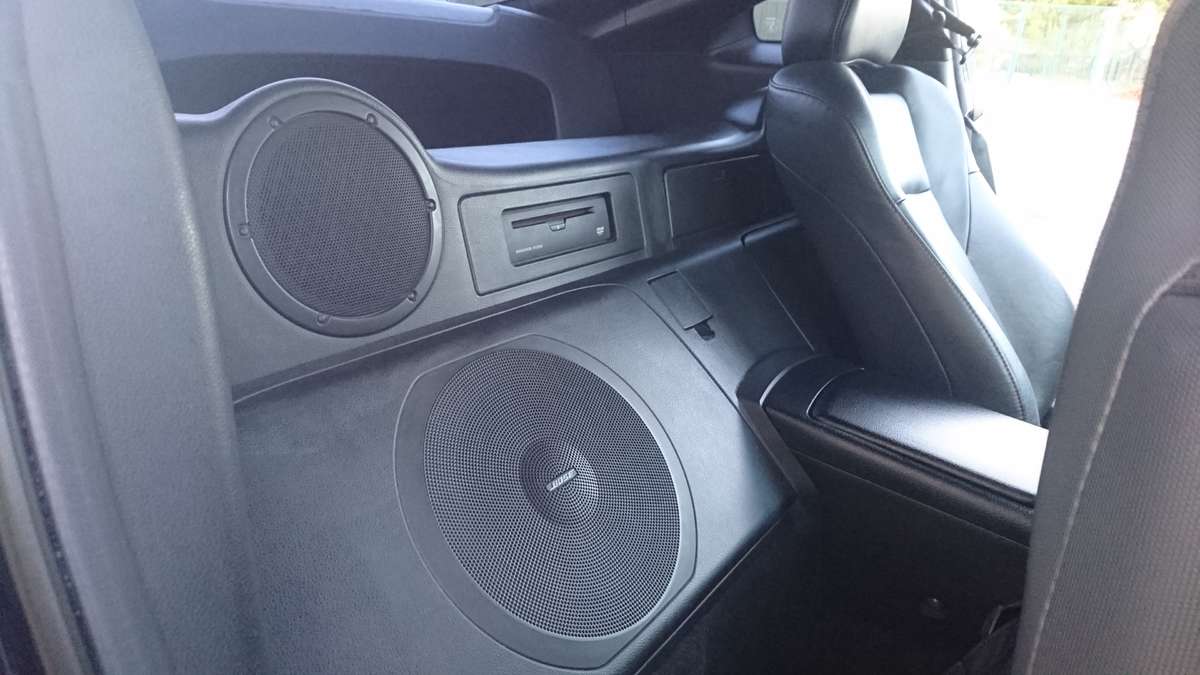
Leather electric adjustable and heated seats
Built in SatNav
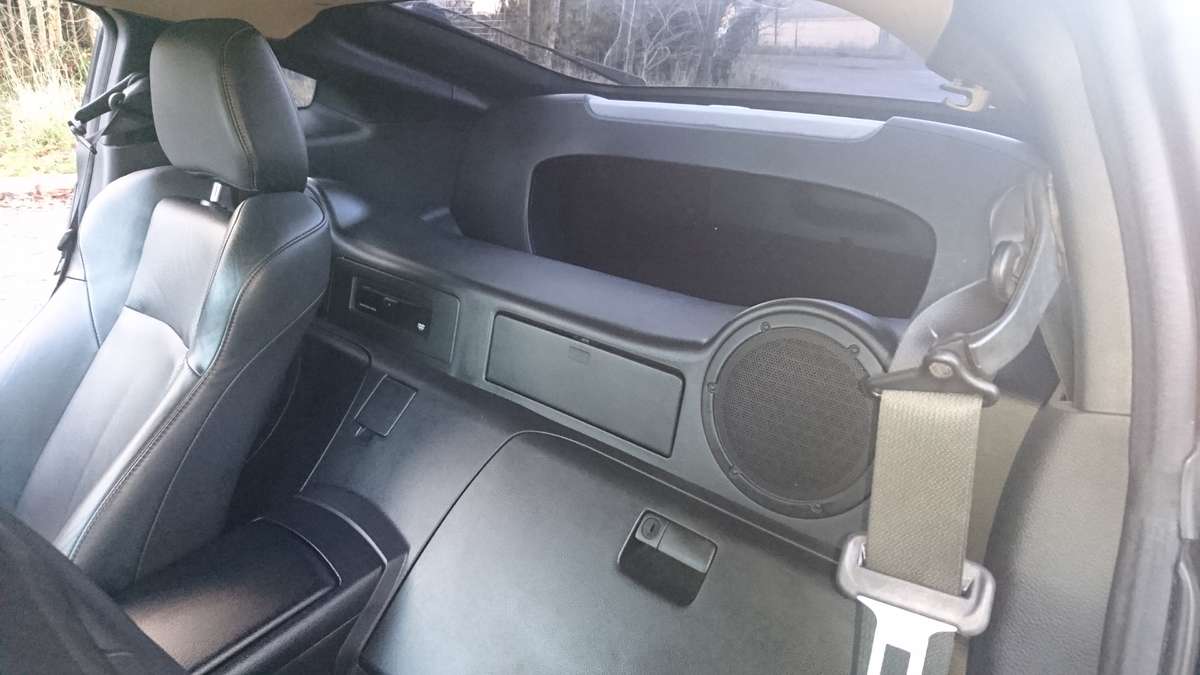
Bose stereo and speaker system (12" sub as standard)
I can provide the usual long ownership insight, tips and understanding of the model to help any new comers to the Z world. If your an old hand I'll happily chat for hours over a brew lol.
I'm sure I'll be back in a Z one day but for the minute I need to bow out to fund another project.
Test rides welcome and test drive only available with proof of insurance and funds present.
Feel free to in box me or email me at matthewdplatt@hotmail.com. I will send you my mobile if you want a conversation over the phone or to arrange viewing that way.
£6700

-
Hi all.
As title suggests I'm after a front NR side wing for a 2008 Z HR model.
Please let me know if you can help.
Many thanks Matt
-
The reason they say to disconnect the negative first and then last when re-fitting. It's because the negative is the low tension side of the circuit and as stated stops/reduces risk of any voltage spikes that will blow fuses etc. If your car functions as normal you will be fine, usually the worse you can do is pop fuses.
-
don't bank on the ball joint been ok mate just because it doesn't budge with the wheel shake test. I had mine in the air, strong bars putting usual ball joint test pressure on and also my trusted knowledgeable MOT Mechanic did the same, and nothing. Took the arm off and still nothing major evident, apart from a slightly easier to oscillate ball joint. Obviously if you bushing looks FUBAR that's probably it but just be aware, you may change those and refit and still get the dreaded knock. I hope you sort it quick and easy. Just go steady swinging on the bushing end mounting bolt. Clean the thread well with wire brush and spray WD40 on night before. Story's of that bolt snapping have been heard. I have 2 x £60 arms that had 12 months warranty and I fit SupePro bushing 7k ago amd are still going strong. My Z is a daily and fast Road fun drive. Personaly don't get ripped off.Had the car on stands today, drivers side compression arm bush looks to be shot, I followed your advice with left foot braking and knocking continued on a bumpy stretch of road.
I also carried out the 12-6 movement on the wheel but could not get any movement whatsoever so ball joints seem to be ok.
Looks like I will be re-bushing both arms, just need to find a trader who sells Superpro compression arm bushes at a good price.
Sent from my SM-G901F using Tapatalk
-
 3
3
-
-
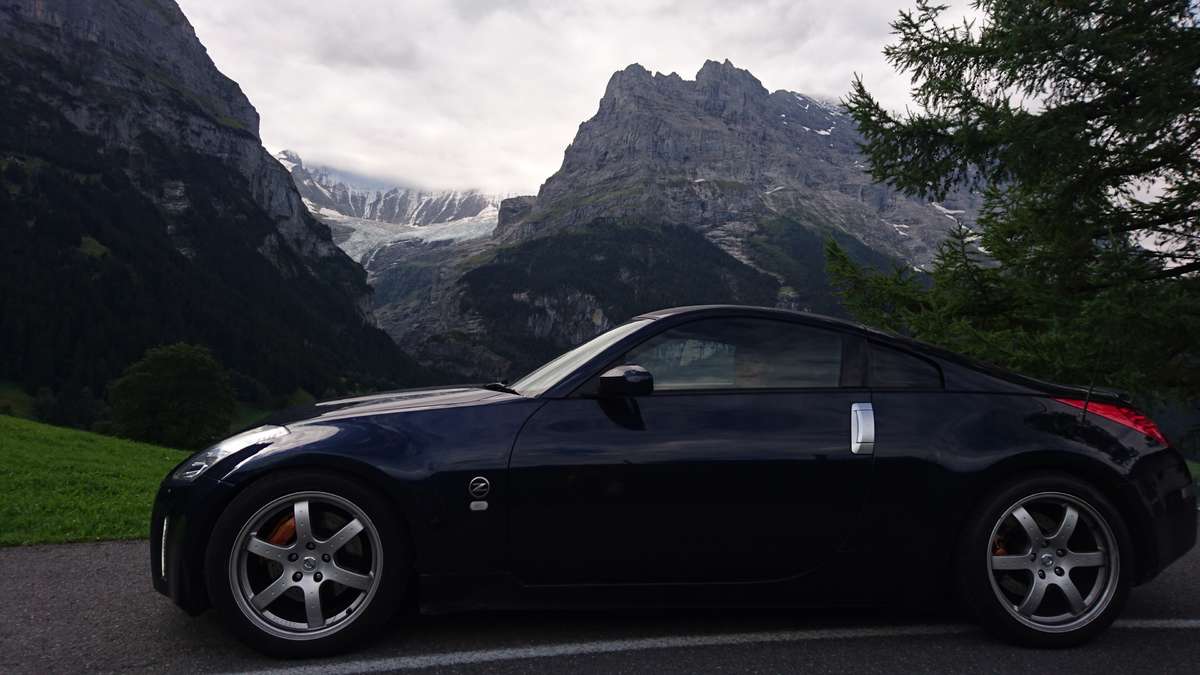
As stated in my post found them on Ebay being supplied by a local parts dealers in town 3 miles where I live. They come with 12 months warranty and for the sake of a basic ball joint that cost pence on one end, and a pressed rubber bush that cost less on the other. If folks have more money than sense crack on. I press removed and press fit the Super Pro bushes with the 15 tone press, fitment was spot on. They have done 7 thousand miles, 3 thousand of which were been hammered around the Alpes. I replaced bother arms and both are bang on. That's my experience and can replace 4 arms to the price of 1 over priced one should I need. The quality was bang on and the price makes sense for what your buying. I had no fear the bushing would stay put due to the fitment and forces required. I don't skimp on parts or cost just make judgment calls based on what's infront of me and in my hand. As an engineer I understand what I'm looking at, I can't pass comment on other people's fitment problems.SupePro poly all the way mate, I went for the increased castor ones and very pleased with them. And don't go buying the £250 arms the £60 jobs are spot on as it's as basic a ball joint as you can get. I did both mine and then hammered the pants off her for 3000 + miles in two weeks through the Alpes taking 7 of the top ten Alpine passes. Not to mention the daily commute and mad country road runs out since. I would suggest as above get new arms, if your going to the expence of SuperPro bushing fit them to mew arms. If the old bushing has been gone a while it may have put the existing ball joints under a bit more stress. You wouldn't want to fit SurperPro bushes to old arms and a month later have the ball joint go down.
I take you mean the £60 chinese ebay arms? We had super-pro bushes fall straight through those as the hole was machined too big, some are ok and some are hopeless , you pays your money and you take your chance
-
1
-
-
if it just helps one person it was worth doing, my fingers are crossed for you pal. Just make sure you check the easy basic stuff first, the assistance spring could be one culprit that doesn't need full pedal removal. Hope you get it sorted either way.Hell, I'm going to have to do this, it's been driving me mad and, like you, I've squirted all sorts of lube at it to no avail.
Superb tutorial, big thanks.
-
1
-
-
SupePro poly all the way mate, I went for the increased castor ones and very pleased with them. And don't go buying the £250 arms the £60 jobs are spot on as it's as basic a ball joint as you can get. I did both mine and then hammered the pants off her for 3000 + miles in two weeks through the Alpes taking 7 of the top ten Alpine passes. Not to mention the daily commute and mad country road runs out since. I would suggest as above get new arms, if your going to the expence of SuperPro bushing fit them to mew arms. If the old bushing has been gone a while it may have put the existing ball joints under a bit more stress. You wouldn't want to fit SurperPro bushes to old arms and a month later have the ball joint go down.
-
I told you that's what you would need to do already, only takes 5mins to get the door card off. You should have it sorted in the morning before you get to mine, seems you get up the same time as old folks lol.
-
Welcome pal, broke in monetary terms maybe but believe me you're life has just become much more fulfilled I guarantee it. 😉ðŸ‘
-
1
-
-
good effort pal, keep the update on fitment coming. I have been rubbish and not hot round to doing it yet. Will be a job for yhe summer I fear.I've just purchased this spoiler, currently prepping but I will update.
Out of most of the spoilers i've seen I really likes this one, not too big not too small.
It came primered and was easy to sand as not too much was needed to be done.
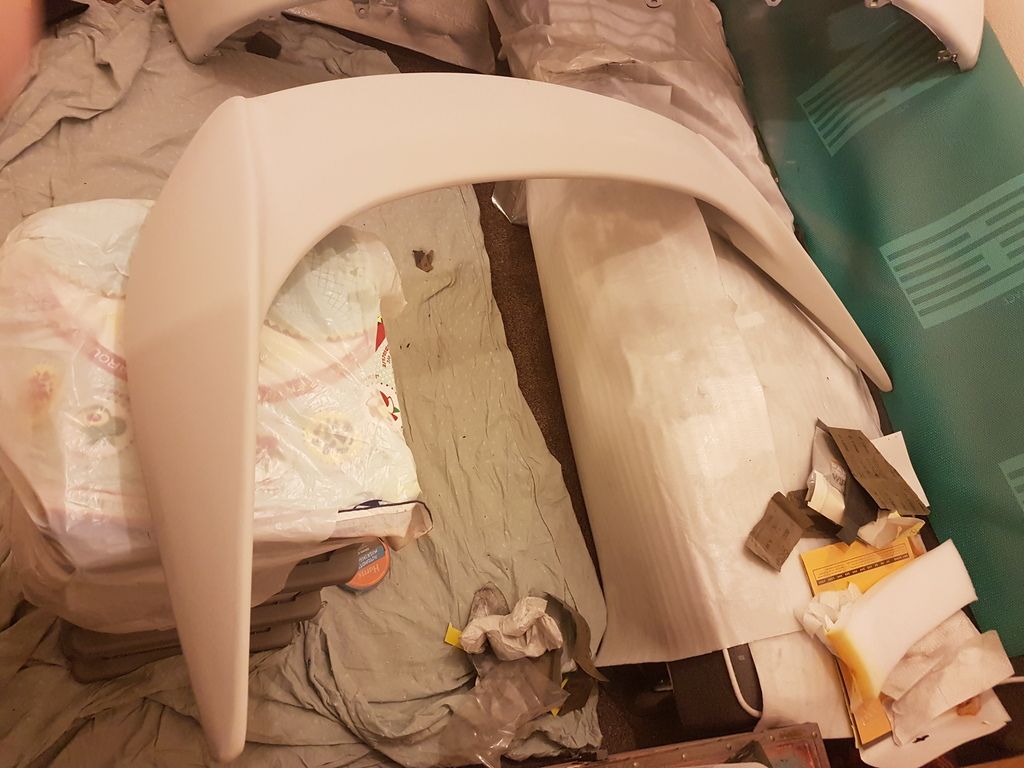
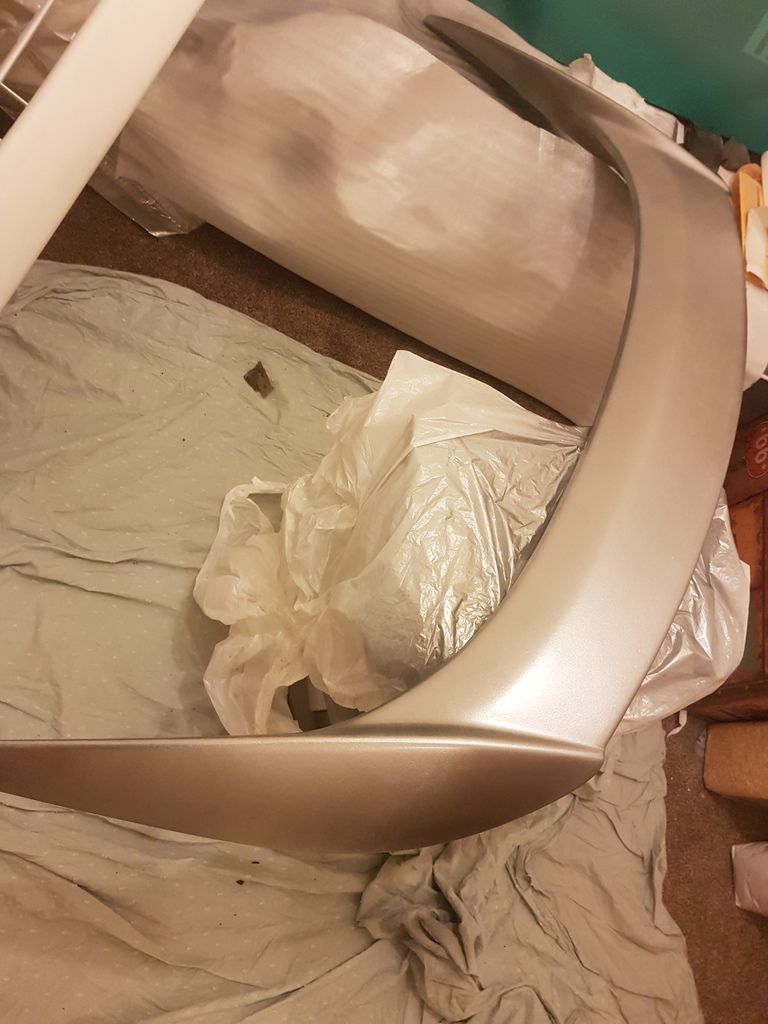
As I say i'll update once i've finished with it, I've just got the second coat of colour on and so far so good.
-
Use this place mate. I can't recommend them high enough. Fantastic service, extremely knowledgeable any questions are answered happily and the prices speak for them selves.
The link is for the ones I fit to my HR. I went for the newly developed TT ones amd they are spot on. Hope this helps.
http://www.sparkplugs.co.uk/catalogsearch/result/?q=VFXEH22&x=0&y=0
-
P.s. Yes it can be the loom as much as the sensor.
-
I believe the knock sensor advances and retards the timing to try and compensate for ignition knock. If the knock sensor isn't working I would suggest the ECU will not govern the timing properly and may effect performance slightly.
Im sure there are others on here that may be able to give you a more in depth analysis. Hope this helps.
-
I'll private message you pal to sort out meeting up.Be happy to pal. I have just finished the fix thread while I was motivated, see what you think. Let me know if you want to meet up and we can sort something.Nice guide, though looks like a right pain.
Honestly no idea if it'll fix my problem, but you seem to have a better understanding of the clutch pedal assembly and might be able to point me in the right direction if nothing else.
I'm free to meet whenever
-
Some major spelling mistakes sorted, sorry .... Was very sleepy when I posted this lol
-
Be happy to pal. I have just finished the fix thread while I was motivated, see what you think. Let me know if you want to meet up and we can sort something.Not to hijack Rob's thread, but seeing as you're just round the corner I don't suppose you'd mind taking a look at mine, Spoons?
Vids in the 2nd post, seems different to Rob's issue though, so probably different to yours too?
-
1
-
-
Something I was intending to share ages ago I never had chance.
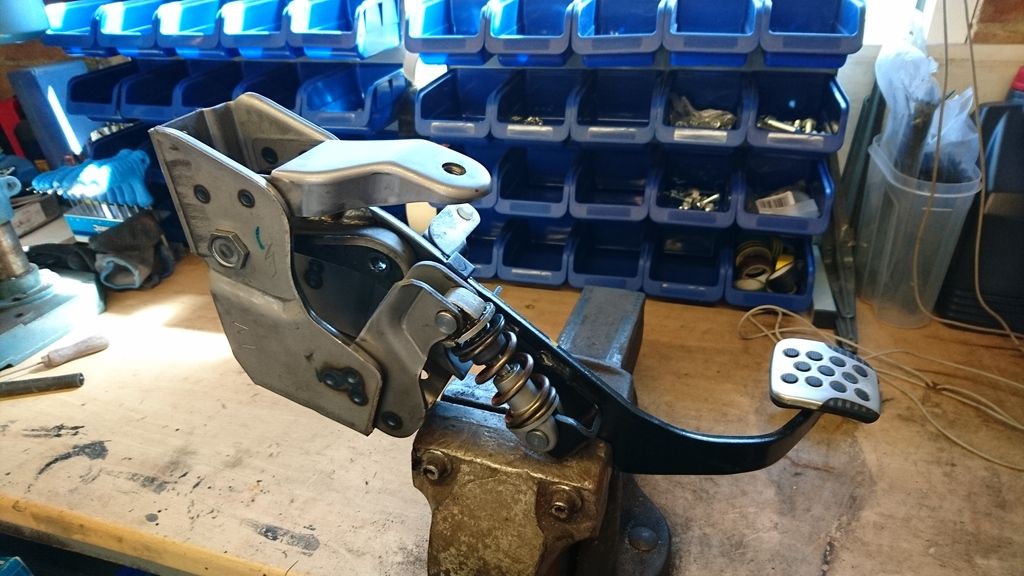
My 2008 HR developed a clutch pedal knocking not long after i purchased it, I did the usual and googled and searched the forum hell out of it. There were all sorts of suggestions, from lubricating the assistance spring pivot bolts, to it been a collapsing clutch diaphram in the clutch cylinder. I started by spraying a multitude of lubicants on every pivot bolt and moving bush on the clutch pedal to no avail. The knocking sound also came with a very off putting notchy knock on the bottom of your foot every time you depressed the clutch pedal, this completly ruined the driving experiance and well pi**ed me off.
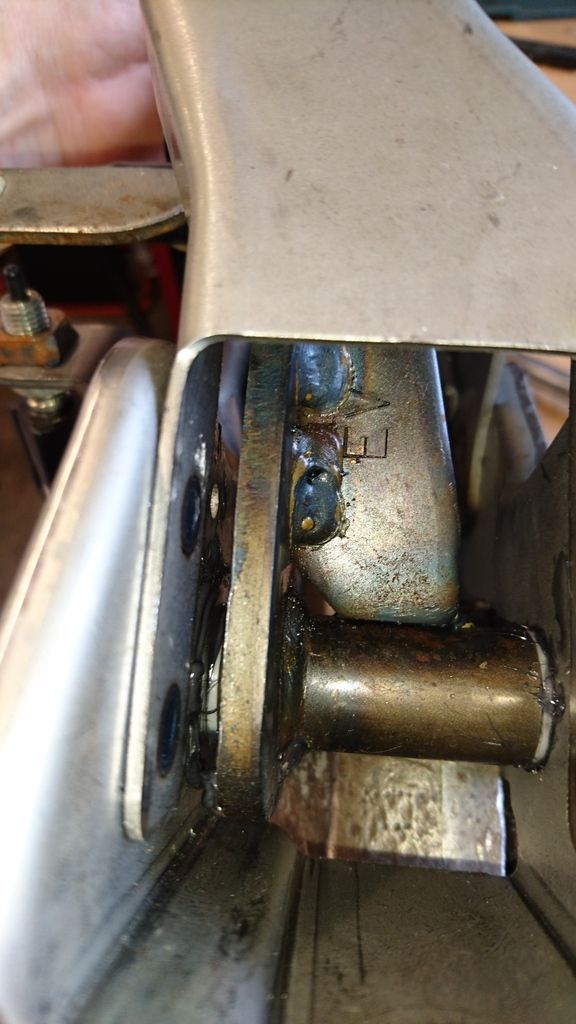
If the above sounds familiar then this may help you fellow 350Z owners. This thread is a step by step guid to a clutch pedal removal and knocking cure. The knocking fault was diagnosed to be coming from the main pivot bolt that the clutch pedal is secured with. When the clutch pedal assembly is in situe it is an absalute sod to get even eyes on it let alone touch it. BE WARNED PACTIANCE AND ACROBATICS/KAMASUTRA POSITIONS REQUIRED.
Diagnosis- Very tricky and a pain. You need to get your hand up the side of the pedal assembly and by feel put your fingers on the main pivot bolt. The next trick is to depress the pedal without breaking fingers or arms. You should feel the knochy knock transmit through the bolt. Sounds simple doesn't it.......
If you want to go to Nissan and purchase a new Clutch pedal pivot/mounting bolt feel free (not sure it will help, I didn't ). The problem that causes the Knocking is the slop that developes from this pivot bolt, posibly from the nut slackening slightly, or the hole in the pedal box wearing where it pivots/slots through. Anyway I fixed it with a washer, some grease and tightening the bolt a little more. Lasted 10 thousand miles so far, touch wood. Just thought I would give you the heads up before you start so you have the option of buying one.
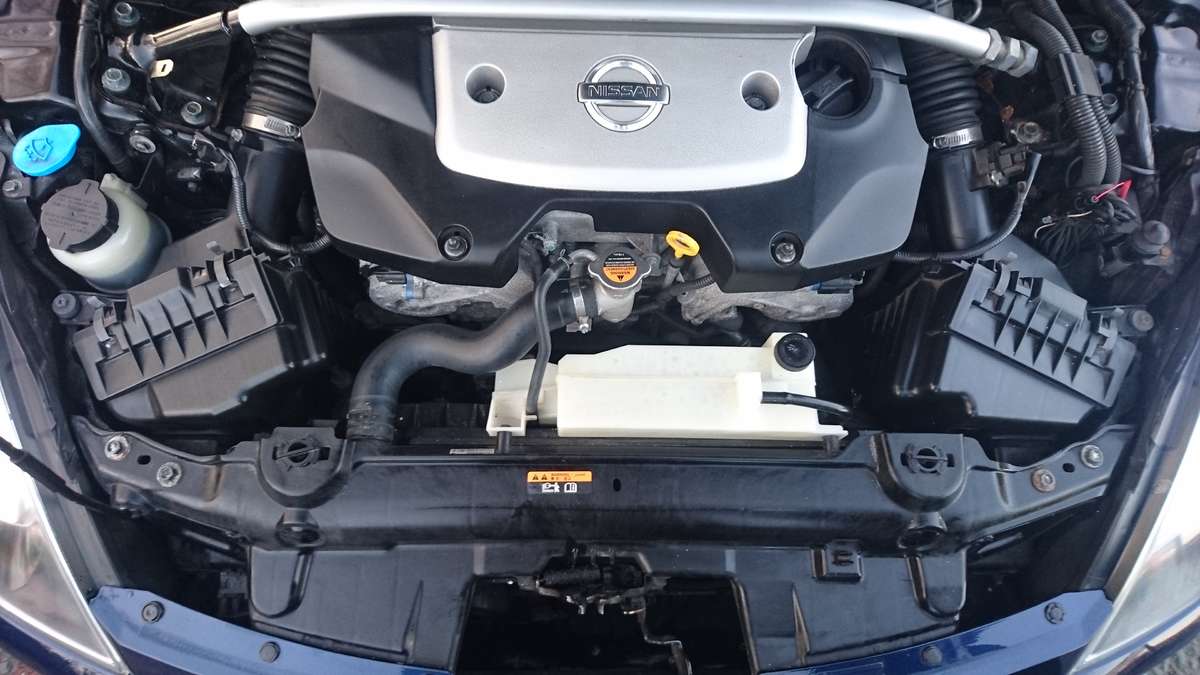
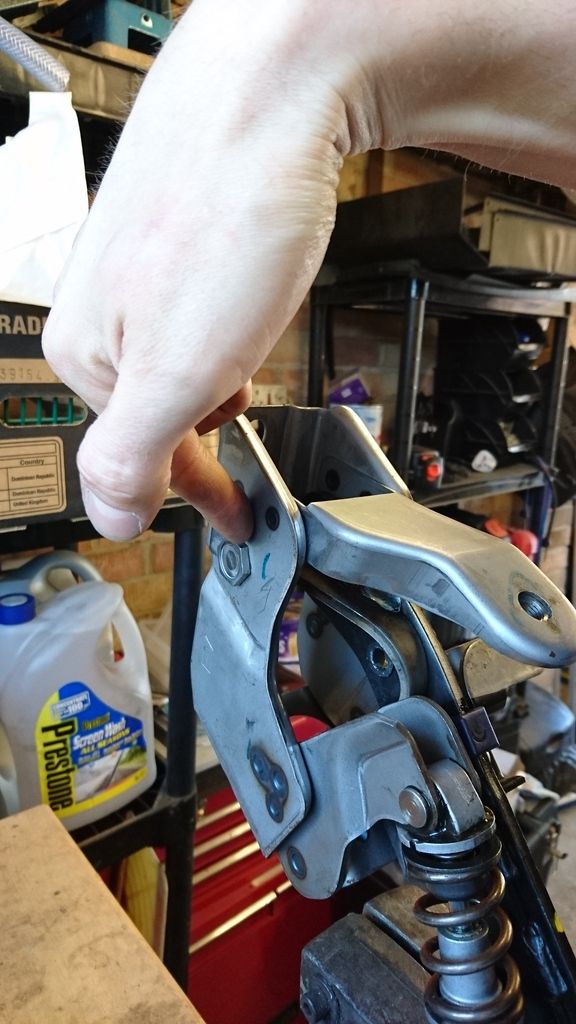
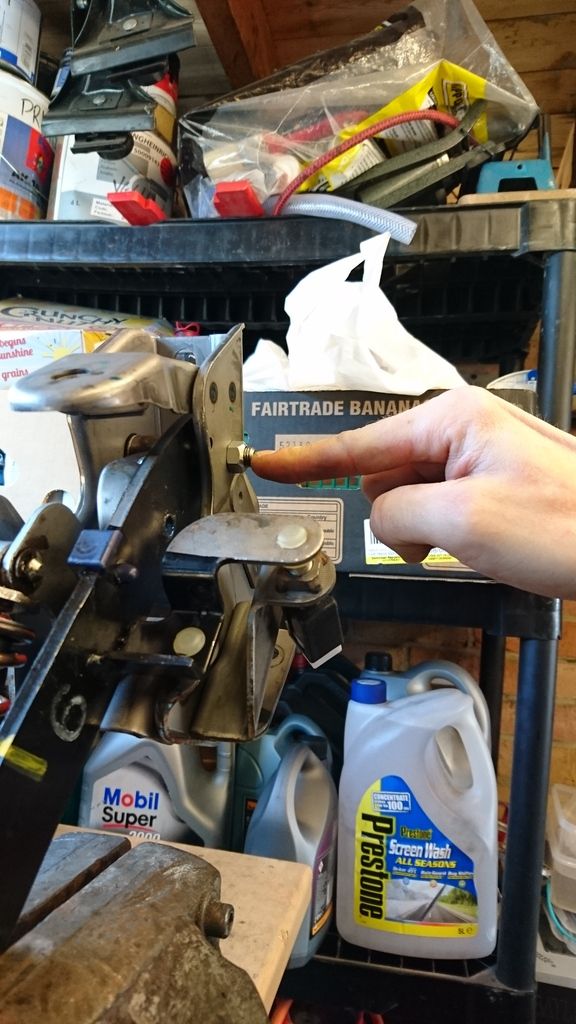
First two pictures are of the main pivot bolt in question. Very easy to do when its out of the car

http://
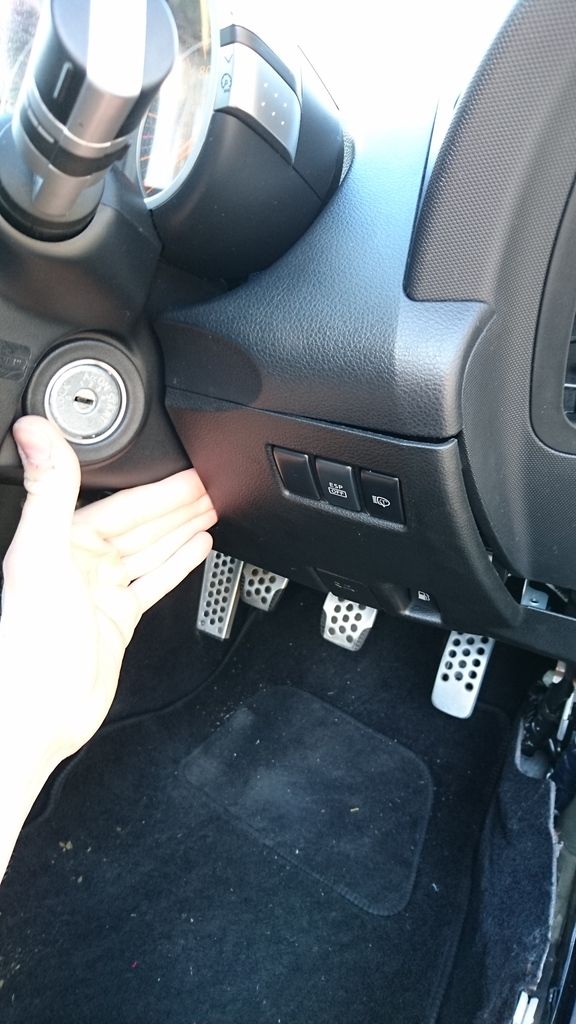
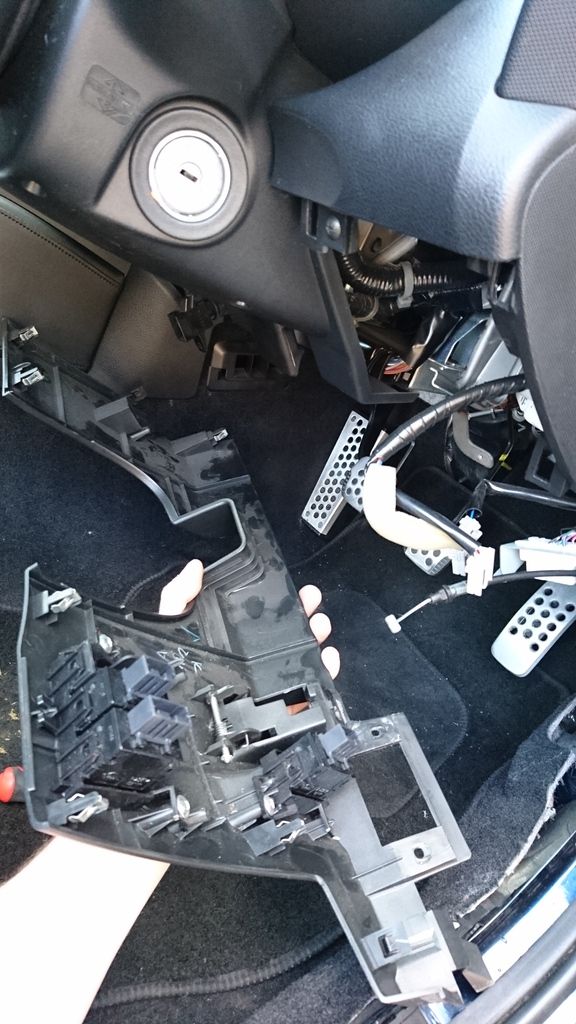
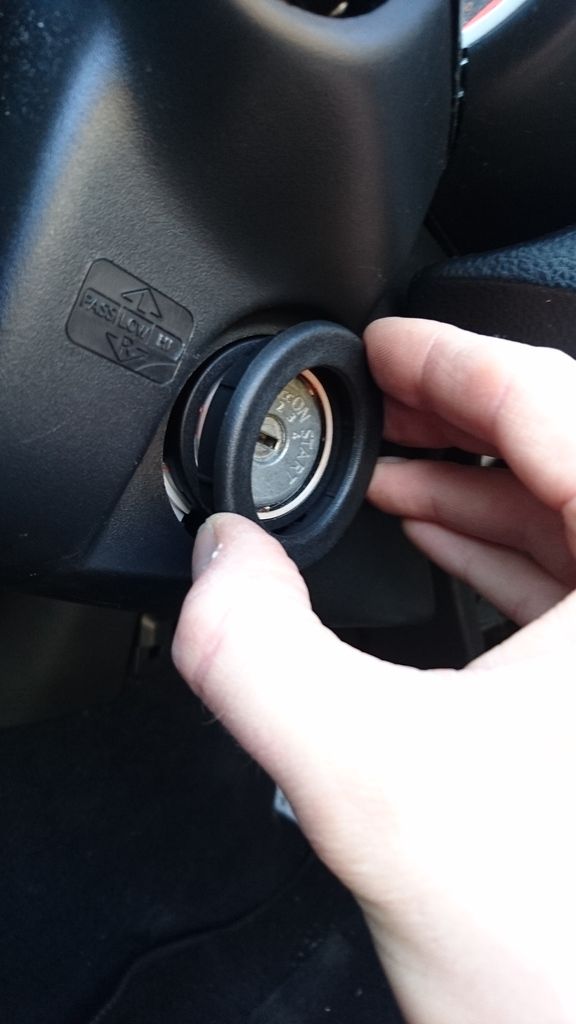
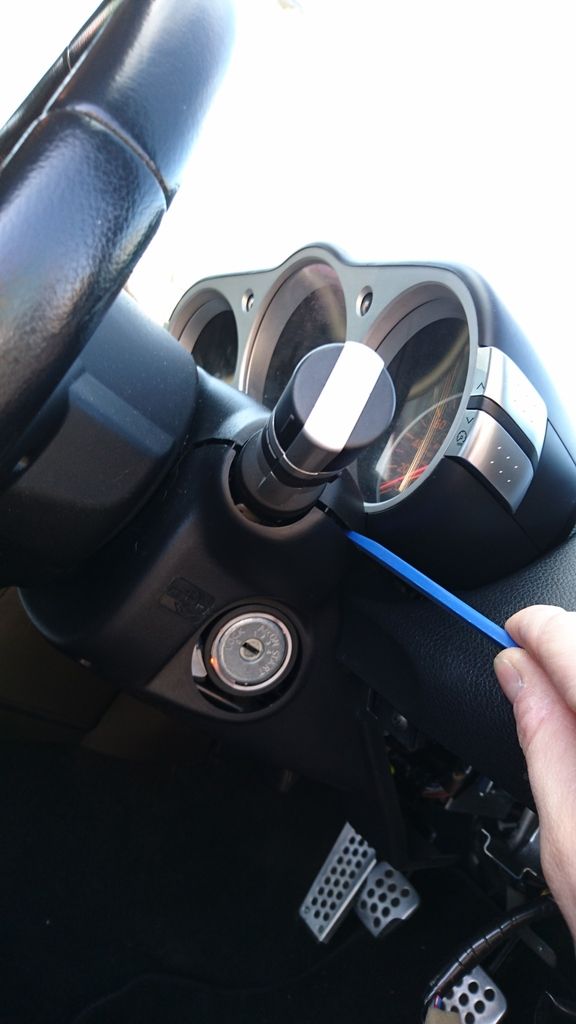
Ok first you need to remove door trim and the plastic panels from under the steering wheel. You will need to disconnect the bonnet pull, ABS button, Petrol cap Button and Headlight washer button.
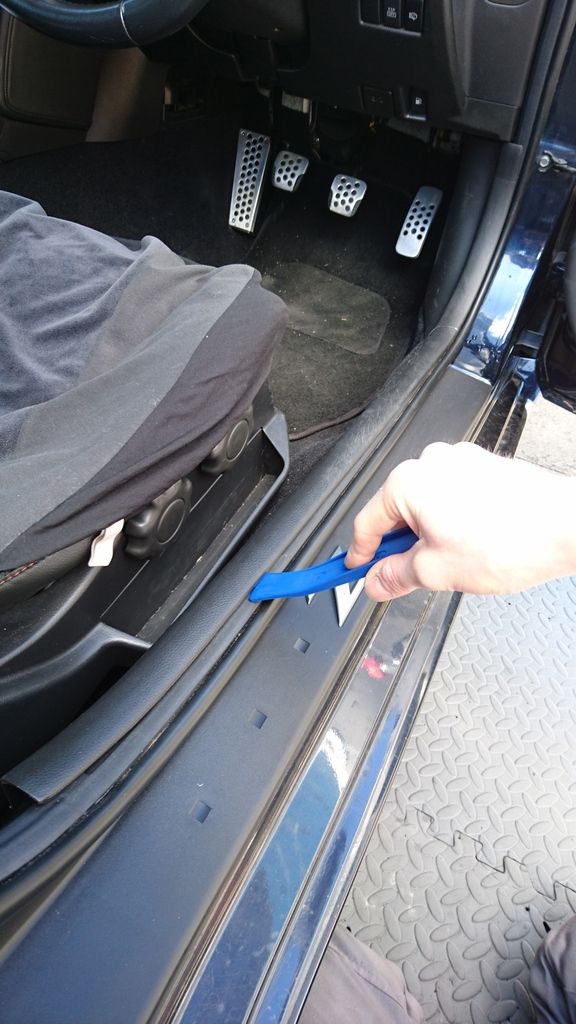
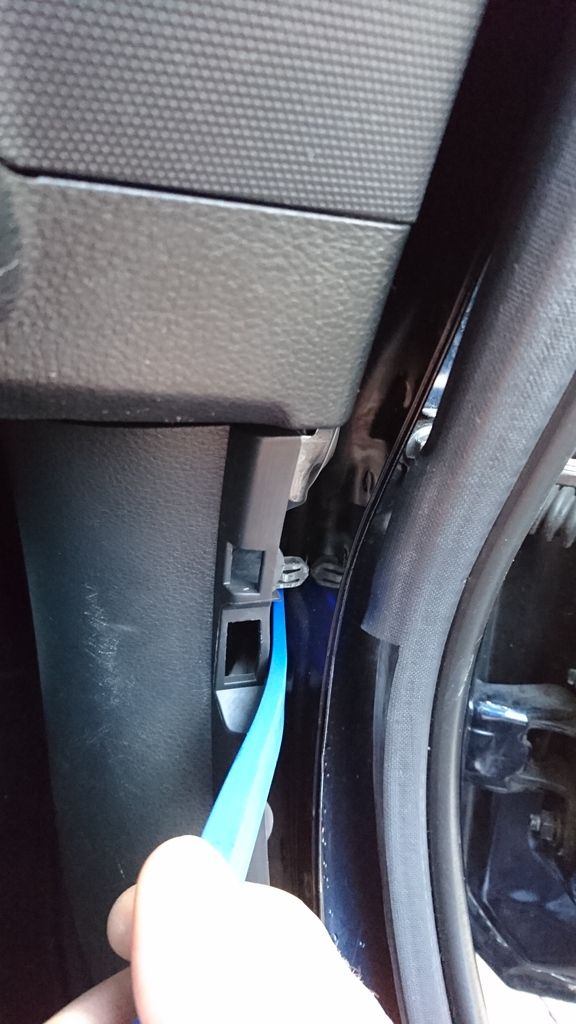
Take these three bolts out
Now ease the panel away by hand
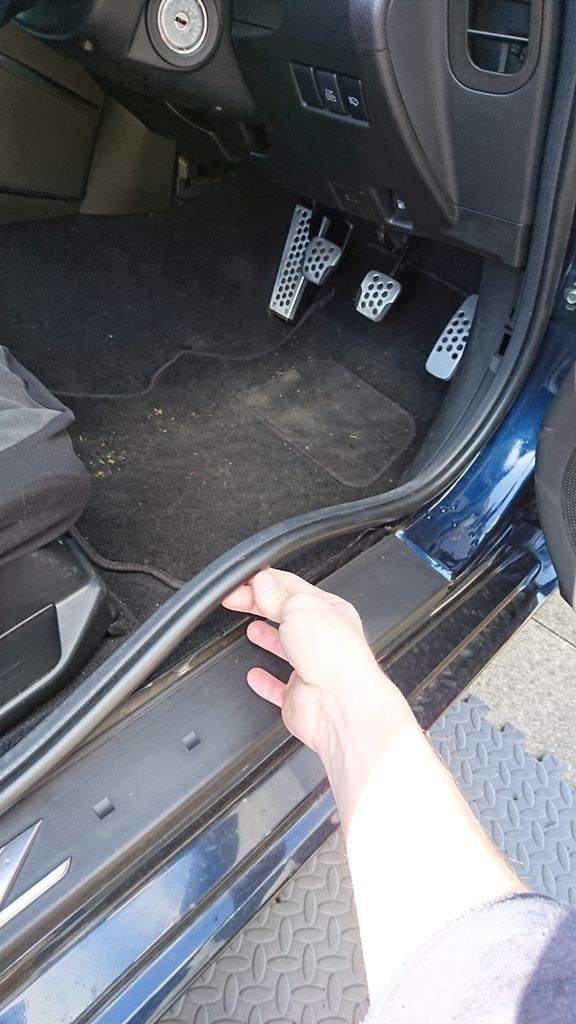
When down you need to remove the previously mention plugs and cable
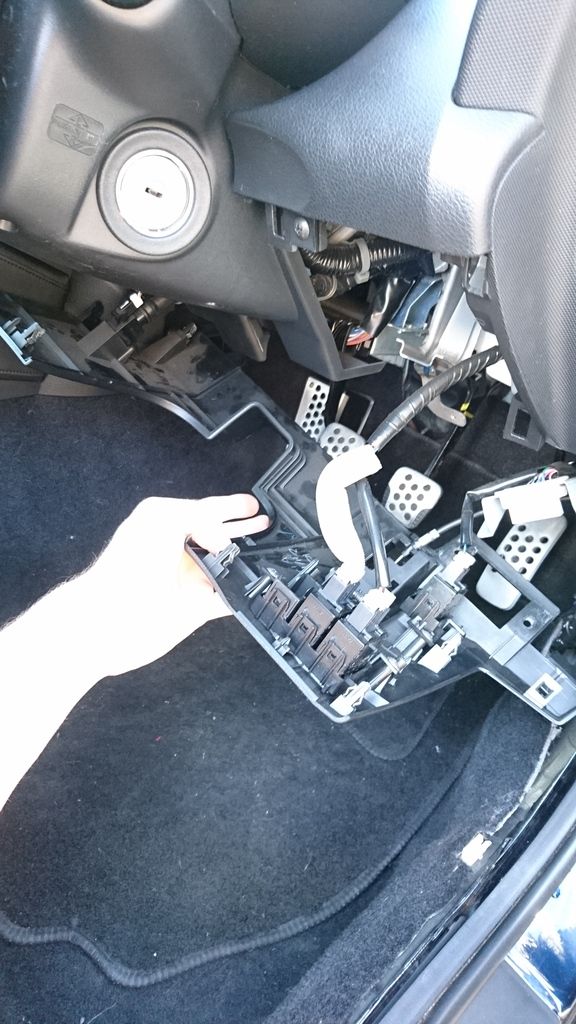
Also remove the in car temp sensor
All that for this one panel, I know what your thinking......
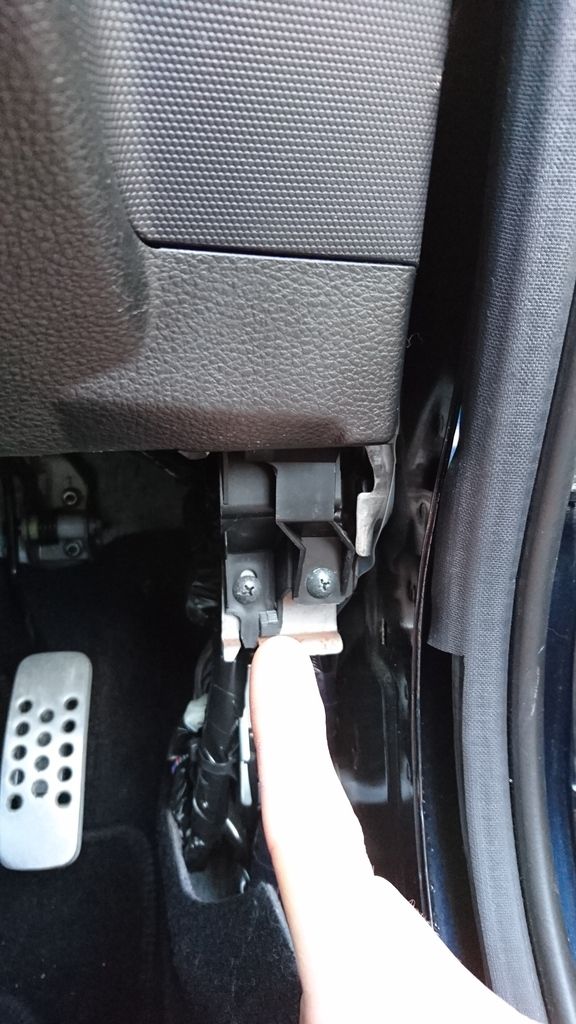
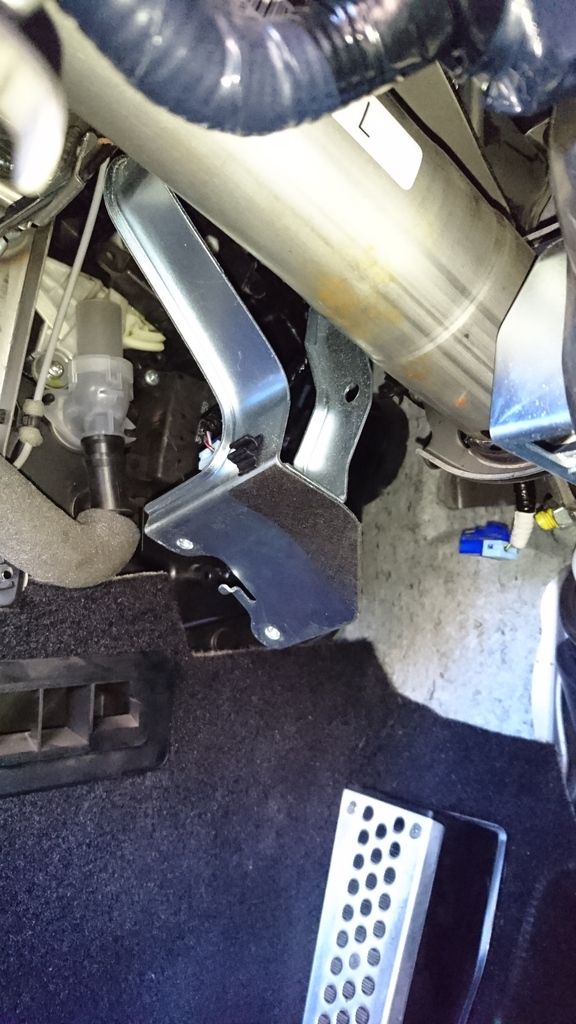
Next the steering column lower cowl needs to be removed, 4 x bolts if i remember right.
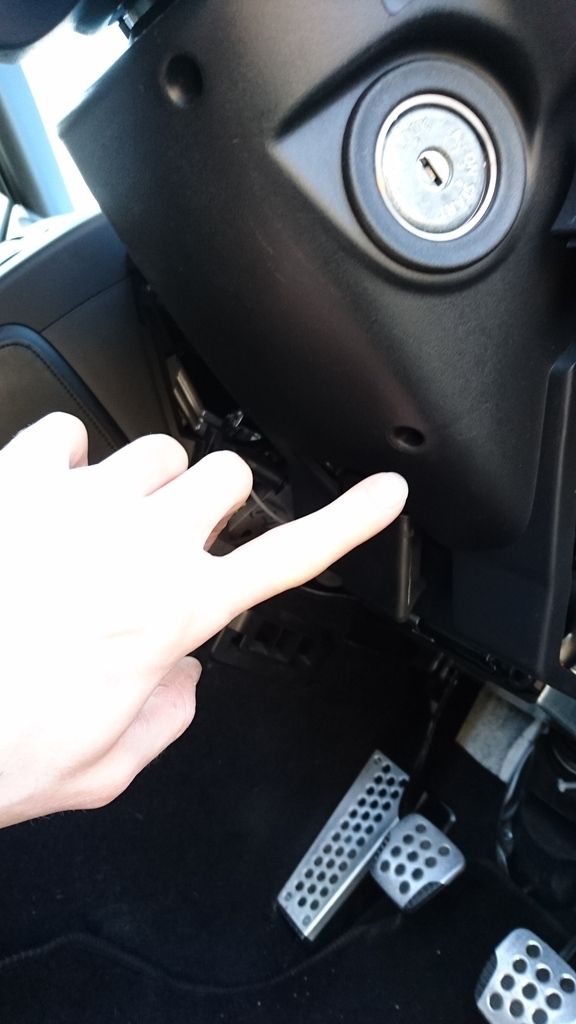
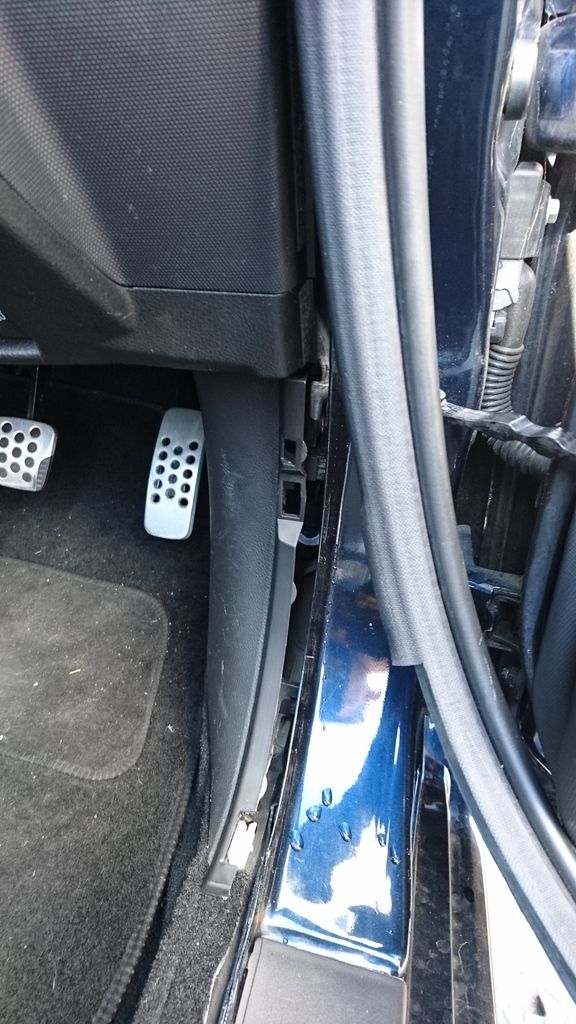
Finally you have sight of your anoying clutch pedal box assembly.
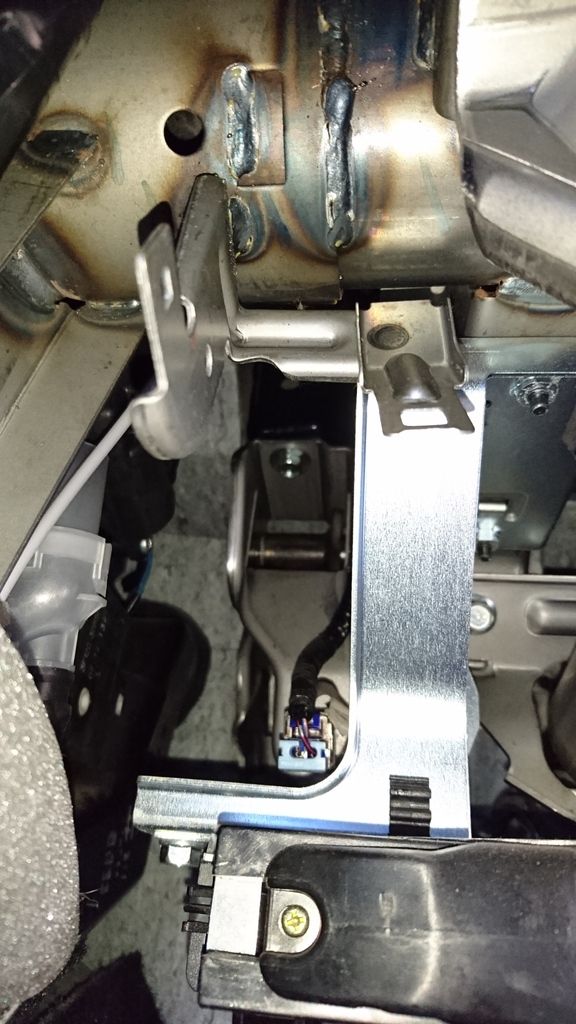
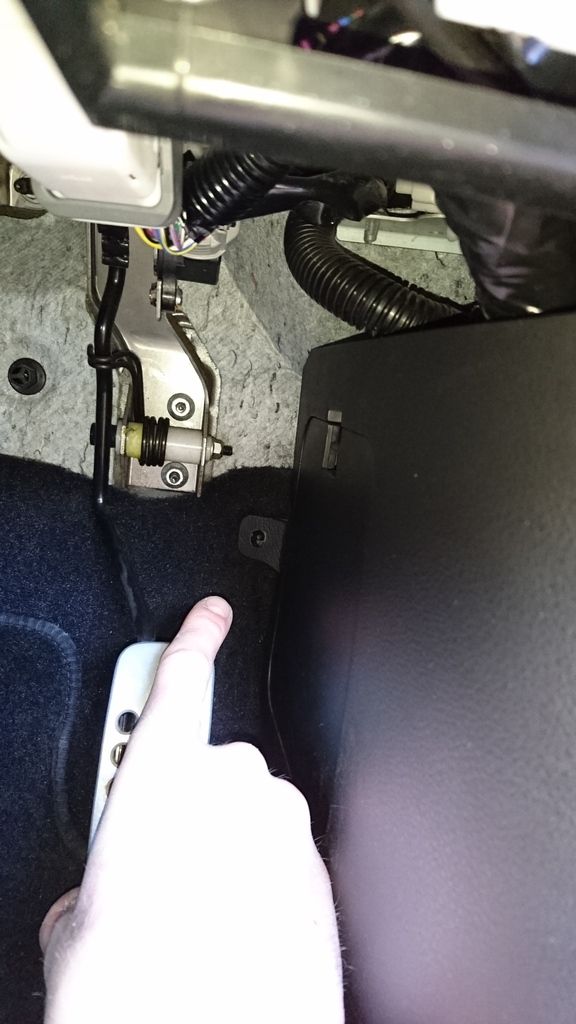
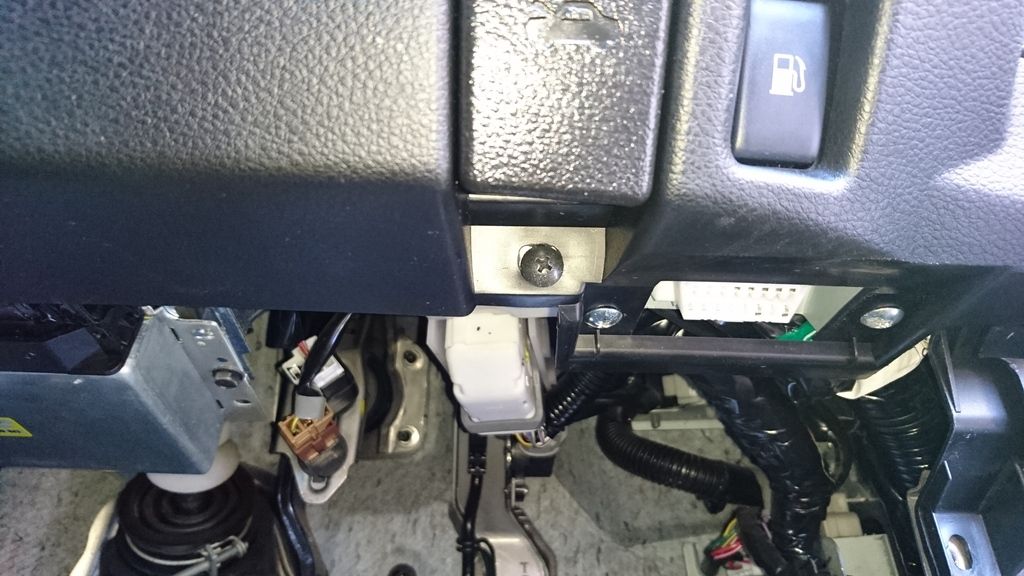
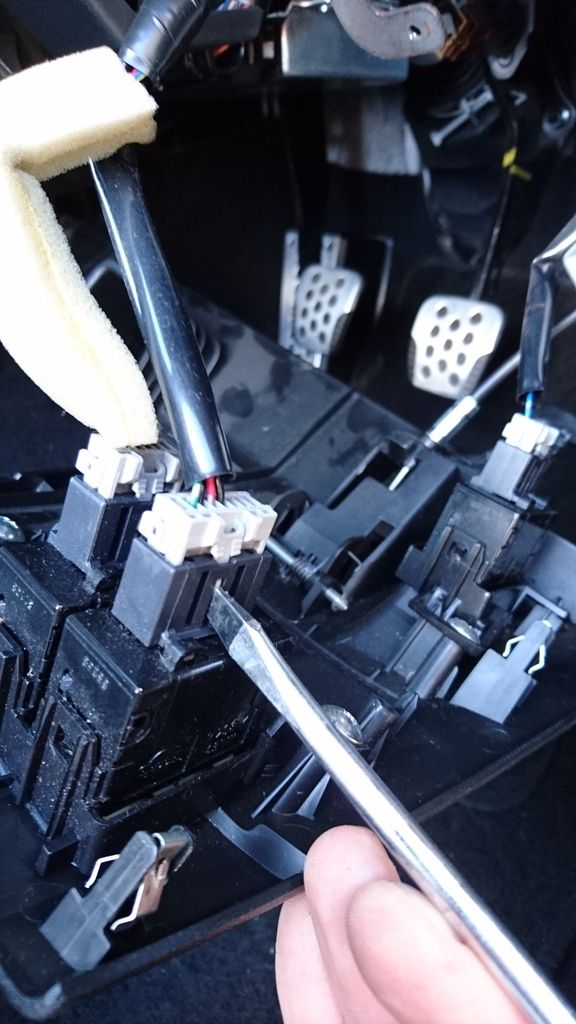
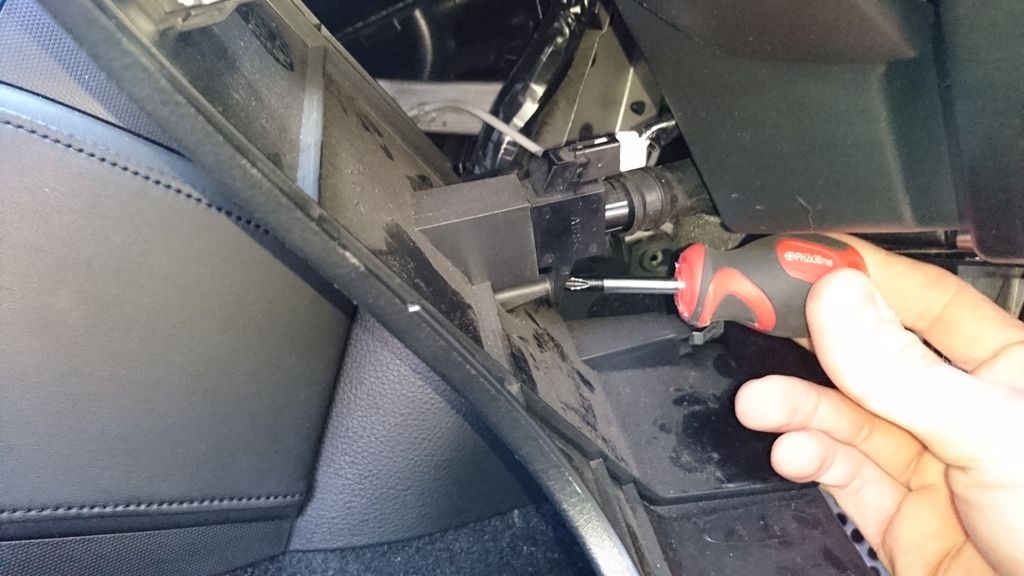
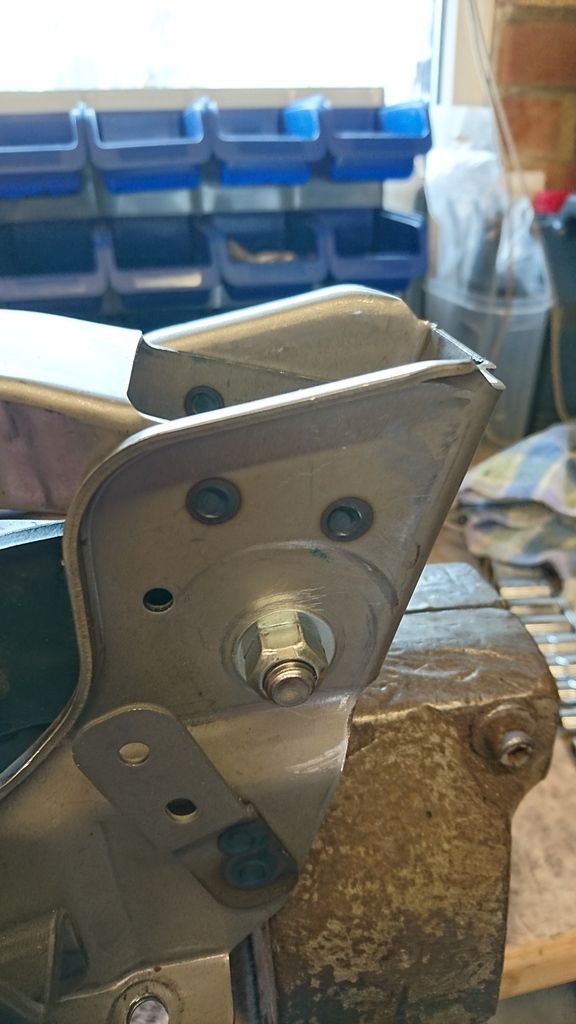
There are three bolts holding the pedal box assembly to the bulck head and dash cross memeber, but first you need to remove the computer module infront of the pedal and two plugs on the pedal itself. More pics.....
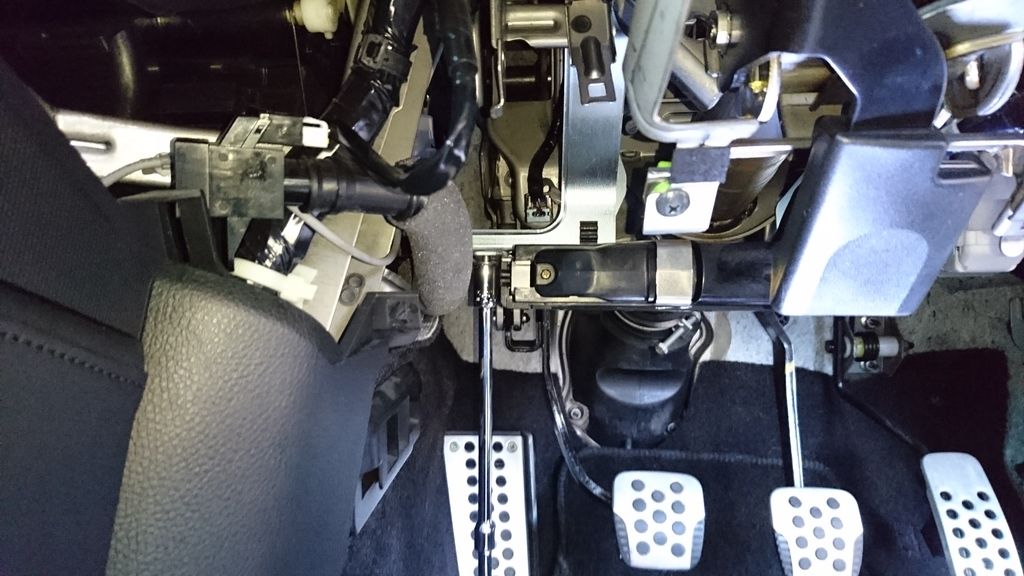
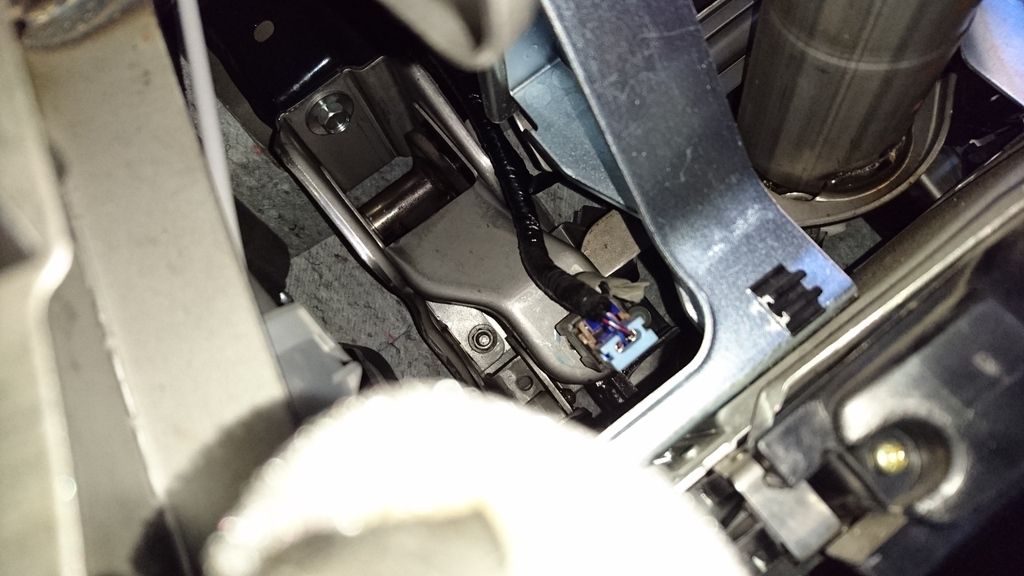
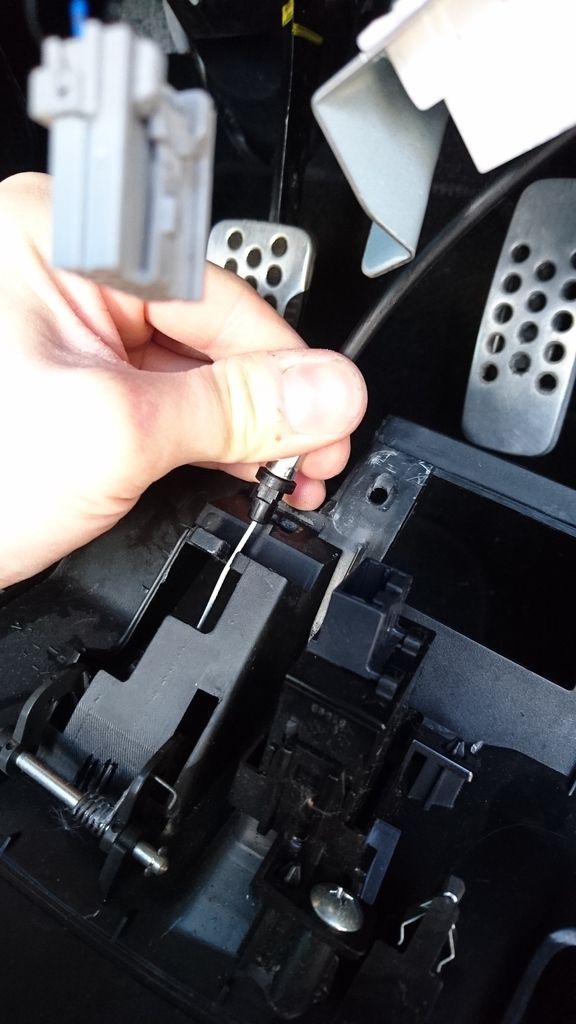
VERY IMPORTANT THAT YOU REMOVE THE SPLIT PIN THAT CONECTS THE PEDAL TO THE CLUTCH CYLINDER BEFORE REMOVING THE PEDAL BOX MOUNTING POLTS.

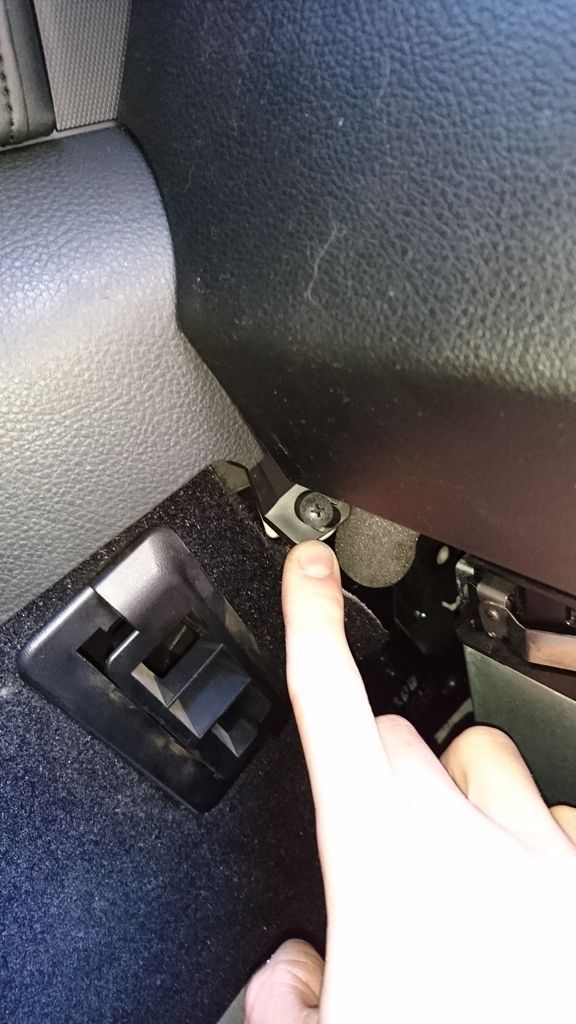
UPPER MOUNTING BOLT
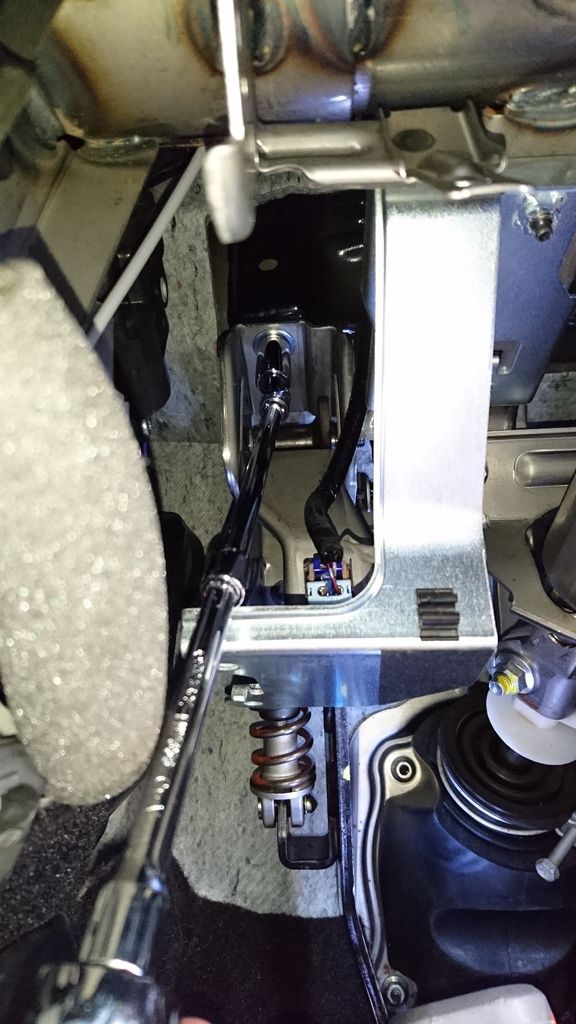
There are two bolt that hold the clutch cylinder to the bulkhead and hold the clutch pedal assebly in place as well.
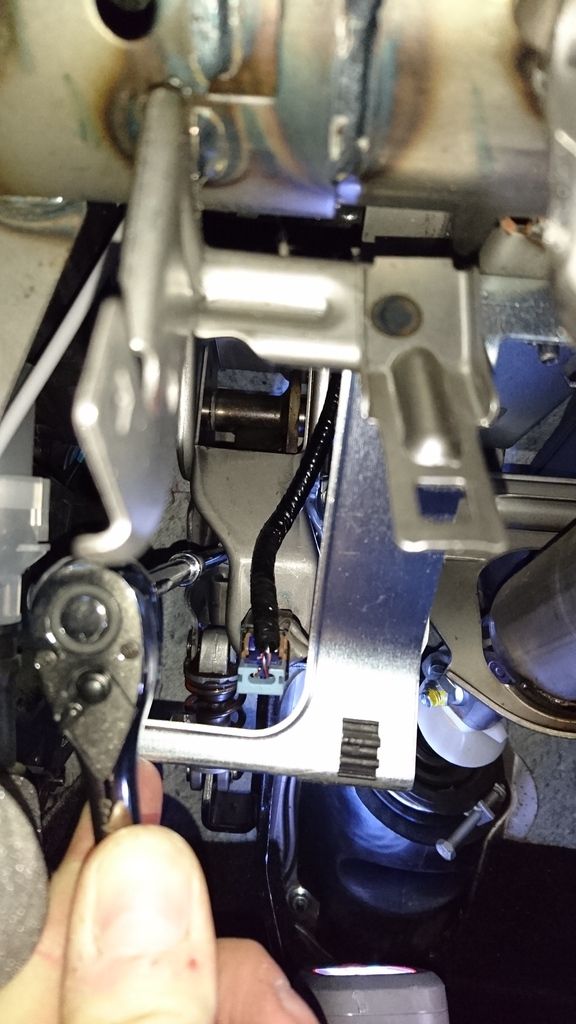
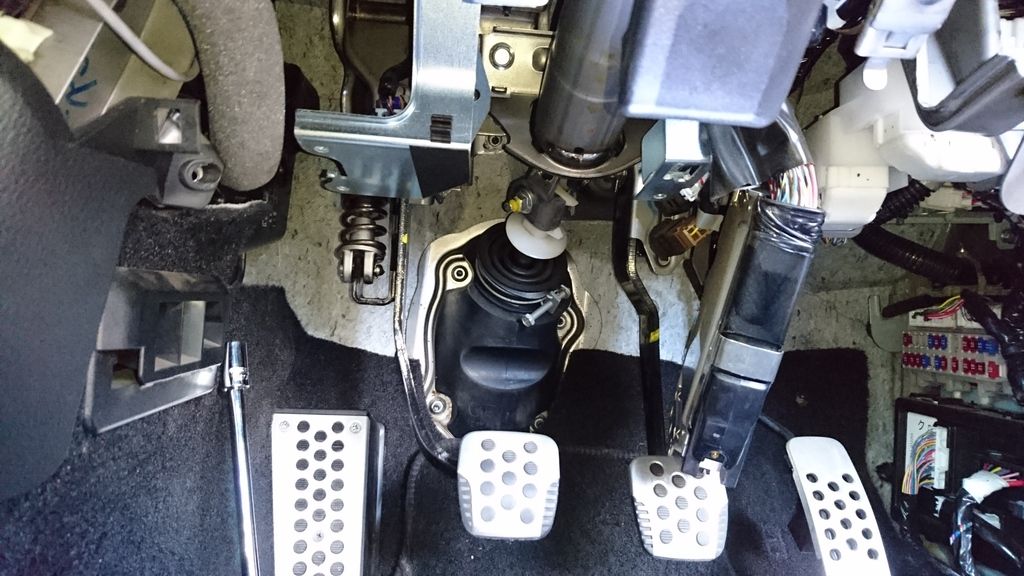
At this point the clutch pedal will now drop out, BUT...as you will now find try as you might there is not enough room to pull it past the frame work that the computer module mounts to. Unless you are a better man than me then simply bend this enough to free the pedal box and then bend it back on re-fit.
TAAHDAAH
Ok so with it on the bench remove the pivot bolt nut and slide the bolt out. You will note that the bolt is very specific as it has been turned down to a smaller size at the threaded end so it acts as a crush bar for the pedal box when the nut is tightened. Stay with me as I forgot to take a picture. The pedal box is made of two layers of steel where the bolt passes through, the thread on the bolt stops just before the step on the bolt. This is where the wear occures and the notchy knocking is the thread catching between the two layers of steel. I greased the plastic bush and the pivot bolt and then re-fit the bolt. Then placed a washer on before re-fitting the nut. Tighten the nut firmly and test the pedal on the bench. I found that the washer and the extra tension help stop the twist on the bolt, so the thread doesn't notch on the two steel layers. I hope that wasn't two confusing and with the couple of picture will be clear enough.
All thats left now is to get the bloody thing back in, hope the back is still up for it. I recomend booking a Chiropractor appointment for the same afternoon you do this little job lol. Best of luck and hope this helps.
-
3
-
-
Hi Rob350,
It's a little tricky to tell from the video but you may have the same problem I had on mine. It completely ruined the driving experience for me personally as its not just the clunk but the feeling of it under your foot as well. That is if it is the same fault as mine. Good news is if it is the same its a cheap fix, But it does mean a clutch pedal has to be removed and if you’re not as supple as gymnast it hurts lol.
Before I go and even try and explain the fix, or get of my ass and put a thread up for it. Where in the world do you live? I only ask as I would be able to diagnose it very easy in person. I’m in the Wakefield, West Yorkshire area.
It could be a different part of the clutch operation and I wouldn’t want to send you on the wrong route.
Regards Matt
-
Hi pal, I wouldn't use WD40 on the clutch pedal joints if I was you. Try a lithium spray grease if you suspect a dry joint. WD40 dissolves grease and will quickly dry up with the heater venting in the footwell and with the amount of use the pedal gets. Just to Confirm is it definitely a squeak with no notchiness. I only ask as I had to make a clutch pedal box repair on mine and it's a bitch of a job but 10 thousand miles on still sweet. I keep meaning to put the fix up on here. it was a full pedal assembly removal job.I'm going to investigate tonight and see if I can stop it with some WD40 to find the issue and then go back in wth proper grease
The pedal has an assistance spring and mini shock, these have a few pins and pivot points to check for dry points. Then there is the main pedal pivot bolt high up under the steering column and the master cylider pushrod. Hope your flexible it's an upside down in the footwell job I'm afraid. Hope this helps.
-
Hey, just because the battery is showing 12.7v does not mean the battery is good. The amps may not be there to back the voltage up. When you connect via a jump start a bad battery will rob everything you throw at it and give nothing to the car. I would strongly recommend begging borrowing or purchasing a known good battery and trying again. I cant stress enough the ghosts you will chase from what you think is a good battery.
Chin up pal.
-
I think I have seen your fitting thread pal. All very helpful thanks, and thanks for pointing out my ball drop. Castor is exactly what I meant, head was half at work half here lol. Thanks again.I've got these on mine.
The variant compression arm bushes give extra caster not extra camber
I'm not going to be very helpful here as I'm not sure I can tell how much better they are

Here was DIY fitting http://www.350z-uk.c...40#entry1500420 ages ago.
I think there was a difference although it has become normal to me now. Certainly still feels responsive but very safe at high speed, but I can't remember it being that sloppy before I fitted them.
My car is on MPSS, Zeta-S, Eibach ARB and Powergrid links and it all feels pretty rails at all speeds, although perhaps steering is a touch heavier at low speed although I am long overdue realign.
I chose extra caster bushes because H-Dev's website recommended them, then bought from Clark MS, rather than coming from any empirical knowledge.
Yep, these are all subjective comments... so no help really

-
1
-
-
Thanks for the reply pal, they will be been fit to new arms. I take it you have had no experience of the extra Camber option ones. That was the question really 😉The super pro bushes last ages , two or three times as long as the stock ones but are only worth while if the ball joints at the other end of the arm are good so imo if the arms are fairly new then fit the SP bushes if not just fit stock


(Sold) 2008 Midnight Blue 350Z HR GT - £6700
in Zeds For Sale
Posted
Well with a heavy heart, I have today bowed out of the Z world! I will be back as I have loved every minute of my ownership and Z adventures. Safe trips everyone and a happy Christmas and have a prosperous New Year.
Oh and happy driving to Steve the new owner. Be gentle with him people, he's a Z virgin but will be a good addition to the owners group for sure.